Crushed Diamond Powder Cat Eye French
Star Nails — Step-by-Step Tutorial
Create dazzling nails featuring reflective cat eye bases, textured crushed diamond powder French tips, and sparkling star art.
This unique nail look combines luminous cat eye gel bases with high-texture crushed diamond powder details and hand-painted stars. By applying the powder directly over a cured top coat and mixing painting gel with rhinestone glue, you achieve an explosively bright, secure finish that sparkles even in low light.

Steps
- 1Apply translucent cat eye gel to middle finger
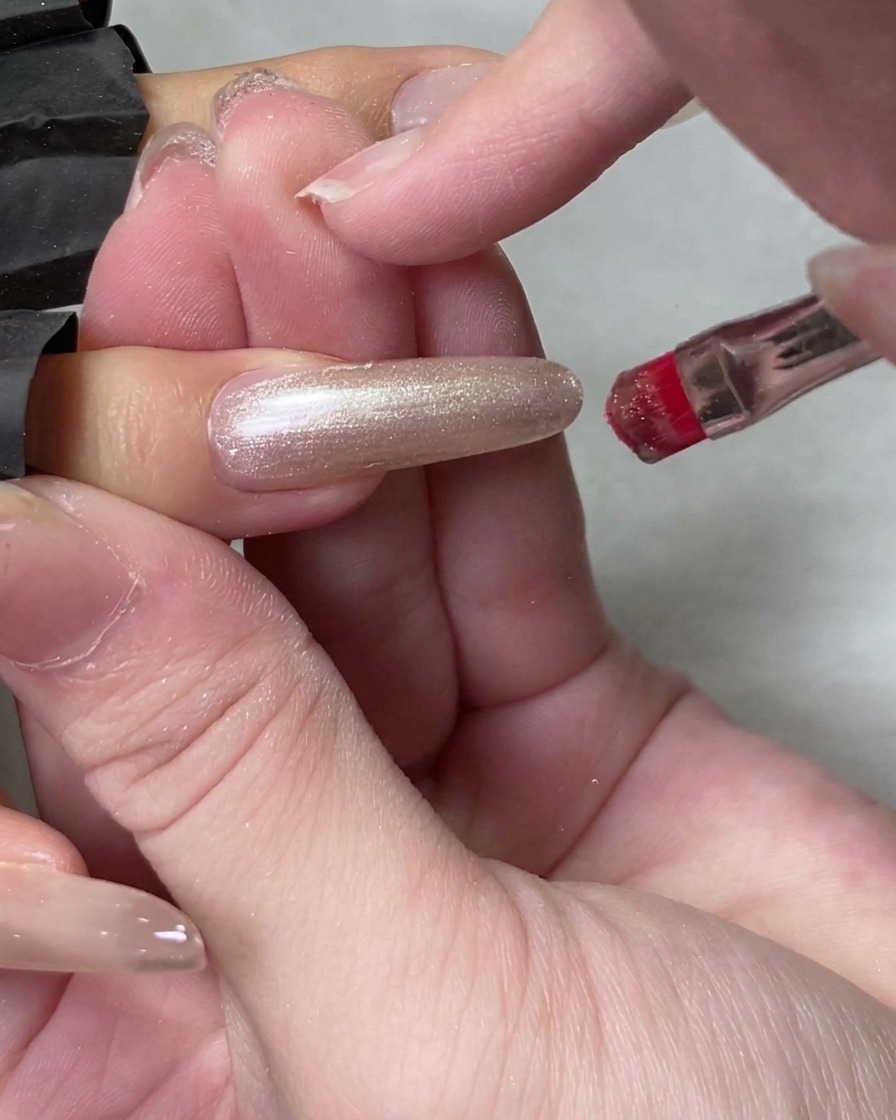
Using the bottle brush, apply a smooth and even layer of translucent cat eye gel to the middle finger. Ensure the application covers the entire nail surface evenly to create a solid foundation for the magnetic shimmer effect.
Tip: Keep the gel layer even and avoid flooding the cuticles for a clean application. - 2Apply translucent cat eye gel to index finger
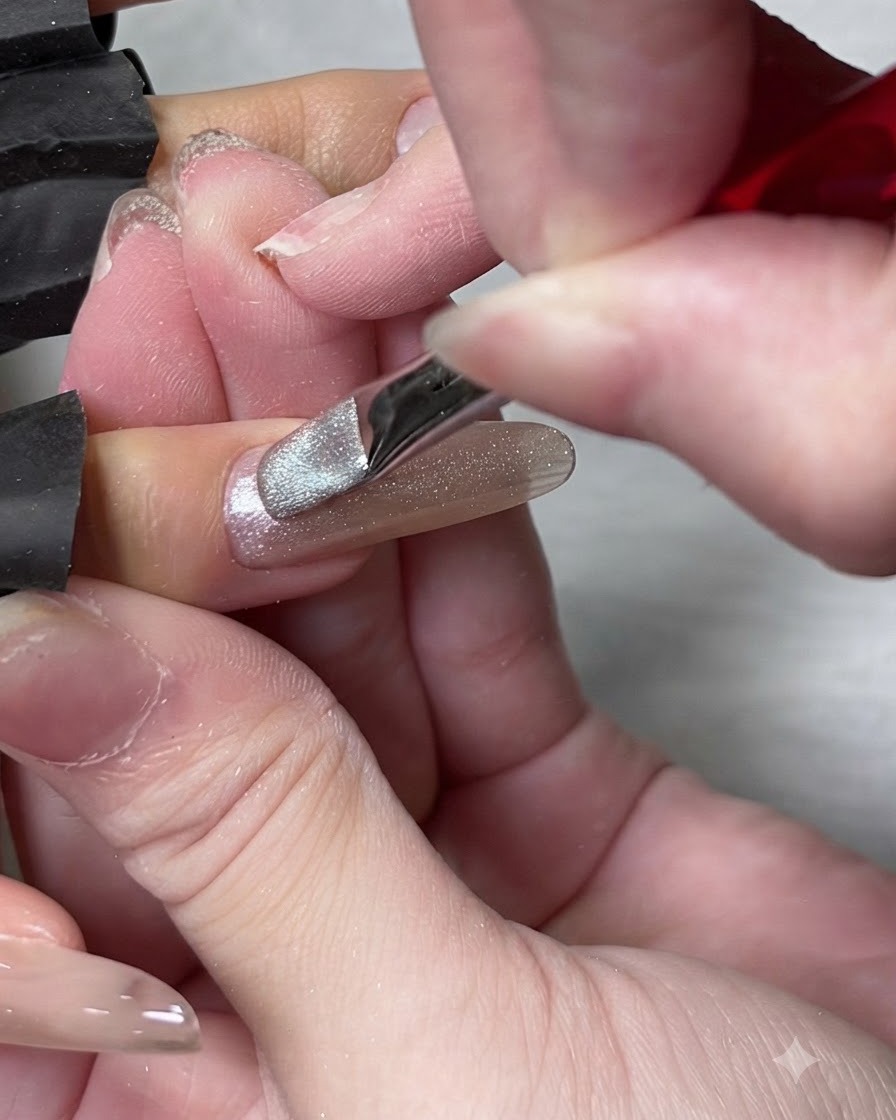
Take the bottle brush and apply a layer of translucent cat eye gel to the index finger. Make sure the coat is evenly distributed across the nail plate before moving on to the magnetic activation step.
Tip: Work efficiently so the gel remains fluid for the magnet manipulation. - 3Activate cat eye shimmer on index finger
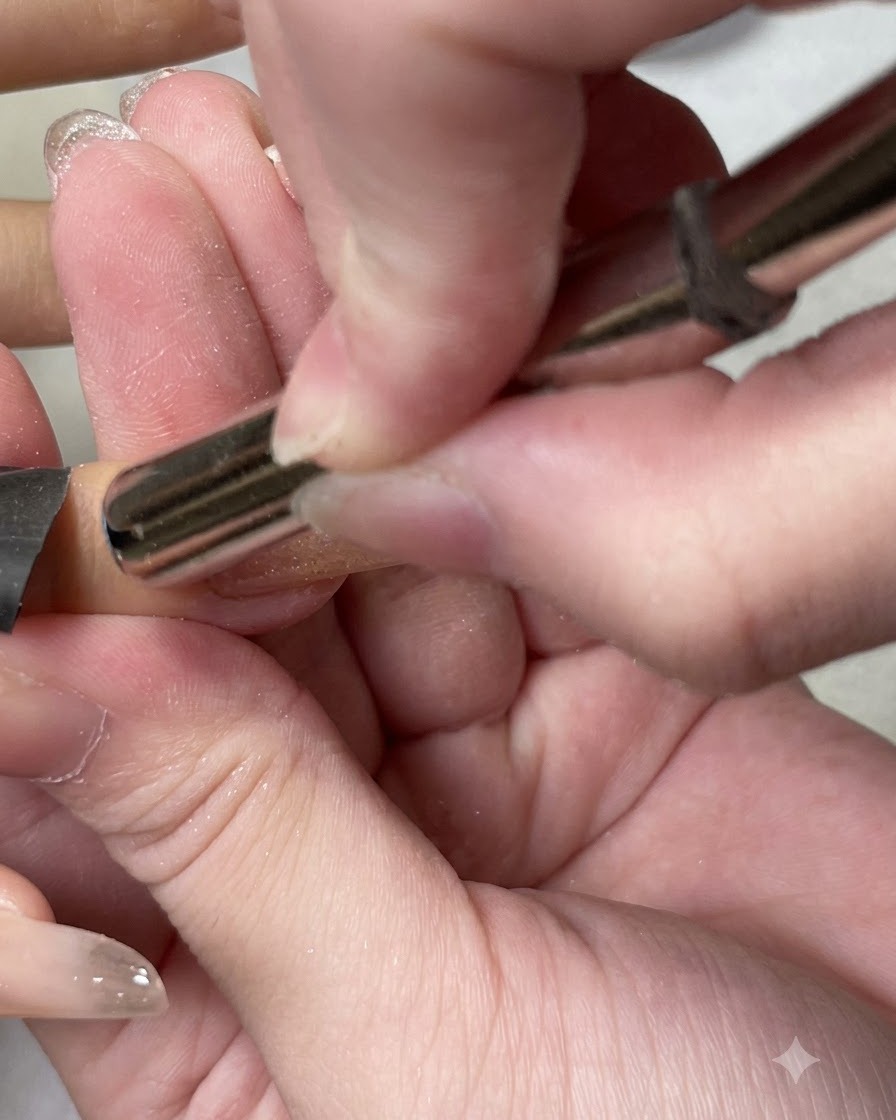
Position stacked cylindrical magnets closely along the side of the index finger. Hold them steady to pull the magnetic particles into place, creating the desired intense shimmer band before curing.
Tip: Keep the magnets close to the nail without touching the wet gel surface. - 4Create glass bead flash on middle finger
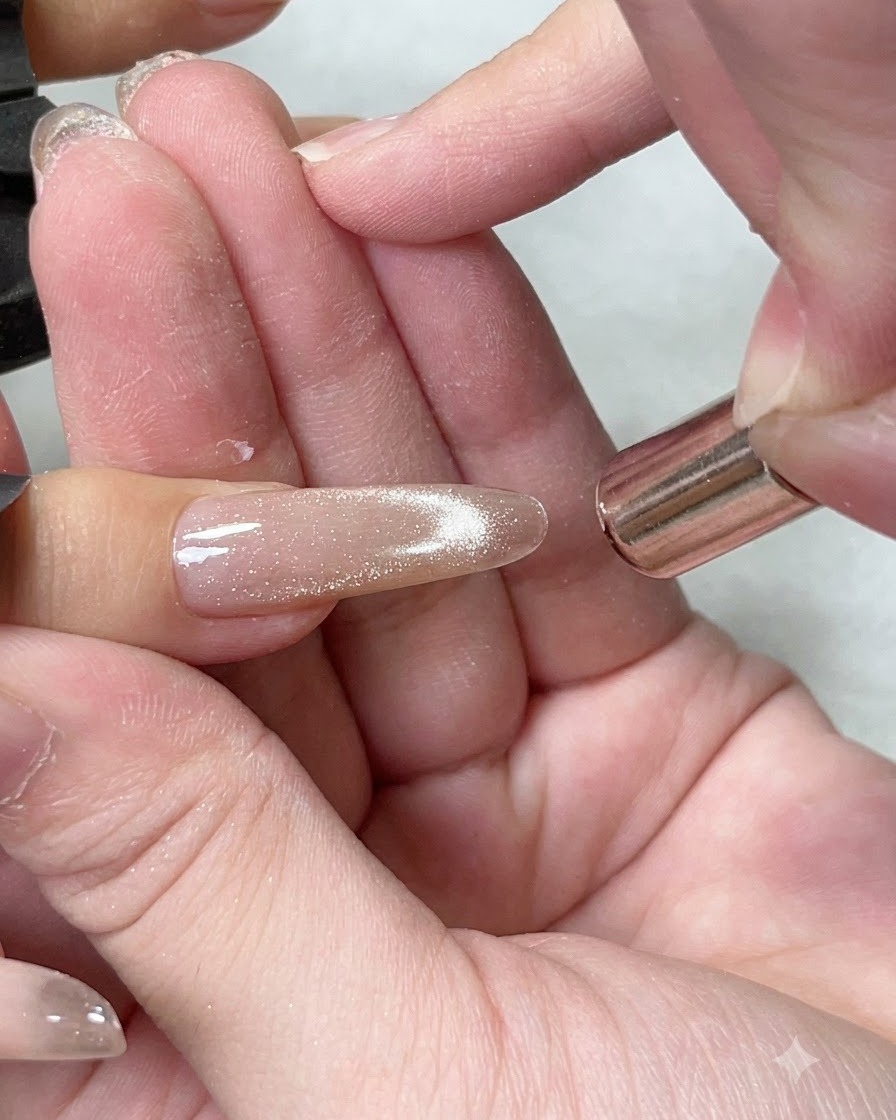
Hold stacked cylindrical magnets over the middle finger to draw the magnetic particles together. This technique forms a bright, focused glass bead flash effect across the cat eye base.
Tip: Hold the magnets steady for a few seconds until the bright line effect stabilizes. - 5Apply glossy top coat over cat eye base
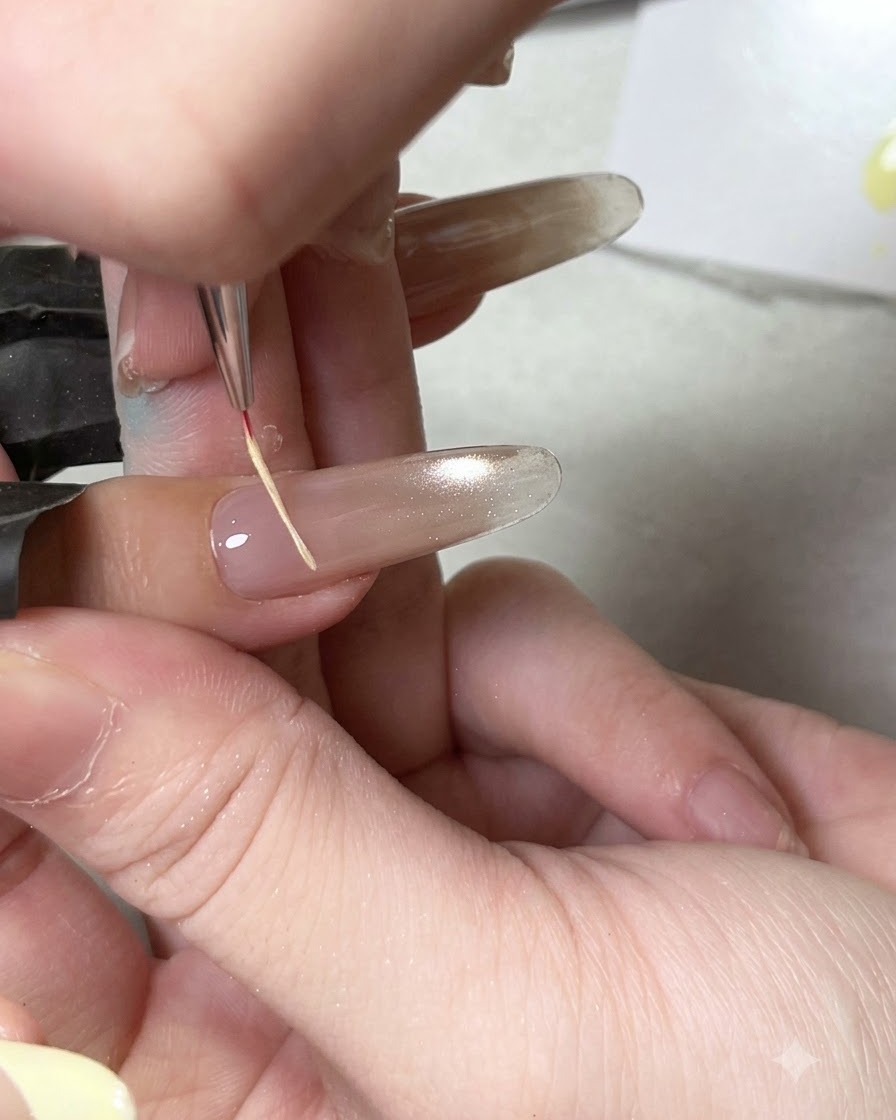
Using a fine detail brush for precise control near the edges, apply a layer of glossy top coat directly over the cured cat eye base. This seals the cat eye layer and provides a smooth surface for upcoming hand-painted art.
Tip: A fine detail brush helps maintain clean boundaries around the cuticle and sidewalls. - 6Draw star outline with yellow gel mixture
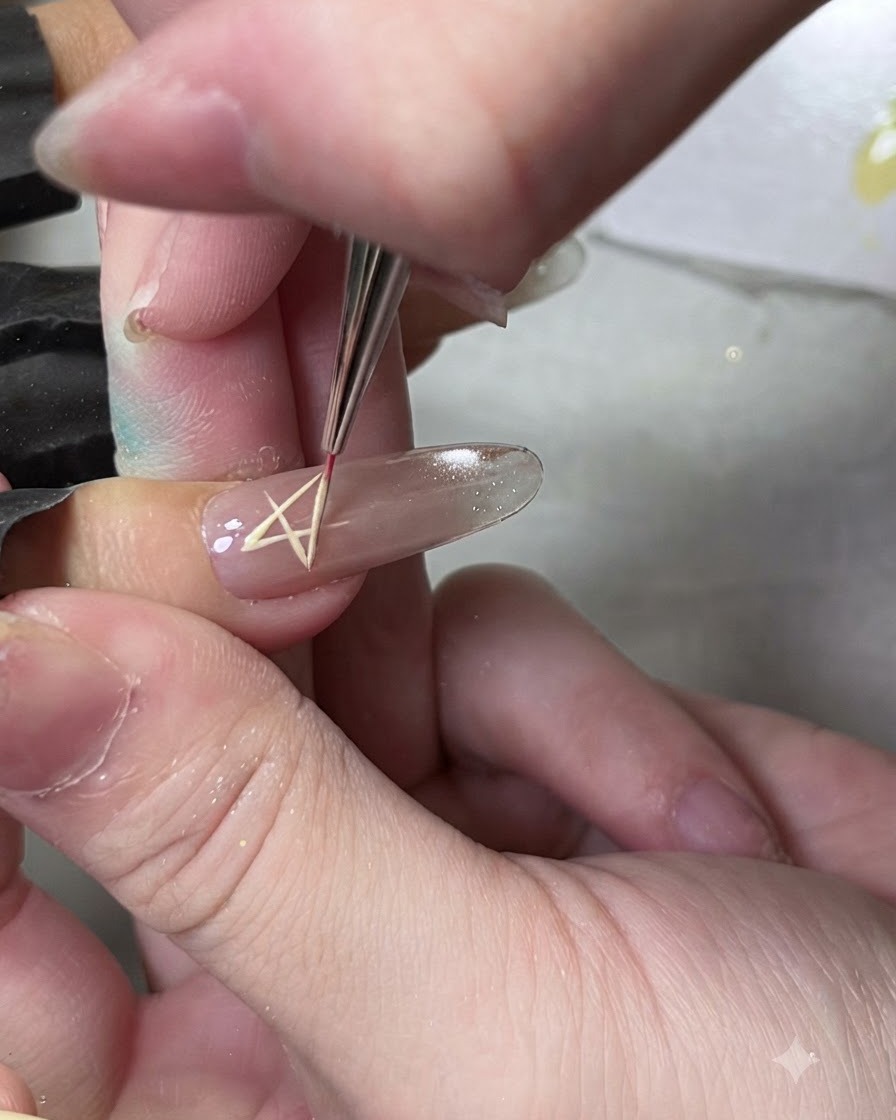
Dip a fine liner brush into the custom mixture of yellow painting gel and rhinestone glue. Carefully draw a crisp star outline on the middle finger over the cured top coat layer.
Tip: Mixing rhinestone glue into the painting gel provides extra grip to secure the crushed diamond powder later. - 7Paint a solid star shape
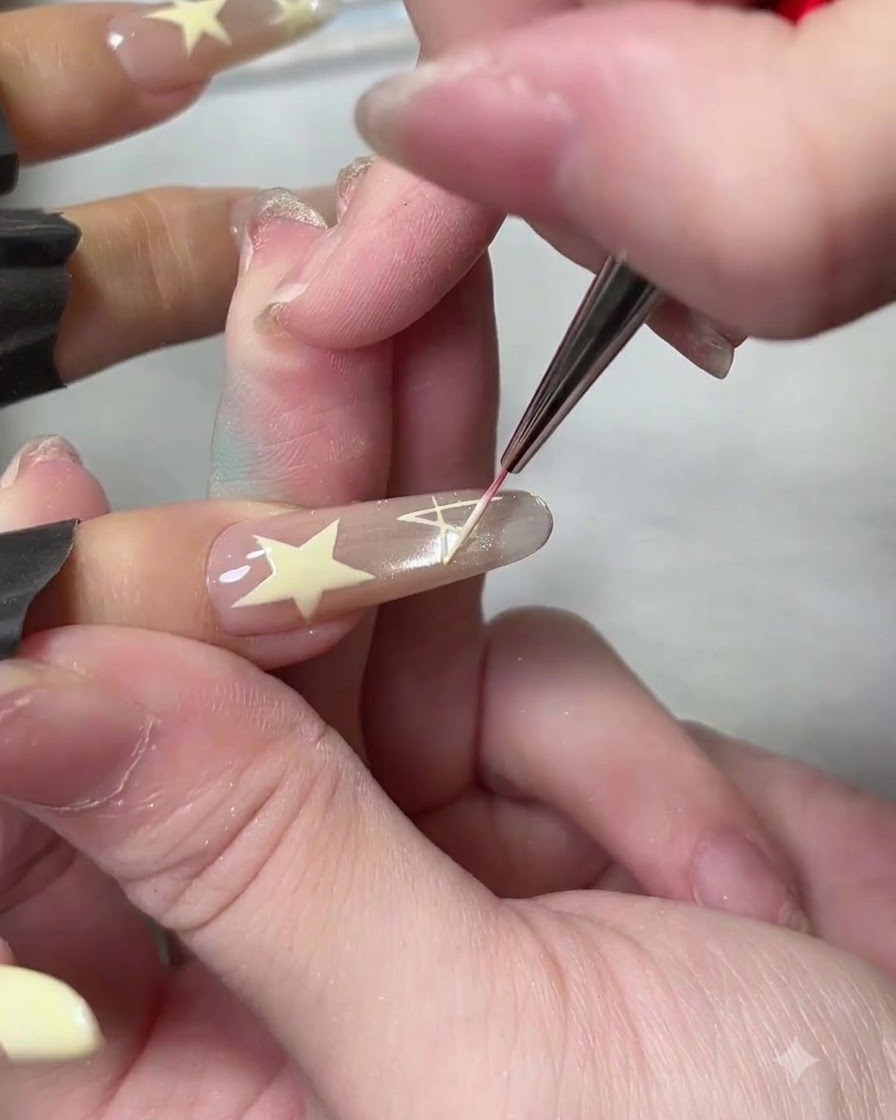
Using a fine liner brush and your mixed painting gel, carefully outline and fill in a solid star shape on the prepped index finger. Take your time to ensure the edges are sharp and clean. This hand-painted detail sits directly over the cured top coat layer for a crisp finish.
Tip: Work in thin applications when painting details to prevent the gel from pooling or running outside your lines. - 8Apply creamy yellow French tip
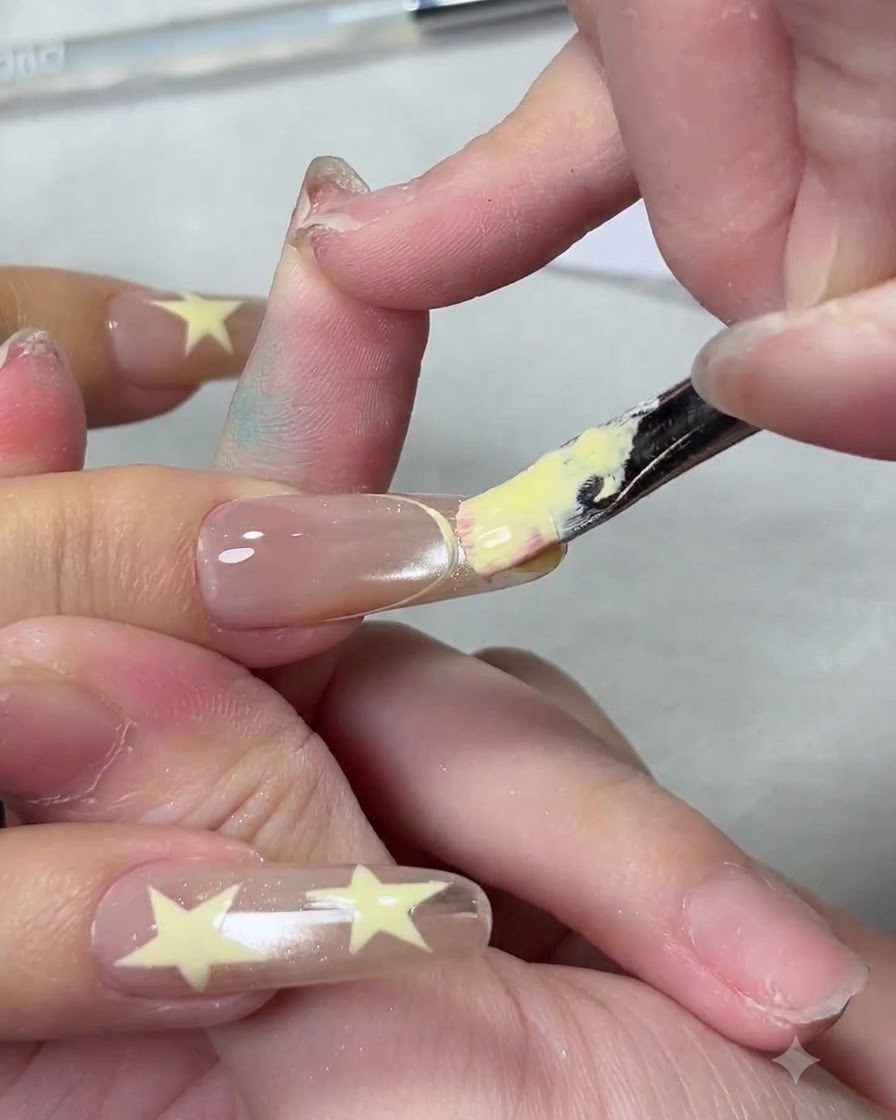
Dip a flat gel brush into the creamy yellow gel mixture and apply it smoothly across the tip of the middle finger to form a classic French tip line. Ensure the coverage is even across the free edge before curing or powdering.
Tip: Hold the brush flat against the nail tip to easily sweep along the smile line curvature. - 9Refine the Yellow French Smile Line
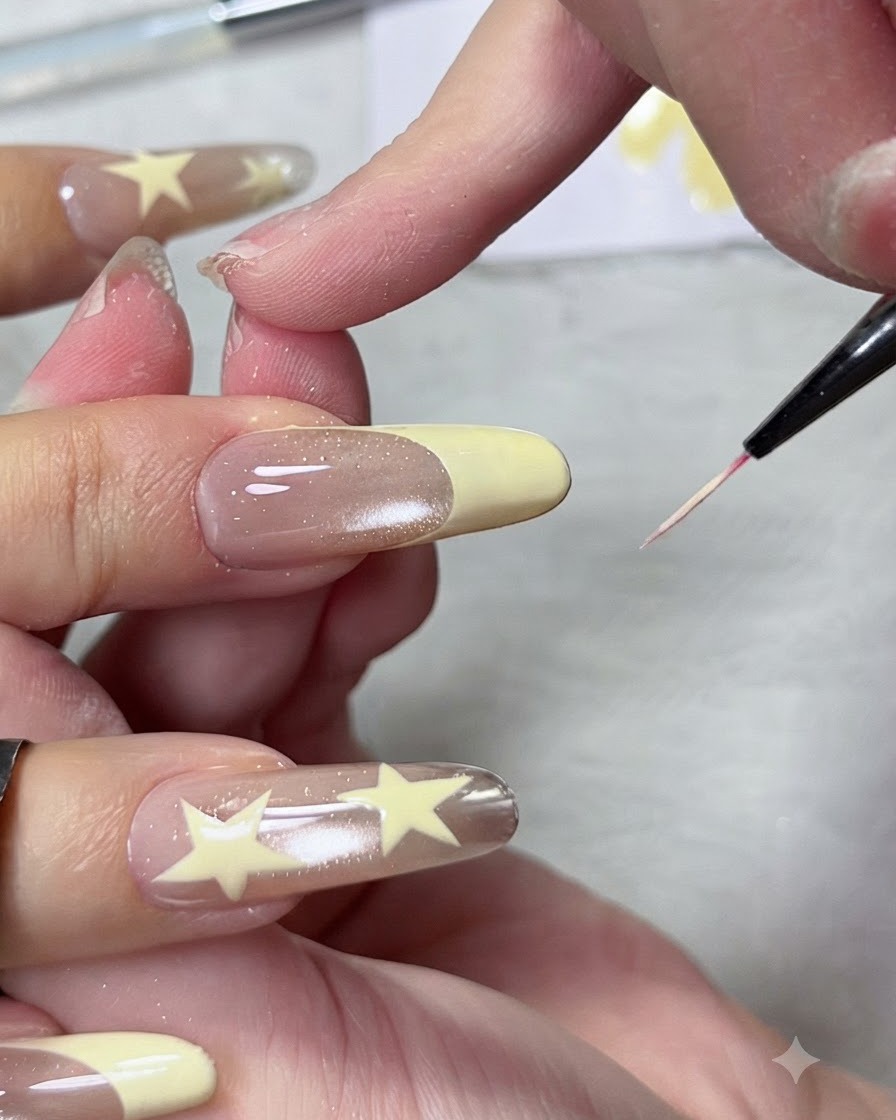
Take a fine liner brush and carefully tidy up the edges of the yellow French tip on your index finger. Smoothing out the curve ensures a clean, professional finish before moving on to the next step of the design. Take your time to get the transition sharp and even.
Tip: Wipe your liner brush clean with a lint-free pad and a tiny bit of alcohol between strokes to keep the tip ultra-sharp. - 10Outline blue French tip on the left hand
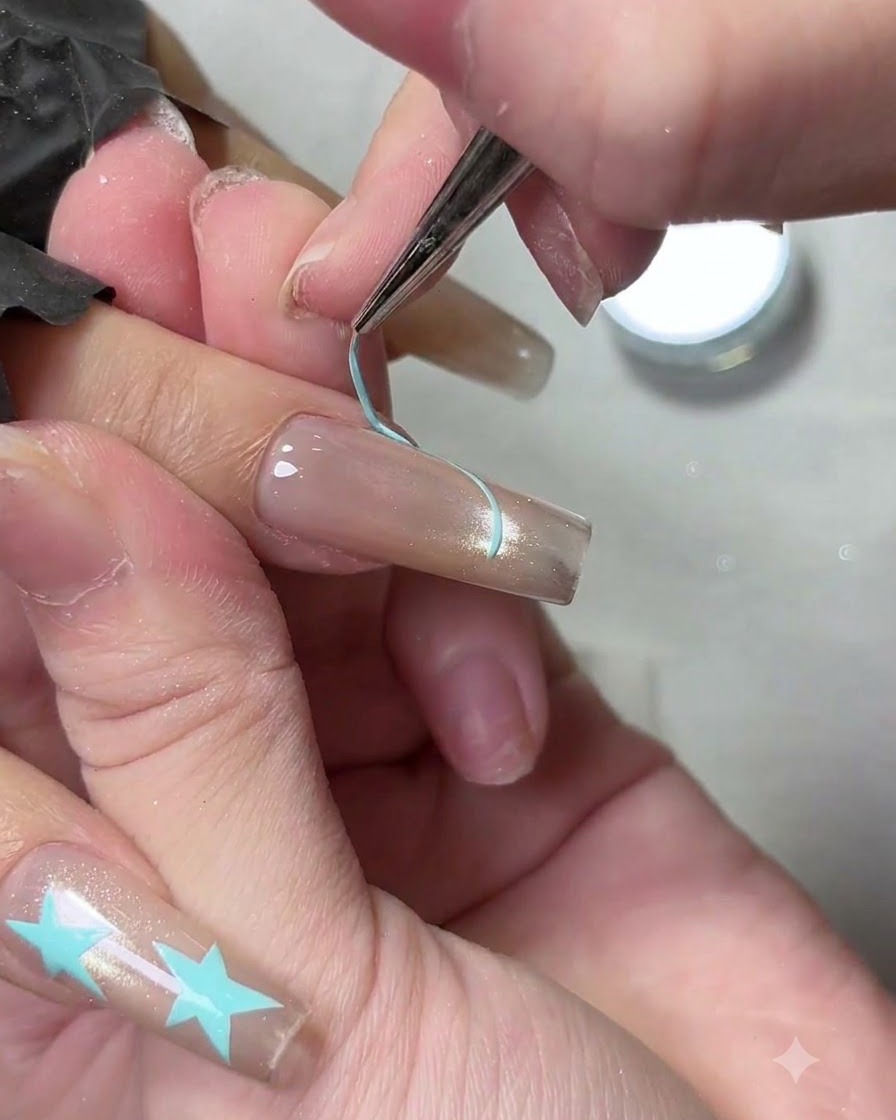
Switch over to the other hand and use a fine liner brush dipped in blue mixed gel to carefully outline the shape of a French tip on the middle finger. Mapping out the smile line first ensures symmetrical placement before filling in the broader tip area.
Tip: Anchor your pinky finger against the clients hand for stability when drawing fine lines. - 11Fill in the blue French tip
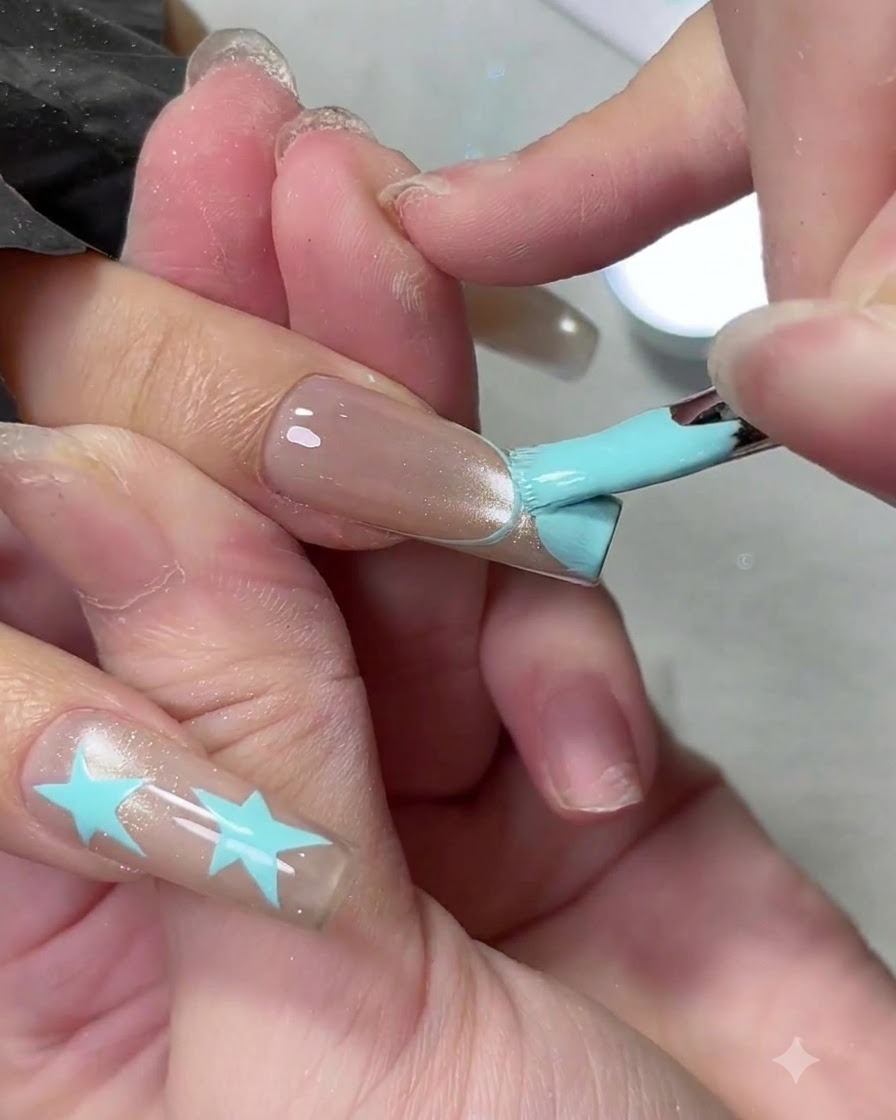
Take a gel brush and fill in the remaining space of the French tip area on the middle finger up to the free edge using the blue mixed gel. Smooth out any brush strokes to ensure a uniform layer of color.
Tip: Lightly cap the free edge with the blue gel to prevent premature chipping at the tip. - 12Draw blue stars on the ring finger
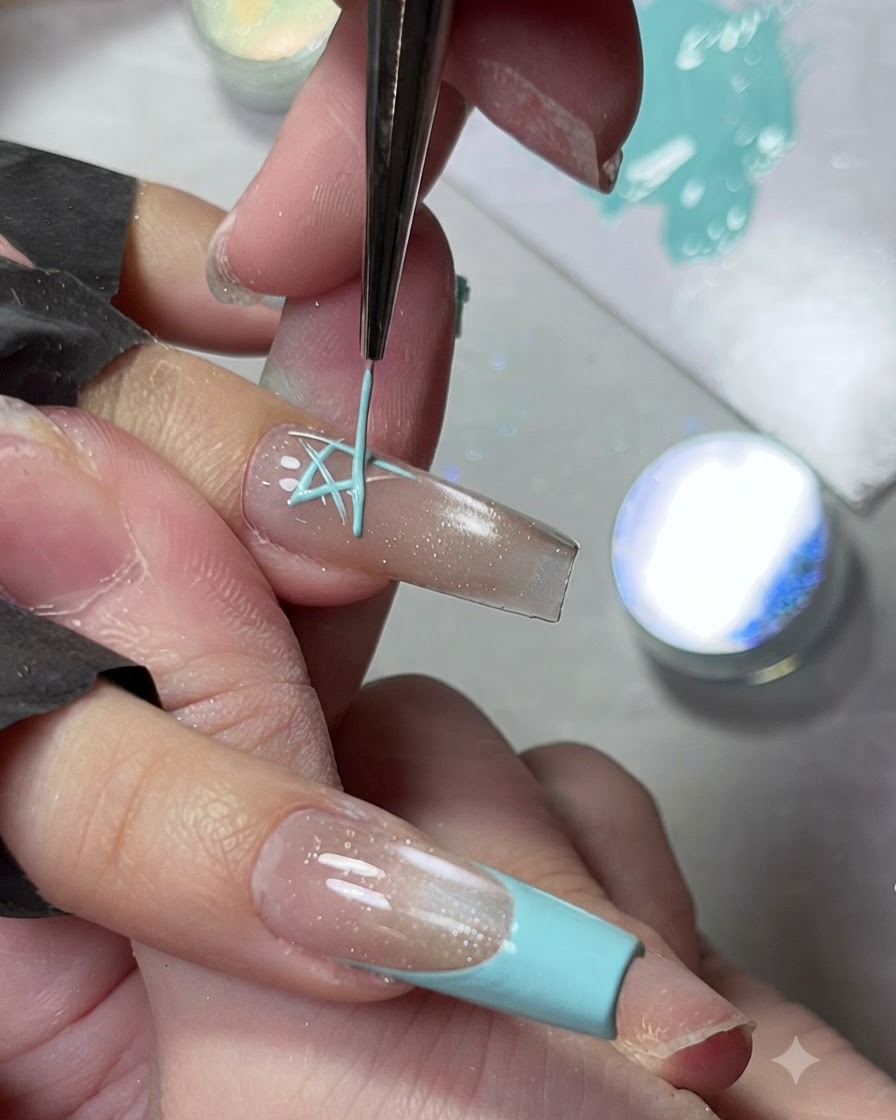
Using the fine liner brush and the blue mixed gel, draw and fill in solid blue stars on the ring finger of the left hand. Match the style and proportions of the stars created on the opposite hand for a cohesive look.
Tip: Wipe your liner brush clean frequently to keep the tips of the star points sharp and well-defined. - 13Apply Yellow Crushed Diamond Powder to Stars
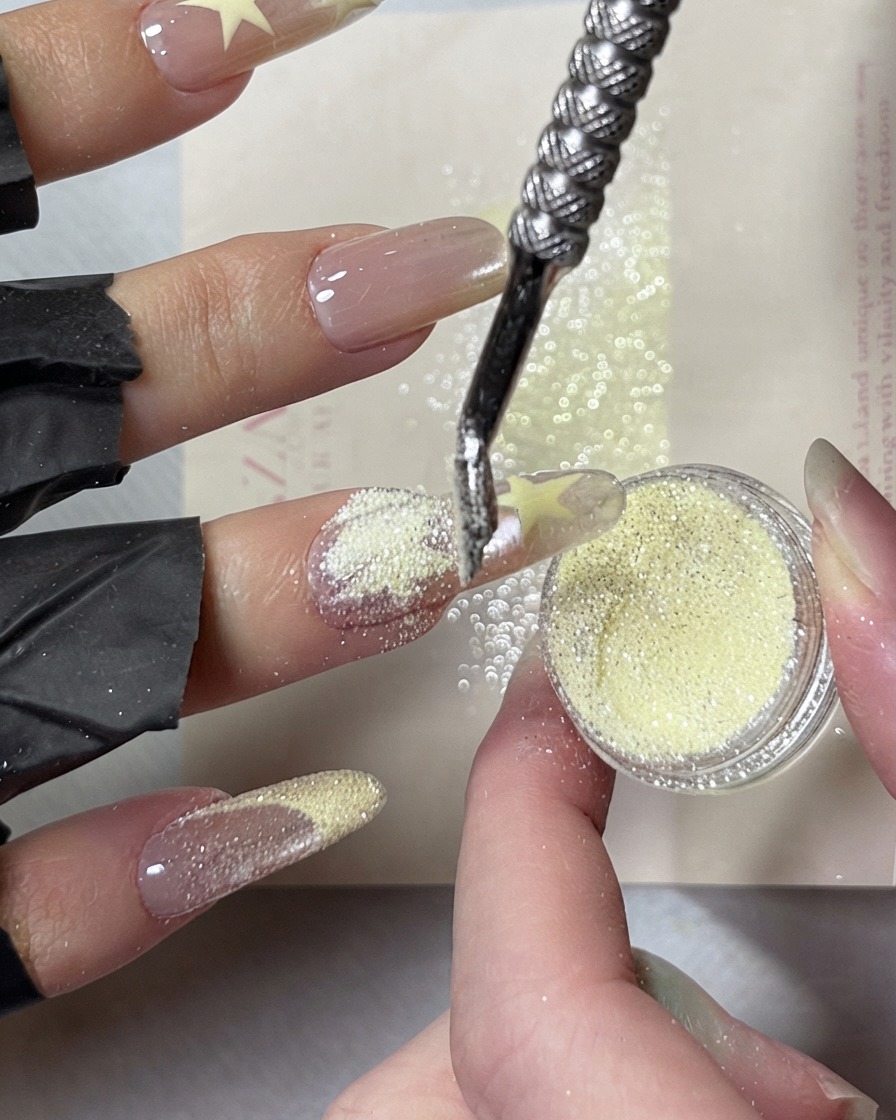
Using a cuticle pusher as a scoop, pick up a generous amount of creamy yellow crushed diamond powdercite: 1. Carefully sprinkle the powder directly over the wet yellow star designs on your right handcite: 1, ensuring complete coverage so every part of the star catches the light.
Tip: Hold a small card underneath your hand while sprinkling to catch any excess powder and prevent waste. - 14Coat Yellow French Tips with Diamond Powder
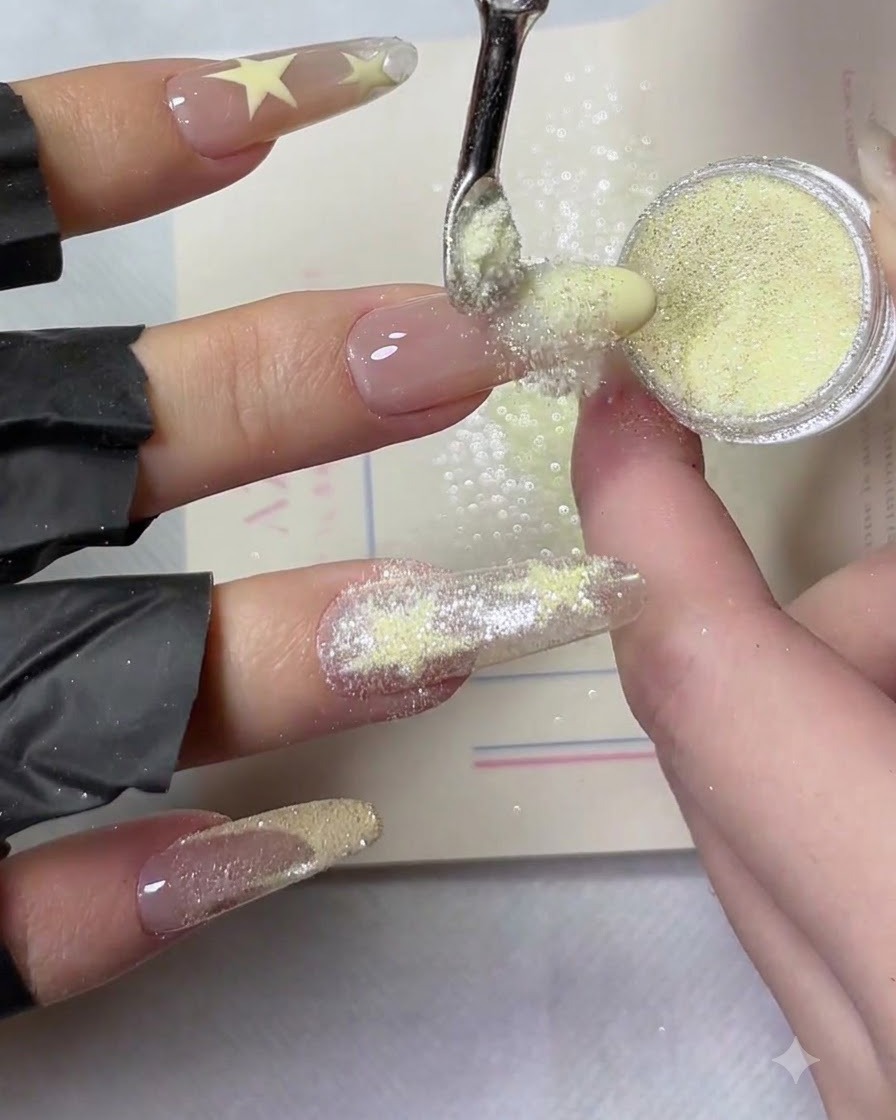
Continue using the cuticle pusher to evenly distribute the creamy yellow crushed diamond powder over the wet yellow French tips on the right handcite: 1. Make sure the entire tip area is saturated with the sparkling texture before curingcite: 1.
Tip: Tap your finger gently from underneath to settle the powder and shake off any loose grains before curing. - 15Coat the Side Edges of French Tips
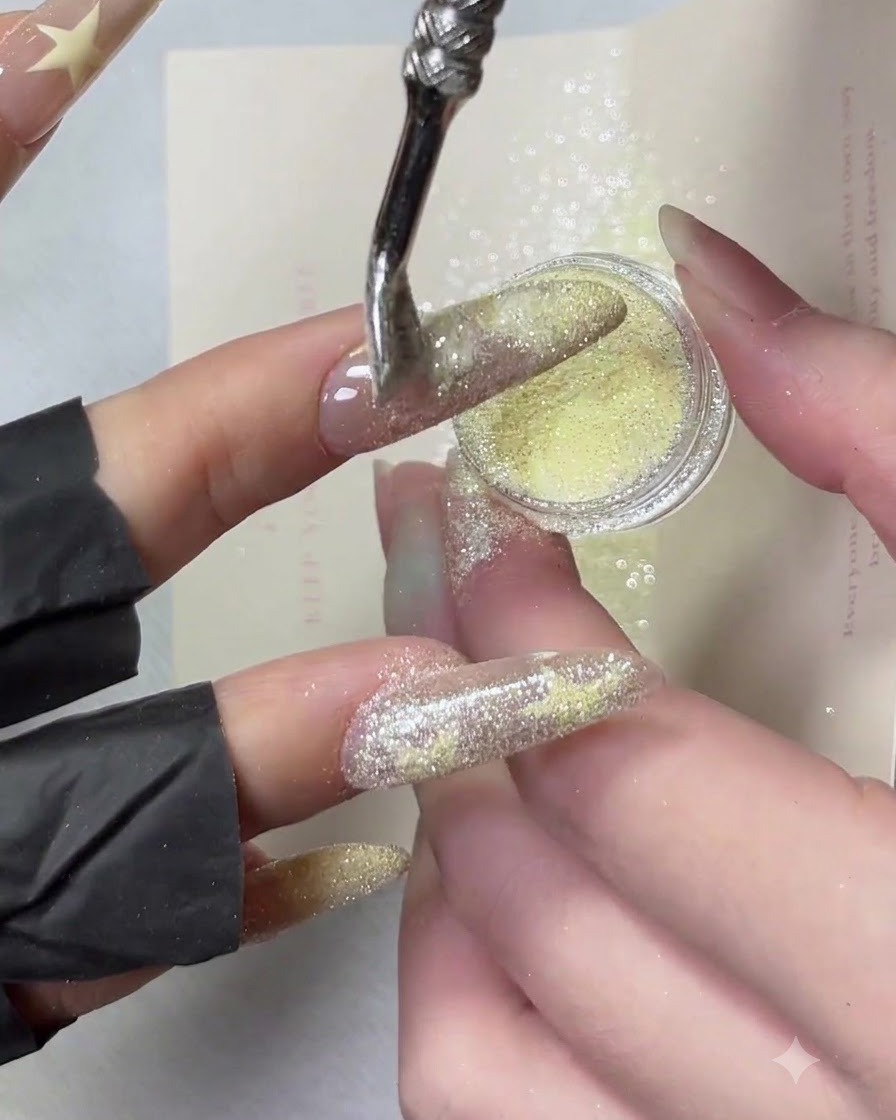
Tilt your right hand sideways to expose the lateral sidewalls and edges of the French tipscite: 1. Sprinkle the yellow diamond powder along these edges to guarantee total coveragecite: 1 with no bare spots visible from different angles.
Tip: Turning the hand sideways allows gravity and precise powder placement to reach the hard-to-cover side walls easily. - 16Apply Blue Crushed Diamond Powder to Stars
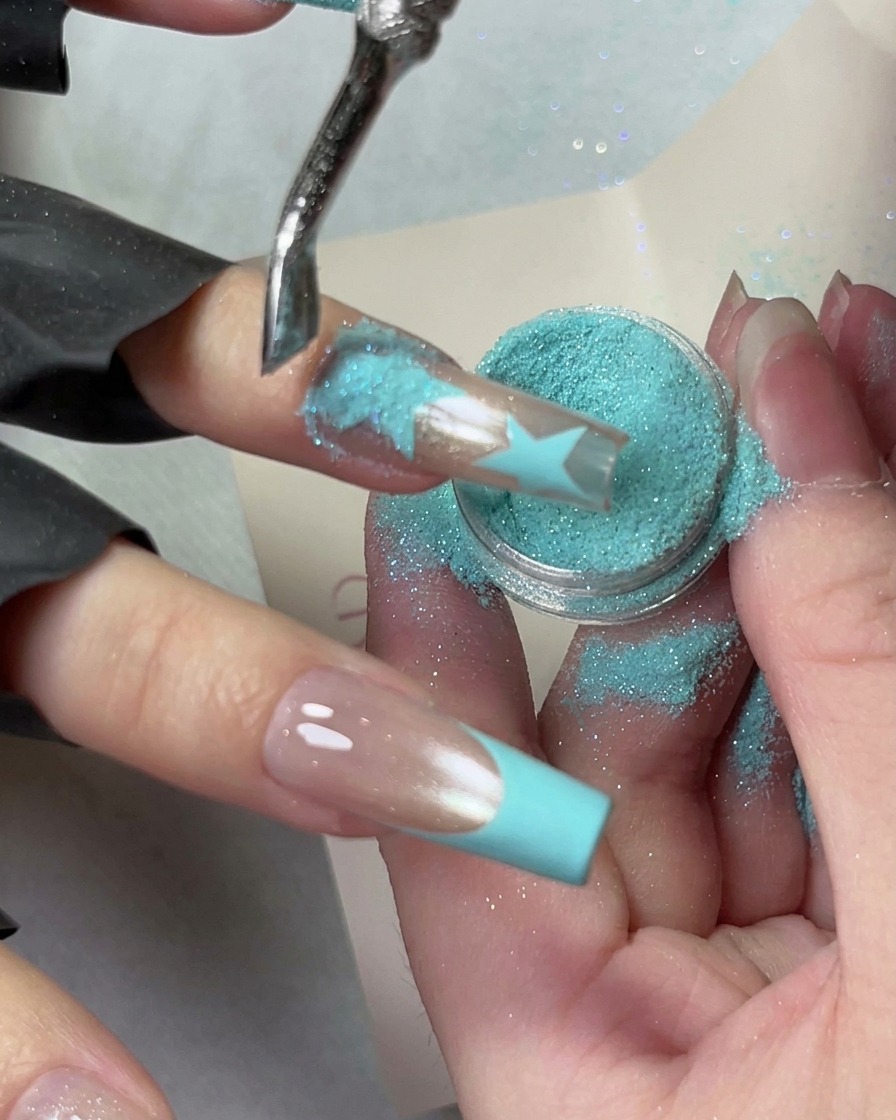
Switch to the baby blue crushed diamond powder for the left handcite: 1. Use the cuticle pusher to scoop and shower the vibrant blue powder over the wet blue star designscite: 1, making sure the textured glitter adheres fully to the wet gel mixture.
Tip: Keep the different powder colors separated to avoid mixing the pastel yellow and baby blue pigments. - 17Coat Blue French Tips with Diamond Powder
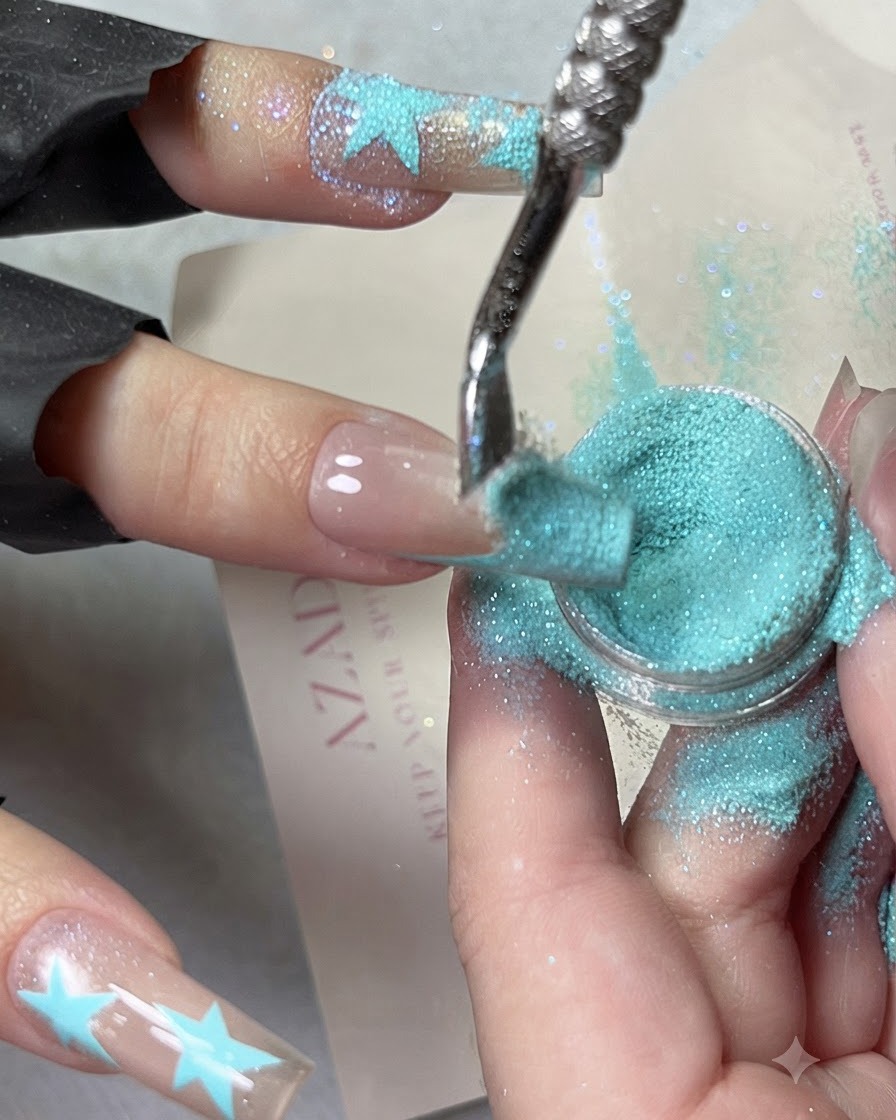
Carefully sprinkle the baby blue crushed diamond powder over the remaining wet blue French tips on the left handcite: 1. Ensure a thick, even layer covers the entire painted tip sectioncite: 1 to achieve that maximum bling effect.
Tip: Do not press the powder down too hard; let it settle naturally into the tacky gel base for the best sparkling texture. - 18Sweep away excess yellow powder
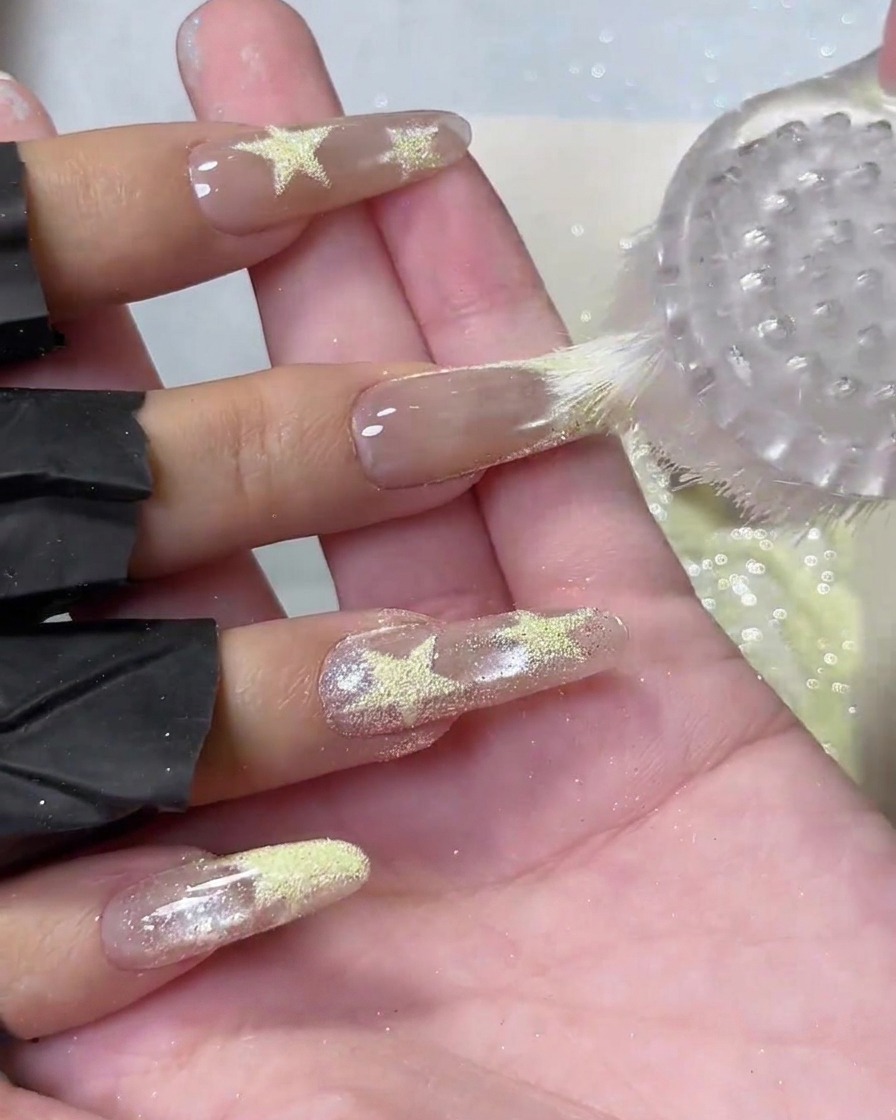
Take a clean round plastic dusting brush and gently sweep away all loose, unbonded crushed diamond powder from the right hand. This action reveals the crisp, textured star designs and clean French tips created with the creamy yellow pigment. Brushing off the excess is a satisfying step that leaves behind only the firmly adhered, sparkling diamond texture.
Tip: Brush gently in one direction across the nail surface to avoid disturbing the uncured edges of your textured art before it is fully set. - 19Sweep away excess blue powder
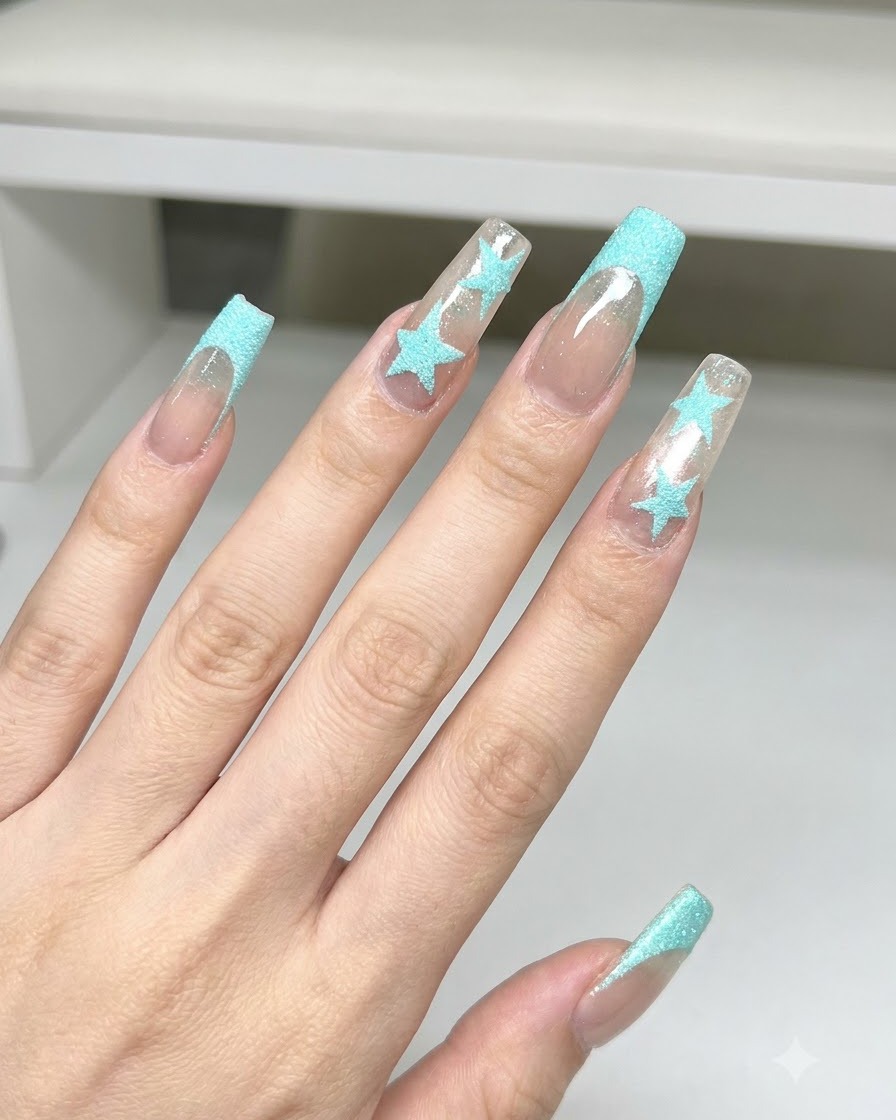
Using the same round plastic dusting brush, gently sweep away all excess blue crushed diamond powder from the left hand. This clears away the loose pigment particles and exposes the sparkling blue-green polarized shift of the star designs and French tips against the bright cat eye base. Make sure to brush around the cuticles and sidewalls thoroughly.
Tip: Perform this brushing motion over your collection card or tray so all the clean excess powder falls right back into your container for future use.

