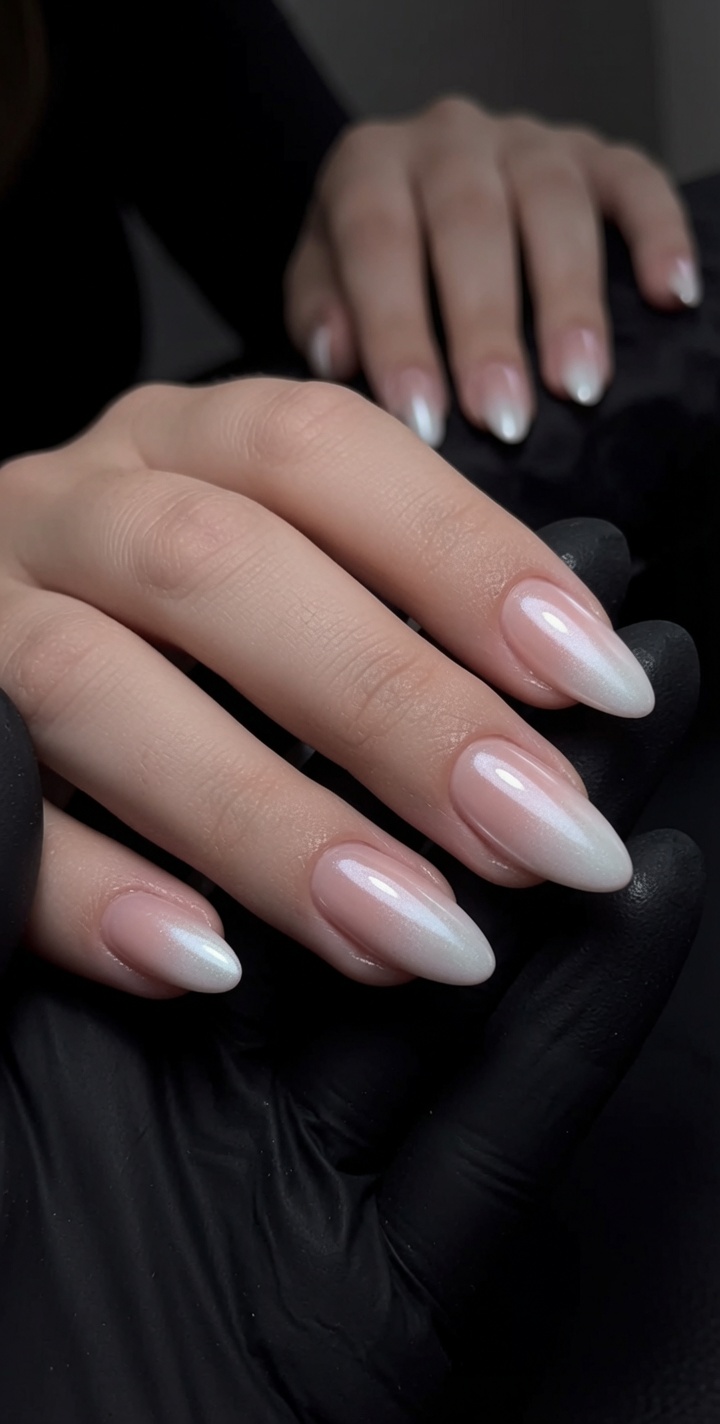
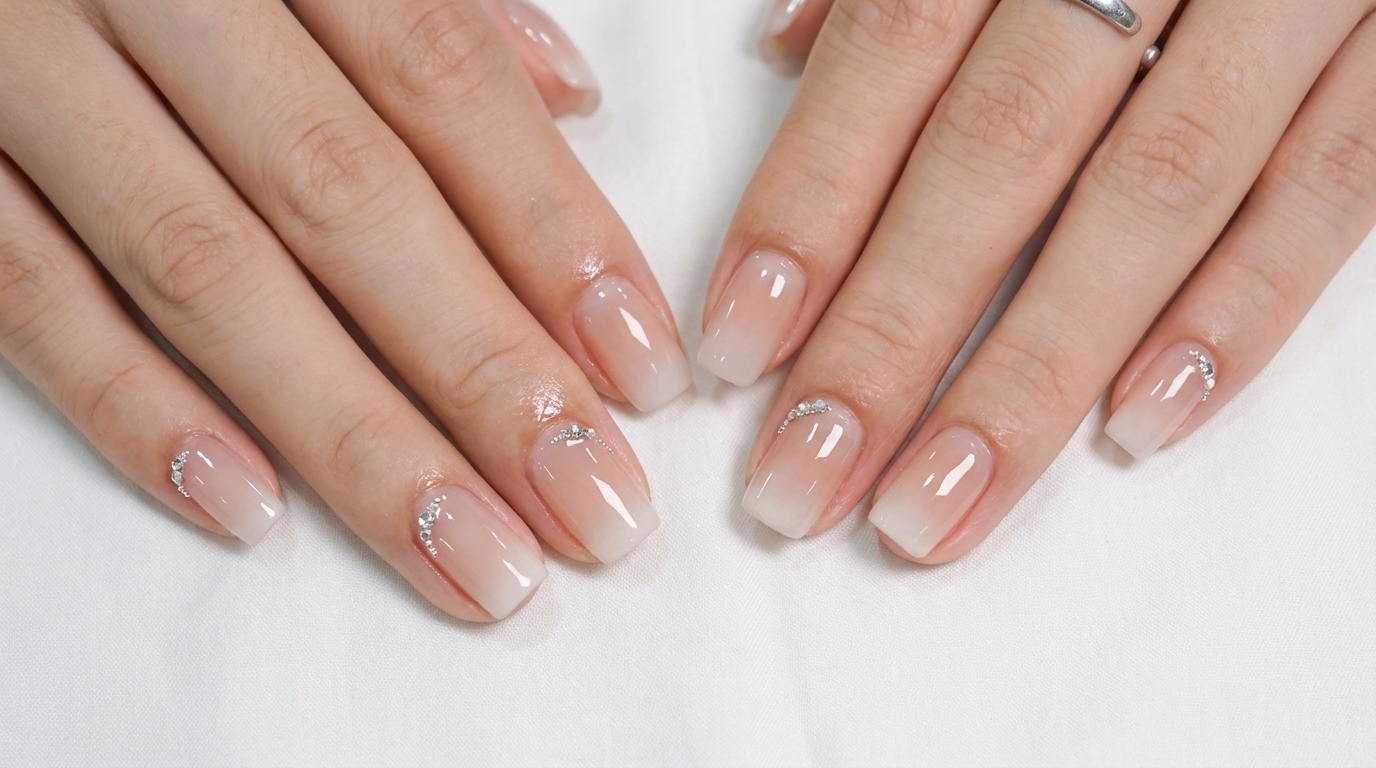
Milky White Gradient Nails
Cuticle Rhinestones — Step-by-Step Tutorial
Achieve a sophisticated, ethereal look with this milky white gradient nail tutorial. Learn how to blend the perfect ombre and accent it with delicate gems.
The milky white gradient look, often called baby boomer nails, offers a timeless and sophisticated aesthetic that works for any occasion. By incorporating delicate rhinestone and steel bead detailing at the cuticle, you can elevate this minimalist design into a piece of wearable jewelry. This tutorial will guide you through the precise sponging and embellishment techniques needed to achieve a smooth, professional finish at home.
Steps
- 1Apply the second base coat
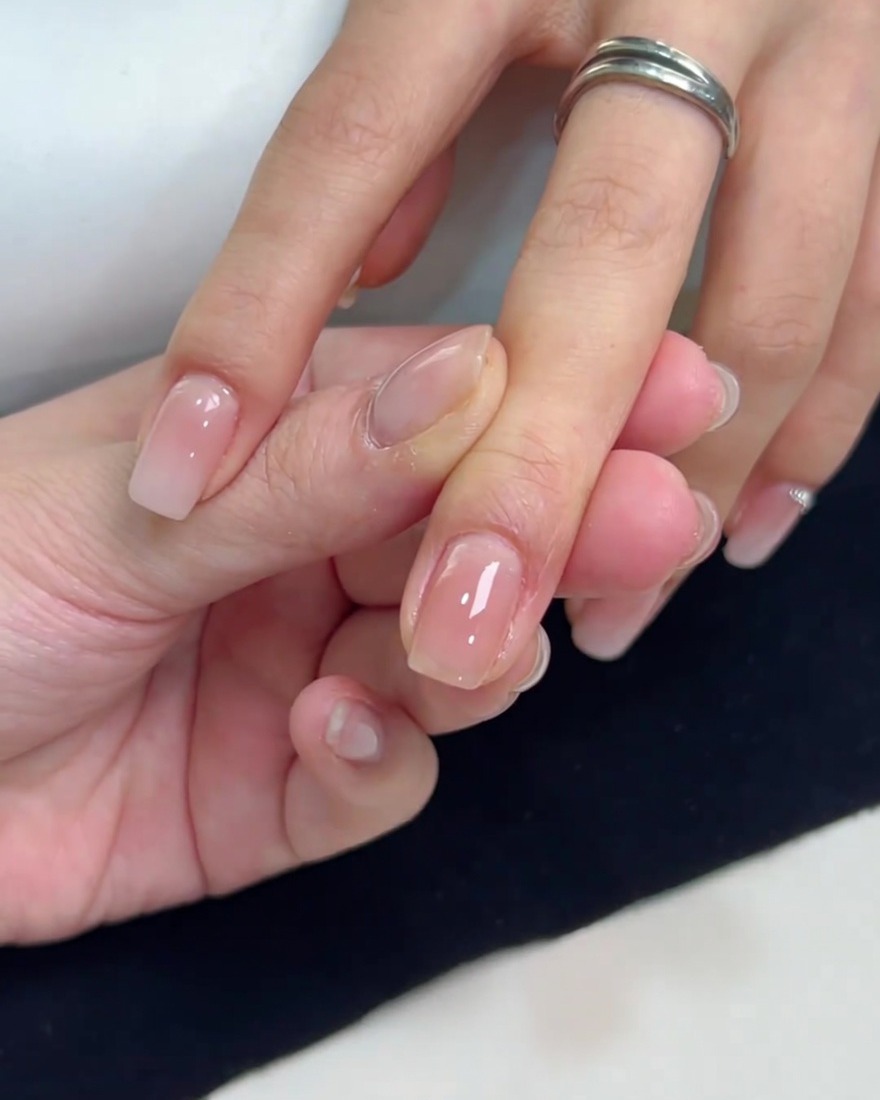
Apply a second layer of the nude gel polish across the entire nail surface. This second coat ensures full, even coverage and creates a smooth, flawless base for the gradient effect. Be sure to cap the free edge and keep the layer thin to prevent any pooling near the cuticles.
Tip: Keep your layers thin and even; multiple thin coats cure much better than one thick layer. - 2Create the white gradient
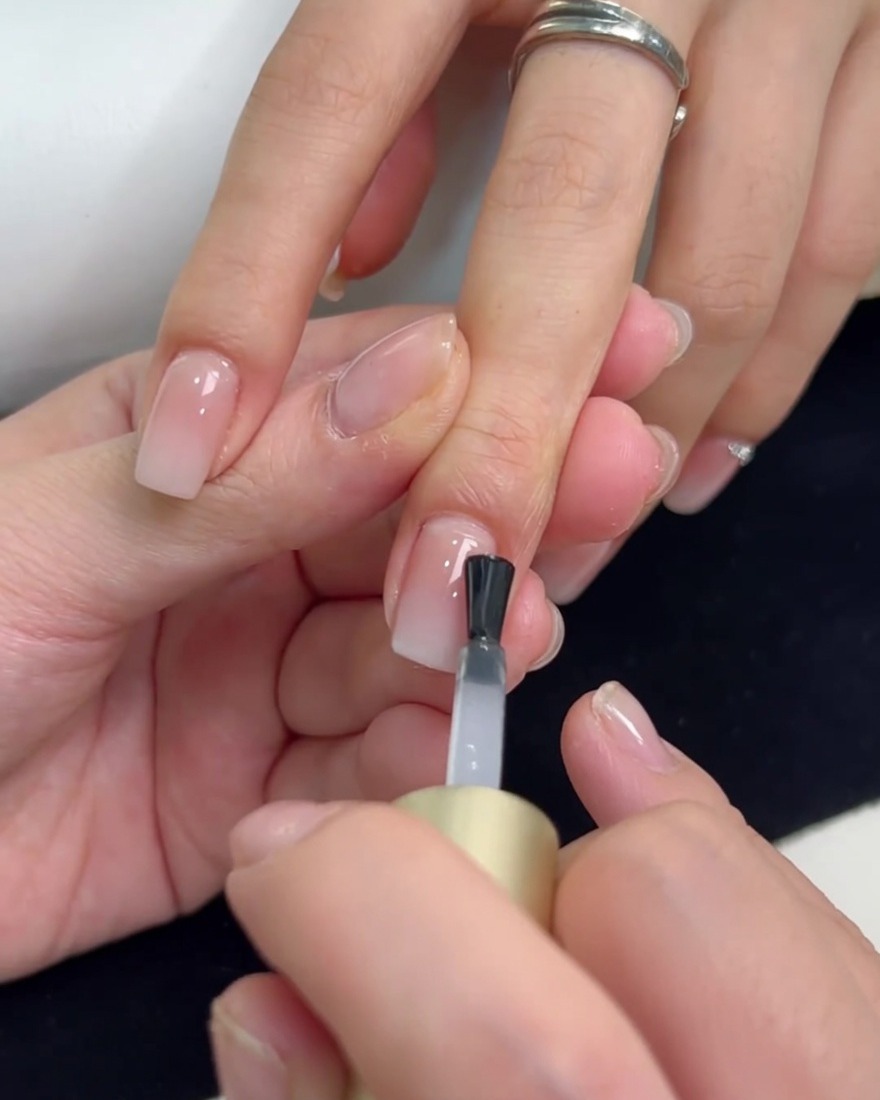
Dip a small wedge sponge into white dabbing gel and gently pat it onto the tip of the nail. Lightly blend the color downwards toward the center of the nail to form a seamless, milky gradient effect. You can repeat this step in multiple thin layers to gradually build up the intensity at the tips.
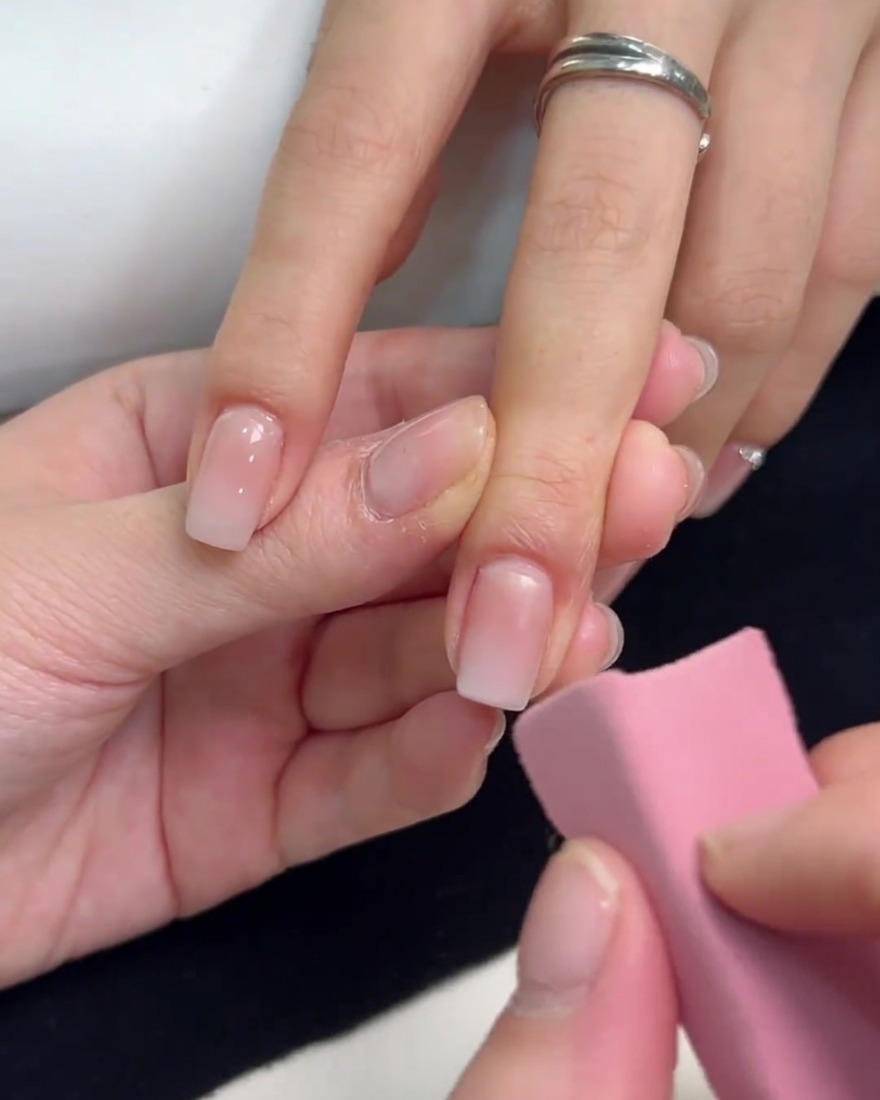
Tip: Dab the sponge lightly on a palette or lint-free wipe before touching the nail to remove excess gel and avoid harsh lines. - 3Deepen the white gradient
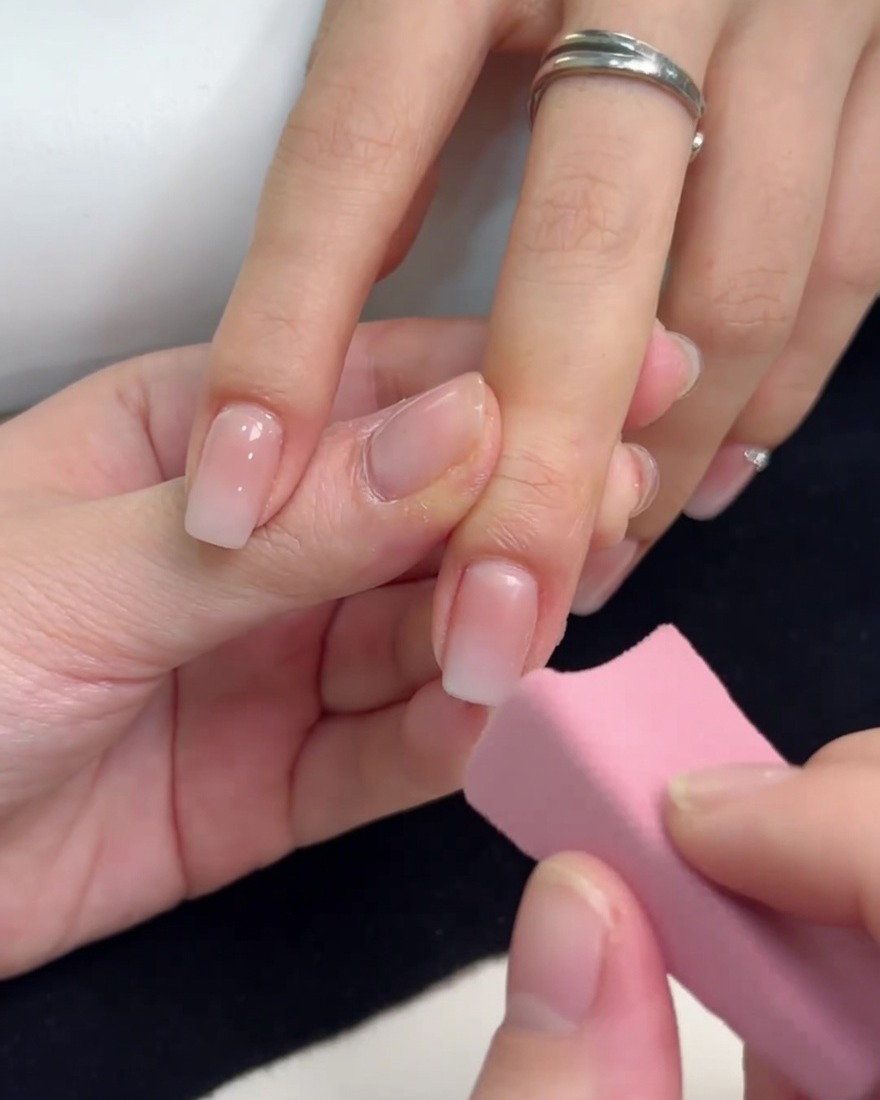
Using a small pink sponge, dab a second layer of milky white gel onto the very tips of the nails. Focus the color concentration at the free edge and gently tap the sponge downwards to blend it seamlessly into the sheer nude base. This layering technique builds the opacity needed for an ethereal look.
Tip: Use a light tapping motion rather than pressing hard with the sponge to avoid lifting the underlying gel or creating harsh lines. - 4Flash cure the gradient
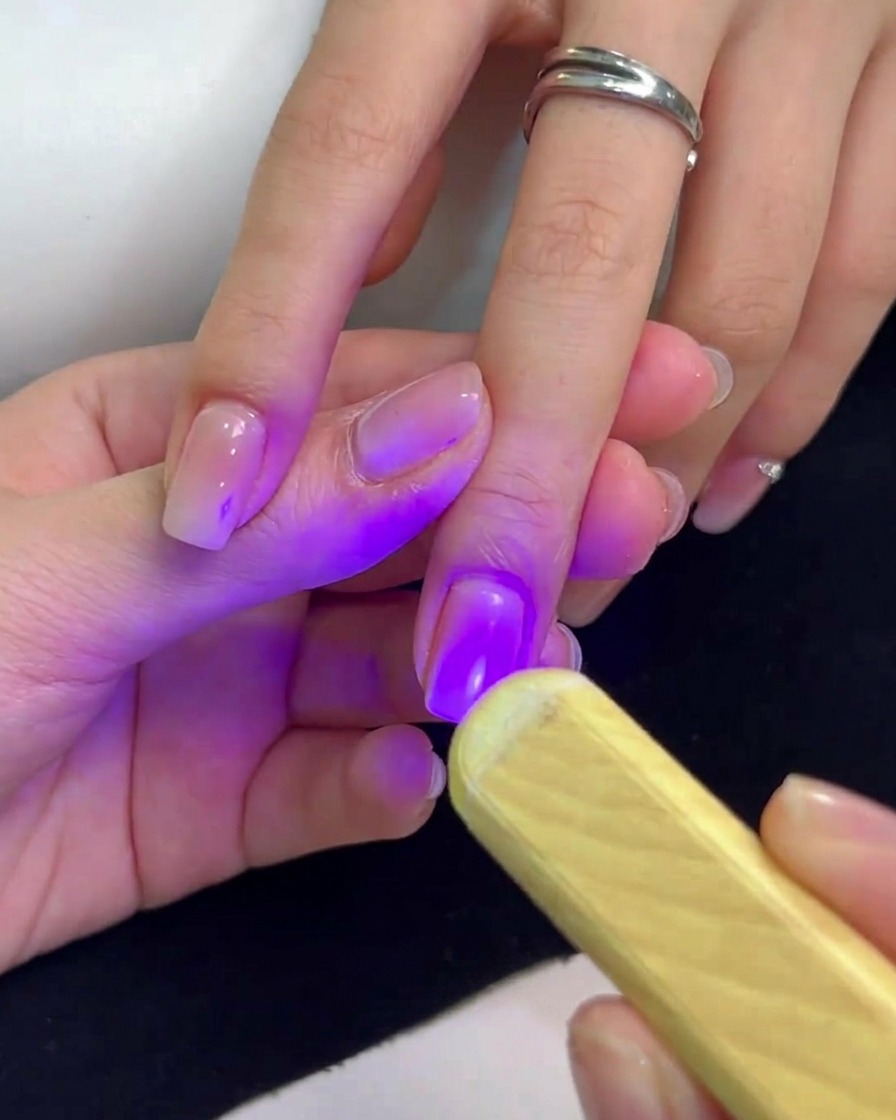
Once you are satisfied with the gradient blend, immediately hold a mini handheld UV or LED lamp over the nail to flash cure the white gel. This locks the design in place and prevents the gel from self-leveling or losing the blurred effect before a full cure.
Tip: Keep the handheld lamp steady and close to the nail for about 10-15 seconds to ensure the top layer is completely frozen. - 5Apply reinforcement gel
Brush a layer of clear reinforcement gel or builder gel over the entire nail. This step smooths out any texture left behind by the sponging technique and provides a perfectly even surface. It also adds strength to the nail before you apply rhinestones.
Tip: Let the reinforcement gel self-level for a few seconds before curing to ensure a glass-like finish. - 6Apply rhinestone glue
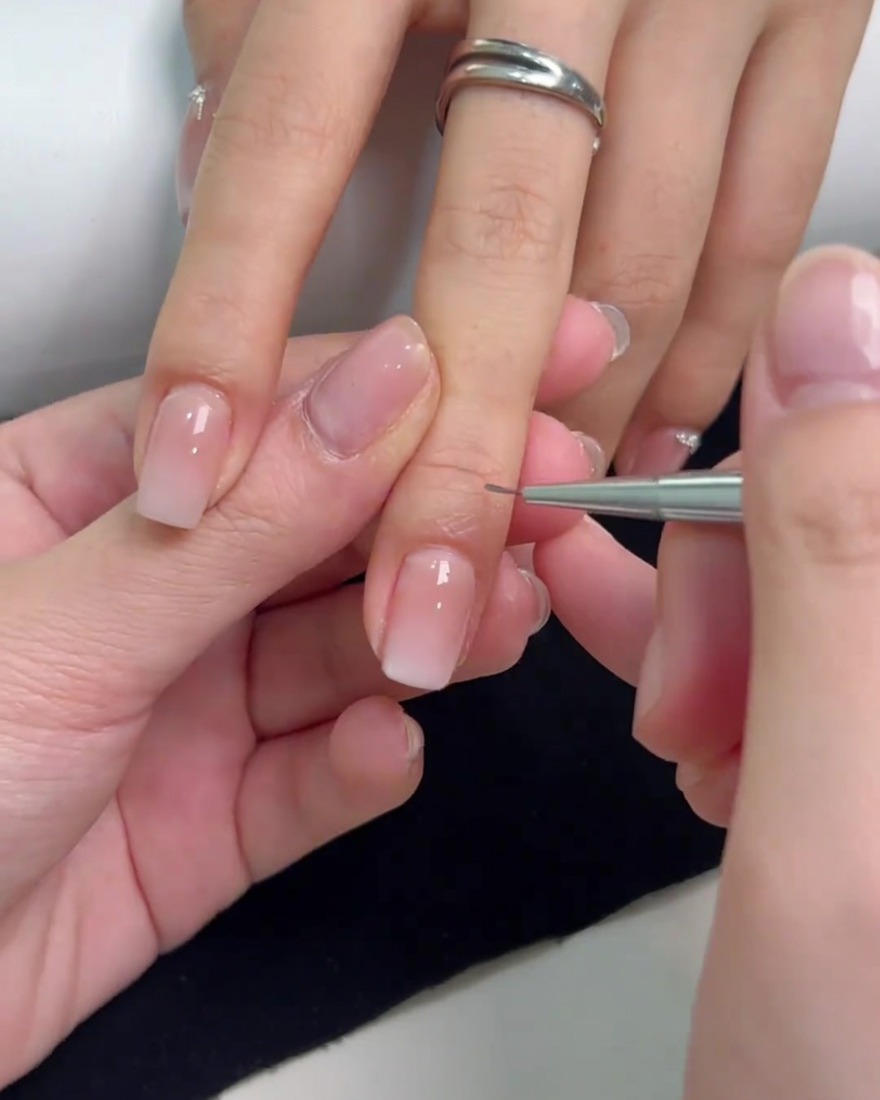
Using a fine liner brush, pick up a small amount of rhinestone glue or thick jewelry gel. Carefully trace a clean, curved line along the cuticle area where you plan to position the gems. This precise placement ensures the rhinestones stay secure without messy overflow.
Tip: Using a dedicated liner brush gives you much more control over glue placement than applying it straight from the tube. - 7Place the rhinestones and beads
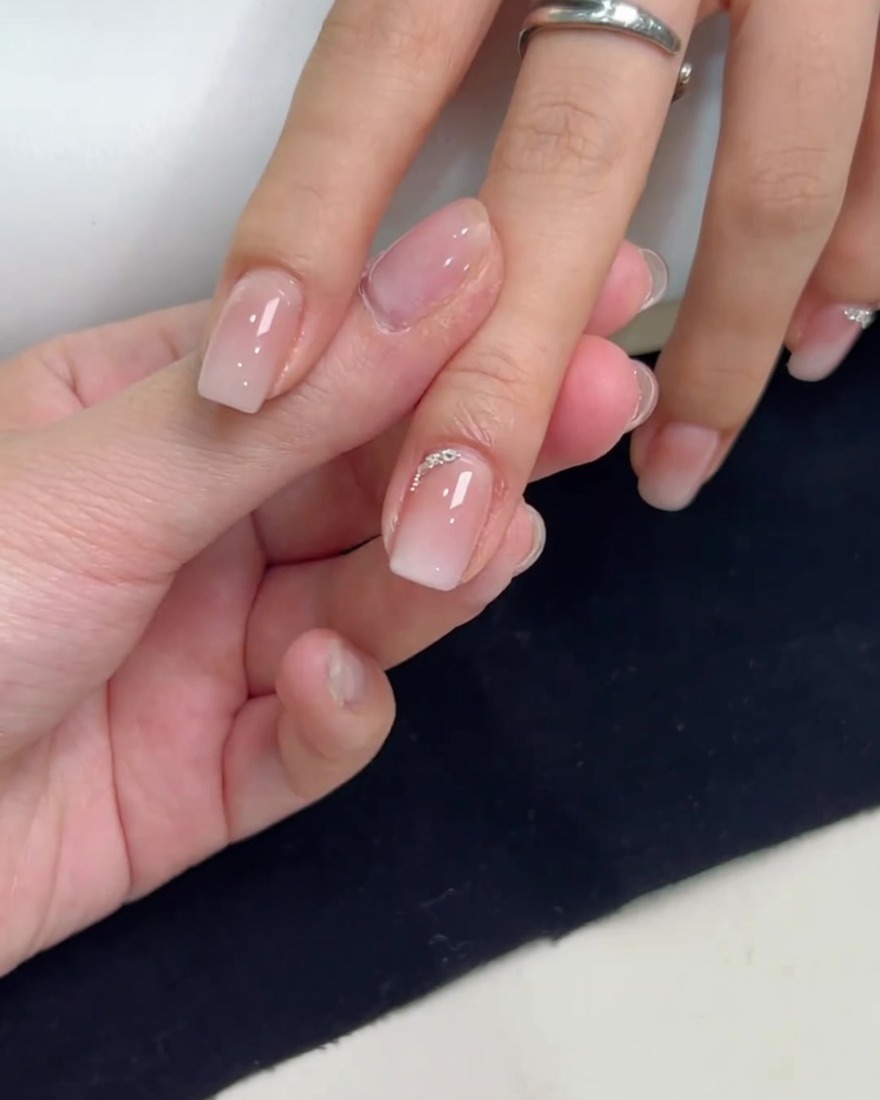
Carefully arrange small round silver rhinestones along the wet glue line at the cuticle using a wax pen or tweezers. Nestle tiny steel microbeads in between the rhinestones to fill any gaps and create a polished, jewelry-like accent line.
Tip: Gently press down on each rhinestone to ensure it is fully embedded in the glue before curing. - 8Cure the rhinestones
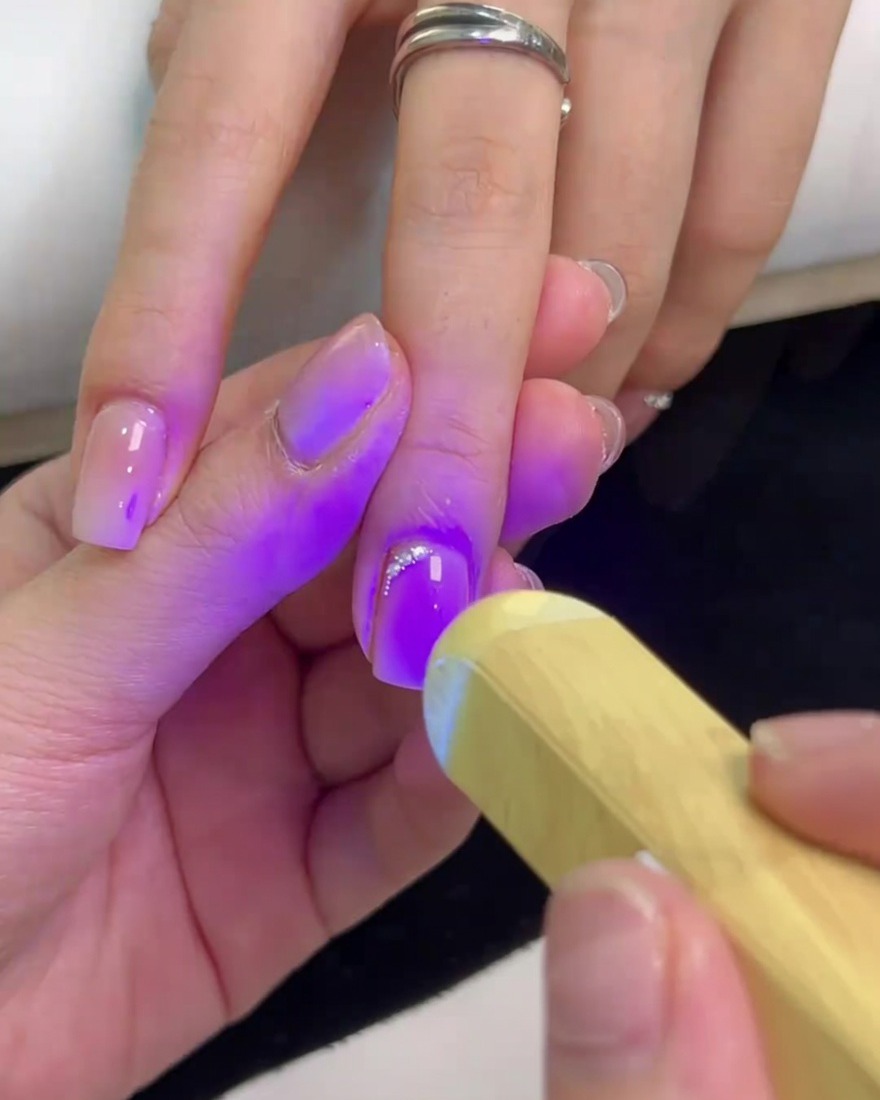
Position a mini handheld UV lamp directly over the decorated nail and flash cure the glue for a few seconds to lock the rhinestones and steel beads firmly in place. Follow up with a full cure in a standard nail lamp to ensure complete durability.
Tip: A handheld lamp is perfect for flash curing embellishments individually, preventing them from sliding around before the final cure.