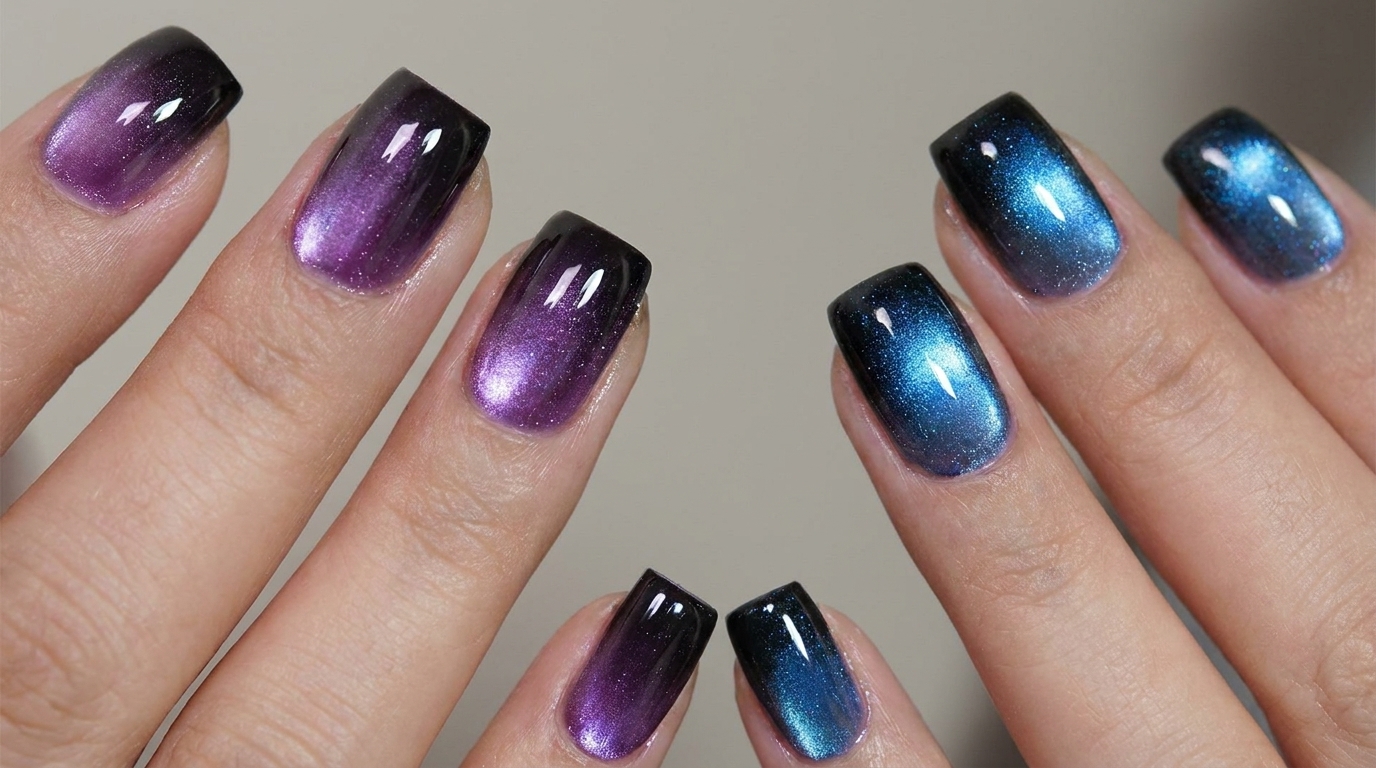
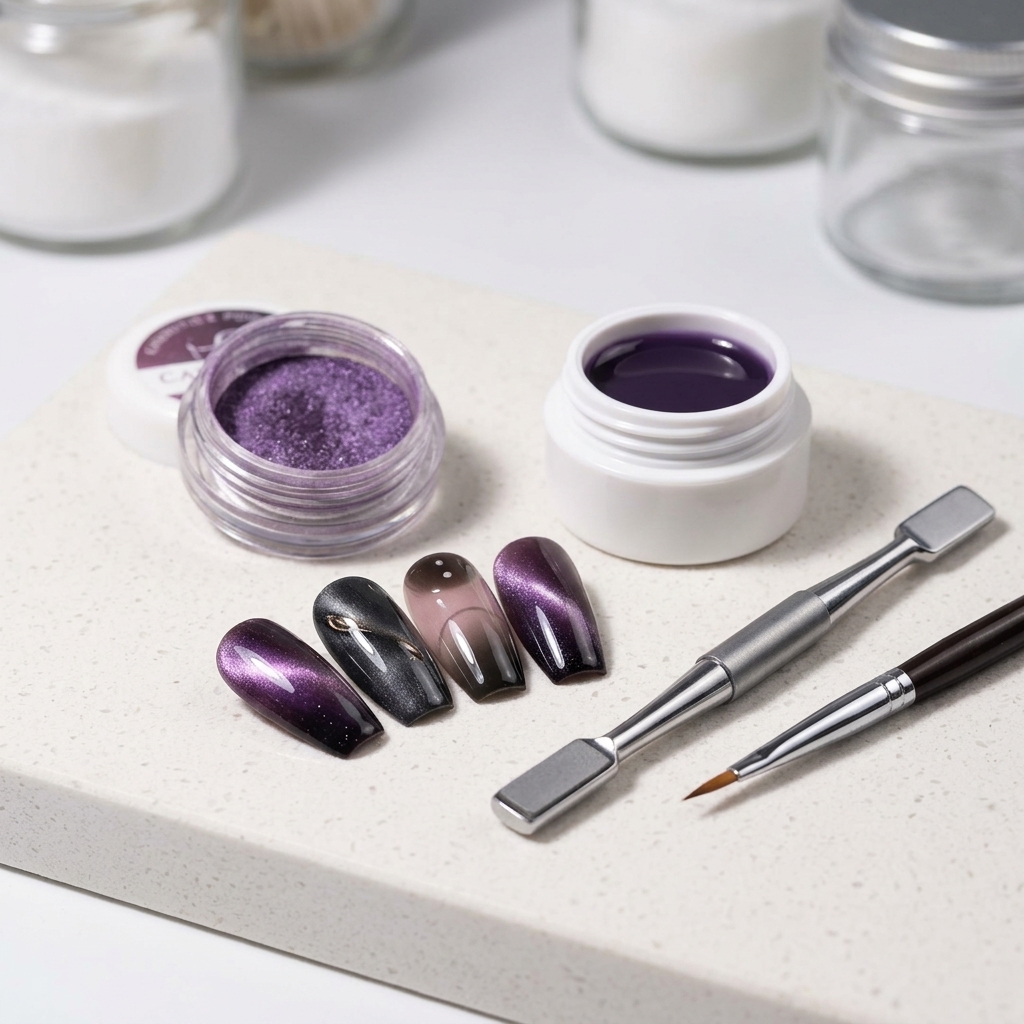
Blue and Purple Cat Eye Gradient Nails — Professional Step-by-Step Tutorial
Create a stunning galaxy-inspired manicure with this purple and blue cat eye gradient tutorial. Learn professional magnetic techniques for a glass-bead effect.
Embrace the trendy Year of the Snake aesthetic with this sophisticated purple and blue cat eye gradient look. Combining a deep black base with high-shine magnetic gel, this design mimics the depth of a galaxy. Follow along to master the precise magnet movements needed to achieve a sharp, professional glass-bead finish on your own nails.
Steps
- 1Apply black gradient base
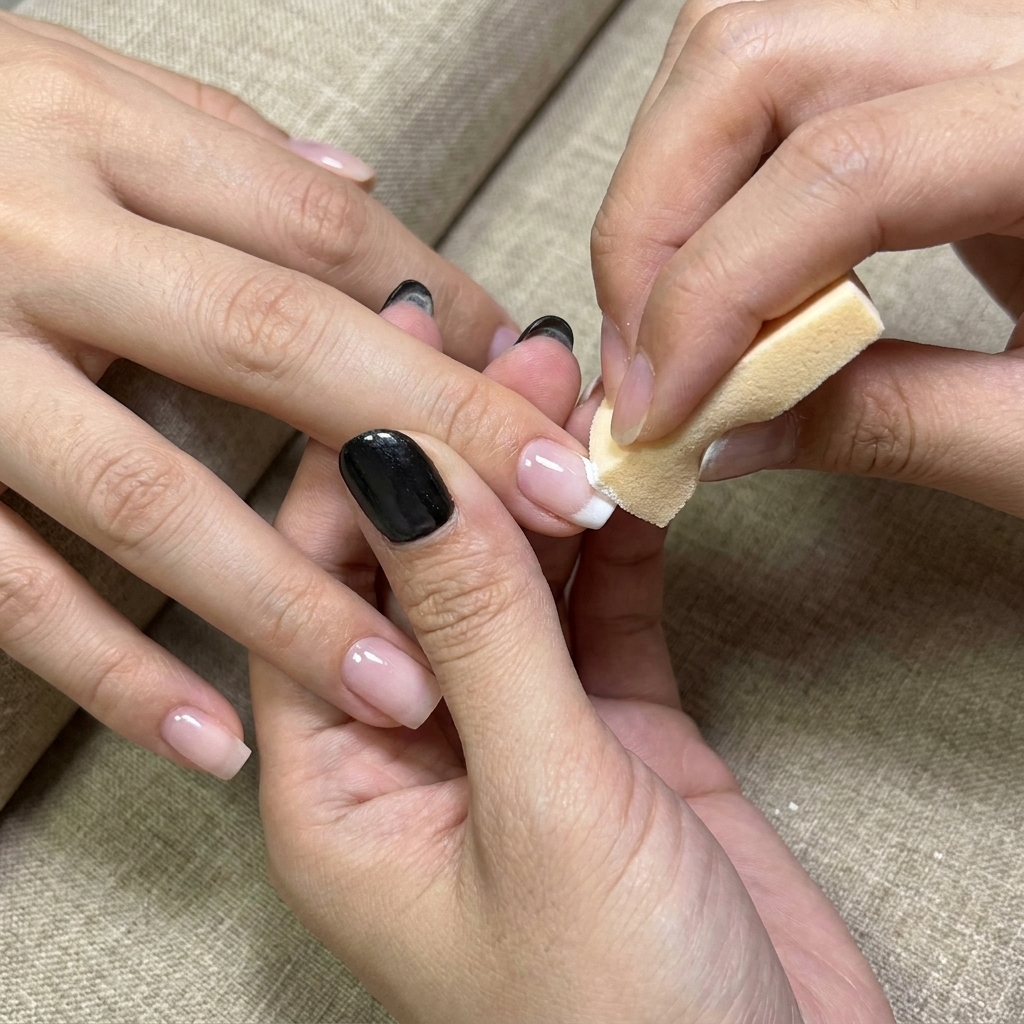
Apply a black gel base coat onto the nail using a makeup sponge. Lightly dab the sponge onto the nail plate to create a seamless gradient effect, focusing the intensity where desired.
Tip: Dabbing with a sponge helps blend the gel for a smooth, airbrushed-look gradient. - 2Deepen the nail tips
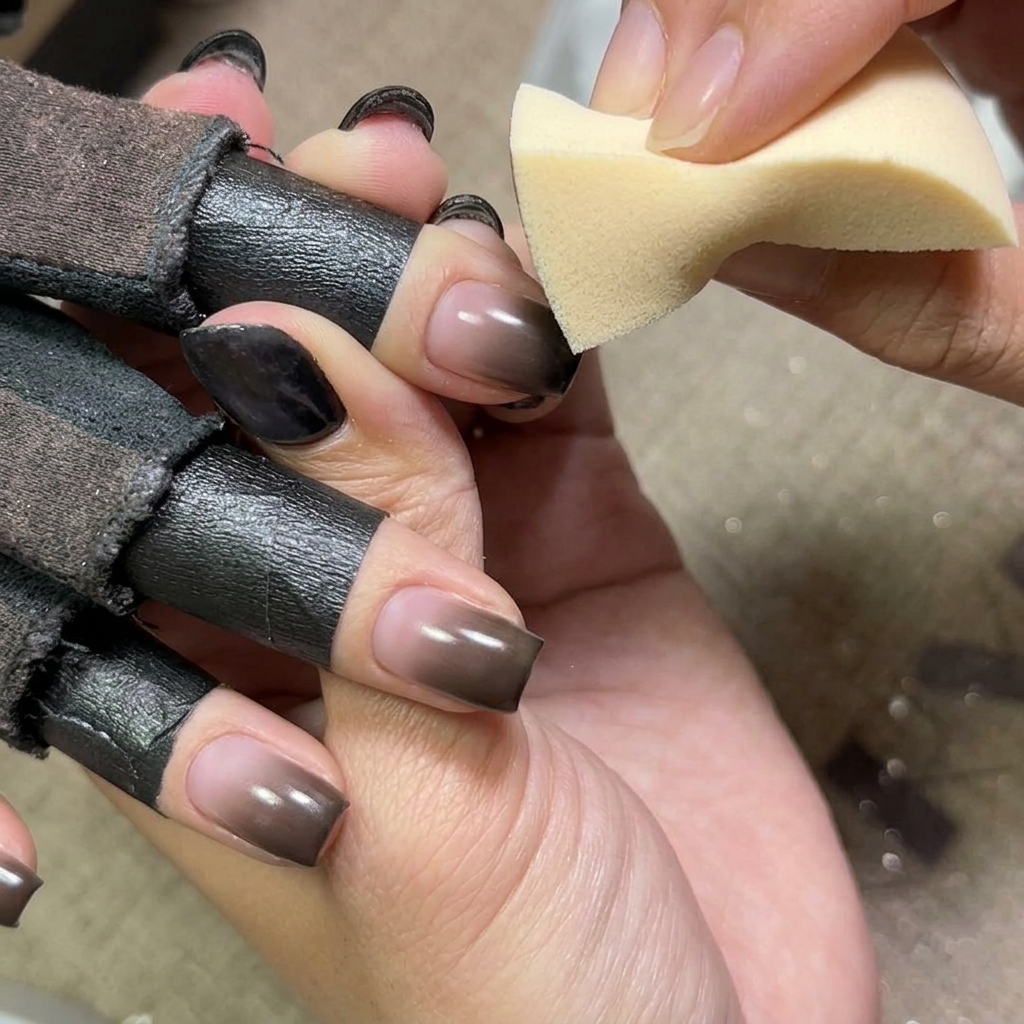
To build intensity, apply additional black gel to the free edge of the nails using the sponge. Focus the application on the tips to create a deeper, more pronounced gradient effect.
Tip: Building the color in layers at the tips creates depth and makes the gradient more striking. - 3Encapsulate with base gel
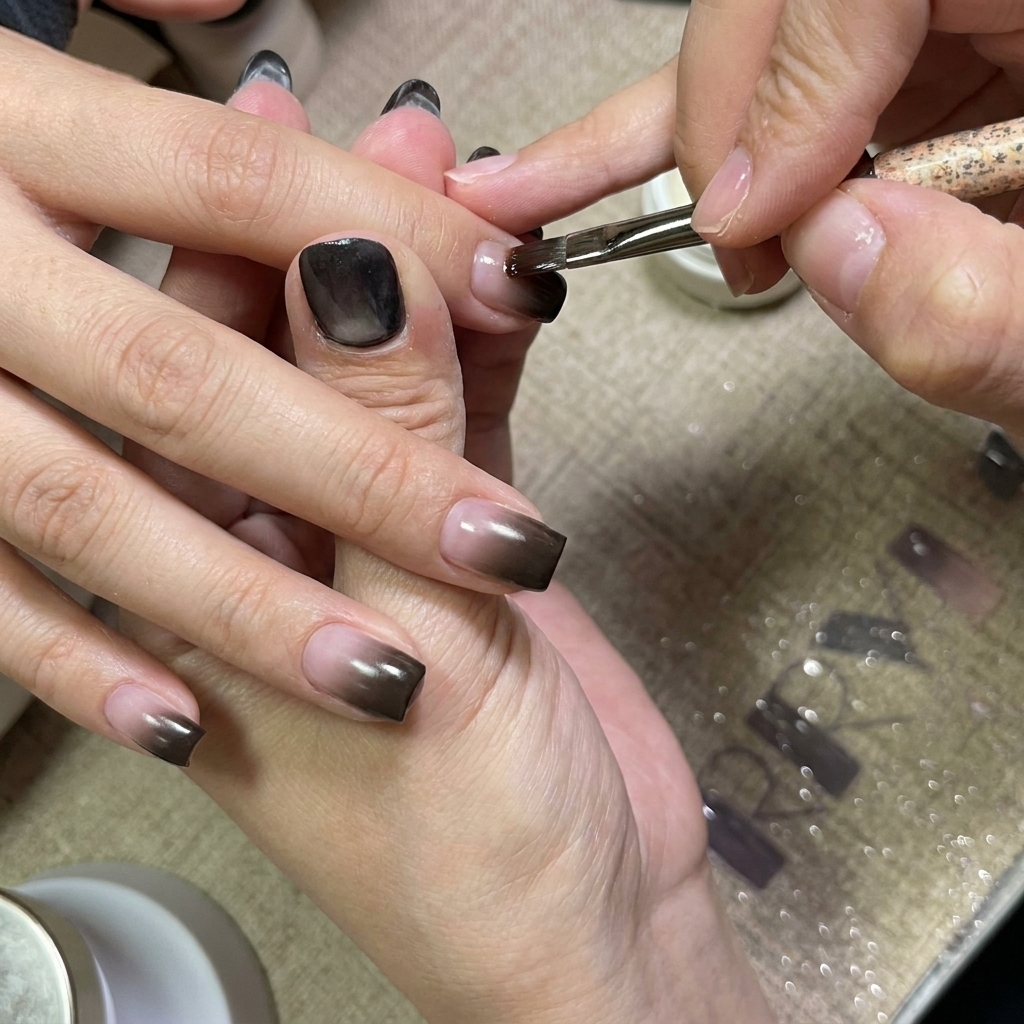
Apply a coat of clear base gel over the entire nail surface. This step helps to encapsulate the gradient work and smooths out any texture from the sponging process, creating an even base for the next layers.
Tip: Clear gel helps seal the gradient design and prepares a perfectly smooth surface for the cat eye gel. - 4Apply purple cat eye gel
Apply an even coat of purple cat eye gel over the entire nail surface. Ensure complete coverage for consistent pigment distribution before introducing the magnet.
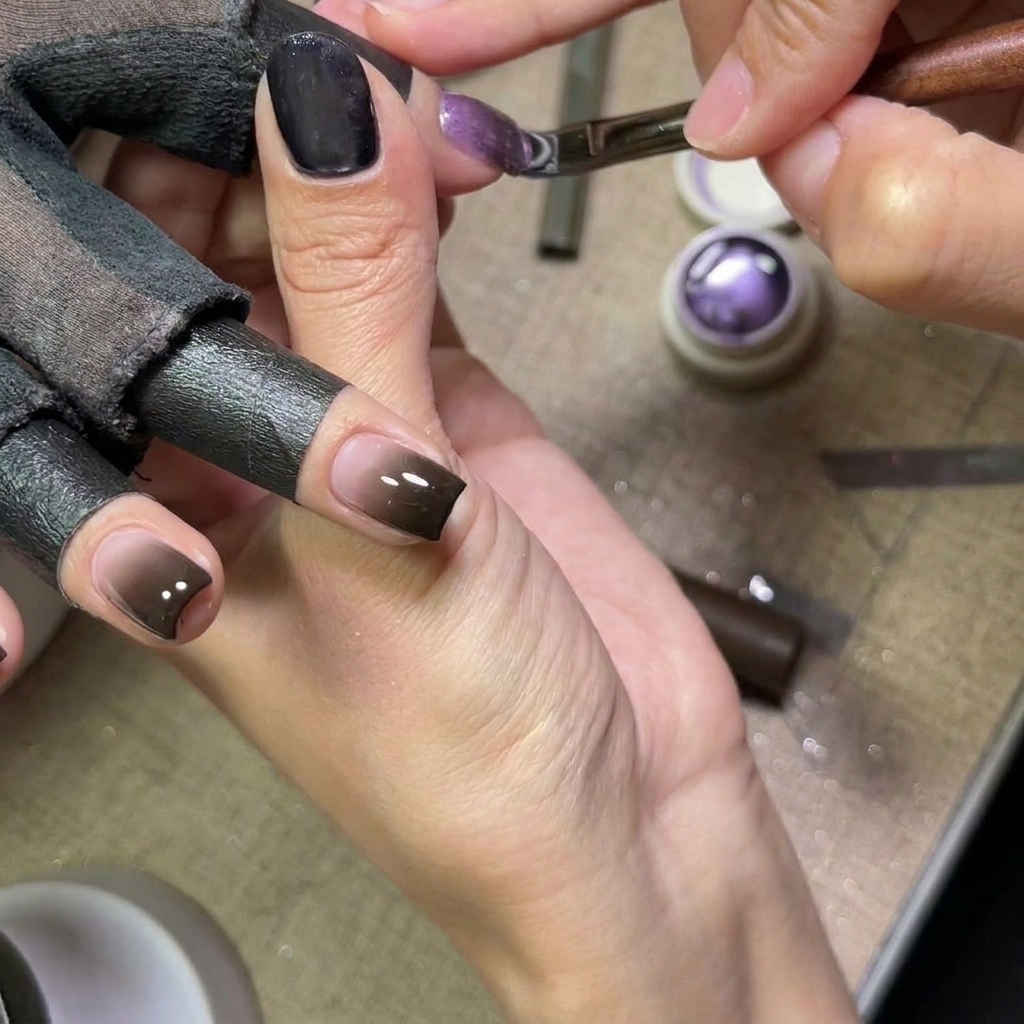
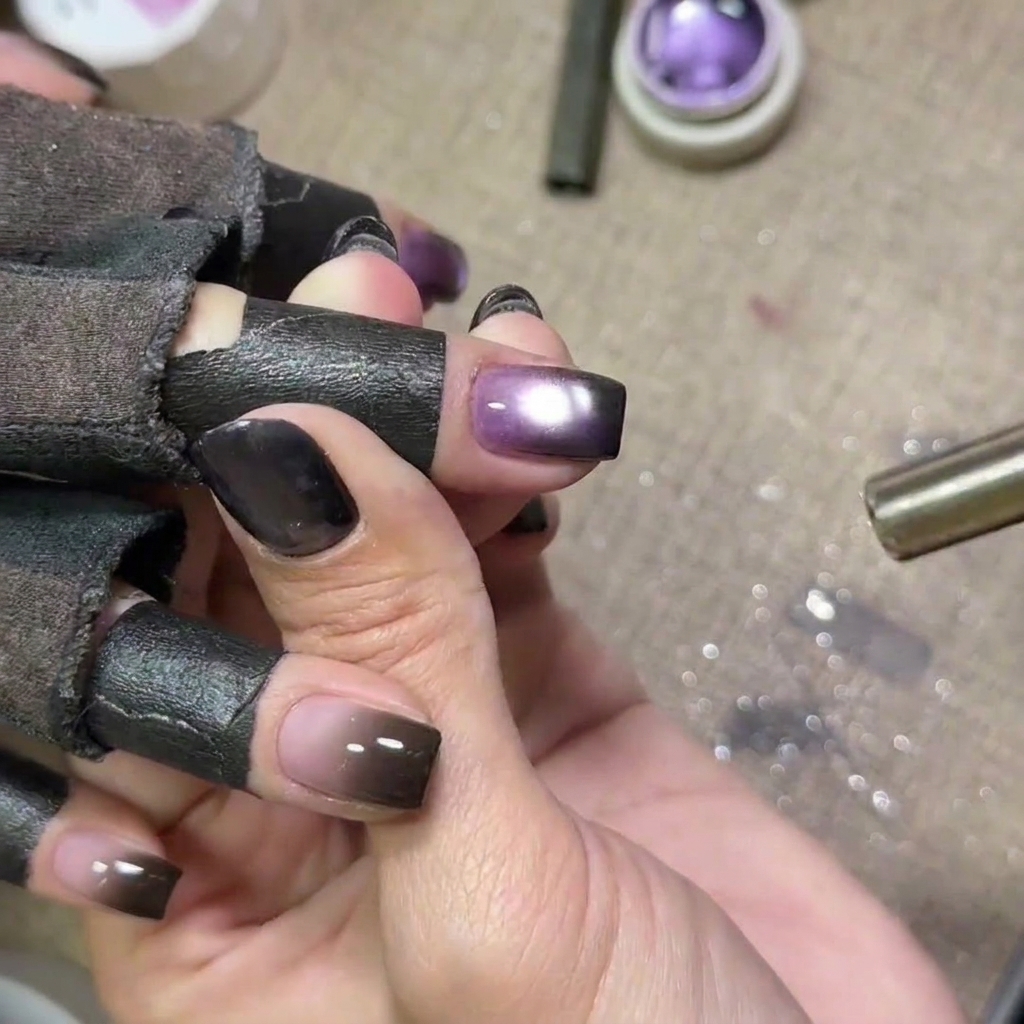
Tip: A full, even coat ensures that the magnetic particles have plenty of medium to move within. - 5Create the cat eye design
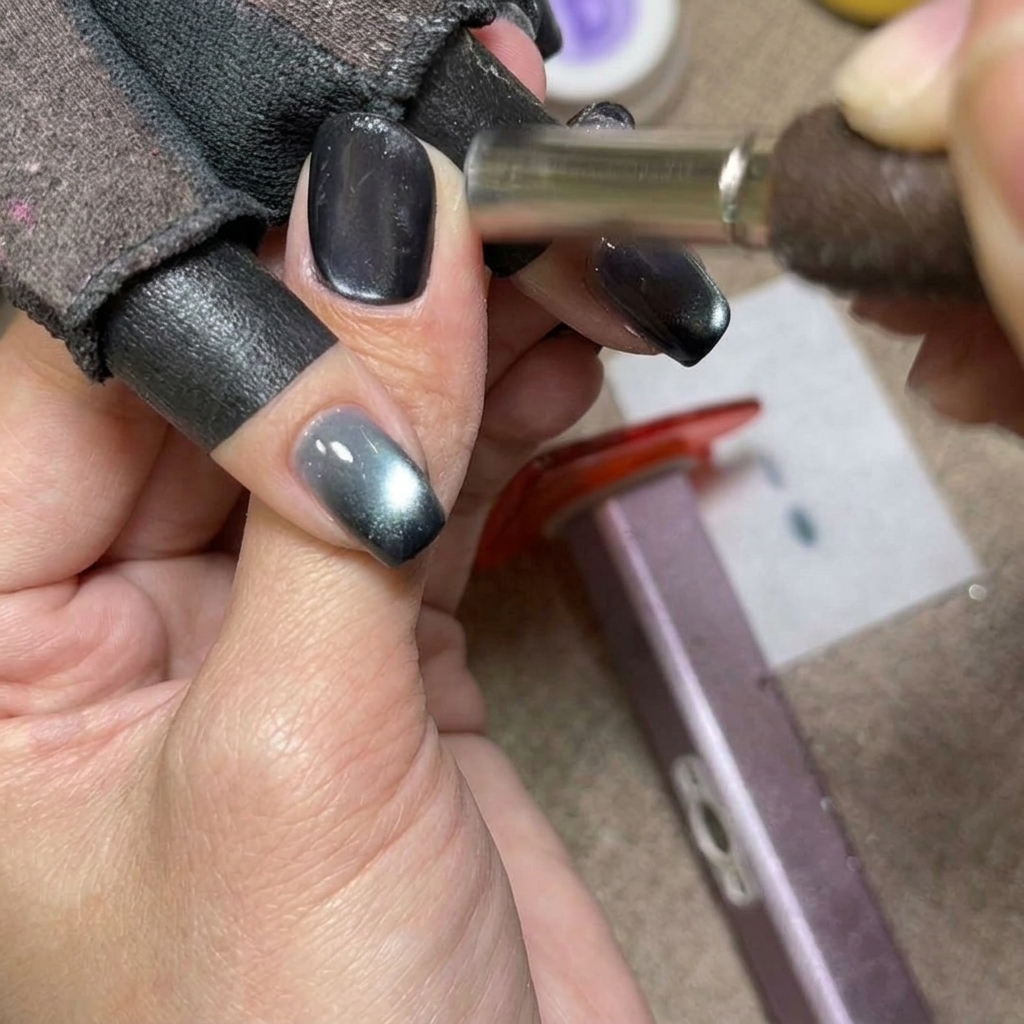
Hold a magnet near the nail to manipulate the cat eye pigment. Move the magnet side-to-side and then draw gentle half-circles to shape the shimmer into a decorative design on the wet gel.
Tip: Moving the magnet in circular motions helps create more complex, glass-like dimension in the pigment. - 6Form glass-bead effect
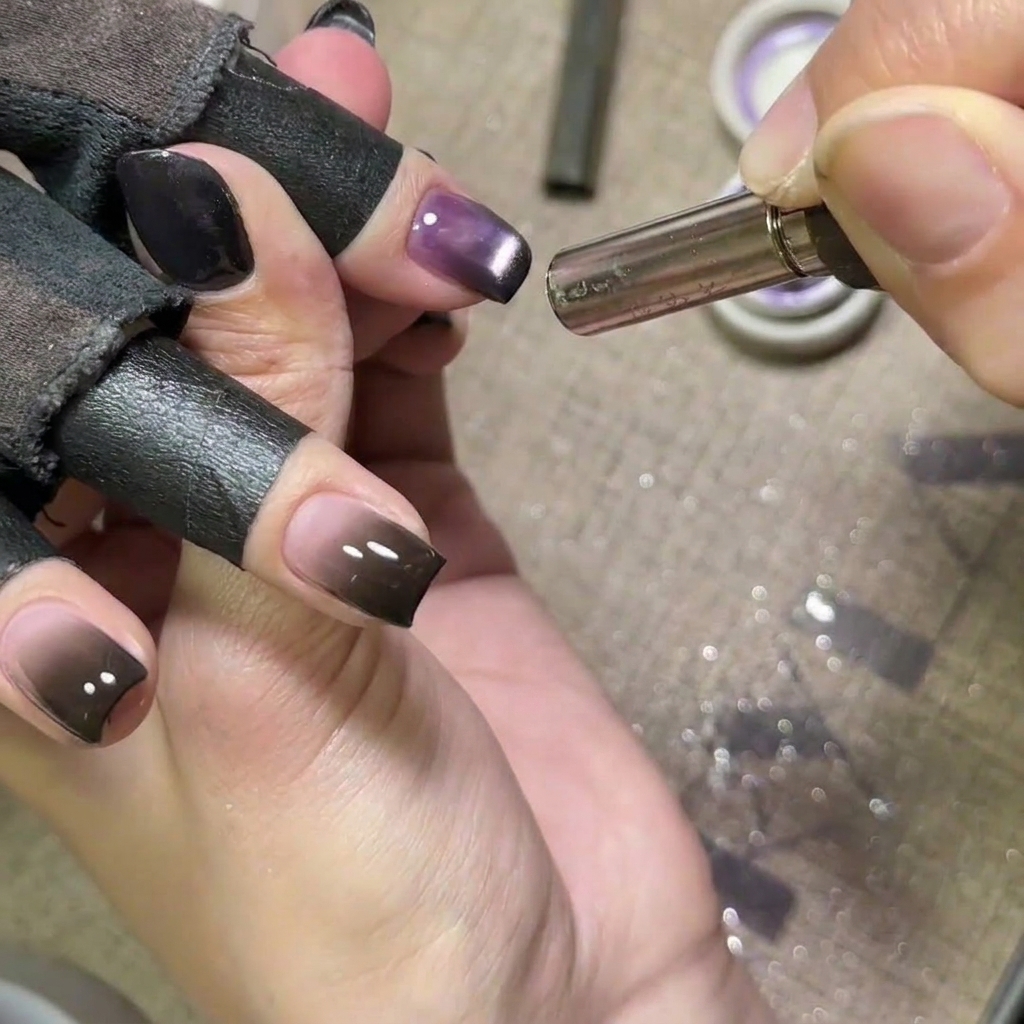
Use the magnet to pull the magnetic pigment towards the tip of the nail. This creates a concentrated glass-bead shimmer effect. Once satisfied with the pattern, cure the nails under a UV lamp.
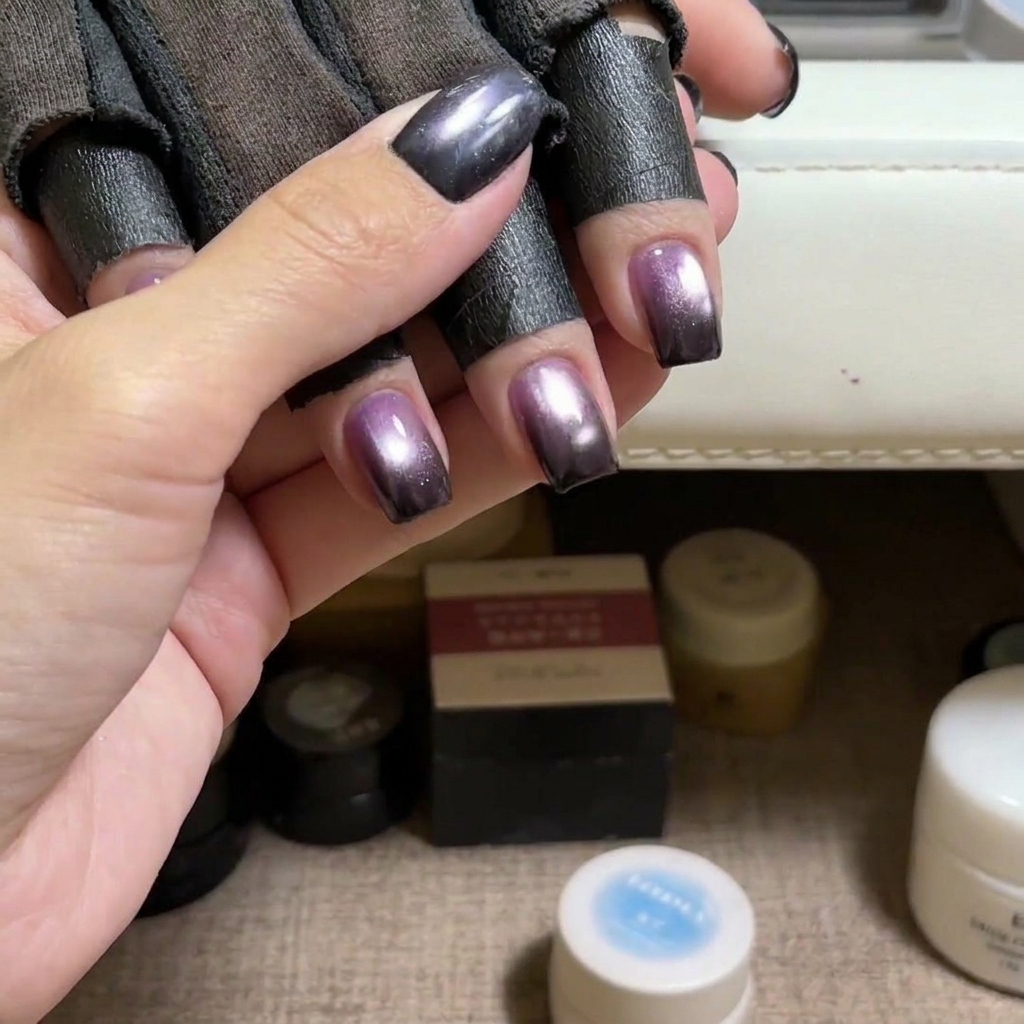
Tip: Curing immediately after achieving the desired magnetic look keeps the effect sharp and defined. - 7Enhance purple shimmer
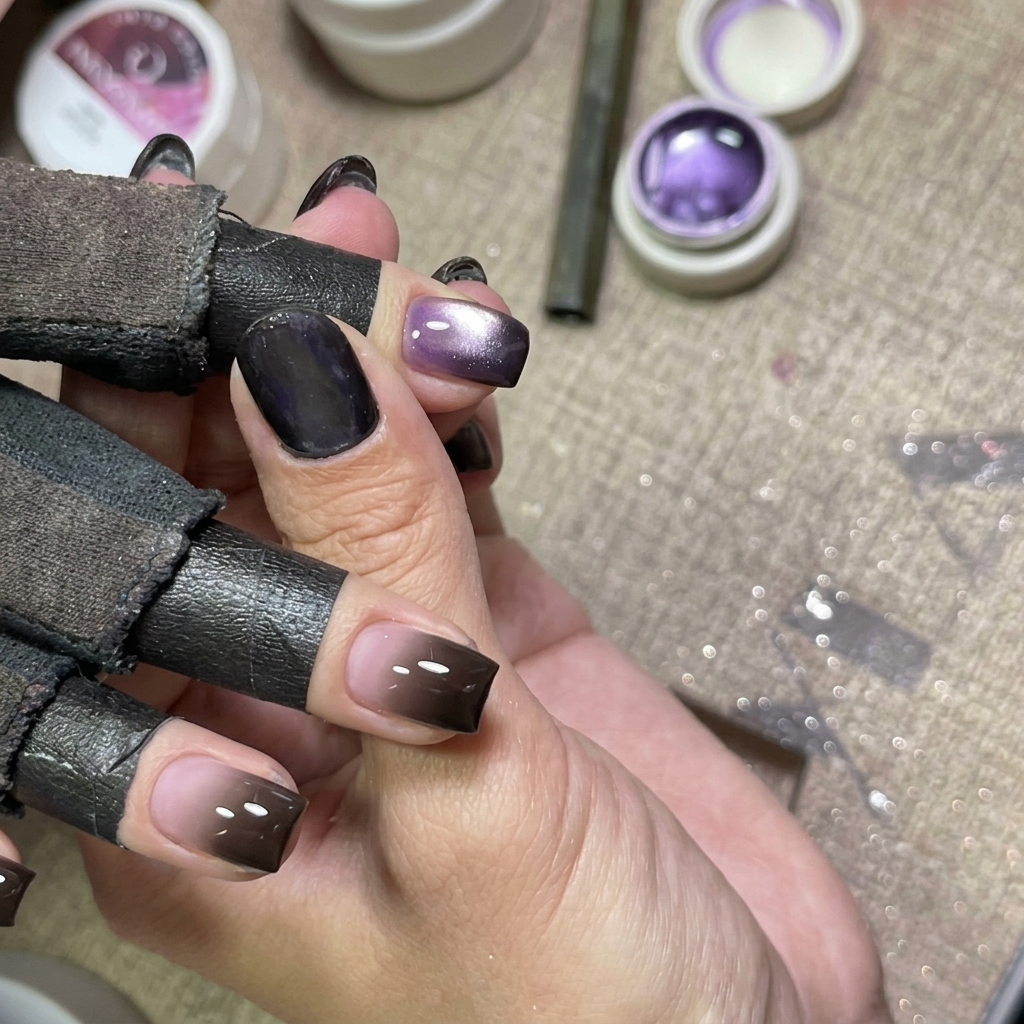
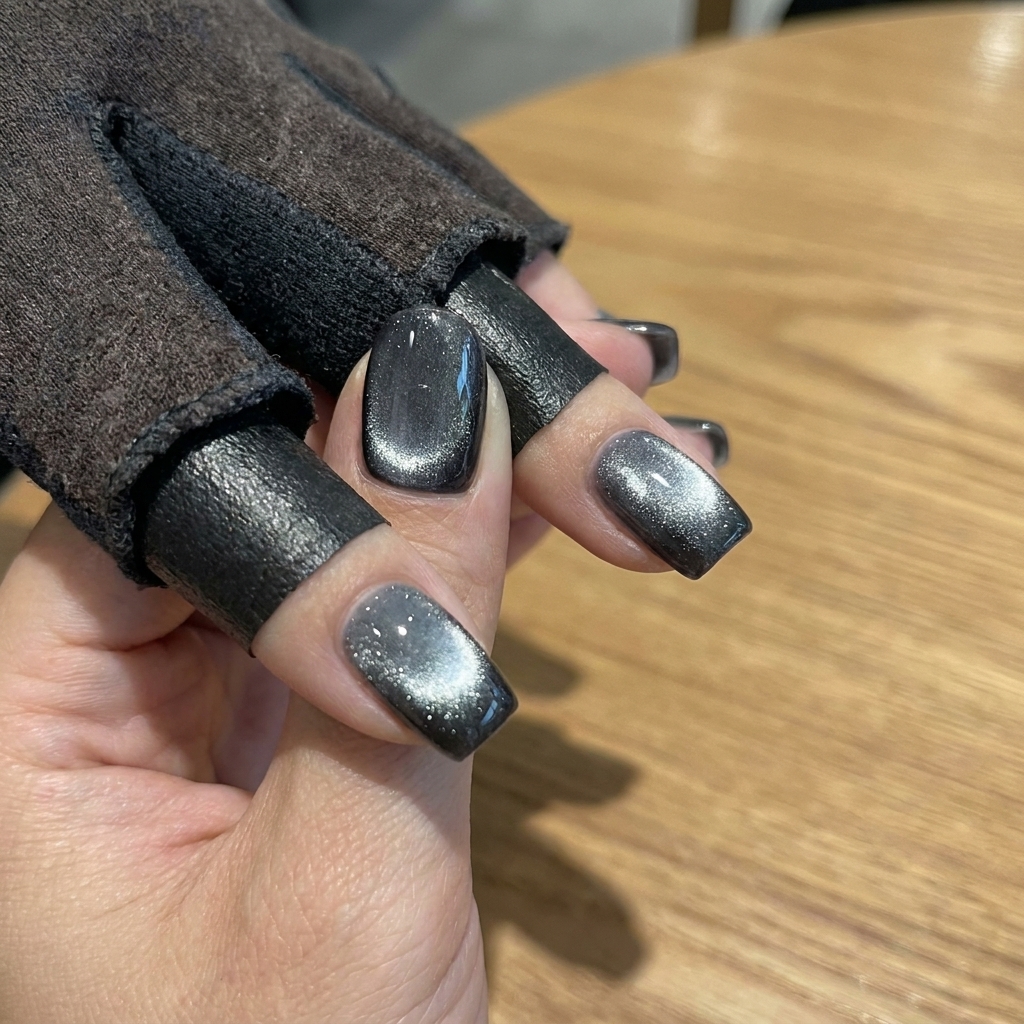
Apply another layer of purple cat eye gel and use the magnet once more to manipulate the pigment. This refines the gradient, deepens the color, and adds extra dimension to the cat eye effect.
Tip: Keep the magnet close to the nail without touching it to get the most precise magnetic movement. - 8Cure purple nails
Place the hand with the purple cat eye nails under a UV or LED lamp. Cure for the time recommended by your gel product to ensure the cat eye effect is set and locked in place.
Tip: Ensure the hand is placed flat and stable under the lamp for an even cure. - 9Apply blue cat eye gel
Apply a coat of blue cat eye gel to the nails on your other hand. Ensure even coverage across the nail plate for a consistent base before using the magnet.
Tip: Work on one or two nails at a time if the gel self-levels too quickly, ensuring you have enough time to use the magnet. - 10Magnetize blue cat eye
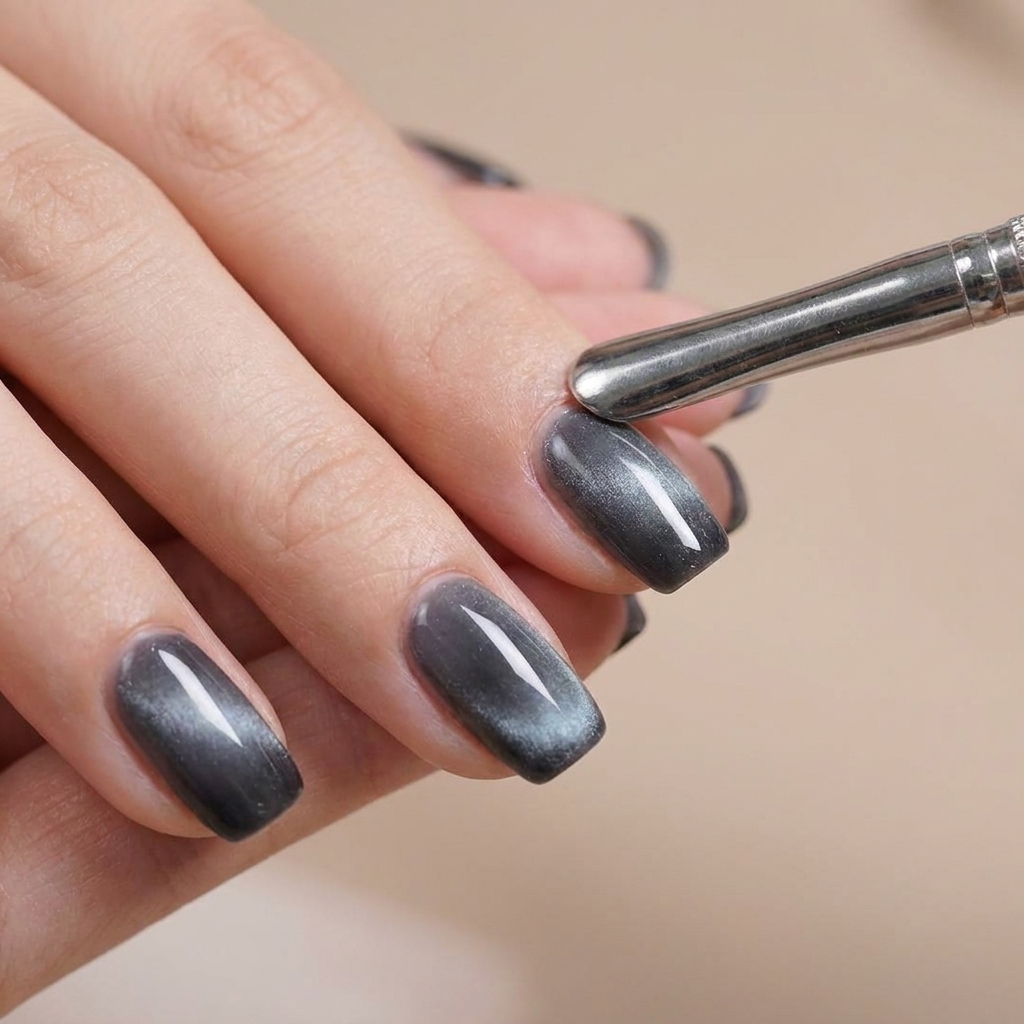
Use a magnetic tool to draw out the blue cat eye pigment. Move the magnet side-to-side and in half-circles to create a stunning, icy gradient effect on the blue gel.
Tip: Experiment with different magnet angles to see how it affects the movement of the reflective pigment. - 11Cure blue nails
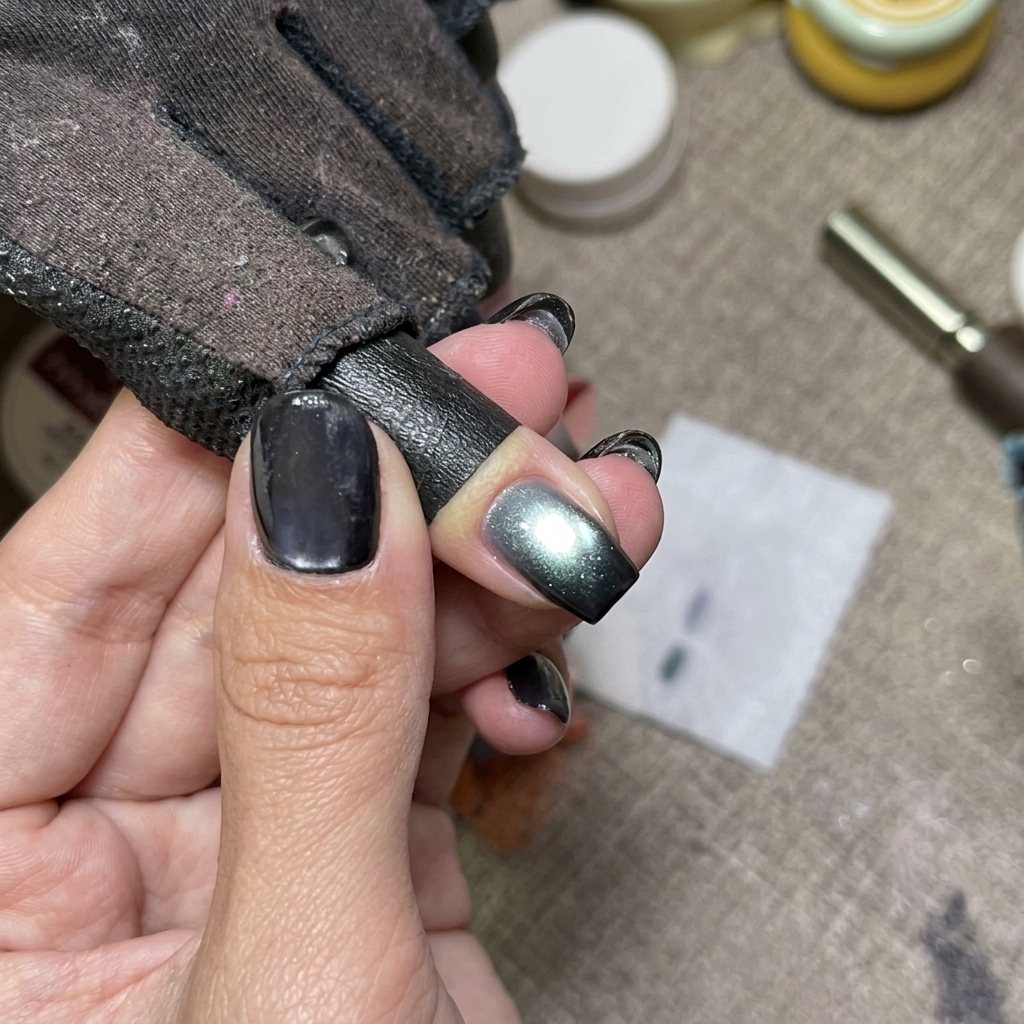
Cure the blue cat eye nails under your UV or LED lamp. Allow the gel to fully harden to finalize the cool, icy look.
Tip: Follow your lamps instructions to ensure the gel is fully cured. - 12Refine blue cat eye
Use the magnet once more on the blue nails to refine the gradient. Small, precise movements help sharpen the cat eye line for a crisp, professional finish.
Tip: Repeating the magnetic technique helps intensify the cat eye glass-bead effect. - 13Cure the blue cat eye gel
Place the hand under the UV or LED lamp to fully cure the blue cat eye polish. Ensure all fingers are positioned directly under the light source to guarantee that the cat eye effect sets properly without shifting. The final cure ensures durability and a professional, long-lasting finish.
Tip: Keep your fingers still while curing to maintain the precise magnetic pattern you created.