Ice-Translucent Cat Eye Cherry Blossom Nails — Step-by-Step Tutorial
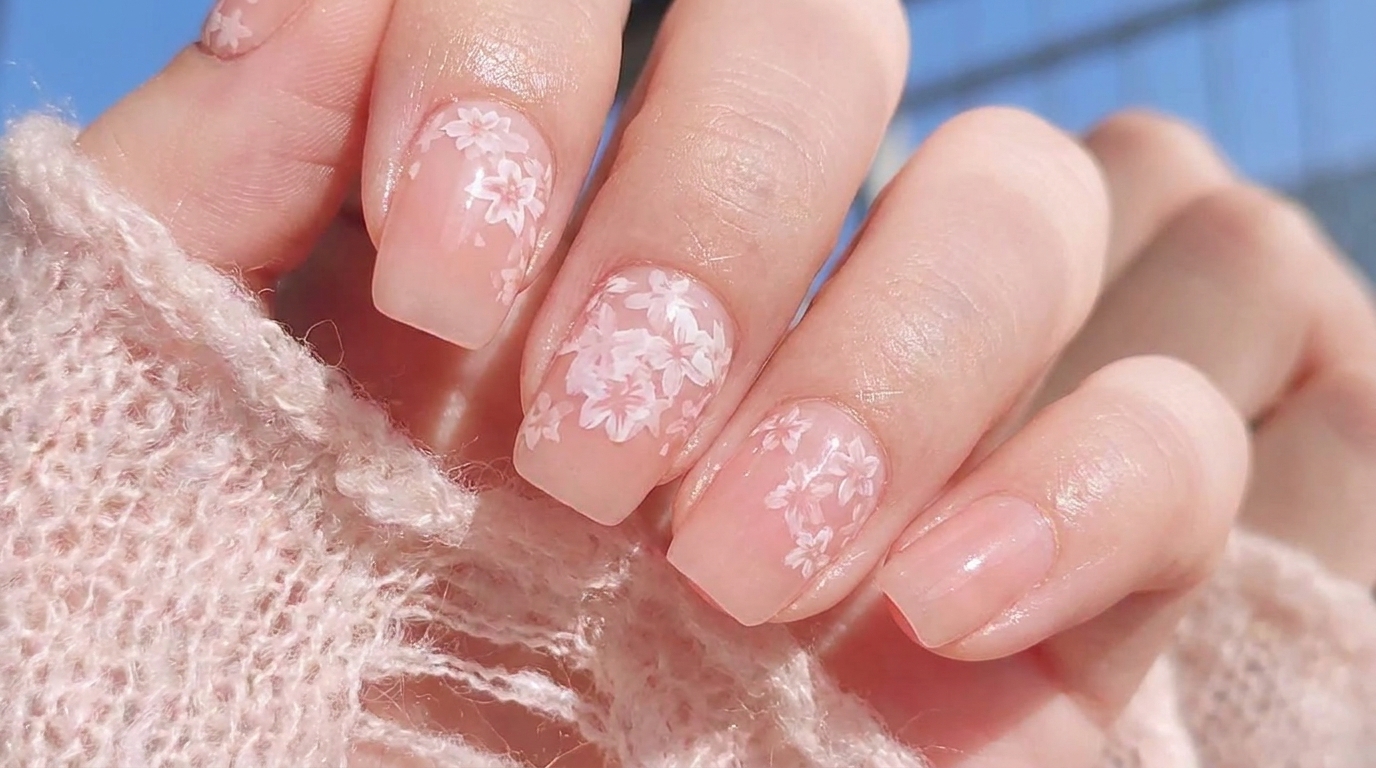
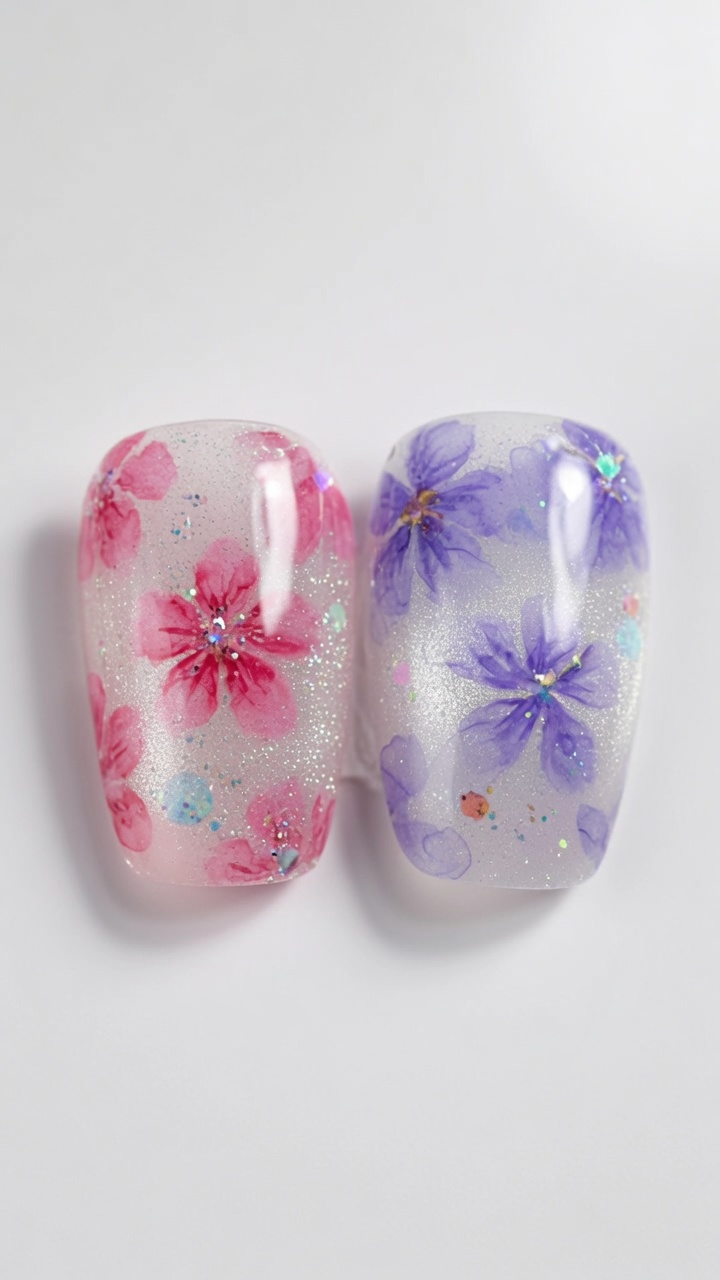
Learn to create stunning watercolor-style cherry blossoms over an ethereal, ice-translucent cat eye base. This elegant look blends magnetic depth with soft, hand-painted floral art.
The intersection of magnetic cat eye gel and soft watercolor art creates a mesmerizing, multidimensional look that feels like a frozen spring garden. This design uses a matte base to allow the floral pigments to diffuse naturally, resulting in a delicate, sophisticated aesthetic perfect for any season.
Steps
- 1Apply ice-translucent cat eye gel

Apply a moderate layer of ice-translucent cat eye gel onto the nail tip, ensuring the coverage is even across the surface.
Tip: Keep the layer thickness moderate to ensure the cat eye effect creates a clear, depth-filled finish. - 2Level the gel application
Carefully brush the ice-translucent cat eye gel across the entire nail surface to ensure an even distribution before applying the magnet.
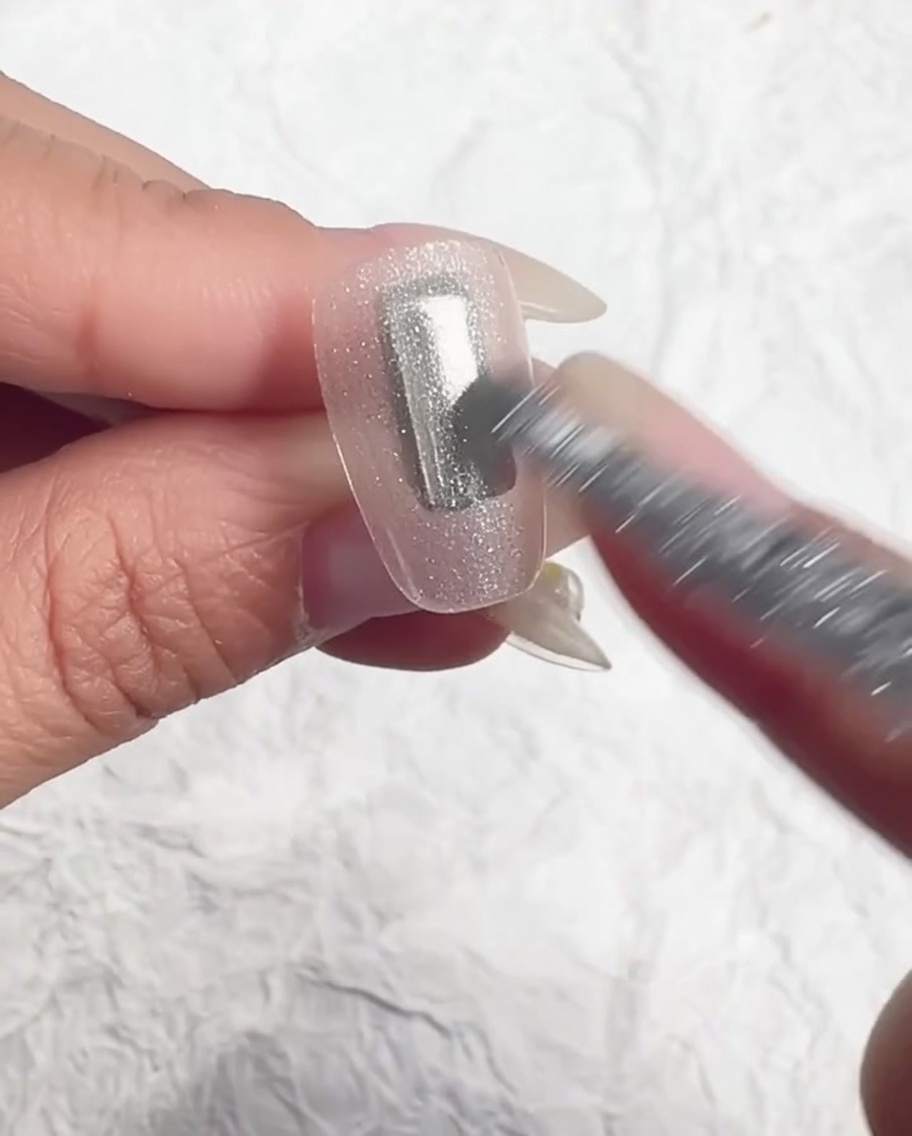
Tip: Even application is key to achieving a uniform and professional-looking cat eye effect. - 3Create the cat eye effect

Position a magnet tool close to the nail surface to attract the metallic particles within the gel, forming the signature cat eye effect.
Tip: Hold the magnet steady and close to the nail for several seconds to get the sharpest and most defined line. - 4Apply matte top coat
Apply an even layer of matte top coat over your cured cat-eye base. This matte finish provides the perfect non-glossy canvas for the watercolor-style cherry blossoms, allowing the colors to spread and diffuse naturally without slipping.
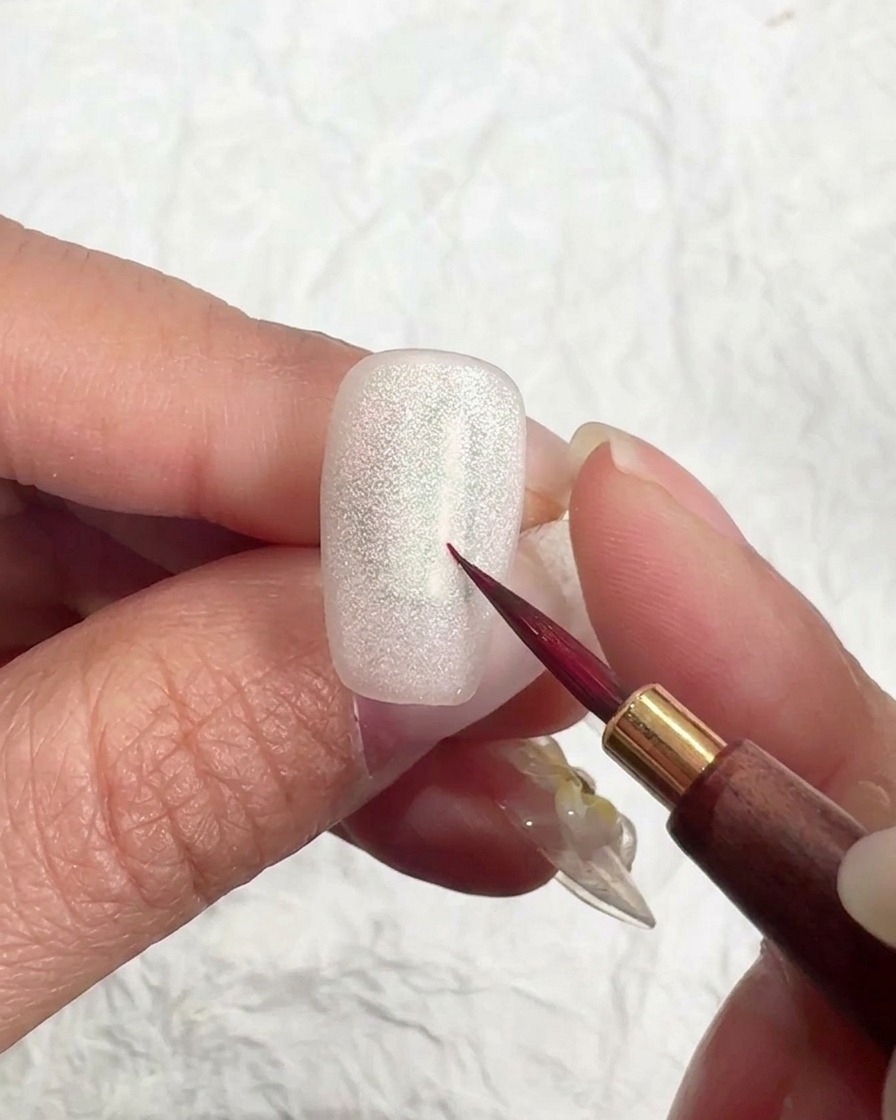
Tip: Ensure the top coat covers the entire nail surface, including the free edge, to seal the cat-eye effect before proceeding to the nail art. - 5Set the floral placement
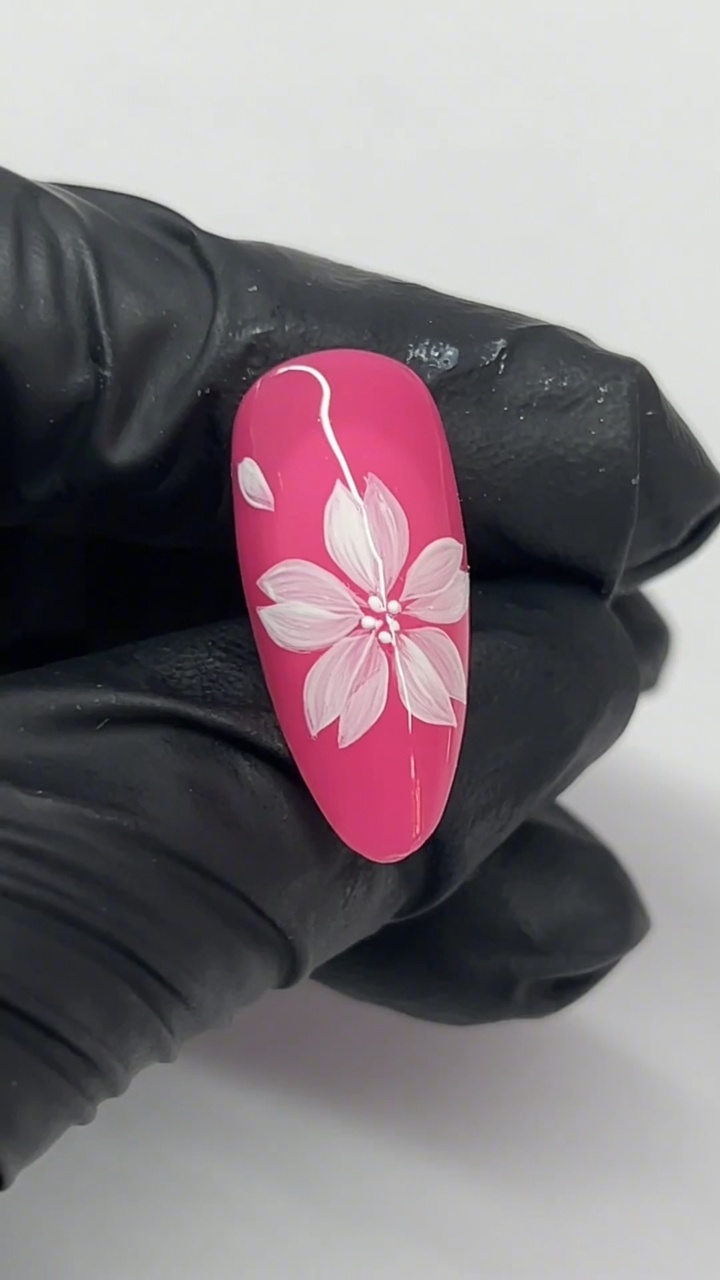
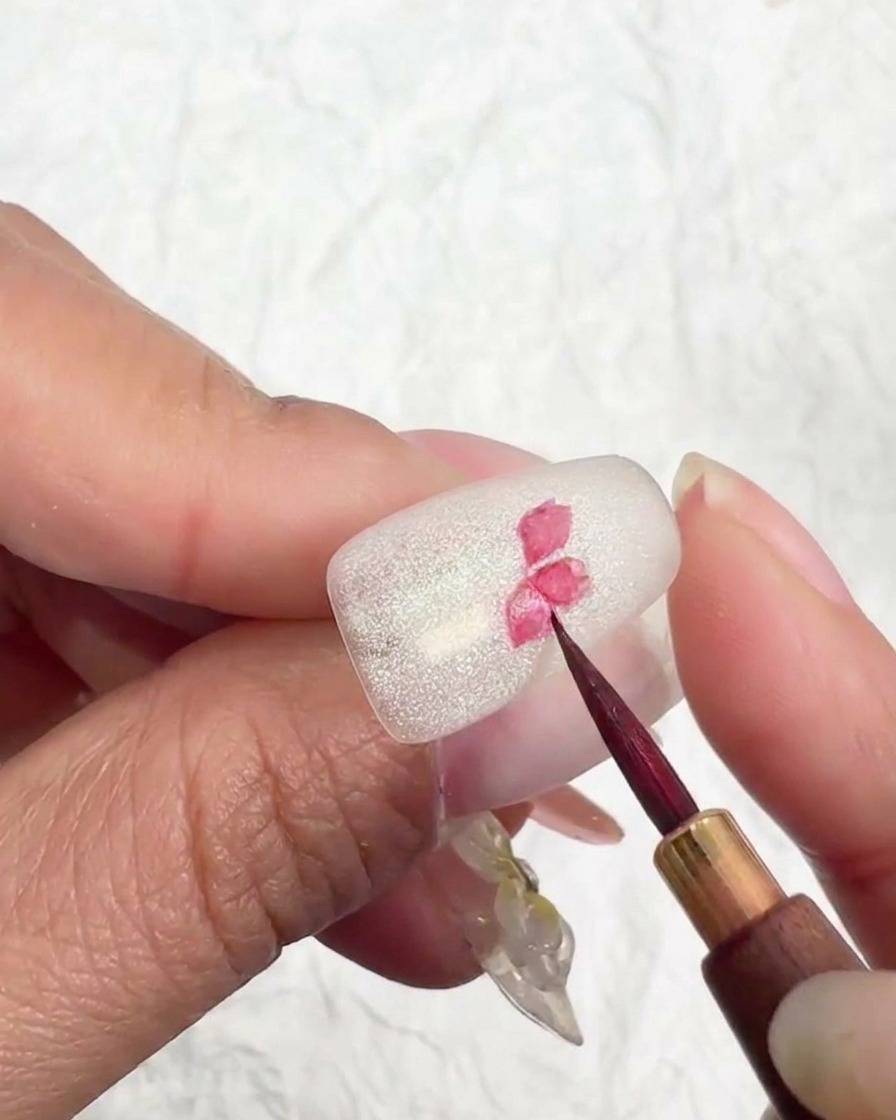
Using a fine liner brush, carefully map out the centers of your cherry blossoms on the nail surface. Placing these dots first helps you maintain balanced spacing and proper proportions for a five-petal flower.
Tip: A very small dot in the center helps anchor the proportions of the five-petal flower. - 6Form the petals
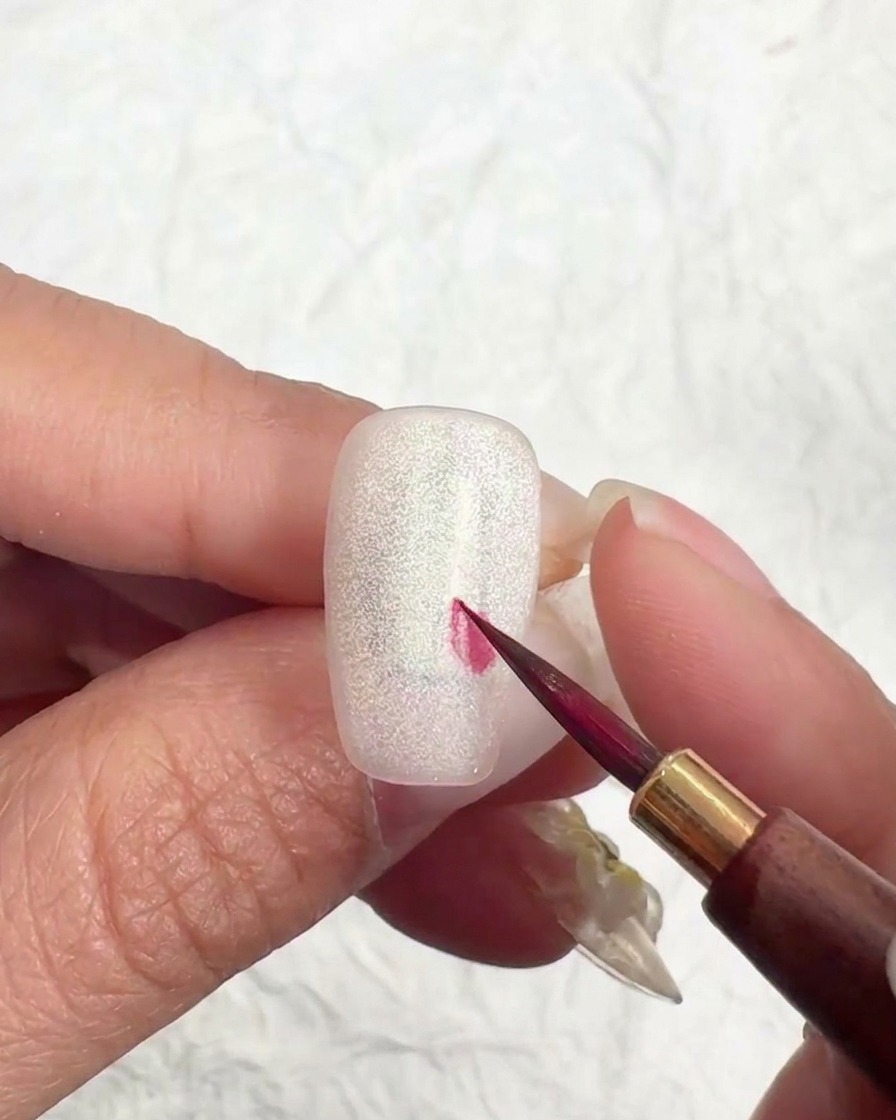
Pull the brush outward from the center dot to create the individual petals of the cherry blossom.
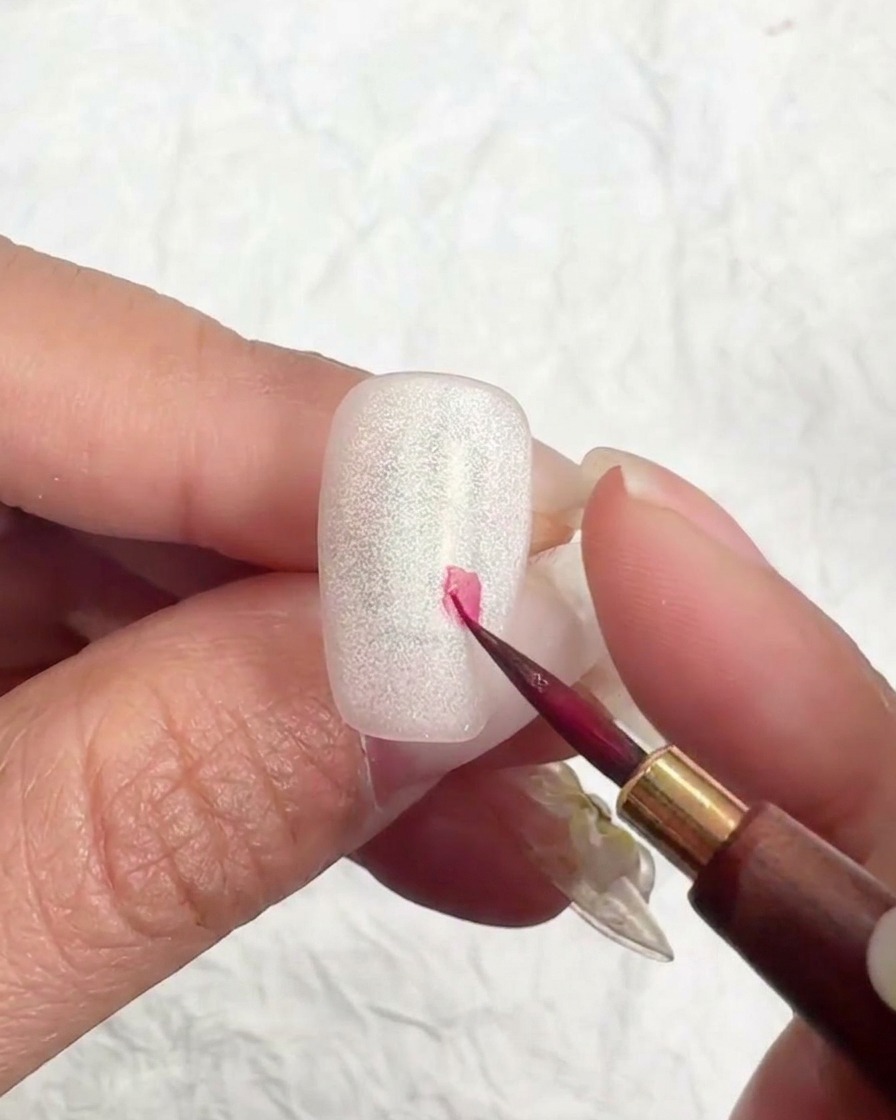
Tip: Work in small, consistent strokes to ensure each of the five petals has a similar shape and size. - 7Paint the petal base
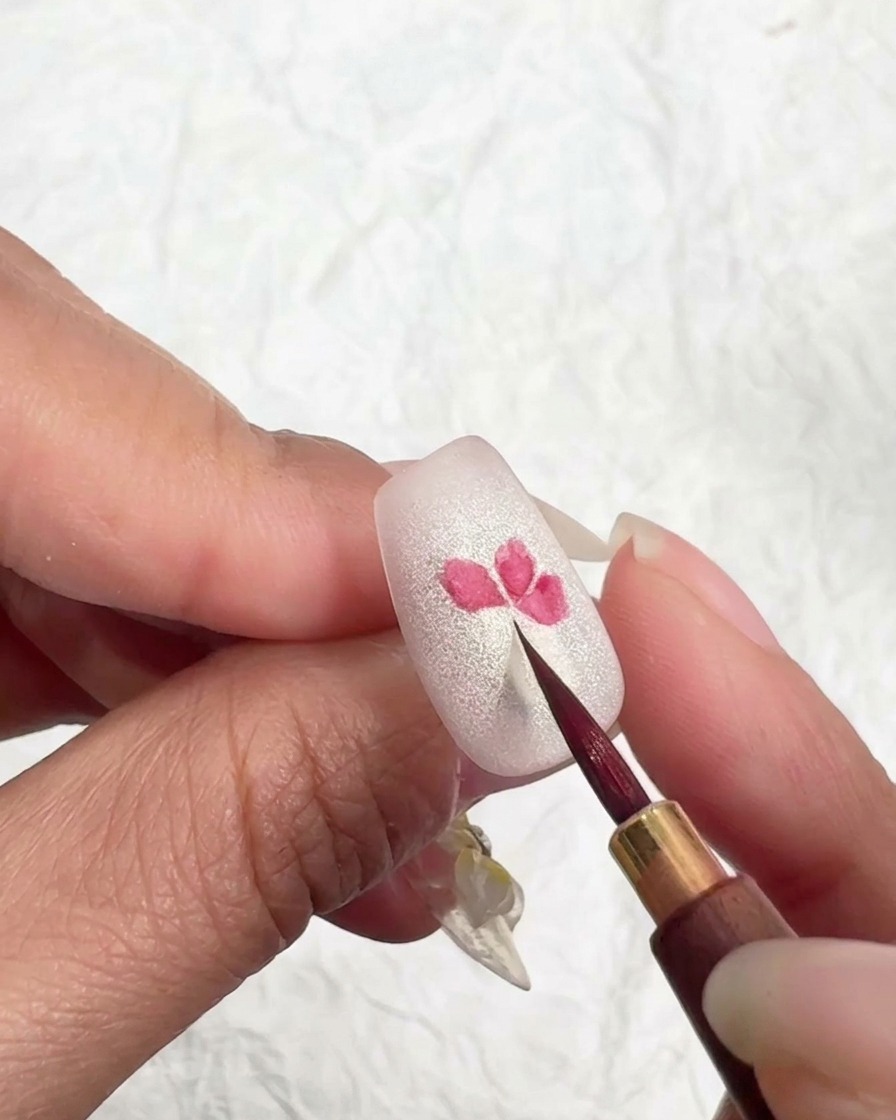
Using a fine liner brush, pull color outward from the center dot to form the petals, ensuring the center is slightly more saturated with pigment to establish a base for the layered effect.
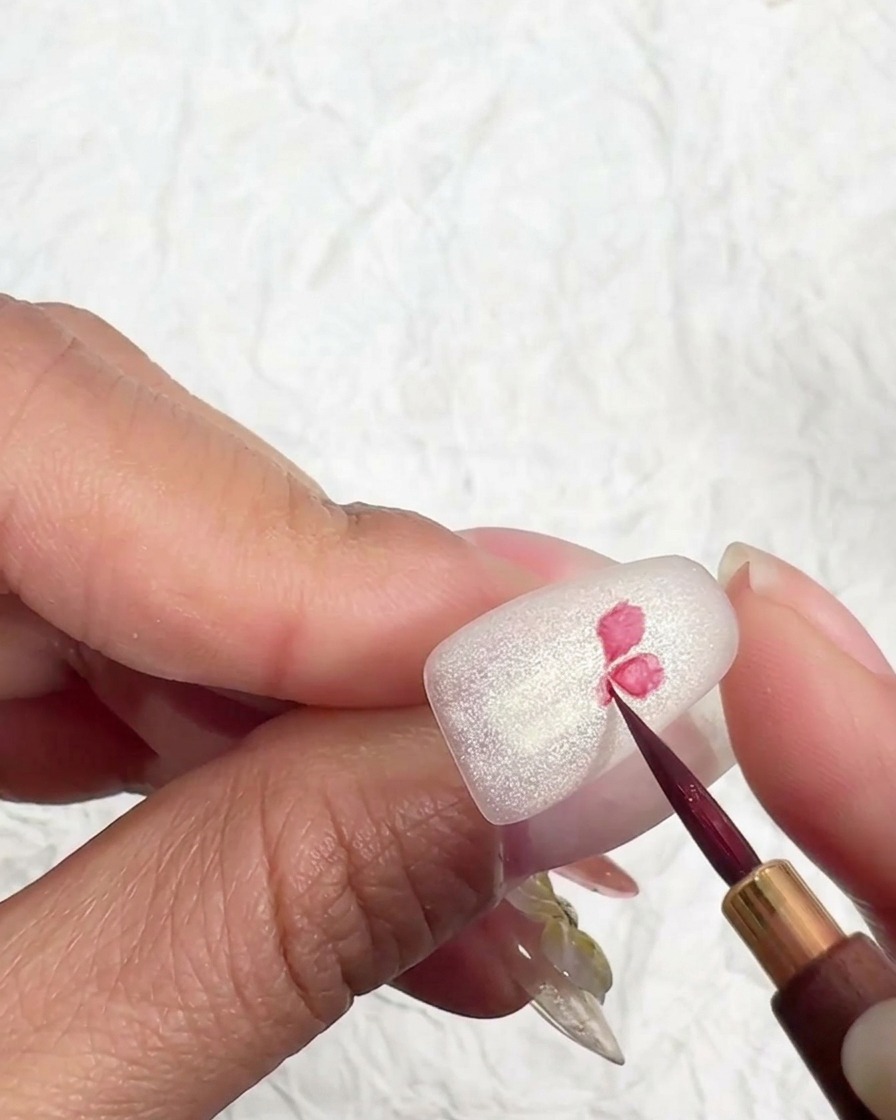
Tip: Keep your brush strokes light and fluid to mimic the delicate appearance of natural cherry blossoms. - 8Refine the cherry blossom petals
Apply a lighter shade of pink to the outer edges of the petals. This contrast between the darker center and lighter edges gives the flower a more dimensional and realistic look.
Tip: Work in small sections to keep the colors from drying too quickly, which helps in achieving a smoother transition. - 9Diffuse the petals
Dip a clean, fine brush into a small drop of clean water and gently blend the edges of the painted petals. This technique encourages natural diffusion, creating a soft, watercolor-like gradient effect.
Tip: Do not over-saturate the brush with water; just a tiny drop is enough to soften the pigment edges without blurring the entire design. - 10Add stamen details
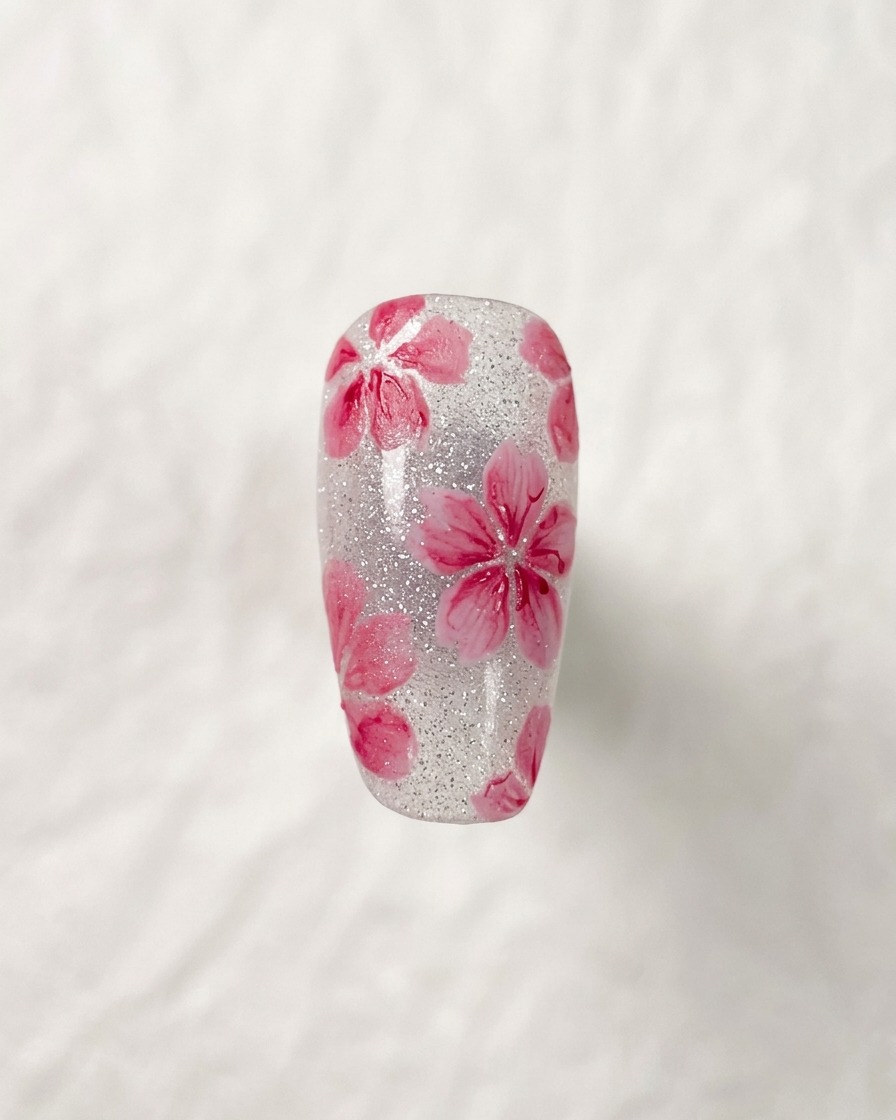
Using a darker color and a very thin liner brush, draw fine, delicate lines in the center of the cherry blossom to represent the stamens. This level of detail adds intricacy and makes the floral art appear more professional.
Tip: Use a light touch to ensure the lines are thin and crisp for the best stamen effect. - 11Embellish the flower center
Carefully place small, shiny flakes into the center of each cherry blossom. These flakes add sparkle and texture, drawing the eye to the center of the flower and completing the design.
Tip: Use a wax pencil or tweezers to place the flakes precisely where you want them before applying your final reinforcing gel. - 12Add final details and reinforcing gel

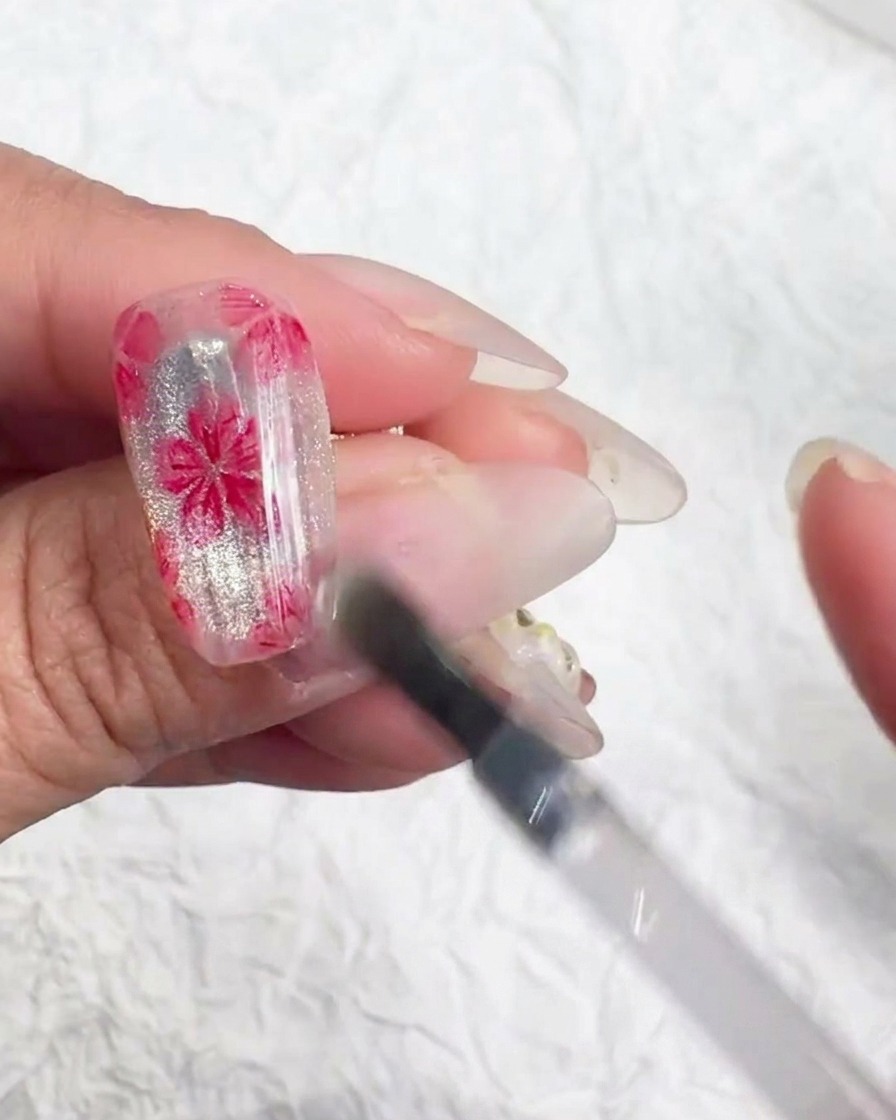
Complete the cherry blossom by carefully placing a few small shiny flakes into the center of the flower using a fine detail brush. Once the details are set, apply an even layer of reinforcing gel over the entire nail to encapsulate the artwork. This step brings out the depth of the stamens and ensures the nail surface is completely smooth, plump, and fully protected.
Tip: Applying reinforcing gel helps level out any texture from the painted petals and flakes, giving the nail a flawless, glass-like finish.