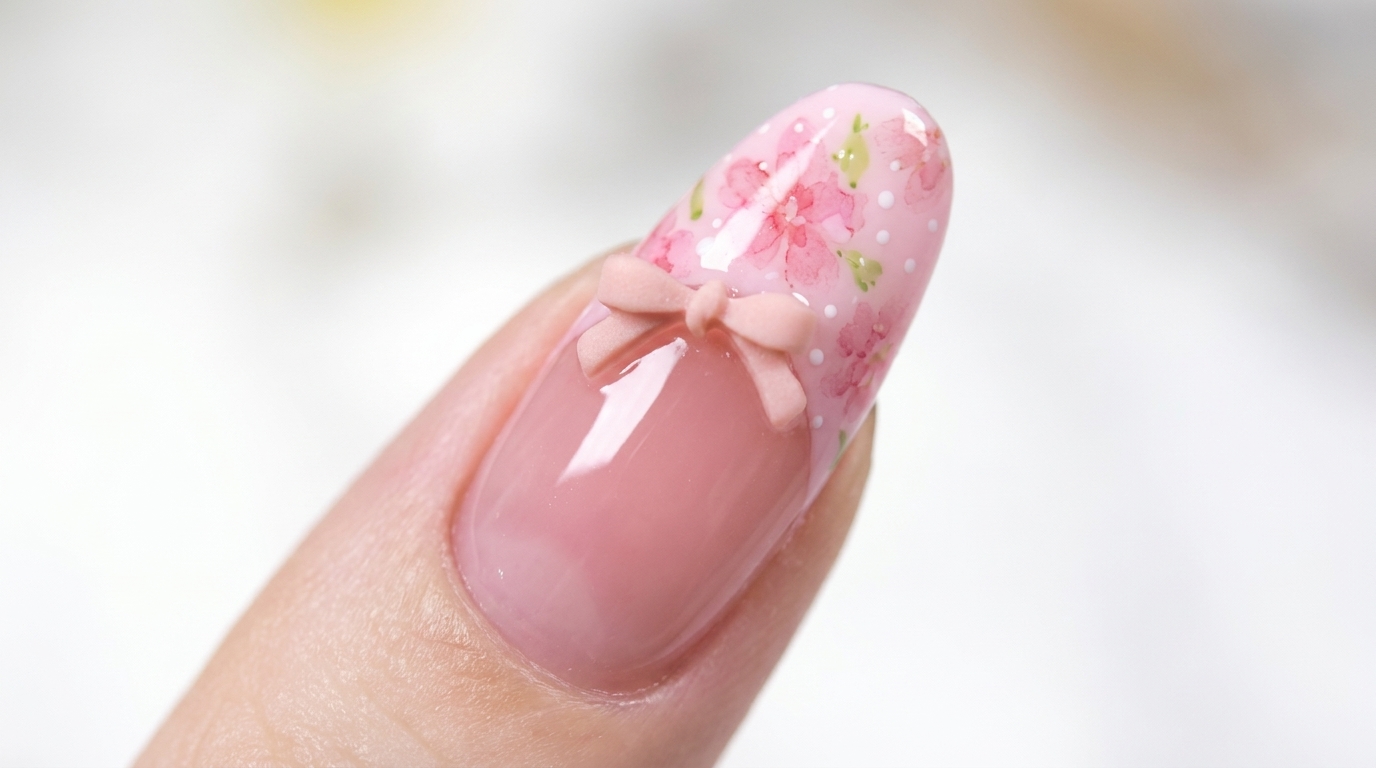
Spring Cherry Blossom Floral French Tip
3D Bow Tutorial
Create a sweet, fresh manicure featuring delicate watercolor cherry blossoms, a pastel pink French tip, and a charming 3D bow accent for the perfect spring look.
This spring cherry blossom floral nail design is the epitome of sweet and fresh. By layering a blush base with a natural nude and a dusty pink French tip, you achieve a healthy, polished look that serves as the perfect canvas for whimsical watercolor petals. The addition of a 3D bow charm brings a tactile, playful element that makes this style truly stand out for the season.
Steps
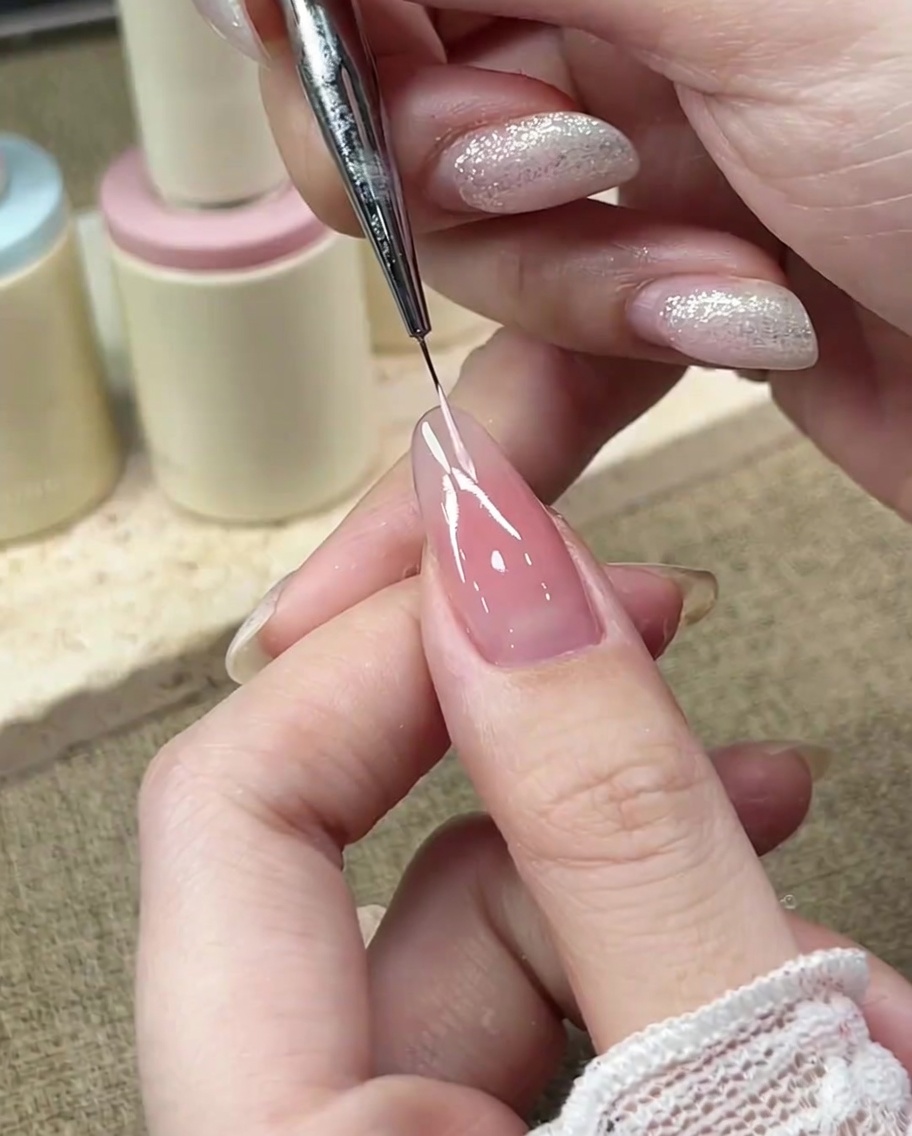
- 1Apply base color
Apply a thin, even layer of the sheer nude pink gel polish over the entire nail extension. Ensure smooth coverage from cuticle to free edge, then cure under a UV or LED lamp as per the gel manufacturers instructions.
Tip: Apply in thin layers to ensure proper curing and prevent pooling at the cuticles. - 2Outline French tip (left side)
Using a fine liner brush, carefully apply the pastel pink gel to map out the left curve of the French smile line. Take your time to achieve a clean, symmetrical line before filling it in.
Tip: Rest your hand on a steady surface to keep your line work precise and prevent shaking. - 3Outline French tip (right side)

Complete the smile line by drawing the right side of the curve with the fine liner brush. Ensure it connects smoothly with the left side to create a uniform French tip shape, then cure.
Tip: Check for symmetry between the two sides of the smile line before curing. - 4Fill in the French tip
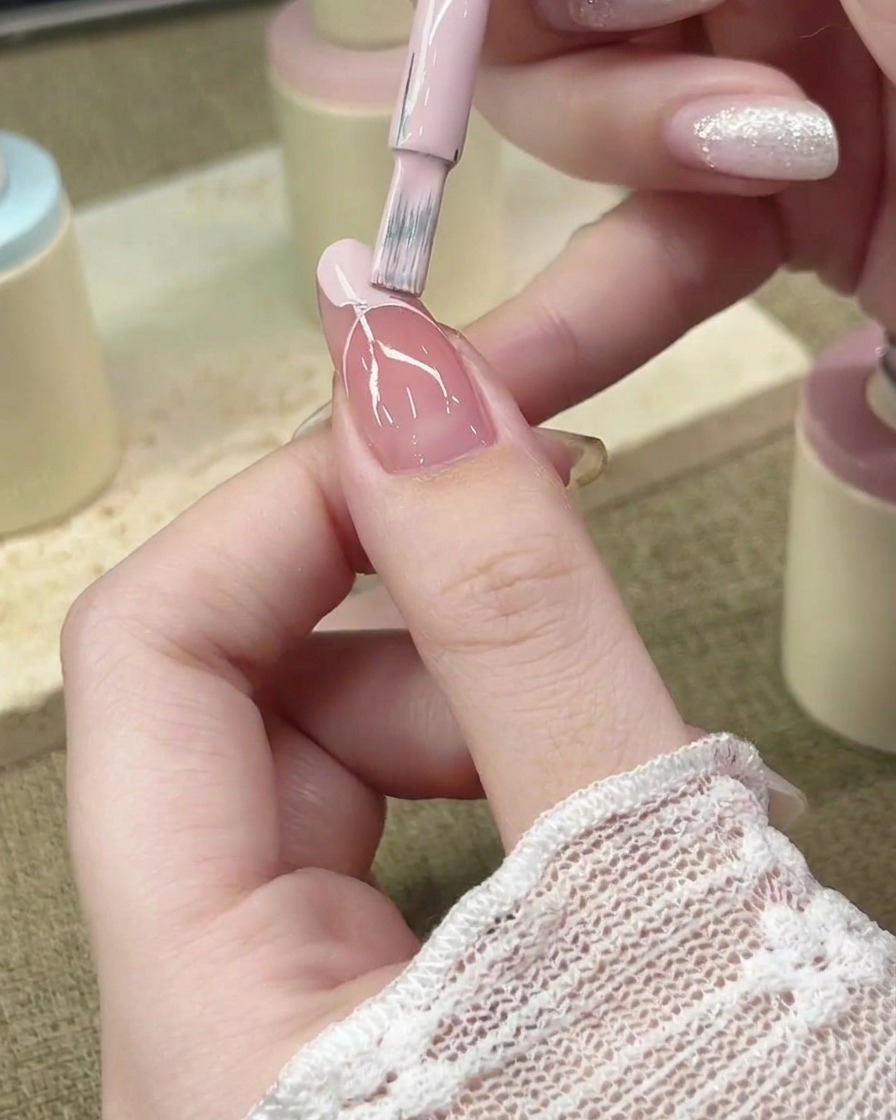
Using the applicator brush directly from the gel polish bottle, fill in the defined French tip area. Apply the color evenly to avoid streaks, capping the free edge for durability, then cure.
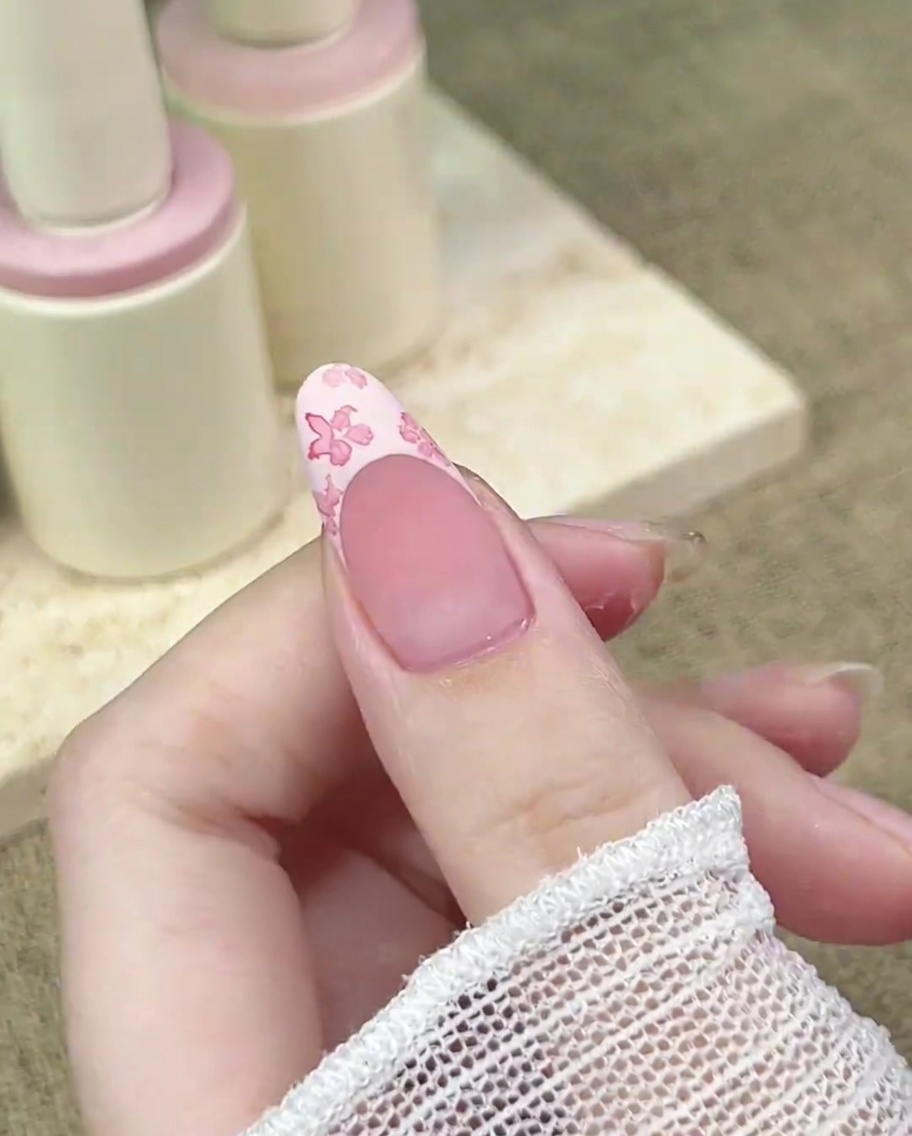
Tip: Use light, controlled strokes to fill in the tip without going over your established smile line. - 5Paint cherry blossom base
After applying a matte top coat, use a fine brush to gently dab pink watercolor paint onto the French tip. Create small, soft petal shapes to build the base of your cherry blossom design.
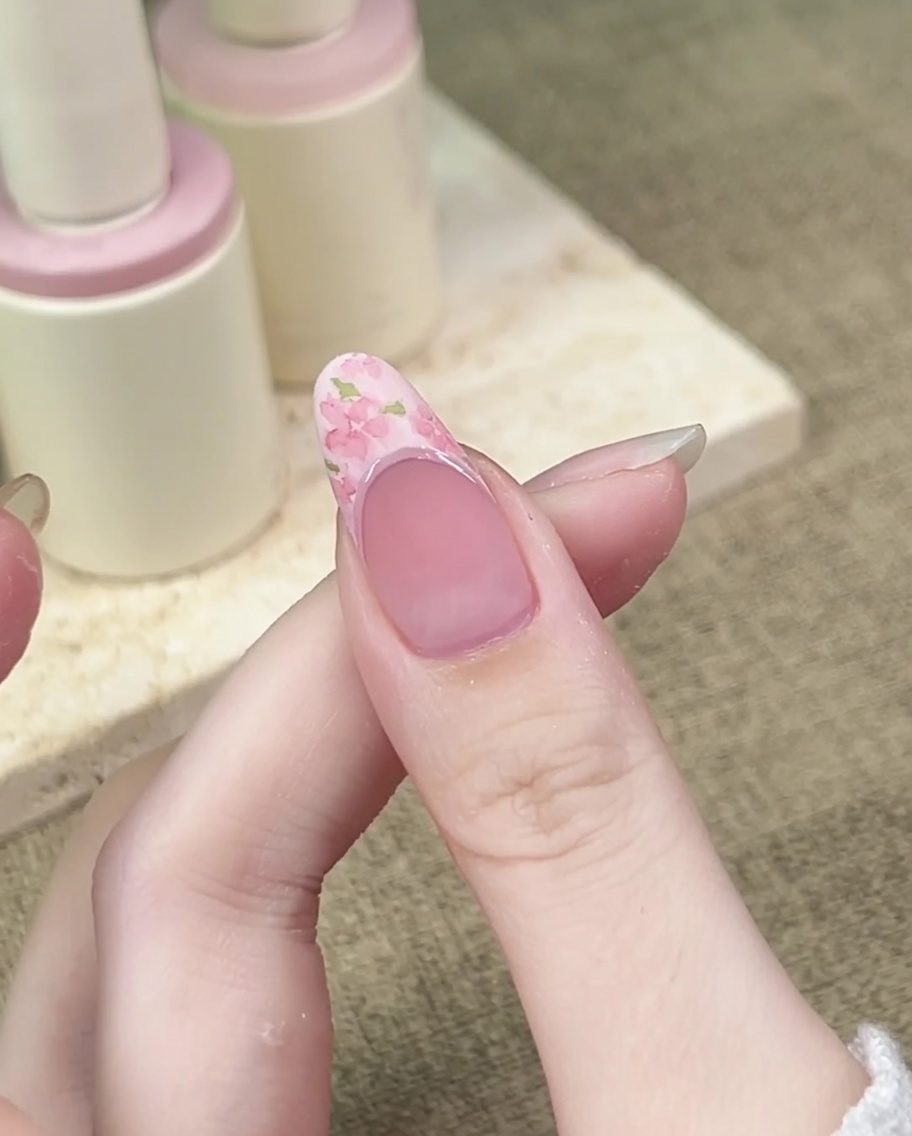
Tip: Keep the watercolor layers thin for a delicate, ethereal look. - 6Develop floral pattern
Continue building the floral pattern by adding more watercolor petals. Work in layers, allowing colors to blend naturally to create depth and dimension in your cherry blossom design.
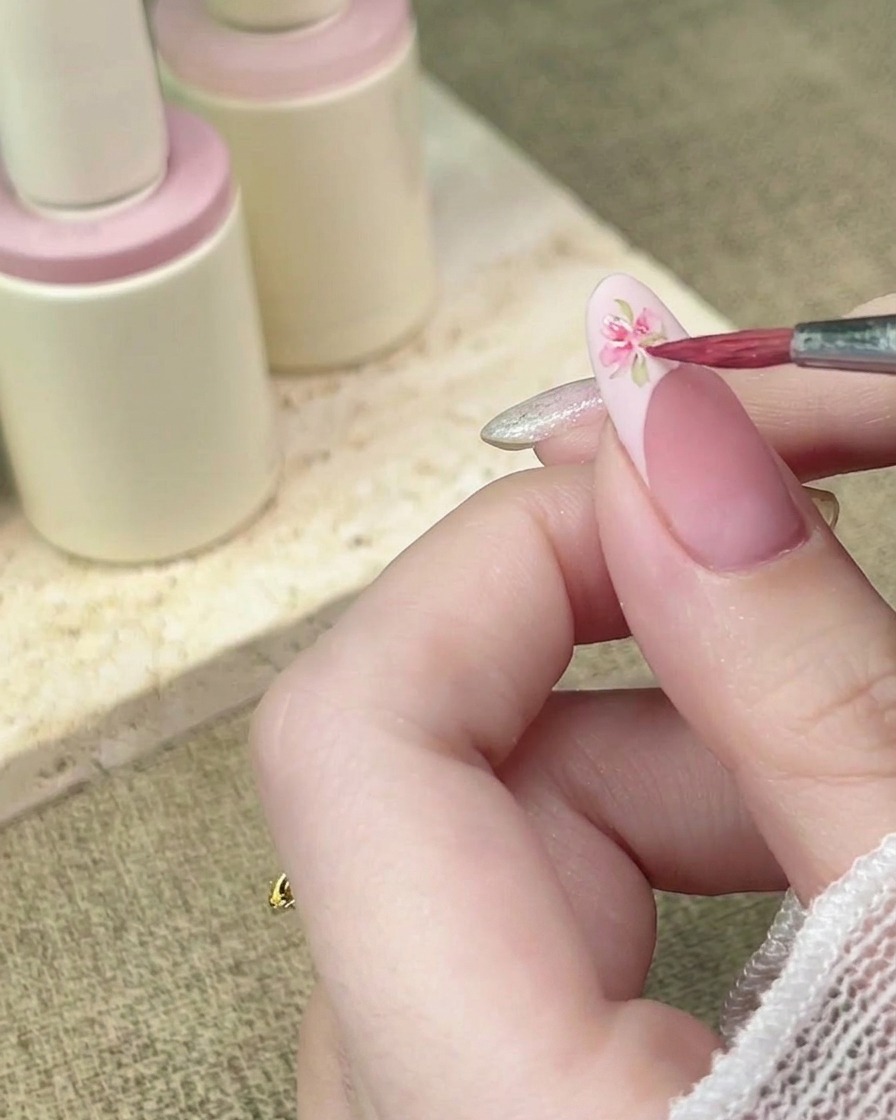
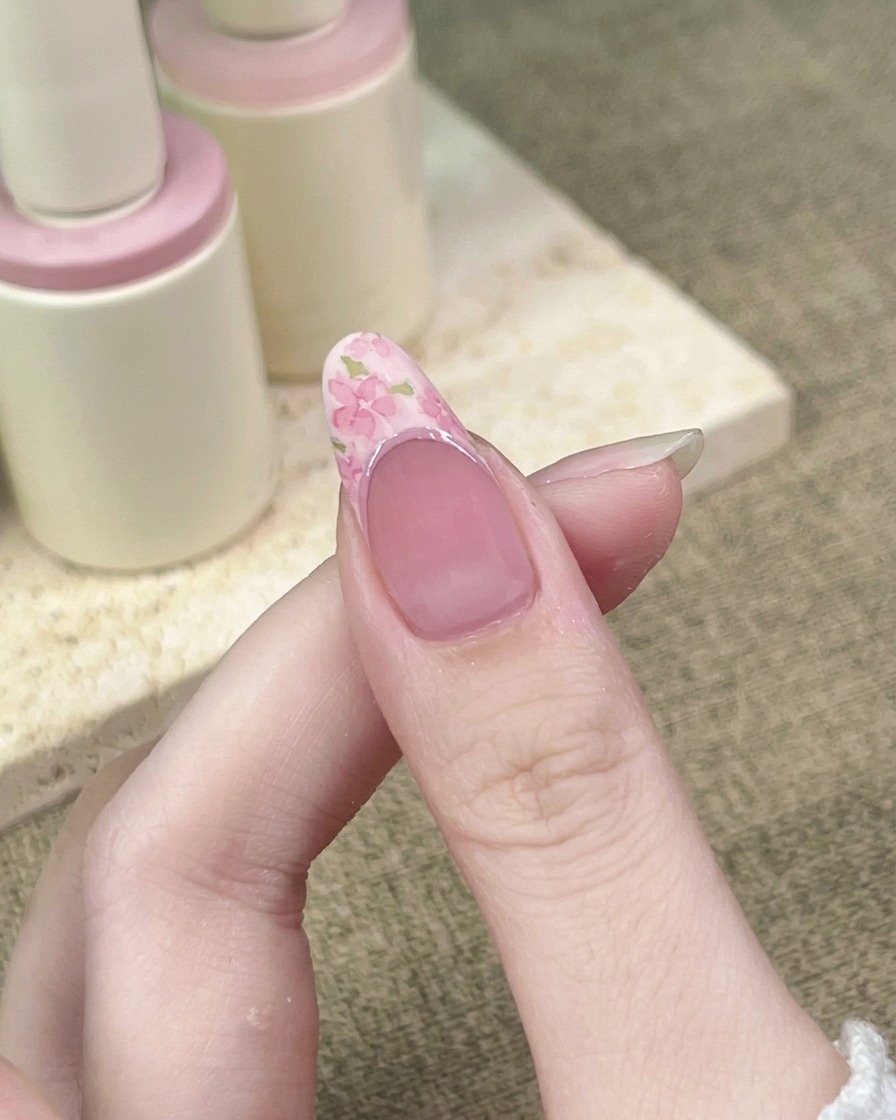
Tip: You can add slight variations in pink tones to make the flowers look more realistic. - 7Add depth to flowers
Using a fine detail brush, dab a slightly darker shade of pink watercolor into the center of each previously painted flower. This simple layering technique adds instant dimension and makes the floral design appear more intricate and realistic.
Tip: Work with a small amount of product on your brush to maintain control and prevent the watercolor from bleeding outside the petals. - 8Paint delicate leaves
Dip a fine liner brush into green watercolor or gel paint and carefully sketch small, delicate leaves around your pink blossoms. Focus on placing them organically to fill empty spaces and enhance the natural, botanical look of the floral art.
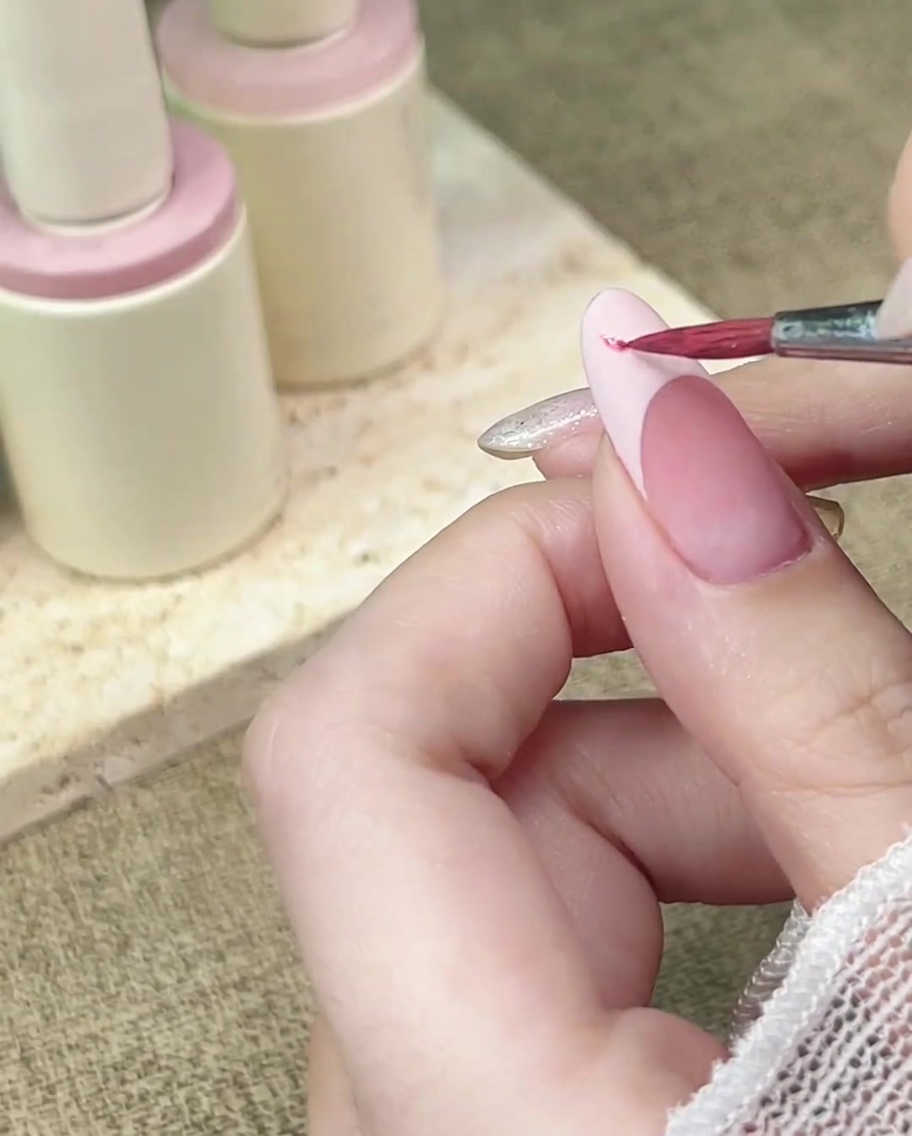
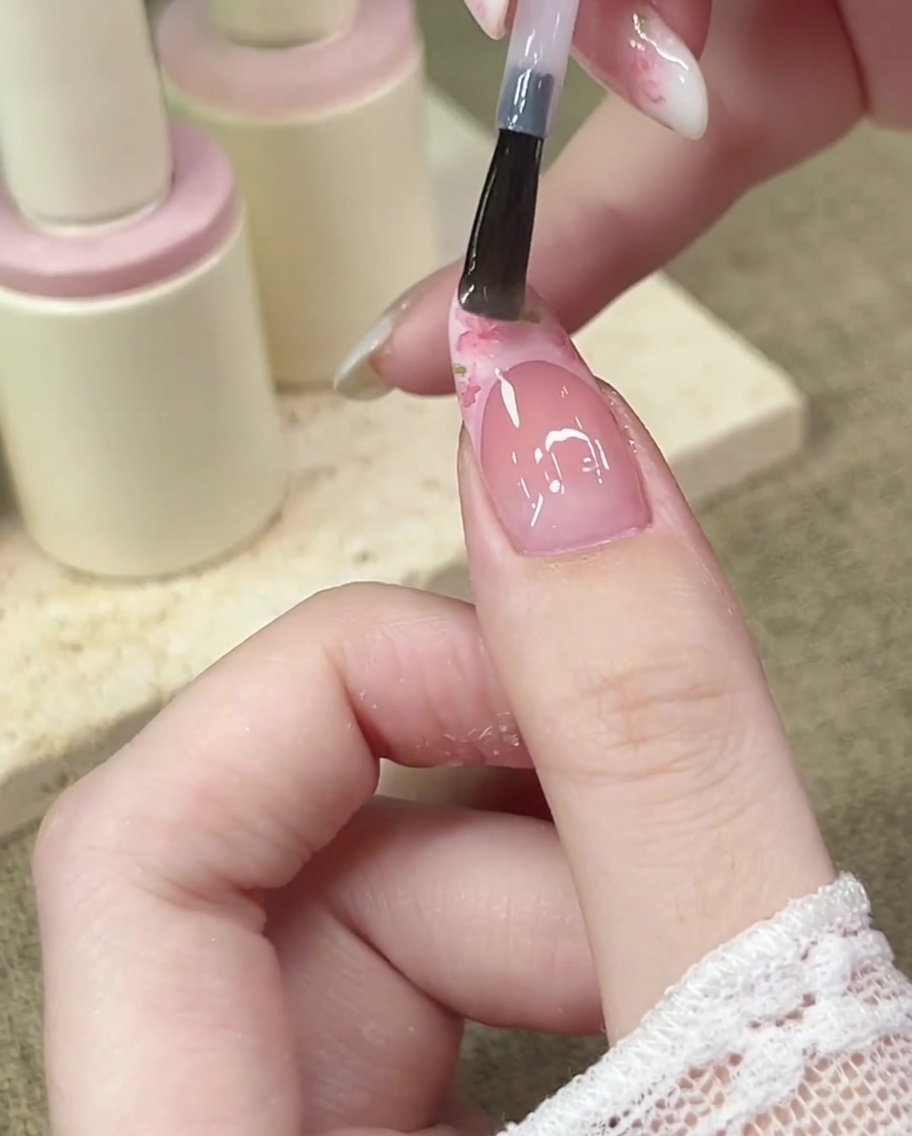
Tip: Keep your hand steady and use light pressure for thin, elegant leaf lines that dont overwhelm the flowers. - 9Outline the French border
Using a thin liner brush and a darker pink shade, carefully trace the boundary of your French smile line. This crisp outline defines the shape of the French tip, providing a polished, professional finish that makes the nail design pop.
Tip: Anchor your pinky finger on your other hand to maintain stability while drawing this precise outline. - 10Attach charm and finish
Apply a small bead of thick clear builder gel or rhinestone glue to the center of the smile line. Carefully place your 3D pink bow charm into the wet gel and cure to lock it in place. Finish with a final layer of top coat over the entire nail to secure the charm.
Tip: Make sure to cure the charm thoroughly under the UV lamp so it remains securely attached and does not snag on clothing.