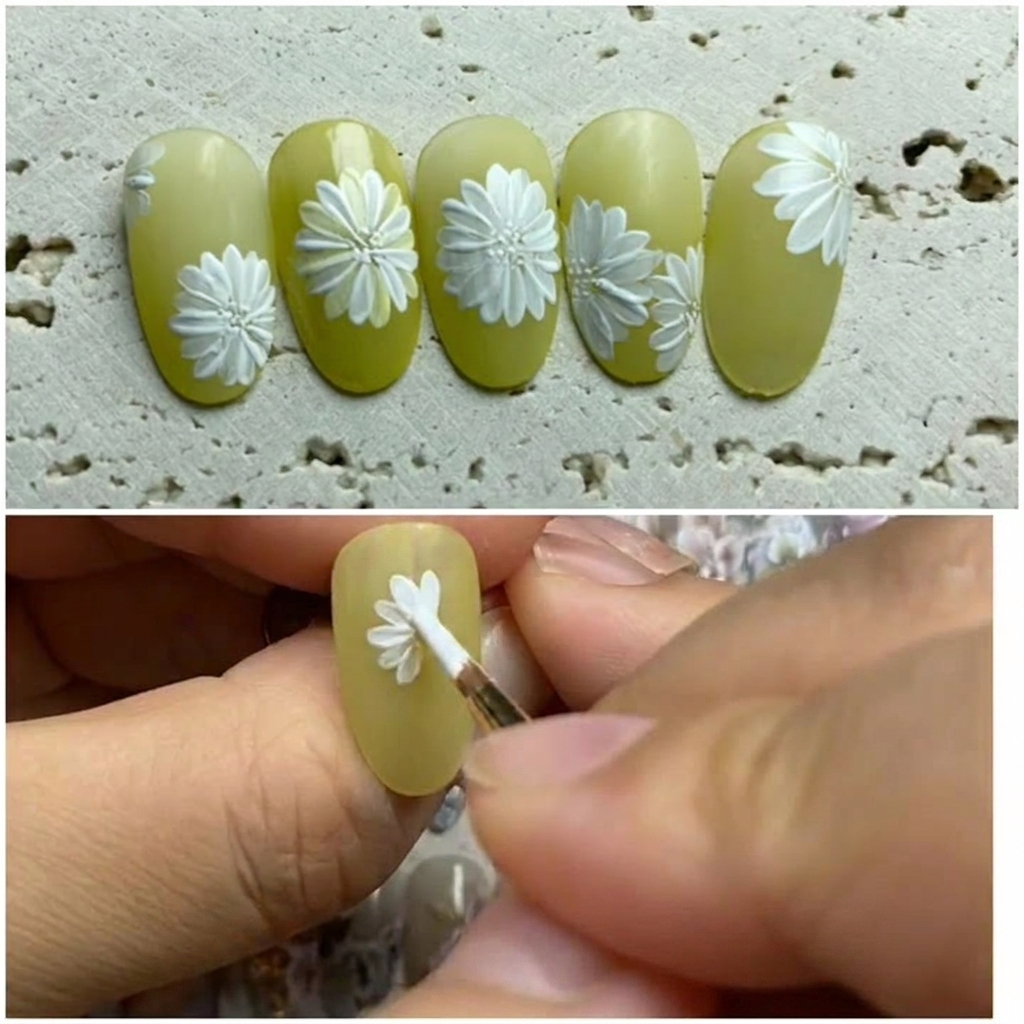
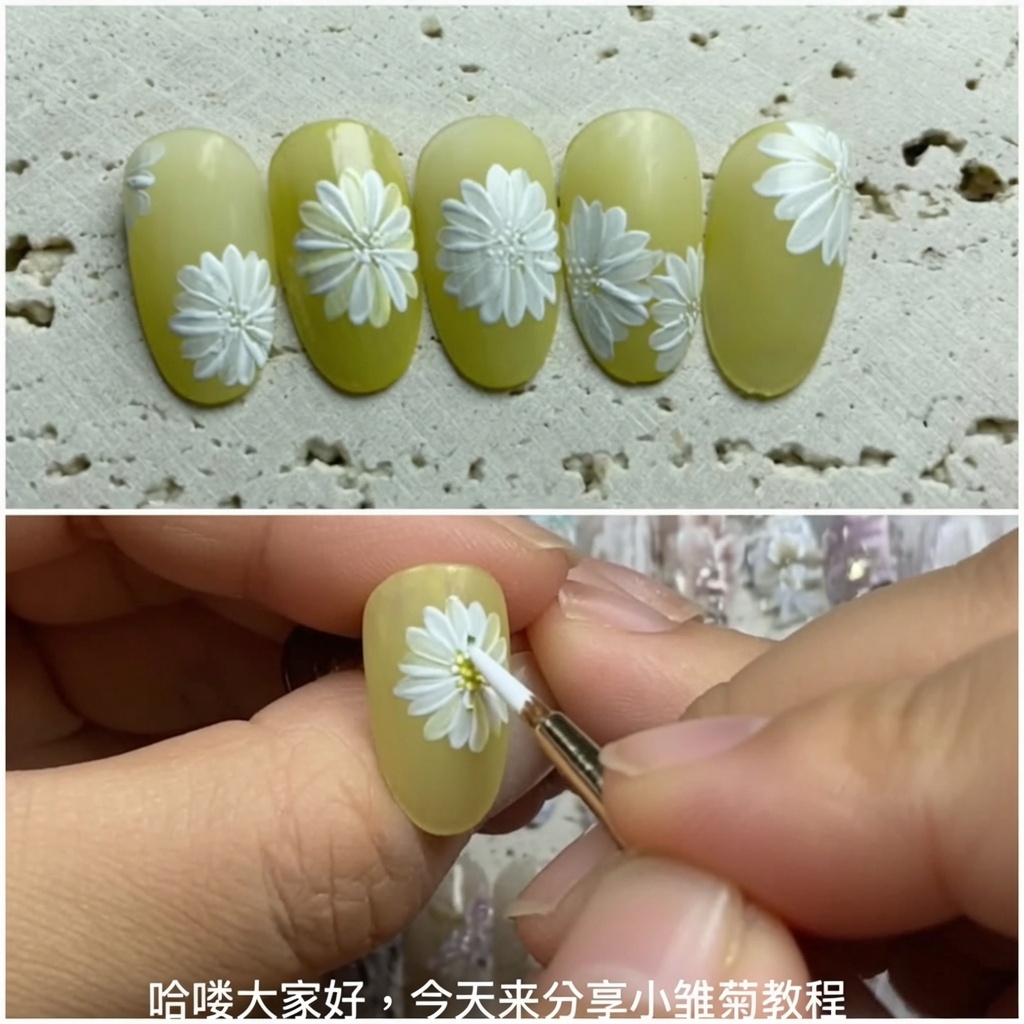
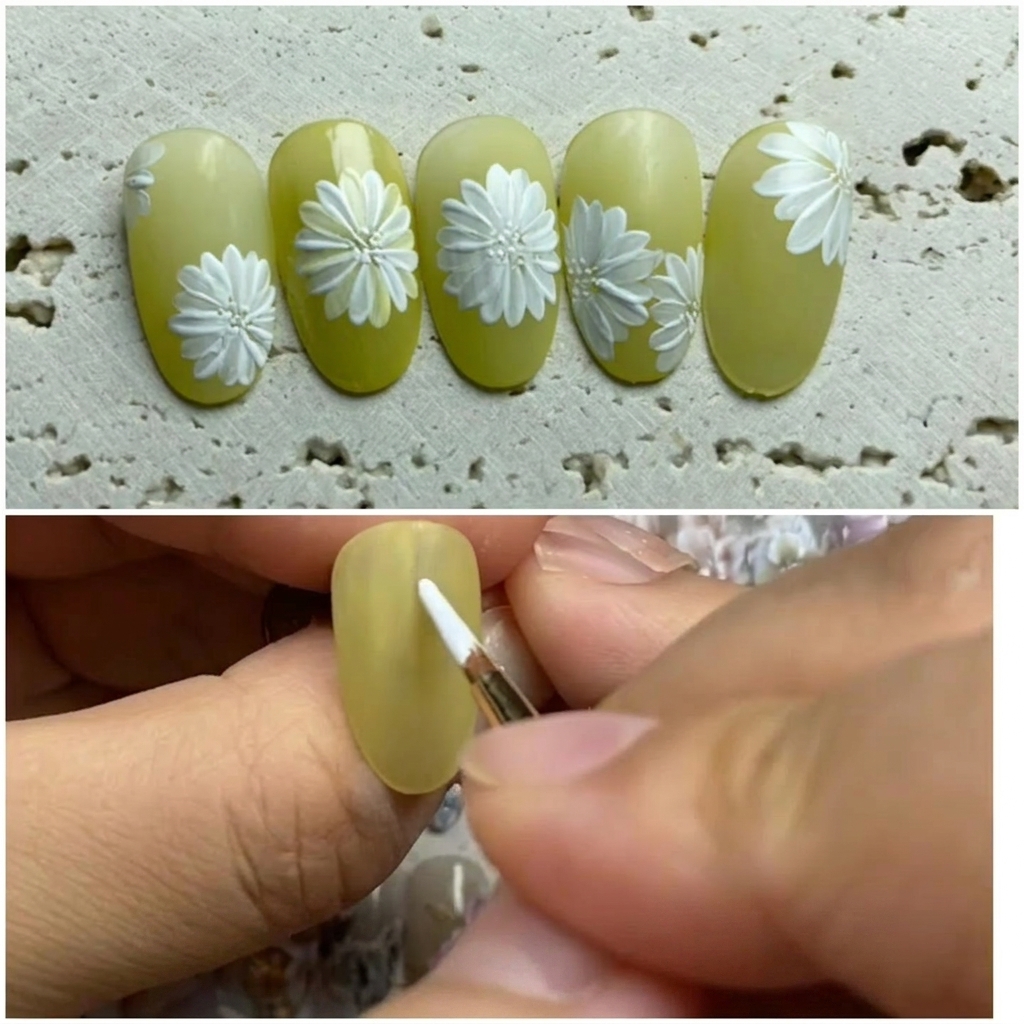
Hand-Painted Daisy Gel Nail Art — Step-by-Step Tutorial
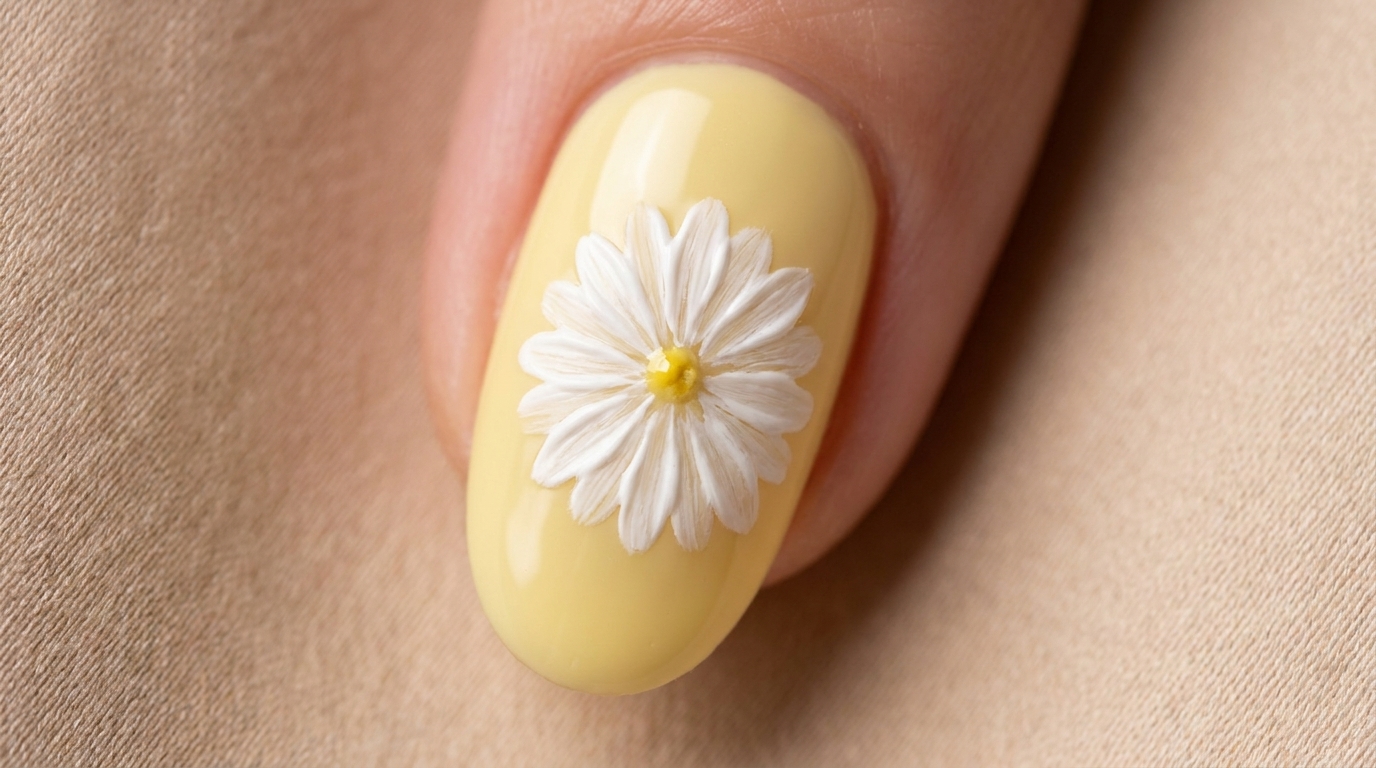
Create delicate, hand-painted daisies over a soft yellow base with this simple gel nail tutorial perfect for all skill levels.
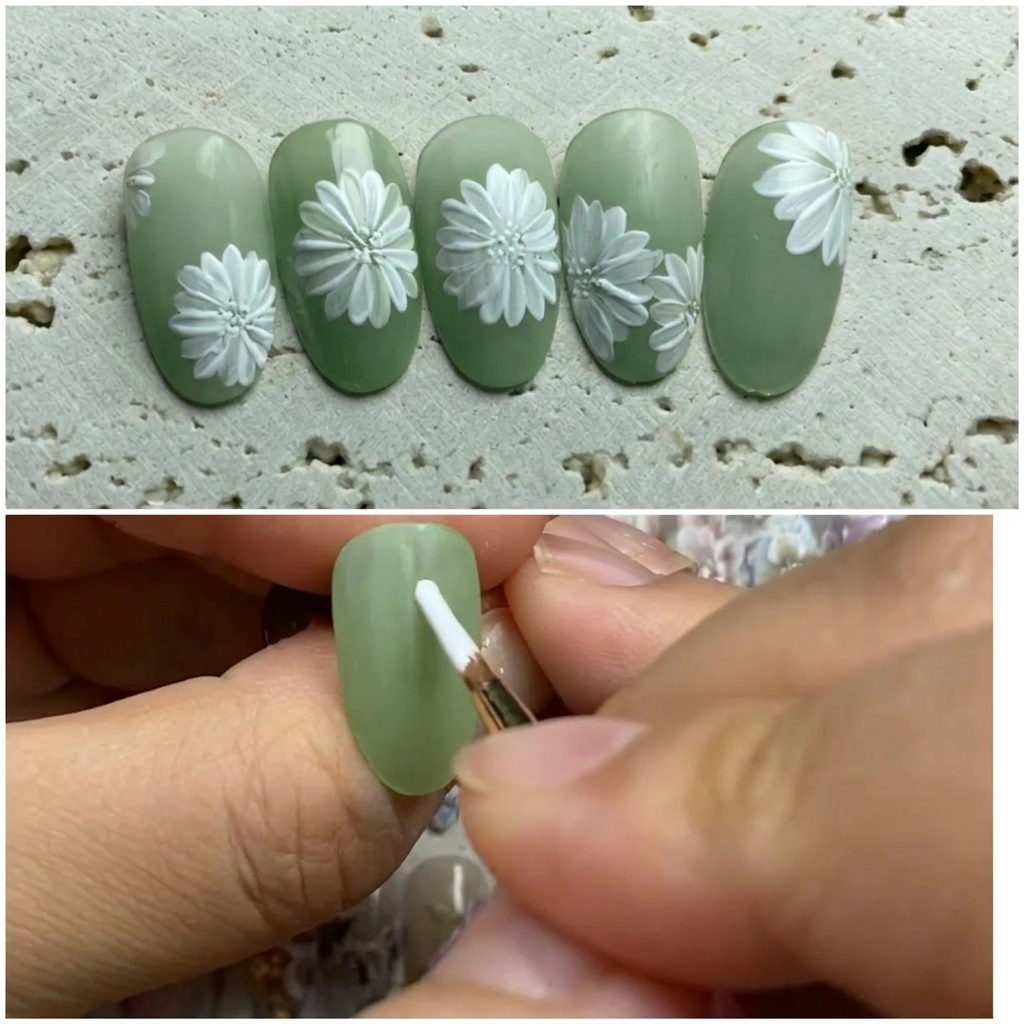
Floral nail art is a timeless choice, and these hand-painted daisies are the perfect way to embrace a soft, feminine aesthetic. By layering white petals over a pastel yellow base, you can achieve a design with beautiful depth and dimension. This tutorial breaks down the process into easy steps so you can create a professional-looking floral manicure at home.
Steps
- 1Apply yellow base color
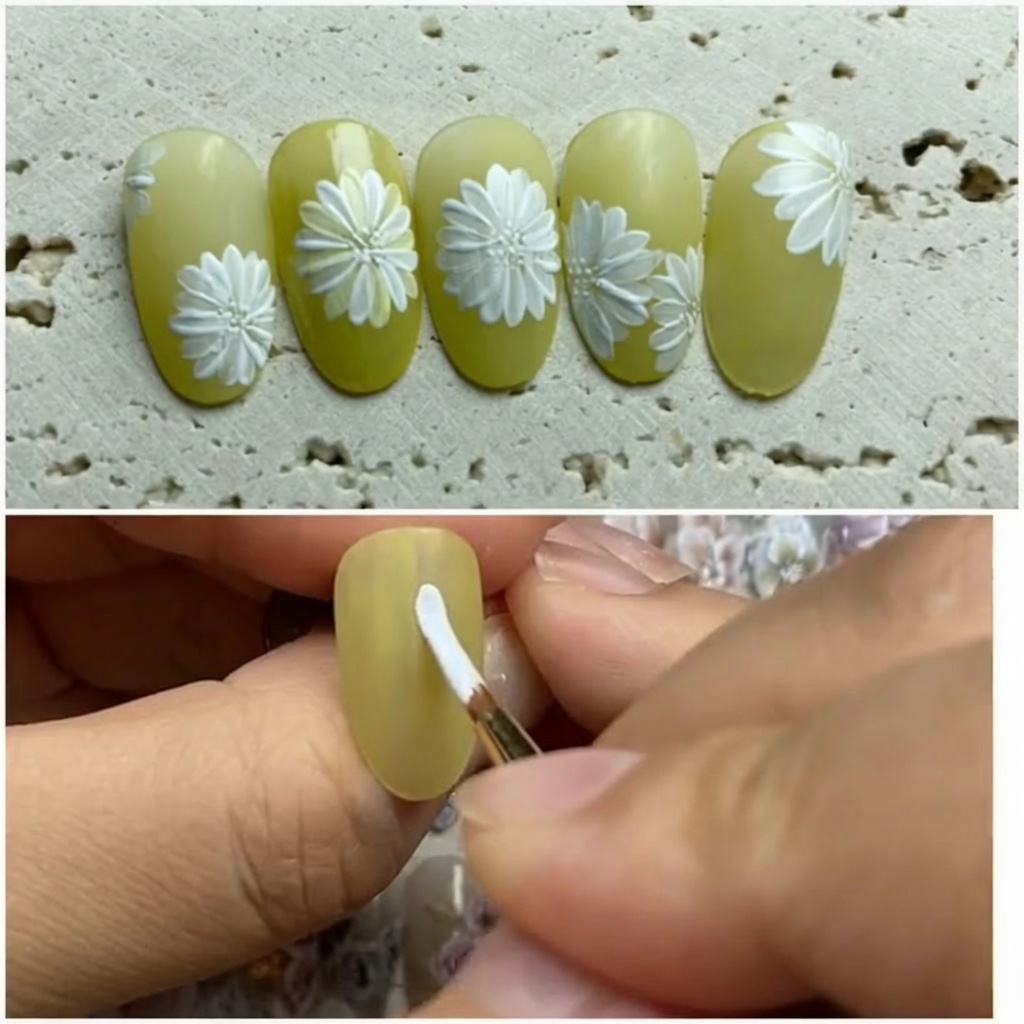
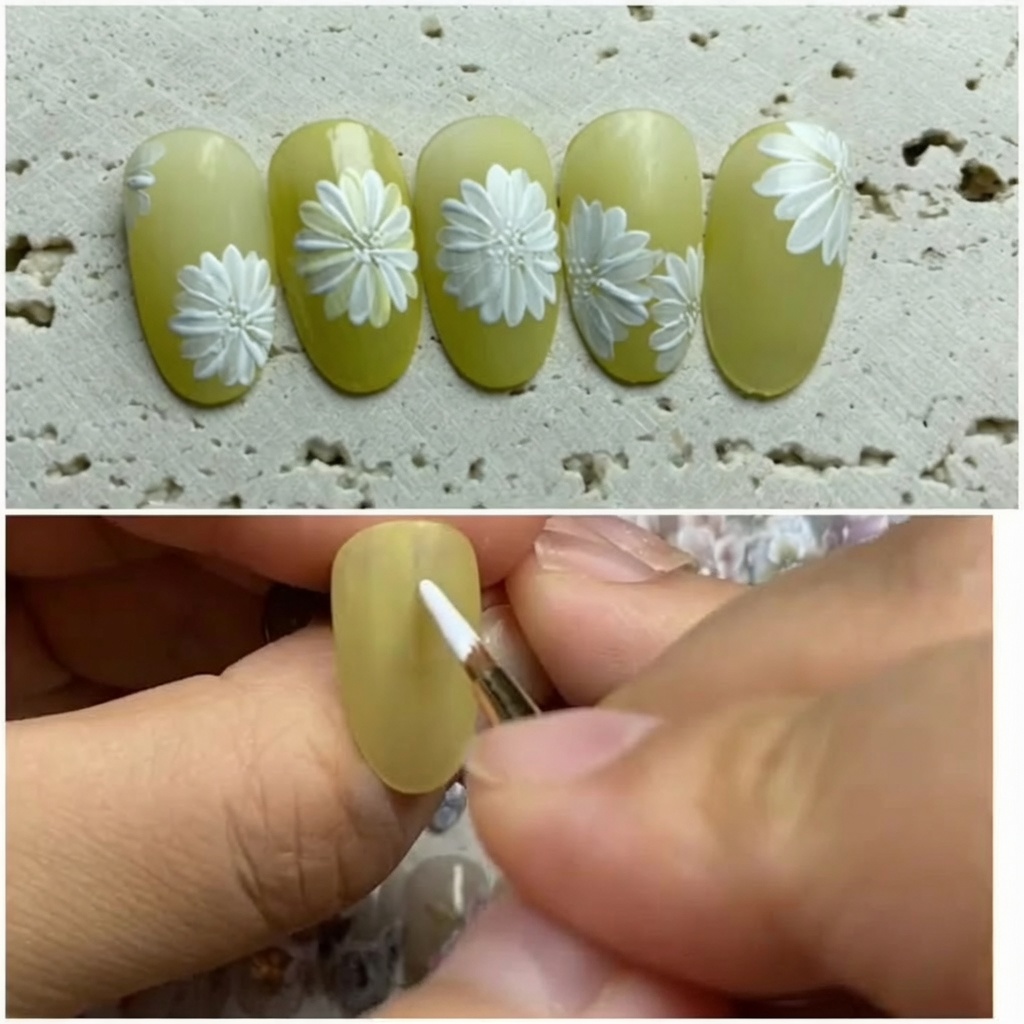
Apply an even layer of yellow gel polish across the entire nail plate. Ensure the coverage is smooth and consistent, reaching the sides but avoiding the cuticle. Cure under your UV or LED lamp as required.
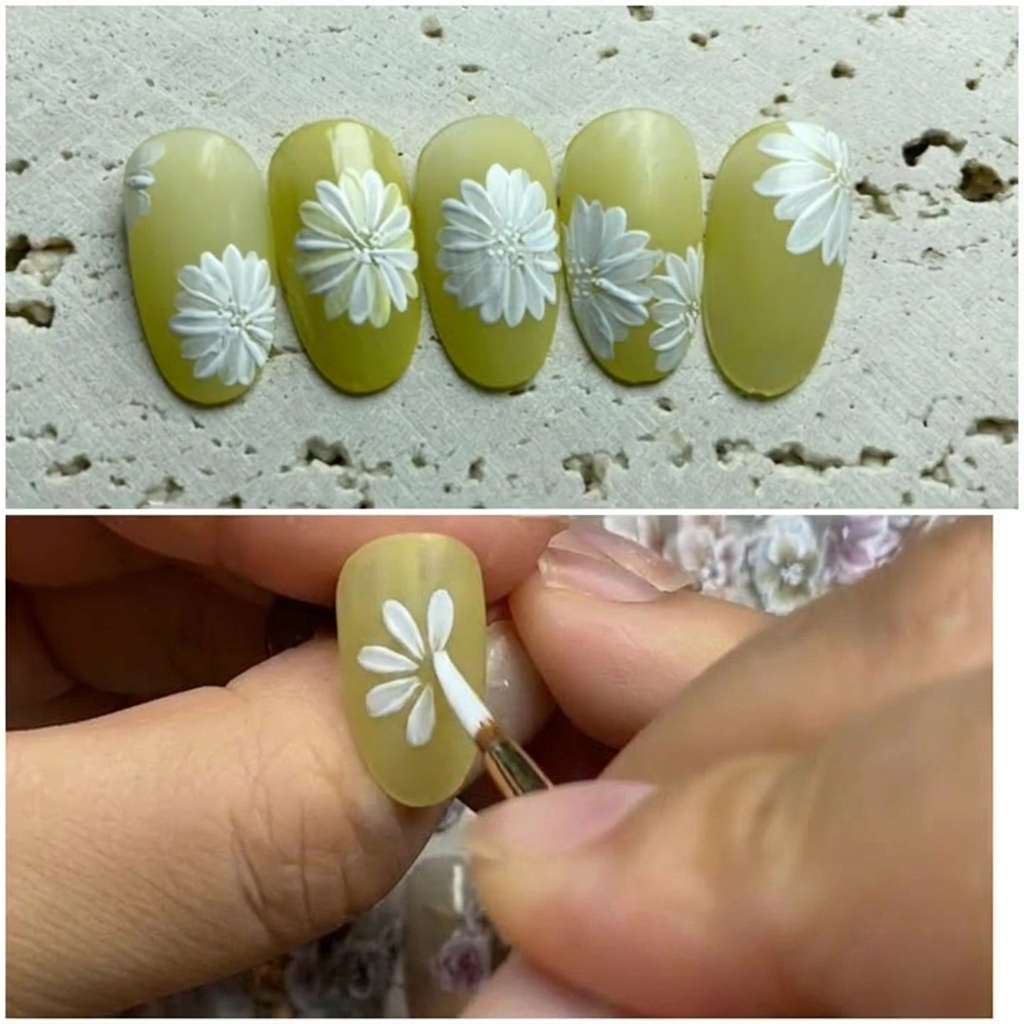
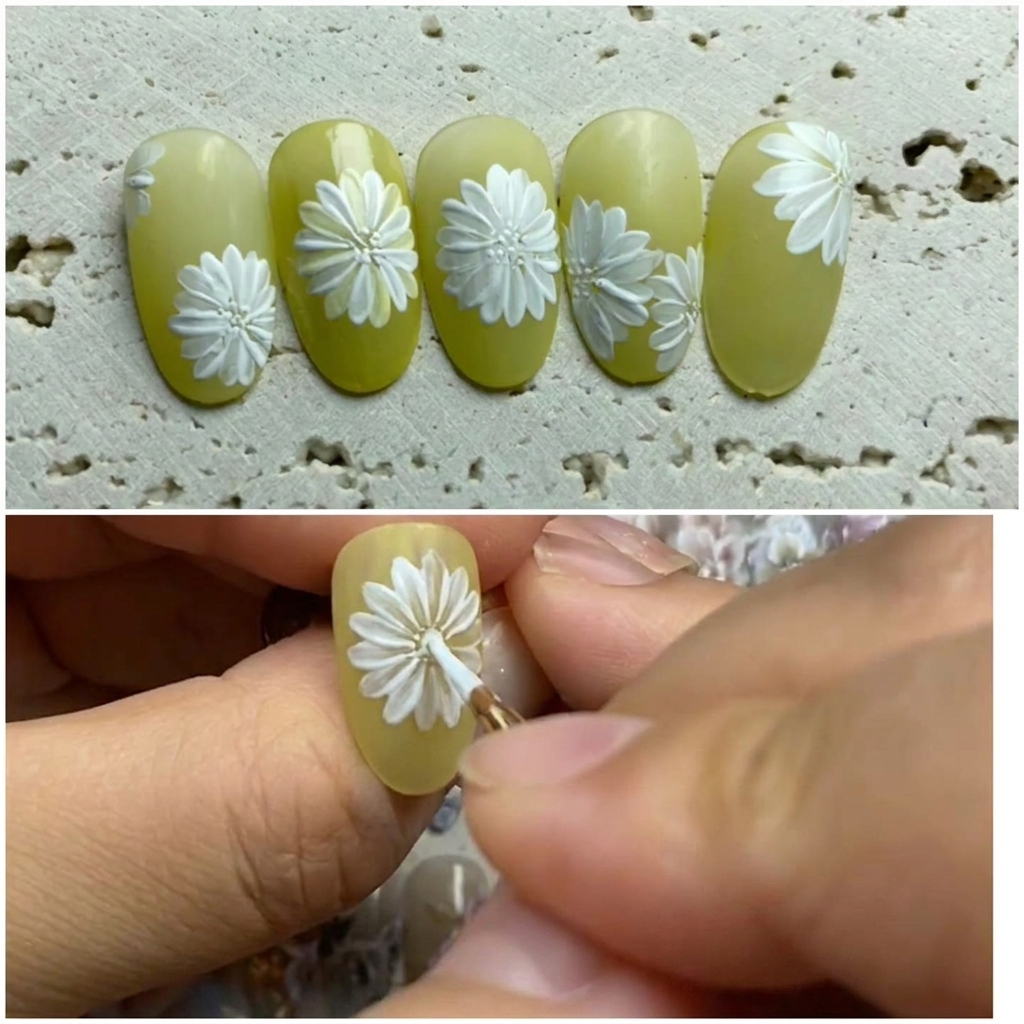
Tip: Thin coats are key to a smooth finish without bubbling. - 2Mark daisy centers
Dip a fine liner brush into white paint and create small dots on the nail surface to serve as the center points for your daisies. Placing these dots helps guide the arrangement of your petals for a balanced design.
Tip: Keep the dots small so they remain the center of the flower. - 3Paint first petal
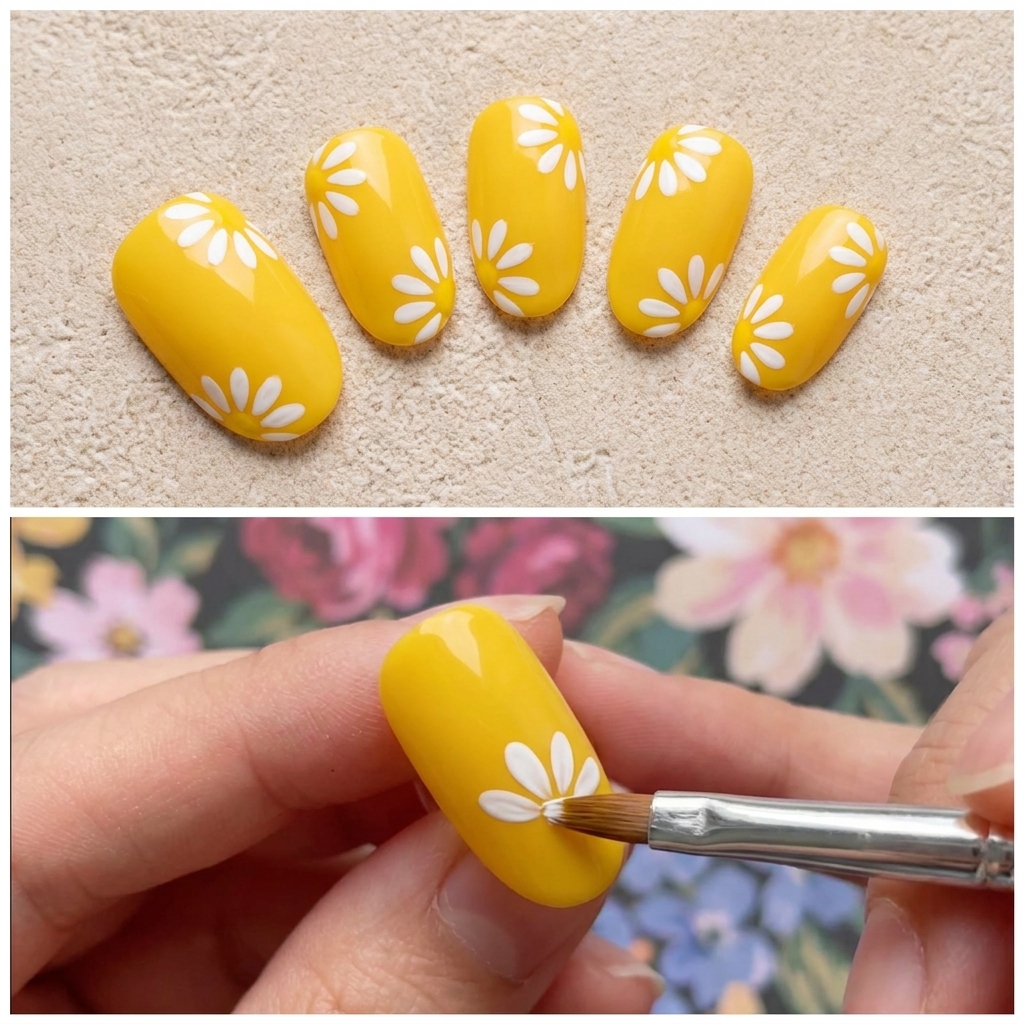
Using a painting brush with white pigment, gently press down near your center dot to form the first daisy petal. Use a light touch to ensure the petal shape is delicate and clean.
Tip: Apply minimal pressure for a tapered petal look. - 4Paint second petal
Continue the pattern by painting a second white petal directly adjacent to the first. Maintain consistent pressure to match the size and shape of your initial petal.
Tip: Keep the base of the petals meeting at the center point. - 5Paint third petal
Add a third white petal to your flower, spacing it out evenly around the center point. Ensure the paint is applied smoothly for a professional result.
Tip: Rotate your finger slightly if needed for better control. - 6Paint fourth petal
Complete the first round of petals by painting a fourth white petal. This builds out the base of your daisy design, setting the stage for more detail later.
Tip: Ensure the petals are distributed symmetrically. - 7Continue painting petals
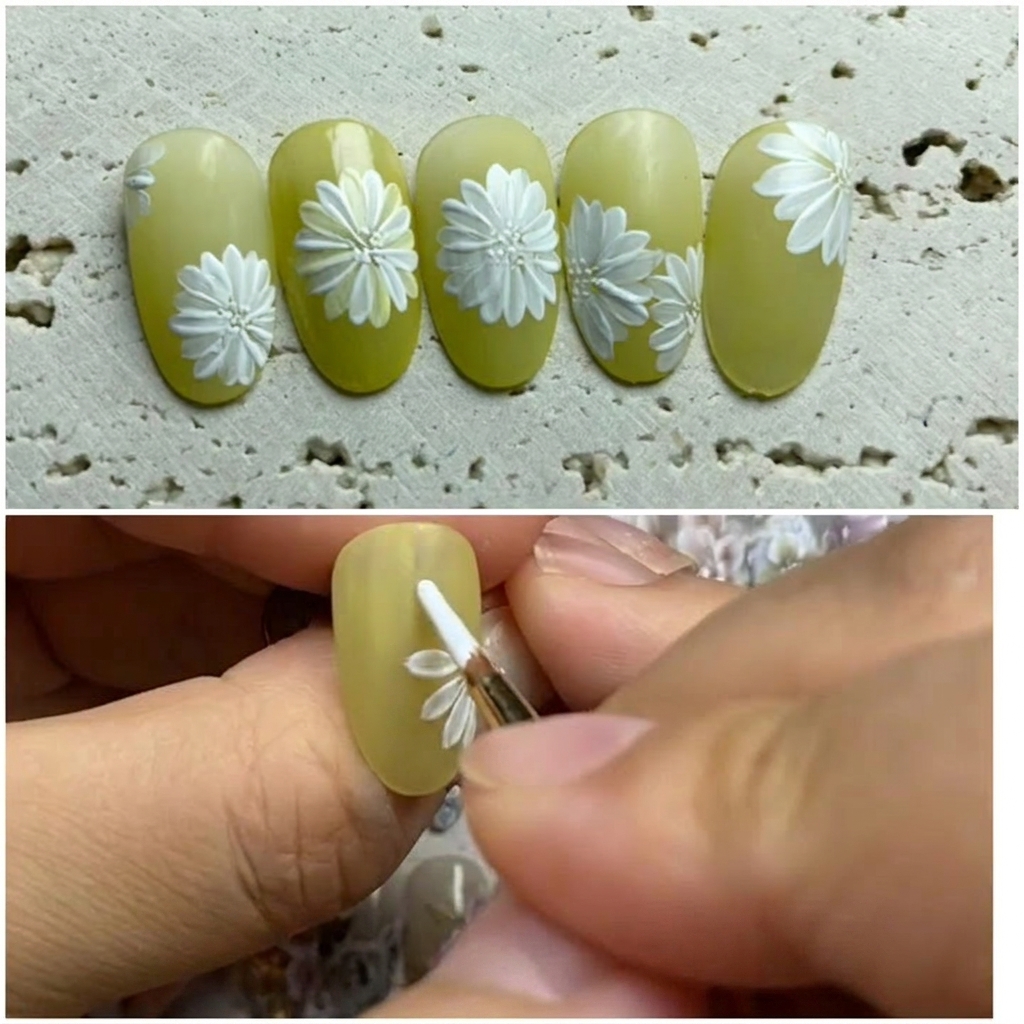
Continue adding white petals around the center of the daisy using your painting brush. Use a combination of light and heavy pressure to create the tapered petal shape, ensuring they are evenly spaced around the center point.
Tip: Varying the pressure on your brush is the key to achieving the characteristic petal shape of a daisy. - 8Add the sixth petal
Continue the circular pattern by painting the sixth white petal. Maintain consistent brush pressure to match the size and style of the previously painted petals.
Tip: Keep your hand steady and move in a consistent direction around the flower center to keep the spacing uniform. - 9Continue petal application
Proceed to paint the seventh white petal. Ensure each petal radiates from the center point, overlapping slightly at the base if necessary for a natural look.
Tip: If the paint begins to pool, wipe your brush and continue to ensure clean, crisp petal edges. - 10Complete the first layer
Apply the eighth petal to finish the first layer of your daisy. Ensure the flower is balanced and symmetrical before preparing to cure.
Tip: Check your spacing one last time before moving to the curing stage to ensure a balanced final design. - 11Cure the design
Place your nails under your UV or LED lamp and cure for the time recommended by your gel polish manufacturer to set the white petals in place.
Tip: Full curing ensures the design is stable and wont smudge when you apply the next layers of depth. - 12Add depth with base color
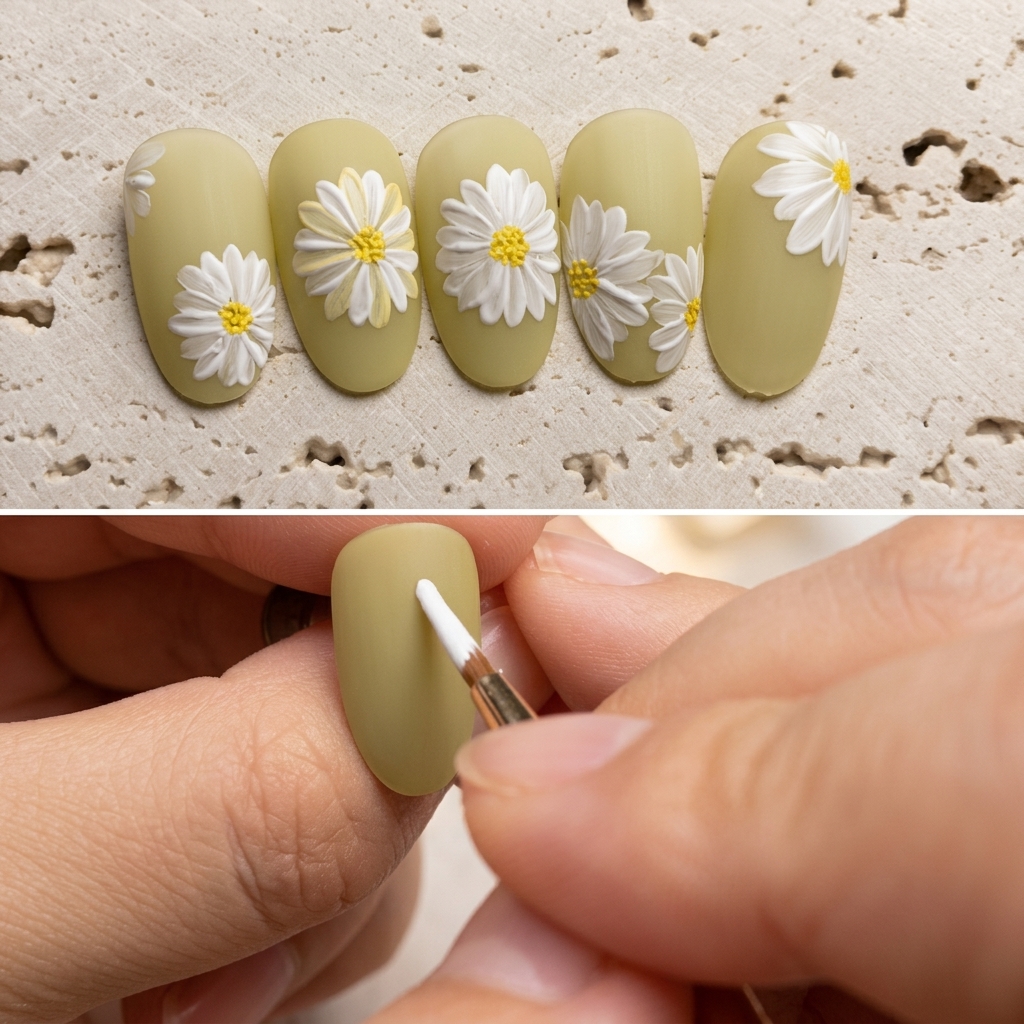
Apply a thin layer of your base color over the cured white petals. This technique creates a translucent, layered effect that adds depth and dimension to the daisy.
Tip: Use a light touch to avoid obscuring the petals; the goal is a subtle, layered appearance. - 13Add secondary petals
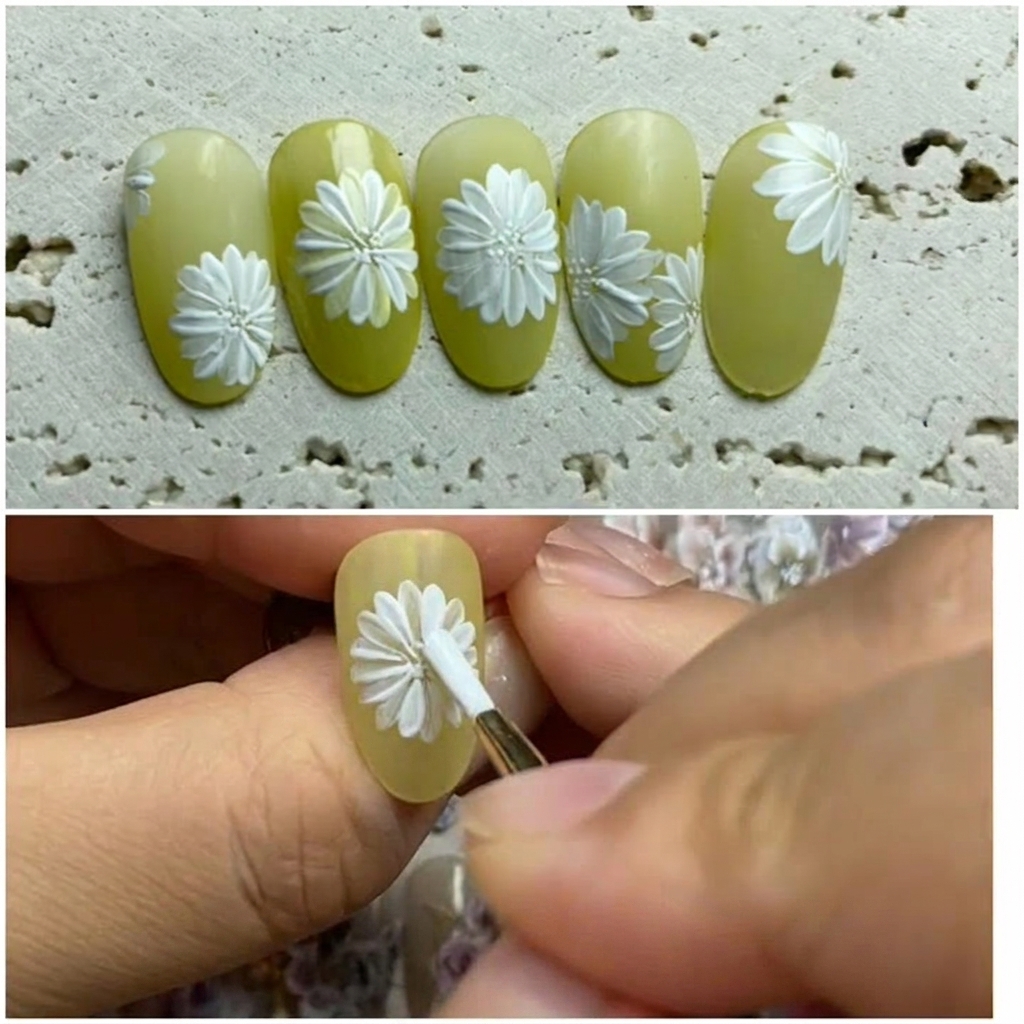
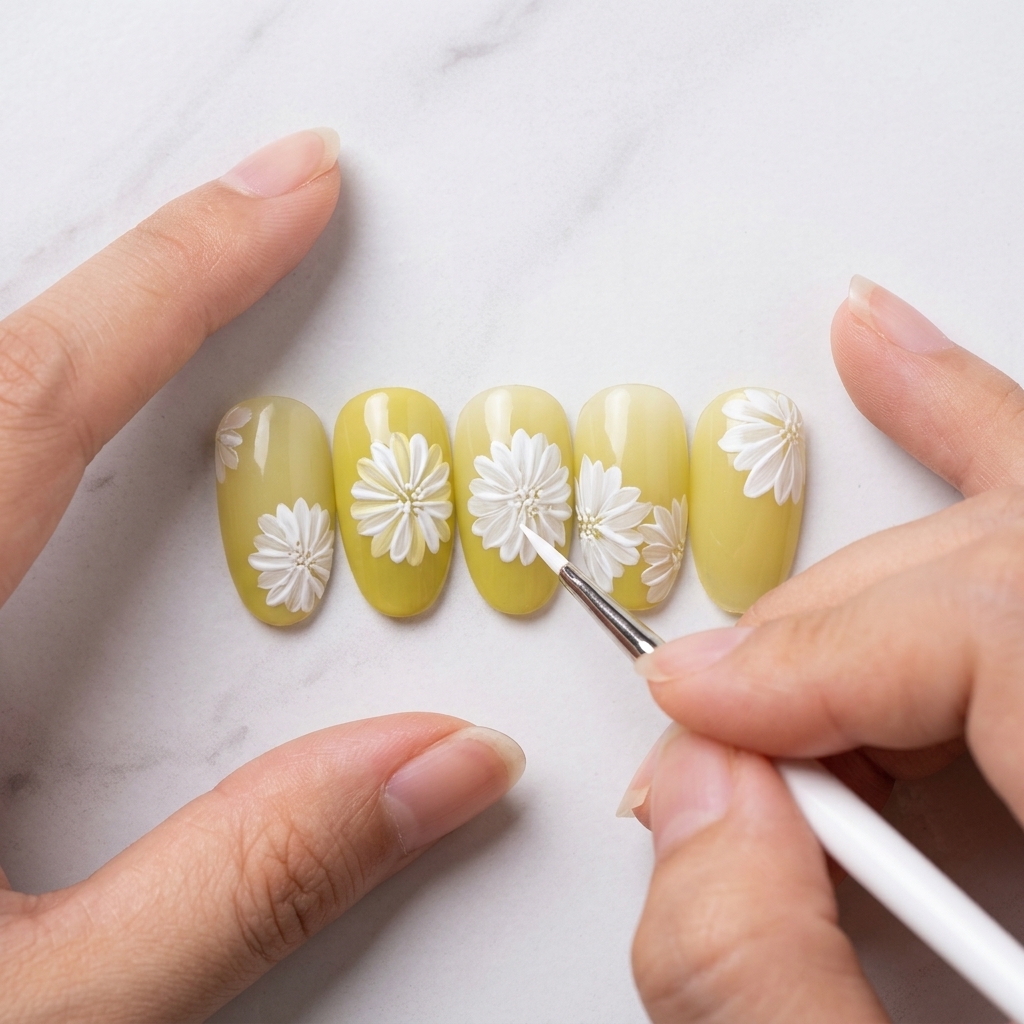
Using the same white paint and your versatile painting brush, fill in the gaps between the initial daisy petals. Apply these secondary strokes with a lighter touch to create the appearance of depth and volume, ensuring the petals overlap slightly to build a realistic, layered floral design.
Tip: Varying the pressure of your brush helps create petals of different sizes, making the daisy look more natural. - 14Detail the daisy center
Using a fine liner brush and a contrasting color or a concentrated dot of paint, carefully place a small, distinct center point in the middle of your daisy. This final touch anchors the flower and completes the floral detail before you finish your manicure with a top coat.
Tip: Keep your hand steady by resting your pinky finger on your other hand or the table for stability.