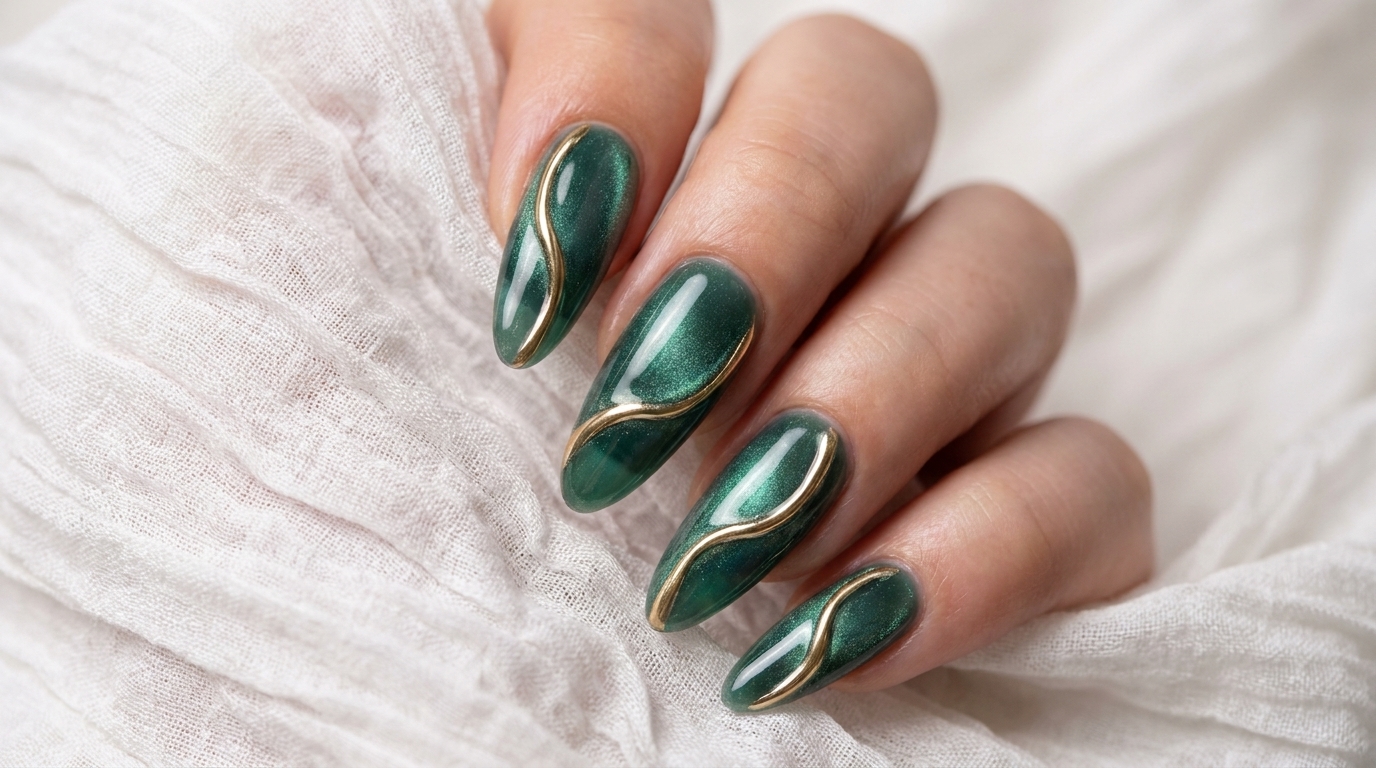
Lake Green Cat Eye Nails
3D Gold Chrome Accents — Step-by-Step Tutorial
Elevate your manicure with this stunning lake green cat eye look featuring raised 3D gold chrome lines for a sophisticated, jewelry-inspired finish.
This captivating design combines the depth of magnetic cat eye polish with the modern, tactile appeal of 3D metallic sculpting. Perfect for those who love an editorial edge, the contrast between the shimmering green base and the raised, glowing gold accents creates a luxurious, water-like aesthetic that is surprisingly achievable at home.
Steps
- 1Apply white solid gel tip
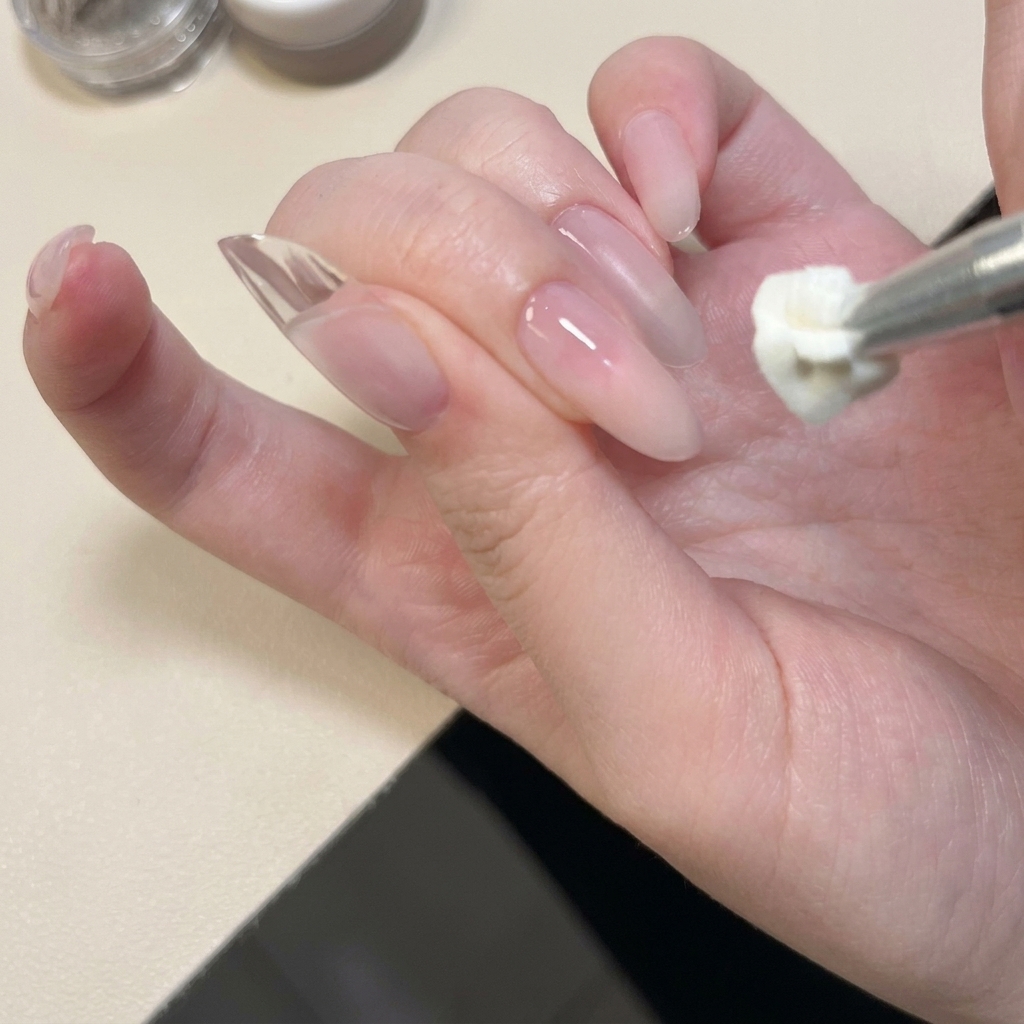
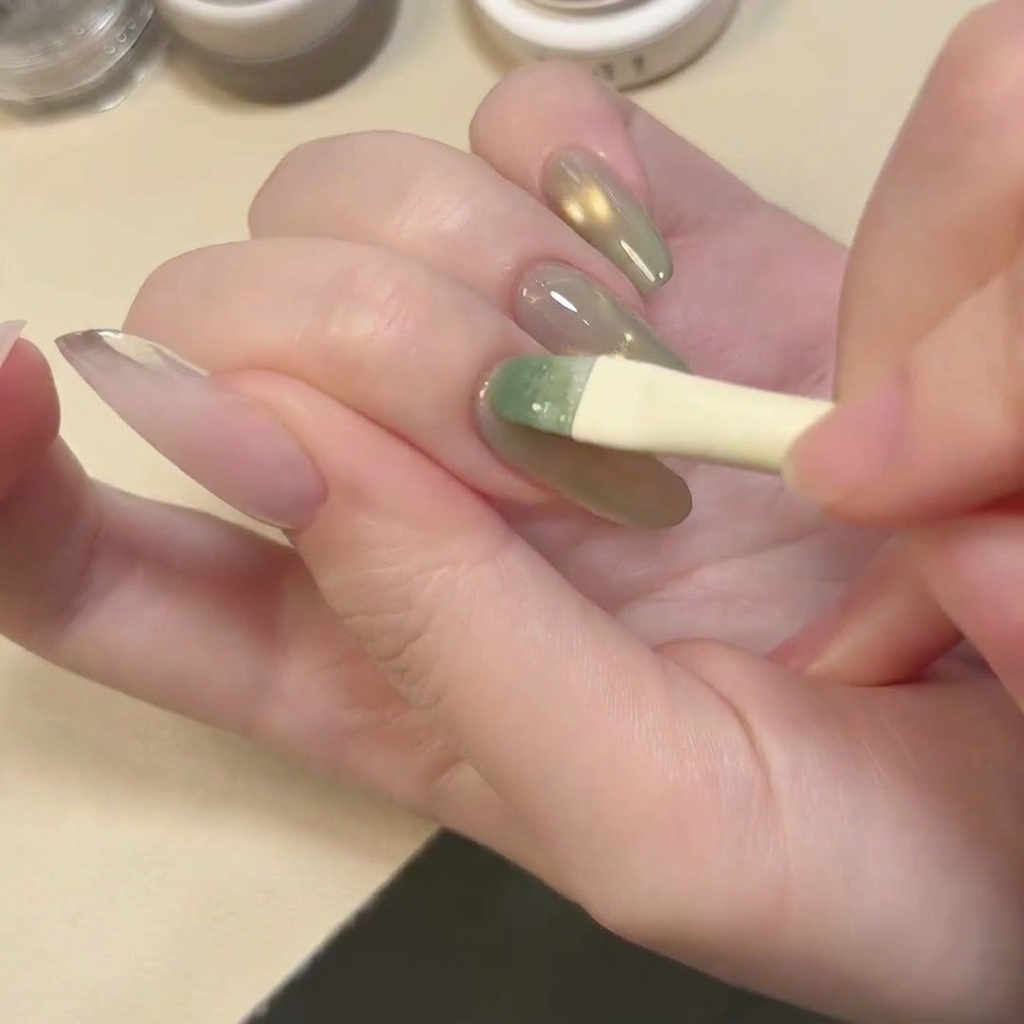
Using a metal spatula tool, pat a small amount of white solid gel onto the free edge of the nail. Smooth and shape it to create an opaque, elongated tip that extends past your natural nail, providing a solid foundation for the cat eye design without needing a base color.
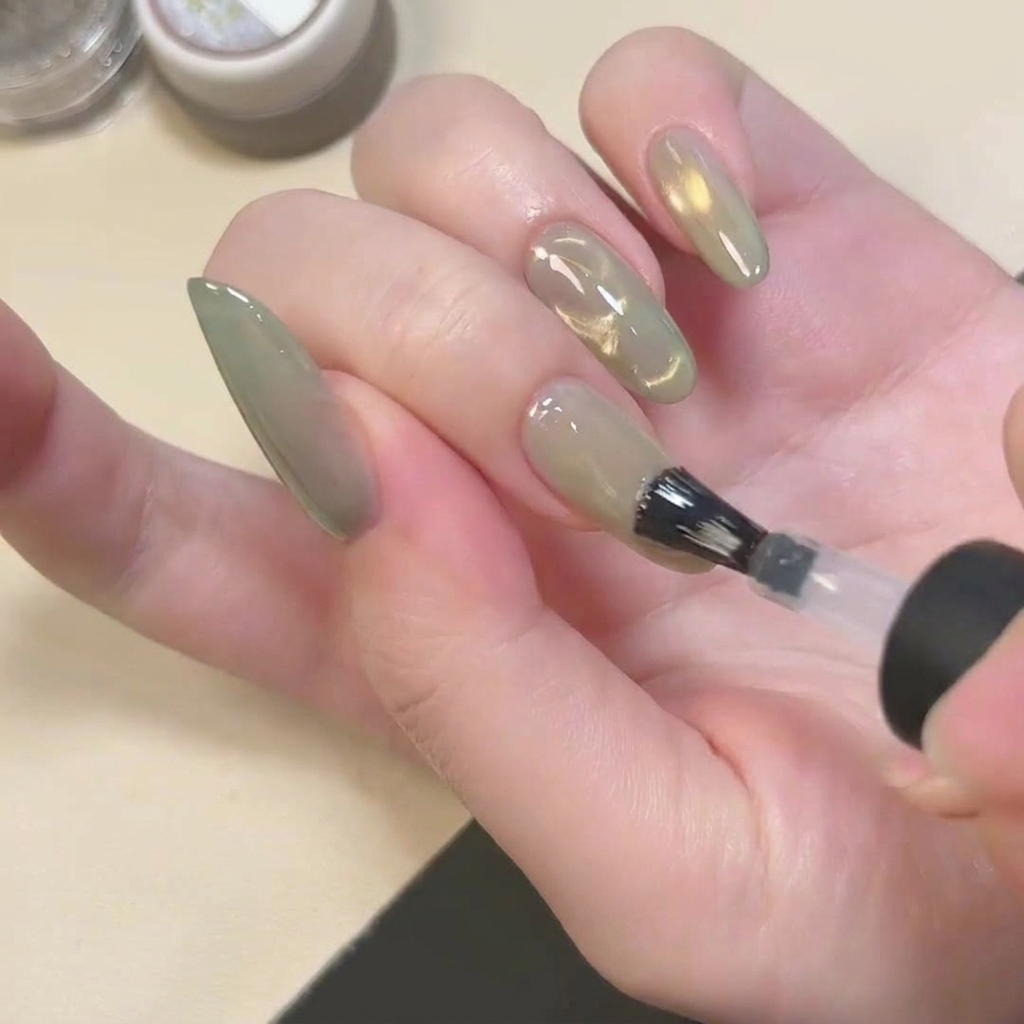
Tip: Work in thin, controlled pats to maintain an even thickness and avoid bulkiness at the free edge. - 2Apply lake green cat eye gel
Apply a layer of the translucent lake green cat eye gel polish over the entire nail plate, including over the previously applied white tip. Ensure even coverage from cuticle to free edge for a consistent base for the magnetic effect.
Tip: Keep your brush strokes smooth and light to avoid air bubbles before using the magnet. - 3Position magnetic particles - left side
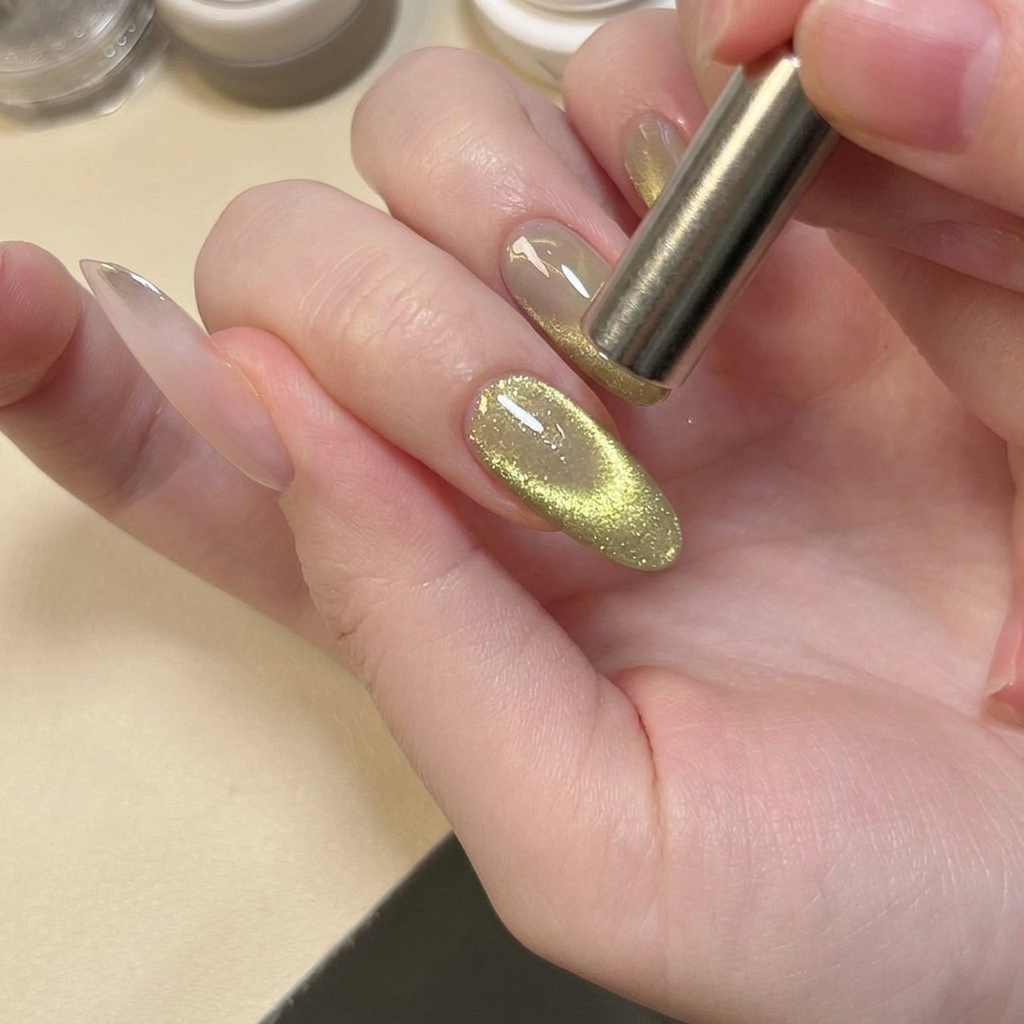
Before curing, hold a cylindrical magnet close to the left side of the wet nail polish. Move it along the side to push the magnetic particles into position, creating the start of your desired cat eye effect.
Tip: Hold the magnet steady but dont touch the wet gel surface; keep it as close as possible to the nail to maximize the movement of the particles. - 4Position magnetic particles - U-shape
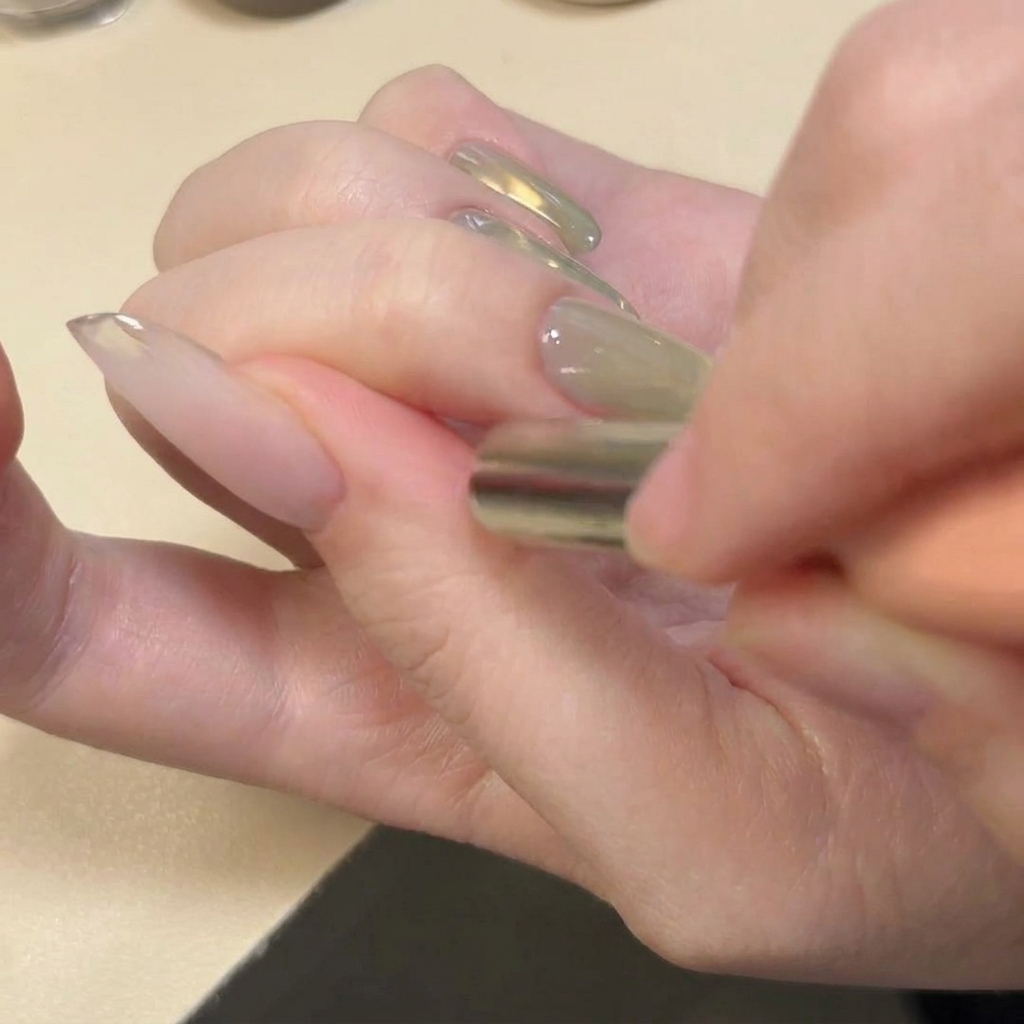
Move the cylindrical magnet to the right side of the nail to pull particles accordingly, then transition to holding it horizontally across the free edge tip. This technique pushes the magnetic glitter into a distinct U-shape pattern.
Tip: Use deliberate, fluid motions to ensure the glitter particles settle into the U-shape before curing the nail. - 5Concentrate magnetic effect
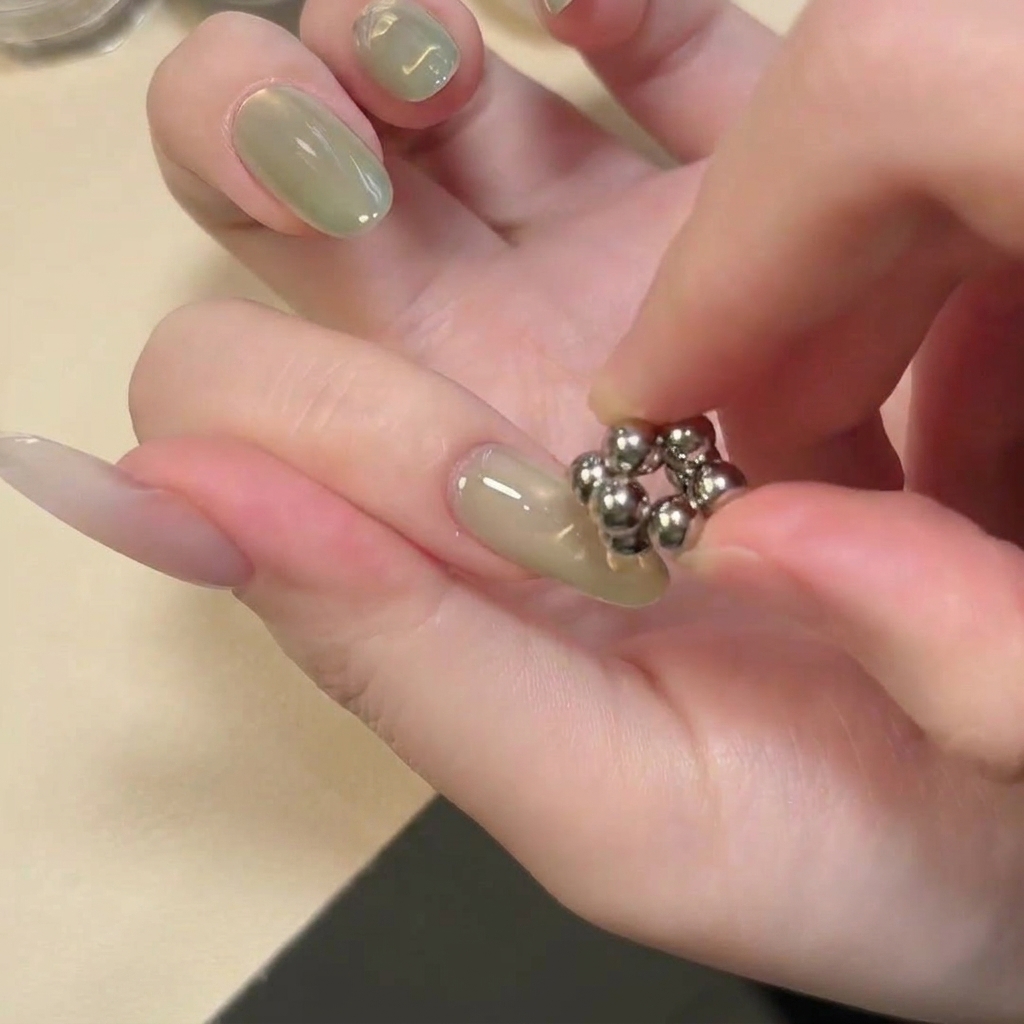
While the gel is still wet, take a small cluster of round bead magnets and hold them directly over the center of the nail. This concentrated magnetic field will draw the particles together into a precise, highlighted shape.
Tip: Ensure the beads are held steady for several seconds to allow the particles to fully react and concentrate. - 6Apply non-stick matte top coat
After curing the cat eye effect, apply a layer of clear, non-stick matte top coat over the entire nail surface. This base ensures the correct texture and adhesion for the subsequent powder application.
Tip: Cap the free edge carefully to ensure complete coverage, which will help keep the powder application clean and precise. - 7Draw 3D gel lines

Using a fine detail liner brush, pick up a small amount of clear 3D sculpting gel. Carefully draw thin, raised, curving lines diagonally across the nail surface over the existing matte base. Ensure the lines are consistent in thickness for an even finish before curing.
Tip: Work with a light touch to keep the lines thin and elegant. If the lines start to spread, flash cure them for a few seconds to lock the shape in place. - 8Apply chrome powder to lines
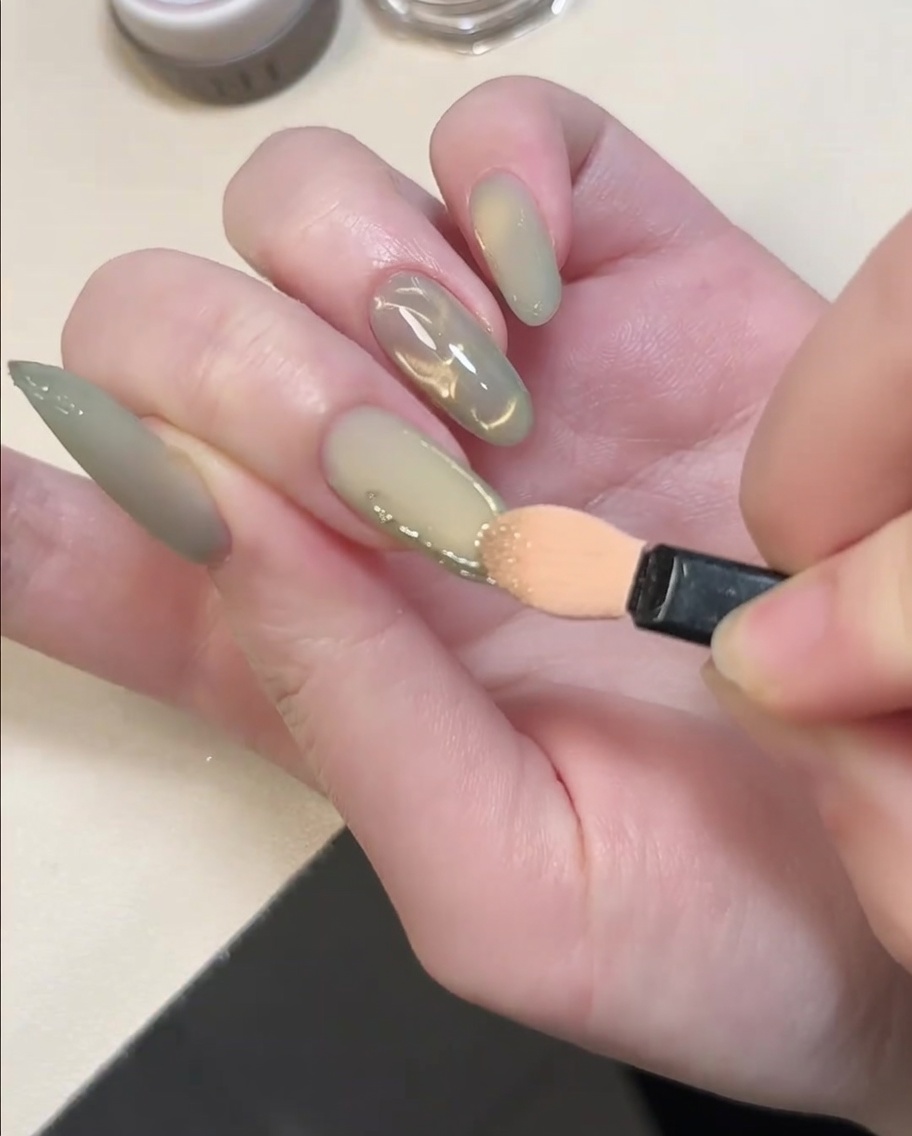
After curing the 3D gel lines, use an eyeshadow sponge applicator to pick up metallic gold chrome powder. Gently but firmly rub the powder onto the cured, slightly tacky surface of the 3D lines. Continue until the lines are fully coated with a metallic gold finish, then dust off any excess powder from the surrounding nail surface.
Tip: Focus the application specifically on the raised 3D lines to maintain a clean contrast between the metallic details and the matte background. - 9Seal chrome details

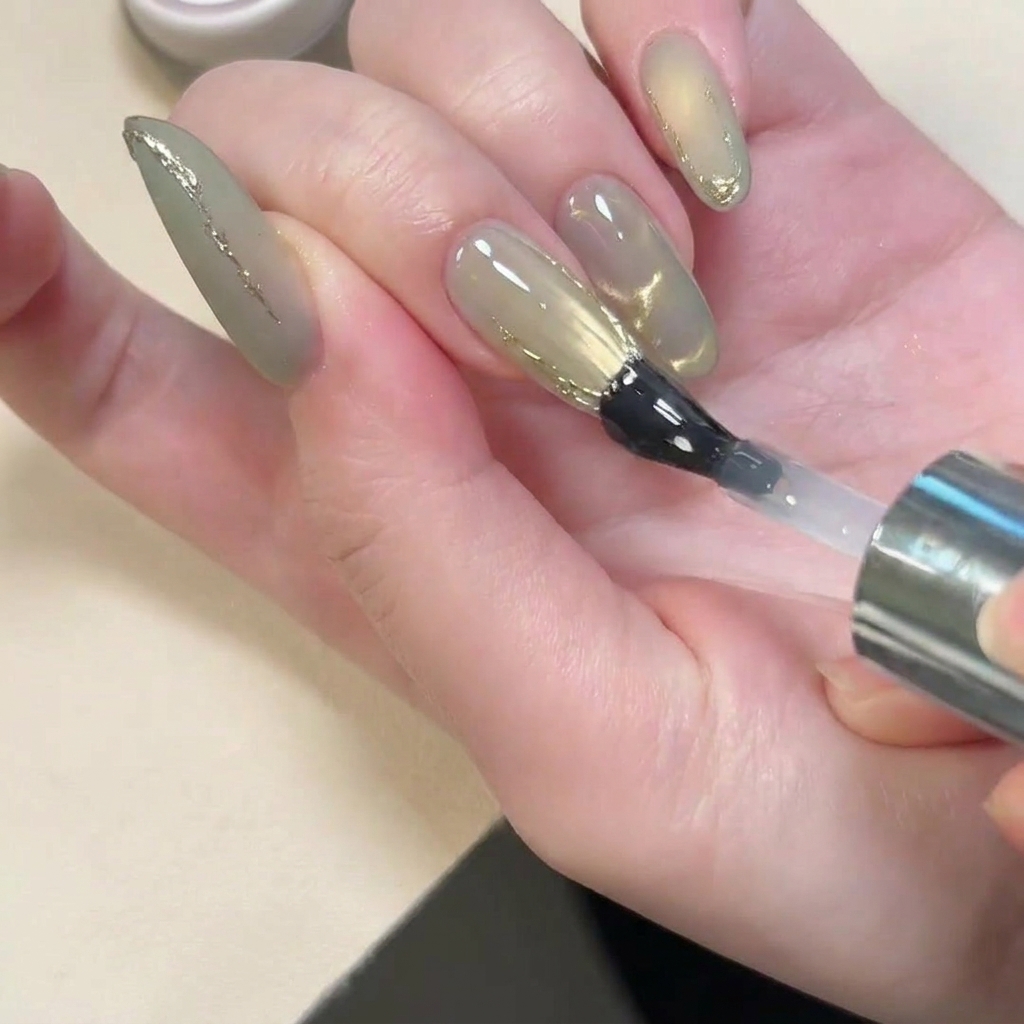
Carefully apply a thin layer of clear reinforcing gel specifically over the golden 3D lines. This step acts as a protective seal to prevent the chrome powder from rubbing off or fading during wear. Ensure the gel covers the entirety of the gold lines, then cure according to your lamp instructions.
Tip: Use a steady hand and a fine brush to keep the reinforcing gel contained to the lines so you dont lose the matte finish of the base. - 10Apply final top coat
Apply a final layer of glossy top coat over the entire nail surface. This encapsulates the 3D gold-accented lines and provides a durable, high-shine finish to the overall look. Ensure full coverage over the free edge and cure completely in your UV or LED lamp.
Tip: Applying a top coat over the entire nail will smooth out the transition between the matte background and the glossy gold details, unifying the final look.