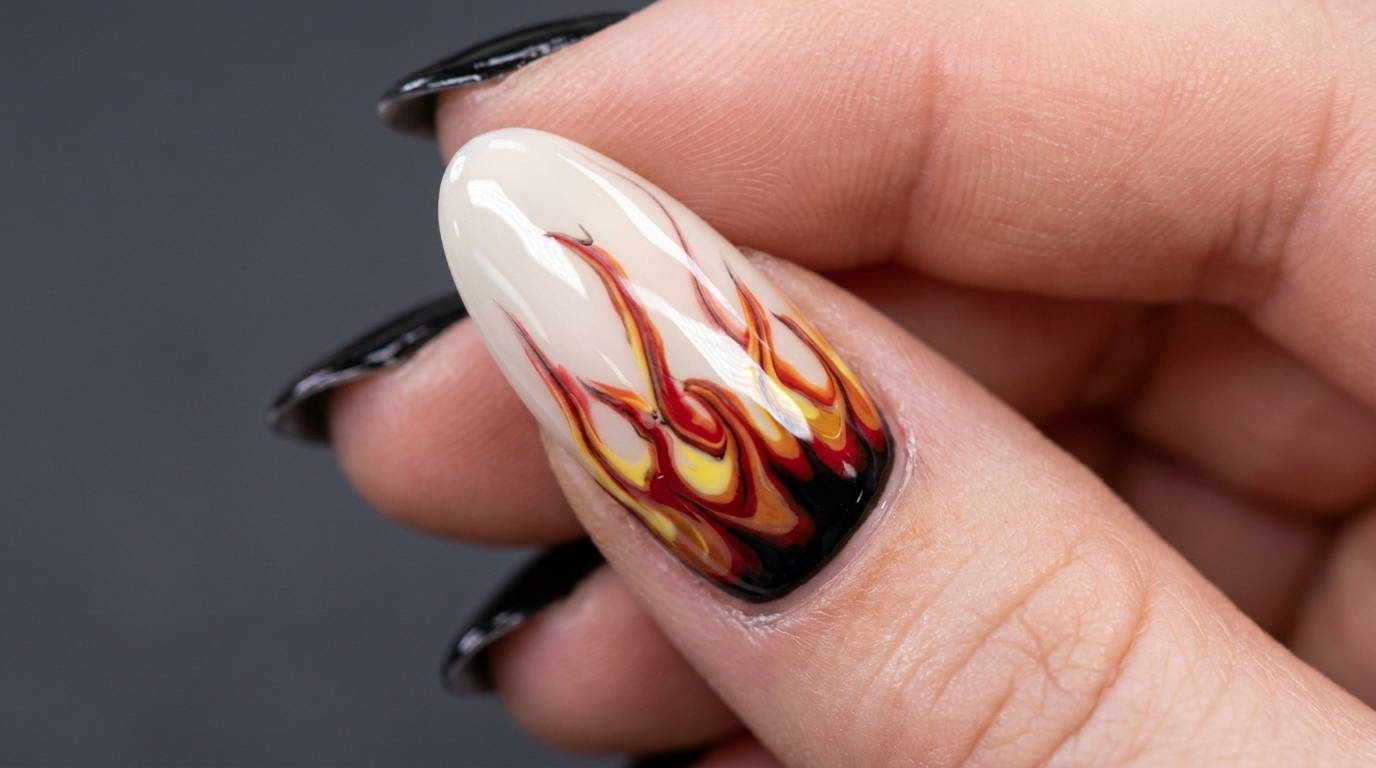
Glossy S-Shape Flame Nail Art — Step-by-Step Tutorial
Master the trendy S-shape flame manicure with this easy wet-on-wet blending technique. Create a stunning gradient flame design with a high-gloss finish.
The flame nail art trend continues to dominate, and this S-shape variation offers a sophisticated, fiery look that is surprisingly easy to achieve at home. By utilizing a wet-on-wet gel blending technique, you can create seamless transitions from deep black tips to vibrant yellow wisps. This tutorial guides you through the process of layering and dragging your gels to perfection.
Steps
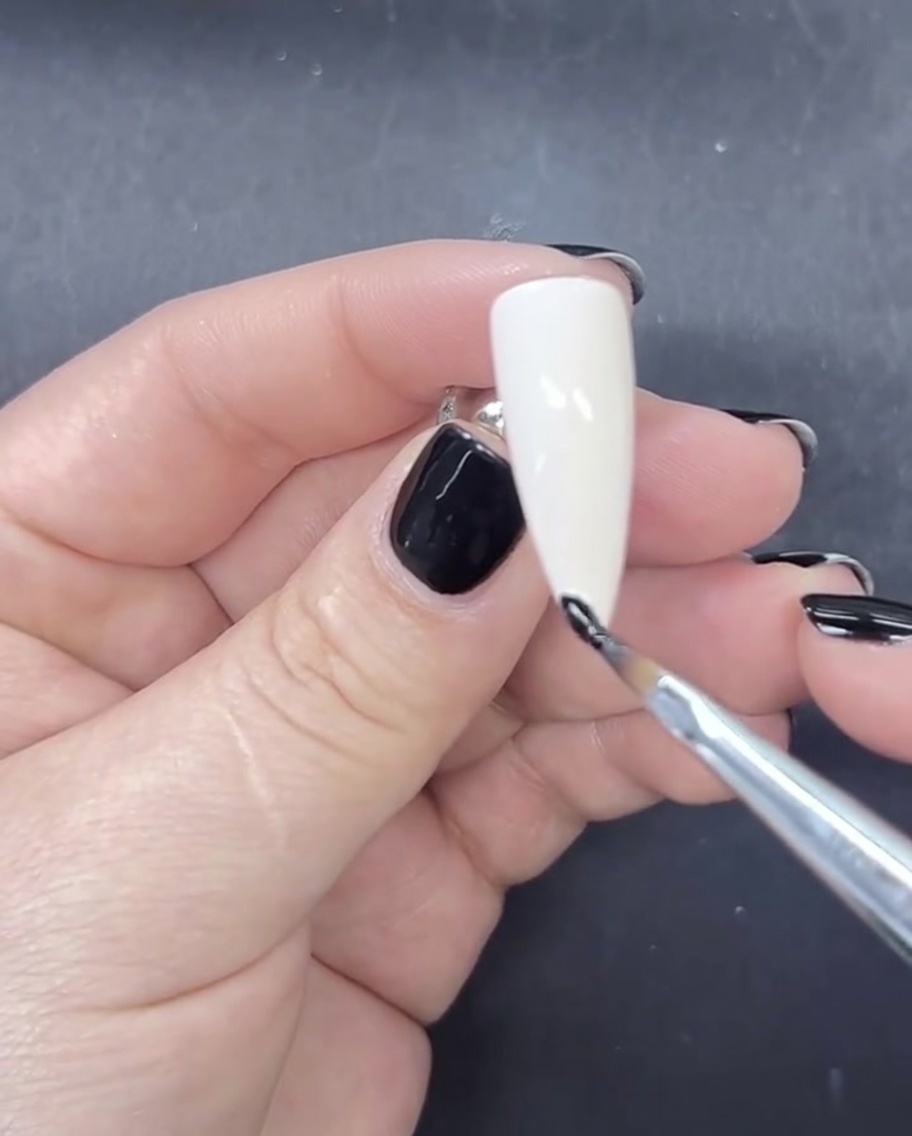
- 1Apply milky white base coat

Apply a coat of milky white gel polish to the nail plate, ensuring smooth and even coverage. Do not cure the gel at this stage; keeping it wet is essential for blending the colors in the next steps.
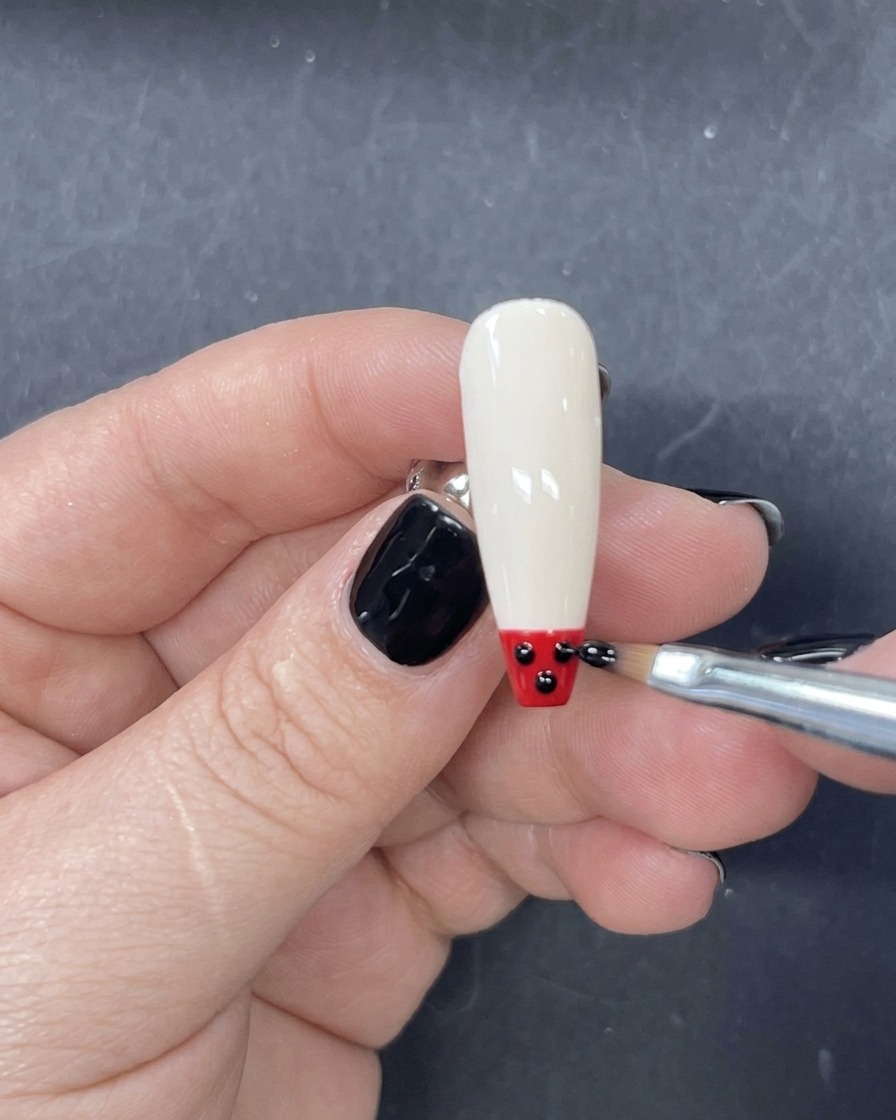
Tip: Keep the layer thin to prevent pooling at the cuticles, but ensure enough product is on the nail to allow for easy color blending. - 2Apply black gel tip
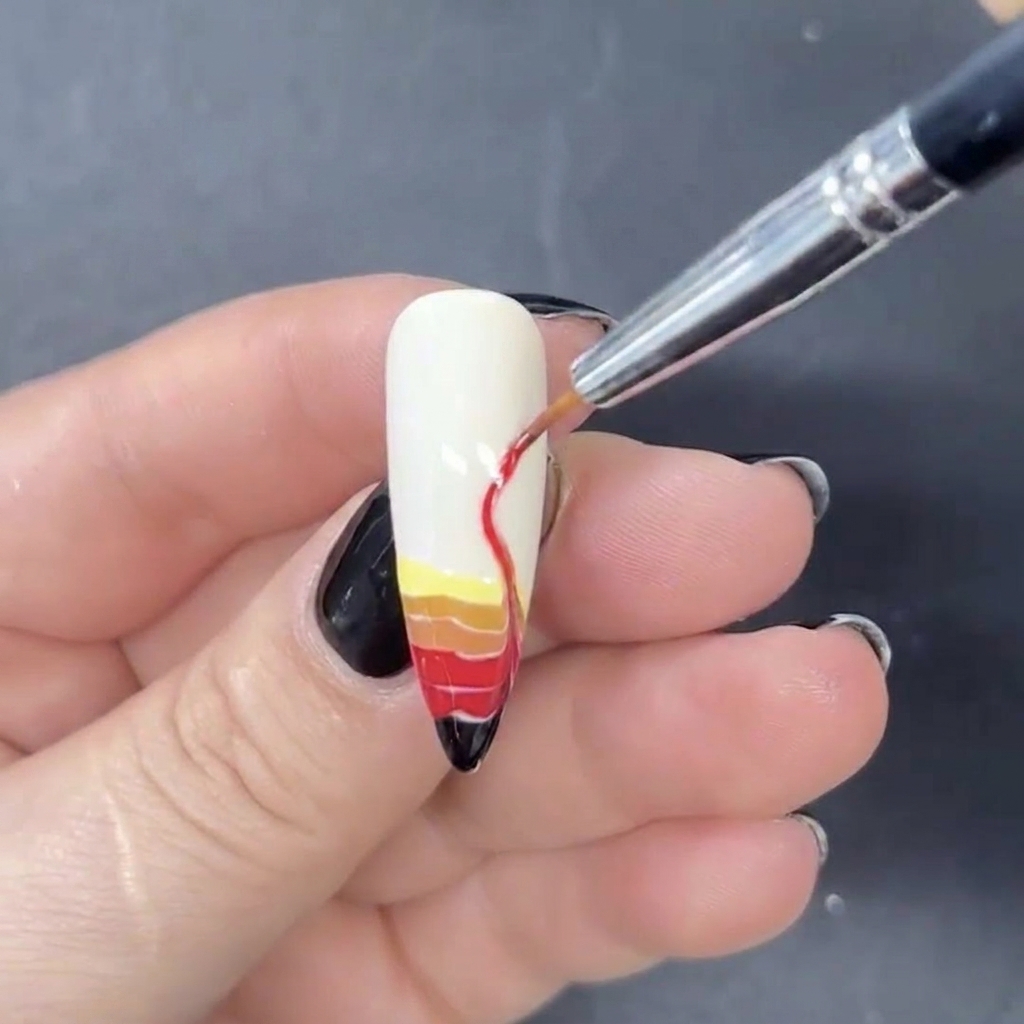
Using a fine liner brush, apply a horizontal band of black gel polish across the very tip of the nail. This will serve as the base for the darkest part of the flame design.
Tip: Keep the black band narrow at the very edge to maintain room for the other colors to blend upward. - 3Apply red gel stripe
Immediately above the black band, apply a horizontal stripe of red gel polish. Layer this directly onto the wet surface to prepare for blending.
Tip: Apply the color carefully so that the edges meet the black band without blurring too much before you are ready to style the flames. - 4Apply orange gel stripe
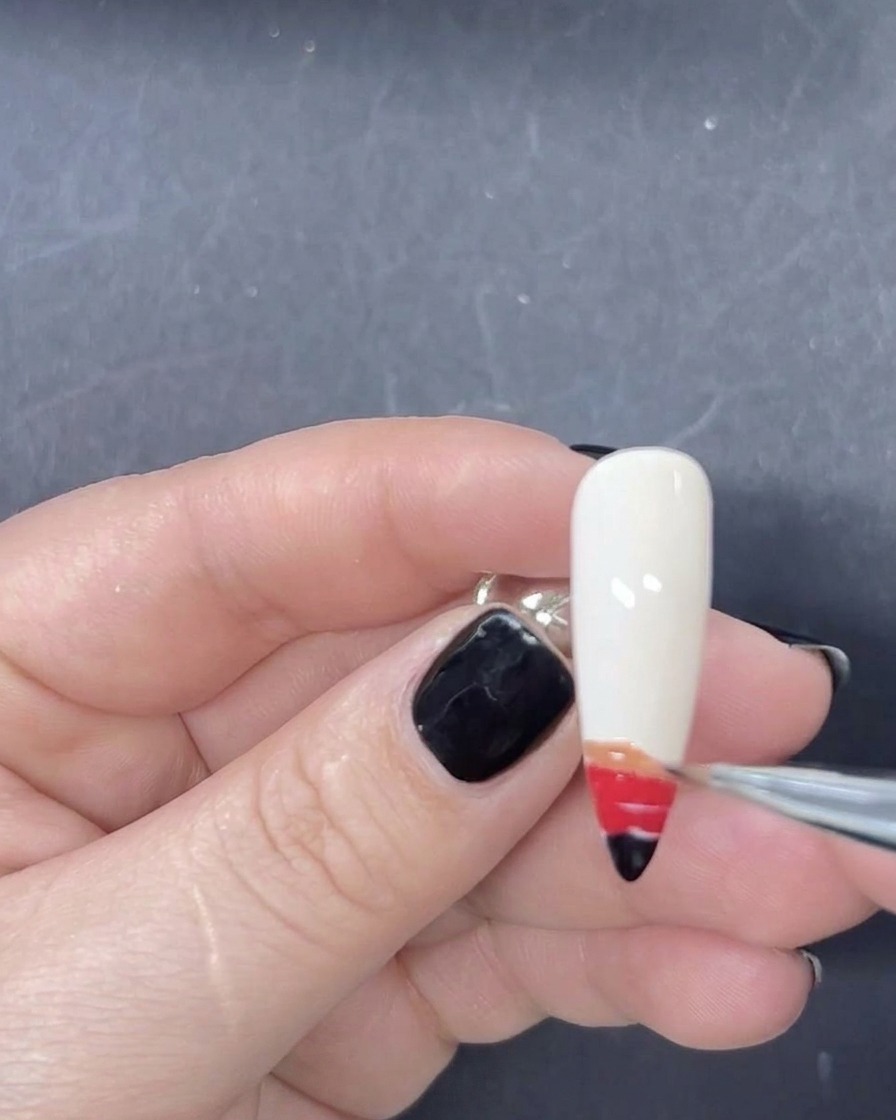
Add a horizontal stripe of orange gel polish directly above the red band. This transition color will help create the realistic gradient effect of the flames.
Tip: Work quickly to keep all the gel layers wet so they can be easily manipulated in the subsequent steps. - 5Apply yellow gel stripe
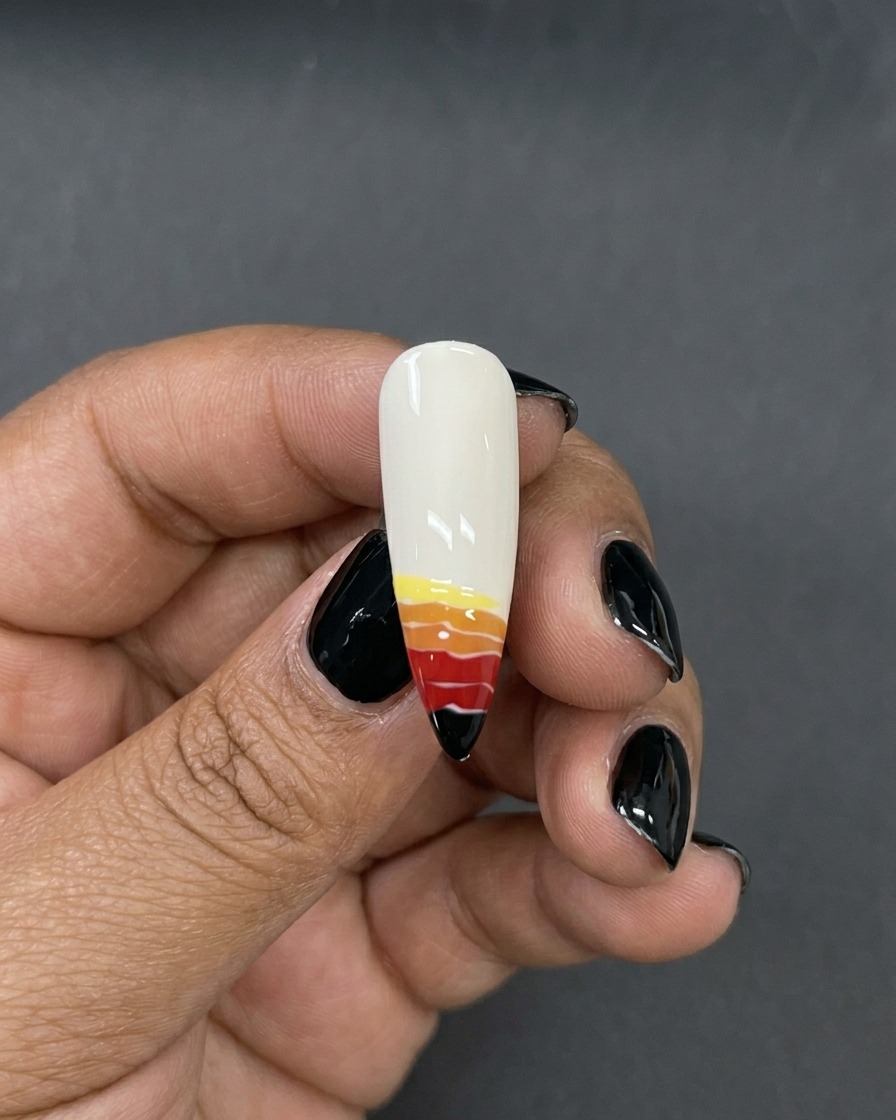
Complete the color gradient by applying a final thin horizontal stripe of yellow gel polish at the top of the colored section.
Tip: Use a light hand to apply the yellow so it doesnt overwhelm the other colors. - 6Create flame shapes
Using a clean fine liner brush, gently drag the wet gel colors upward in S-shaped motions. Vary the length of the strokes to create natural-looking, jagged flame patterns that blend the colors together.
Tip: Pull the brush upward with a light touch to ensure the colors bleed into each other without muddying the design. - 7Pull and shape the flames
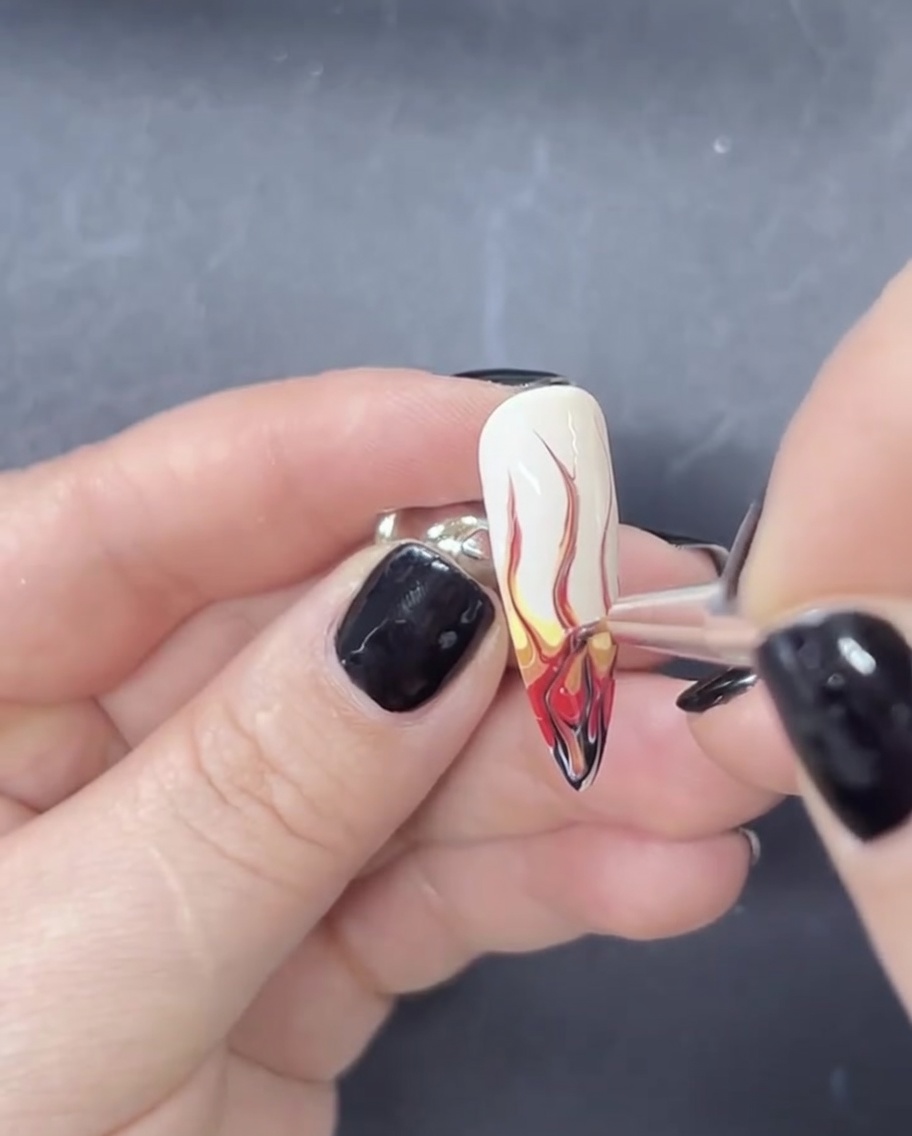
Continue using your fine liner brush to drag the wet gel colors higher up the nail plate in subtle S-shapes. Vary the lengths of these wisps—making some longer and others shorter—to create a dynamic, realistic flame effect that blends upward into the milky white base.
Tip: Use a very light touch when pulling the gel upward to maintain fine, delicate tips on your flames without smearing the colors too much. - 8Add final contrast to the tips
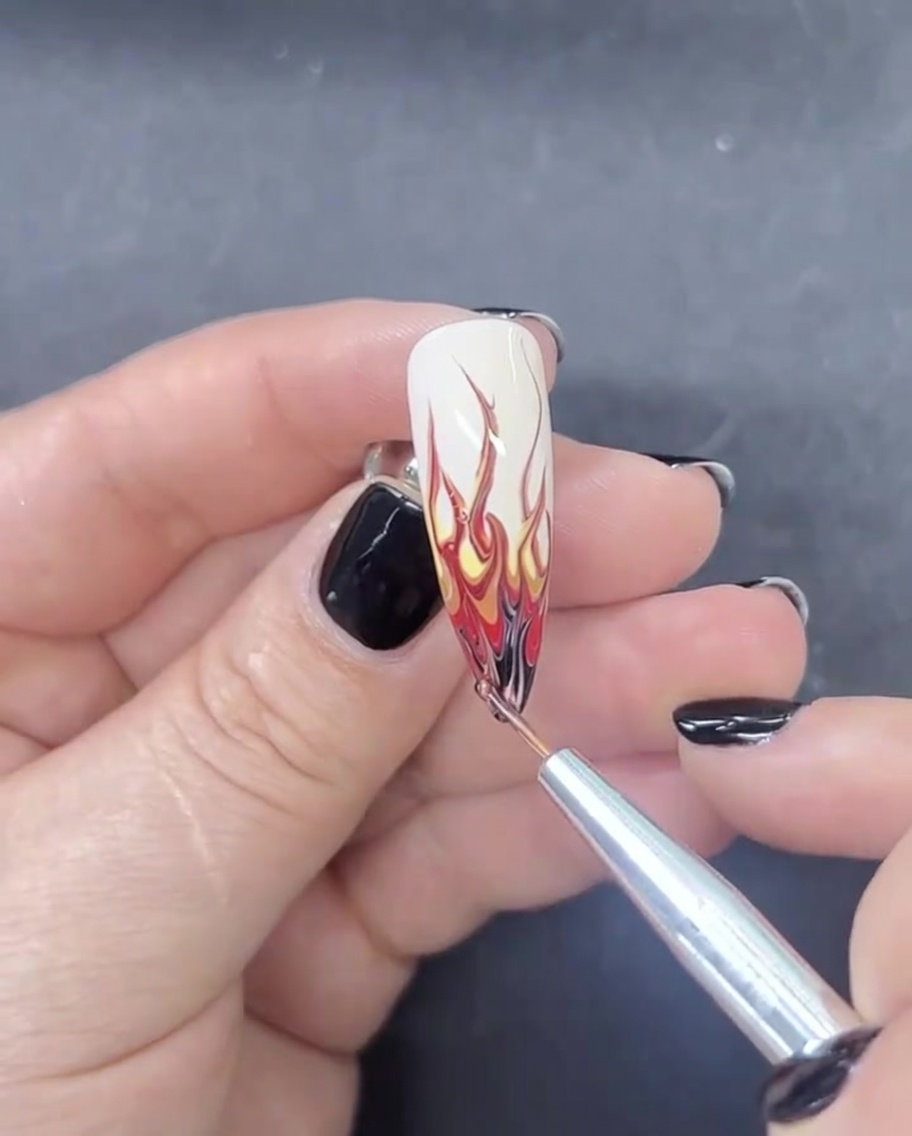
Take your fine liner brush and apply a small touch-up of black gel right at the free edge or tip of the nail. This extra black deepens the contrast at the base of the flames. Once the design is complete, turn the finger upside down briefly to let the un-cured gel self-level, then cure it fully under your lamp and finish with a top coat.
Tip: Turning the finger upside down allows gravity to help smooth out any ridges created by the detail brush, ensuring an even surface before curing.