Sparkling Pink Gradient Heart Nail Art — Step-by-Step Tutorial
Elevate your manicure with this dreamy sparkling pink gradient look. Learn how to create a crisp heart design embellished with delicate pearls and rhinestones.
Bring a touch of romantic charm to your fingertips with this stunning sparkling pink heart design. By combining a sheer nude base with a shimmering silver glitter gradient, this look offers the perfect balance of sophistication and playfulness. It is an excellent project for those looking to master hand-painted heart detailing and gem placement.

Steps
- 1Apply nude base coat
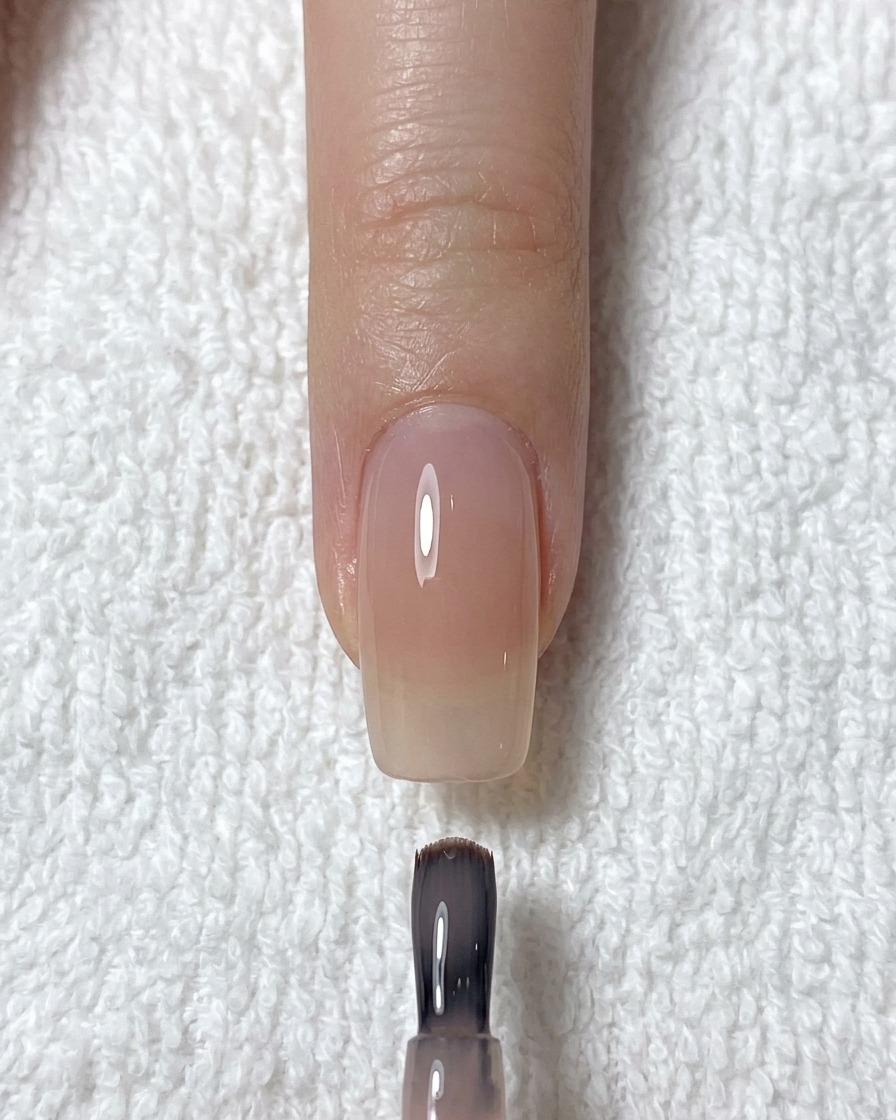
Apply a thin, even layer of sheer nude gel base coat across the entire nail surface. Ensure smooth coverage from the cuticle area to the free edge, avoiding the skin. Cure under your UV or LED lamp as directed by the product instructions to create a solid foundation for the nail art.
Tip: Keep your application thin to prevent pooling at the cuticles, which can lead to premature lifting. - 2Apply glitter to the tip
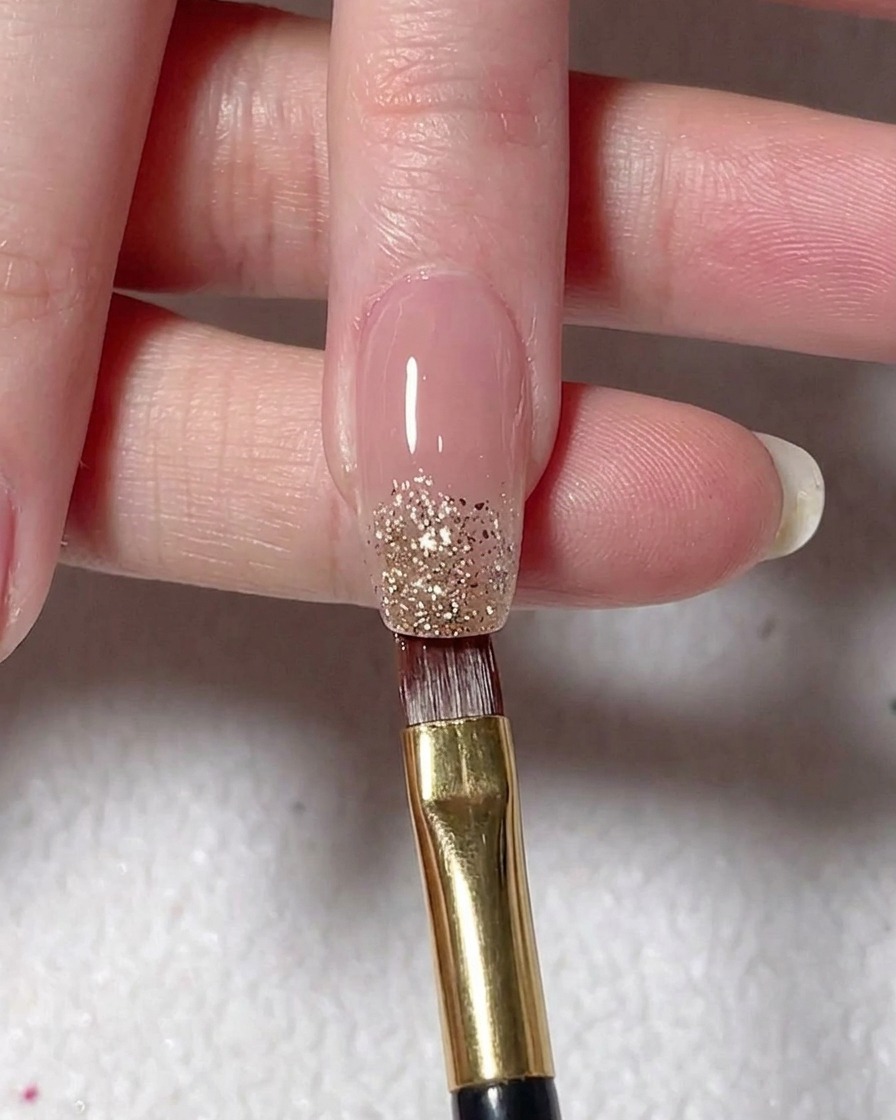
Using a flat gel brush, apply silver glitter gel horizontally across the free edge of the nail. Focus the heaviest concentration of glitter at the very tip, leaving the upper portion of the nail sparse to prepare for the gradient transition.
Tip: Use a light hand when applying glitter to avoid creating unnecessary bulk at the free edge. - 3Create glitter gradient
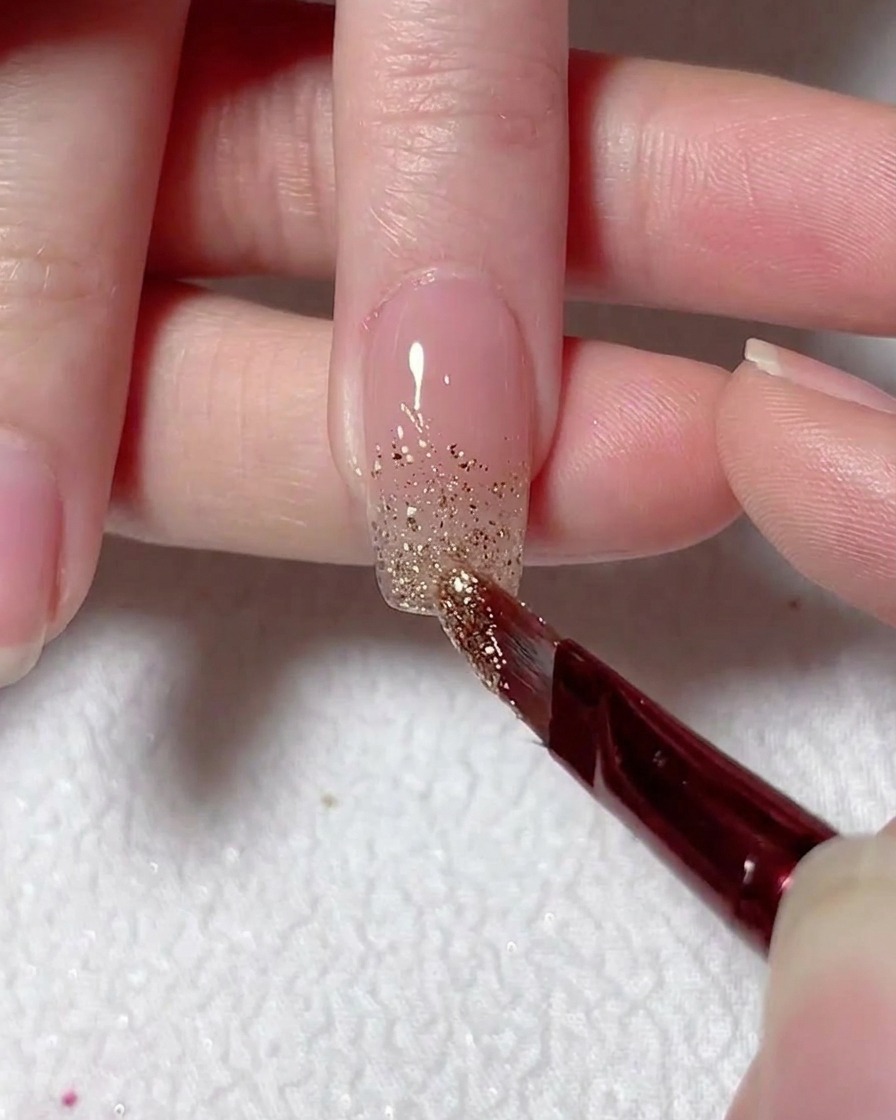
With a clean, fine brush, gently drag the wet silver glitter upwards from the tip toward the middle of the nail. Use light, feathery strokes to diffuse the edges of the glitter, creating a smooth, faded gradient effect before curing.
Tip: Wipe your brush frequently on a lint-free pad to keep the glitter distribution clean and prevent clumping. - 4Begin the heart design
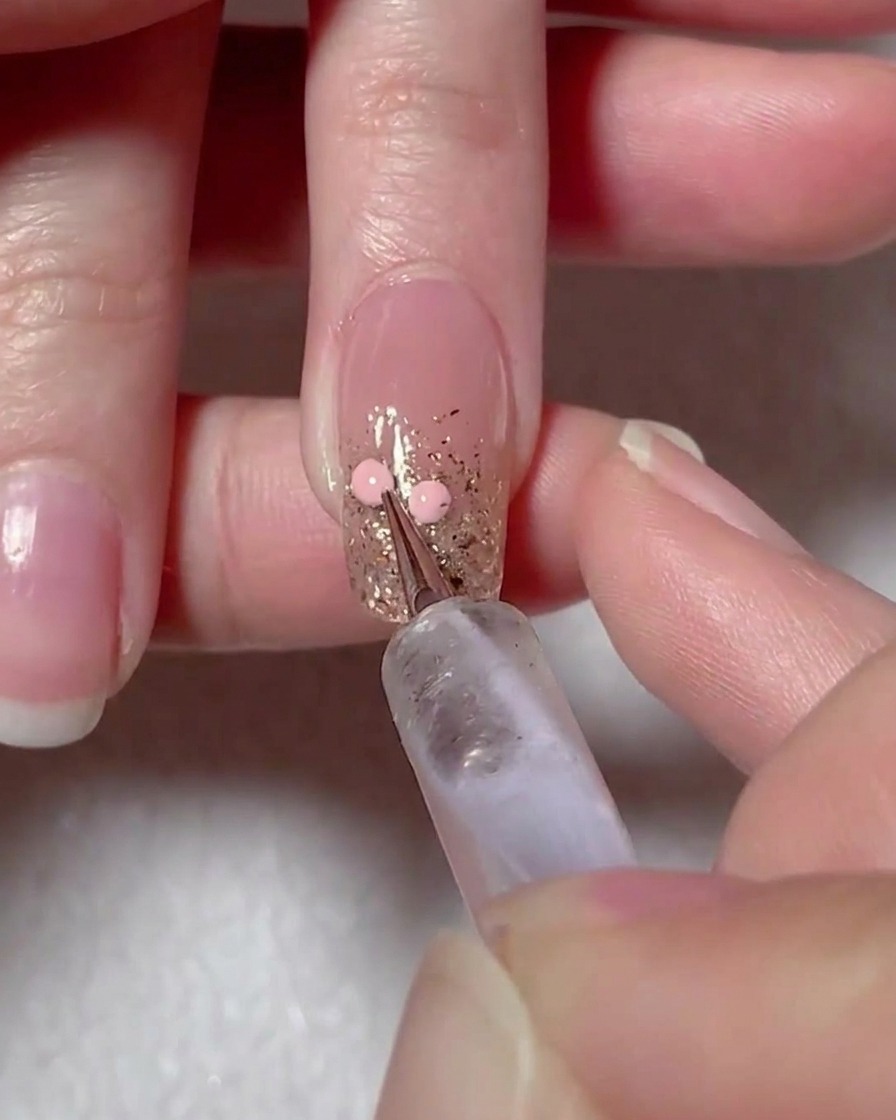
Using a dotting tool, place two small, equal-sized dots of opaque pink gel side-by-side near the center of the nail. These dots will serve as the base for the upper lobes of your heart design.
Tip: Ensure the dots are perfectly rounded and spaced evenly to create a symmetrical heart shape. - 5Form the heart shape
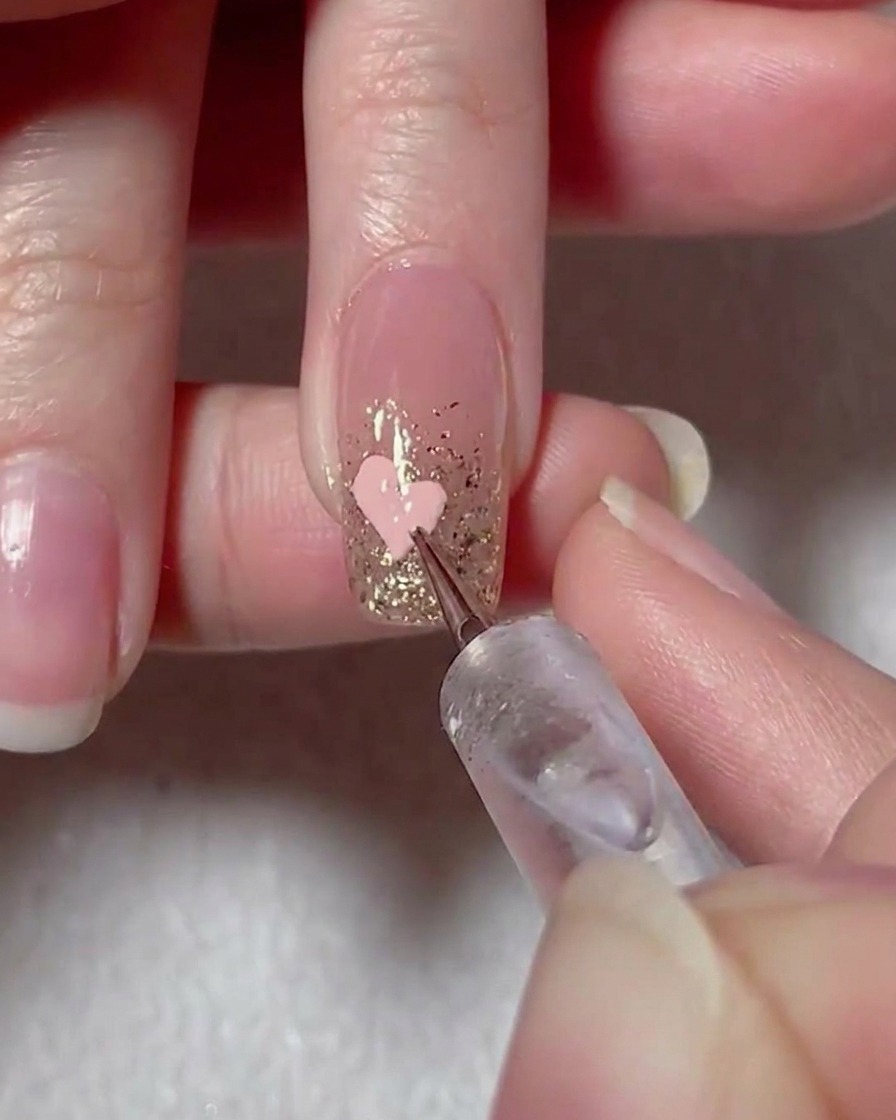
Using a fine liner brush, carefully pull the pink gel downward from each dot, connecting them at the bottom to form the pointed tip of the heart. Fill in the center area to complete the solid shape, then cure under your lamp.
Tip: Use light pressure with the liner brush to maintain sharp, clean edges for the heart. - 6Refine the heart
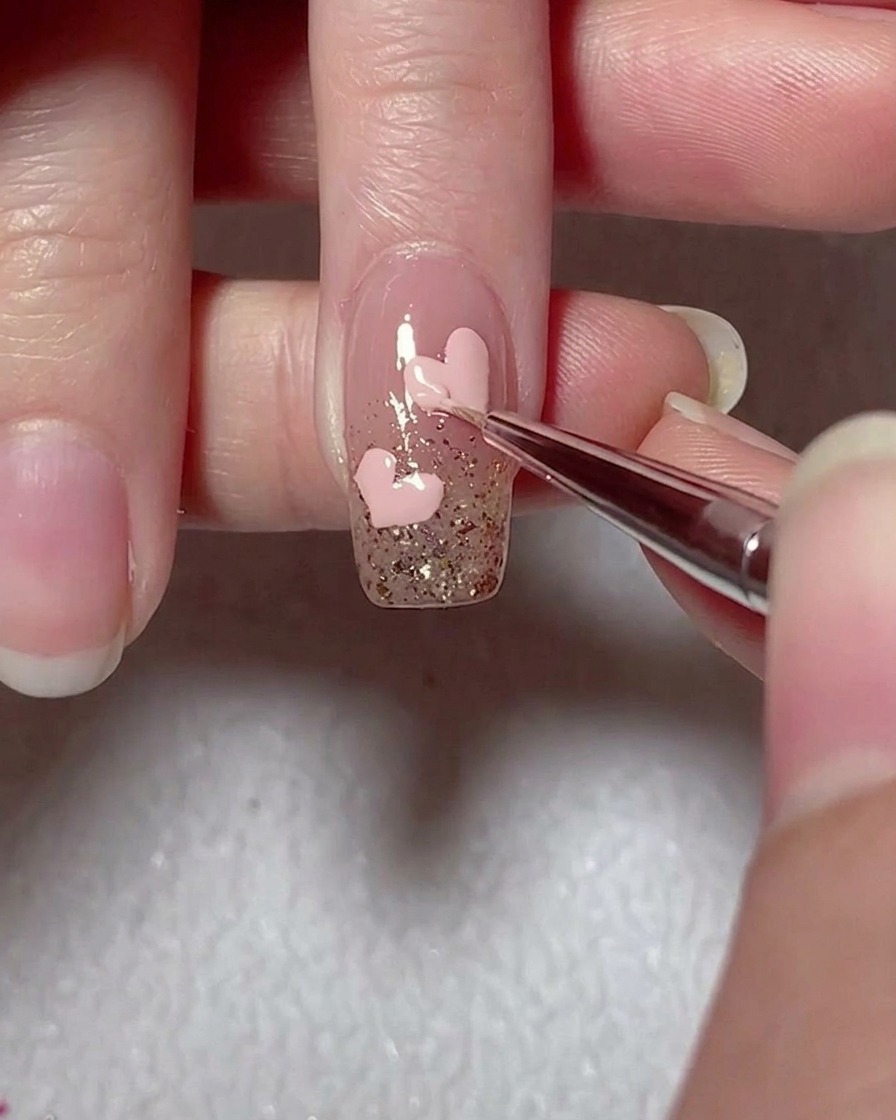
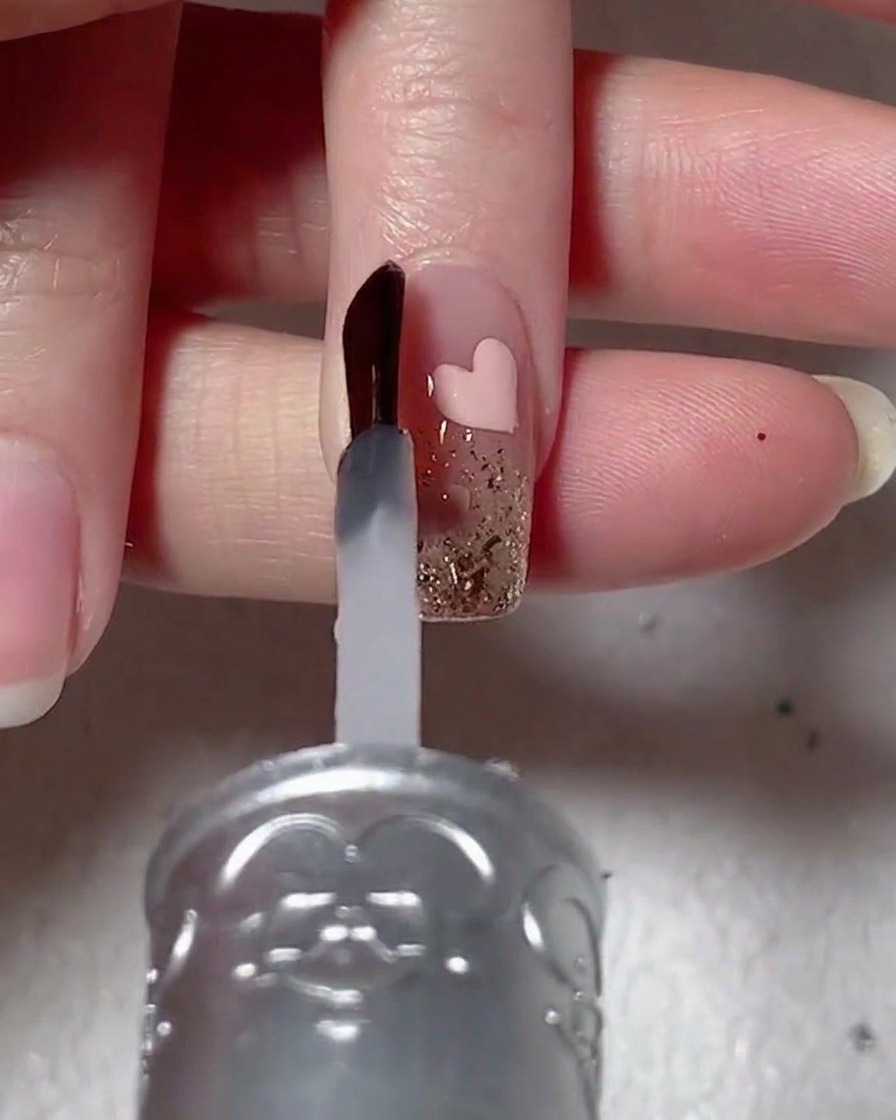
Take a fine liner brush and carefully trace around the perimeter of the painted pink heart. Smooth out any uneven edges and refine the points to ensure the shape is crisp and well-defined before performing the final cure.
Tip: If you make a mistake, use a clean brush dipped in a tiny amount of cleanser to nudge the gel edges into place before curing. - 7Apply reinforcement gel
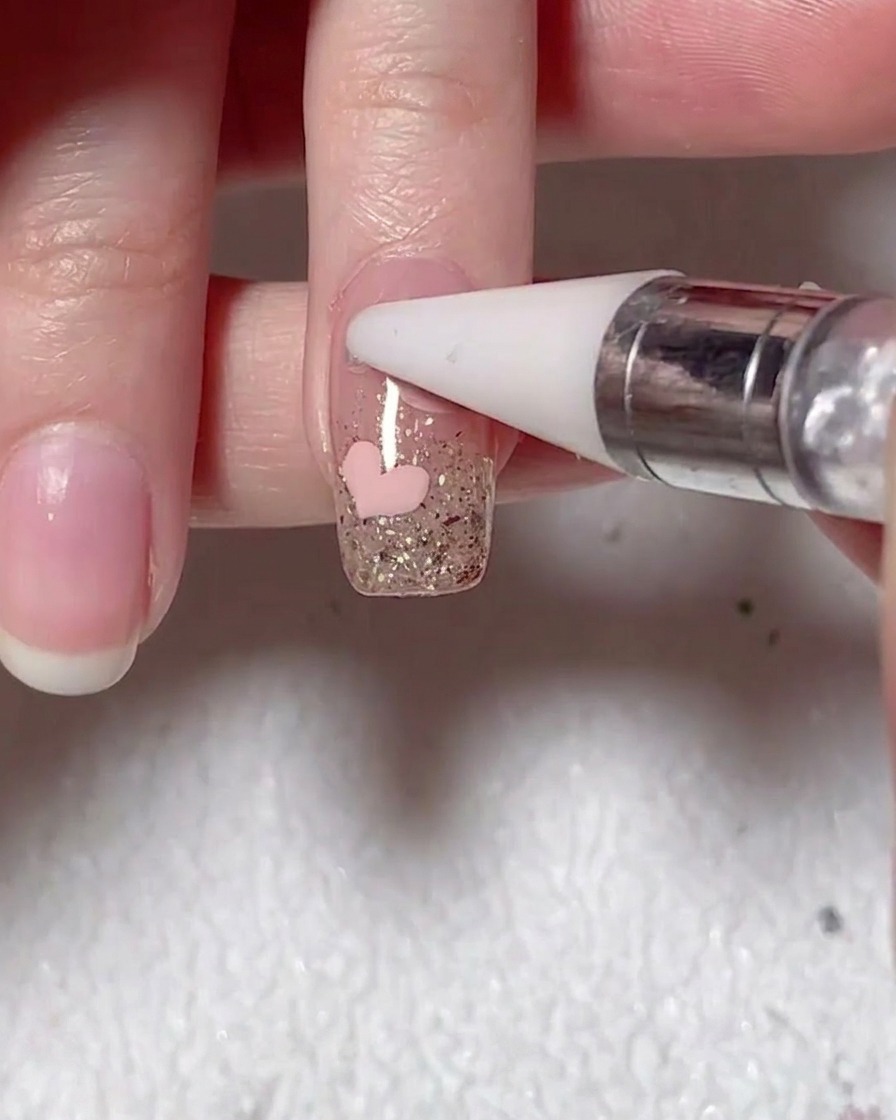
Apply a layer of clear builder or reinforcement gel over the entire nail surface. This step helps level out the nail, smoothing over the texture created by the glitter and the hand-painted heart design to ensure a flat, even base for the final top coat.
Tip: Use a light hand when applying to avoid flooding the cuticles, which keeps the nail profile slim and natural-looking. - 8Place embellishments
Using a wax pen or gem picker, carefully pick up tiny pearls and rhinestones and place them onto the tacky layer alongside the heart design. Position the gems to accent the nail art without overcrowding the design.
Tip: Keep the embellishments away from the very edge of the nail to ensure the top coat can fully encapsulate them, preventing them from catching on hair or clothing.
