Double-Layer Daisy Nail Art — 3D Floral Gel Tutorial
Master the art of dimensional double-layer daisy nail art over a chic green gel base with detailed step-by-step guidance.
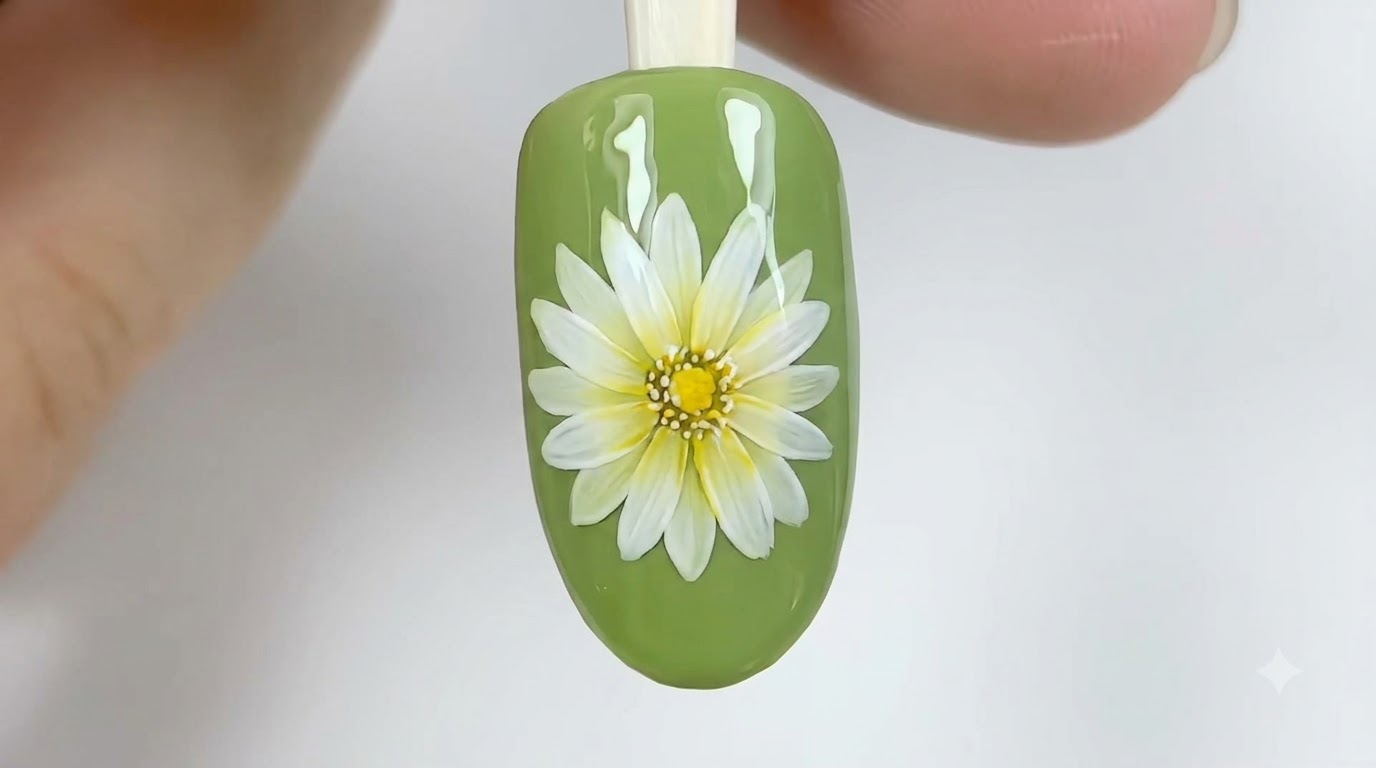
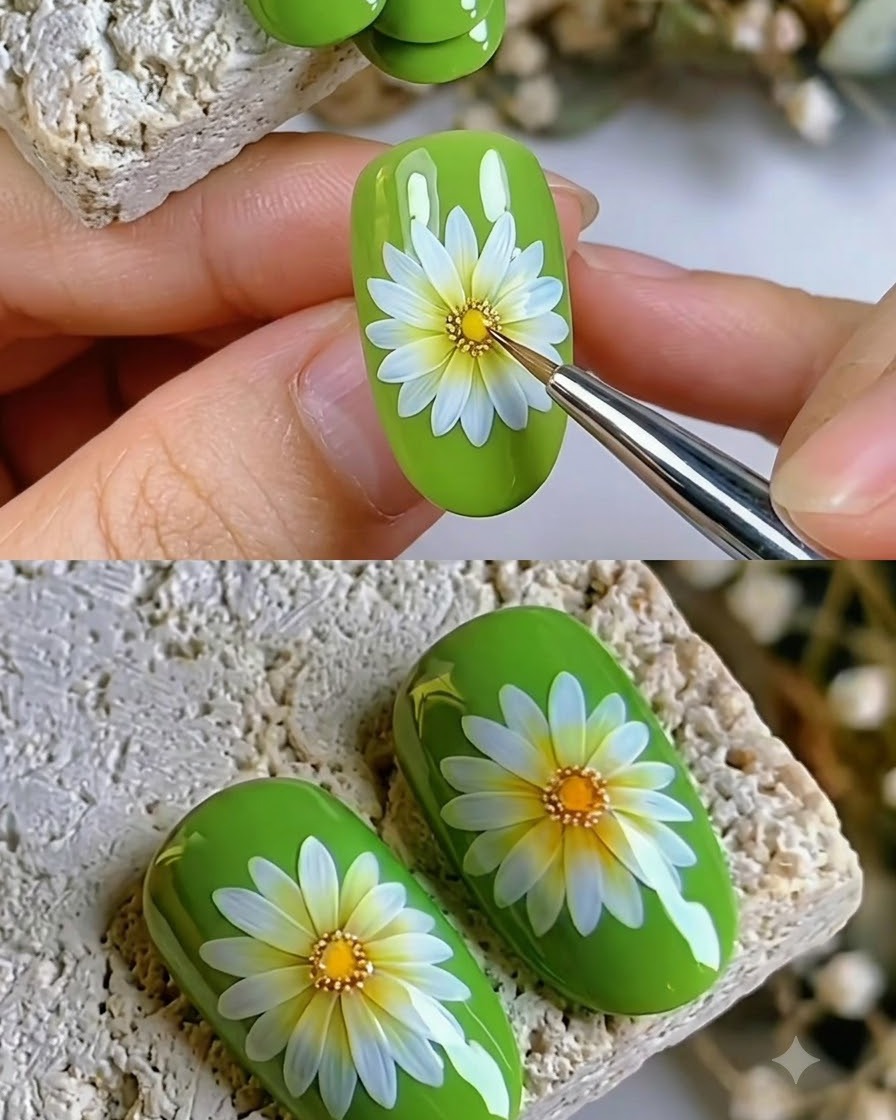
Floral nail designs continue to charm beauty enthusiasts, and this double-layer daisy look adds a stunning 3D effect to a vibrant green base. By staggering your petal placement and accenting the center with rich yellow detail gel, you create a look that feels both fresh and sophisticated. Perfect for spring or any time you want to showcase intricate floral artistry.
Steps
- 1Apply green gel polish
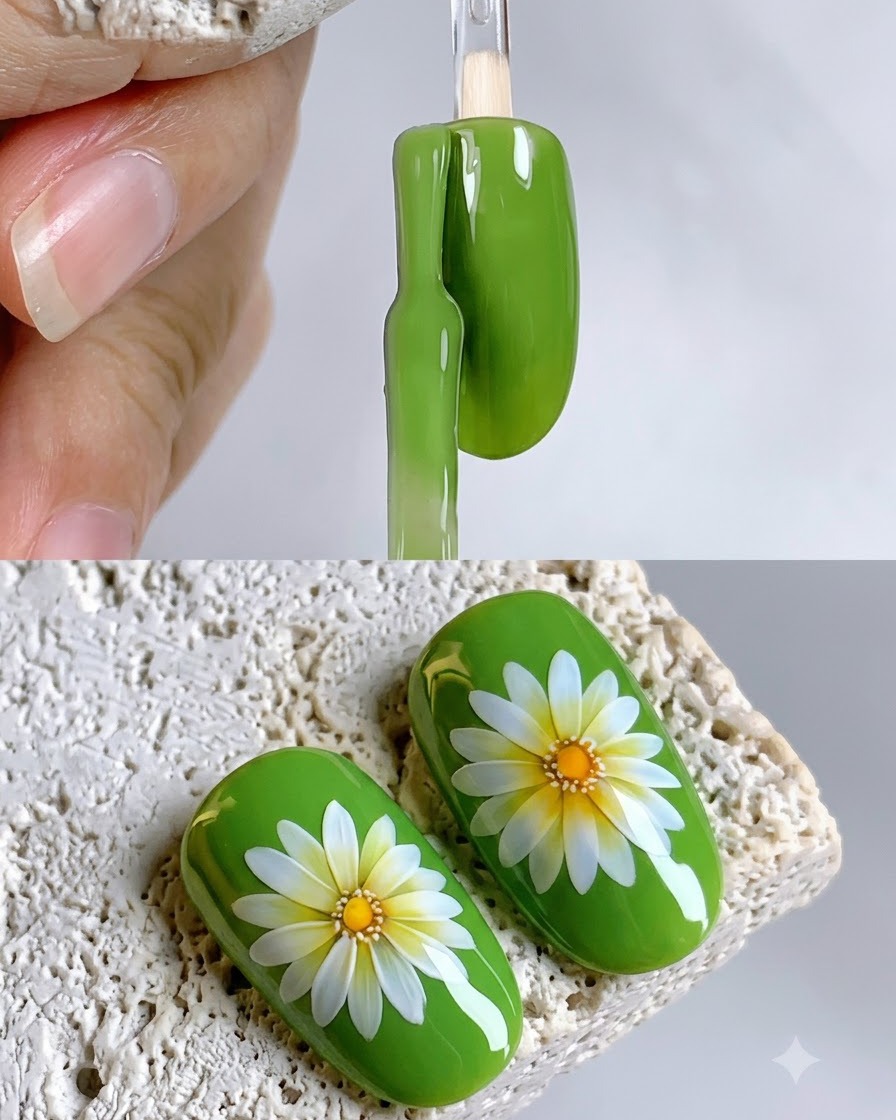
Apply an even coat of green gel polish onto the nail surface using a brush, ensuring smooth coverage from the cuticle to the free edge. Cure under a UV or LED lamp according to the product guidelines to set the base color before proceeding with nail art.
Tip: Apply in thin layers to prevent wrinkling or uneven curing under the lamp. - 2Draw dividing lines
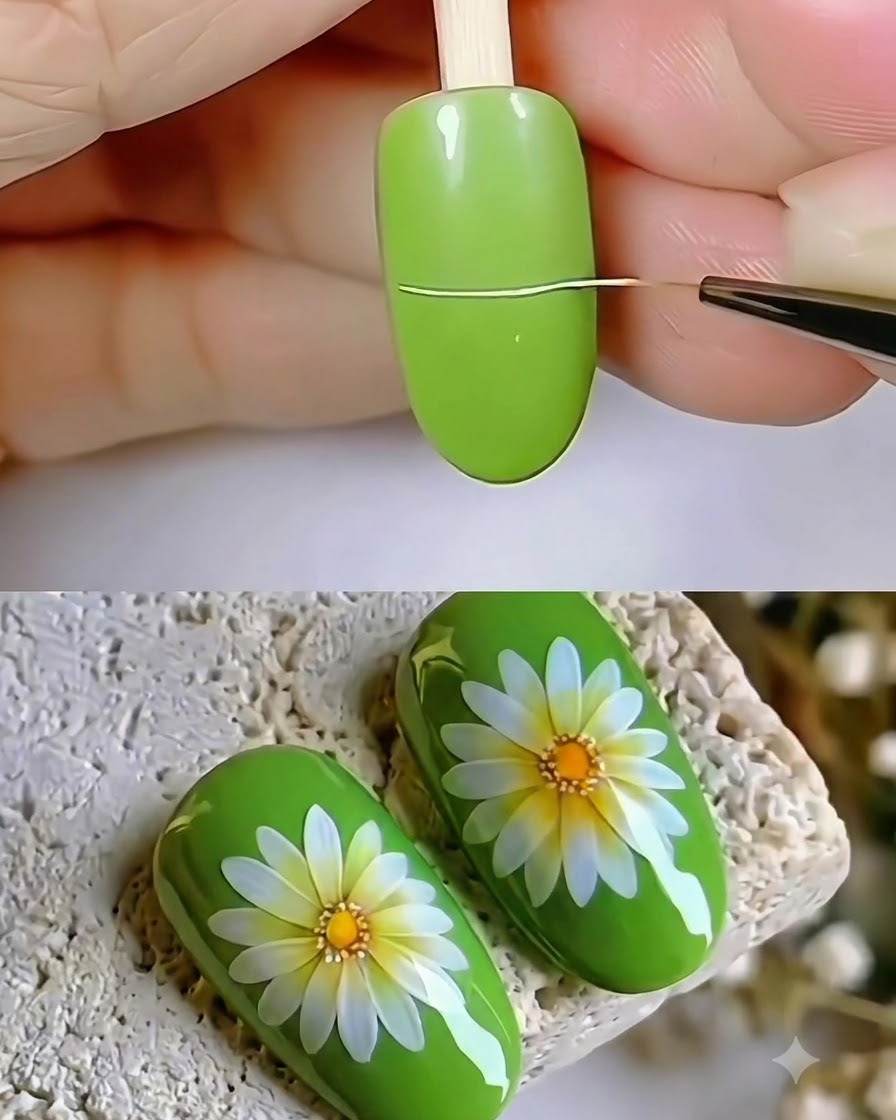
Using a fine liner brush dipped in white or light gel, draw thin, precise dividing lines across the green nail base to map out the positioning for the flower design. This acts as a structural guide for placing petals accurately.
Tip: Keep a light hand to ensure the lines remain thin and clean. - 3Paint first set of white petals
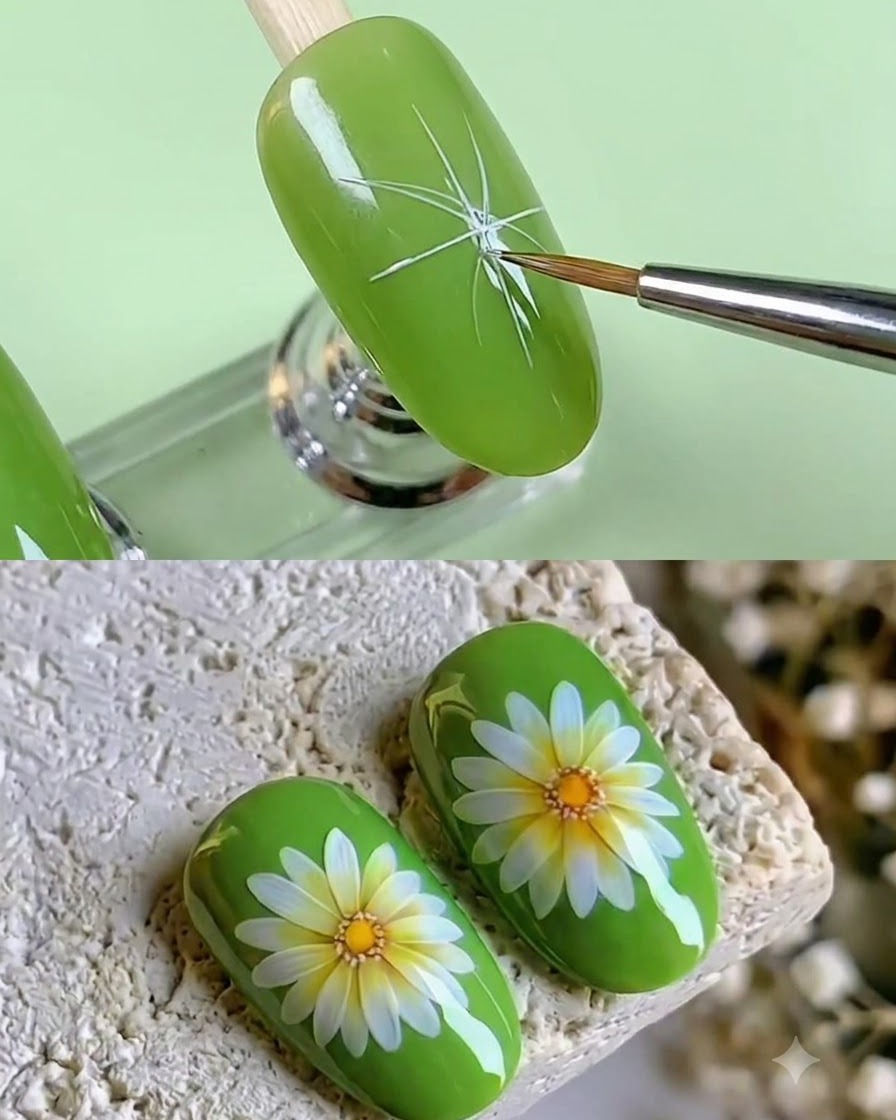
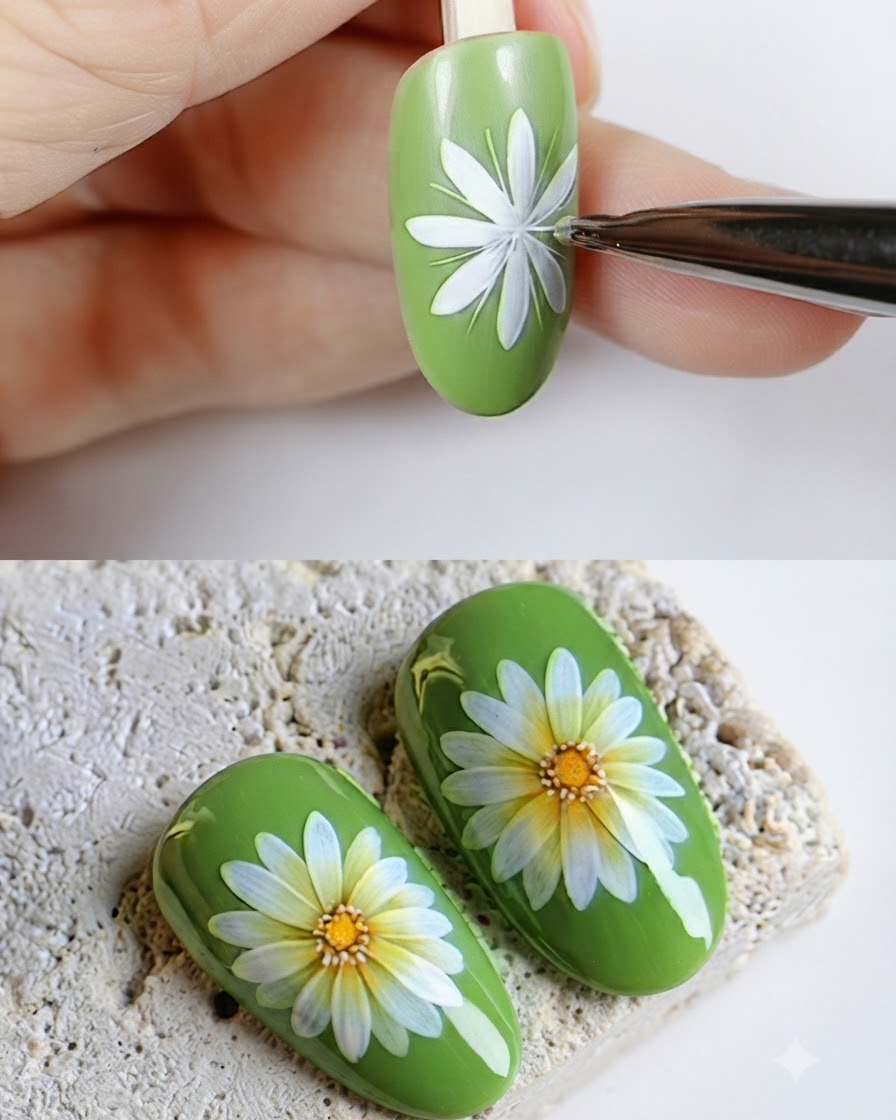
Paint the first set of elongated white petal strokes radiating outward from a central meeting point on the green nail base. Pull the brush outward gently to create tapered, natural-looking daisy petals.
Tip: Press down slightly at the base of the petal and lift as you pull outward to create a fine tip. - 4Add overlapping white petals
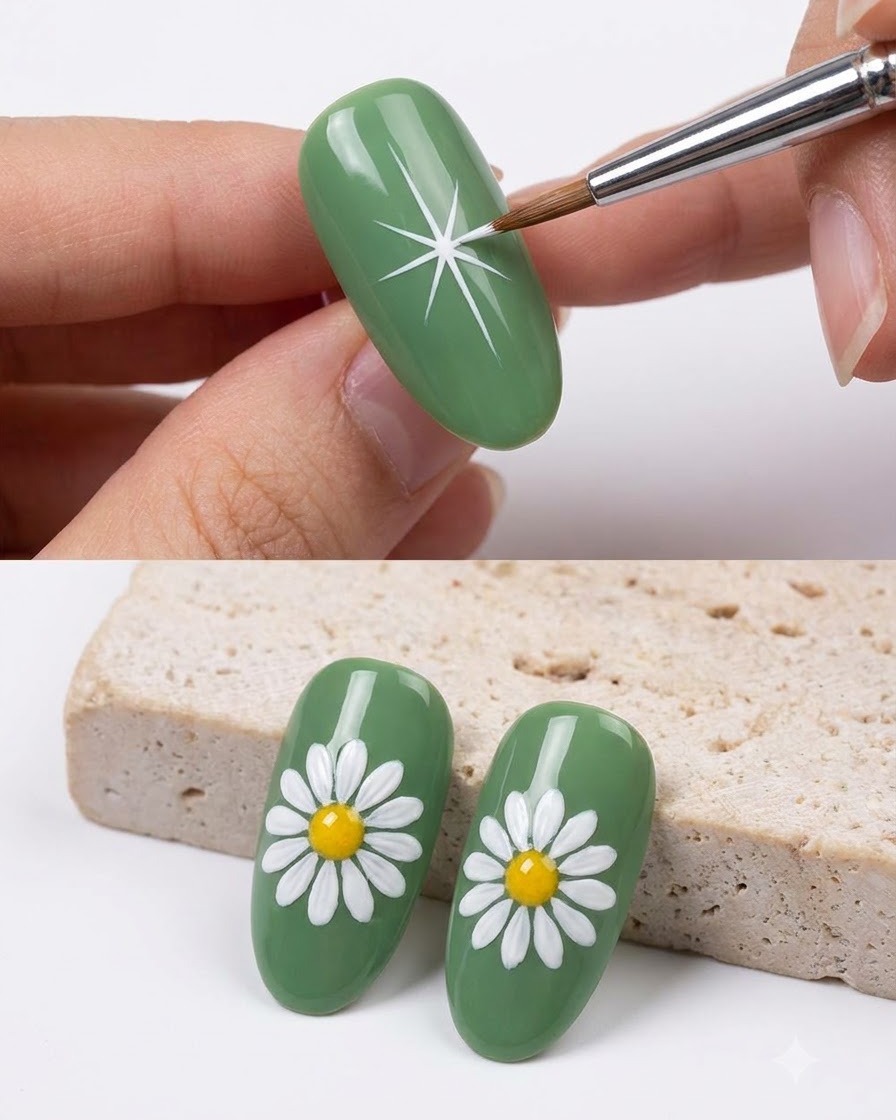
Add a second layer of overlapping white petals interspersed between the first set to create depth, dimension, and fullness for the daisy flower design. Cure briefly if needed to lock in the layers.
Tip: Vary the length slightly for the second layer to give the flower a more organic, realistic look. - 5Prepare color gel for flower center
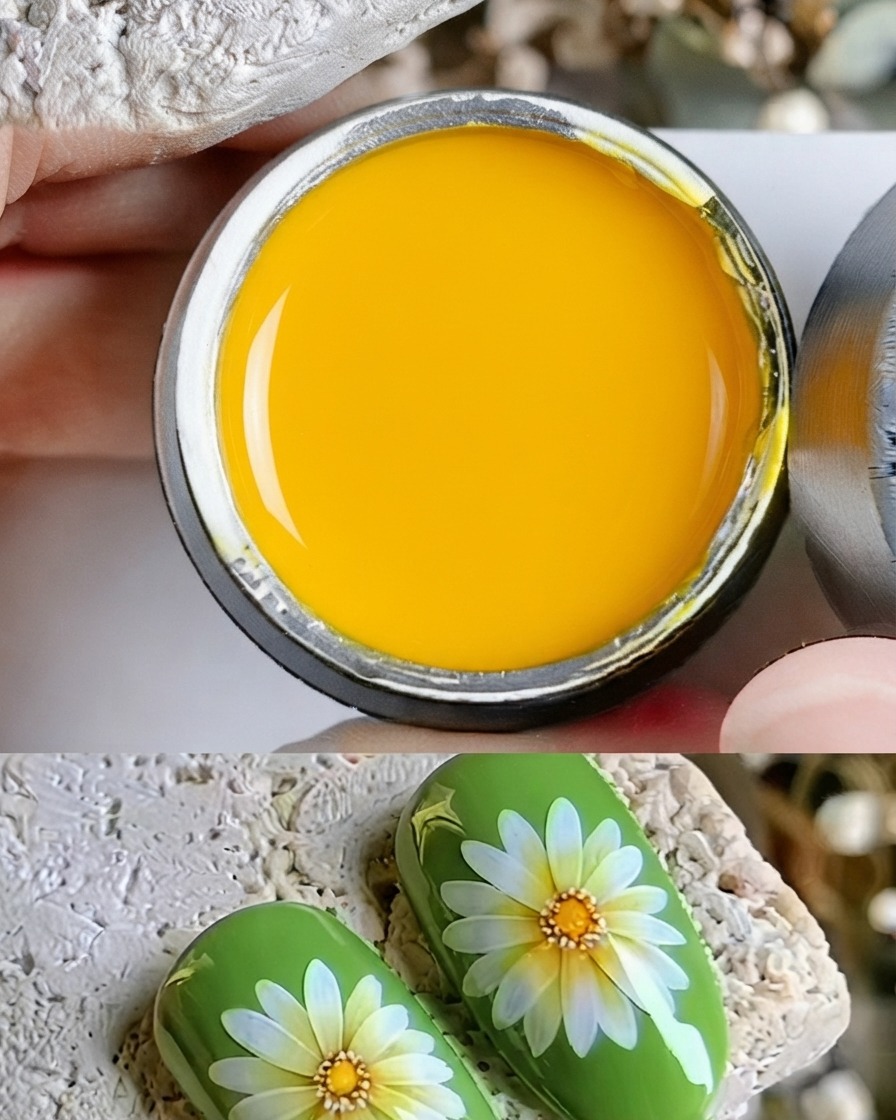
Open DYDS color gel pot number 3 to access the bright yellow shade required for adding the intricate texture and color details to the center of the daisy flower.
Tip: Keep the gel pot covered when not in use to prevent dust or light exposure from curing the product. - 6Apply Yellow Gel to Daisy Center
Using a fine liner brush, carefully apply vibrant yellow gel polish to the center of the daisy flower design on the green nail. Keep the application controlled within the textured center area to define the flowers core clearly against the white petals.
Tip: A very fine detail brush ensures precision and prevents the yellow gel from bleeding into the surrounding white petals. - 7Apply clear top coat
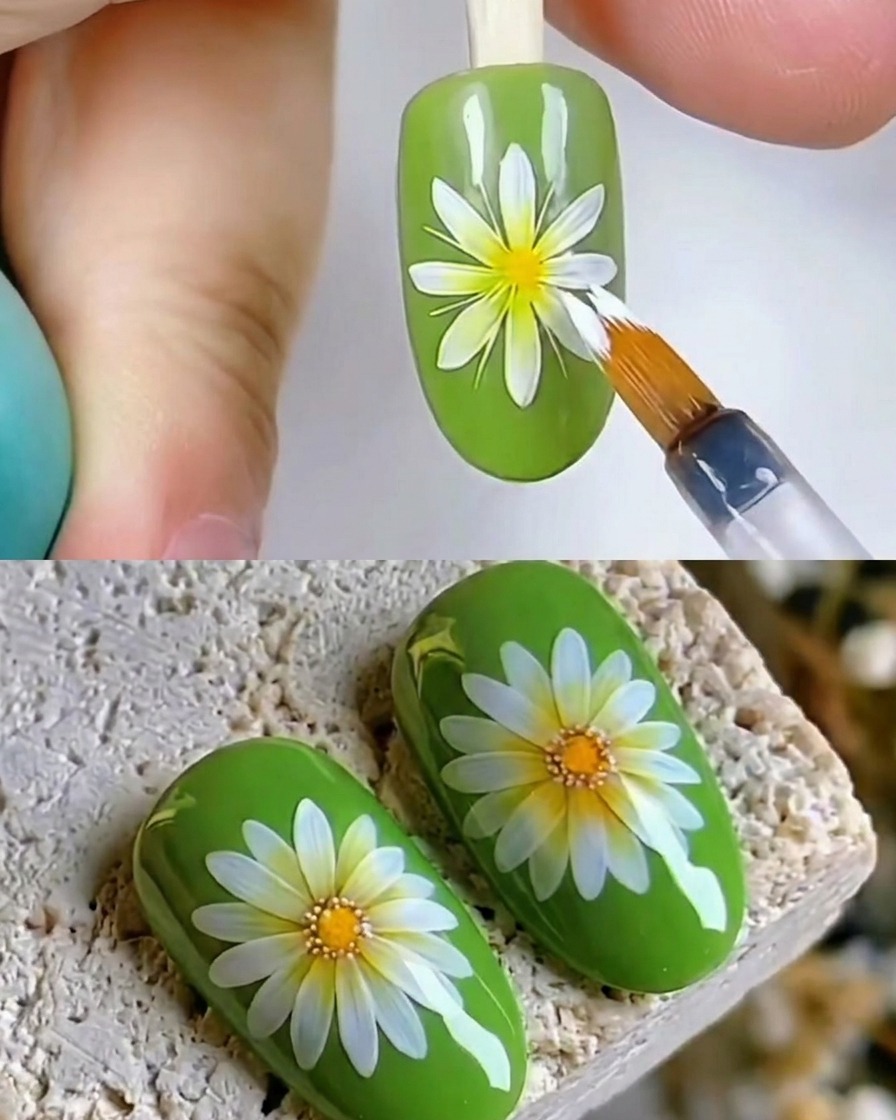
Apply a generous, even layer of clear top coat over the fully painted daisy design using a fine detail brush to seal and protect the artwork. Ensure the entire surface and the free edge are completely covered to prevent chipping and maintain high gloss. Cure under the UV or LED lamp as specified by your gel brand.
Tip: Cap the free edge carefully with the top coat to lock in the nail art design and extend the longevity of your manicure. - 8Refine Details on Daisy Petals and Center
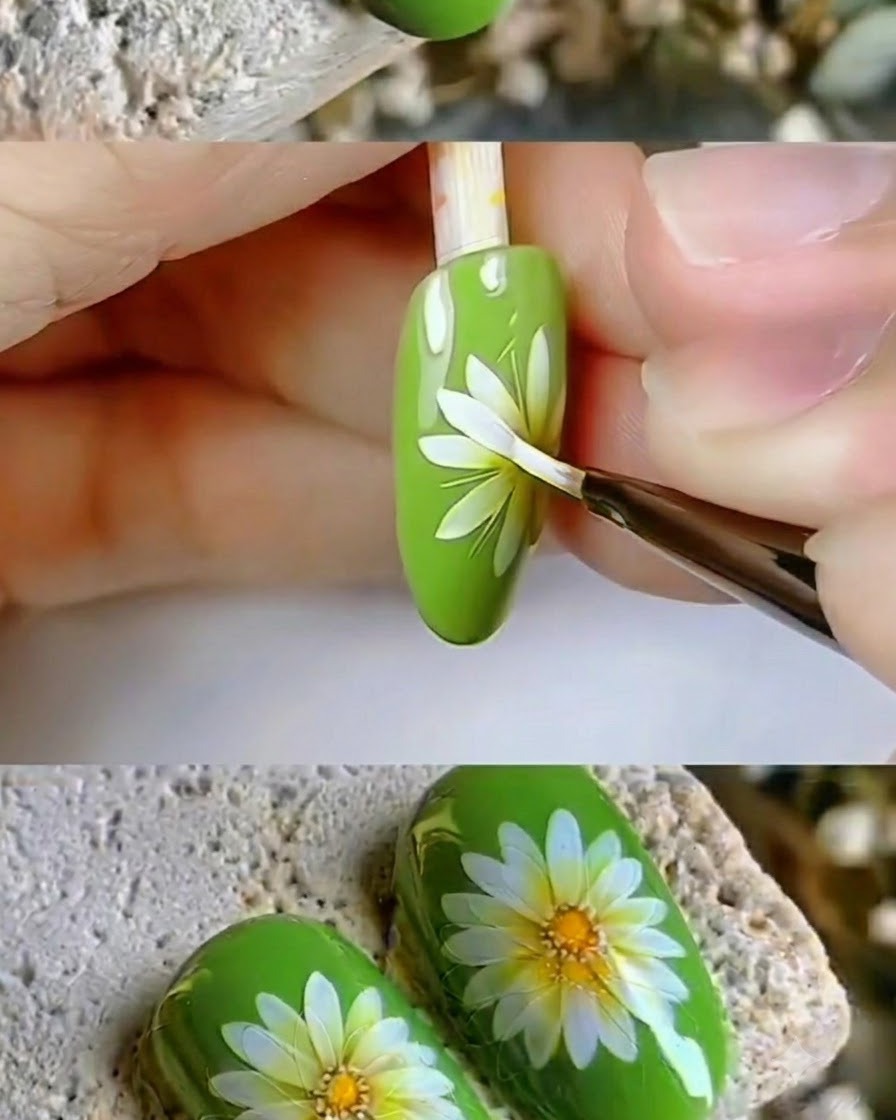
Take a fine liner brush and carefully refine the edges and highlights of the white daisy petals and the detailed yellow center. This step sharpens the definition of the design, enhancing contrast and depth for a clean, professional finish.
Tip: Use minimal product on the tip of your liner brush to execute sharp, clean strokes without creating thick ridges. - 9Apply Final Top Coat Seal
Apply a final sealing layer of clear top coat over the completed double-layer daisy nail art. Cap the free edge securely to prevent chipping and cure under a UV or LED lamp to lock in the entire design with a durable, protective gloss.
Tip: Always cap the free edge with top coat to significantly extend the wear time and durability of your dimensional nail art.