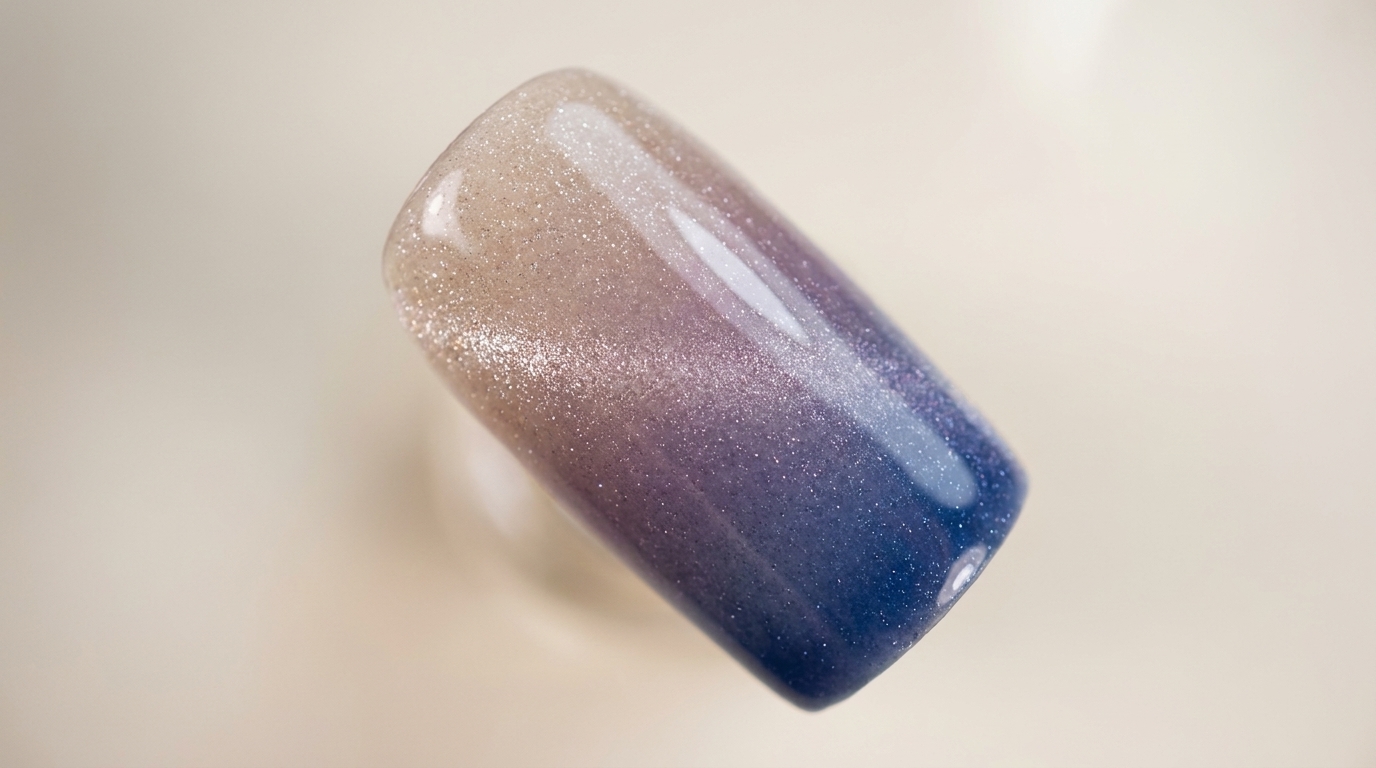
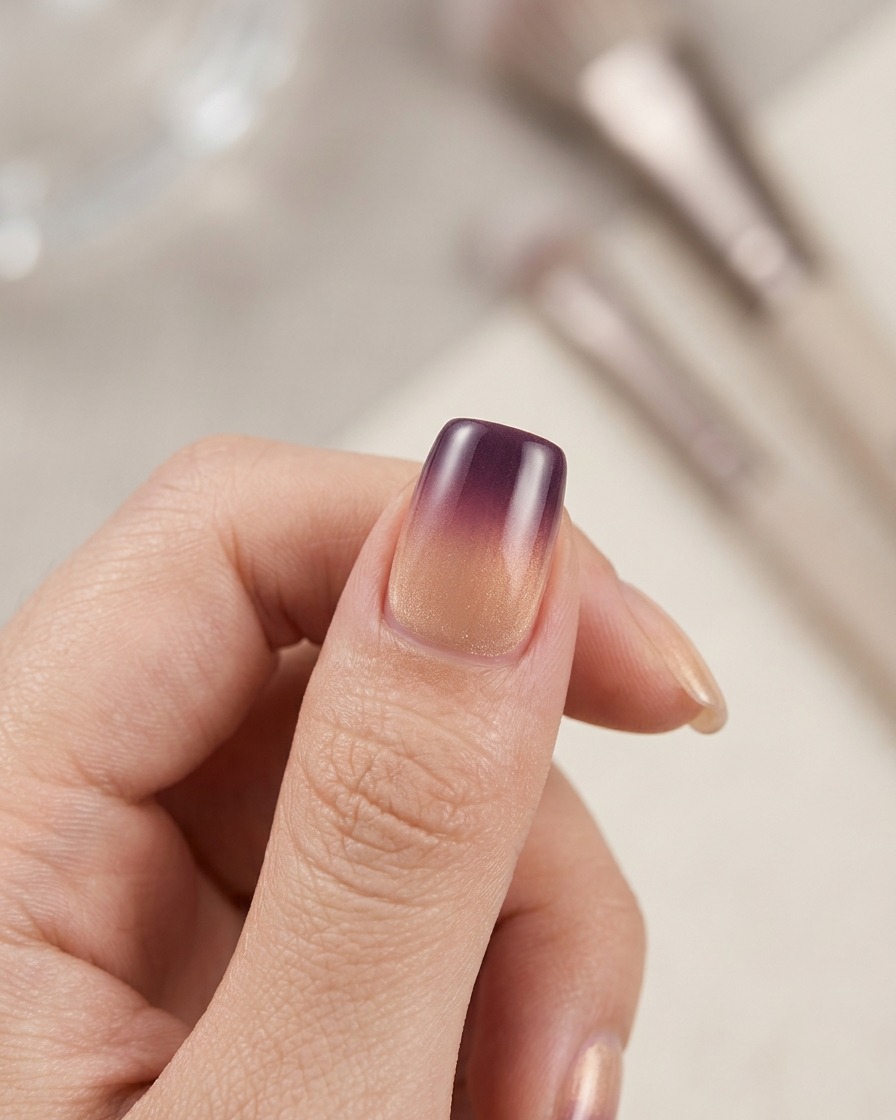
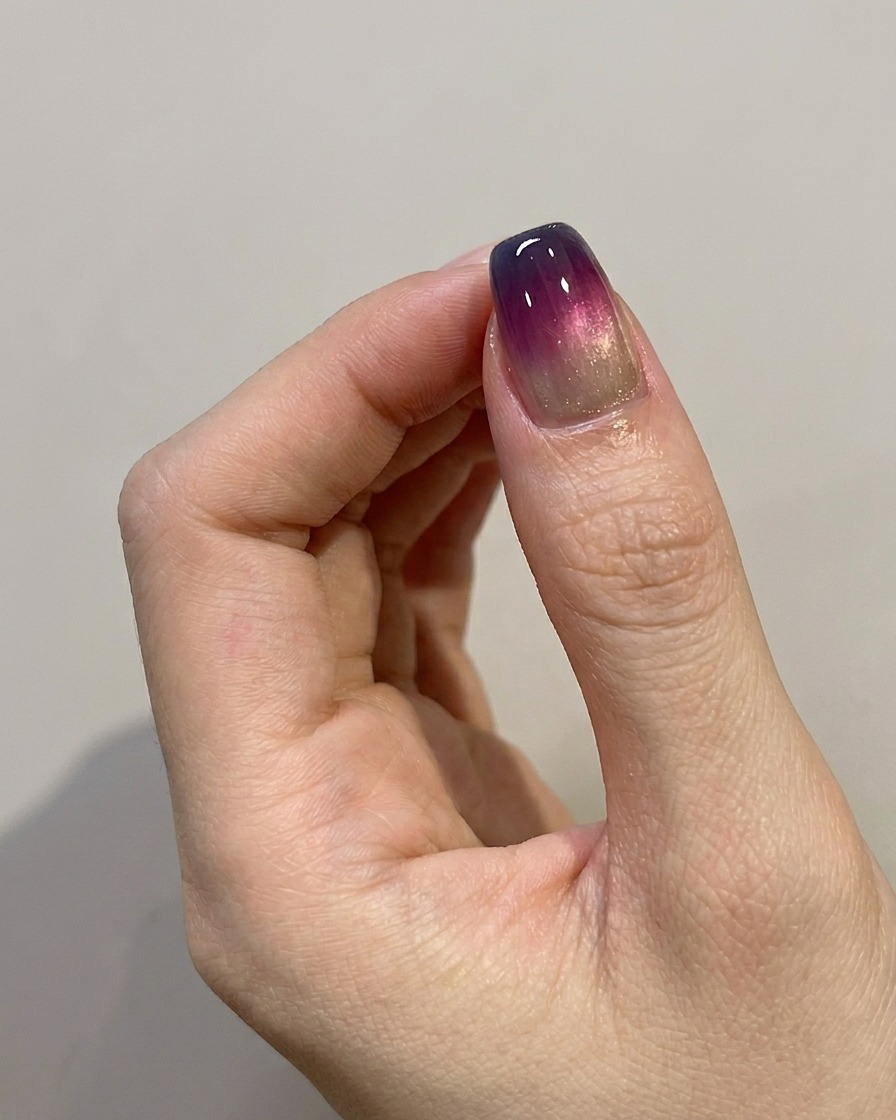
Blue and Purple Gradient Cat-Eye Gel Nails — Step-by-Step Tutorial
Discover how to create a mesmerizing gradient effect with cat-eye gel and sponge-blended colors. This easy technique delivers a high-gloss, multi-dimensional look.
Elevate your nail art with this stunning combination of cat-eye depth and smooth color transitions. By layering sheer gel shades over a shimmering cat-eye base, you can achieve a sophisticated, glass-like finish that catches the light from every angle. This versatile method works beautifully with any color palette, making it a must-try for your next manicure.
Steps
- 1Apply cat-eye base coat
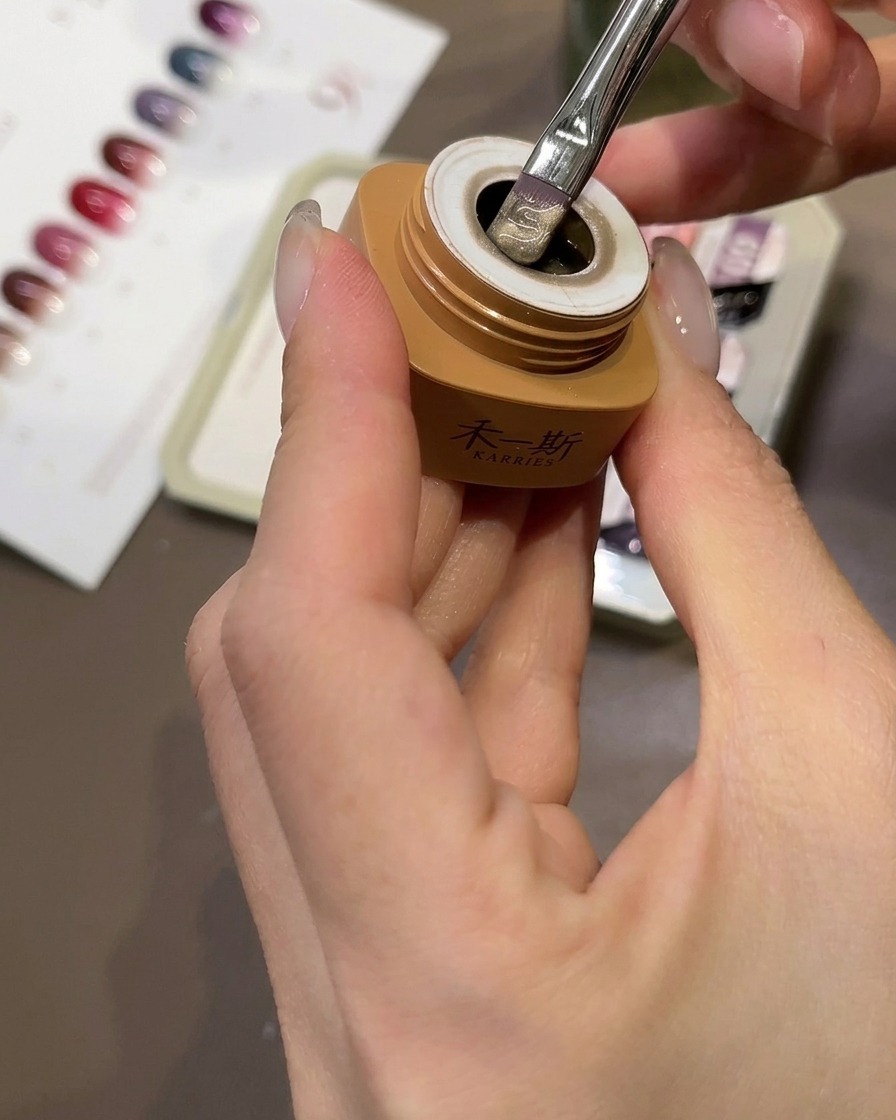
Apply an even layer of beige peach cat-eye gel to the entire surface of the nail tip. Ensure smooth coverage to create the perfect foundation for the magnetic effect, then cure briefly under your LED lamp.
Tip: Keep the layer thin to ensure even curing and better magnetic response. - 2Create cat-eye effect
Before curing, hold a cylindrical magnet near the sides and free edge of the nail. The magnetic particles will shift to form a sharp, glass-bead cat-eye highlight. Once you are satisfied with the design, cure it immediately under the lamp to set the effect.
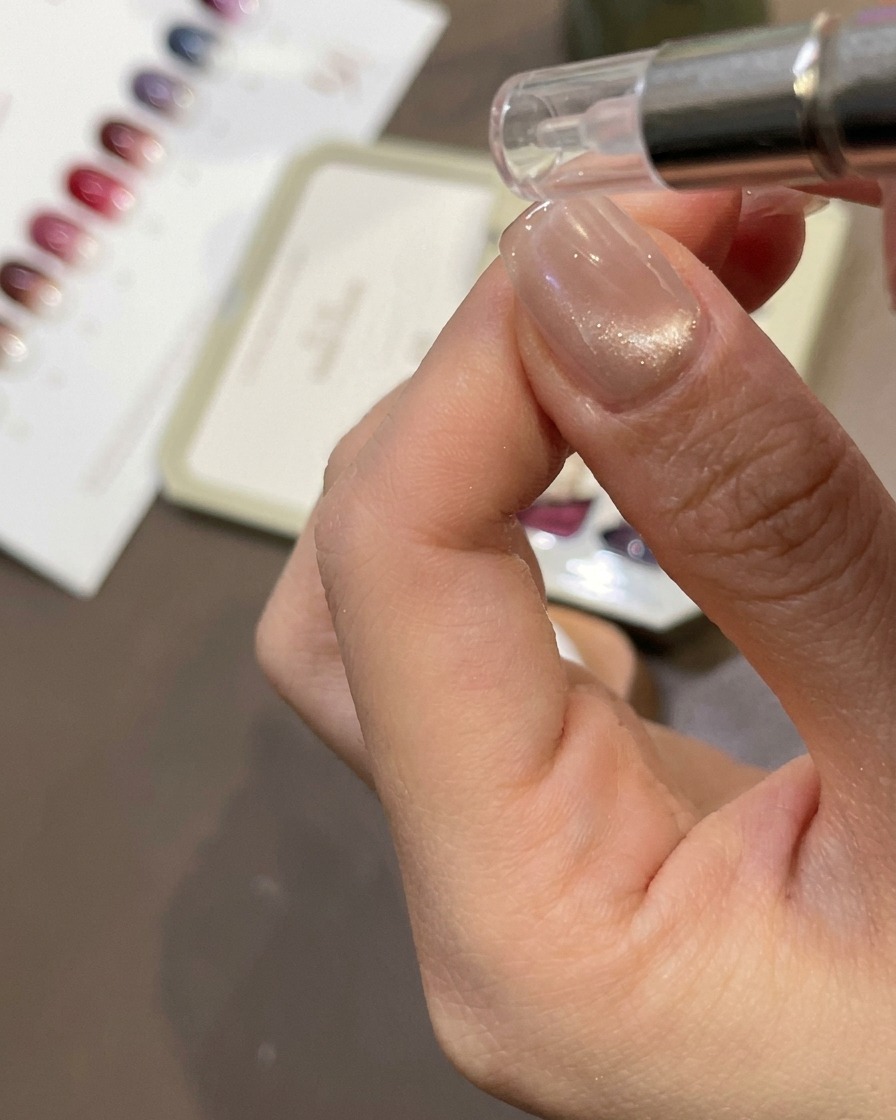
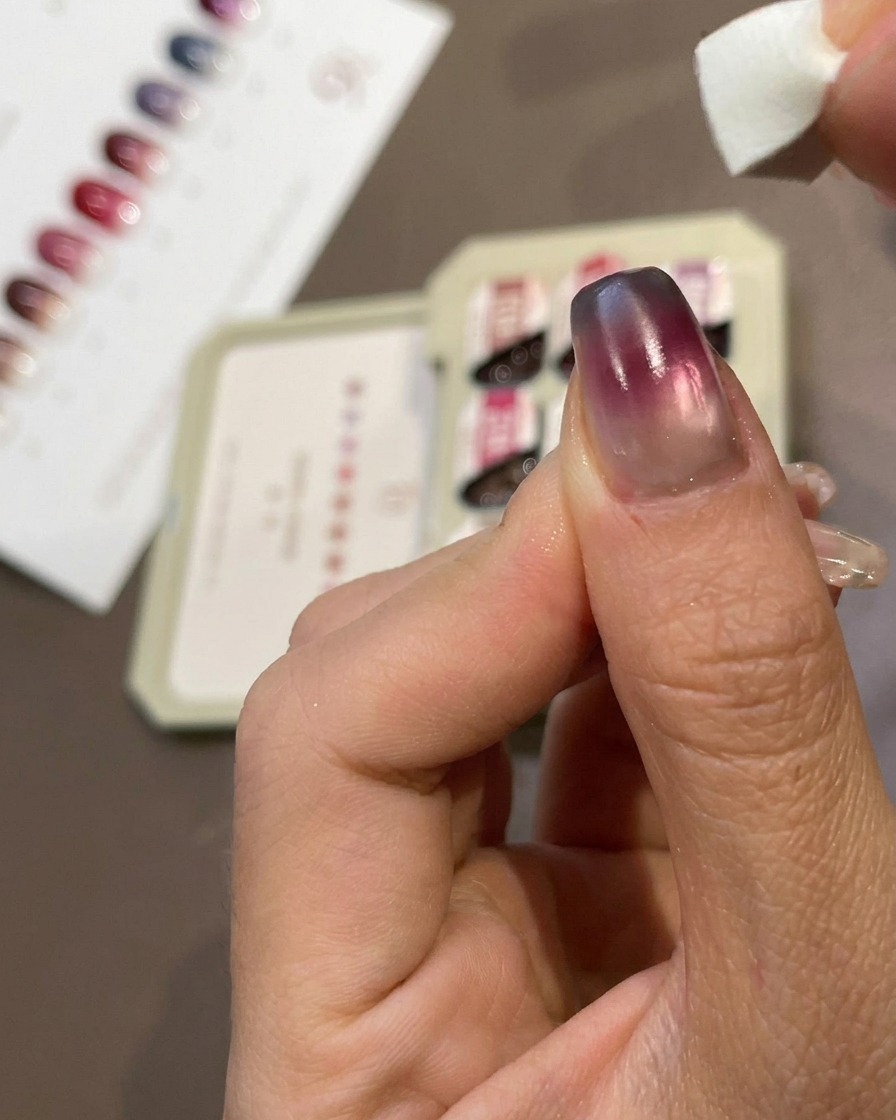
Tip: Hold the magnet steady for a few seconds to get a crisp, defined line. - 3Clean cured surface
After fully curing the cat-eye base, use a folded, lint-free wipe to firmly remove the sticky inhibition layer from the surface. This ensures a clean base for the subsequent gradient application.
Tip: A firm, clean swipe helps remove all tackiness without leaving lint behind. - 4Load color onto sponge

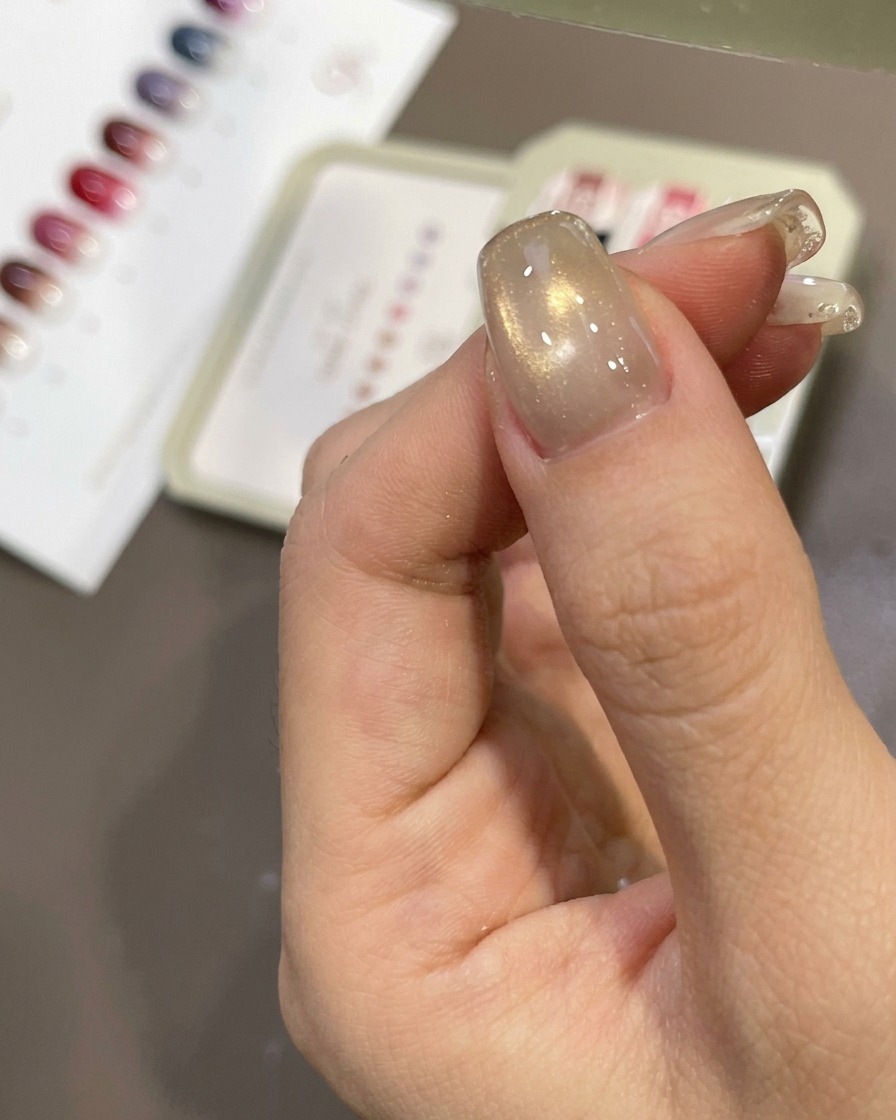
Take a small wedge-shaped makeup sponge and press it firmly into the solid light purple gel (shade 09) in your palette. This picks up the pigment, which you will then use to tap onto the nail for a soft gradient.
Tip: Use a fresh sponge or a clean edge to ensure the color applies smoothly without smudging. - 5Apply purple gradient
Gently dab the sponge onto the cuticle area and middle of the nail. Use light, repeated tapping motions to diffuse the purple color, creating a soft gradient that fades as it moves toward the tip.
Tip: Light pressure is key to building the gradient gradually rather than creating a block of color. - 6Apply deep blue tip
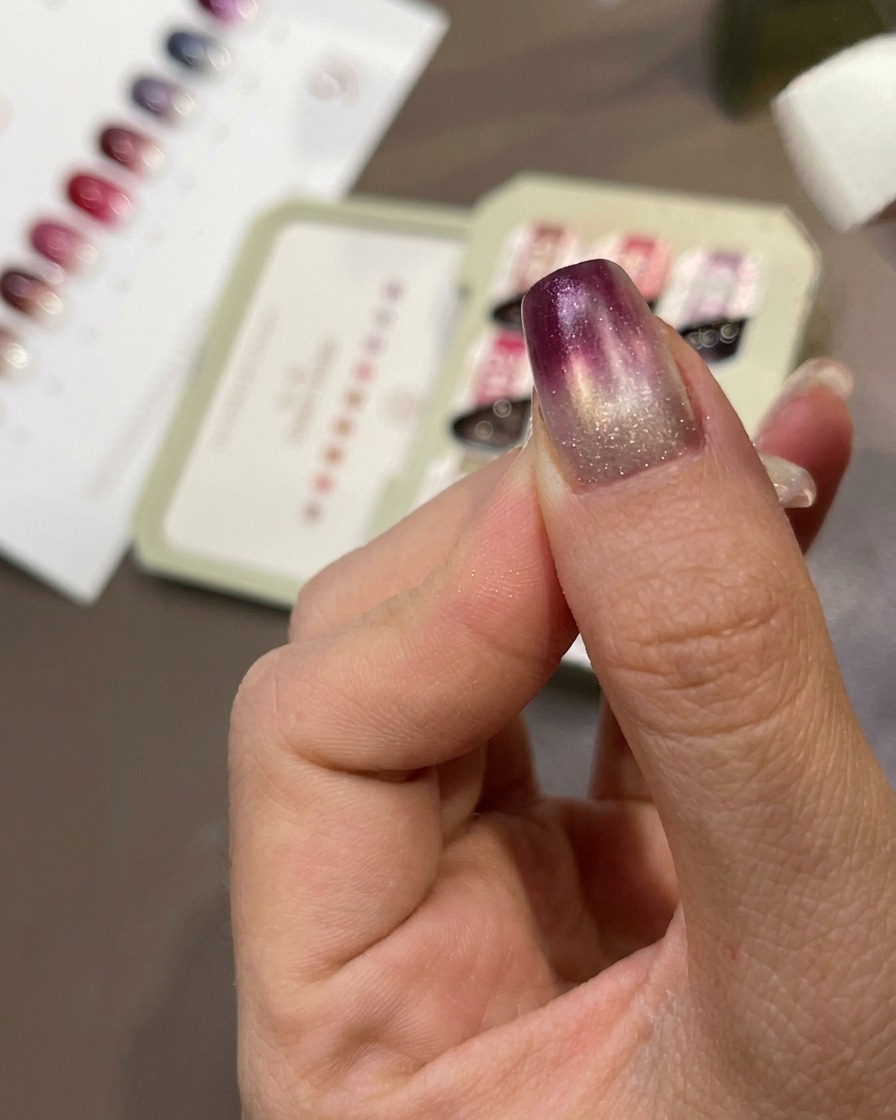
Use a clean edge of your sponge to pick up a small amount of the deep blue gel (shade 08) from the palette. Pat this color onto the very tip of the nail to layer it over the purple, creating a deeper, shorter gradient at the edge.
Tip: Focus the blue only on the fingertip to keep the transition subtle. - 7Apply blue gradient tip
Using a fresh sponge, apply a small amount of the blue gel shade (number 08) onto the tip of the nail. Gently pat the sponge to create a soft, sheer gradient that blends into the previously applied purple layer. Ensure the color is concentrated at the free edge for a seamless transition.
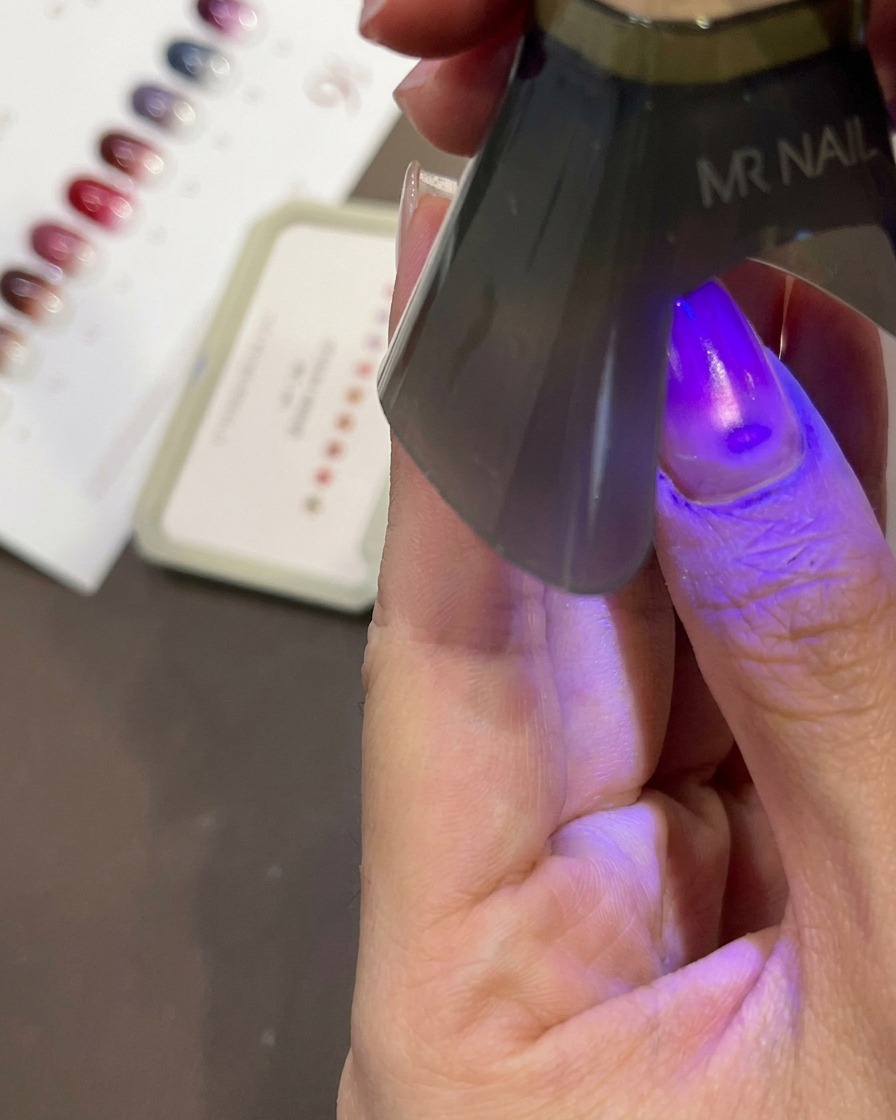
Tip: Use a light, dabbing motion to prevent creating harsh lines or texture; build the color gradually to keep the gradient sheer. - 8Cure the gradient
Position your handheld mini UV/LED lamp directly over the nail to cure the newly applied blue gradient layer. Hold the lamp steady for the manufacturers recommended time to ensure the gel is fully set and the color transition remains smooth.
Tip: Keep your finger flat and the lamp centered to ensure even light distribution across the entire surface of the nail. - 9Apply top coat
Finish your manicure by applying a smooth, even layer of clear, glossy top coat over the entire nail surface. Carefully cap the free edge to protect the design from chipping. Once applied, cure thoroughly under your UV/LED lamp to lock in the shine.
Tip: A high-quality top coat will not only provide a brilliant finish but also protect the delicate gradient from wear.