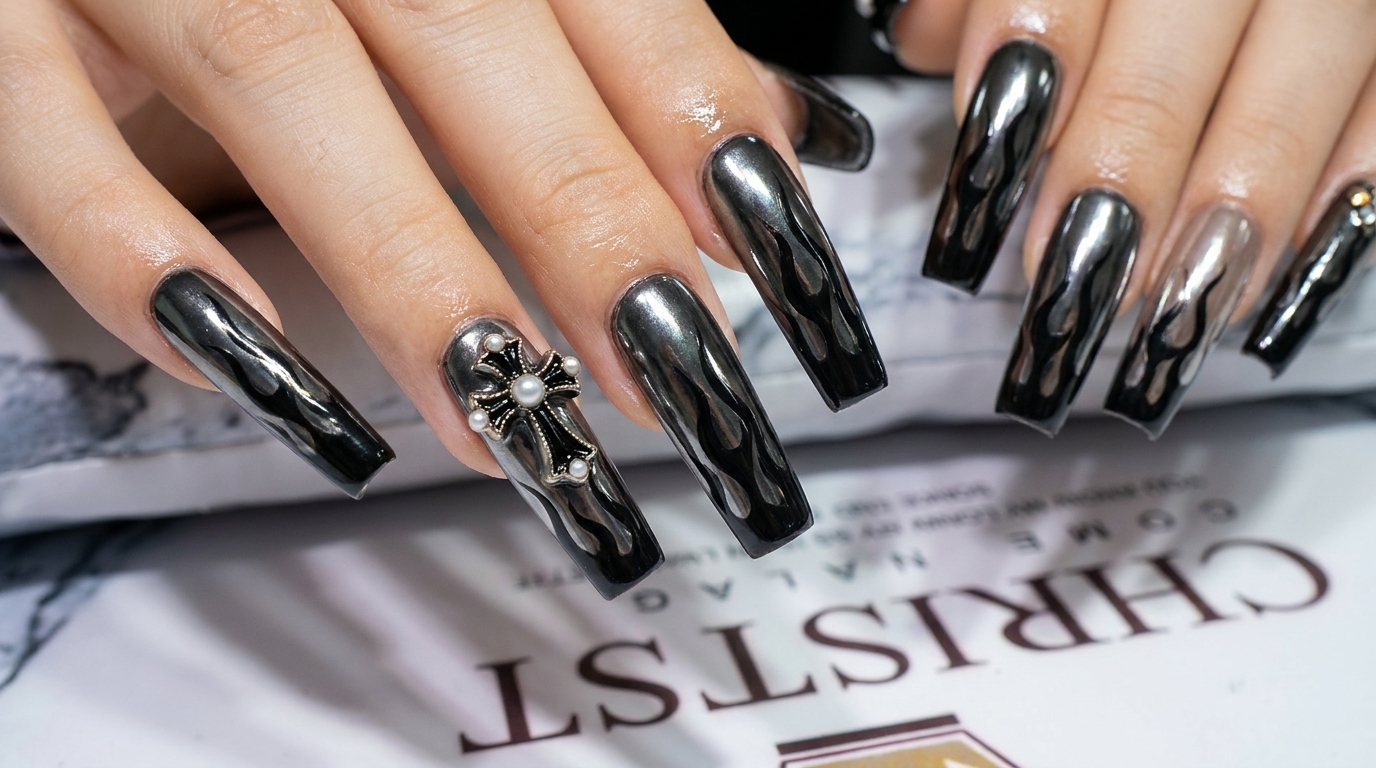
Black Flame Nail Art
Silver Glitter Gradient — Step-by-Step Tutorial
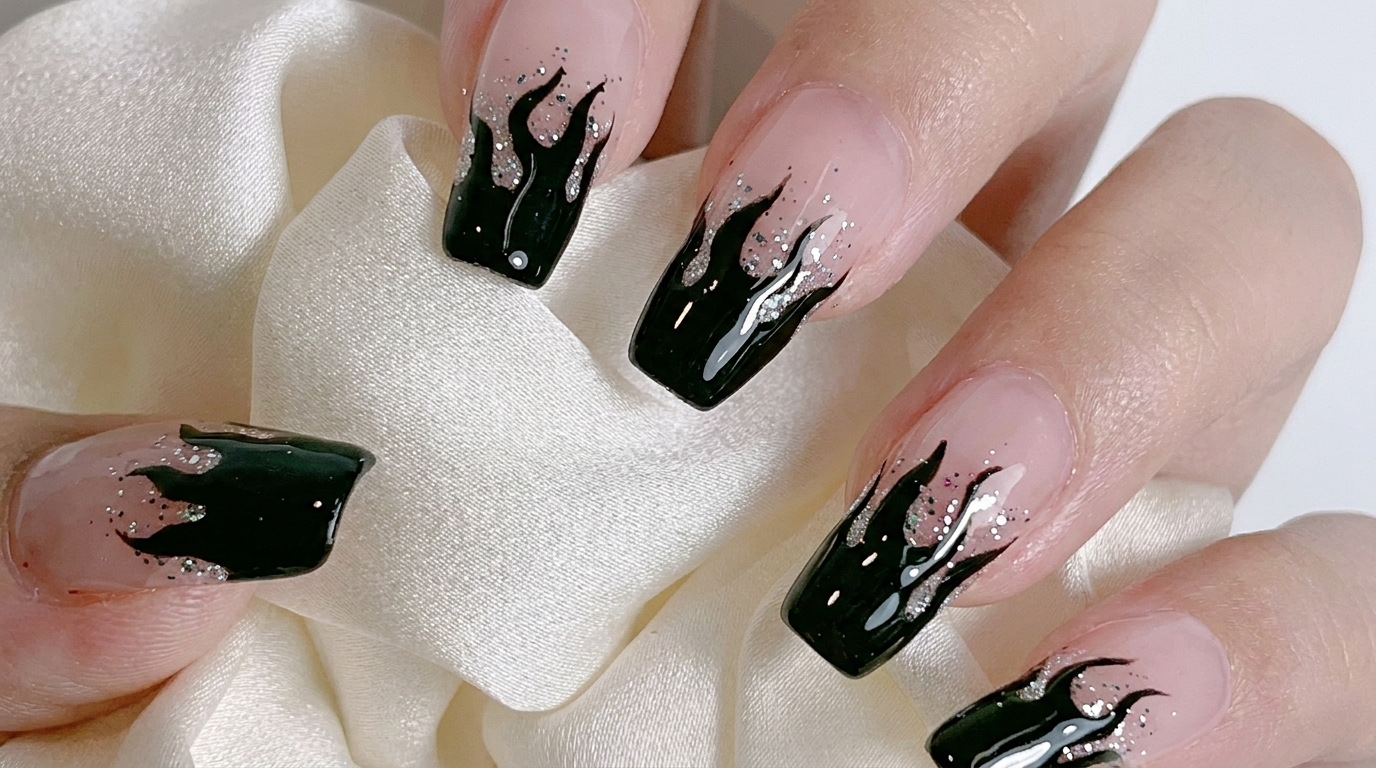
Create celebrity-style flame nail art with this easy tutorial. Combine a shimmering silver glitter gradient with sharp black flames for a bold look.
Flame nail art has taken the beauty world by storm, blending edgy aesthetics with precise detailing. This tutorial walks you through achieving a professional finish by layering bold black pigment over a sparkling silver gradient. It is the perfect design for those looking to make a statement with their manicure.
Steps
- 1Cure the glitter base
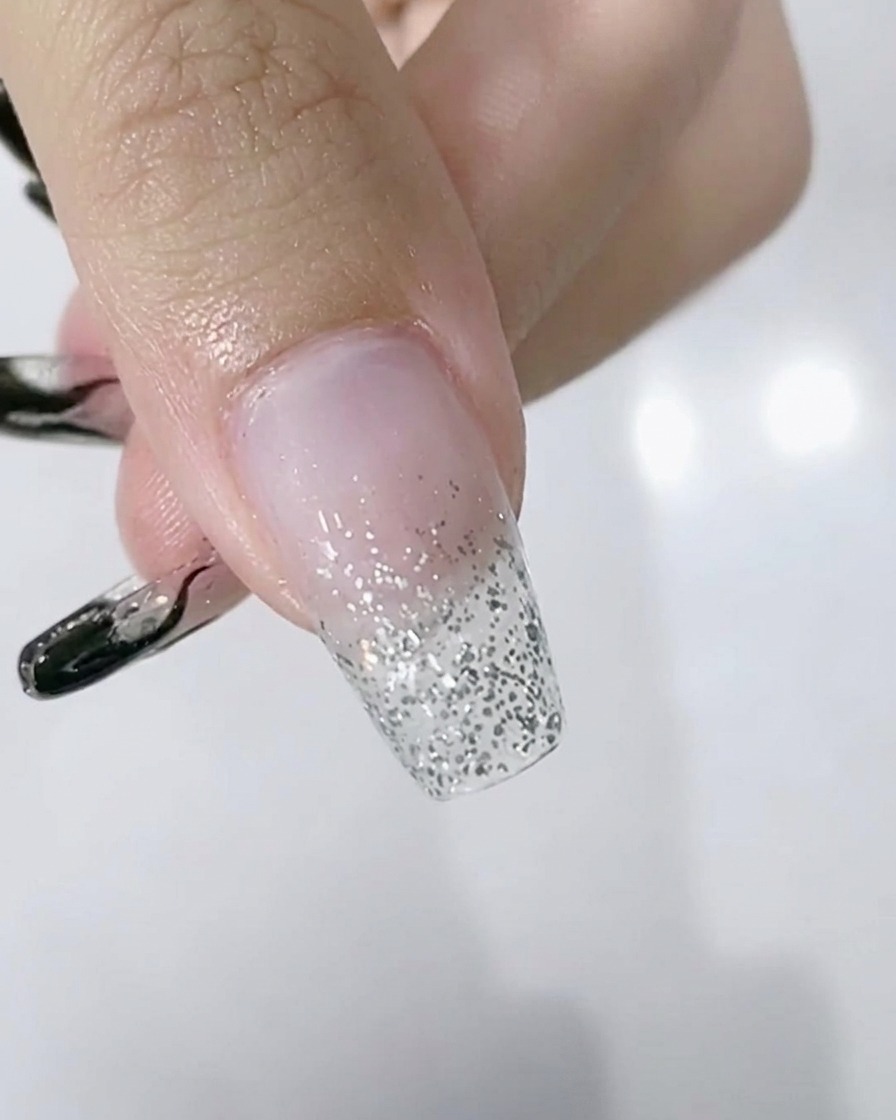
Once your silver glitter gradient is applied to your liking, place your hand into the LED lamp to cure the base layer. Ensure your fingers are positioned correctly to allow the light to reach all parts of the nail evenly, curing for the recommended time to provide a solid foundation for the flame art.
Tip: Make sure the gradient is fully cured before starting the flame art to prevent smudging. - 2Apply black gel to the tip
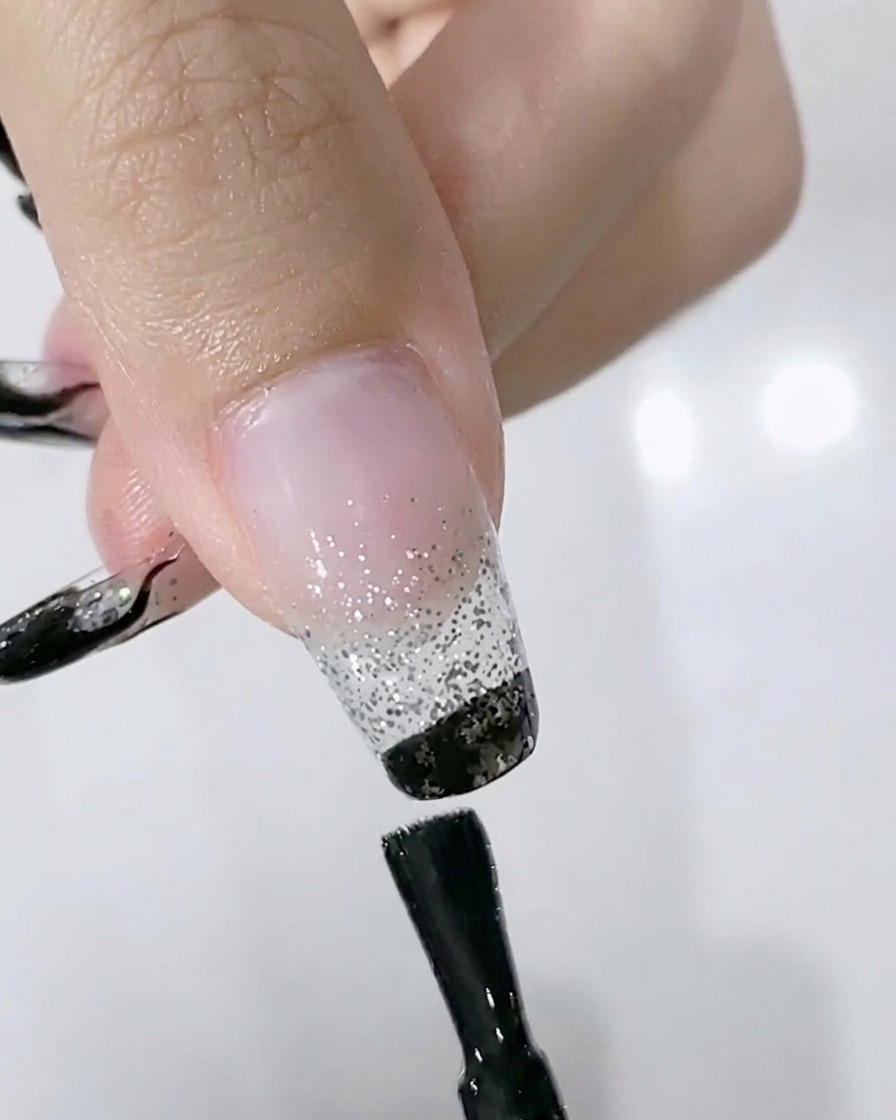
Using the application brush, apply solid black gel polish to the bottom one-quarter of the nail tip. This creates the dark base section for the flame design that sits over your sparkling silver glitter gradient.
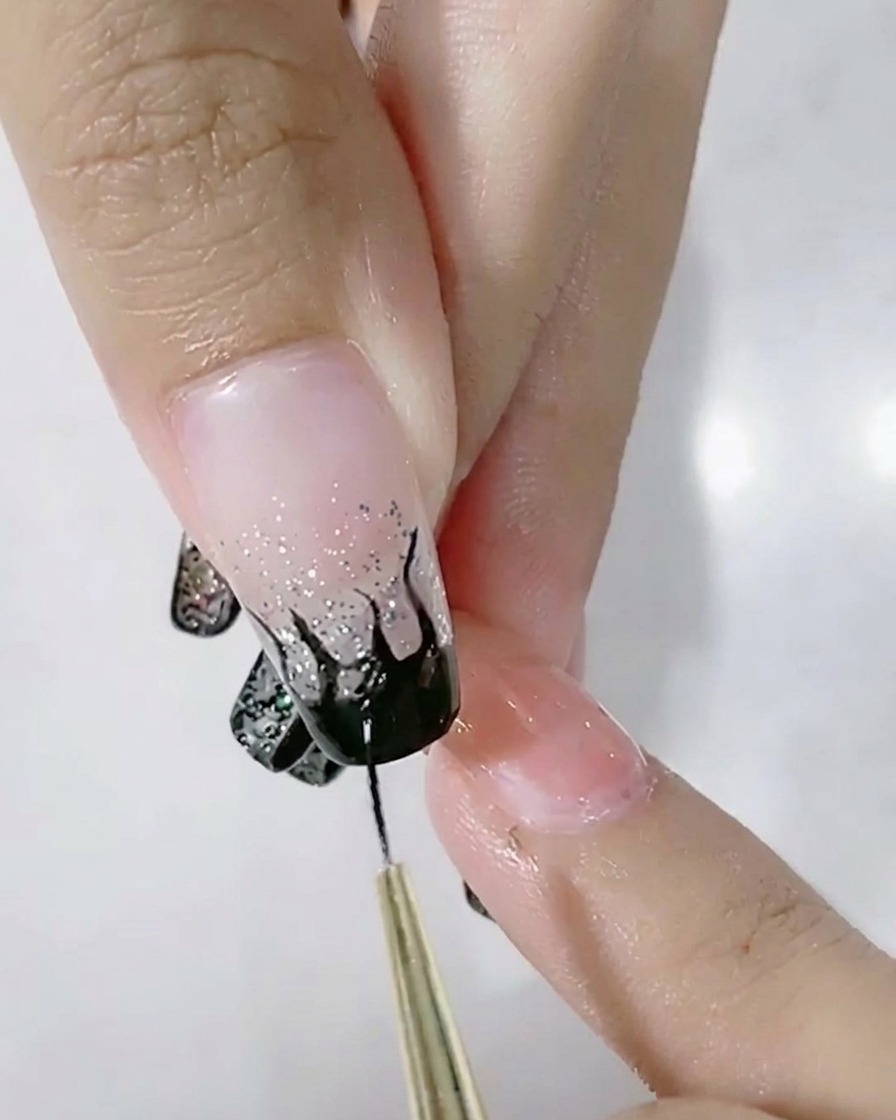
Tip: Apply the gel carefully across the free edge, ensuring it is opaque and evenly distributed. - 3Draw a U-shape outline
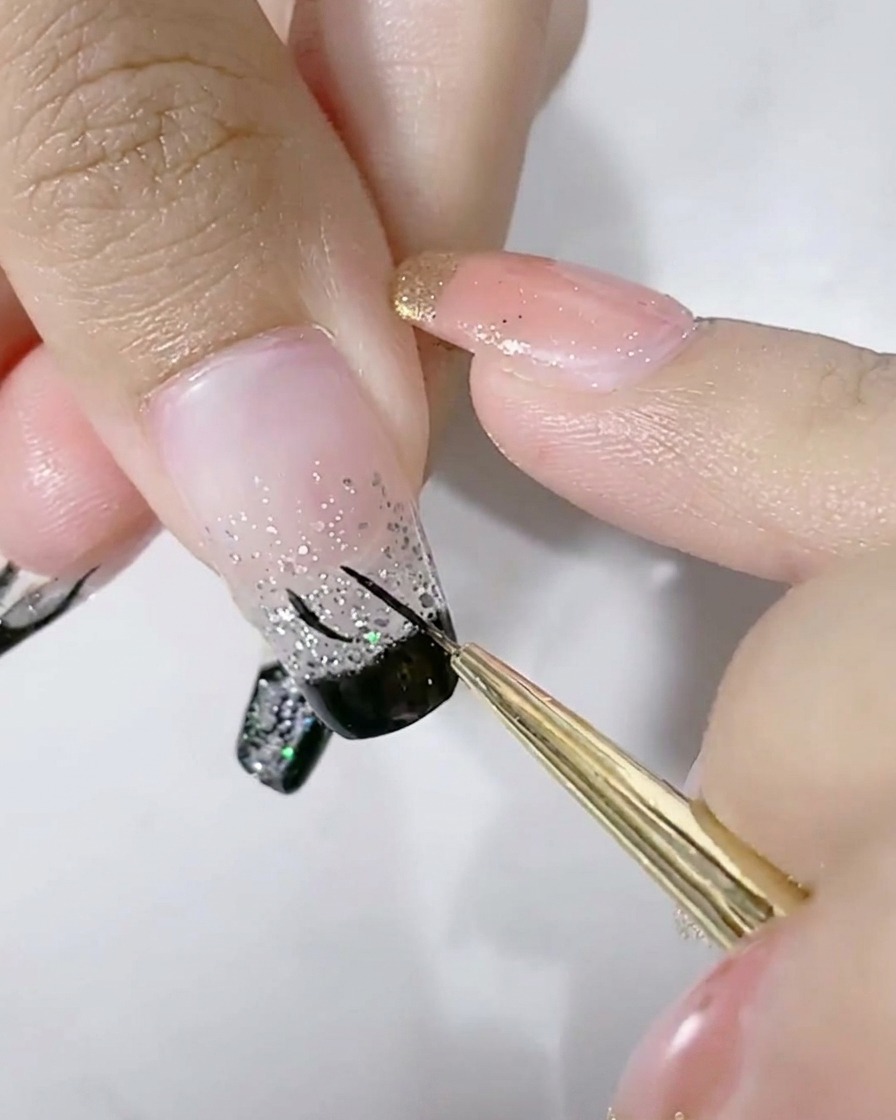
Take a fine liner nail art brush dipped in black gel and draw a U-shape outline at the top edge of the black section you just applied. This curved shape serves as the central anchor for your flame structure.
Tip: Rest your pinky finger on your other hand for stability while drawing thin, precise lines. - 4Add S-shaped side curves
With the same fine liner brush, carefully draw two symmetrical S-shaped curves on either side of the central U-shape. These flowing lines will form the outer tendrils of the black flame design.
Tip: Keep the curves fluid and organic, mirroring the natural upward movement of real flames. - 5Finalize the flame outline
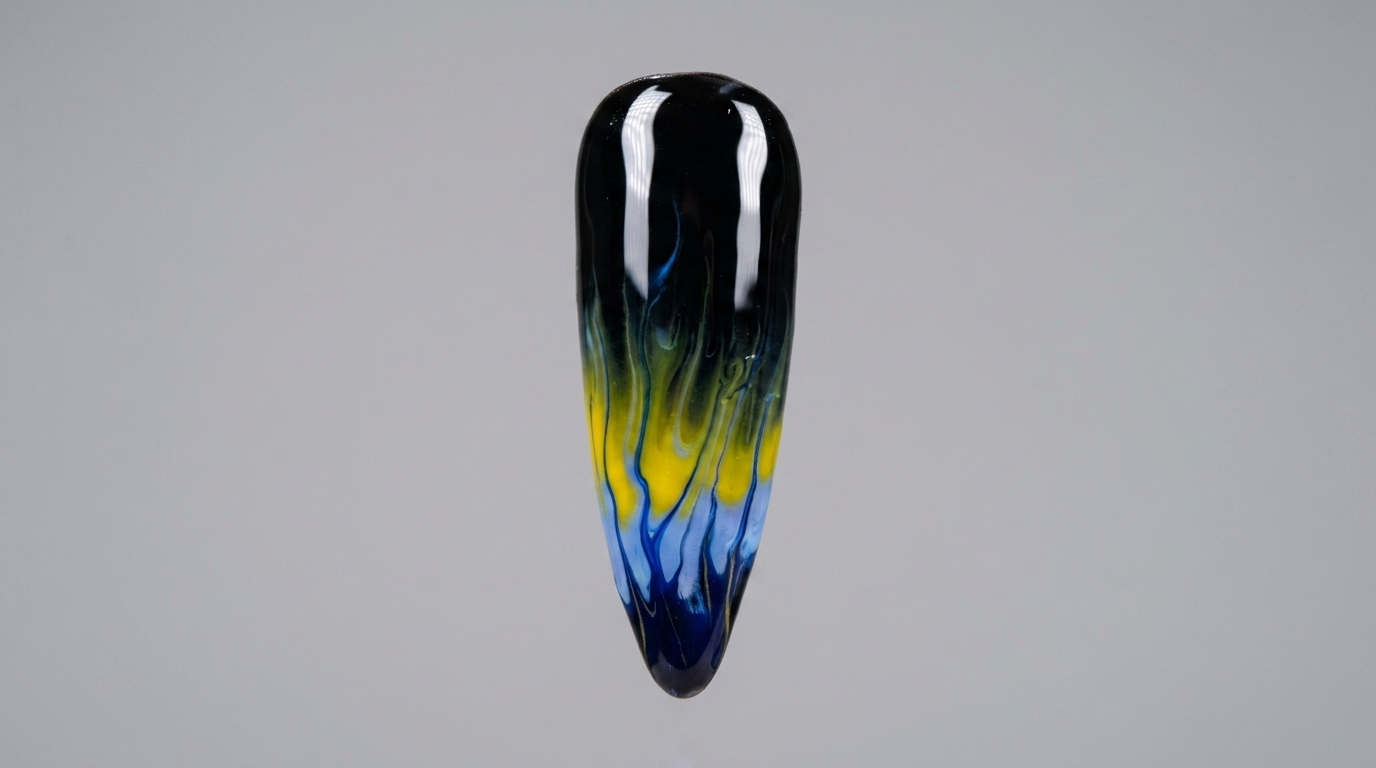
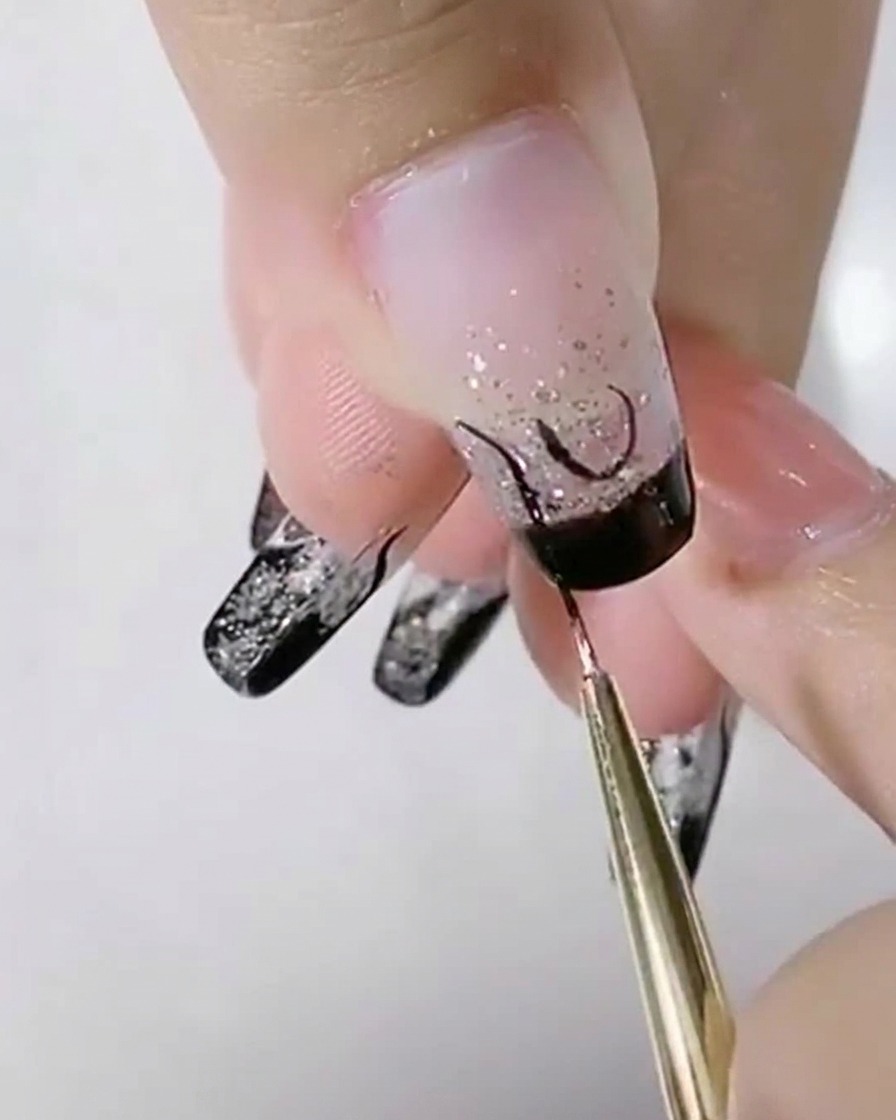
Connect the top points of the S-shaped curves back to the main black tip to complete the structural outline of the flames. Ensure the tips of the flames taper smoothly into sharp, delicate points before you begin filling in the shape.
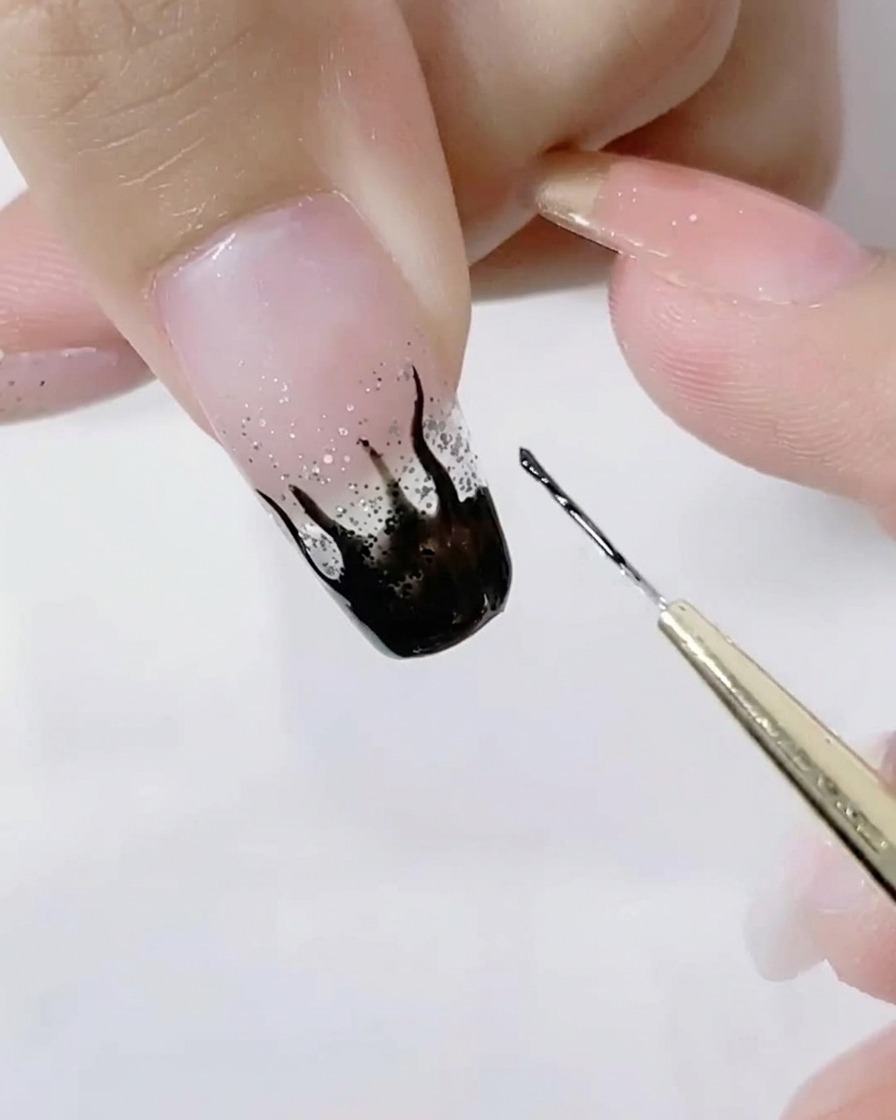
Tip: Take your time refining the points of the flames, as sharp tips are key to achieving a professional, celebrity-style look. - 6Fill in the flame outline
Using a thin liner brush, take your black gel polish and fill in the outline you created at the tip of the nail. Carefully pull the gel to ensure the shape is fully opaque and the edges of the flames are sharp and defined.
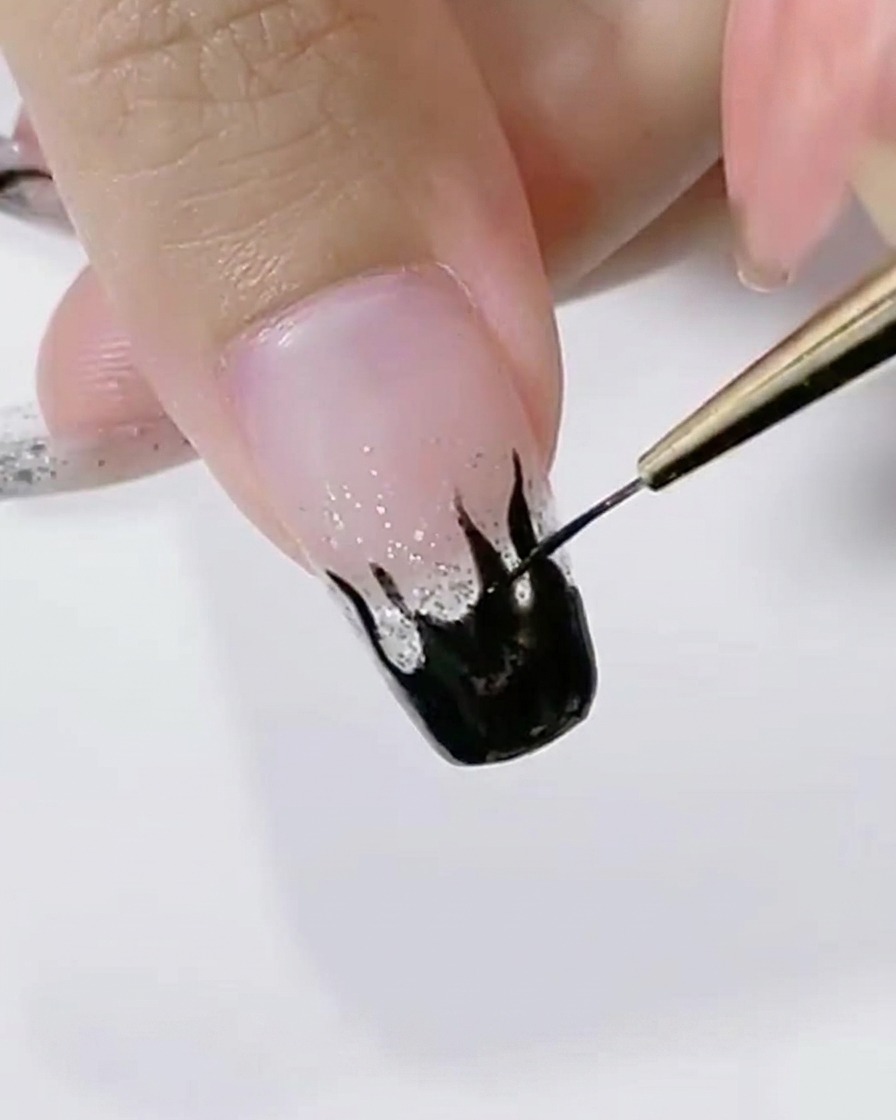
Tip: Use a small amount of product on your brush to maintain control and avoid flooding the edges. - 7Refine flame tips
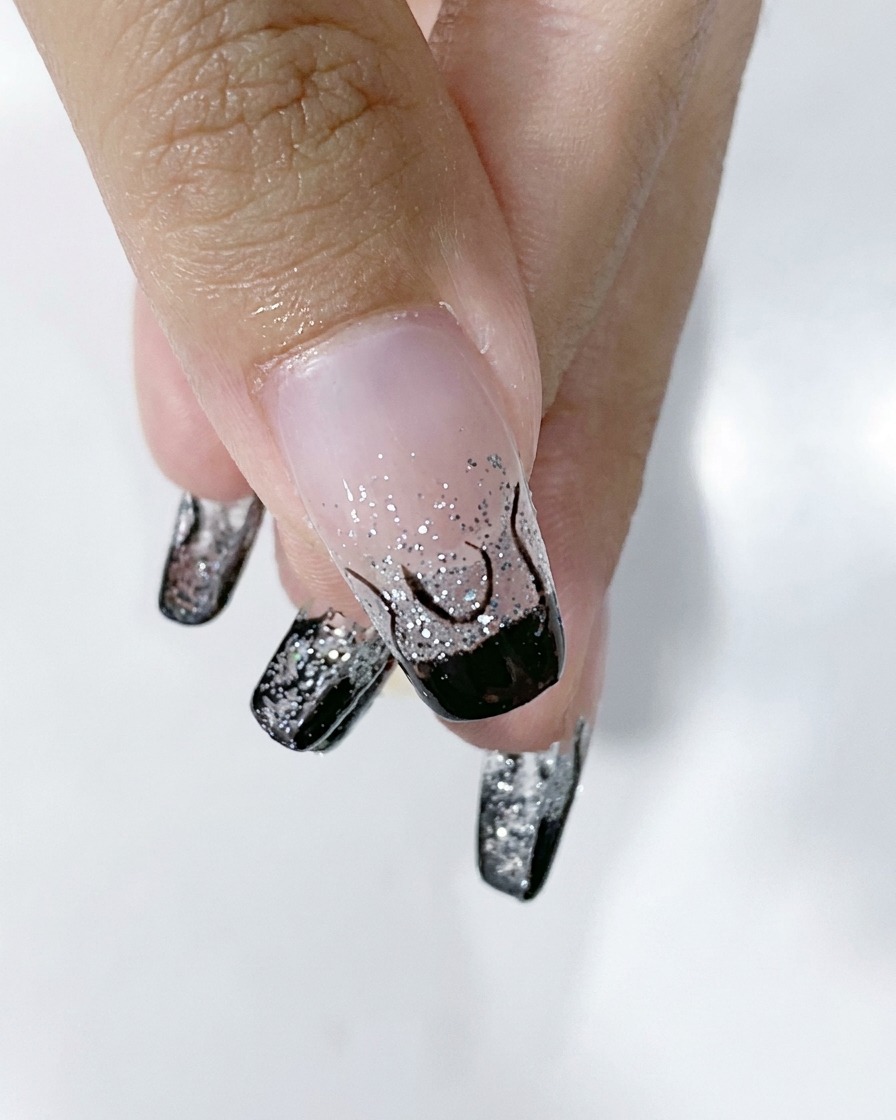
With a fine liner brush, extend and sharpen the tips of the flames. Gently refine the edges to ensure a smooth, clean transition between the black gel and the glitter background, giving the flames a dynamic and realistic look.
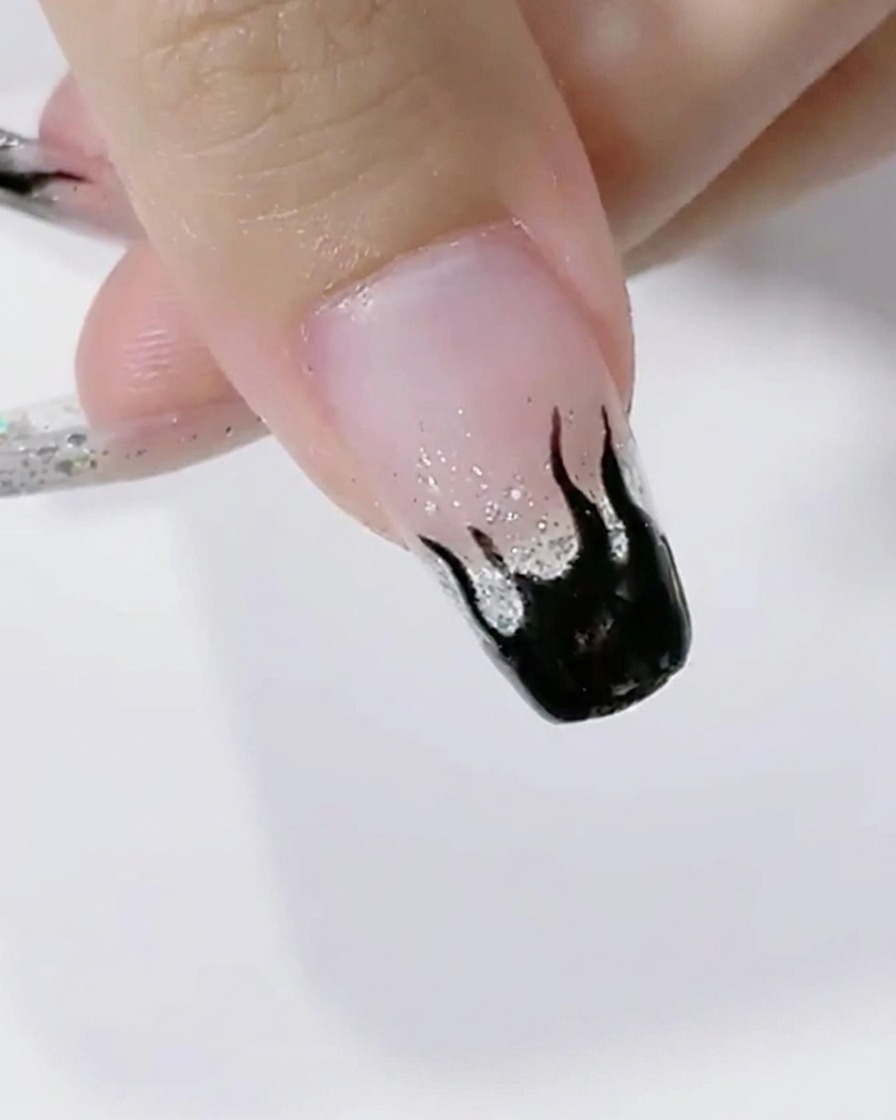
Tip: Work with a very light touch to create thin, crisp lines for the flame points. - 8Smooth flame edges
Go back over any areas where the lines may be uneven. Gently smooth out the edges of the flame art with your liner brush to create a seamless, polished look, ensuring the curves are fluid and symmetrical.
Tip: If a line goes astray, use a clean brush dipped in a tiny bit of base coat to gently erase and reshape. - 9Cure the flame art
Once the flame design is perfected, place your hand into the LED lamp to cure the black gel. Cure for a full minute to ensure the art is completely set and hardened, preparing the surface for the final top coat application.
Tip: Do not skip the full cure time, as black gel requires thorough curing to be fully opaque and durable. - 10Apply second coat
To achieve maximum opacity and depth, apply a second thin layer of black gel over your flame design. Carefully follow the previous lines, ensuring the color is rich and saturated before you proceed to the final top coat.
Tip: Keep this layer thin to prevent the edges from looking bulky or losing the sharp definition of the flames. - 11Apply top coat
Apply a final layer of glossy top coat over the entire nail to seal in your flame nail art. Ensure you cap the free edge to protect the design from chipping. Cure under your lamp for the full recommended time to ensure a durable, high-shine finish.
Tip: Cap the free edge carefully to extend the longevity of your manicure.