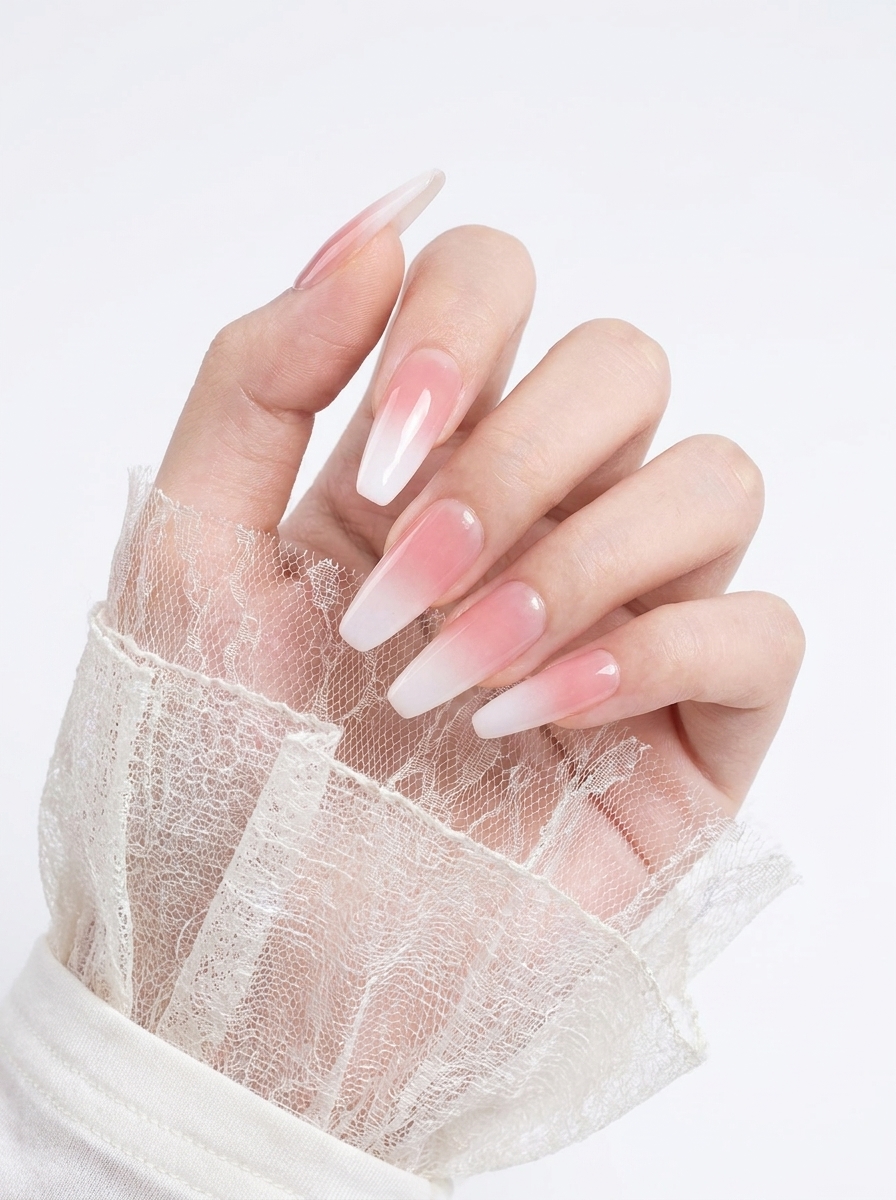
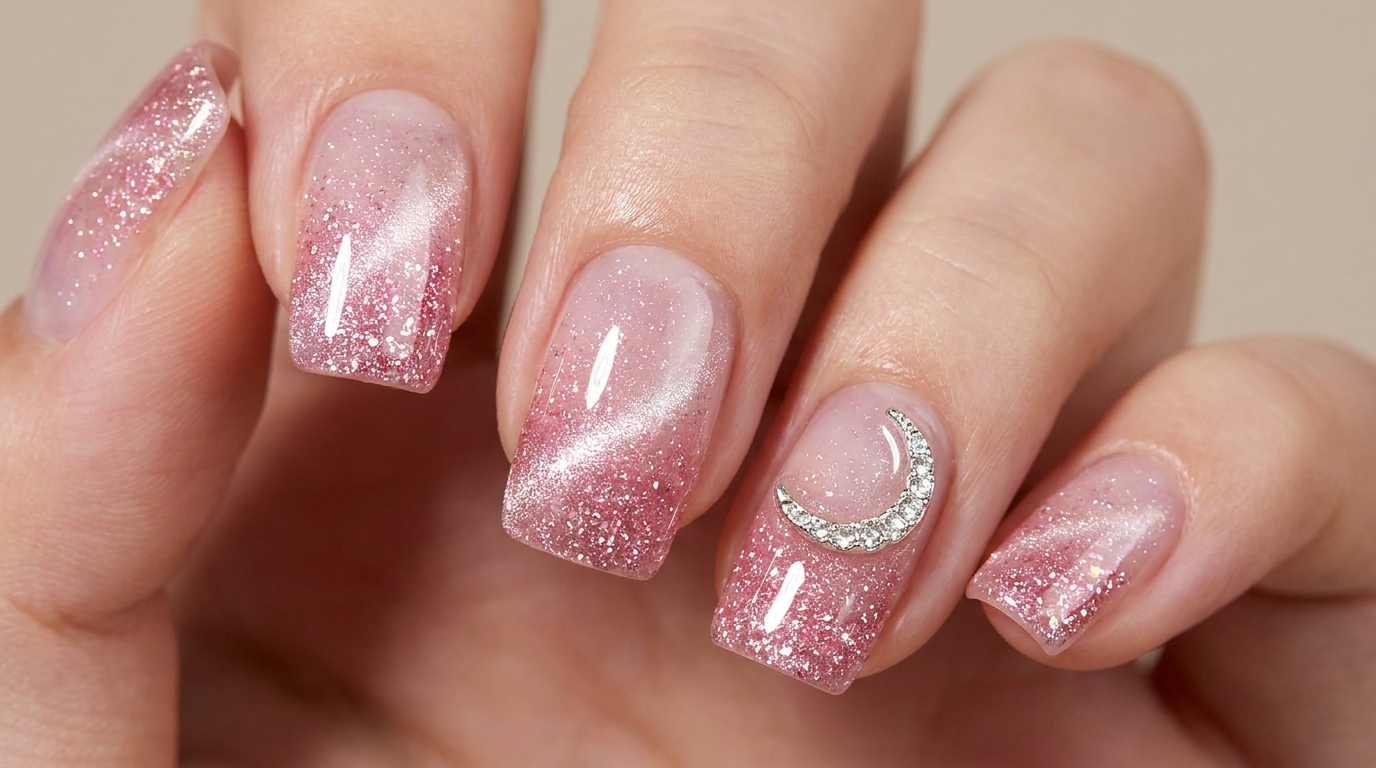
Pink Crushed Diamond Glass Bead Cat Eye Nails — Step-by-Step Tutorial
Elevate your manicure with this stunning pink crushed diamond cat-eye look. Learn how to create a luminous gradient and add delicate crystal accents at home.
This crushed diamond and glass bead cat-eye look offers a perfect blend of practicality and high-end sparkle. Using a unique magnetic technique, you can reveal a multidimensional glow that transitions beautifully from cuticle to tip. It is an excellent choice for those looking to add a touch of sophisticated shimmer to their everyday style.
Steps
- 1Apply base coat
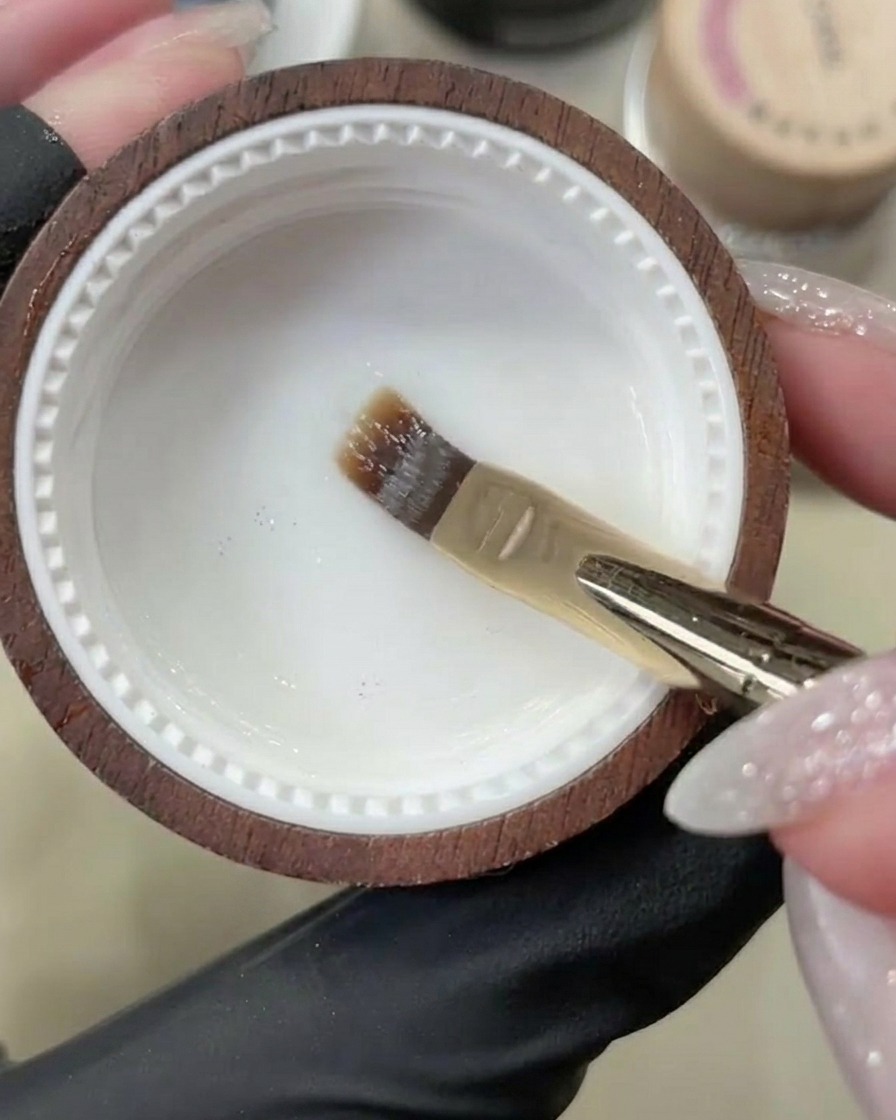
Apply a thin, even layer of base coat to the nail plate using a gel brush. Ensure full coverage while avoiding the cuticle area to prevent lifting. Do not cure at this stage.
Tip: Apply in thin layers to ensure the product cures evenly and adheres well to the nail. - 2Cure the base coat
Place your hand inside the UV/LED lamp and cure the base coat for the manufacturers recommended time. This ensures a solid foundation for the subsequent layers of gel.
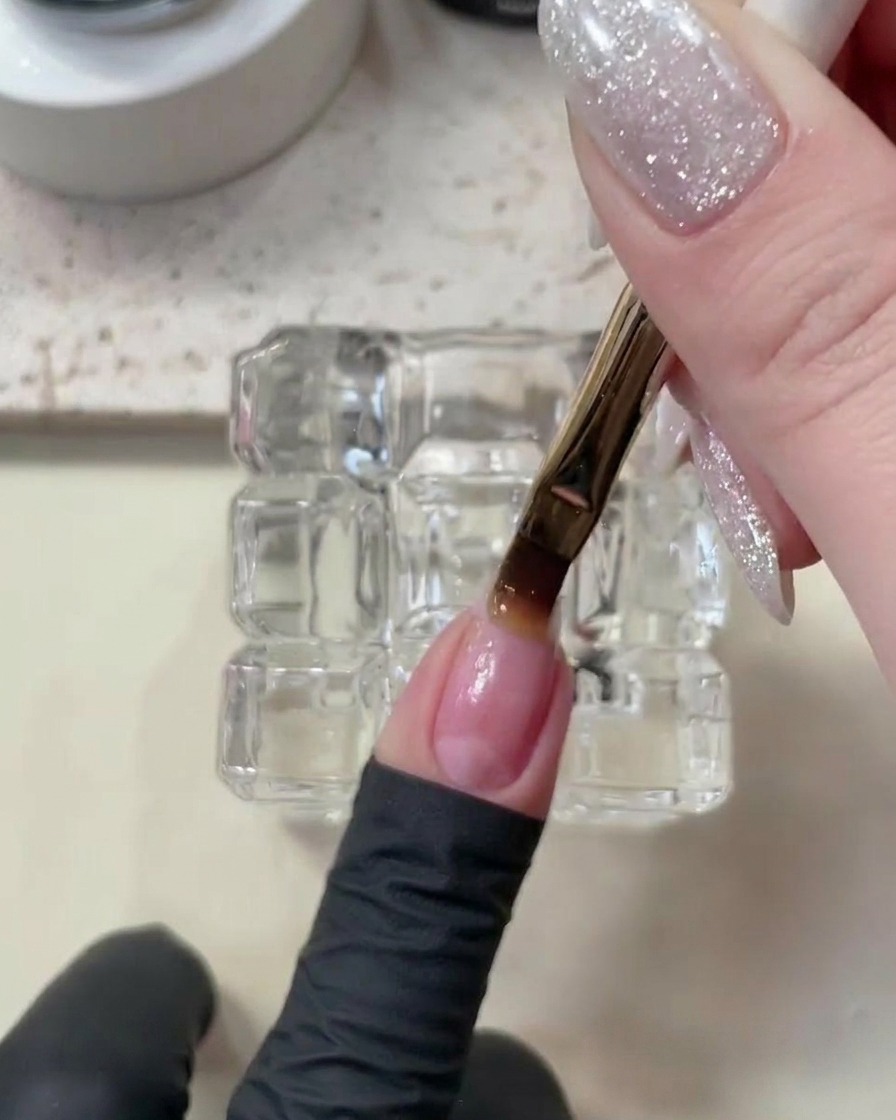
Tip: Ensure your fingers are positioned correctly inside the lamp for uniform curing across all nails. - 3Create the Gradient Base
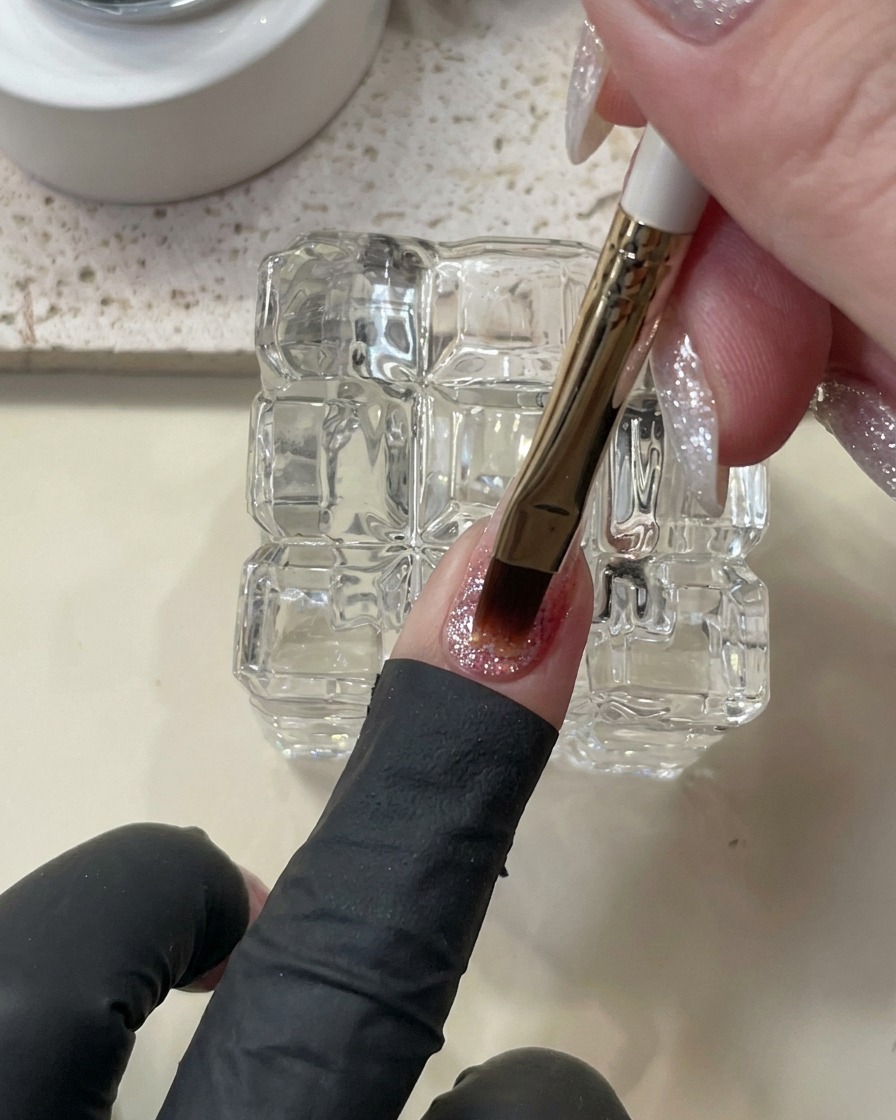
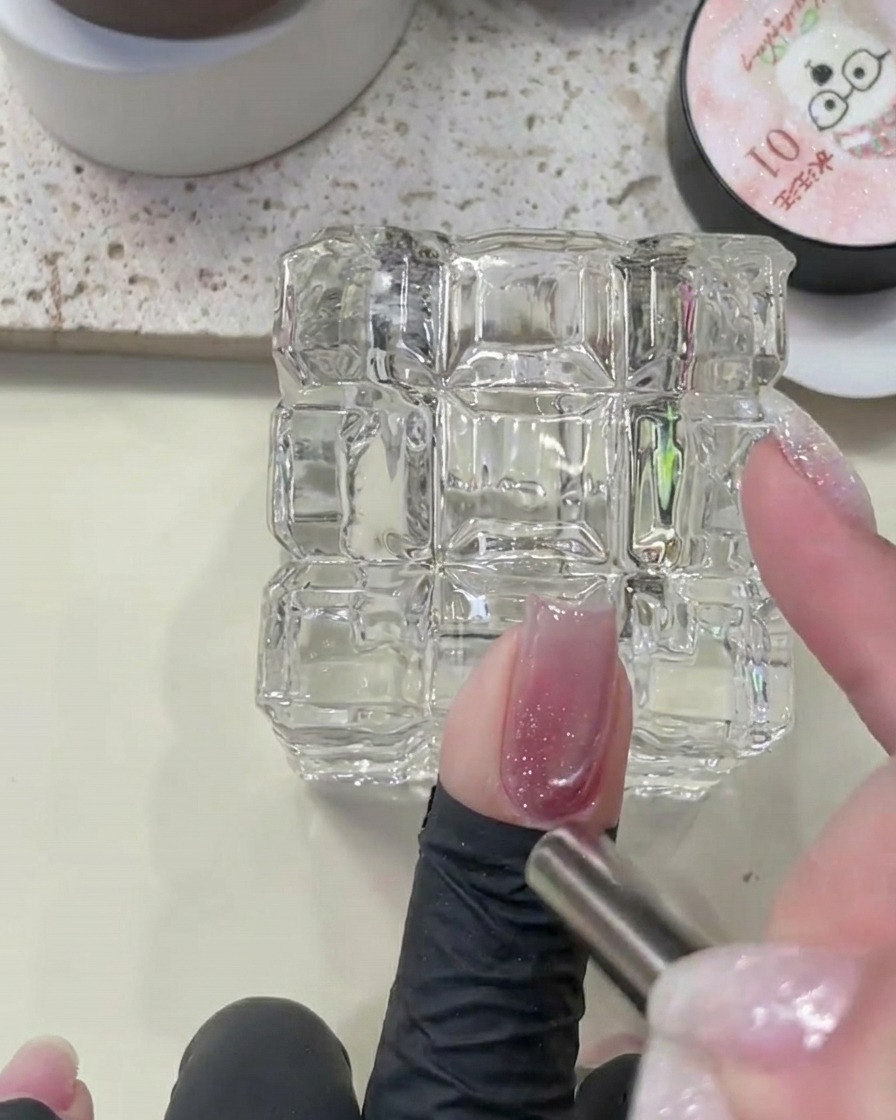
Apply the pink crushed diamond gel starting from the cuticle area and gently pull it toward the tip to build a soft, blended gradient effect.
Tip: Use light pressure to build the gradient, focusing more product at the base and thinning it out toward the free edge. - 4Add glitter detail
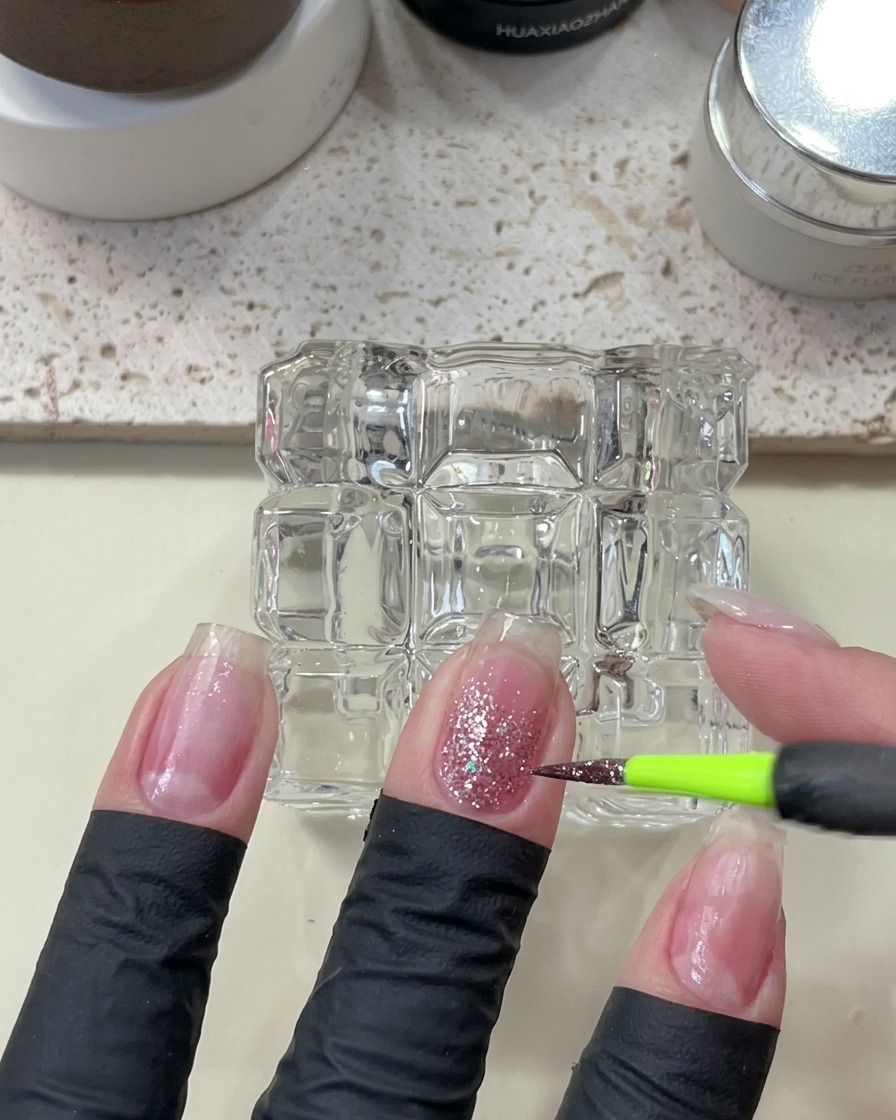
Using a fine detail brush, carefully apply the pink-toned shimmer glitter over the gradient layer to enhance the sparkle. Focus the application where extra brilliance is desired.
Tip: Tap the glitter on gently to avoid disturbing the underlying gel gradient. - 5Cure the glitter layer

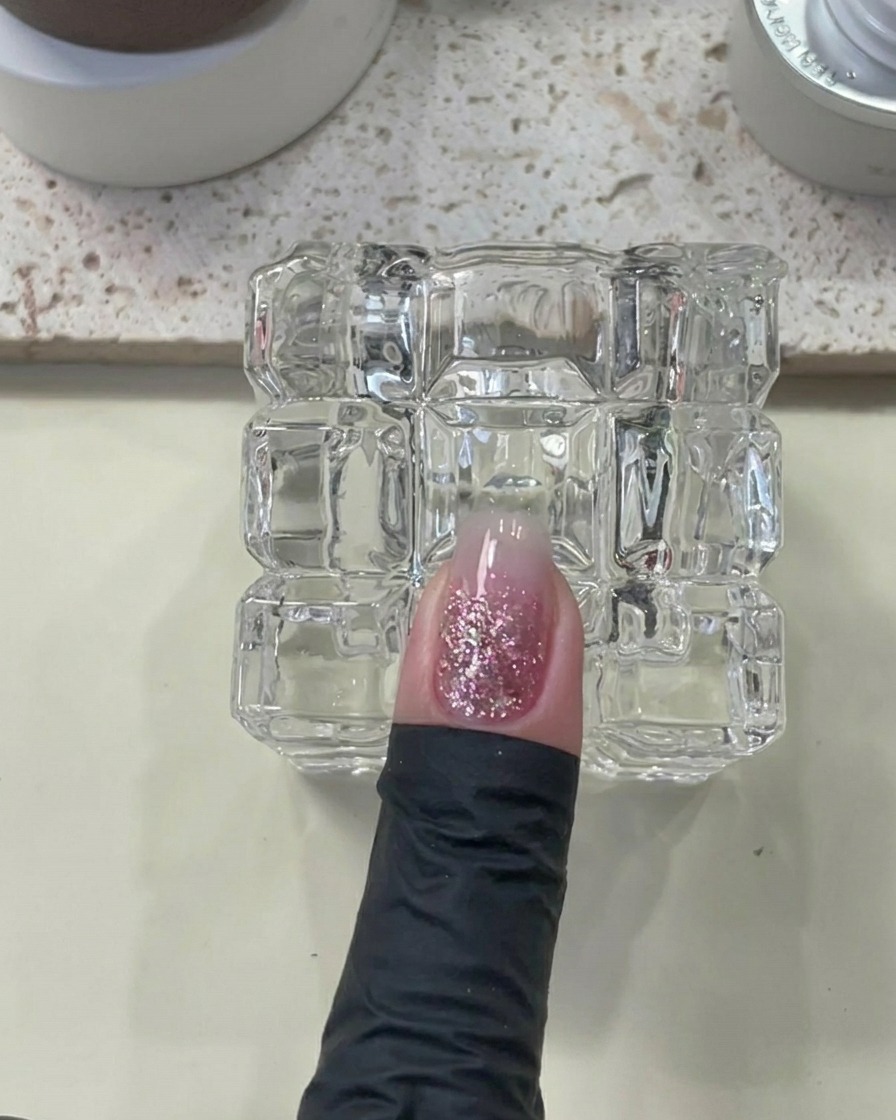
Place your hand under the UV/LED lamp to cure the glitter layer. Make sure the nails are fully exposed to the light to set the glitter and gel properly.
Tip: Check that the lamp is fully active and your hand is positioned correctly to ensure a complete cure. - 6Clean up cuticle area
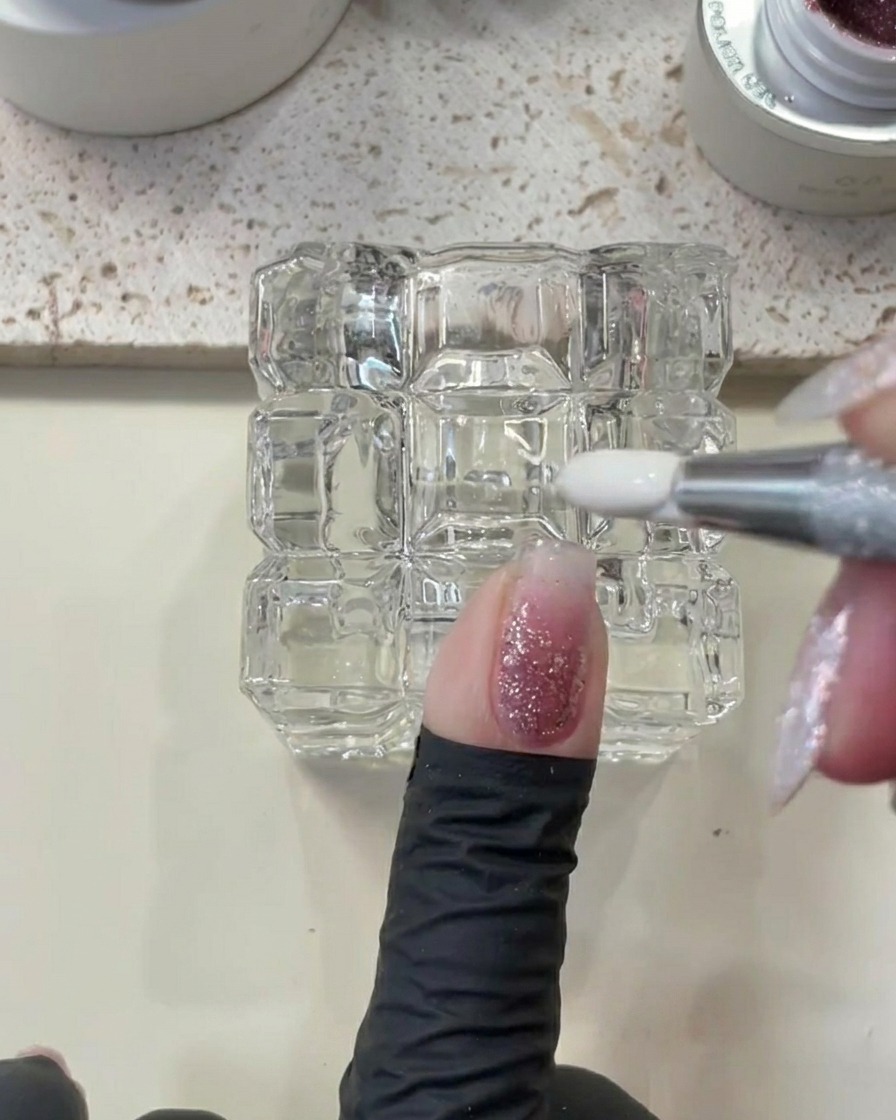
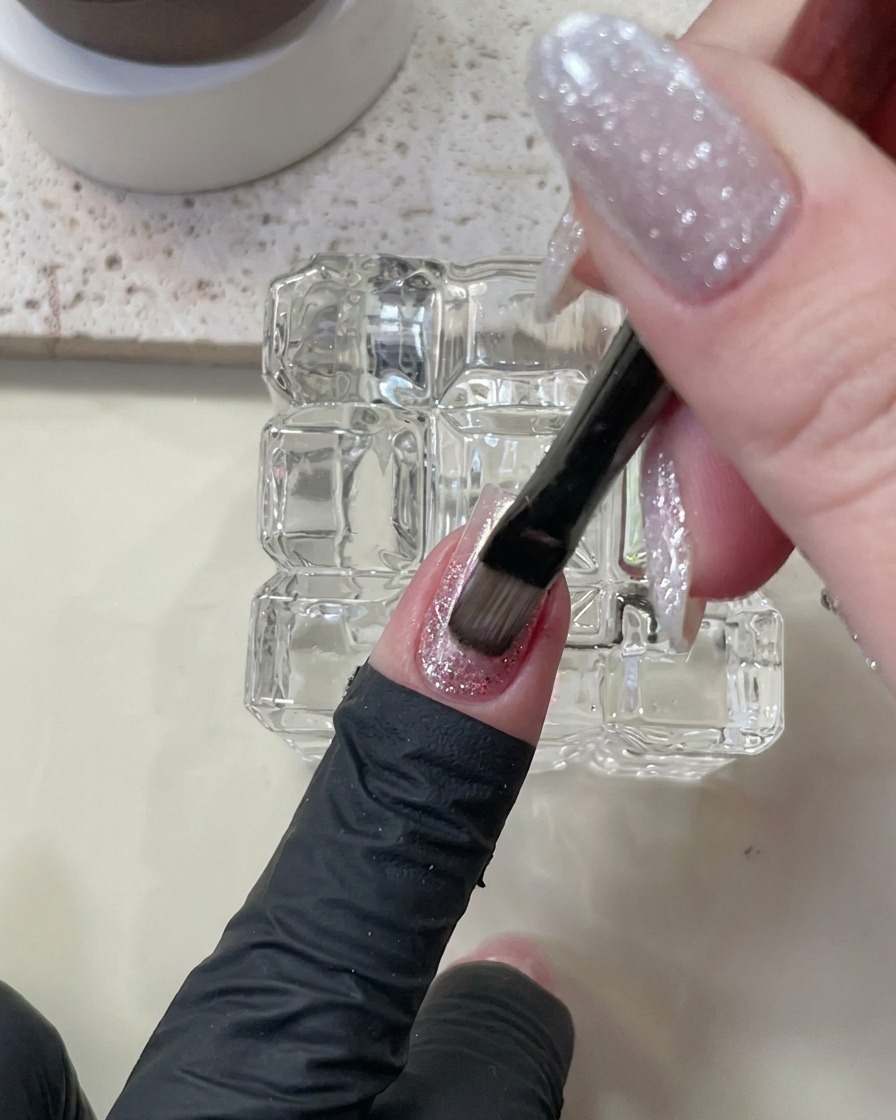
Use a specialized tapping or clean-up tool to gently remove any excess gel that may have pooled near the cuticle. This ensures a clean, professional finish.
Tip: Work slowly and carefully to avoid dragging the product away from the nail plate. - 7Cure the nail
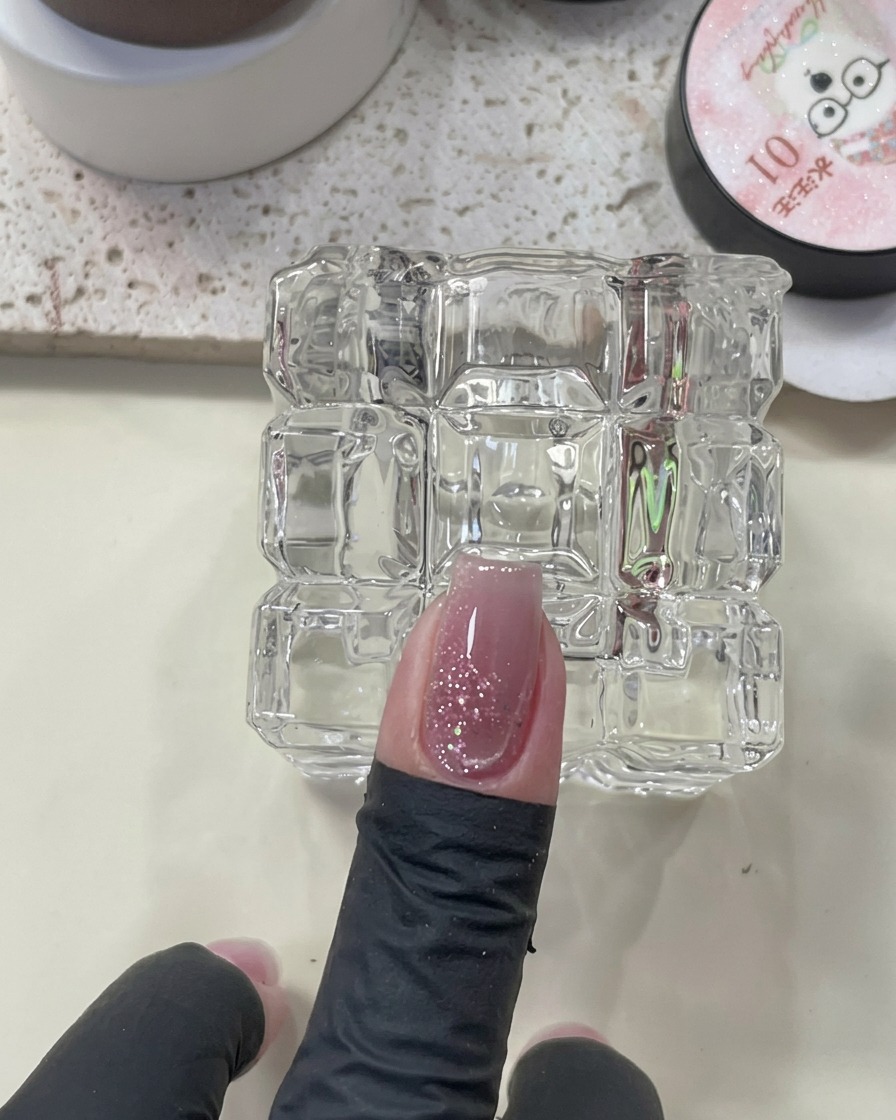
After cleaning up the cuticle area, place your nail under the UV/LED lamp. Curing at this stage ensures the clean-up work is set and secure before moving on to the next layer of the application.
Tip: Make sure your finger is positioned directly under the light for an even cure. - 8Apply thin builder gel layer
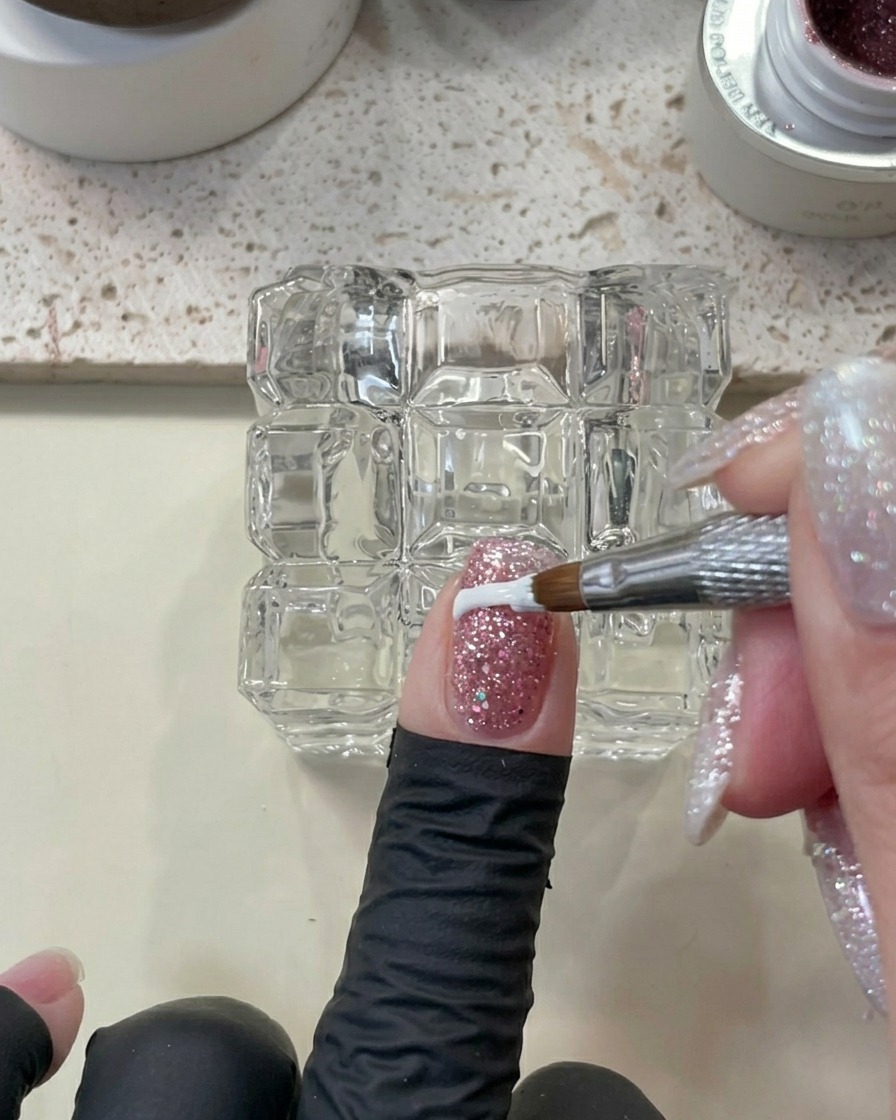
Apply a thin, initial layer of builder gel across the nail plate. This layer acts as a base to help the subsequent, thicker application adhere properly to the nail surface.
Tip: Keep this layer thin to prevent the product from pooling at the cuticles. - 9Apply builder gel structure
Apply a thicker layer of builder gel over the nail surface. This adds strength, provides structure, and helps to smooth out the texture of the glitter, creating a perfect base for the cat-eye polish.
Tip: Use a steady hand to float the gel, ensuring a smooth, level surface without running. - 10Cure the builder gel
Place the nail under the UV/LED lamp to cure the builder gel. This step hardens the product, locking in the structure and smooth surface you have created.
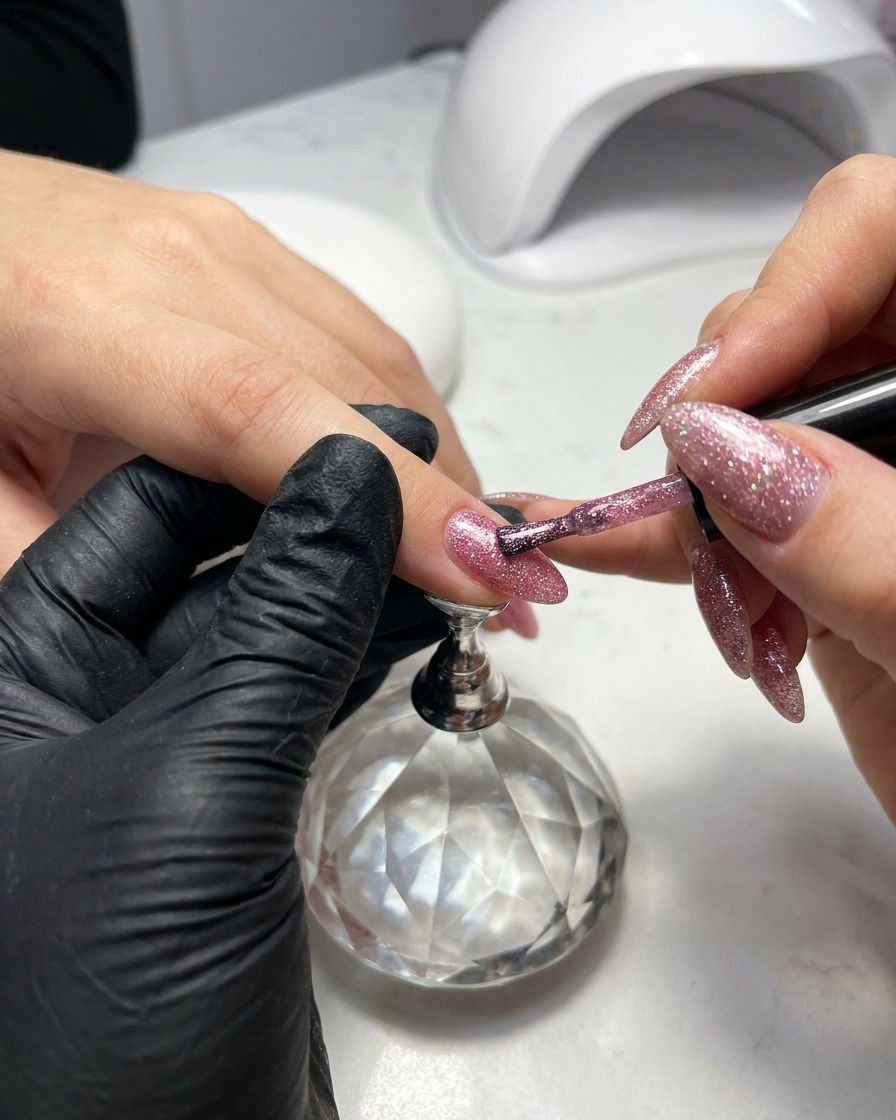
Tip: Ensure the gel is fully cured to prevent any tackiness or movement under the final polish layers. - 11Apply Nude Cat-Eye Polish
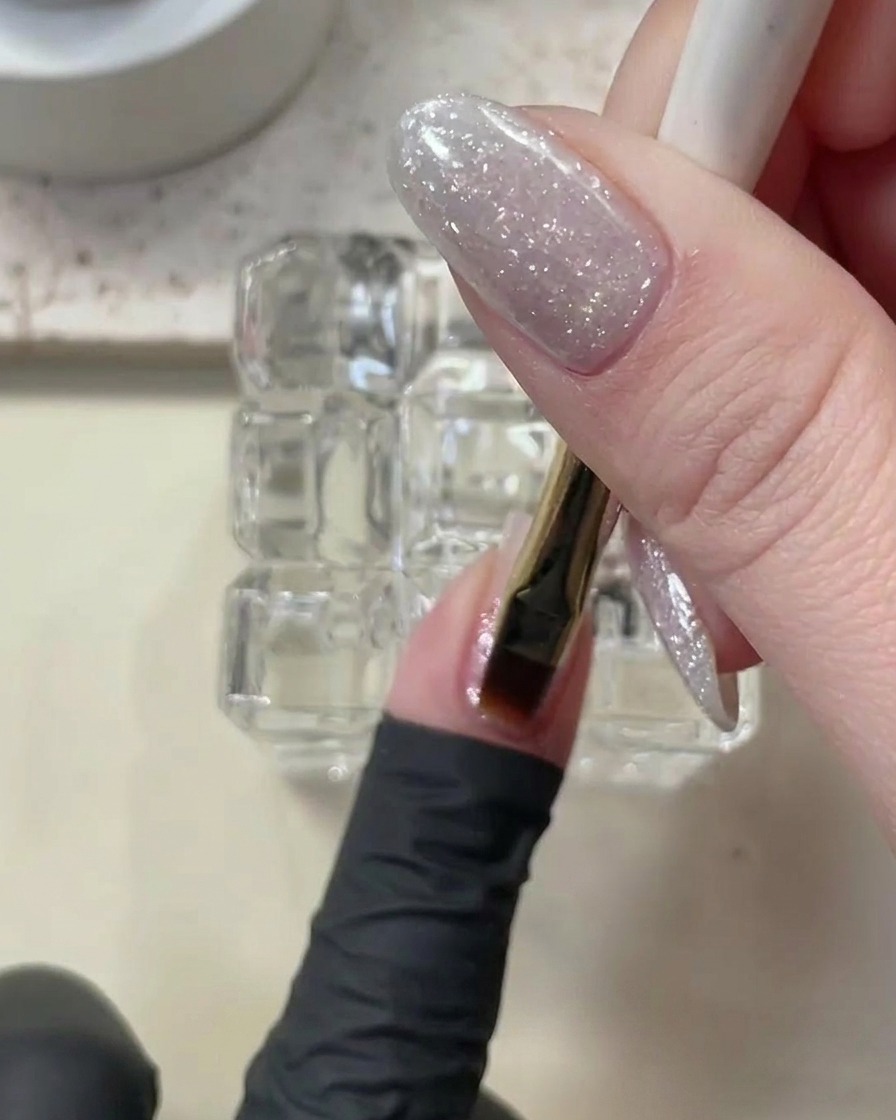
Apply an even layer of the nude cat-eye gel polish over the cured builder gel. Keep this layer wet so you can manipulate the magnetic particles.
Tip: Apply a medium coat for the best cat-eye effect; too thin, and the particles wont move enough. - 12Create cat-eye highlight
Hold your cat-eye magnet near the surface of the wet polish. Move the magnet to pull the magnetic particles into a wide, glowing highlight stripe across the nail.
Tip: Experiment with the magnet angle to get the desired width and intensity of the cat-eye effect. - 13Refine the Cat-Eye Design
Hold your magnet near the nail to manipulate the particles, pulling the highlight toward the tip to reveal the diamond glitter base underneath. Once you are happy with the light-reflecting design, proceed to cure.
Tip: Work slowly with the magnet to create smooth, flowing light effects rather than harsh lines. - 14Cure the cat-eye design
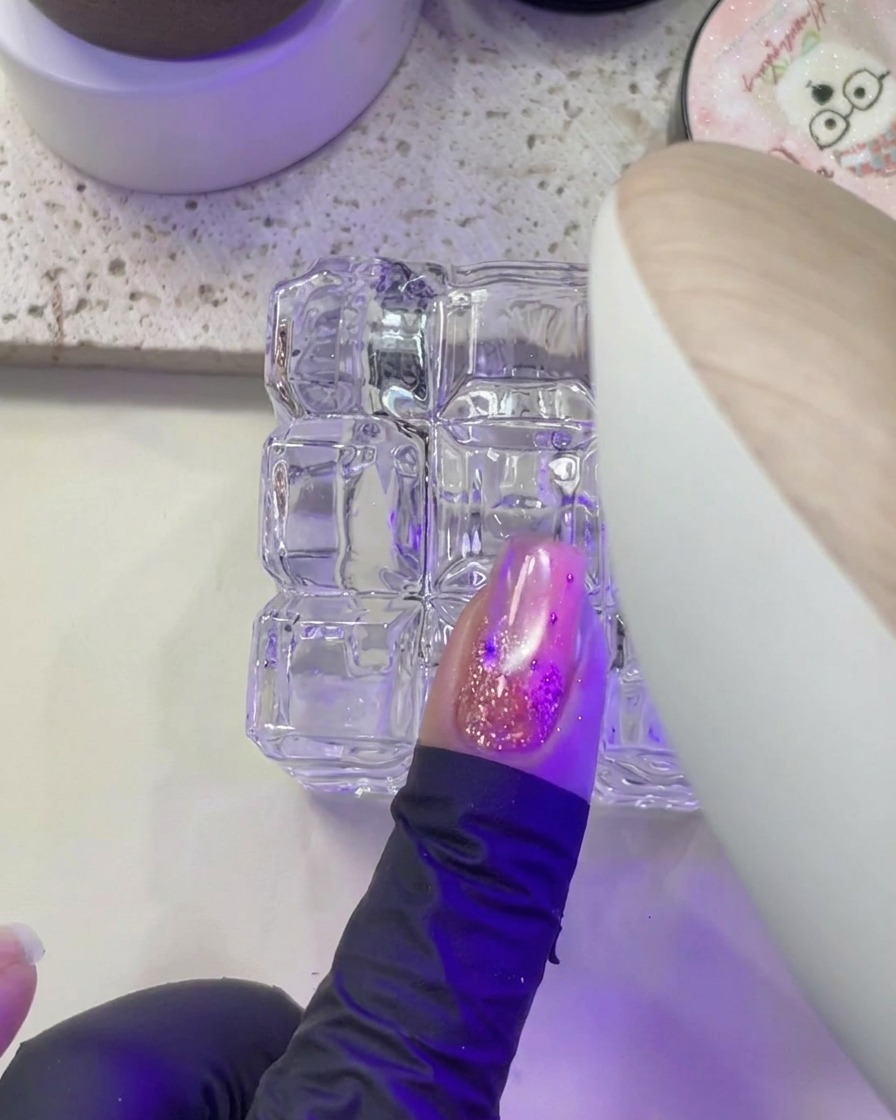
Place your hand inside the UV/LED lamp to cure the cat-eye polish and set the magnetic design in place. Ensure your fingers are positioned correctly to allow the light to reach the entire surface of the nail for a thorough cure.
Tip: Check that the light is covering the full nail surface to ensure the gel cures evenly without any soft spots.