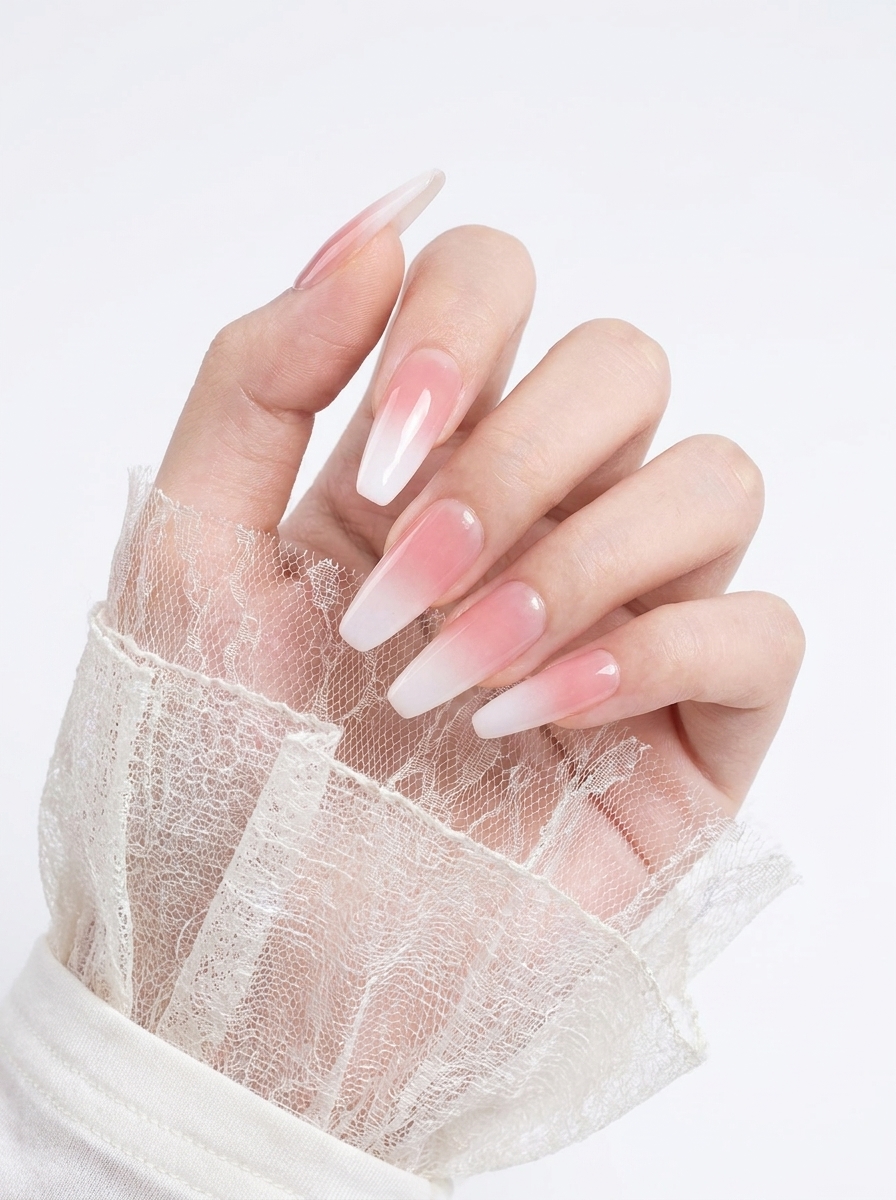
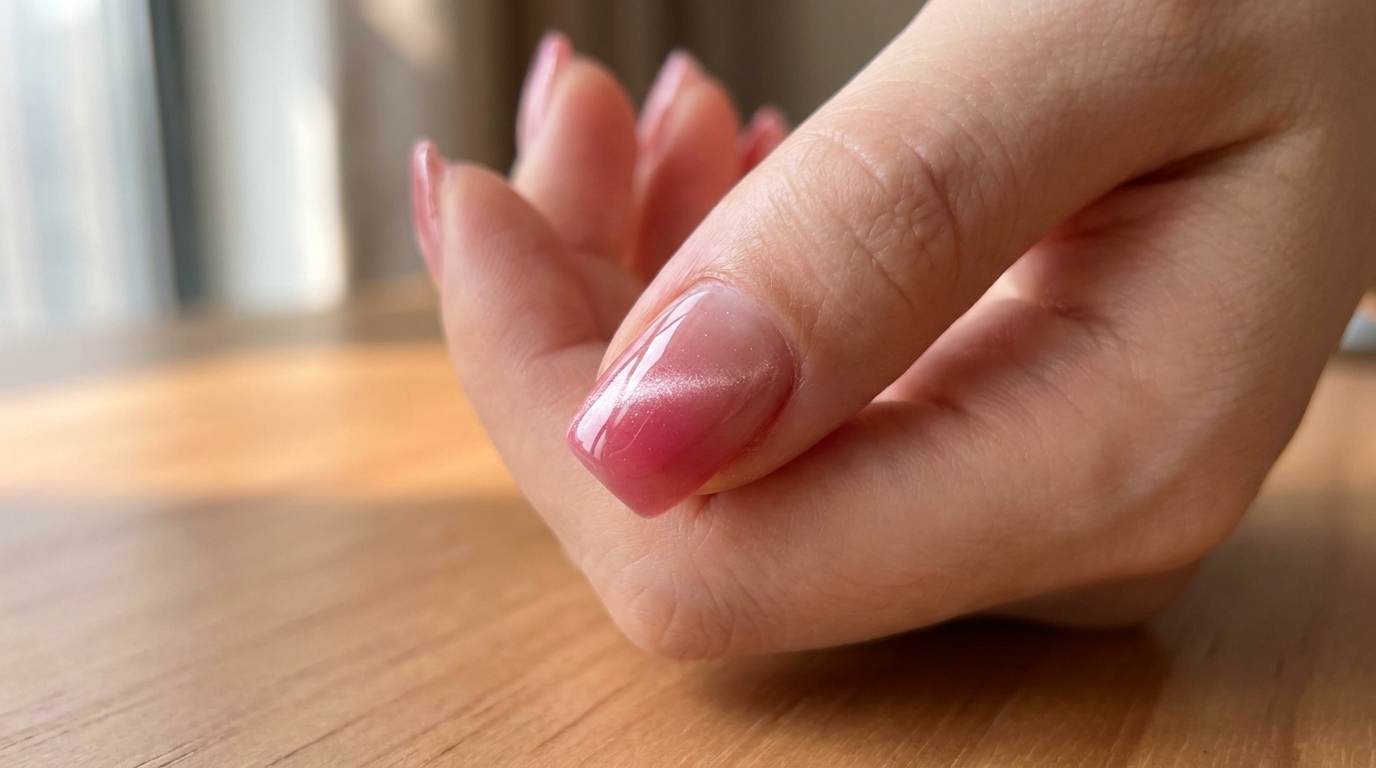
Tulip Pink Cat-Eye Gradient Nails — Easy Step-by-Step Tutorial
Create a sophisticated, shimmering gradient look with our simple tulip pink cat-eye gel tutorial. Perfect for achieving a professional salon finish at home.
The cat-eye effect is a fantastic way to add dimension and intrigue to a classic gradient manicure. By layering a rich, vibrant pink over a sheer base and using magnetic manipulation, you can create a luxurious, light-catching finish. This technique is surprisingly accessible, making it a great project for anyone looking to elevate their nail art game with minimal tools.
Steps
- 1Load the sponge with gel
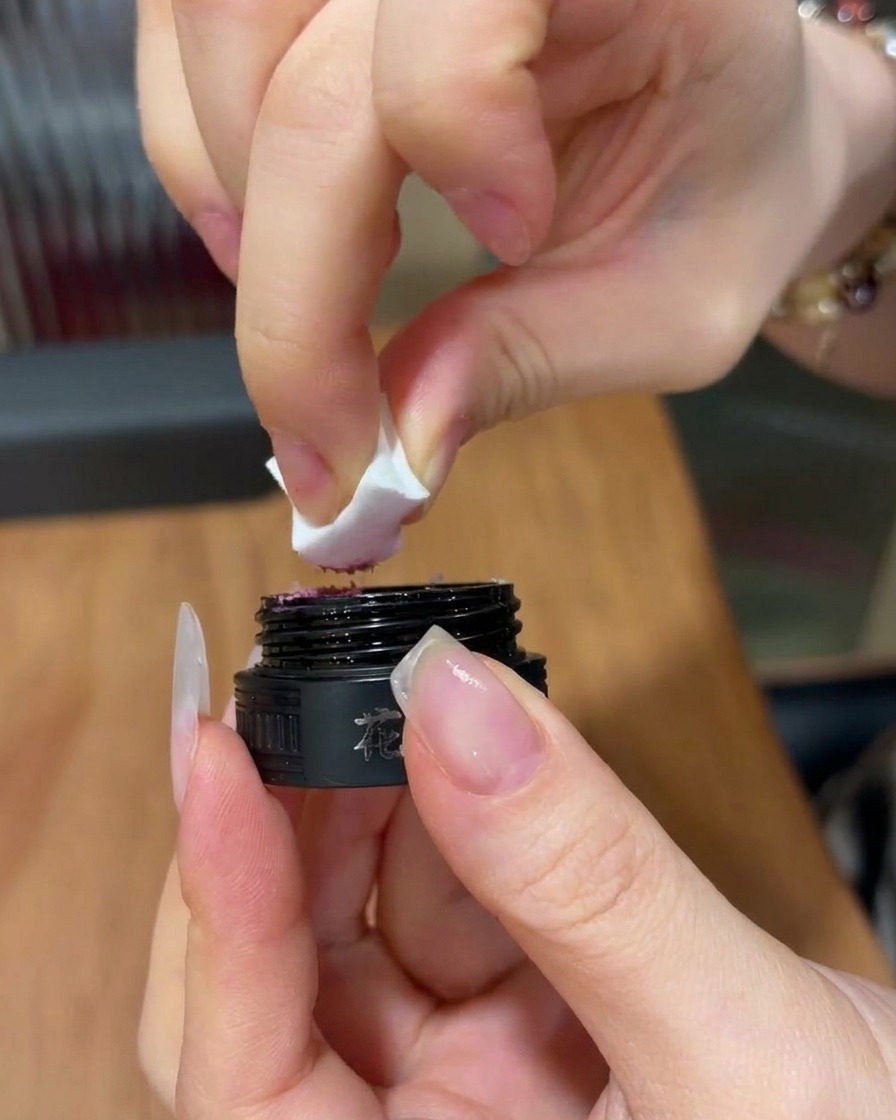
Take a small amount of the patting gel directly from the pot using the corner of a clean makeup sponge wedge. Ensure the gel is concentrated on the corner of the sponge to allow for precise application on the nail tip.
Tip: Use a light touch when picking up the product to avoid getting too much gel on the sponge, which can make the gradient harder to control. - 2Create the color gradient
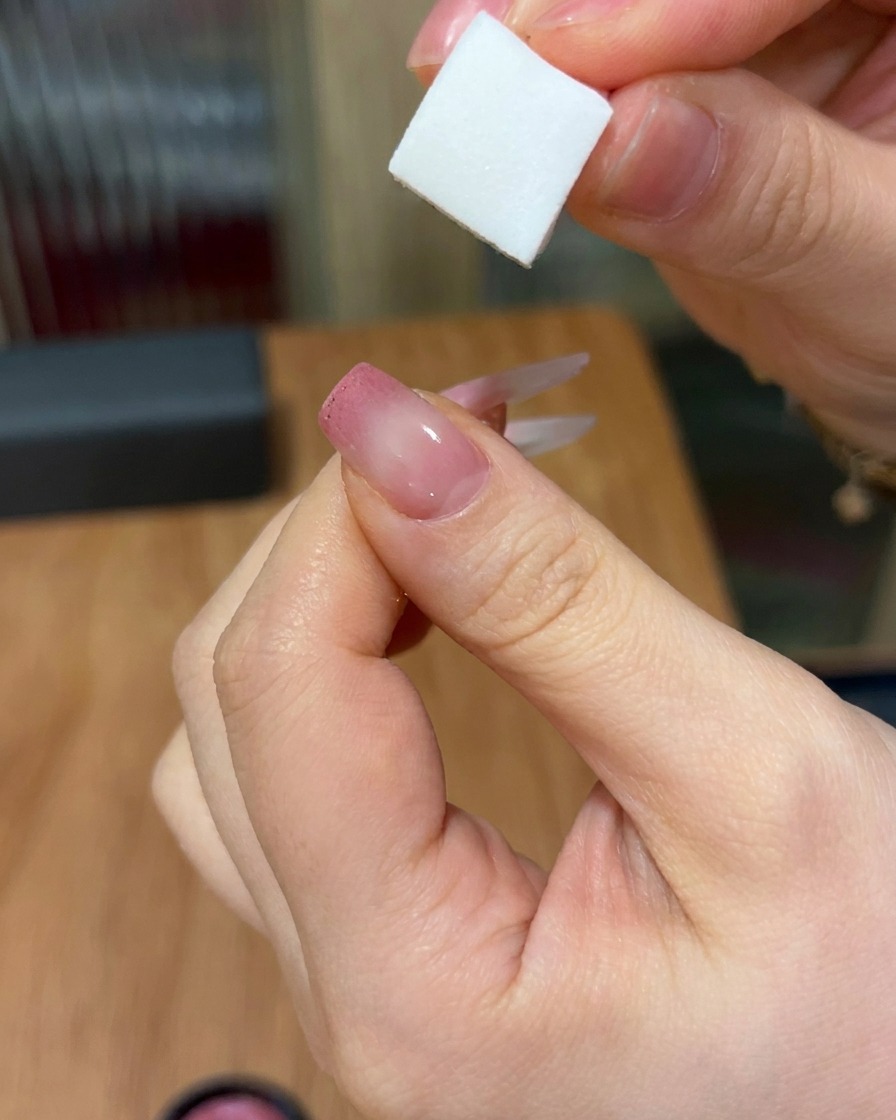
Gently tap the gel-loaded sponge onto the tip and mid-section of the nail. Use a dabbing motion to deposit the color, fading it out as you move toward the base of the nail to create a soft, seamless gradient effect.
Tip: Keep the tapping motion light and consistent to build up the color density gradually without creating harsh lines. - 3Apply cat-eye gel
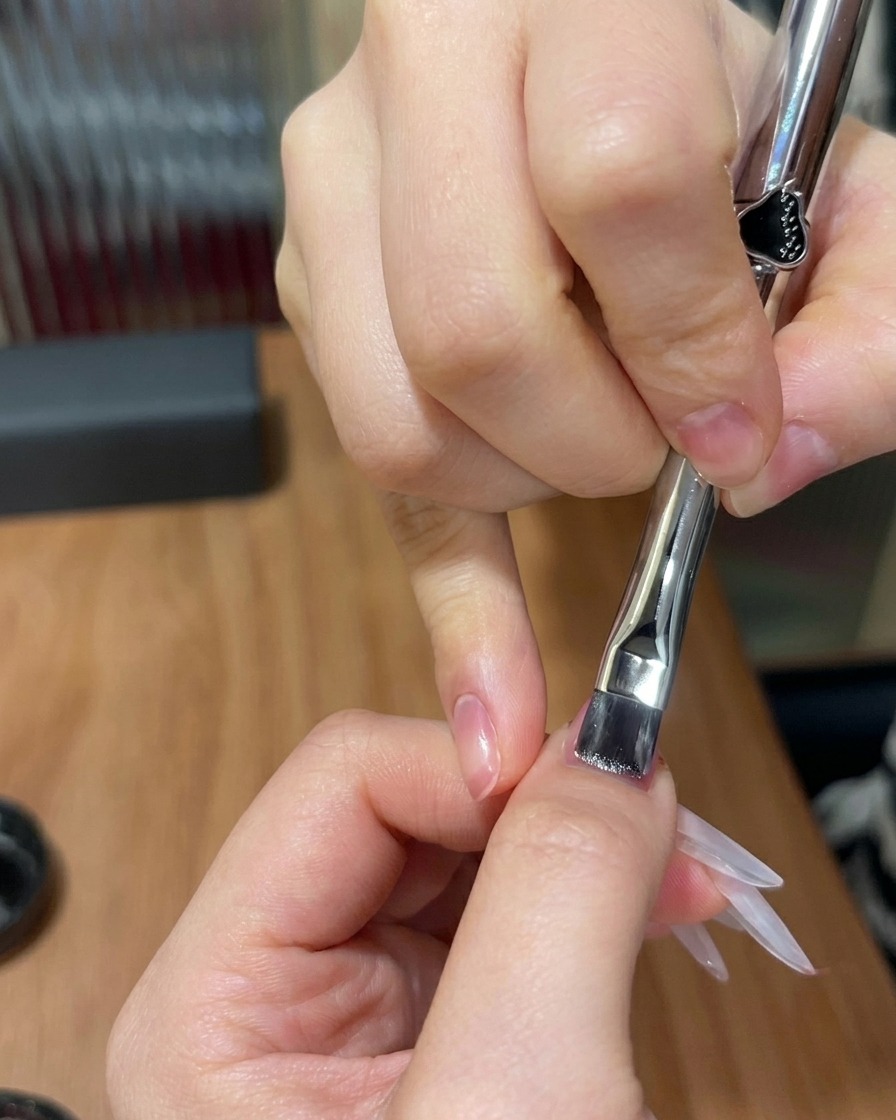
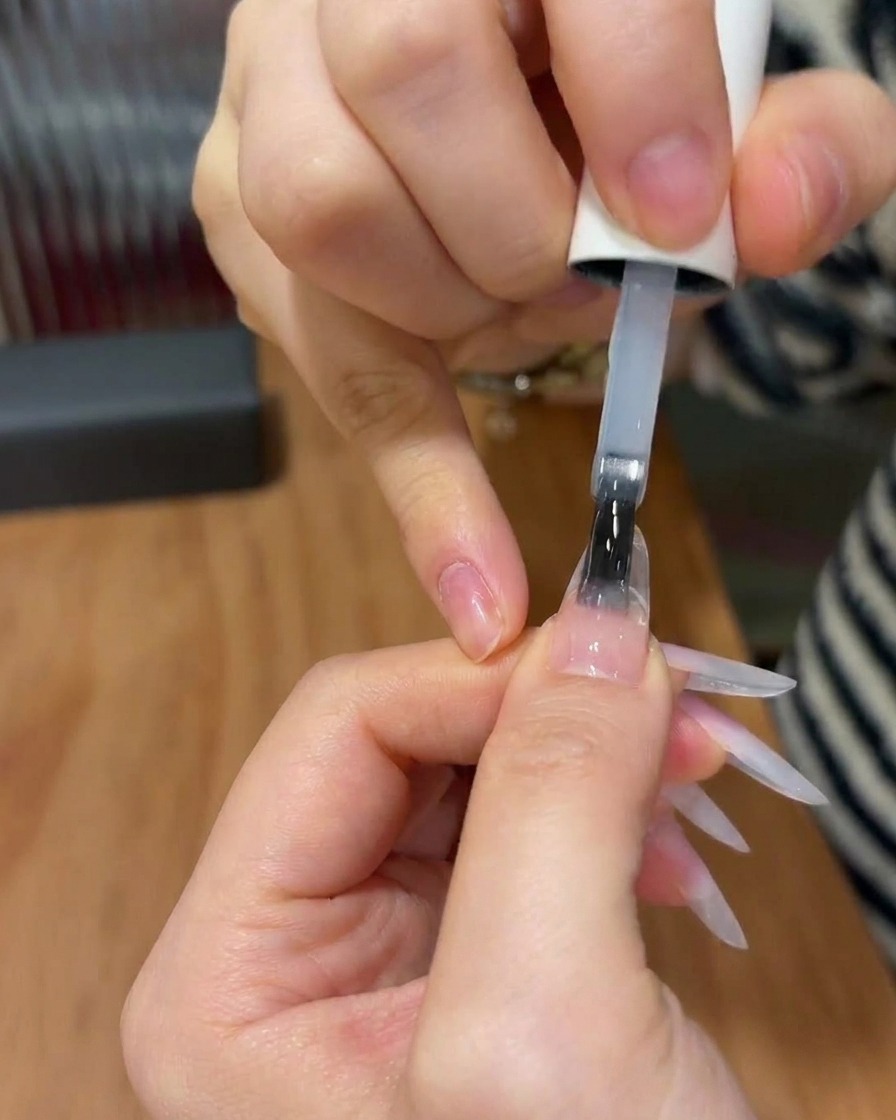
Apply an even, sheer layer of cat-eye gel polish over the entire nail, covering the previously created pink gradient. Use a flat brush to ensure a smooth application across the nail plate.
Tip: Make sure the layer is thin and smooth to ensure the magnetic particles can move freely and create a clean, sharp effect. - 4Activate the magnetic effect
Hold the cylindrical magnet diagonally over the wet cat-eye gel. Sweep the magnet up and down without touching the nail surface to concentrate the magnetic particles into a shimmering, central band.
Tip: Watch the particles shift as you move the magnet; once you are satisfied with the shimmering line, cure the nail immediately to lock the design in place. - 5Cure the nail
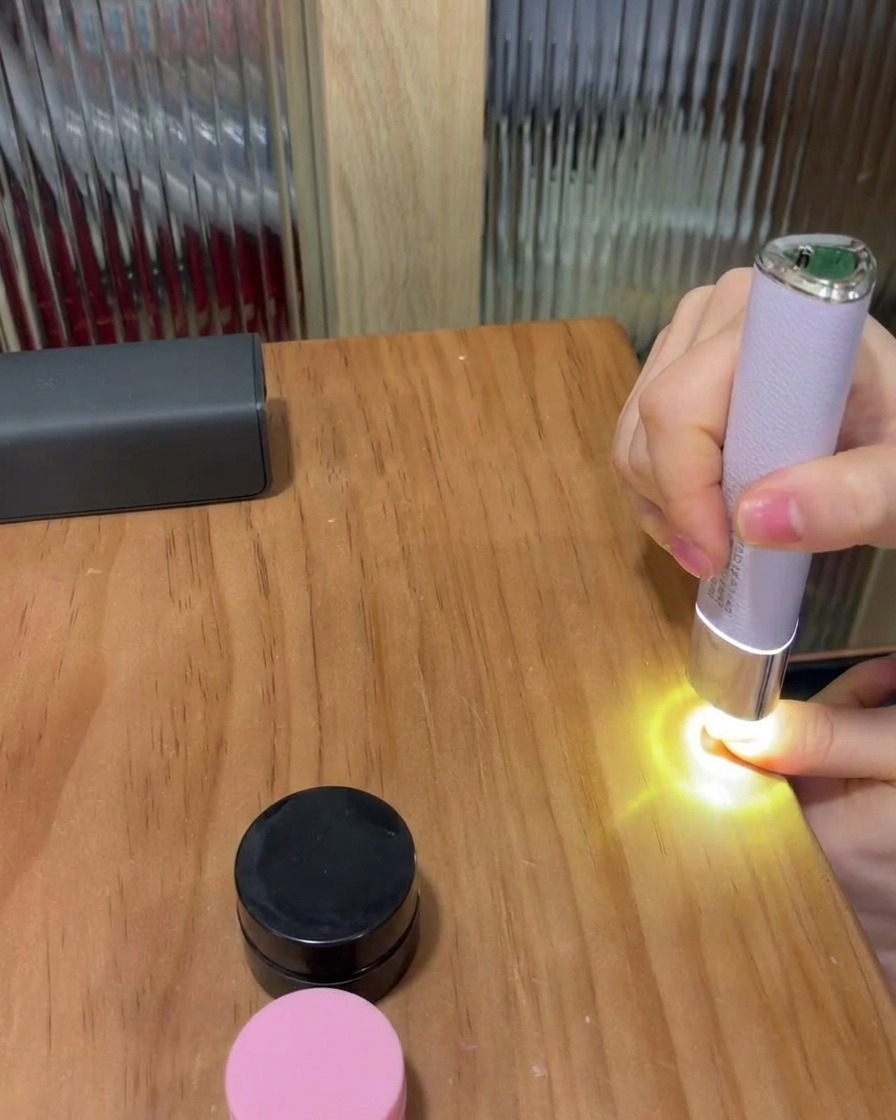
Place the nail directly under your UV or LED lamp. Cure for the manufacturers recommended time to ensure the gel is fully hardened and the magnetic effect is set.
Tip: Keep your finger flat and centered under the light to ensure even curing across the entire nail surface. - 6Remove the sticky layer
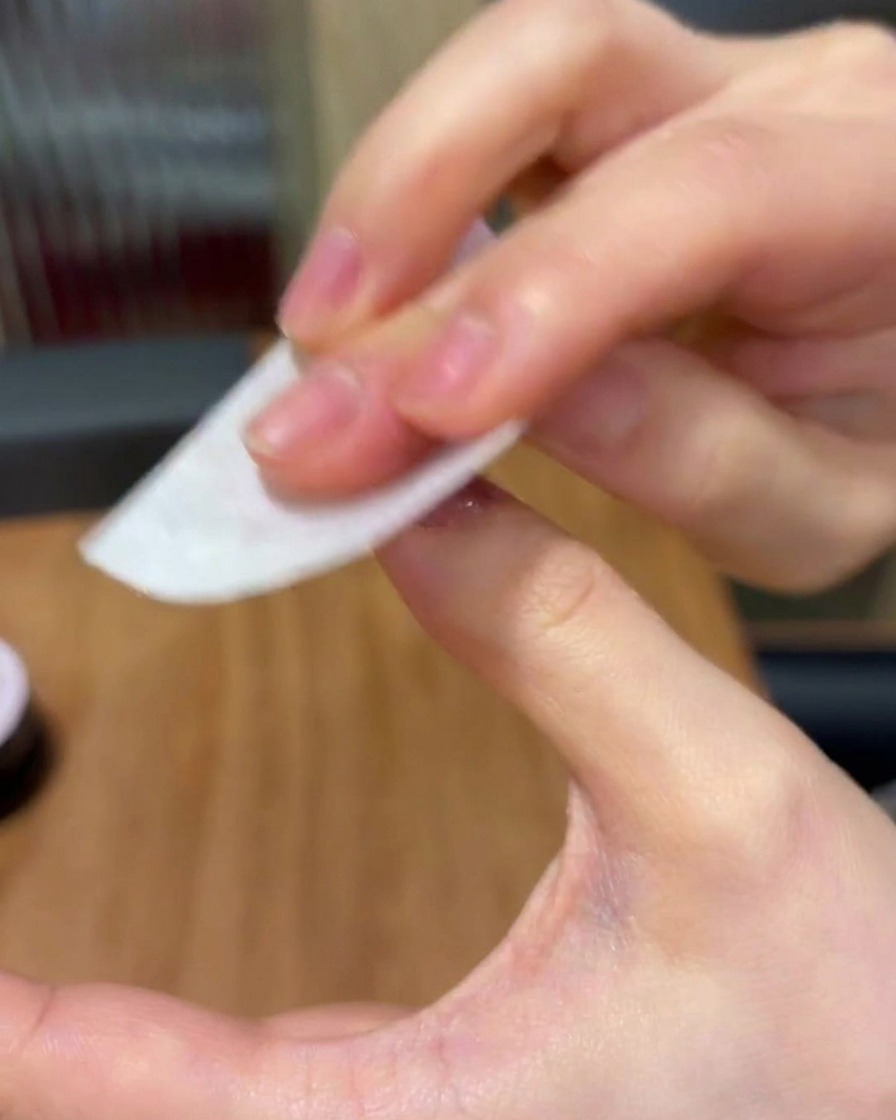
After curing, use a lint-free wipe saturated with cleanser to firmly wipe the surface of the nail. This removes the tacky inhibition layer, leaving behind a smooth, shiny finish.
Tip: Use a fresh section of the lint-free wipe for each nail to prevent smearing any uncured residue. - 7Deepen the gradient tip
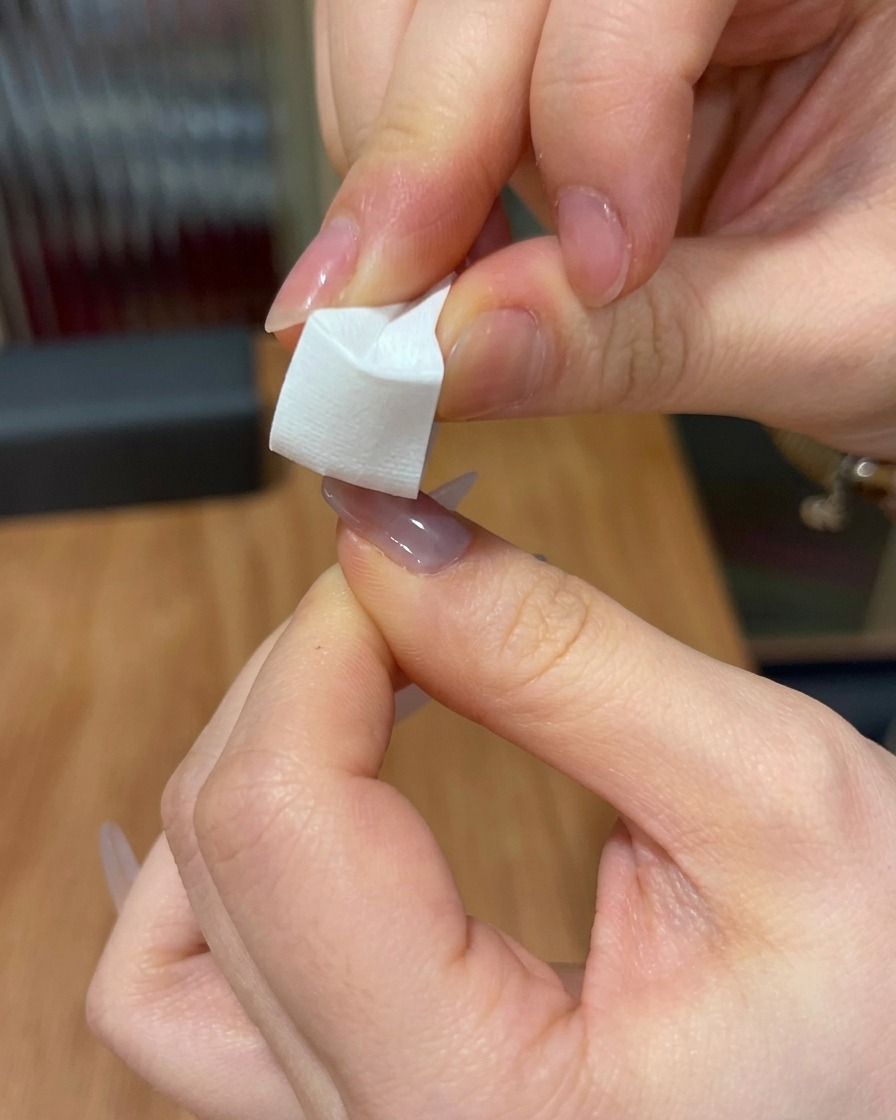
Take your sponge wedge with a small amount of the pink gel and gently pat it onto the very tip of the nail. This second, more concentrated layer helps to intensify the color at the edge, creating a richer, more defined gradient effect against the lighter base.
Tip: Focus the pressure on the very edge of the nail to avoid covering too much of the existing gradient. - 8Cure the gradient layer
Place your finger under the handheld UV/LED lamp and cure the newly applied gradient layer. Ensure the light covers the tip of the nail evenly so that the gel sets completely, preserving the smooth transition of the color.
Tip: Keep your finger steady under the light to ensure even curing and prevent the gel from shifting. - 9Apply top coat
Apply a final layer of clear glossy top coat over the entire nail, starting from the cuticle and brushing smoothly down to the tip. This seals the gradient design, provides a high-shine finish, and protects the nail from everyday wear.
Tip: Cap the free edge with the top coat brush to add extra durability and prevent chipping at the tip.