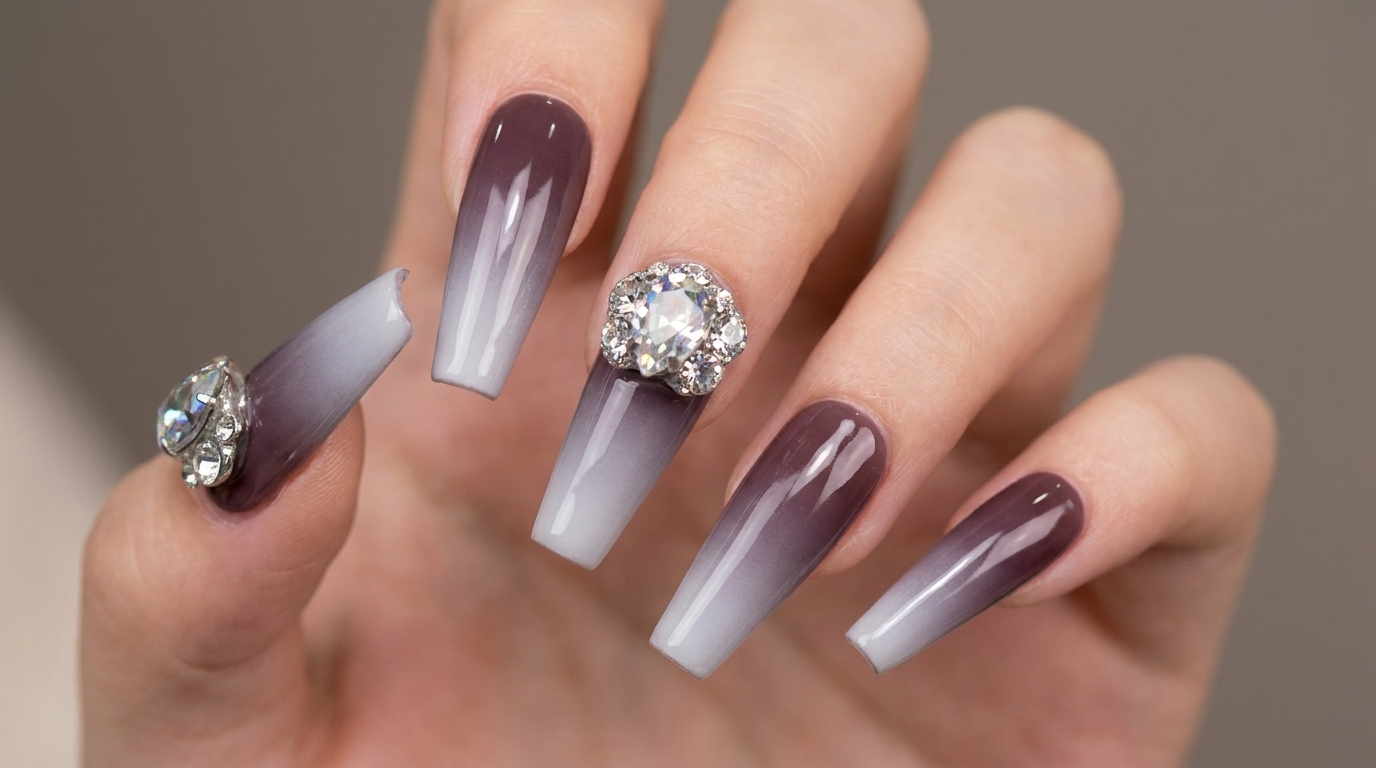
Elegant Dark Purple to White Airbrush Gradient Nails — Expert Tutorial
Master the sophisticated dark purple-to-white airbrush gradient look with this professional step-by-step guide to flawless, high-end nail transitions.
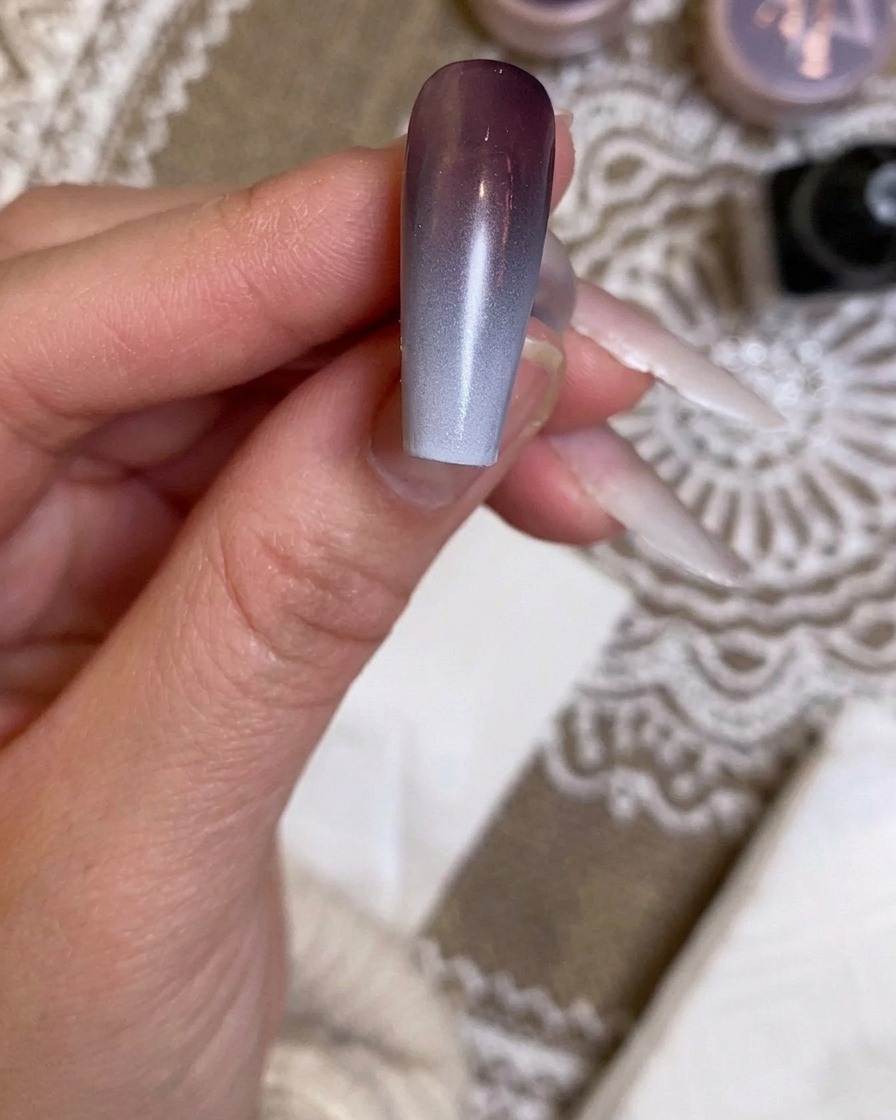
The airbrush gradient technique is a timeless way to add dimension and elegance to any manicure. This dark purple-to-white look creates a seamless, moody transition perfect for any season, elevated further by a statement rhinestone cluster on the ring finger. Follow along as we break down the airbrushing process for a salon-quality finish.
Steps
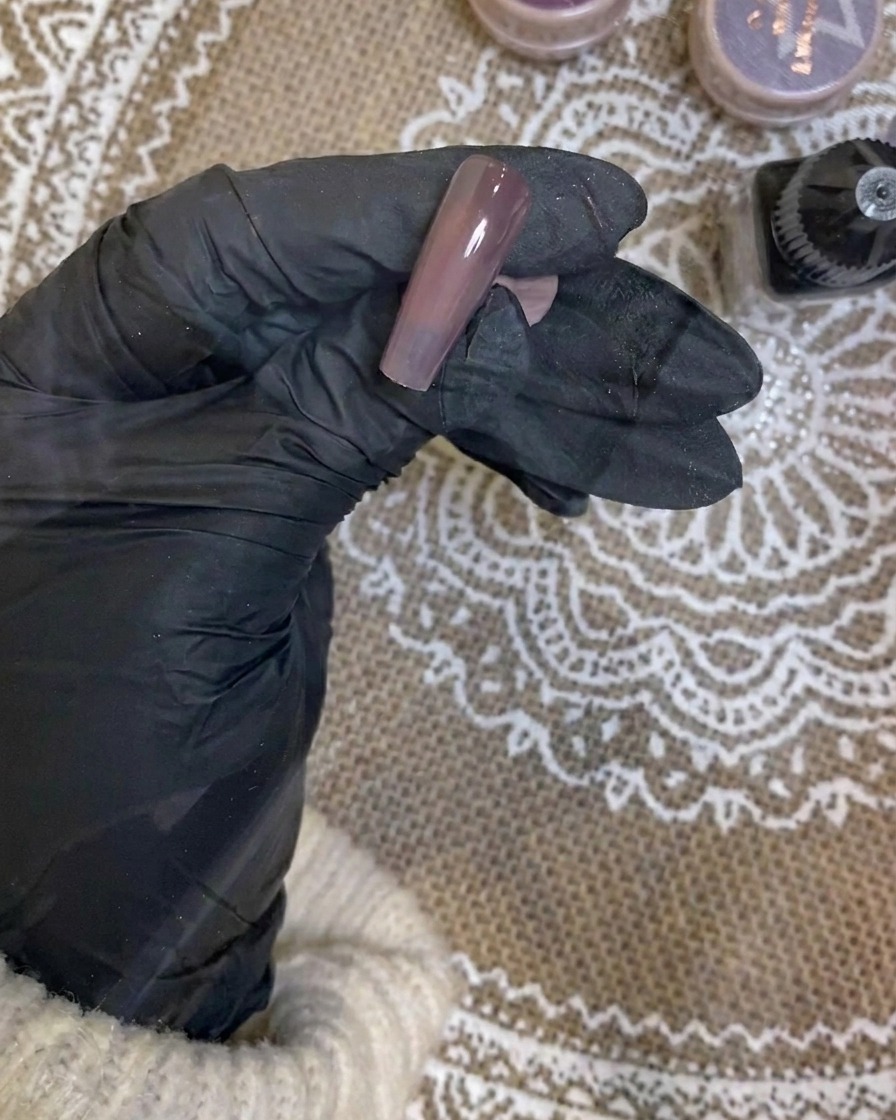
- 1Apply dark purple base layer
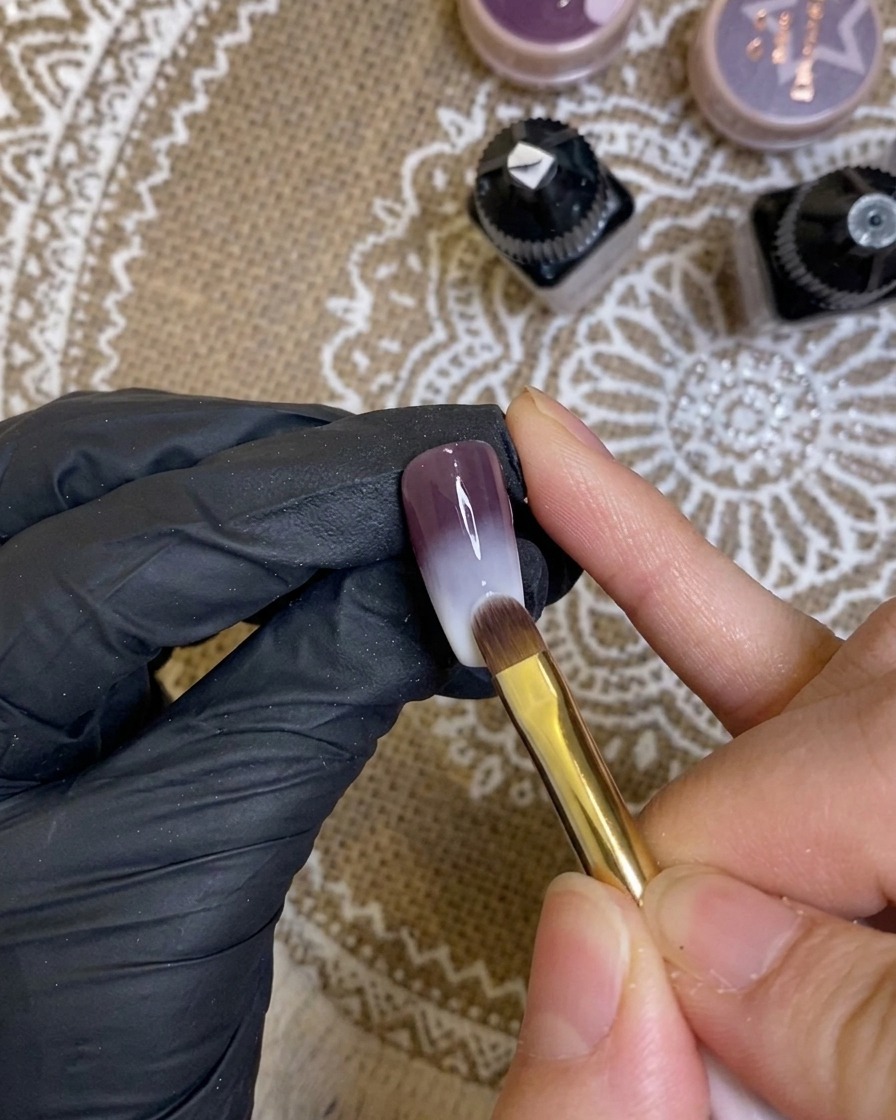
Using a flat brush, apply a smooth, even base layer of dark purple gel to the nail tip. Ensure the color is opaque and covers the surface uniformly, preparing the foundation for the upcoming airbrush gradient effect.
Tip: Work in thin layers to ensure the gel cures properly and to avoid any unwanted bulk or uneven texture. - 2Prepare white gel for airbrush
Carefully pour the white gel into the airbrush cup. This white pigment will serve as the color for your gradient effect, so ensure you add a sufficient amount to work with during the application process.
Tip: Be steady when pouring to avoid spills and contamination; using a dropper can help with precision. - 3Thin the white gel
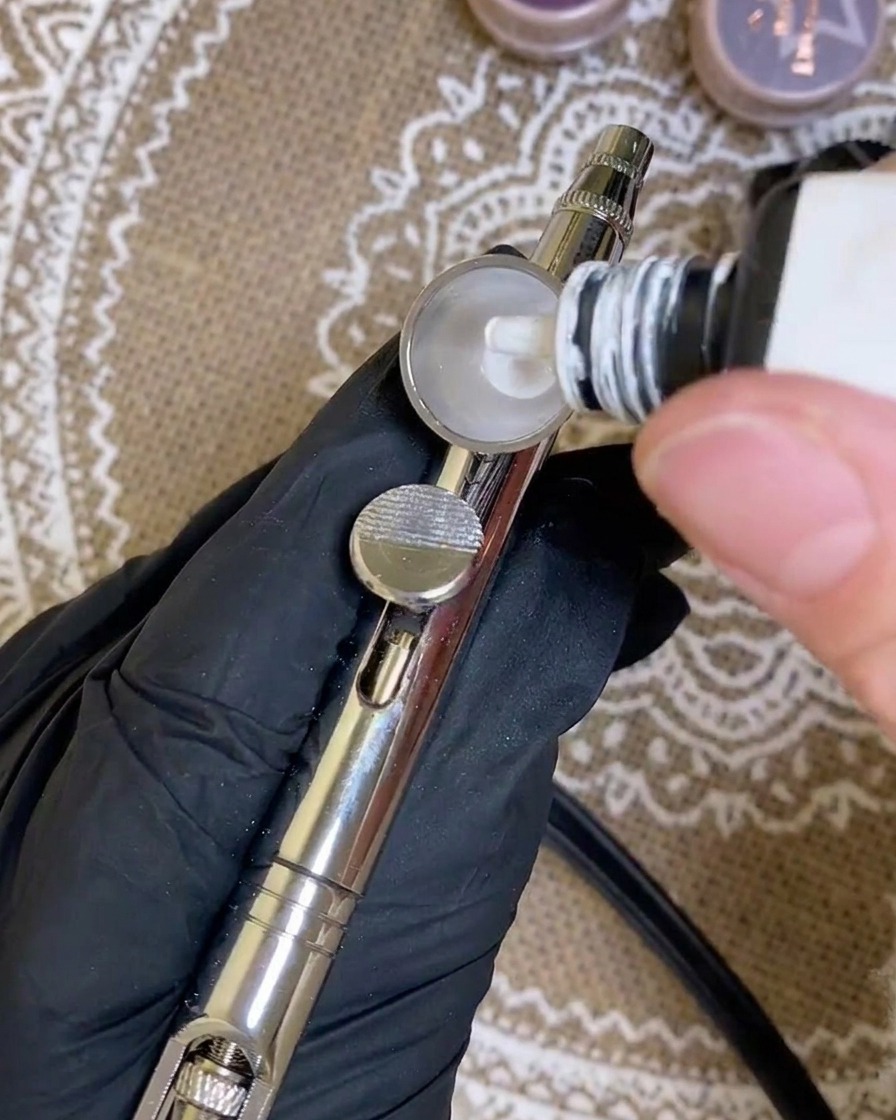
Add an equal amount of airbrush thinner to the gel in the cup to achieve a 1:1 ratio. This consistency is crucial for ensuring the airbrush sprays smoothly without clogging or splattering.
Tip: Mix the solution gently within the cup to ensure the gel and thinner are perfectly combined before you start spraying. - 4Test airbrush spray
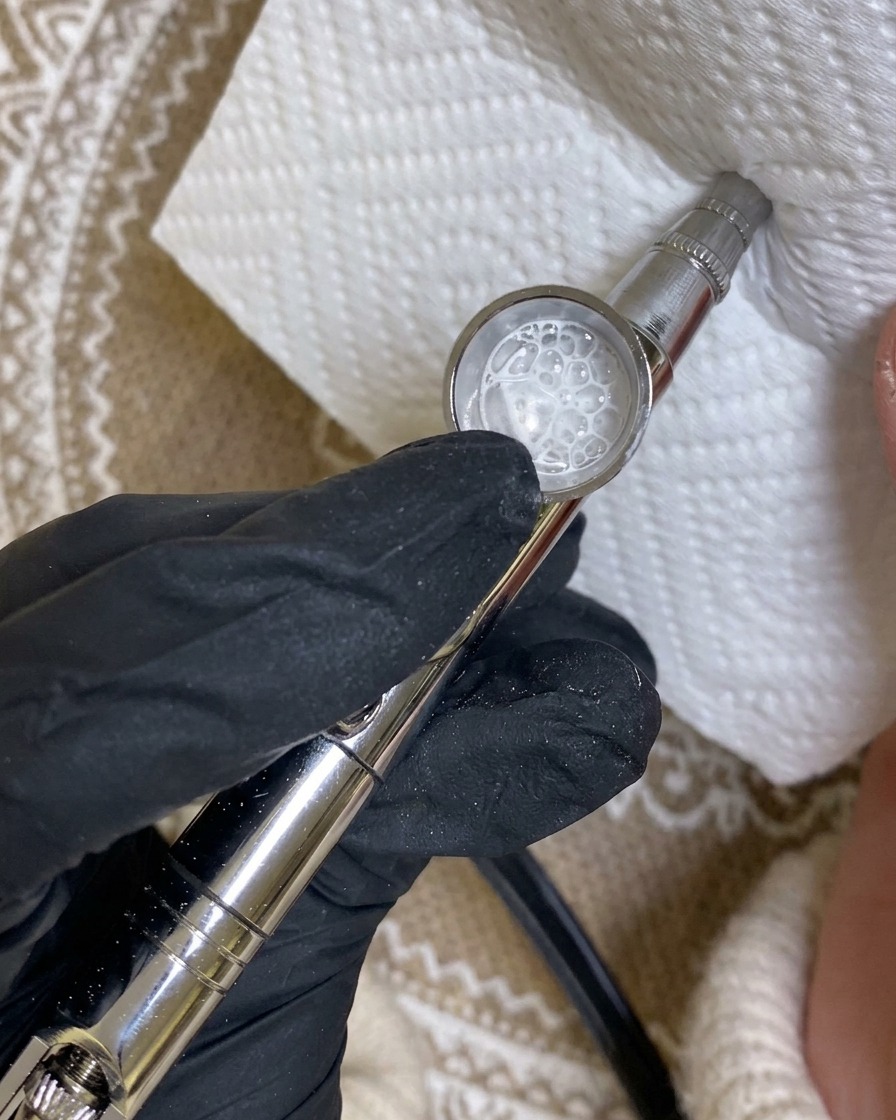
Before applying to the nail, test the airbrush flow on a clean paper towel. Adjust the trigger and mixture as needed to ensure the spray is consistent, fine, and free of clogs.
Tip: This test pass is essential to check your ratio; if the spray is too chunky, add a tiny bit more thinner. - 5Apply first gradient pass
Spray the first pass of the white gradient onto the nail. Hold the airbrush at a distance, moving slowly to create a soft, diffused transition of color on the tip of the nail.
Tip: Keep the airbrush moving to avoid over-saturating one area; this first pass should be light and subtle. - 6Adjust gradient intensity
If the white pigment appears too intense, add more thinner to the airbrush cup to further dilute the mixture. This allows for a more sheer and controlled build-up of the gradient color.
Tip: Always adjust your mixture incrementally to maintain control over the final opacity of your gradient. - 7Apply second gradient pass
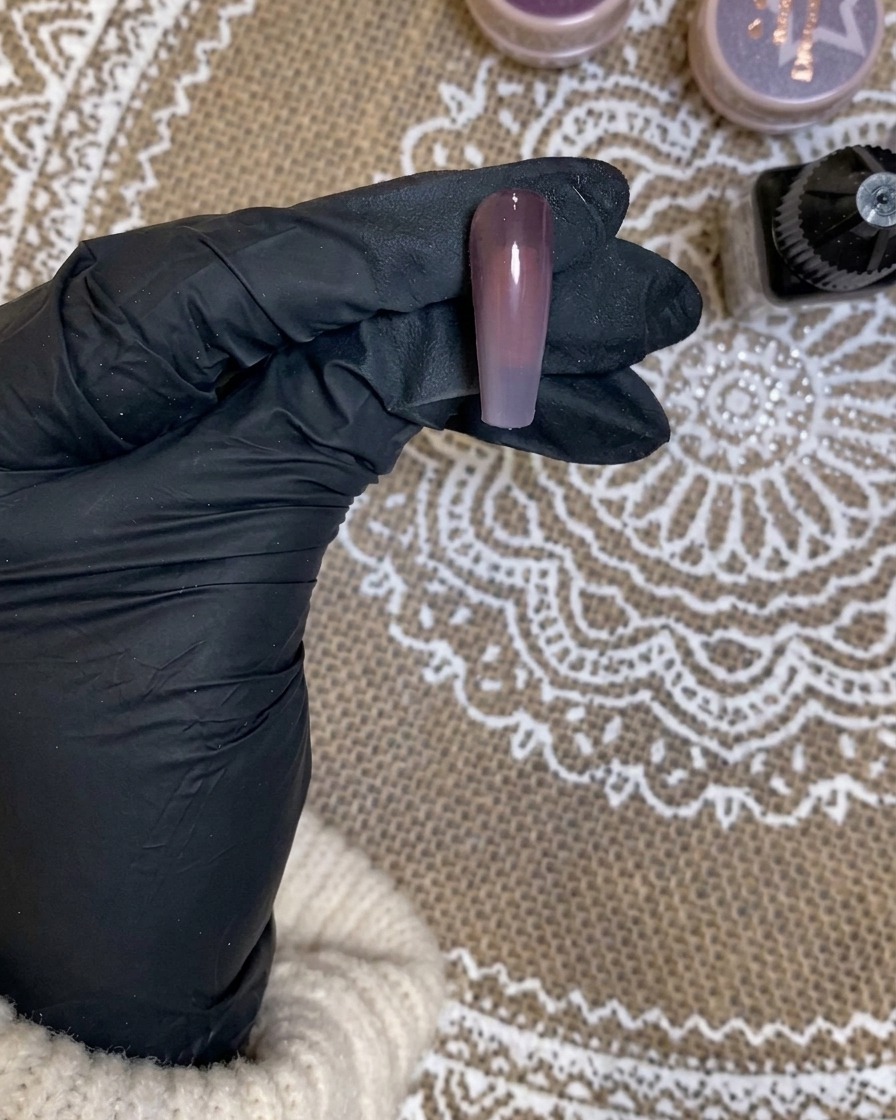
Continue the gradient effect by applying a second pass of the white mixture. Maintain a consistent distance from the nail to ensure a smooth, diffused transition. Build the intensity gradually to achieve the desired opacity while keeping the ombre look soft.
Tip: If the color appears too light, ensure your mixture is well-blended and apply a slightly thicker layer during this pass. - 8Adjust gradient intensity
To increase the color intensity, add more concentrated gel mixture to your airbrush. This adjustment allows for a more pigmented application, helping to deepen the white gradient as you progress toward the final stages of the design.
Tip: Adjust your mixture slowly to maintain control over the opacity; you can always add more, but it is harder to remove excess color. - 9Final gradient pass
Apply the final pass of the gradient, focusing on deepening the base color while ensuring the transition remains smooth. Keep the airbrush at a steady distance from the nail to prevent pooling or harsh lines.
Tip: Concentrate the final spray primarily on the tip area for shorter nails or higher up for longer nails to perfect the ombre effect. - 10Smooth gradient edges
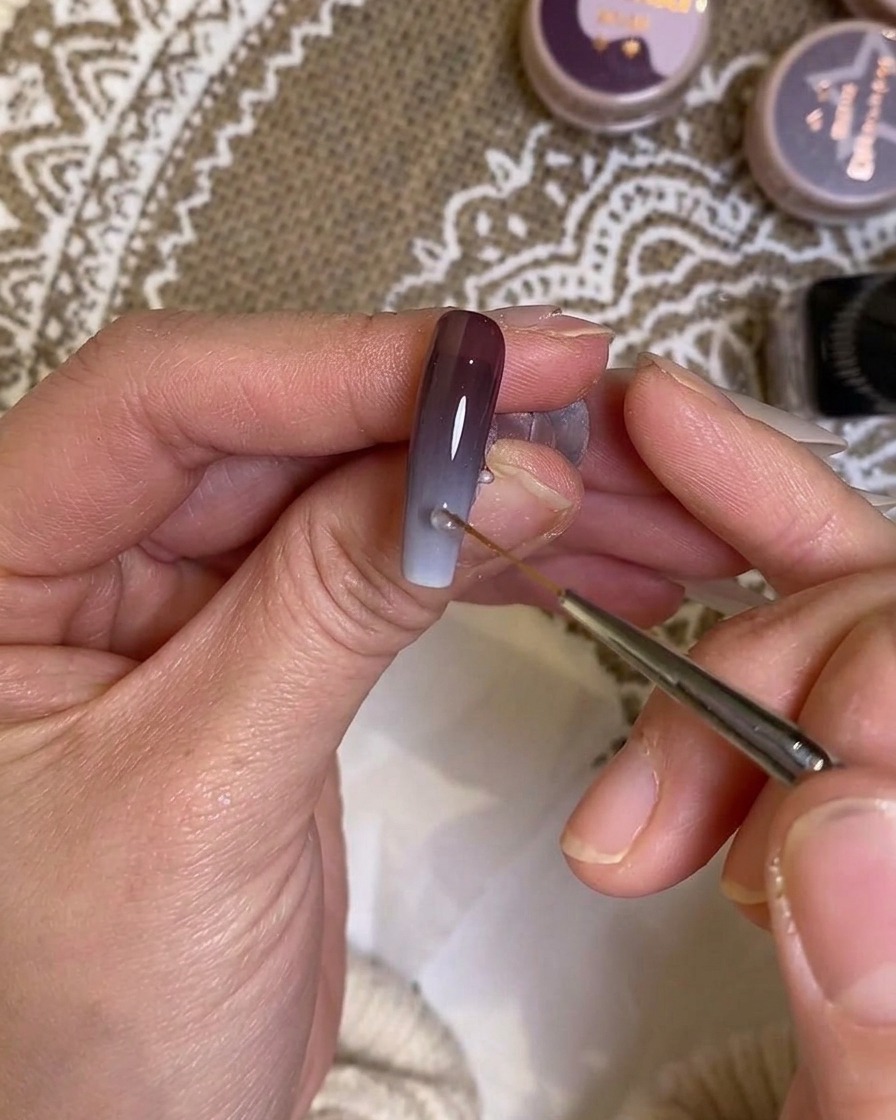
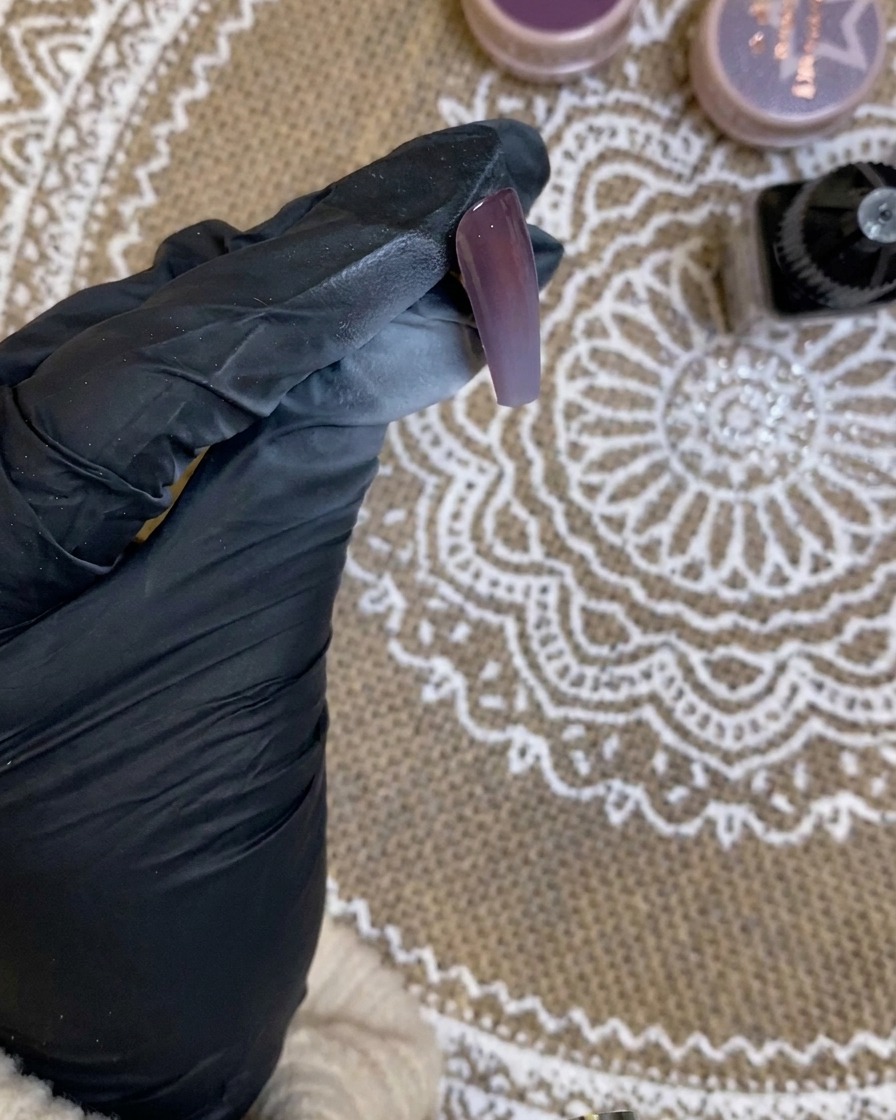
Using a clean, fine liner brush, gently blend the edges of the gradient where the white meets the base color. This manual blending technique ensures a seamless transition and removes any overspray that might appear uneven.
Tip: Keep the liner brush slightly damp with base or clear gel to help smooth the product without disturbing the pigment. - 11Refine cuticle area
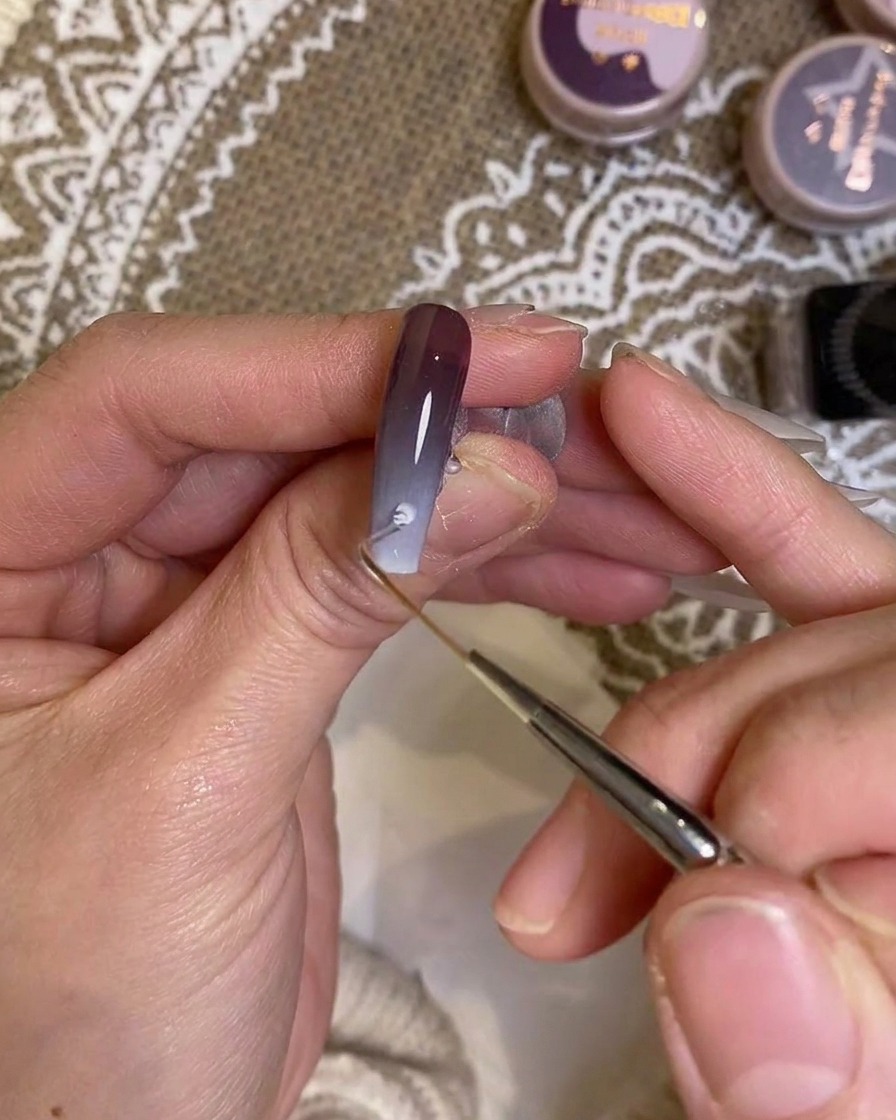
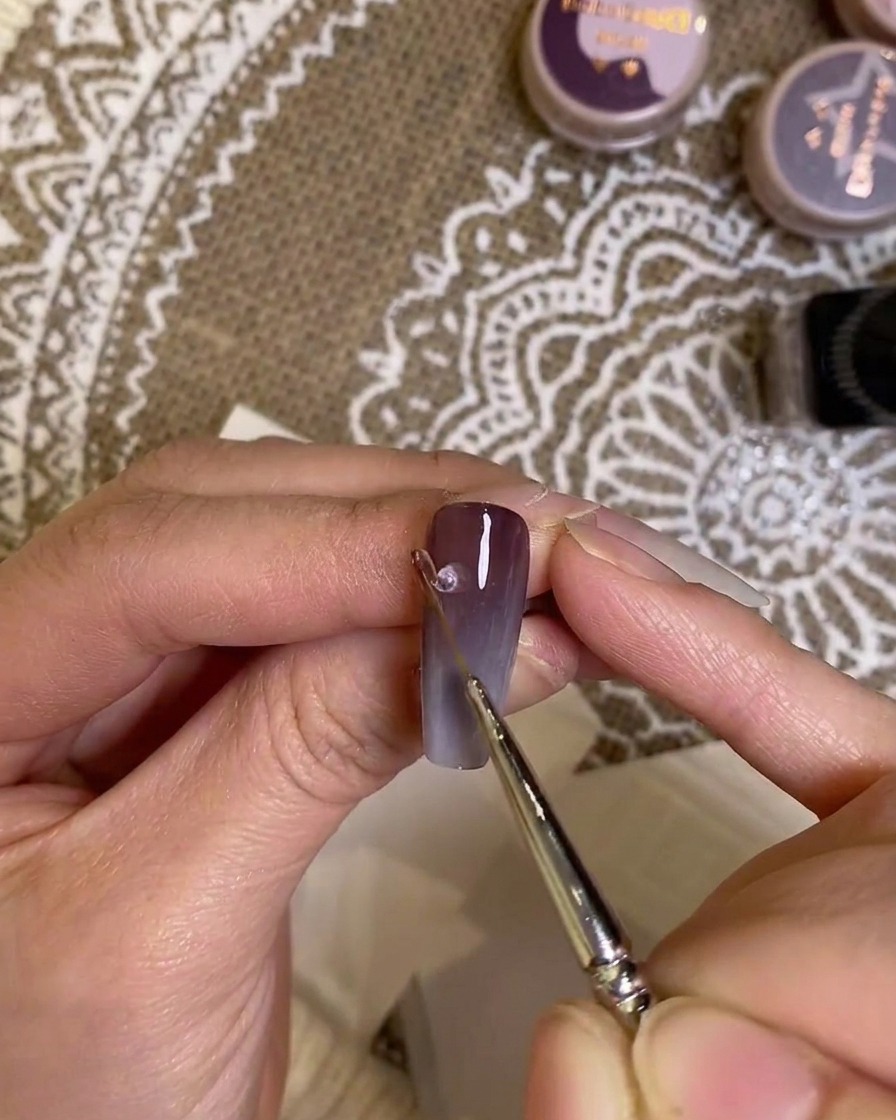
Carefully deepen the base color intensity near the cuticle area using a fine detail brush. This adds depth and definition to the manicure, ensuring the color transition looks professional and clean around the nail folds.
Tip: Apply the color sparingly near the cuticle to avoid flooding the skin, which can cause lifting. - 12Perform final check
Conduct a final inspection of the nail to evaluate the gradient intensity and the smoothness of the transition. Ensure the color is uniform and that the ombre effect is correctly positioned according to the nail length.
Tip: Check the nail under different lighting angles to ensure there are no patches or uneven spots before curing the final layer.