Elegant White Gradient Airbrush Nails — Step-by-Step Tutorial
NF
By NailFrames
Post
0
0/5 (0)
Master the perfect airy gradient with our white airbrush nail tutorial. Achieve a seamless, professional transition with this clean and sophisticated look.
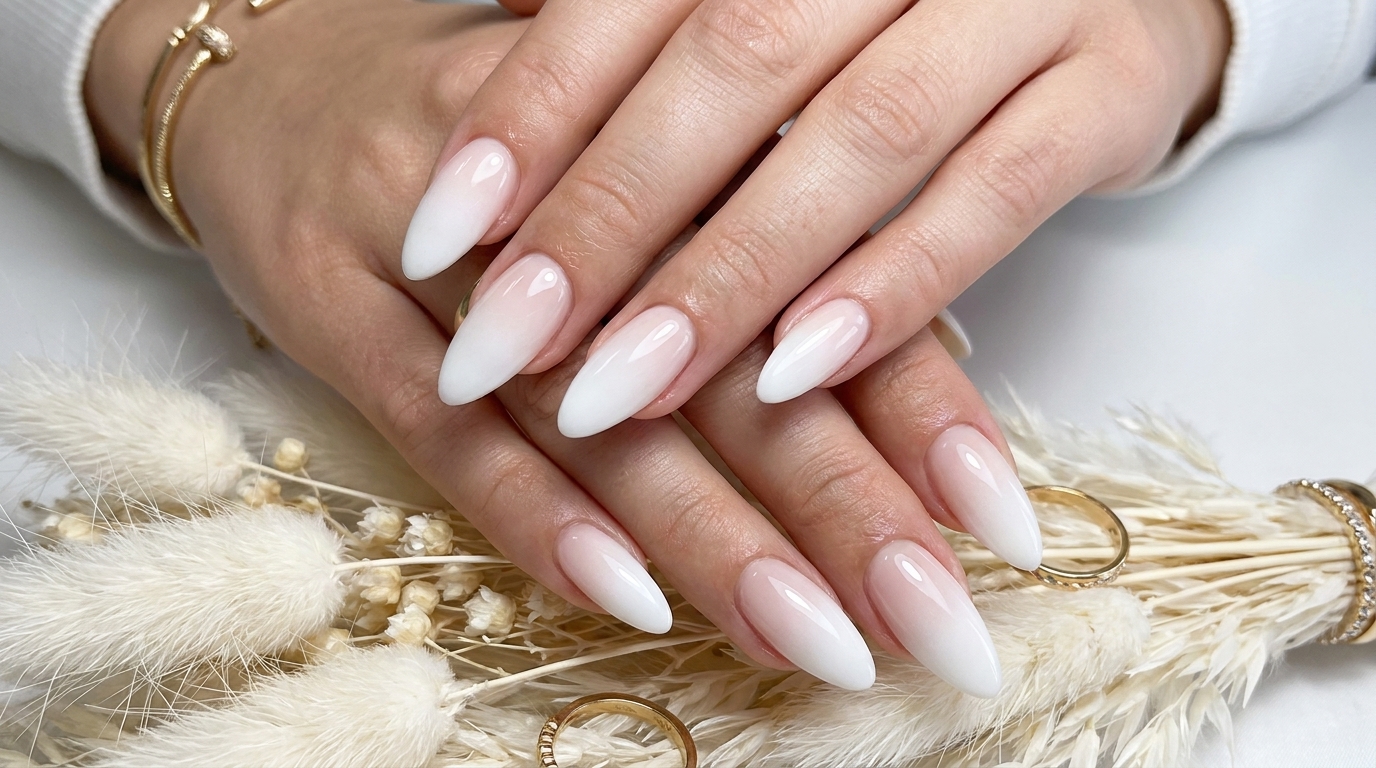
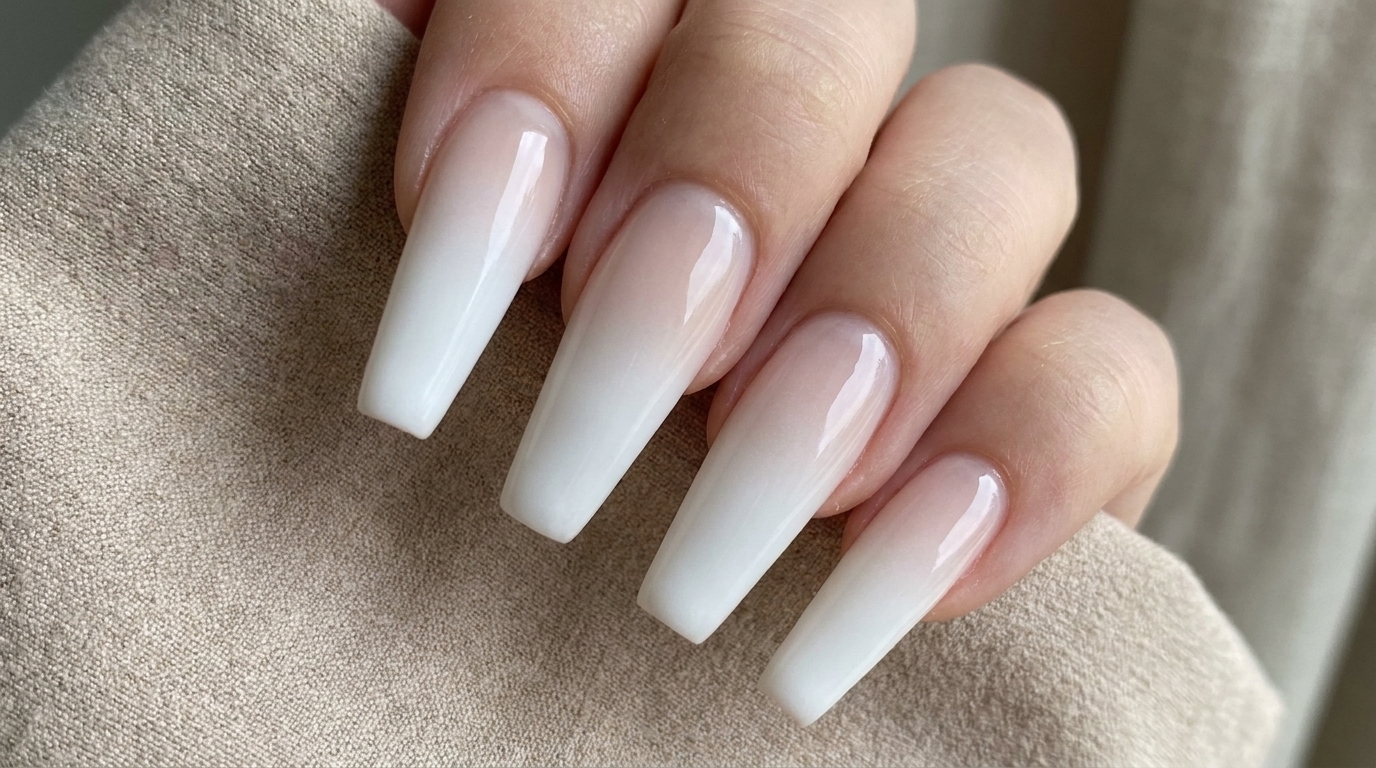
The white gradient airbrush look is a timeless choice that brings a soft ethereal quality to any manicure. This delicate transition from a nude pink base to a crisp white tip offers a clean and polished aesthetic suitable for any occasion. Perfect for those seeking a high end salon finish at home, this airbrush technique creates a smooth diffused gradient that is notoriously difficult to achieve with traditional sponging methods alone.
Stunning white airbrush gradient nails featuring a seamless transition on elegant almond-shaped nails.
Steps
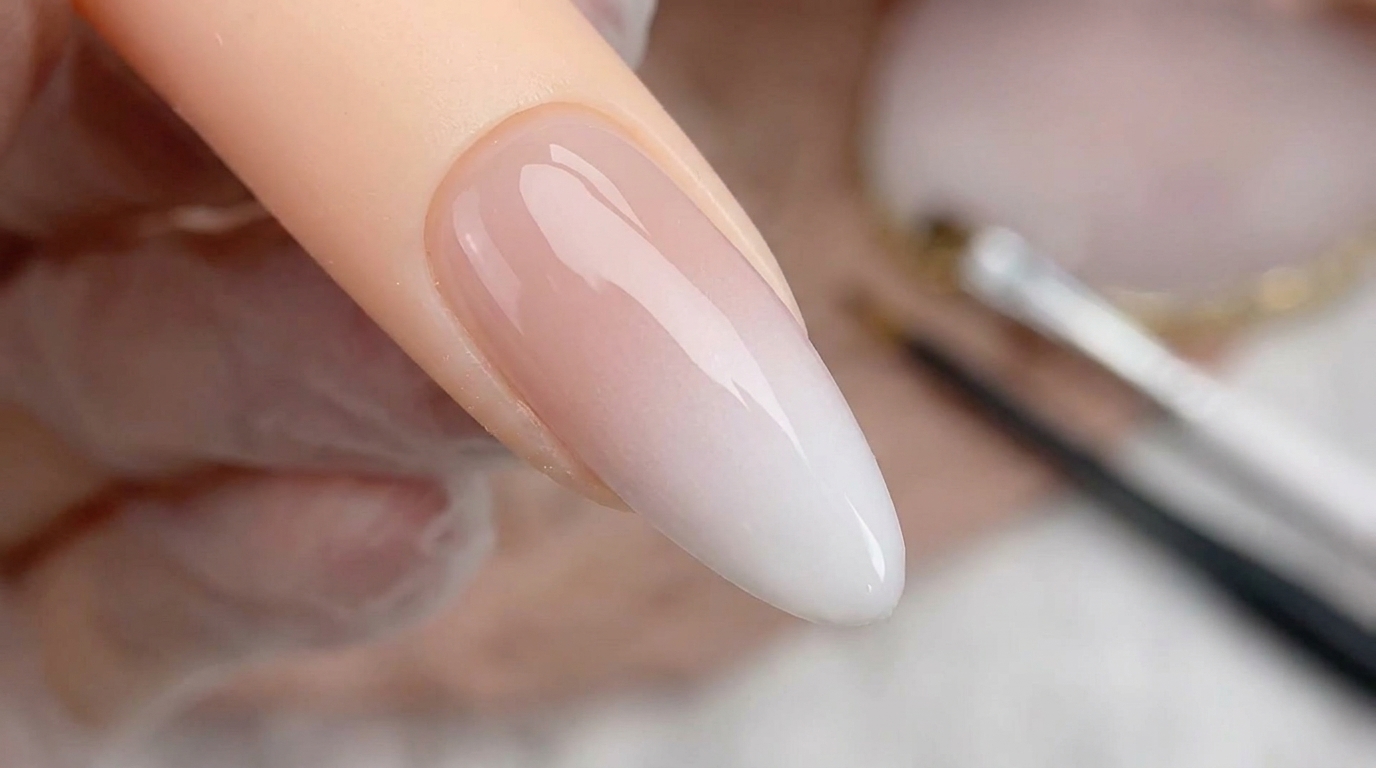
1Inspect the gradient transition
Carefully examine the airbrushed gradient transition to confirm it is smooth and consistent across every nail. The blend should fade seamlessly from the nude base to the white tip without any harsh lines or inconsistent patches. This inspection is vital to guarantee the quality of the airbrush work before sealing it with your top coat.
Tip: If the transition appears uneven, a very light mist of the base color can often help soften and blur any visible lines.
2Final texture and finish check
Conduct a final assessment of the nail surface to ensure the gradient is fully set and the texture is completely smooth. Apply a high-gloss top coat uniformly over the entire nail, ensuring you carefully cap the free edge. This protective layer is crucial to safeguard the delicate airbrush pigment and prevent premature chipping.
Tip: Ensuring the free edge is fully capped with the top coat will prevent premature chipping of the airbrushed gradient.
Frequently Asked Questions
Patchiness often occurs if the paint is too thick or the airbrush distance is too close. Ensure your airbrush paint is properly thinned to the consistency recommended by the manufacturer and maintain a steady, even distance from the nail surface while working.
Yes, using a high-quality, non-wipe gel top coat is essential to protect the airbrushed layer. Because airbrushed ink or paint can be more delicate than gel polish, a slightly thicker top coat helps encapsulate the design and prevents it from smudging or lifting.
While this look specifically uses an airbrush for that signature seamless finish, you can approximate the style using a makeup sponge and white gel polish. However, the airbrush method remains the superior way to achieve a perfectly smooth, cloud-like gradient transition.