Sunset Aurora Cat-Eye Gel Nails — Step-by-Step Tutorial
Discover how to create dreamy sunset-inspired nails featuring a magnetic cat-eye base, iridescent flakes, and an ethereal aurora chrome gradient finish.
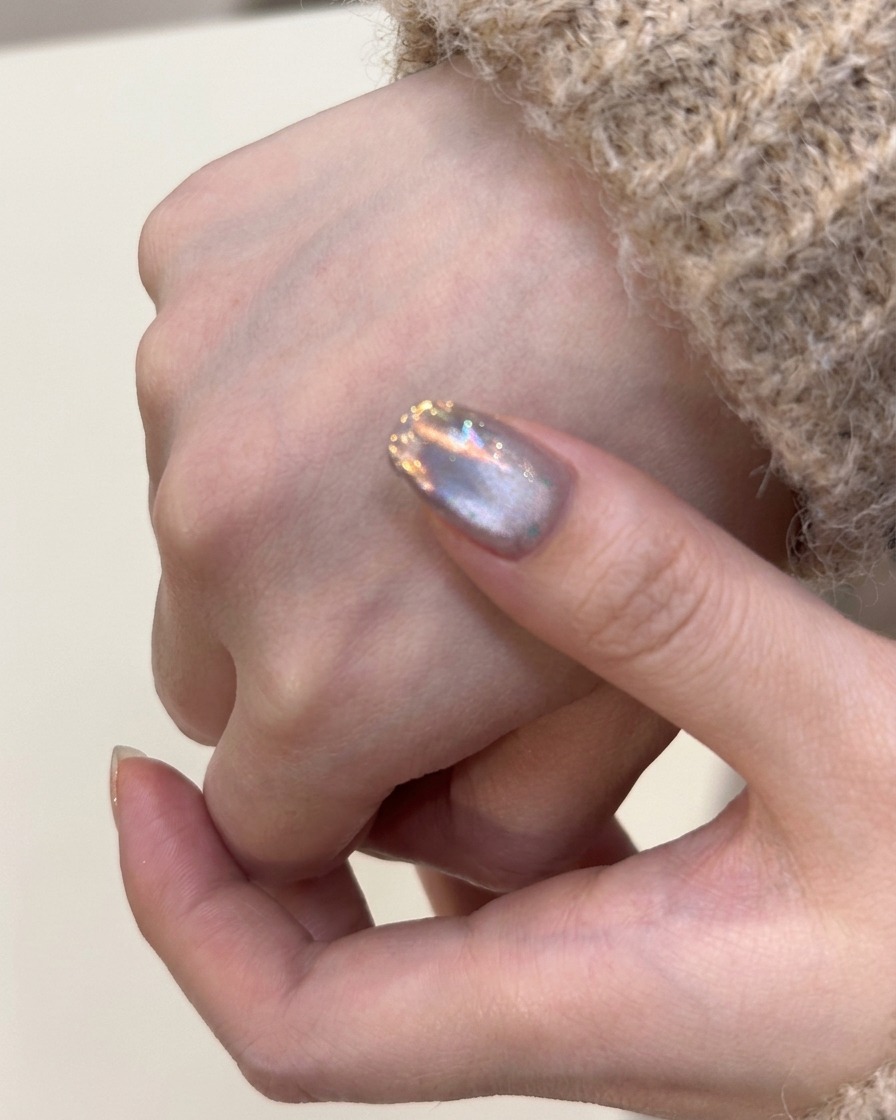
Capture the magic of a fading sunset right at your fingertips with this stunning multi-dimensional manicure. By layering magnetic cat-eye gel with delicate iridescent flakes and a soft aurora chrome powder, you create a complex, shifting look that changes with the light. This tutorial guides you through the layering technique required to achieve this professional-grade finish at home.
Steps
- 1Apply silver cat-eye gel
Apply a thin, even coat of silver cat-eye gel polish to the entire nail surface. Ensure you cap the free edge to provide a secure seal and prevent premature lifting. Do not cure at this stage.
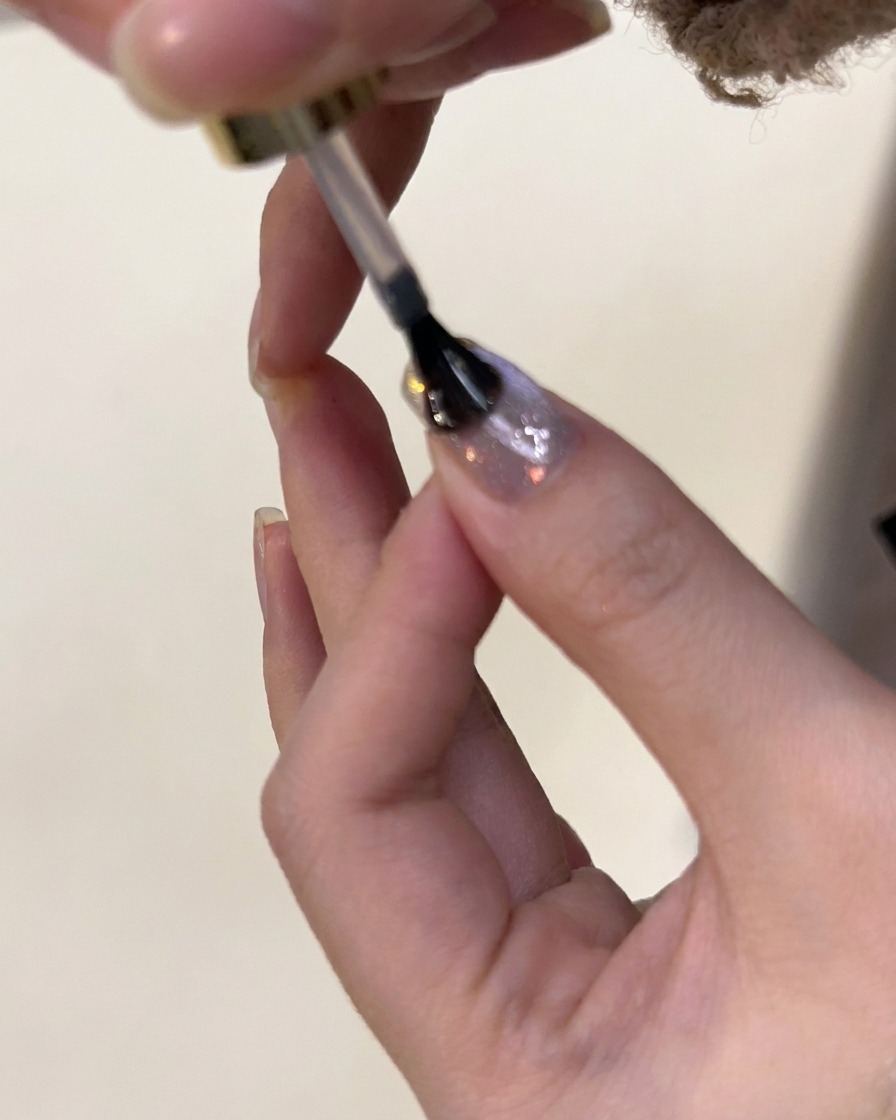
Tip: Apply a uniform layer to ensure the magnetic particles have enough room to move freely when creating the effect. - 2Create cat-eye effect
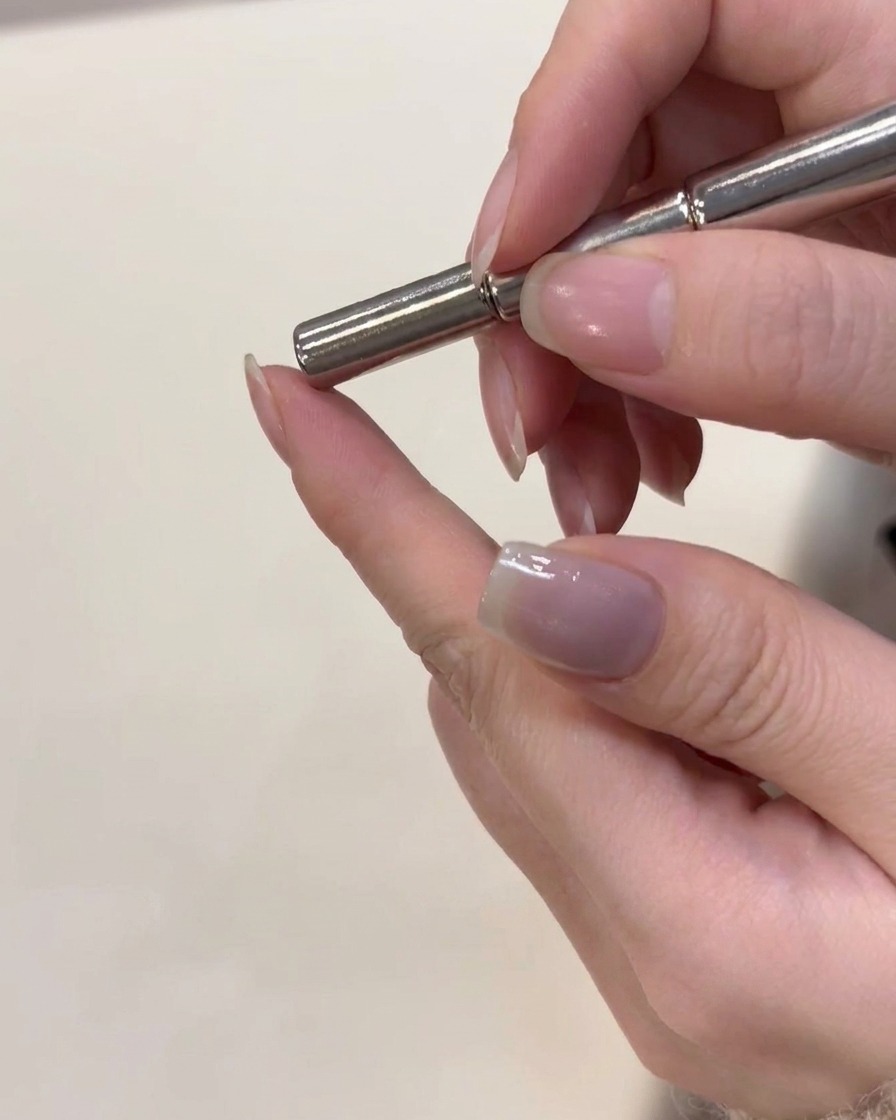
Before curing, hold a cat-eye magnet close to the nail surface without touching it. Move the magnet in your desired direction—typically at an angle—to manipulate the metallic particles within the wet gel to form a sharp, distinct line of light.
Tip: Keep the magnet steady and close to the nail for a crisper, more defined cat-eye line. - 3Cure the cat-eye gel
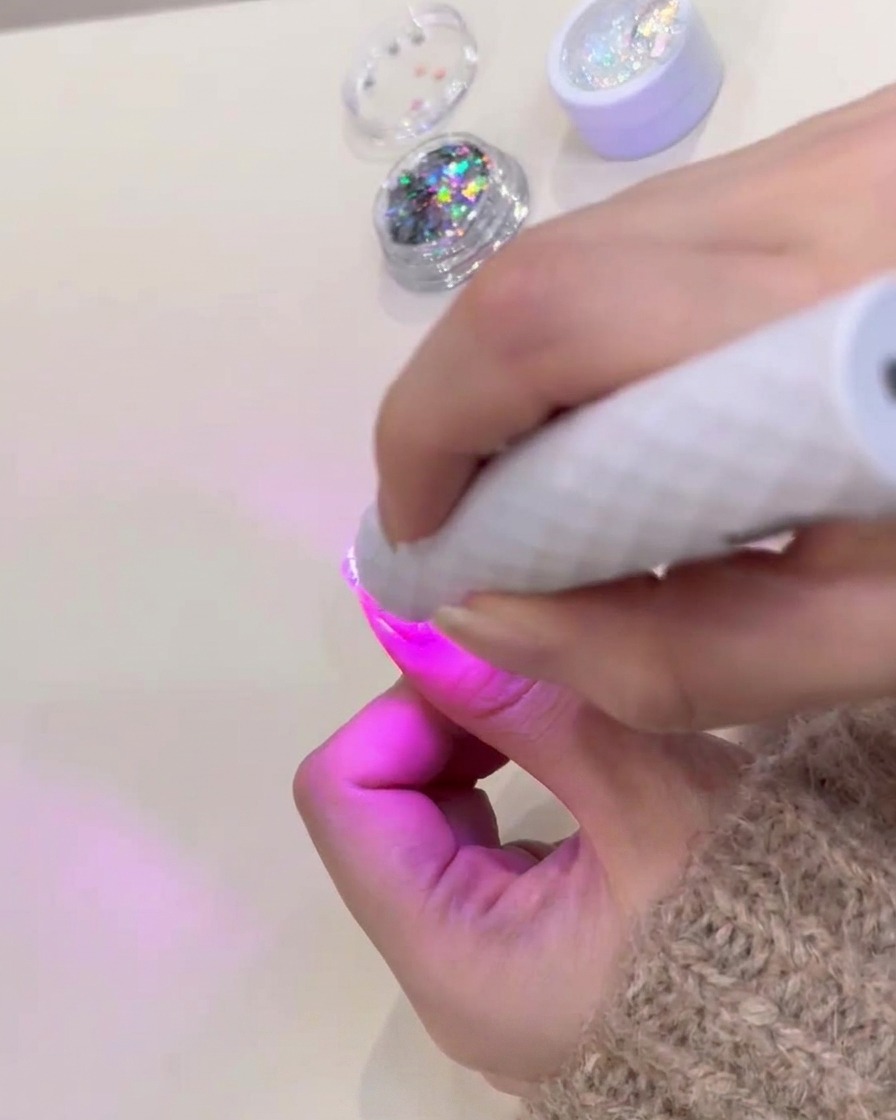
Once you have achieved your desired cat-eye effect, place your hand into the UV or LED lamp to cure the polish. Follow your gel brands specific timing instructions to ensure the gel hardens completely.
Tip: Be careful not to bump your nails against the inside of the lamp while placing your hand inside. - 4Apply clear builder gel
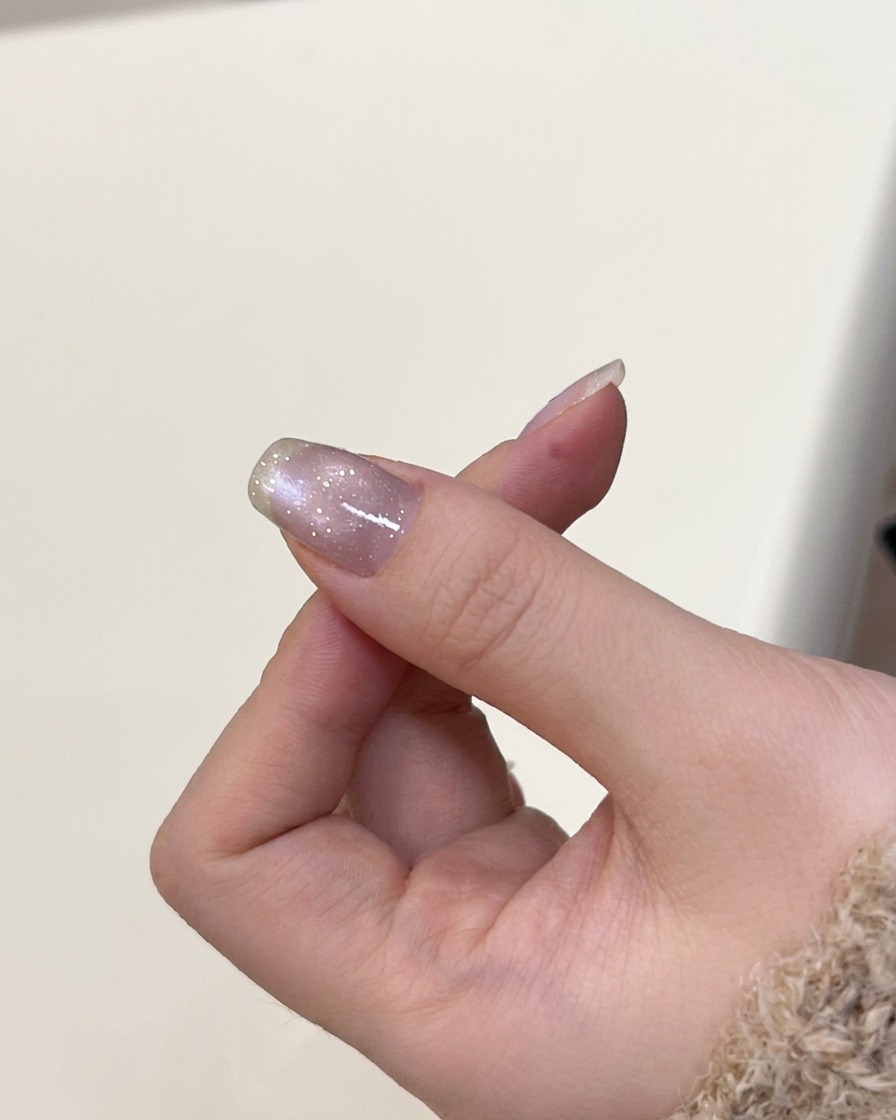
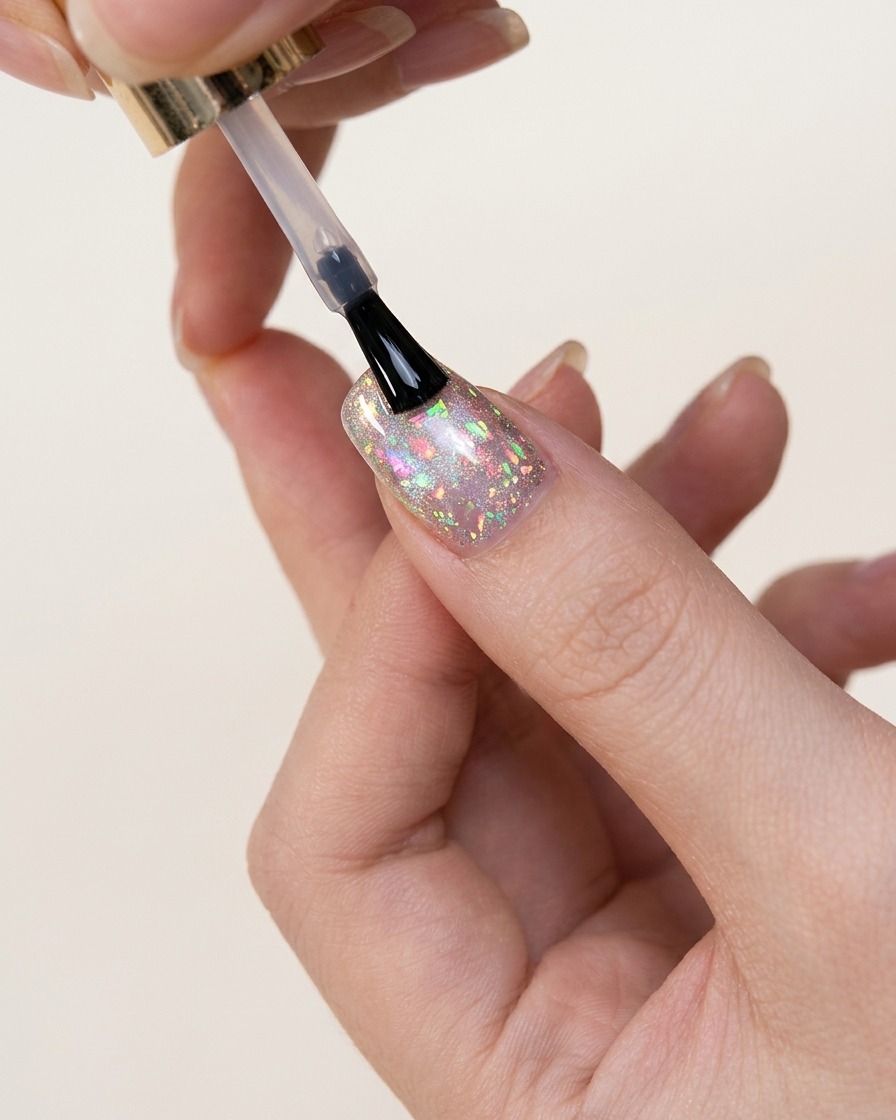
After curing the cat-eye base, apply a layer of clear builder gel over the nail. This provides a slightly tacky, structural layer that will act as a base for embedding your nail art decorations.
Tip: Use a medium-consistency builder gel that self-levels easily for a smooth surface. - 5Add blue iridescent flakes
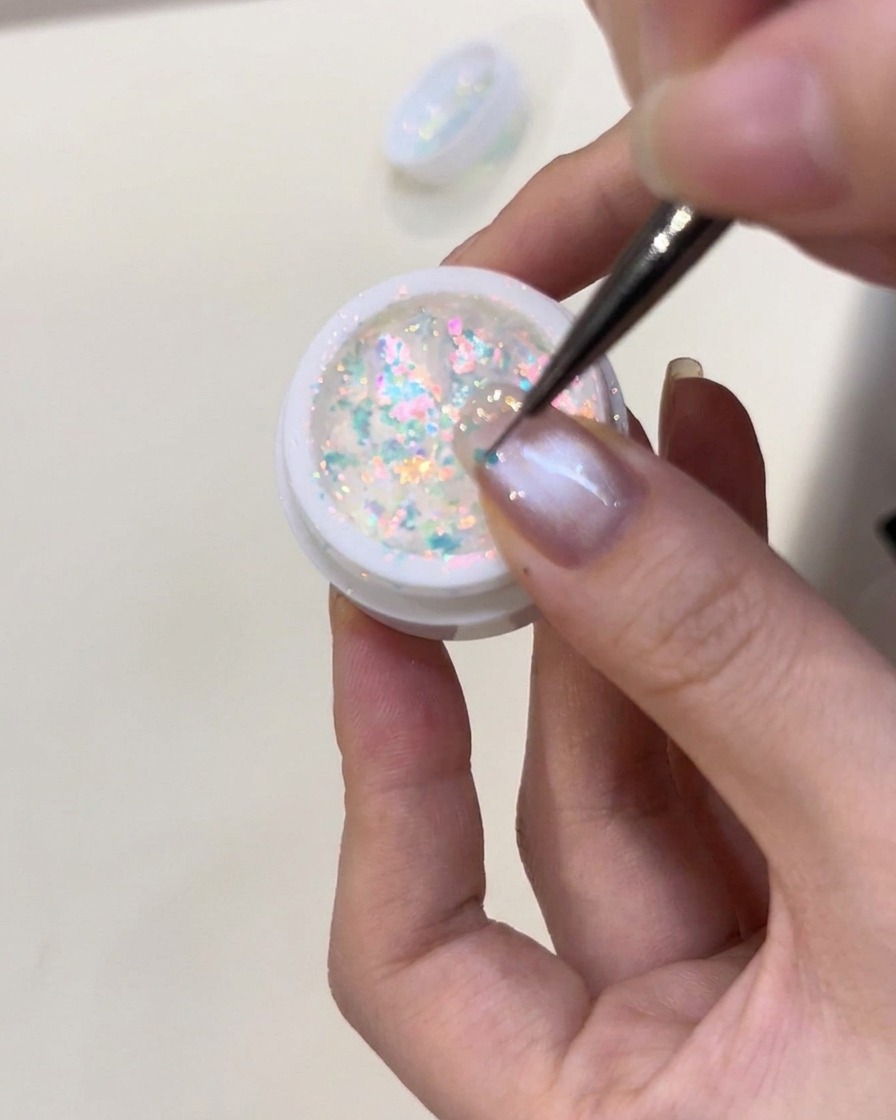
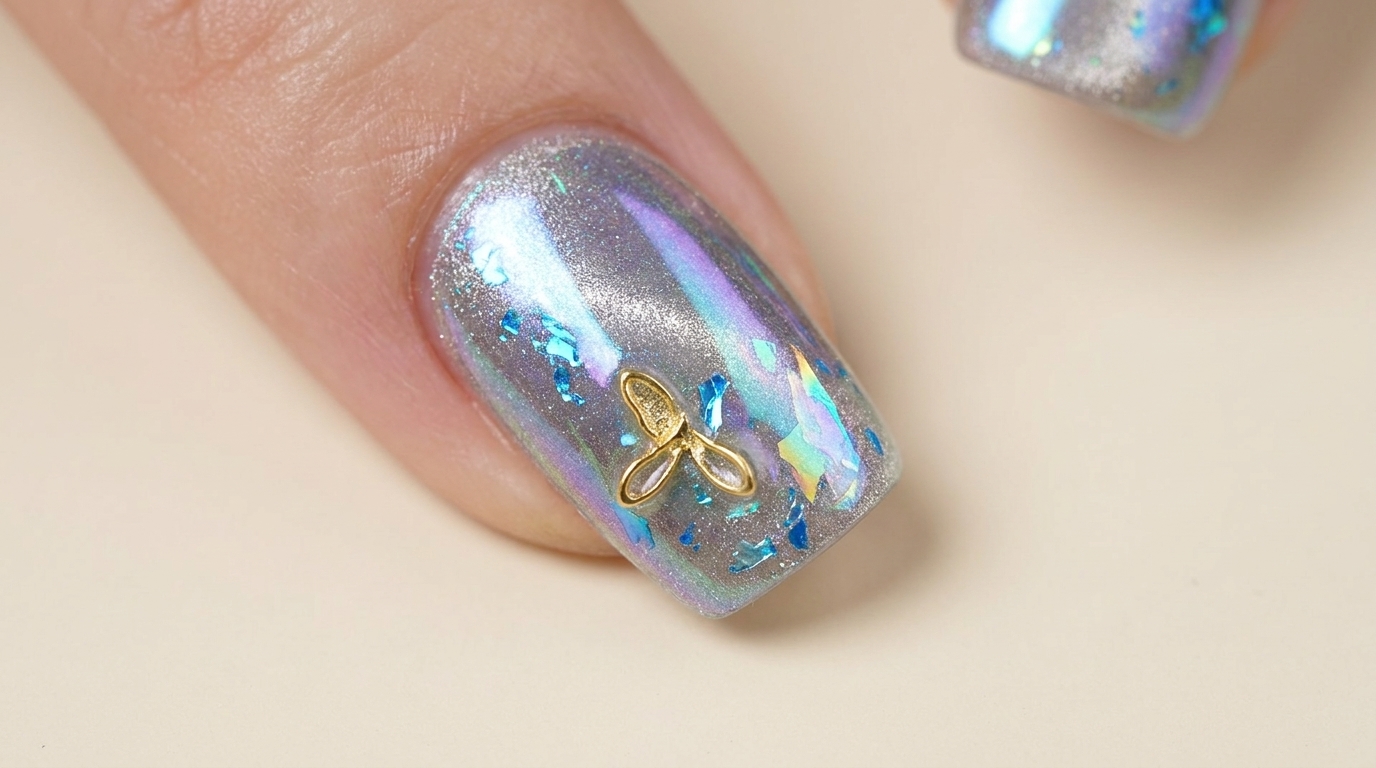
While the builder gel is still wet, use tweezers to carefully pick up and place small pieces of blue iridescent flakes onto the nail. Arrange them to create a scattered, multidimensional look across the surface.
Tip: Apply the flakes sparingly to allow the cat-eye effect beneath to remain visible. - 6Add butterfly charm
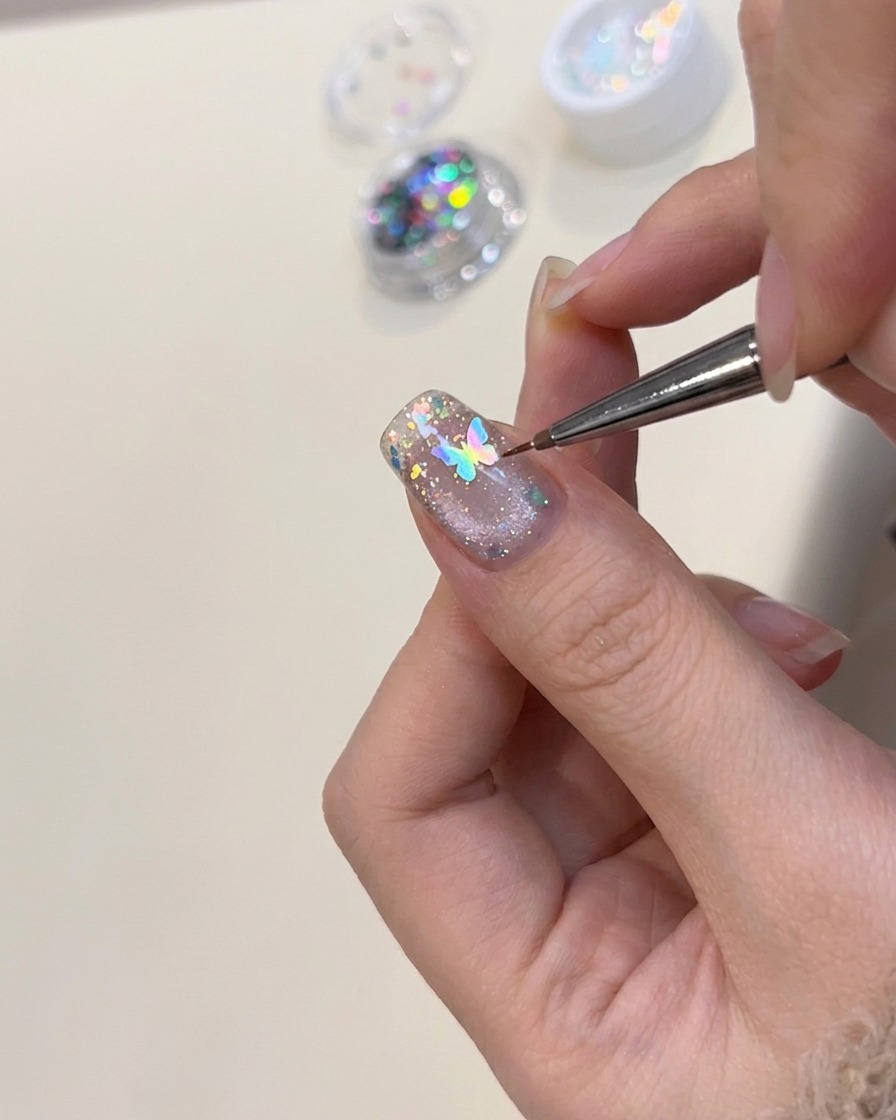
Using your tweezers, place the butterfly charm onto the nail, pressing it gently into the wet builder gel so it stays in place. Ensure it is positioned centrally or where you prefer for the best design balance.
Tip: If the charm is large or curved, press it down firmly to ensure the edges dont lift after curing. - 7Cure the builder gel
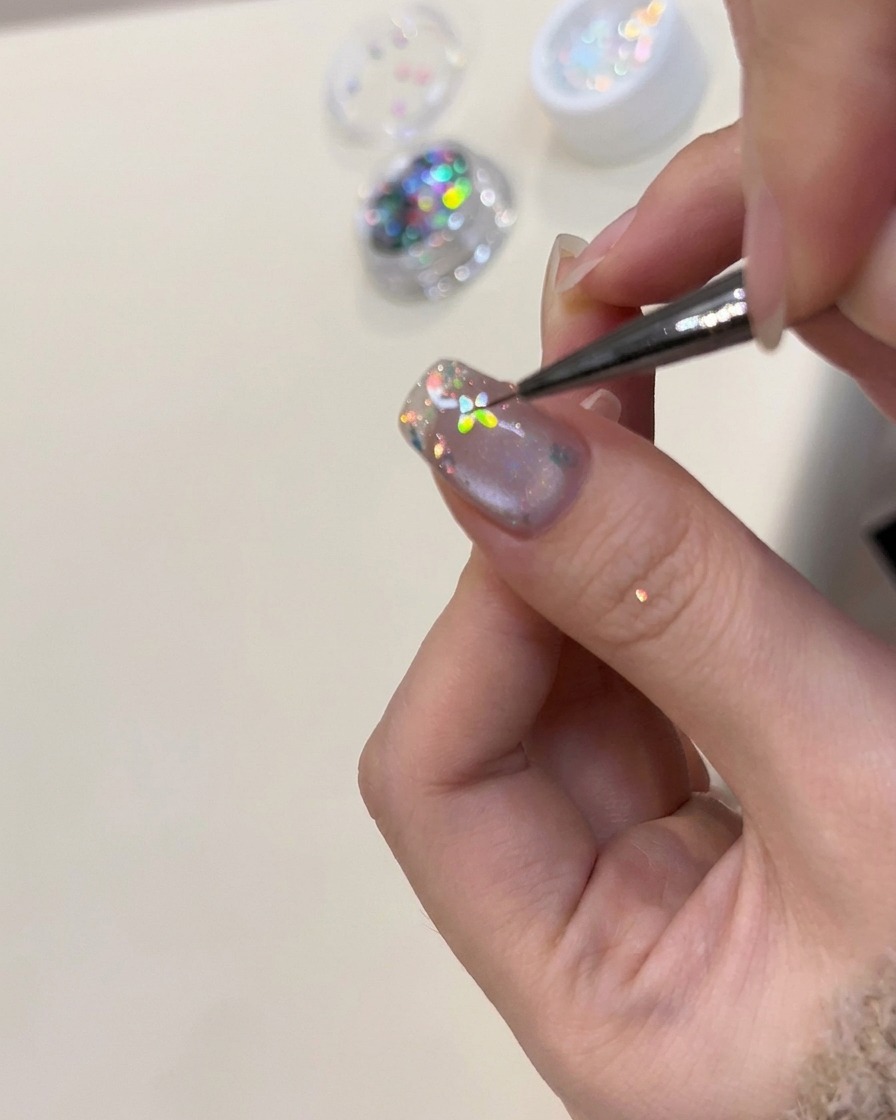
Once the butterfly charm is placed into the wet builder gel, place your hand under the UV or LED lamp. Cure for the full duration recommended by your gel product to ensure the charm and builder layer are completely set.
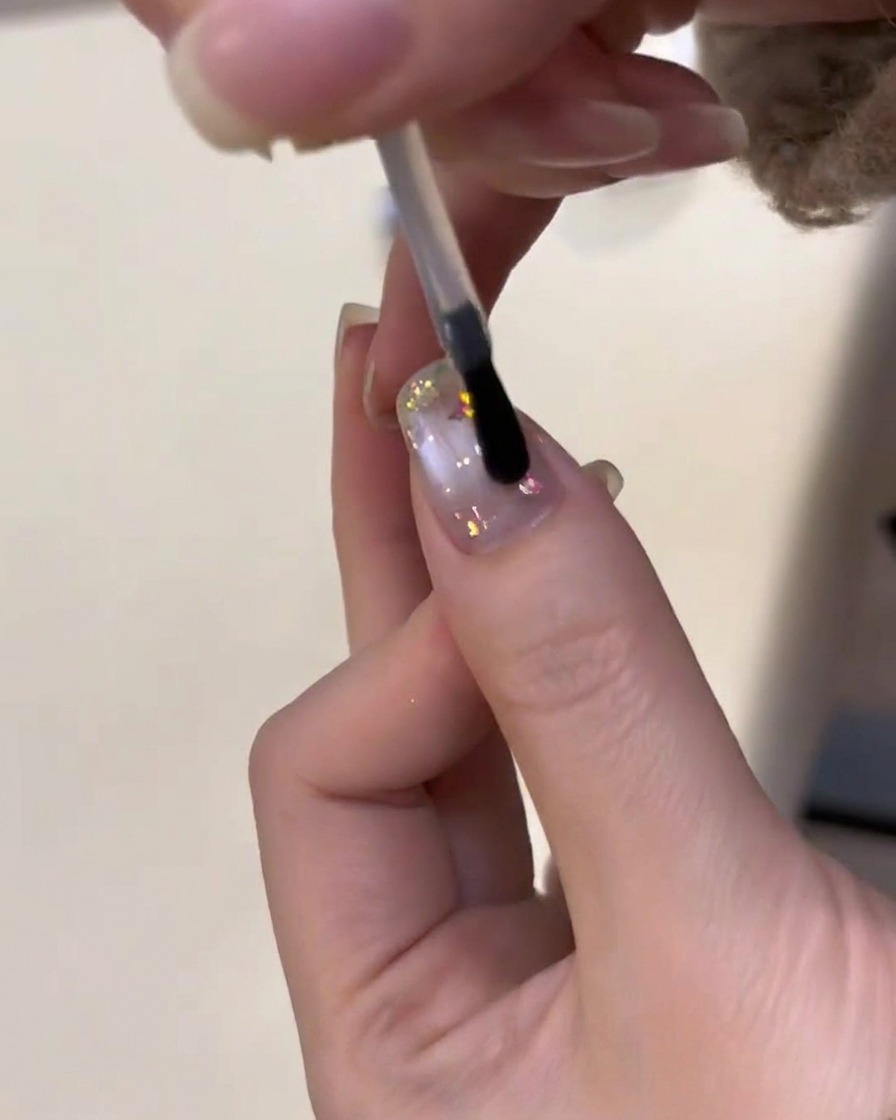
Tip: If the charm is large, ensure your finger is positioned directly under the center of the light for even curing. - 8Apply no-wipe top coat
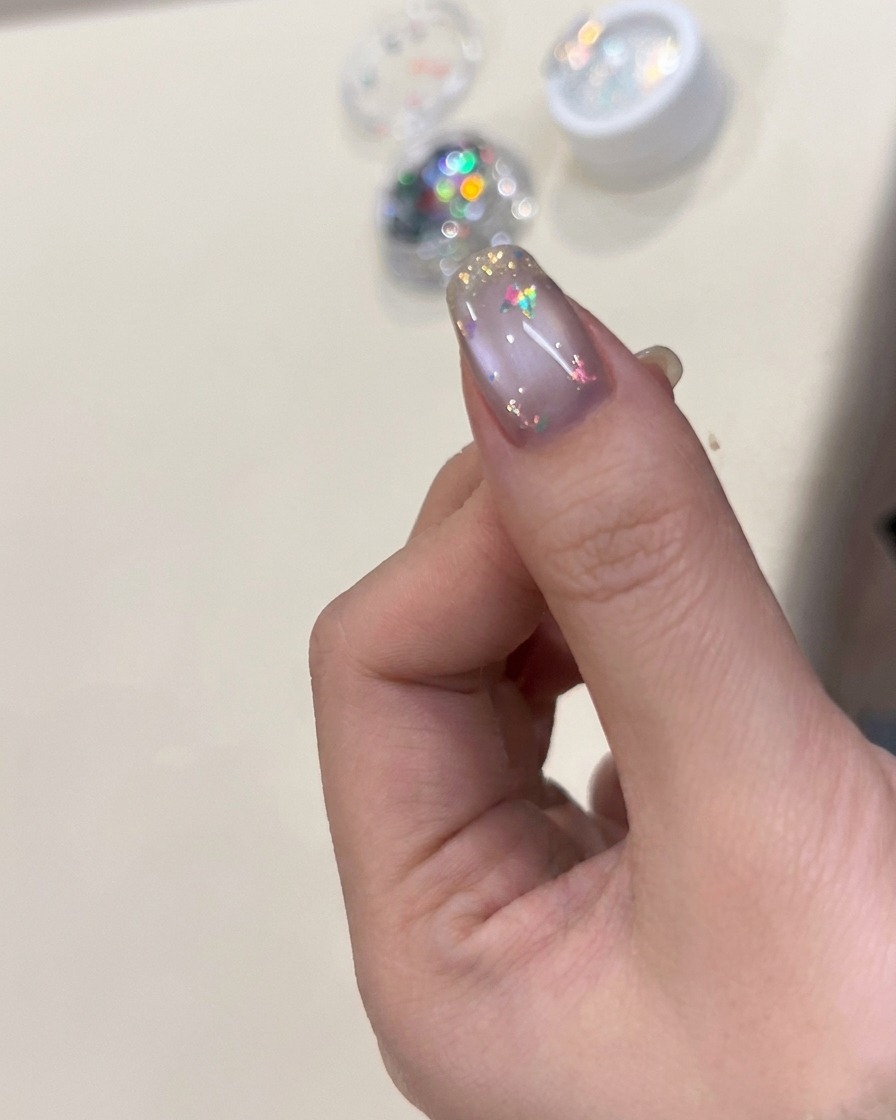
Apply a thin layer of no-wipe top coat over the entire nail surface, ensuring you cover the butterfly charm completely to seal it in place. Use a smooth, controlled stroke to avoid streaks, then cure according to your gels instructions.
Tip: Capping the free edge with the top coat helps prevent the charm from snagging. - 9Cure the top coat
Place your nails under the UV/LED lamp to cure the top coat. This step locks in the design and creates a smooth, durable finish that is ready for the next stage of the application.
Tip: Make sure your fingers are flat and not tilted to ensure the light reaches all parts of the nail surface. - 10Prepare chrome powder
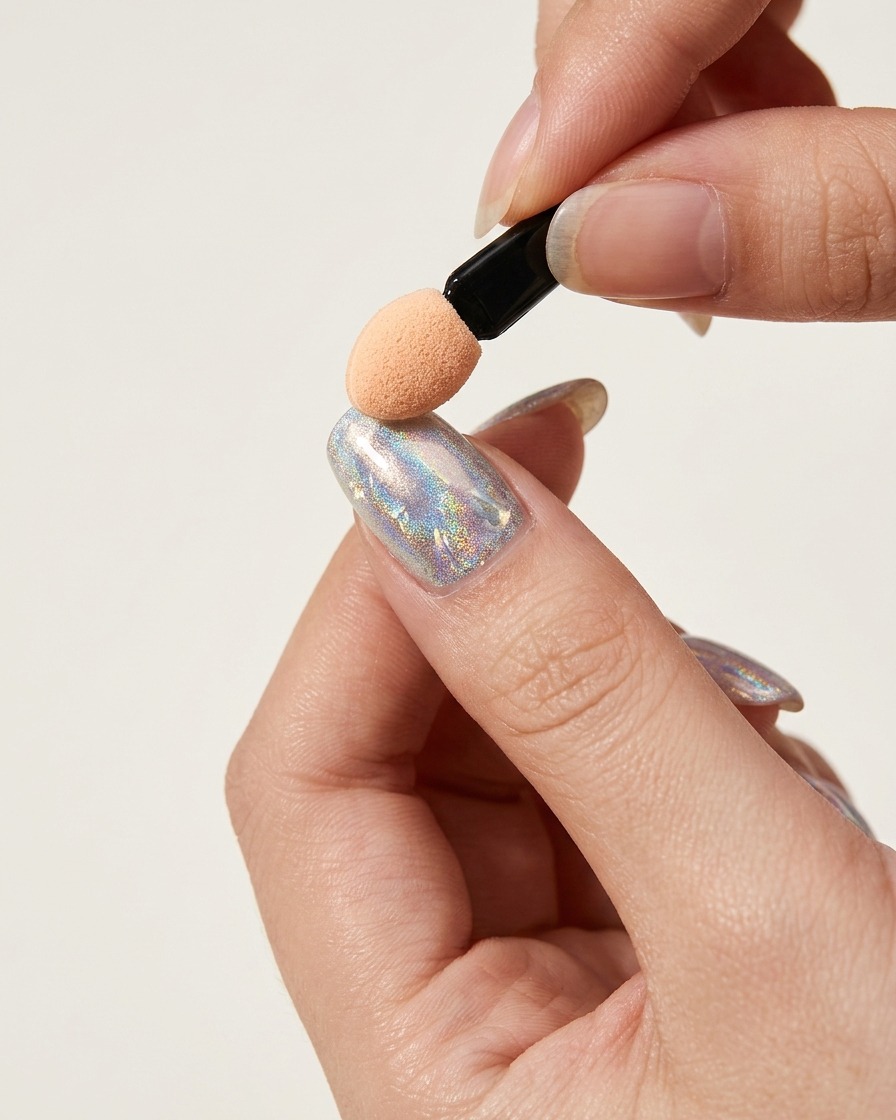
Dip the applicator sponge into the aurora chrome powder, picking up a small amount. You only need a thin, even layer on the sponge to achieve the desired effect.
Tip: Tap off any excess powder from the applicator before touching the nail to prevent clumpiness. - 11Apply aurora chrome
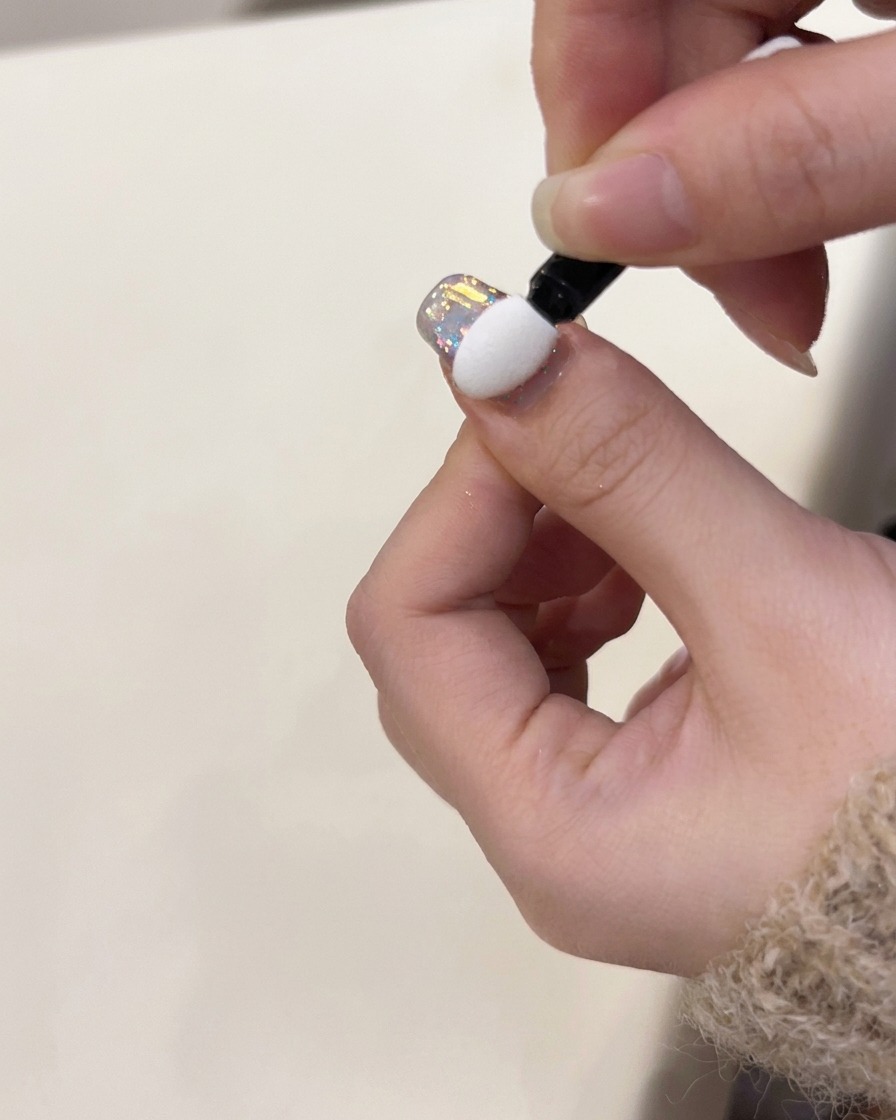
Gently rub the aurora chrome powder onto the cured nail surface using the applicator sponge. Focus the pressure to blend the powder into a soft, ethereal gradient effect over the existing base.
Tip: Use a light, sweeping motion to build the intensity of the chrome effect gradually. - 12Apply final top coat
Apply a final, protective layer of top coat over the chrome-powdered nail to seal the design. Ensure full coverage over the gradient area, then cure for the final time to set the look.
Tip: Clean your brush on a lint-free wipe after this step if any chrome powder accidentally transfers back into the bottle. - 13Cure final top coat
Place your nails under the UV/LED lamp for the final cure. Ensure the entire nail surface, including the free edge, is exposed to the light to fully harden the top coat, providing a durable and high-gloss finish that protects your nail art.
Tip: Do not rush this final cure; a thorough cure ensures the longevity of your manicure and prevents the top coat from peeling or dulling prematurely.