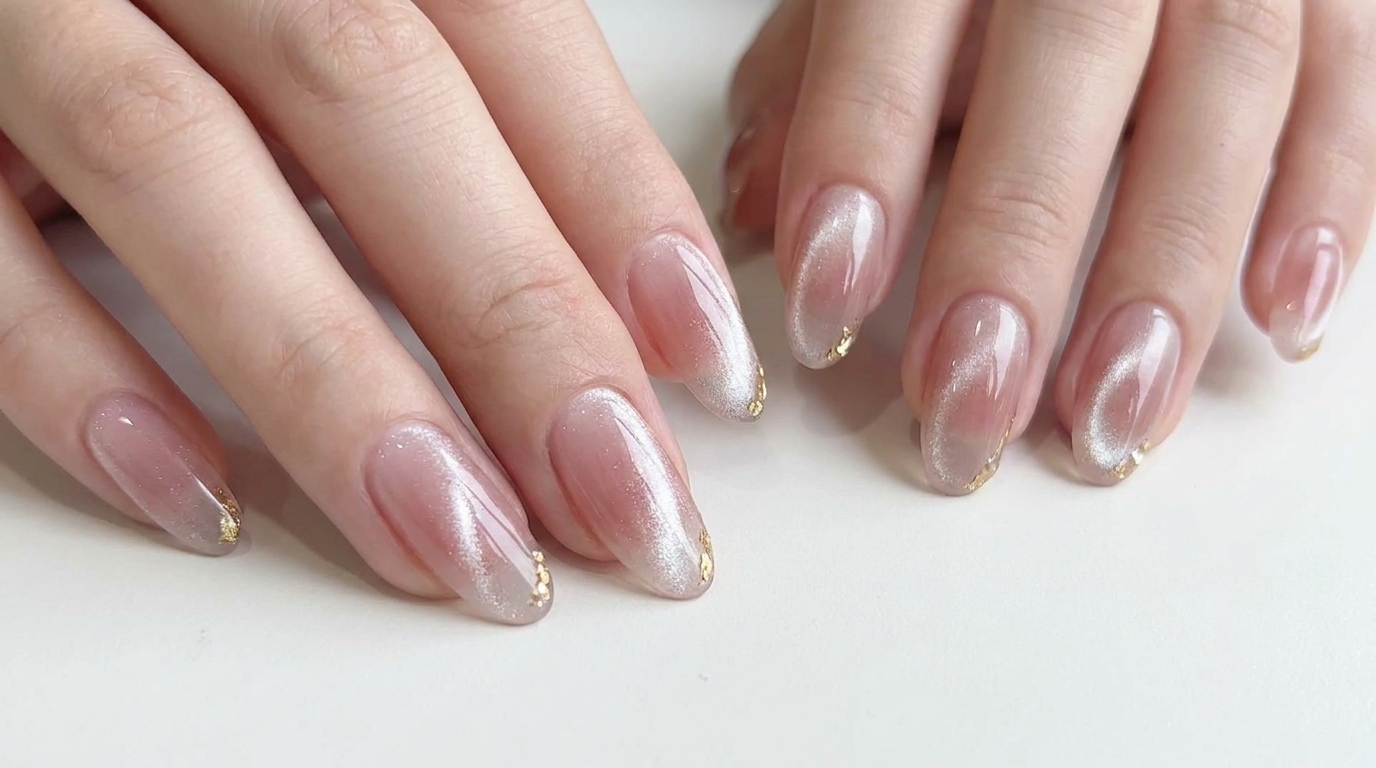
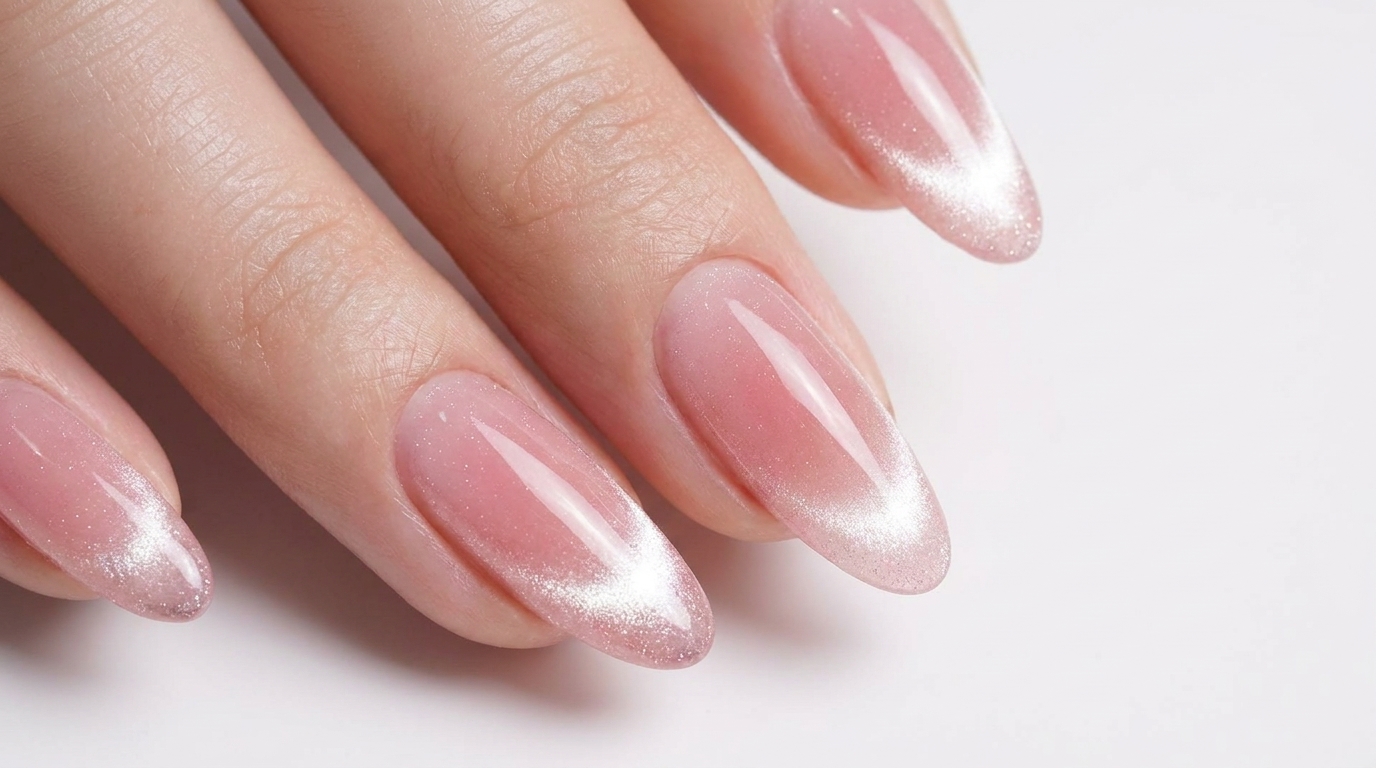
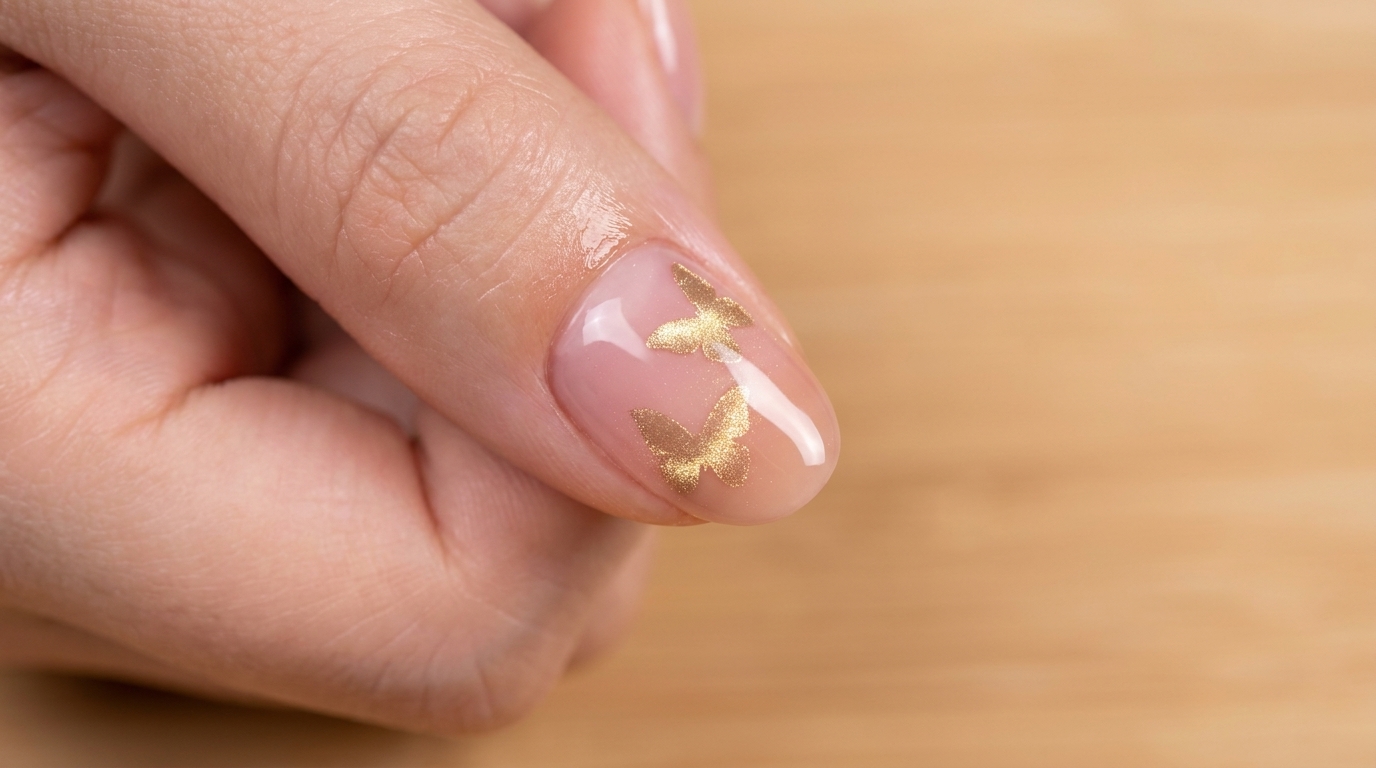
Nude Pink Gold Butterfly Cat-Eye Nails — Step-by-Step Tutorial
Create a dreamy, glowing look with this nude pink and gold cat-eye butterfly tutorial. Perfect for a tender, juicy, and high-shine manicure.
Discover how to blend soft blush tones with shimmering metallic accents in this elegant butterfly nail art look. Using a combination of gradient sponging and magnetic gel techniques, this design delivers a professional, high-end finish that looks both tender and sophisticated. Follow this guide to master the art of the cat-eye butterfly silhouette.
Steps
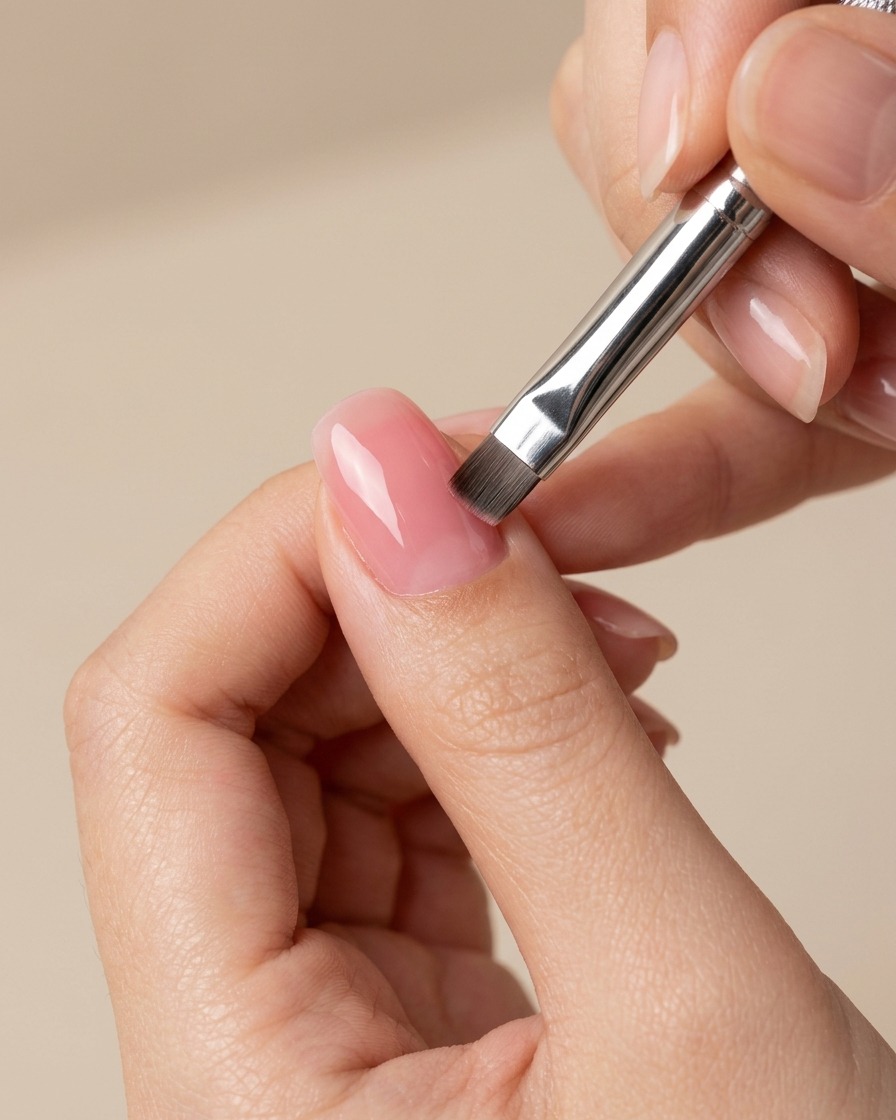
- 1Apply peach blush gel
Apply a small amount of peach-colored gel to the center of the nail plate. Use a flat gel brush to distribute the product, keeping the application focused in the middle to establish the base for the blush gradient effect.
Tip: Keep the gel application thin at this stage to ensure a smooth, natural-looking gradient. - 2Blend the blush effect
Using a small makeup sponge, gently pat the peach gel from the center outwards towards the edges of the nail. This patting motion diffuses the color, creating a soft, seamless blush gradient effect.
Tip: Pat lightly to avoid removing too much product while achieving a smooth, airbrushed transition. - 3Cure the blush layer
Position the nail directly under the UV/LED lamp. Cure the peach blush gel layer according to the recommended time for your specific gel product to ensure it is fully set.
Tip: Ensure the entire nail is positioned directly under the light source for an even cure. - 4Apply nude pink gel
Apply an even coat of sheer nude pink gel polish over the entire nail surface, covering the previously cured blush center. This layer softens the gradient and gives the nail a polished, tender finish.
Tip: Use light pressure to avoid dragging the brush and creating streaks over the blush effect. - 5Place butterfly stencil sticker
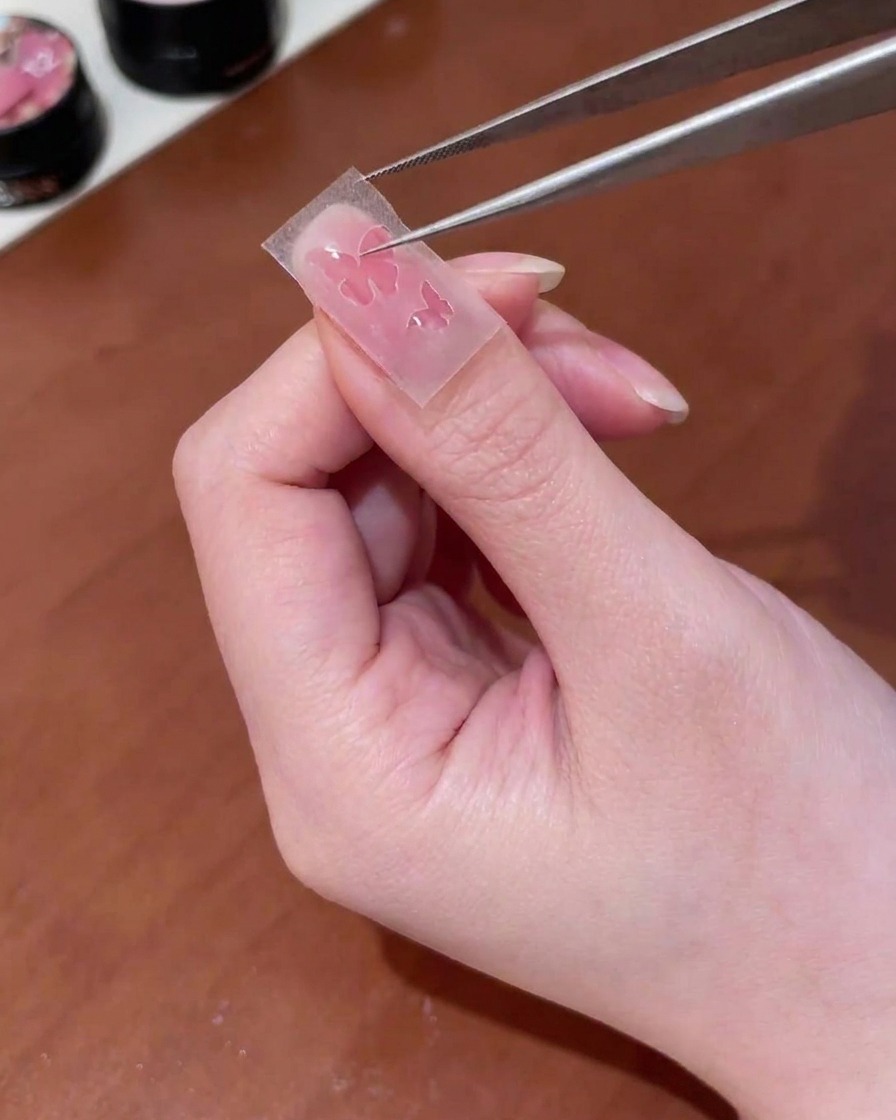
Using fine-tipped tweezers, place the butterfly cutout sticker onto the center of the nail. Press it down firmly, especially around the edges of the cutouts, to ensure it lies completely flat against the nail surface.
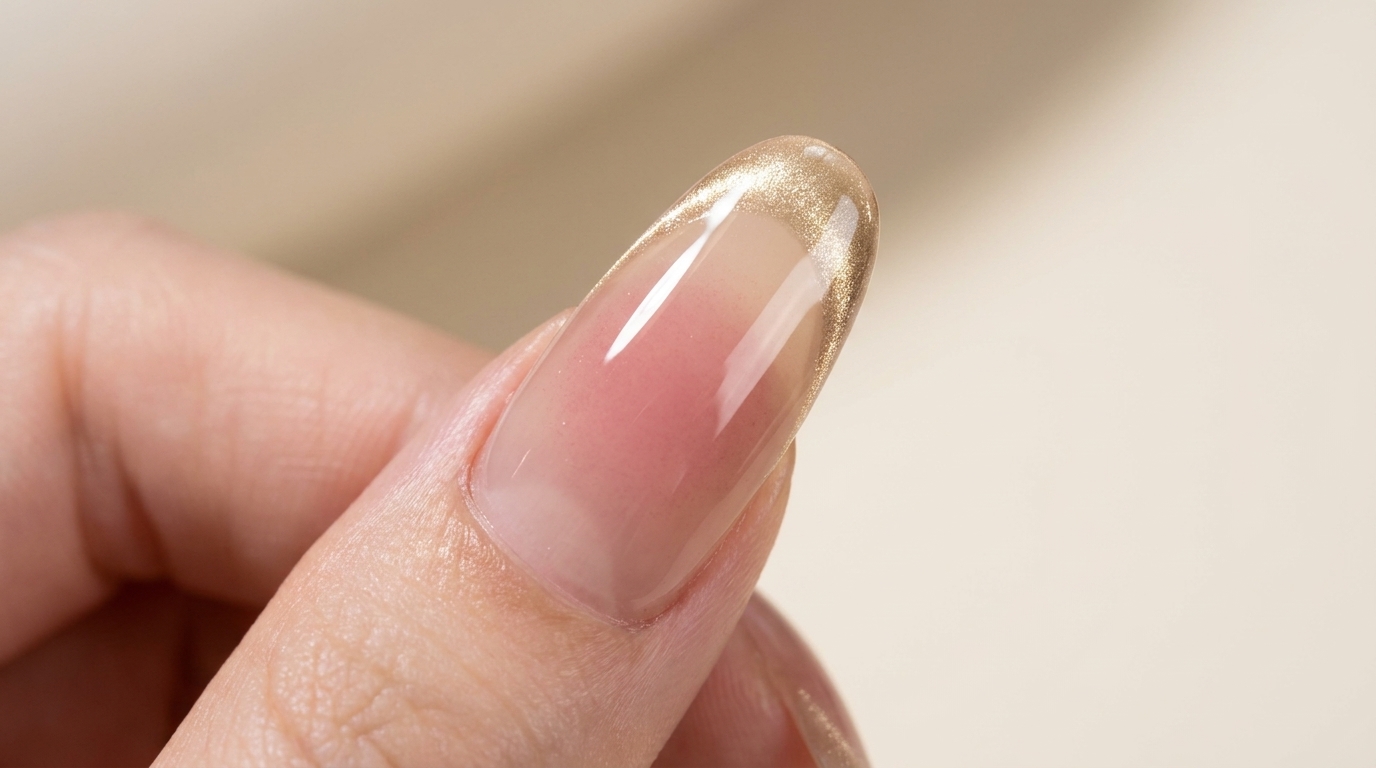
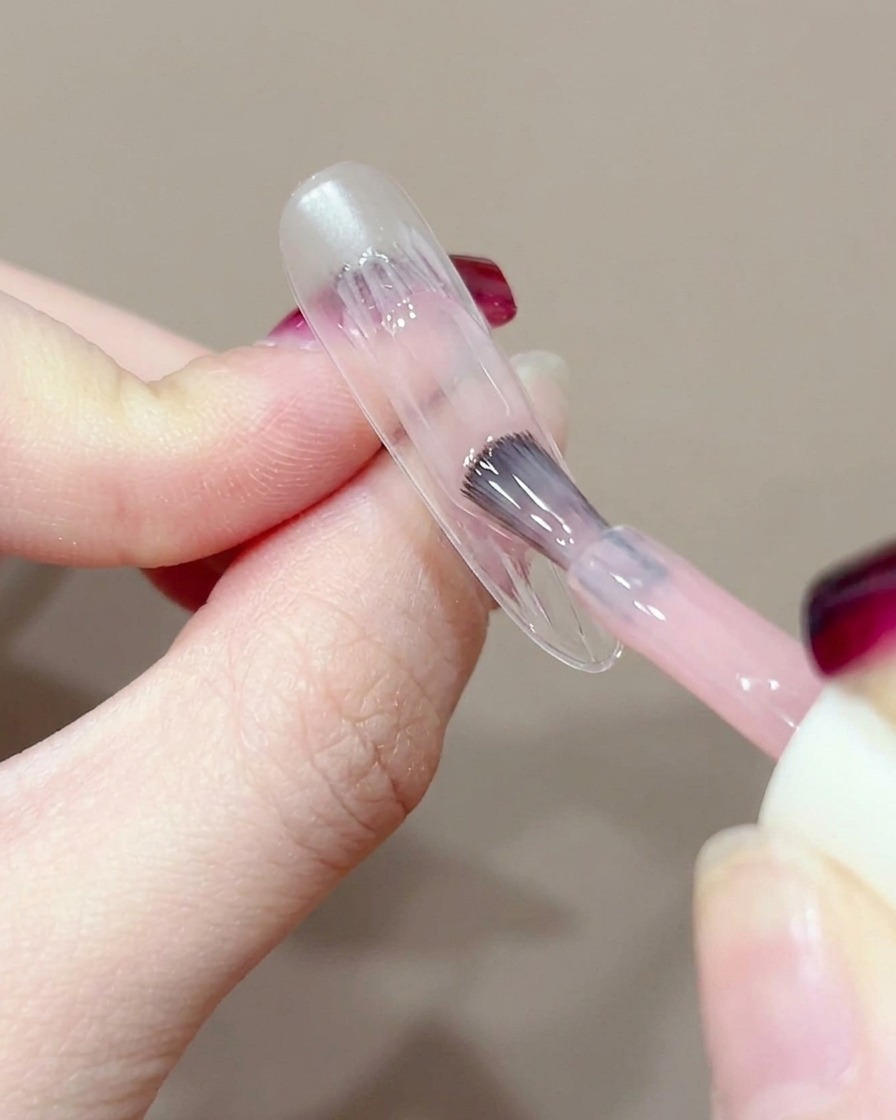
Tip: Ensure the sticker is completely flat to prevent gel from seeping underneath during the next application step. - 6Apply gold cat-eye gel
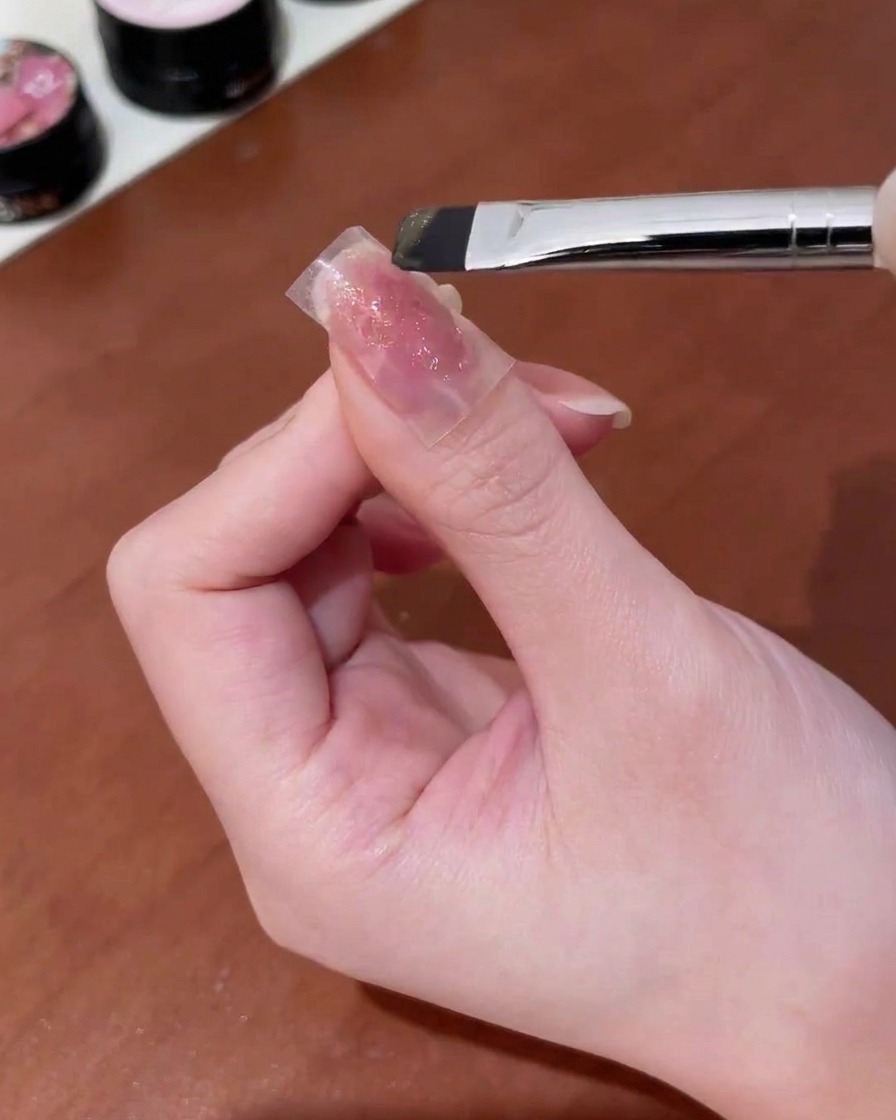
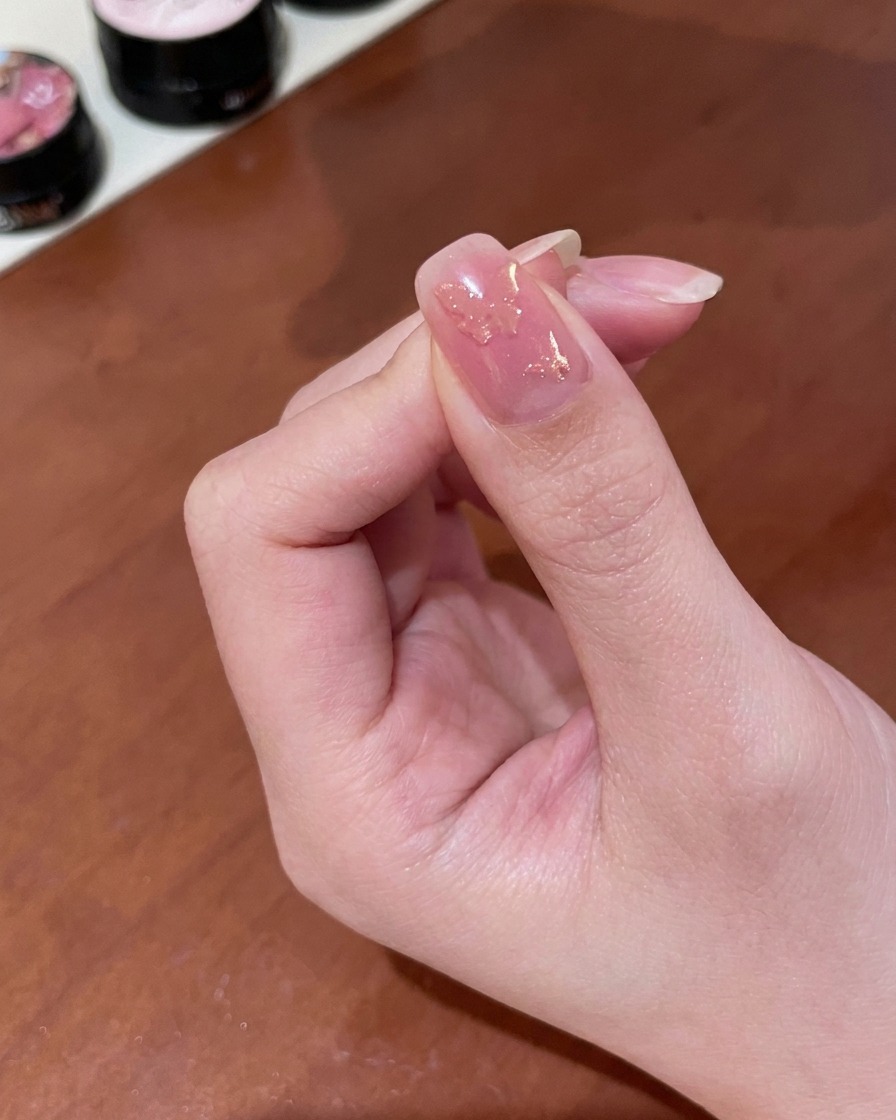
Apply a thin layer of gold cat-eye gel polish directly over the butterfly cutout sections on the nail. Ensure the gel covers the hollowed areas evenly to capture the cat-eye shimmer effect within the butterfly shape.
Tip: Apply a thin layer to maintain a clean outline of the butterfly shape once the sticker is removed. - 7Remove the stencil sticker
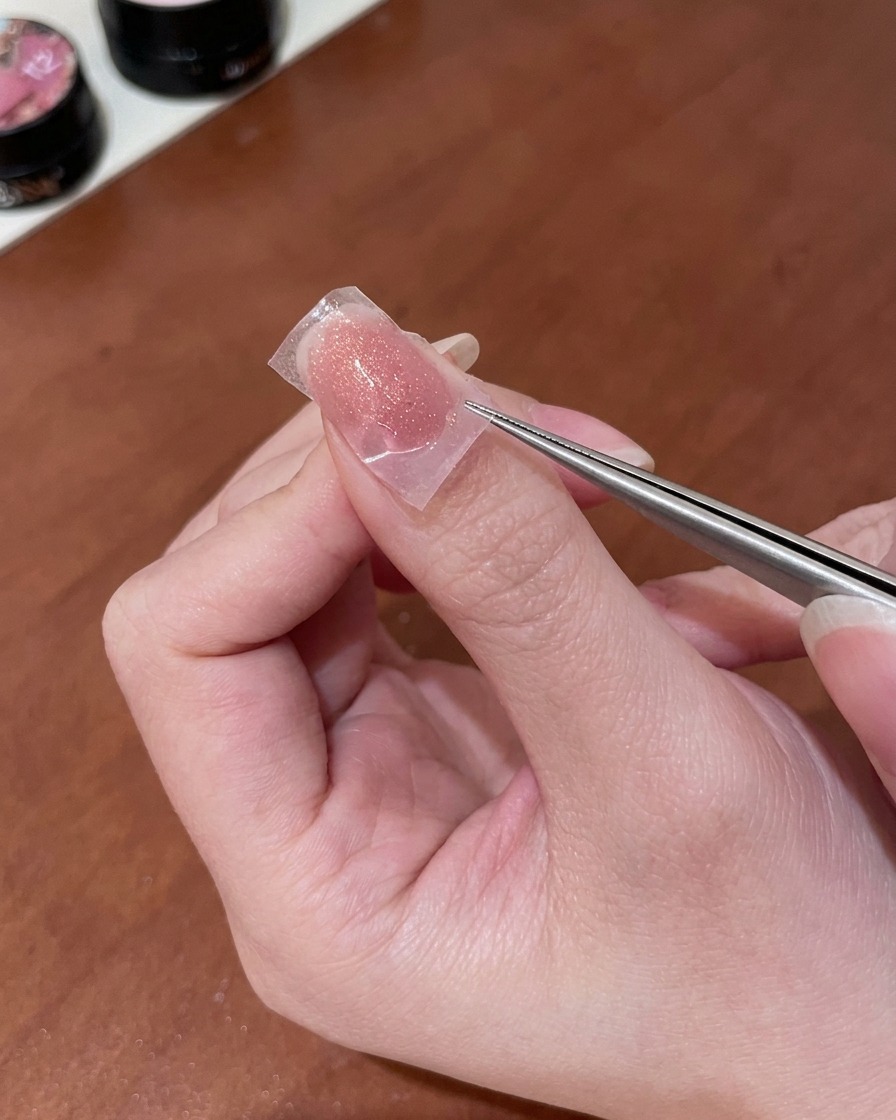
Using a pair of precision tweezers, gently grip the edge of the hollow butterfly sticker and slowly peel it away. Take your time during this step to ensure the crisp edges of the gold gel design remain perfectly intact on the nail without lifting.
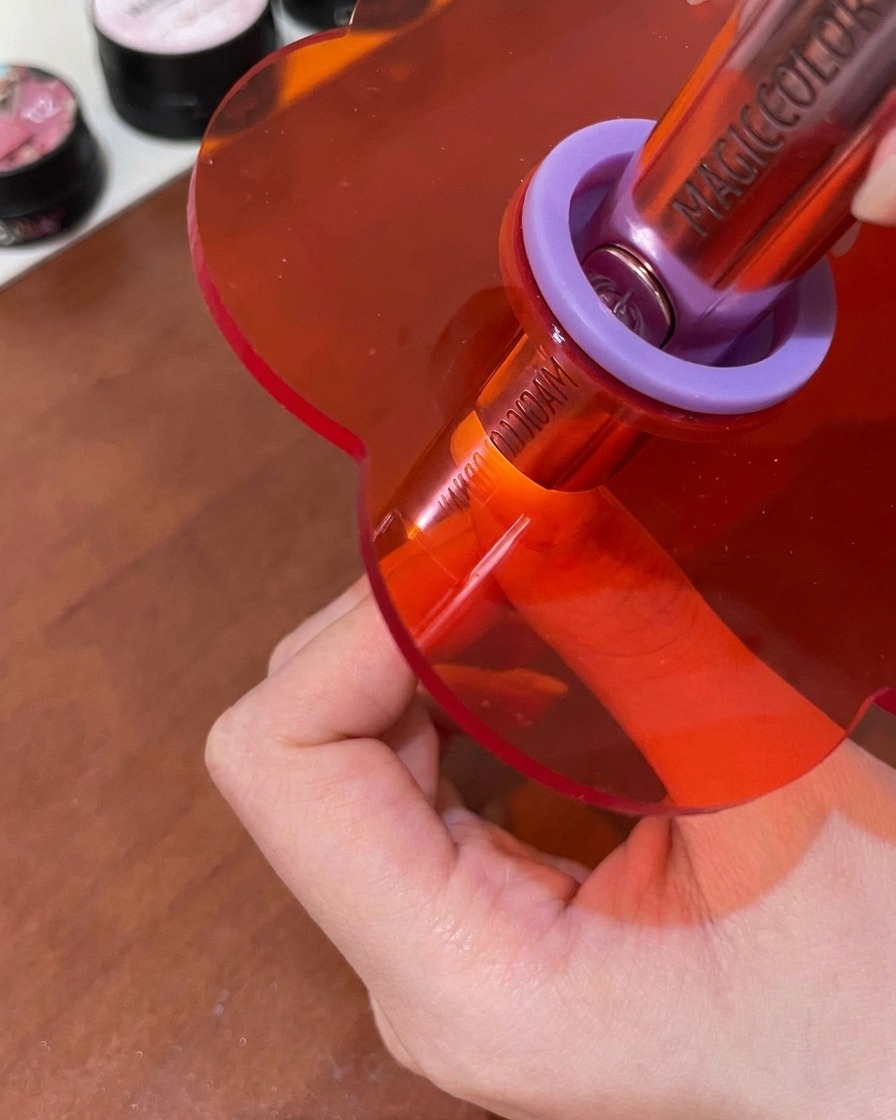
Tip: Peel the sticker back at a low angle close to the nail surface rather than pulling it straight up to avoid stretching the delicate gel. - 8Activate magnetic cat-eye effect
While the gold cat-eye gel is still wet, hold a cylindrical magnet near the sides of the nail. Sweep the magnet back and forth to pull the magnetic particles, creating a deep, glowing shimmer effect within the gel. Once you are satisfied with the design, cure the nail immediately under your UV or LED lamp to lock the pattern in place.
Tip: Keep the magnet close to the nail for a stronger cat-eye effect, but be careful not to touch the wet gel surface. - 9Apply a glossy top coat
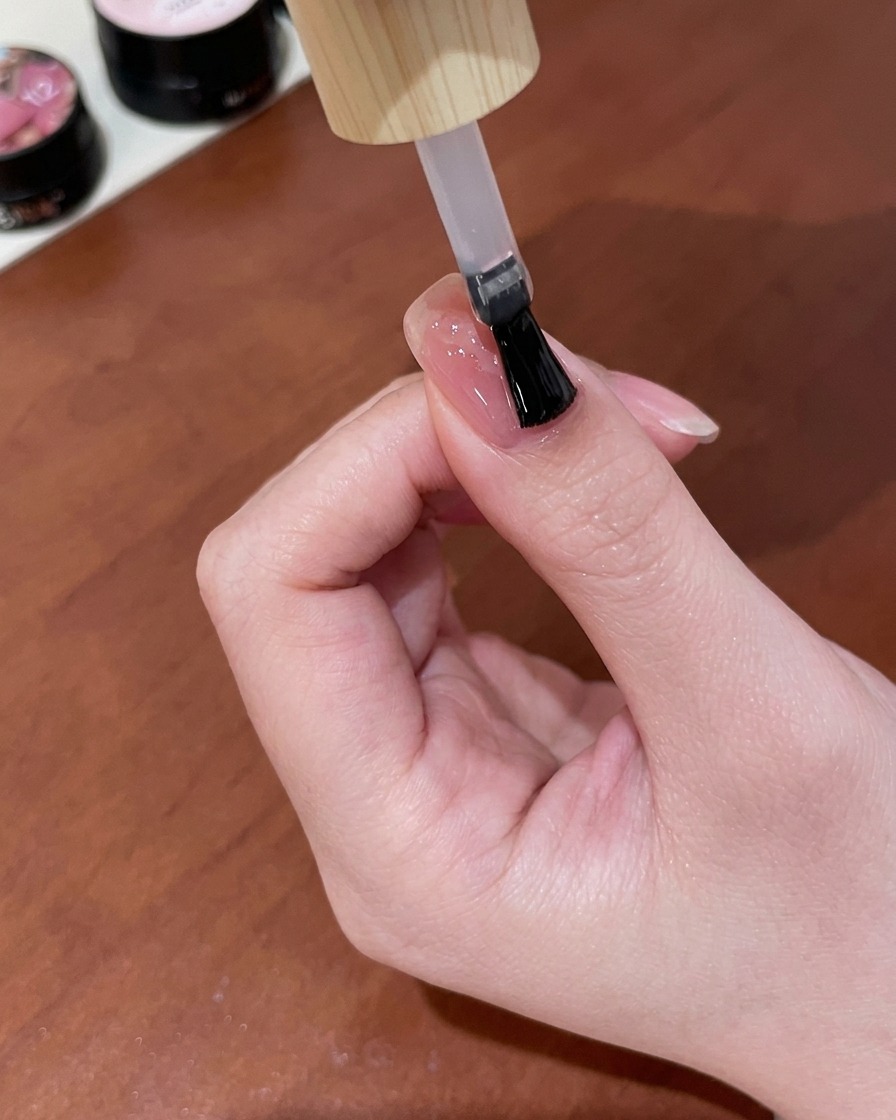
To protect your exquisite cat-eye butterfly and give the nail a juicy, flawless finish, apply an even layer of clear, glossy top coat. Make sure to cover the entire nail surface and cap the free edge before curing it under the lamp for the final time.
Tip: Float the brush lightly over the surface of the nail so you do not drag or disturb the intricate butterfly details.