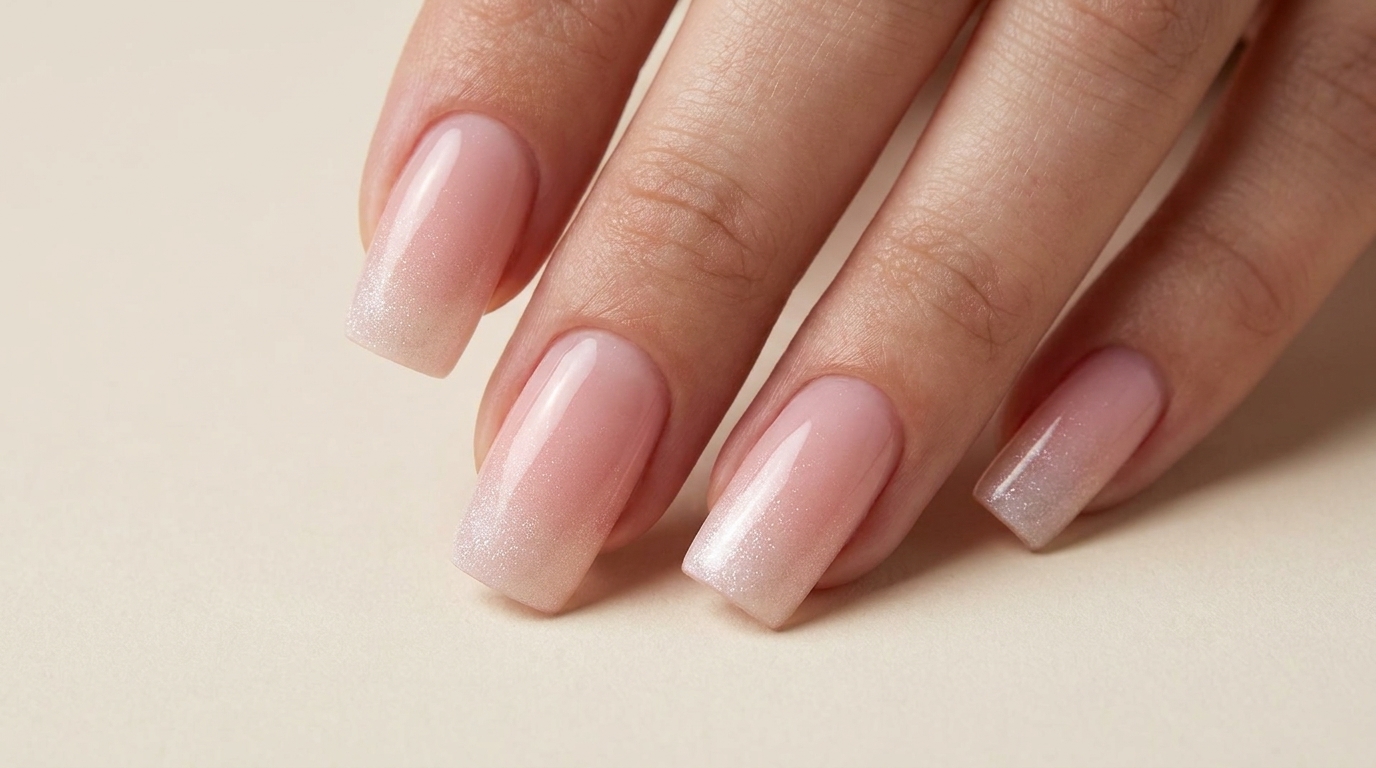
Blush Cat-Eye French Manicure — Elegant Shimmer Tutorial
Elevate your classic French manicure with a dreamy pink blush base and a mesmerizing magnetic cat-eye shimmer tip. Perfect for a sophisticated, modern look.
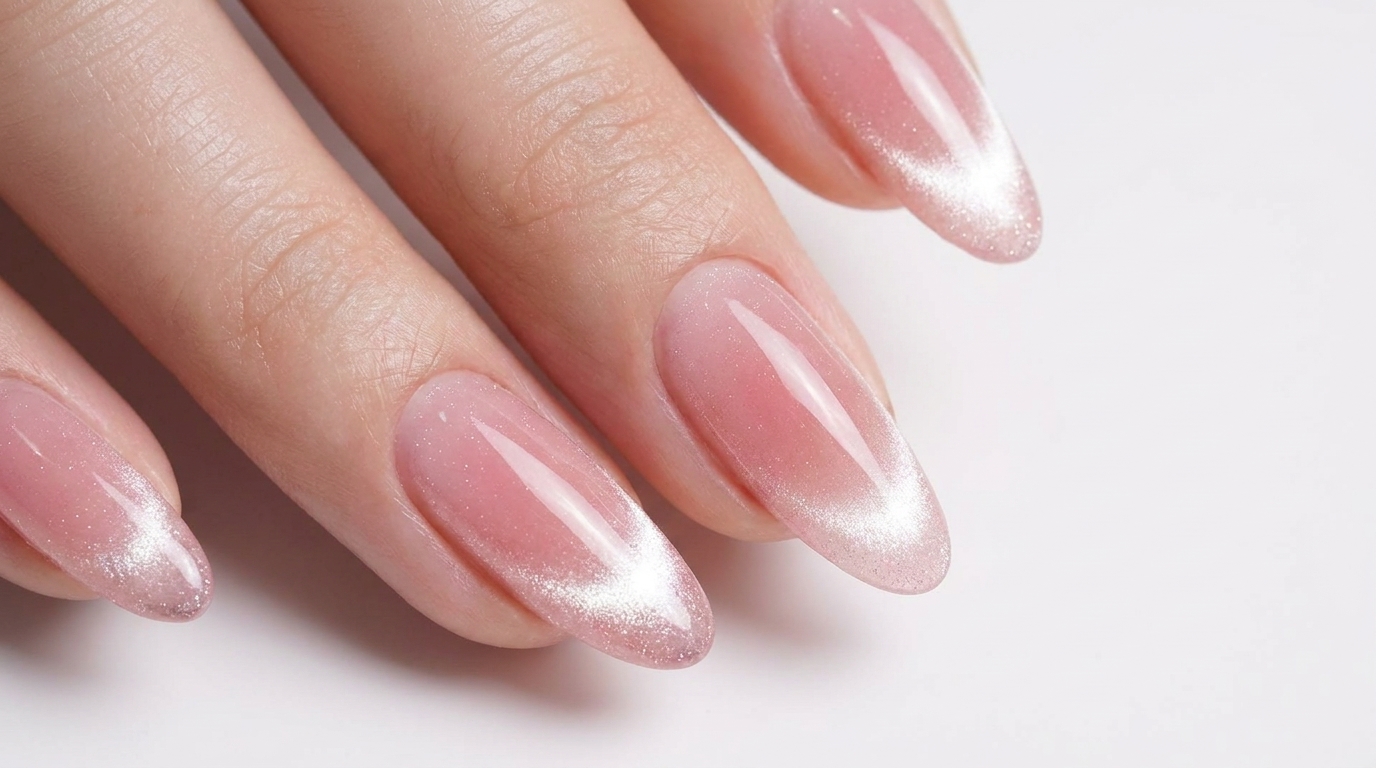
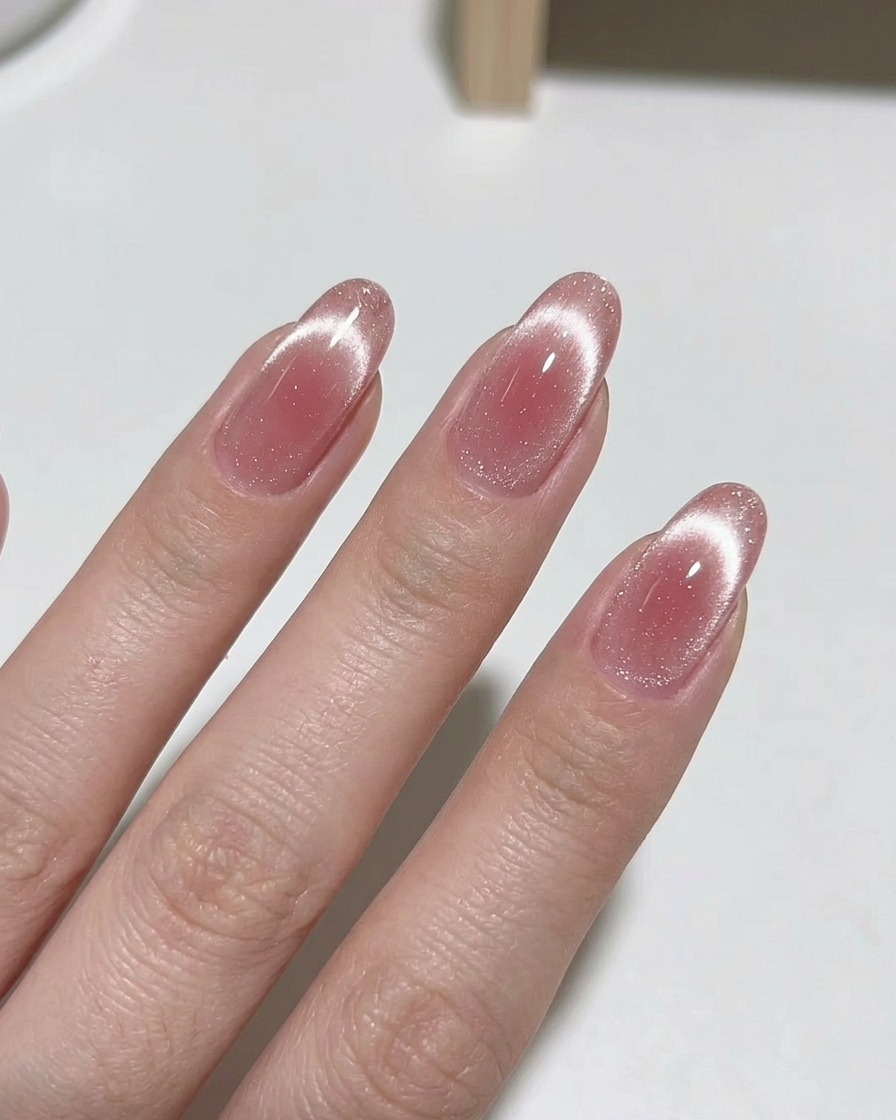
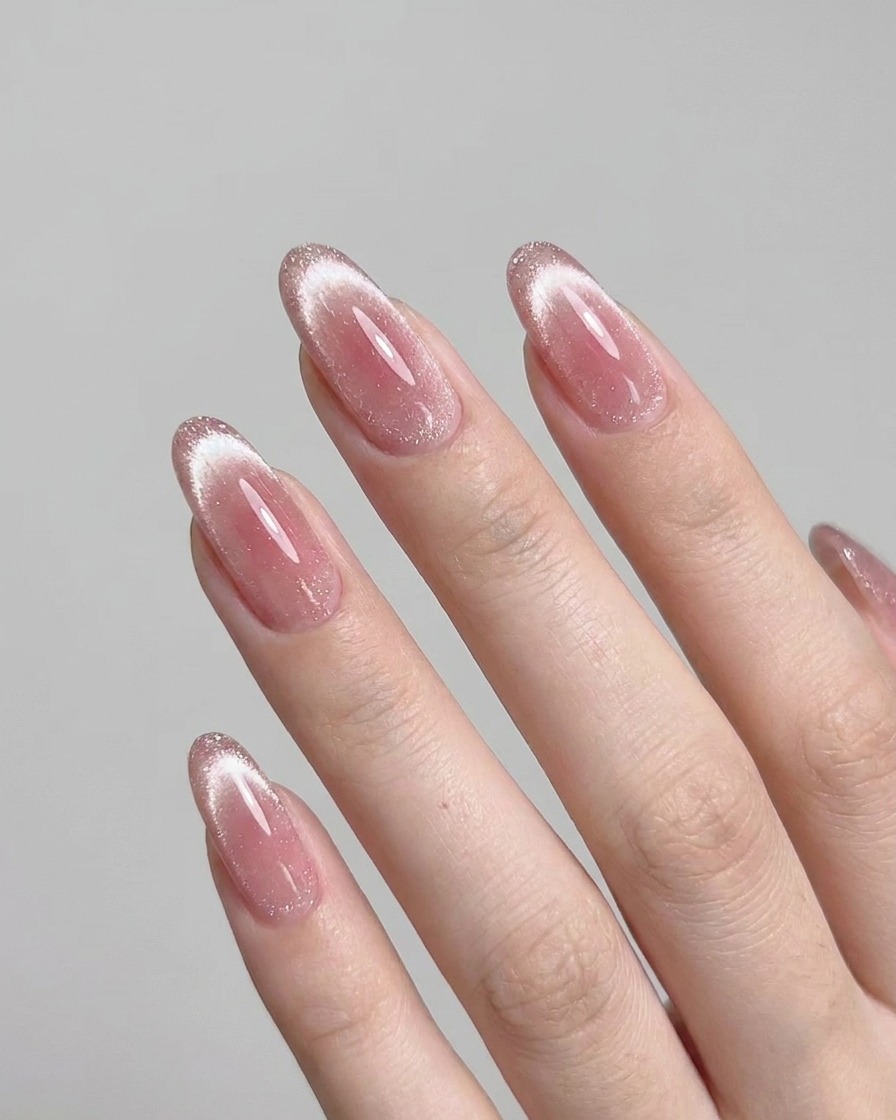
The blush cat-eye French manicure blends the soft, romantic aesthetic of a gradient blush nail with the futuristic, high-dimension allure of magnetic polish. This look creates a beautiful depth on the nail, making it a standout choice for those who want a unique twist on the traditional French tip. By layering subtle shimmer and a crisp magnetic line, you achieve a salon-quality manicure that catches the light beautifully from every angle.
Steps
- 1Prepare the nail
Ensure the nail surface is clean, filed, and free of any debris or old product. A properly prepped nail provides the ideal foundation for the gradient and magnetic polish application.
Tip: Use a lint-free wipe with a little cleanser to remove any dust after filing. - 2Apply blush color

Place a small amount of the soft pink polish in the center of the nail. This will serve as the base for your blush gradient effect.
Tip: Start with a small amount of product to keep the layer thin and easy to blend. - 3Blend the gradient

Using a clean flat brush, gently blend the pink polish outward from the center toward the edges to create a smooth, diffused gradient effect.
Tip: Use light, sweeping motions to avoid creating visible streaks in the blush color. - 4Refine the blush transition

Continue blending until the transition between the pink color and the natural nail is seamless and soft.
Tip: Take your time with this step to ensure the blush look is perfectly diffused. - 5Apply cat-eye polish

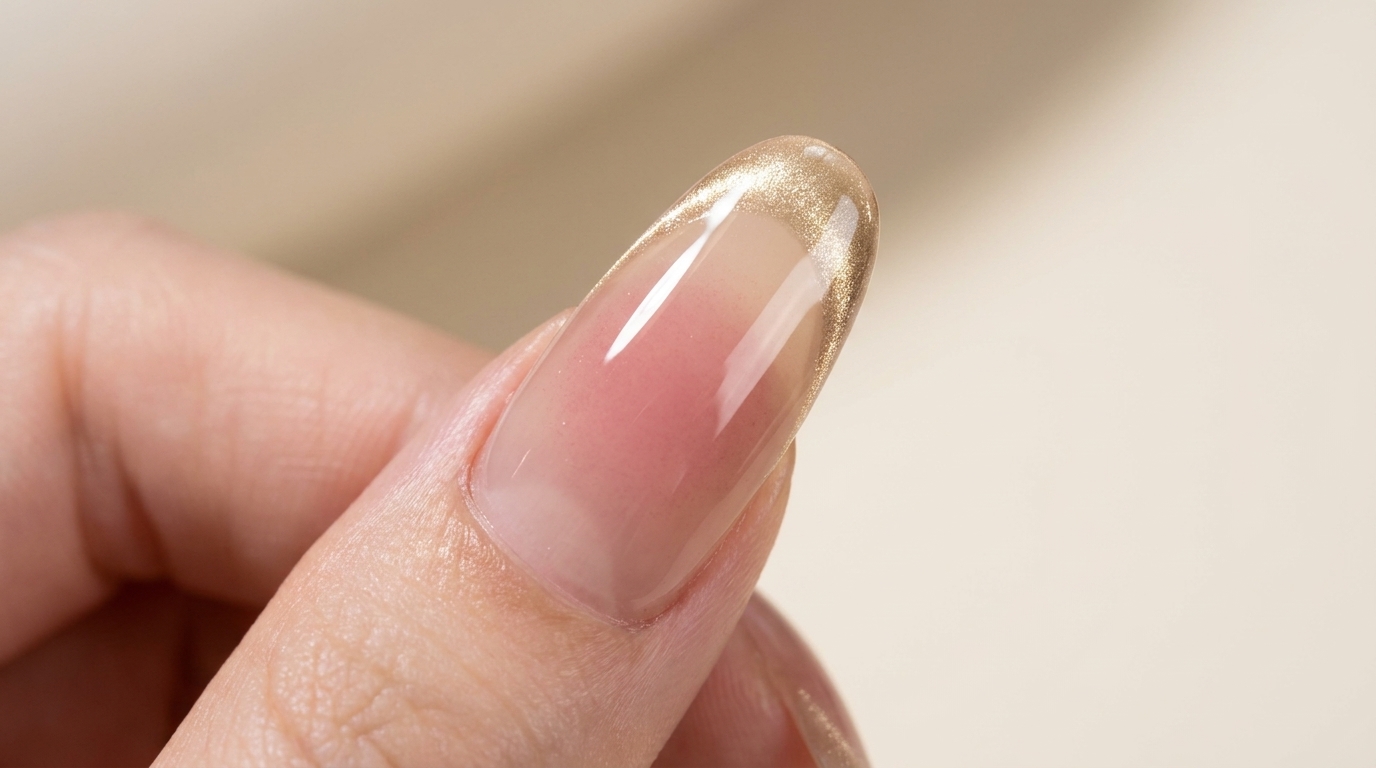
Apply a thin layer of the cat-eye magnetic polish over the tip of the nail, covering the gradient area.
Tip: Ensure the magnetic polish is applied evenly for the best shimmering effect. - 6Create magnetic effect
Hold the magnet tool close to the nail tip without touching the polish to pull the magnetic pigments into the desired shimmering cat-eye line.
Tip: Experiment with the magnet angle to achieve different depths and shapes of the shimmer. - 7Define the magnetic line
With the magnetic polish wet, hold your magnet near the nail tip to draw the metallic particles into a sharp, signature cat-eye line. Hold the magnet steady for several seconds to lock the pattern in place before curing, ensuring the shimmer remains defined and vibrant.
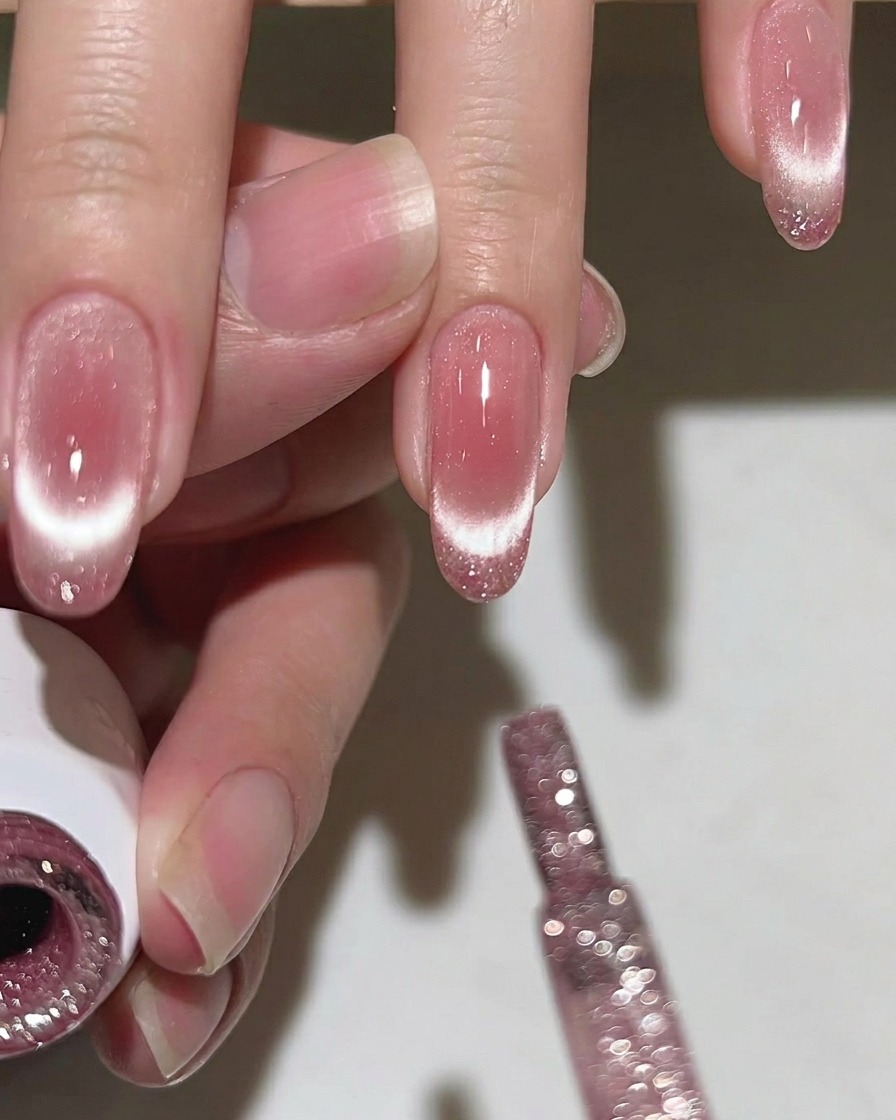
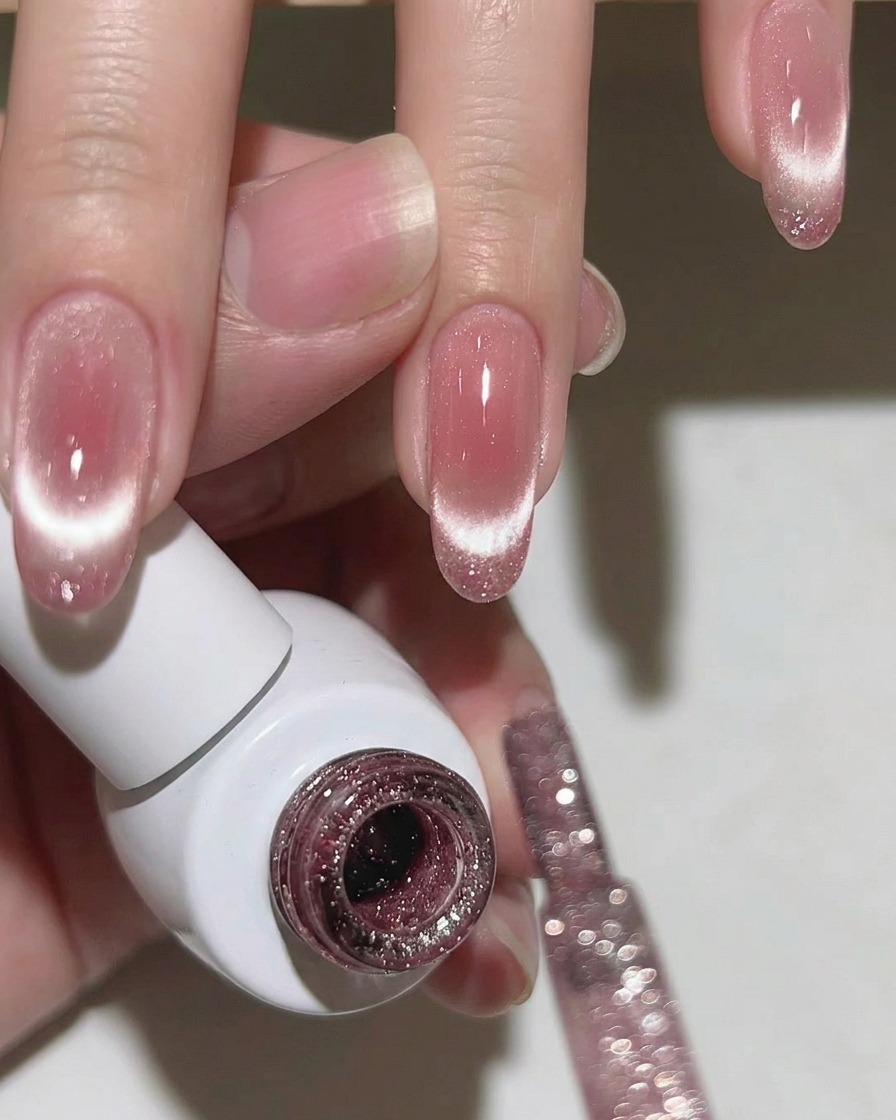
Tip: For the crispest cat-eye line, ensure the magnet is close to the nail surface without touching the wet polish. - 8Apply fine glitter layer

Apply a light, even layer of fine glitter polish over the cat-eye tip to add extra dimension and sparkle. Use gentle strokes to avoid dragging or disturbing the magnetic pattern you just created underneath.
Tip: Focus the glitter mainly on the free edge of the nail to create a subtle transition and enhance the overall shine. - 9Seal with top coat

Apply a clear, high-shine top coat over the entire nail surface to seal in the cat-eye effect and glitter. Carefully cap the free edge of the nail to protect the design from chipping and extend the wear of your manicure.
Tip: Ensure the top coat is applied smoothly to create a glossy, glass-like finish that enhances the depth of the layers below. - 10Cure under UV lamp
Place your nails under the UV lamp for the recommended curing time. Ensure your hand is positioned correctly inside the lamp so that all nails receive even light exposure, allowing the top coat to set completely for a durable, high-gloss shine.
Tip: Avoid moving your hand during the curing process to prevent smudging the fresh top coat.