Acetate Floral Gel Nail Art — Step-by-Step Tutorial
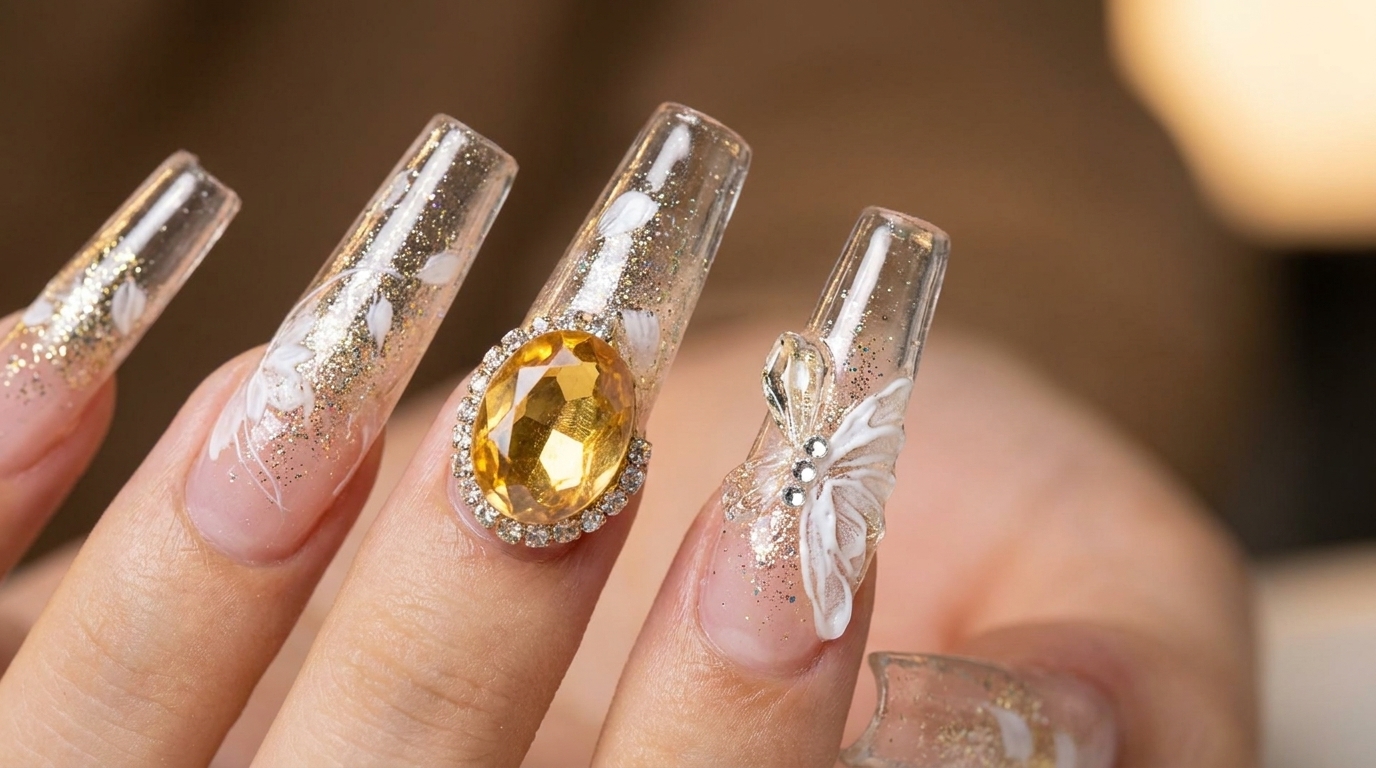
Learn how to create stunning acetate floral gel nails featuring encapsulated shell pieces, intricate lace patterns, and delicate hand-painted watercolor petals.
Teacher Lee guides you through creating an exquisite acetate floral nail art design, blending pastel gradient layers, crushed shell fragments, shimmering fairy powder, and delicate watercolor petals for a multidimensional glass effect.
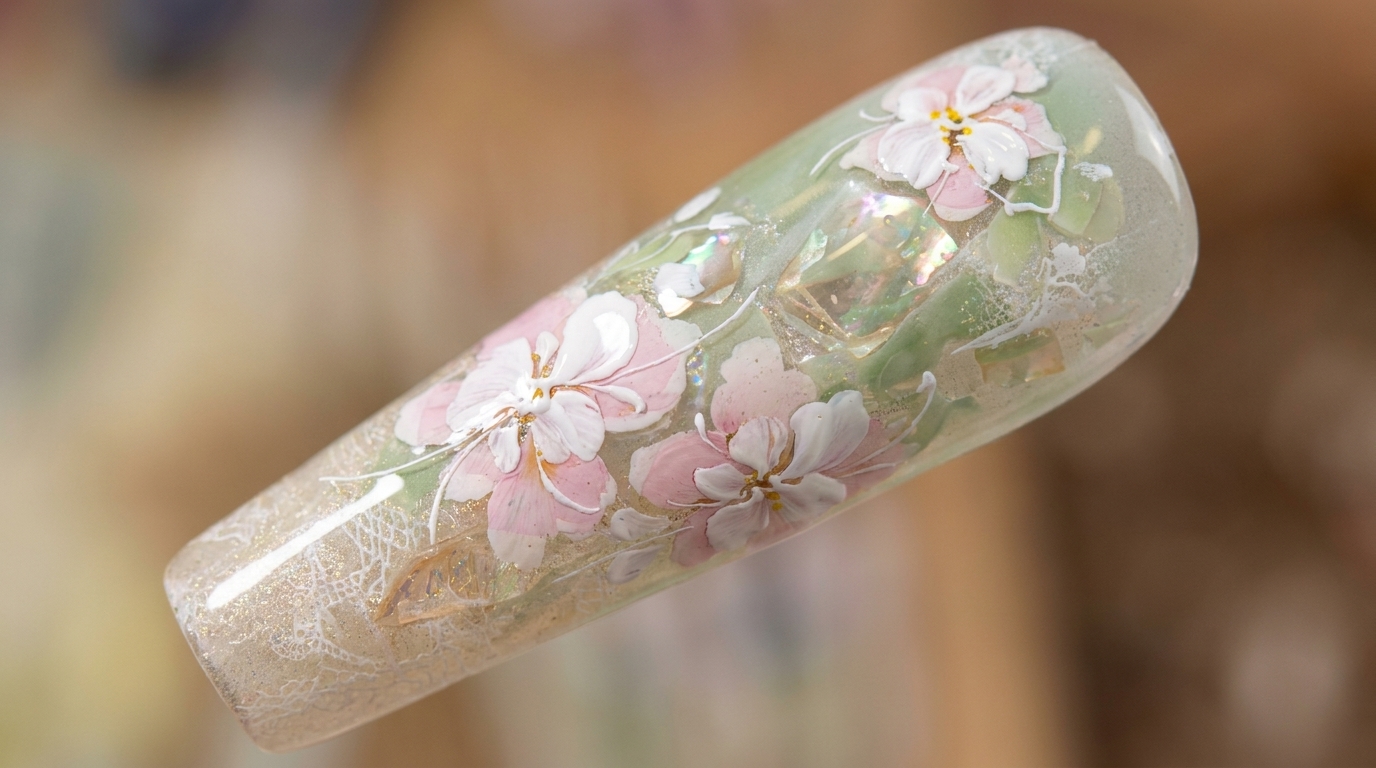
Steps
- 1Dab light blue gel onto the nail
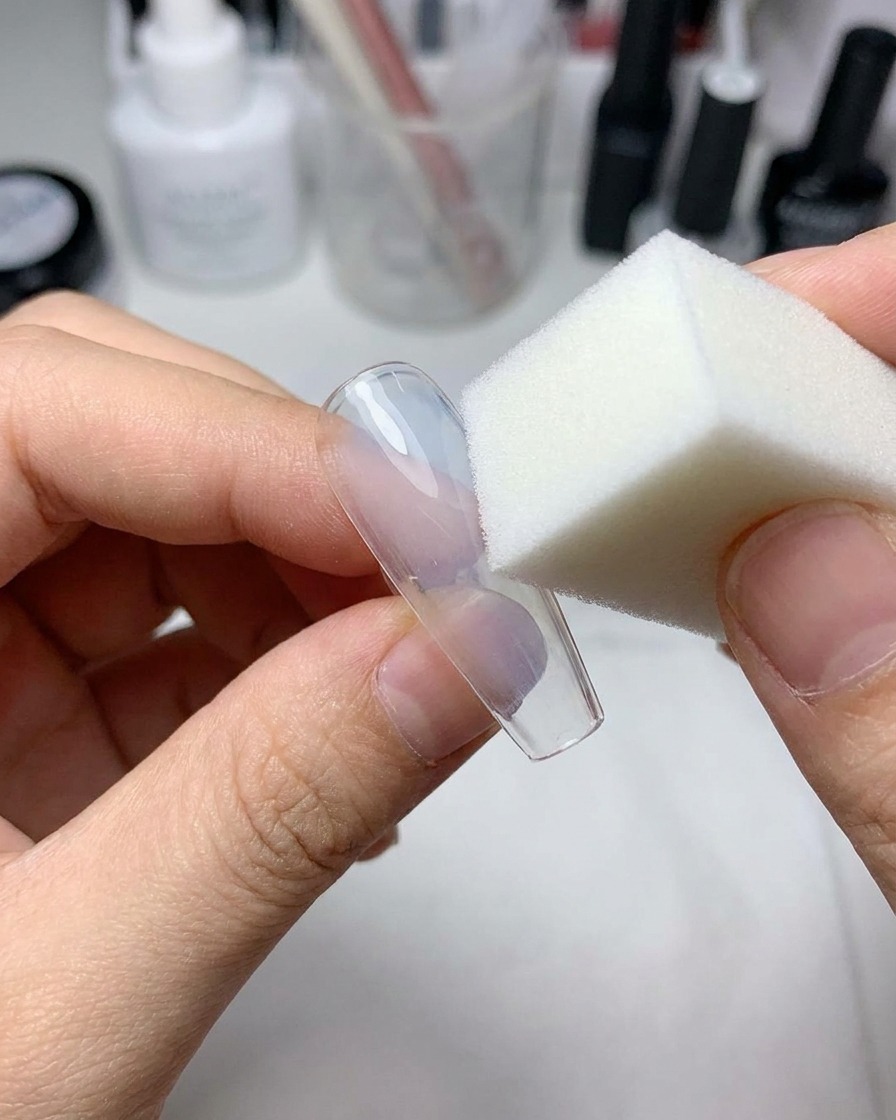
Take a small cosmetic sponge and dab sheer light blue gel over the mid-section of the clear nail extensioncite: 1. This builds the foundational color transition for the multi-toned gradient design.
Tip: Use light tapping motions with the sponge to avoid heavy streaks and ensure an even color deposit. - 2Create a two-tone gradient on the tip
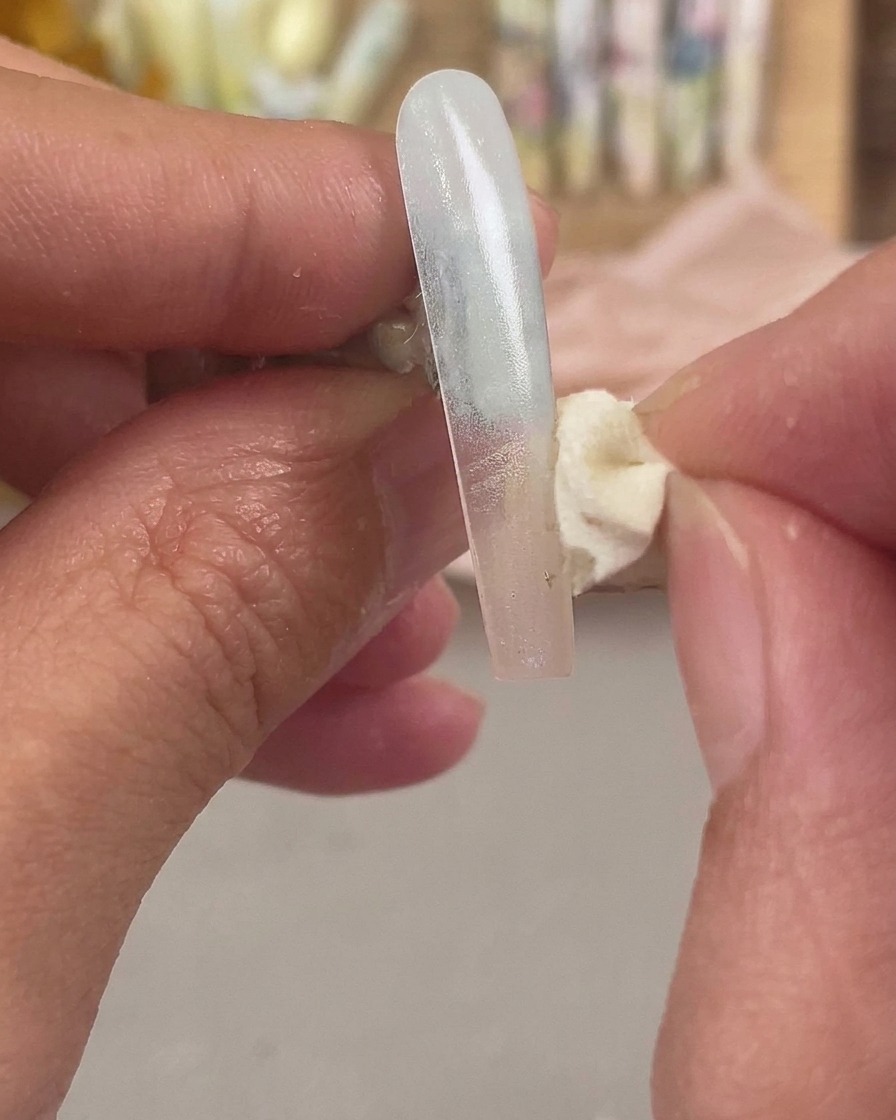
Switch to another color and dab it onto the nail tip area using the sponge to create a seamless two-tone gradient effectcite: 1.
Tip: Overlap the two colors slightly where they meet to ensure a smooth transition without a harsh line. - 3Apply a layer of base gel
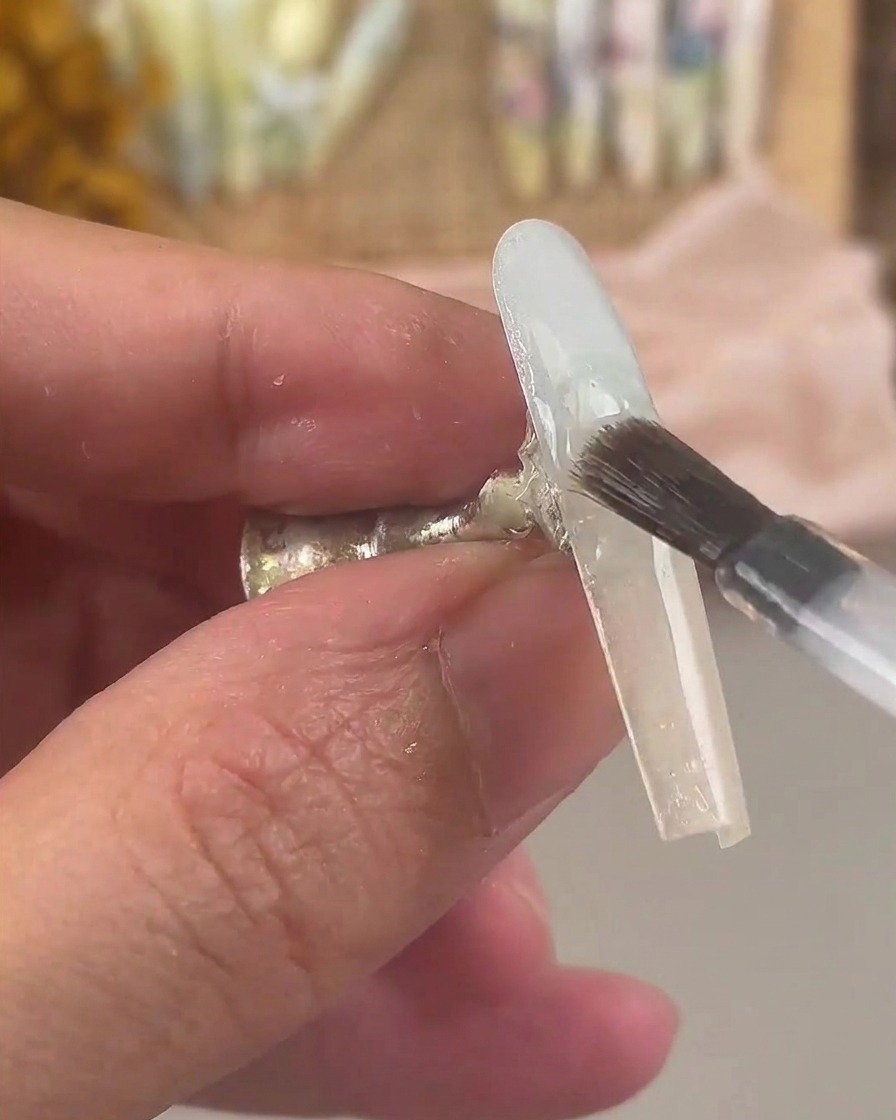
Brush a clear layer of base gel or builder gel over the entire surface of the ombre nailcite: 1. This layer acts as an adhesive base for embedding decorative shell flakes and texture elements.
Tip: Ensure the gel is applied evenly across the gradient without pooling around the edges. - 4Place crushed shell flakes
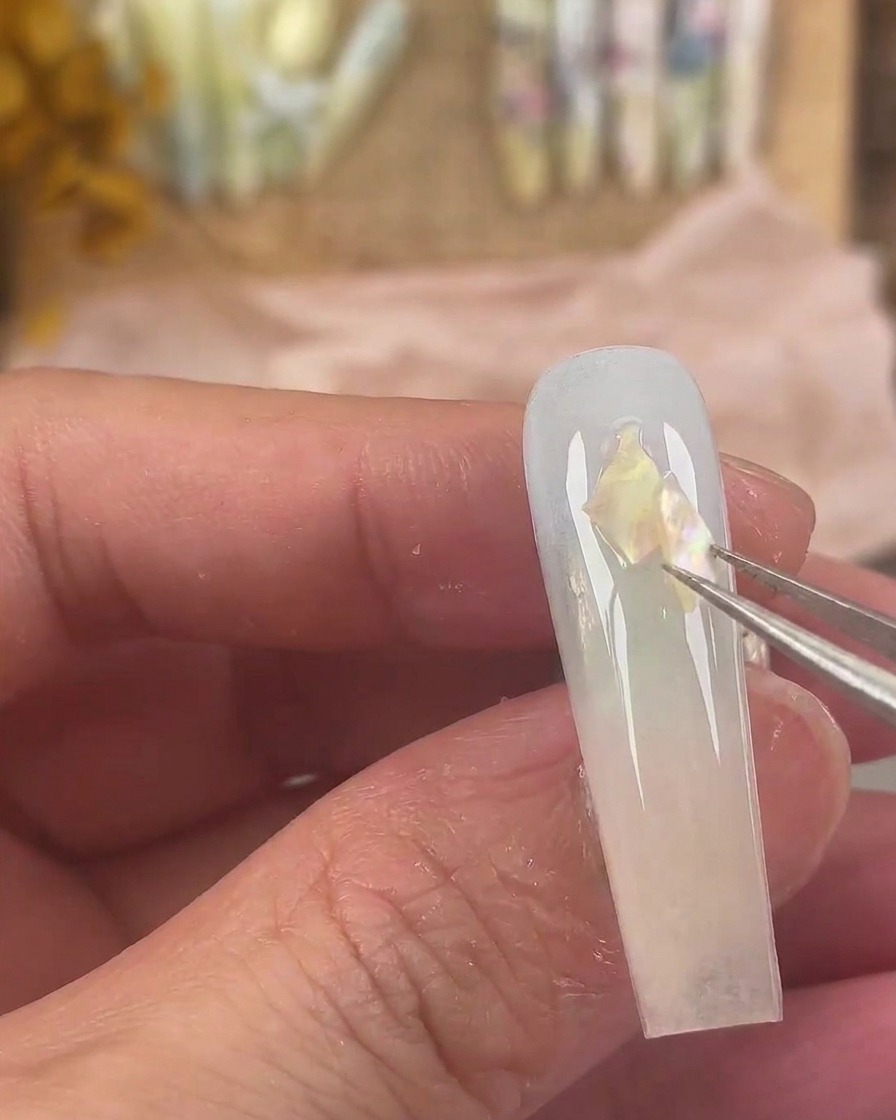
Using fine-tipped tweezers, carefully pick up and place the prepared shell fragments onto the wet gel surfacecite: 1. Arrange them artistically to catch the light.
Tip: Press the shell fragments gently into the wet gel layer so they anchor firmly before curing. - 5Apply fairy powder paste
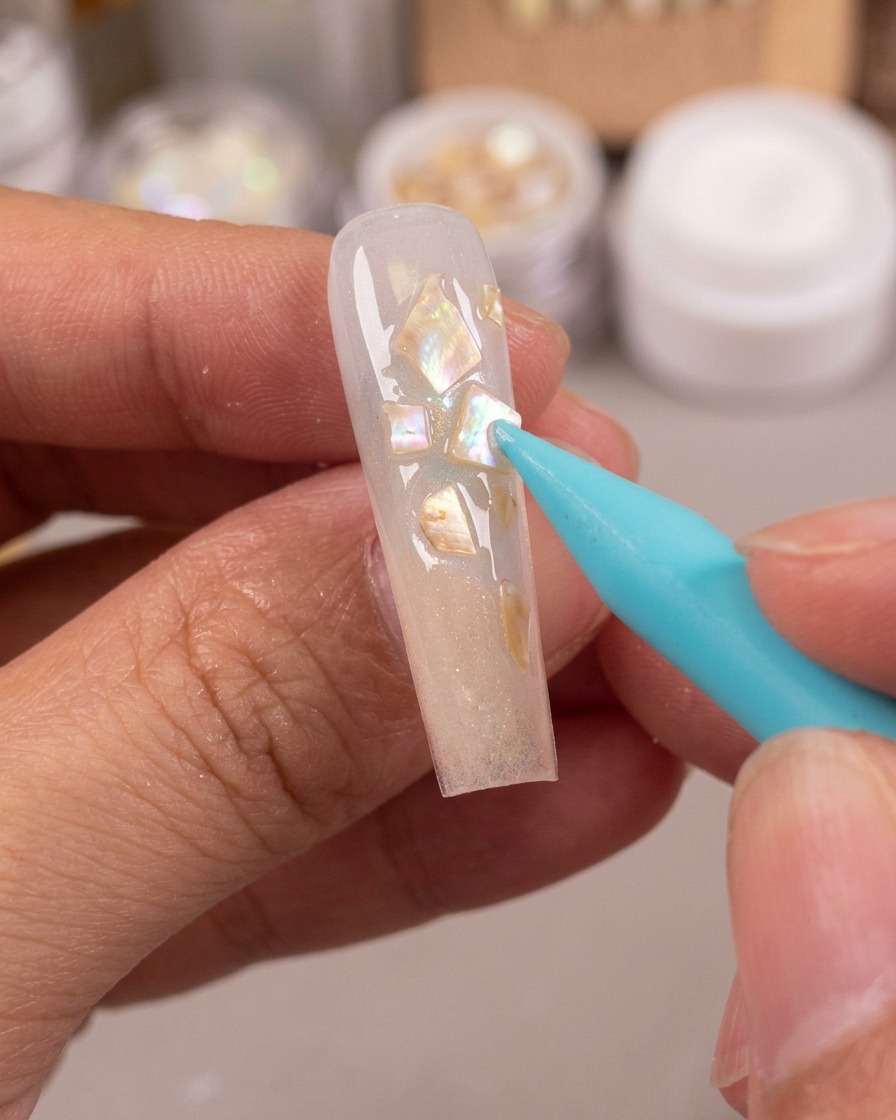
Apply shimmering fairy powder paste into the staggered spaces between the shell fragments using a silicone toolcite: 1. This adds depth and a sparkling dimensional accent to the design.
Tip: Keep the paste targeted in the gaps to maintain the definition of the individual shell pieces. - 6Layer bean sand green gel
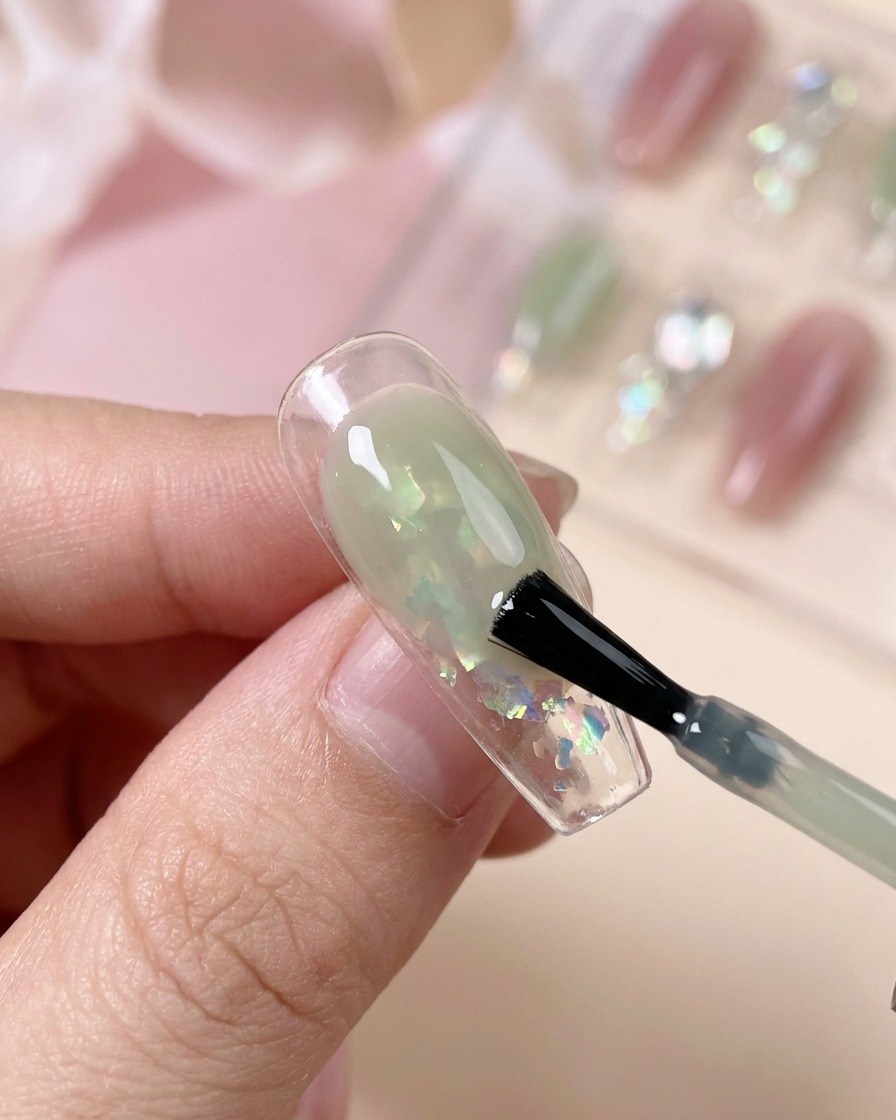
After curing the previous elements, layer on some translucent bean-sand green gel over the designcite: 1. This tints the underlying elements for a soft, smoky, multi-layered look.
Tip: Apply in thin strokes so the embedded shell pieces and glitter remain visible underneath. - 7Transfer the lace pattern
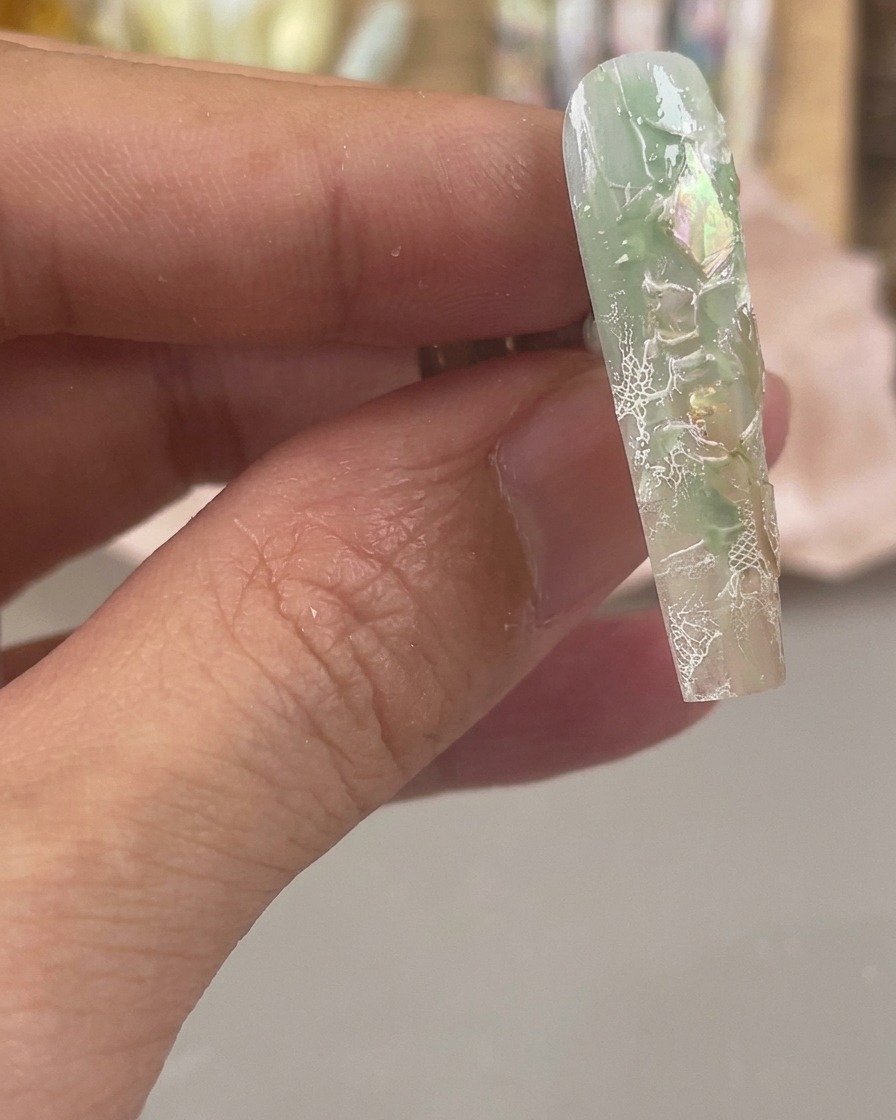
Carefully apply the intricate white lace patterns onto the nail surface using a stamper. Position the lace over the previously placed shell flakes and fairy powder to add depth and texture to your floral design.
Tip: Make sure the base layer is completely cured before stamping so the design adheres cleanly without smudging. - 8Apply clear builder gel
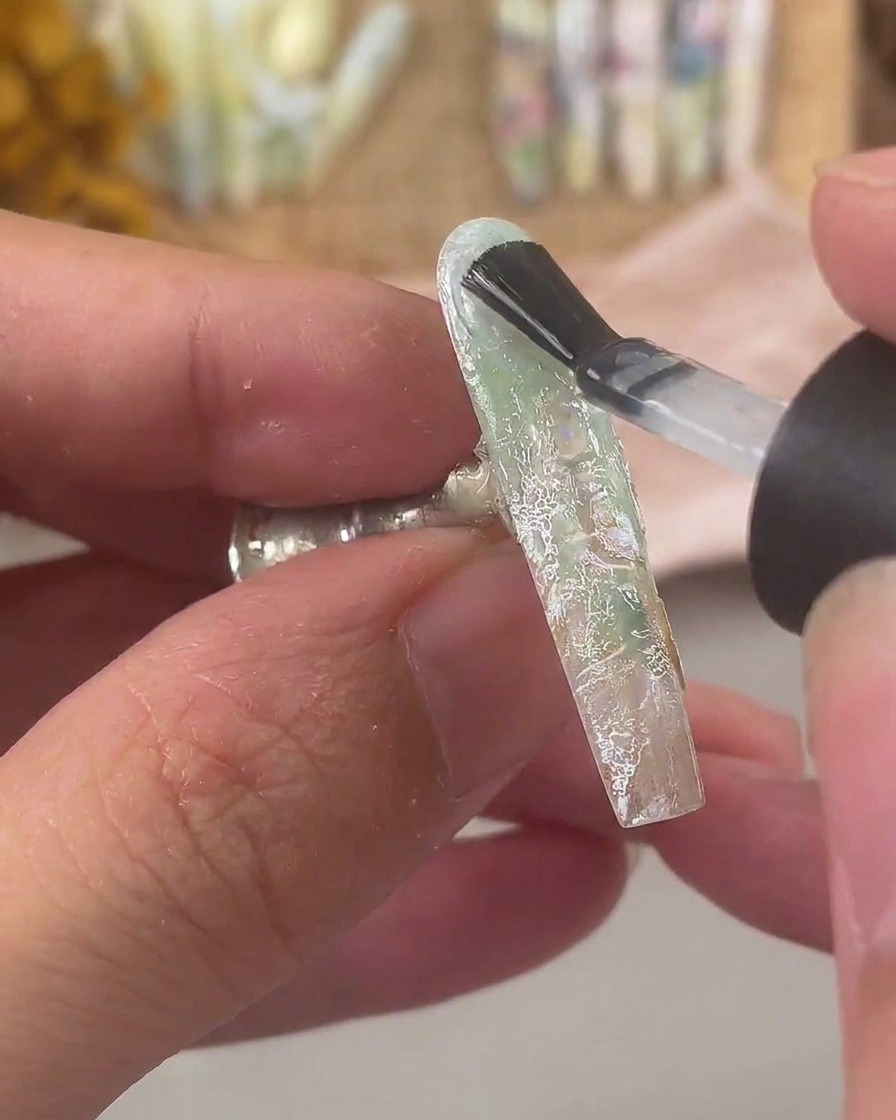
Use a brush to apply a thick layer of clear builder gel over the entire nail. This step encapsulates the shell flakes and lace patterns, protecting the design and creating a beautifully smooth, leveled nail surface.
Tip: Float the gel over the decorations without pressing too hard to prevent trapped air bubbles. - 9Wipe the sticky residue
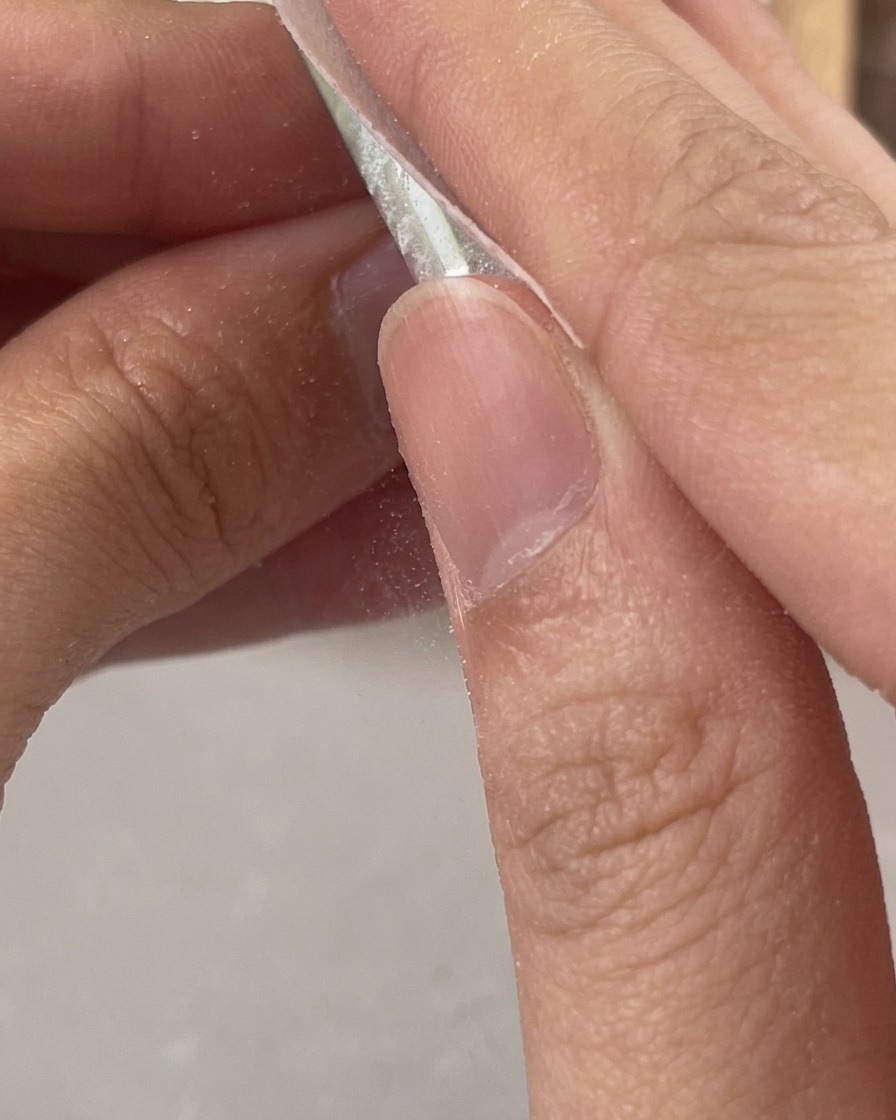
After curing the builder gel under the lamp, soak a lint-free wipe with cleanser or rubbing alcohol and gently wipe the entire nail surface. This removes the sticky inhibition layer, prepping the nail for buffing.
Tip: Always use a lint-free wipe to avoid leaving tiny fibers stuck to your beautifully leveled nail. - 10Buff and file the surface
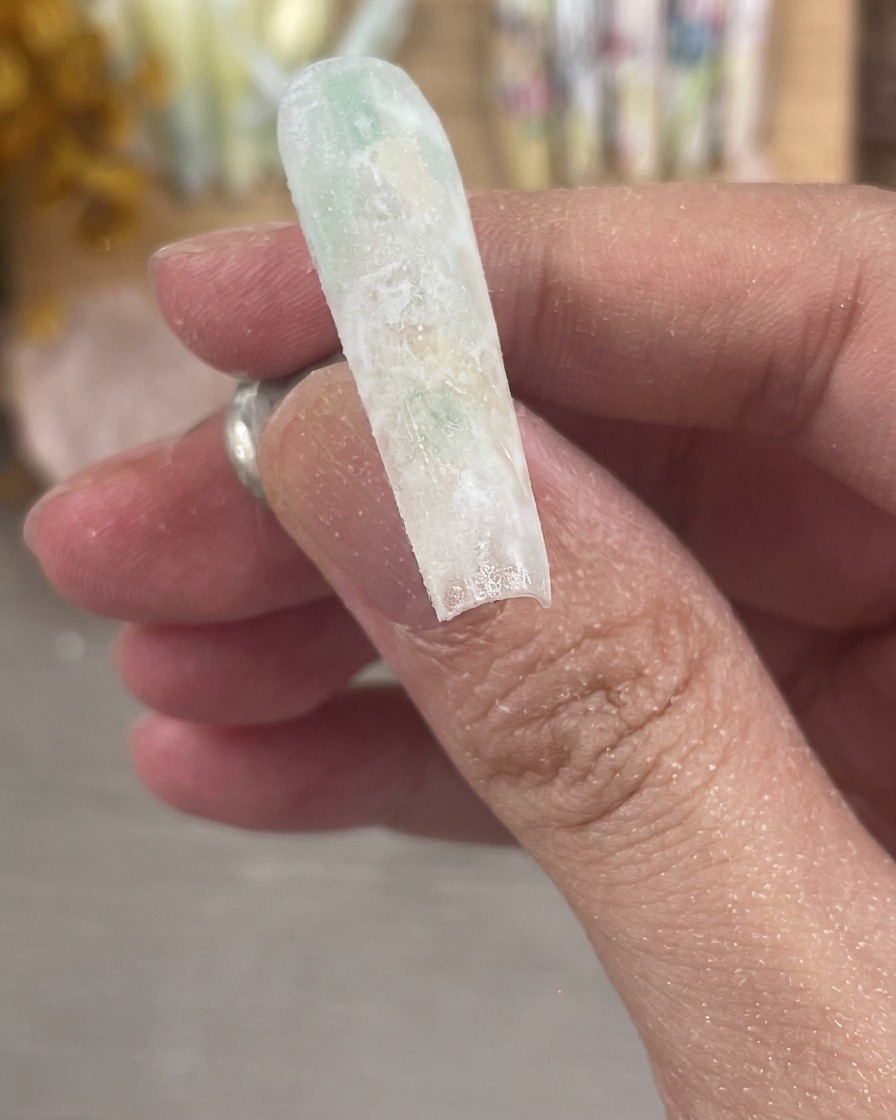
Lightly buff and file the top of the nail plate until it is perfectly smooth and matte. This frosted finish provides the ideal canvas for the hand-painted flowers to grip onto, preventing the paint from slipping.
Tip: Ensure the entire surface is uniformly matte; any shiny spots might cause the painting gel to bead up. - 11Paint the first large flower
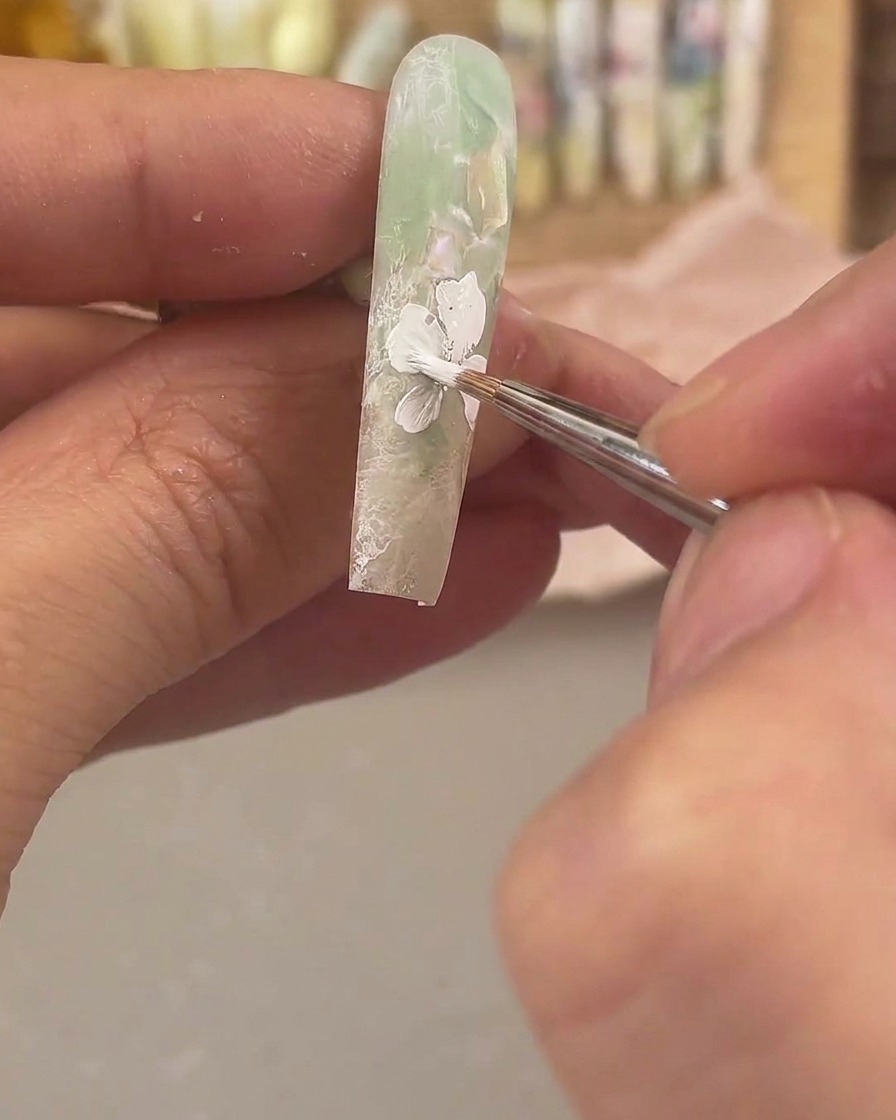
Using a fine detail brush and highly pigmented white painting gel, carefully outline and fill in the petals of the first large flower. Take your time to shape each petal smoothly over the frosted surface.
Tip: Rest your pinky finger on your other hand to steady your hand while doing intricate brushwork. - 12Add smaller white flowers
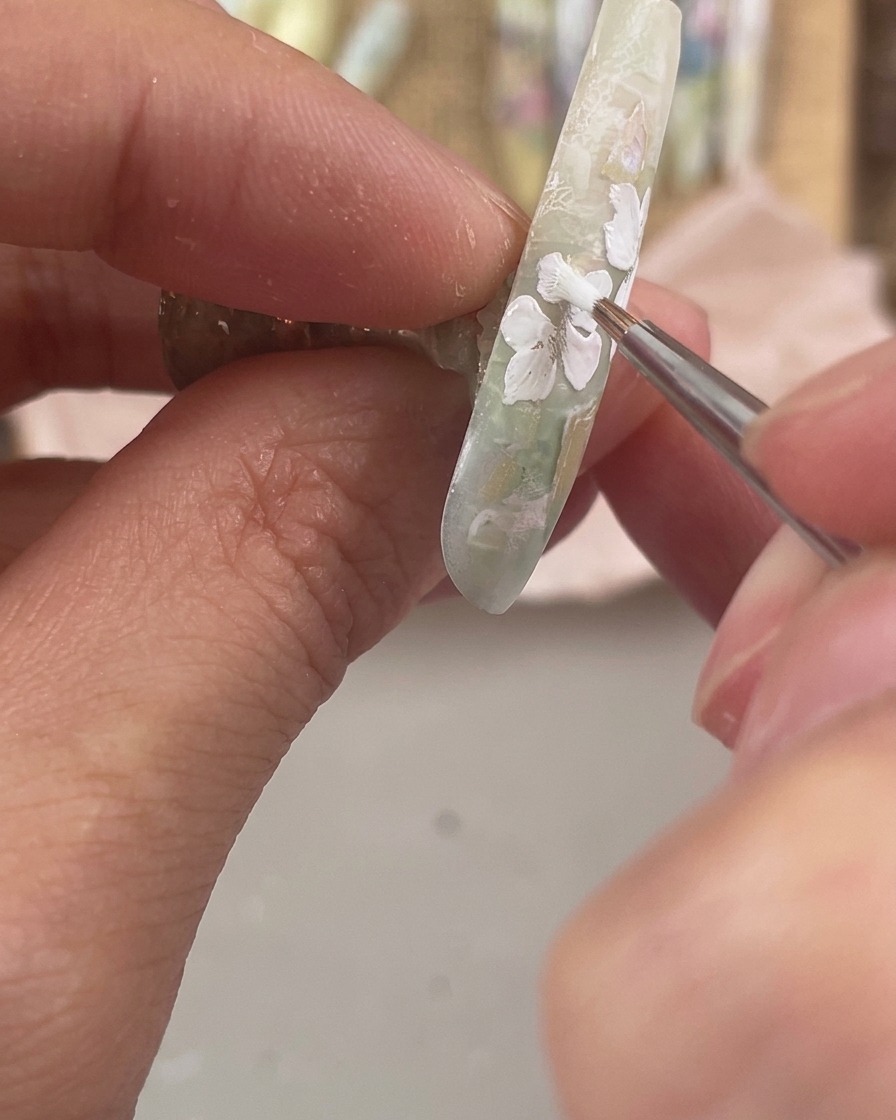
Continue with your detail brush to paint three smaller white flowers along the side edge of the nail. Arrange them elegantly to complement the main flower, and optionally fill in a few tiny leaves to complete the floral cluster.
Tip: Flash cure between drawing flowers if youre worried about accidental smudging while working. - 13Add white leaves
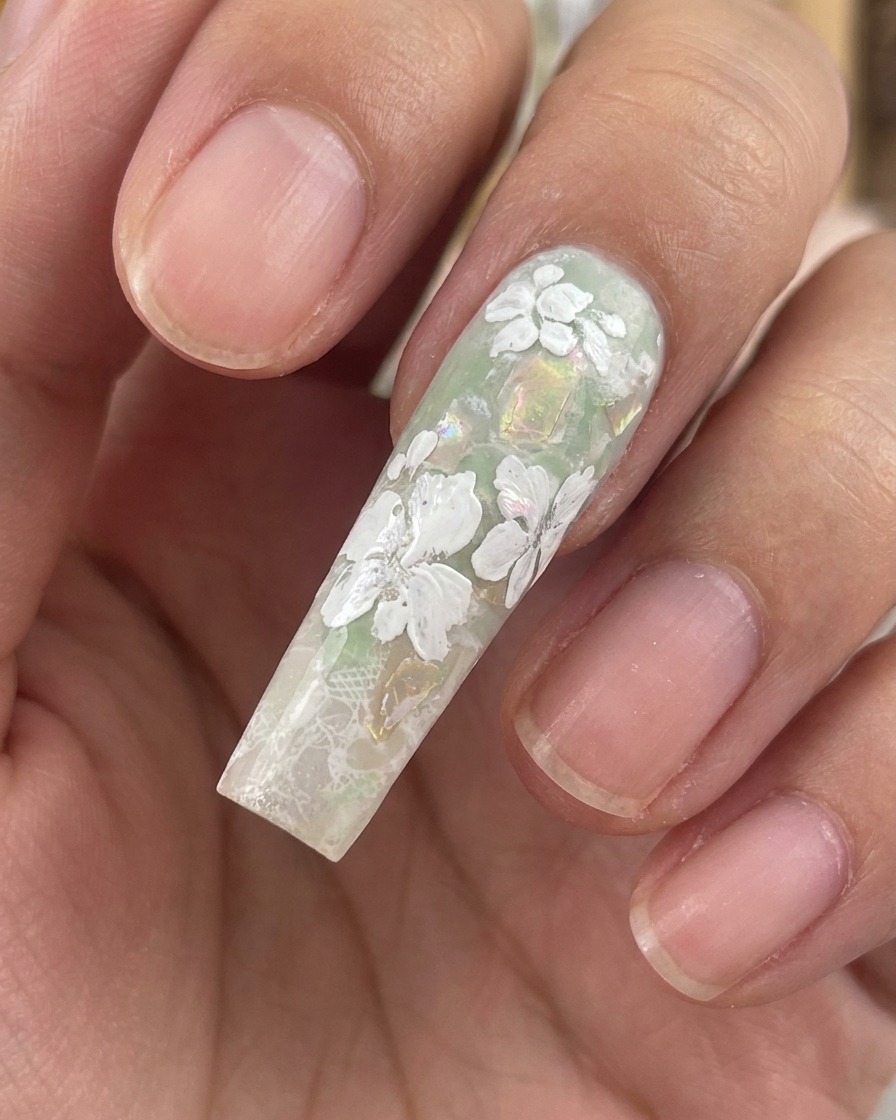
Fill in a few small leaf shapes around your main painted flowers using white painting gel. Once your floral layout is complete and you are satisfied with the design, cure the nail under your lamp.
Tip: Keep the leaves small and delicately placed so they beautifully complement rather than overpower the primary floral elements. - 14Apply matte top coat
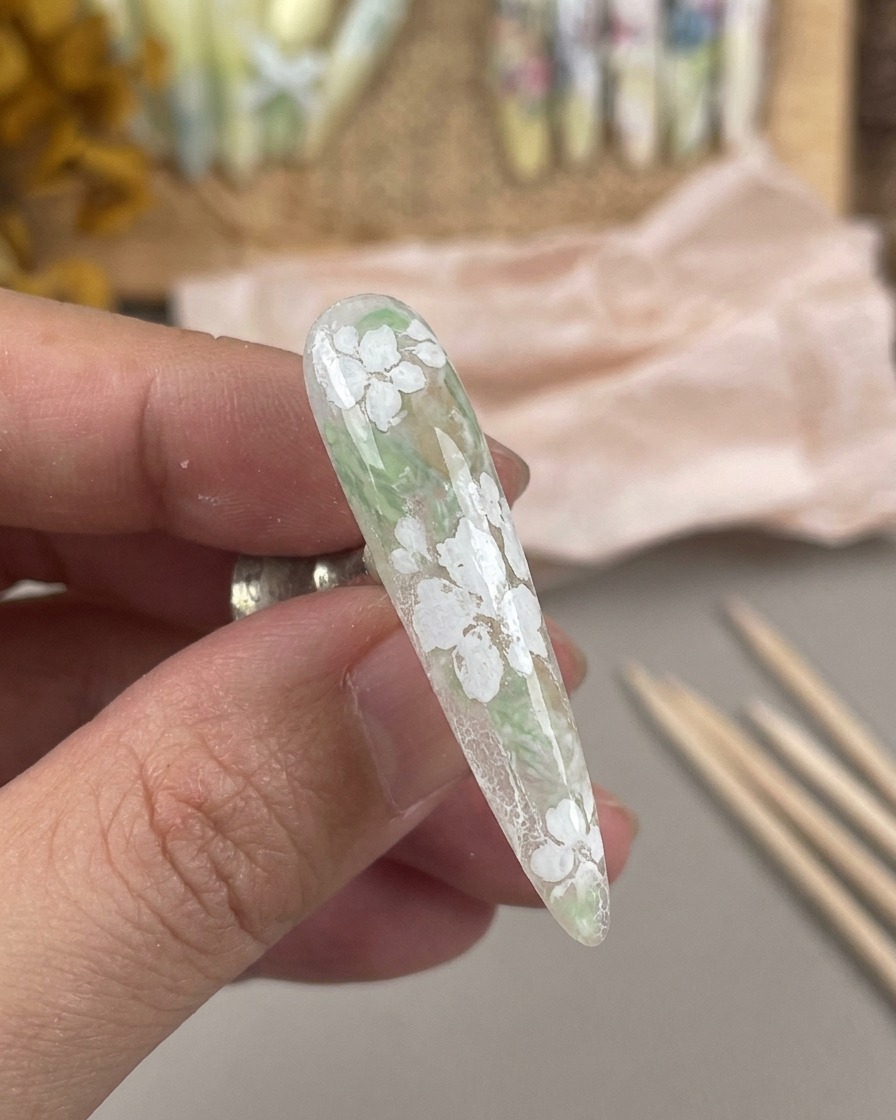
Brush a smooth, even layer of matte top coat over the entire nail to seal the white floral design. This creates the necessary textured, shine-free surface for the upcoming watercolor application. Cure fully under your lamp.
Tip: A matte finish is crucial for watercolor work, as it gives the liquid pigment a porous surface to grip onto. - 15Tint petals with watercolor
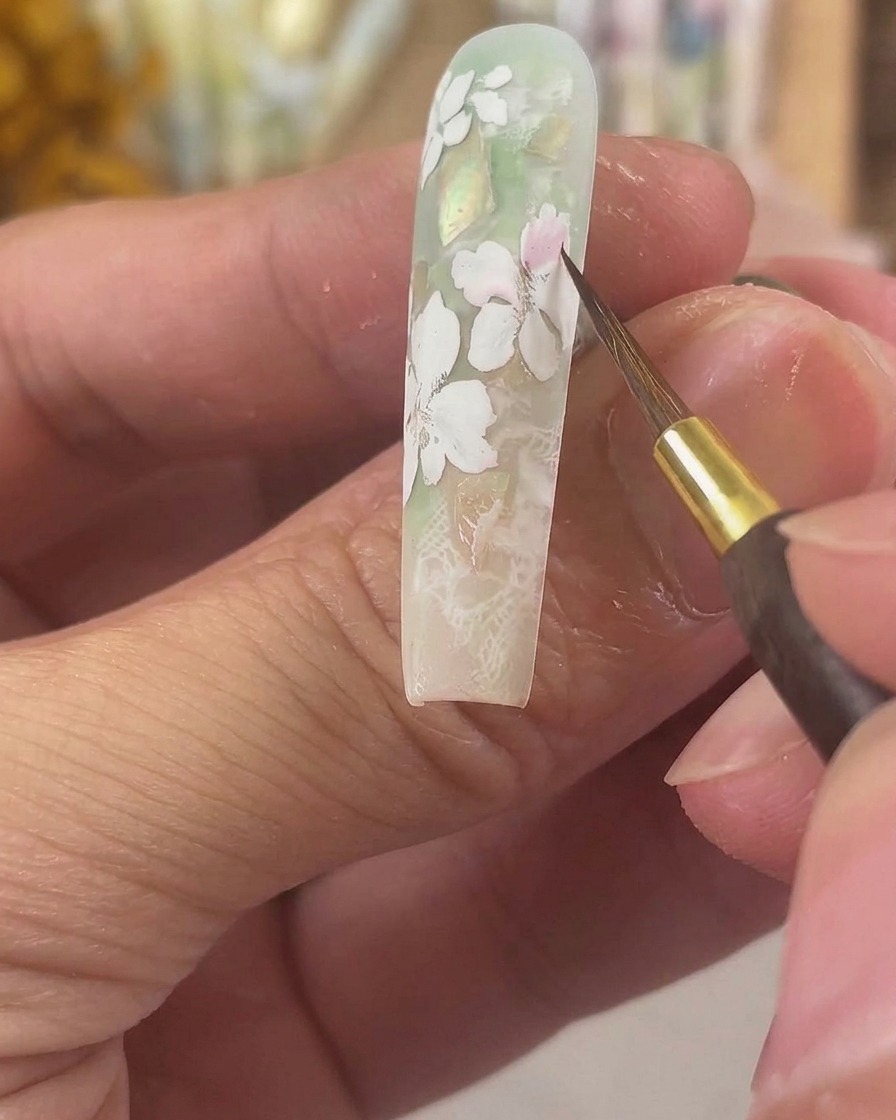
Use a fine detail brush to apply pink watercolor liquid directly onto the white gel petals. Allow the color to naturally pool and blend over the matte surface, creating a soft, delicate gradient effect across the flowers.
Tip: If the pigment looks too concentrated, use a brush lightly moistened with water or alcohol to sheer out and diffuse the color. - 16Add yellow flower centers
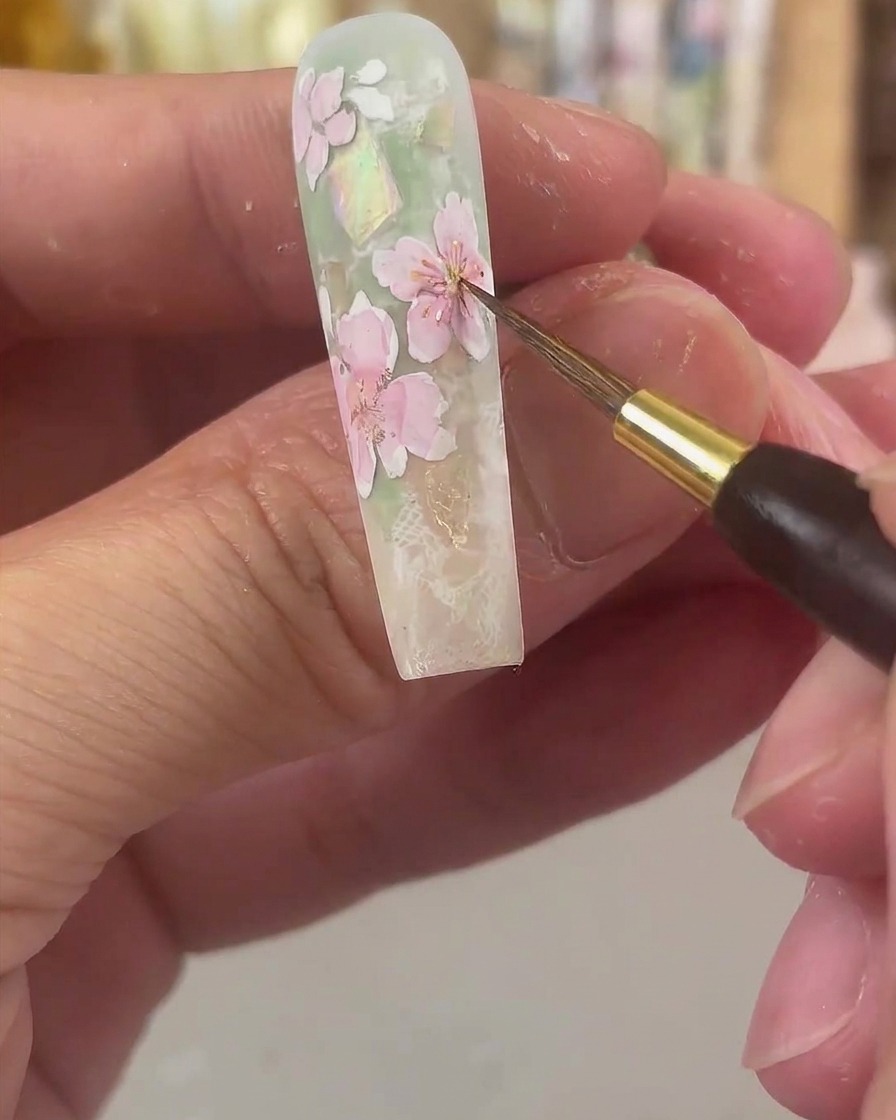
Dab a small amount of bright yellow watercolor directly into the center of each pink-tinted flower. The yellow will gently blend into the pink base, creating a realistic, glowing core. Allow the watercolor to air dry completely.
Tip: Ensure the watercolor is 100% dry before proceeding to encapsulation, otherwise the liquid may smear or bleed into the clear gel. - 17Encapsulate the design
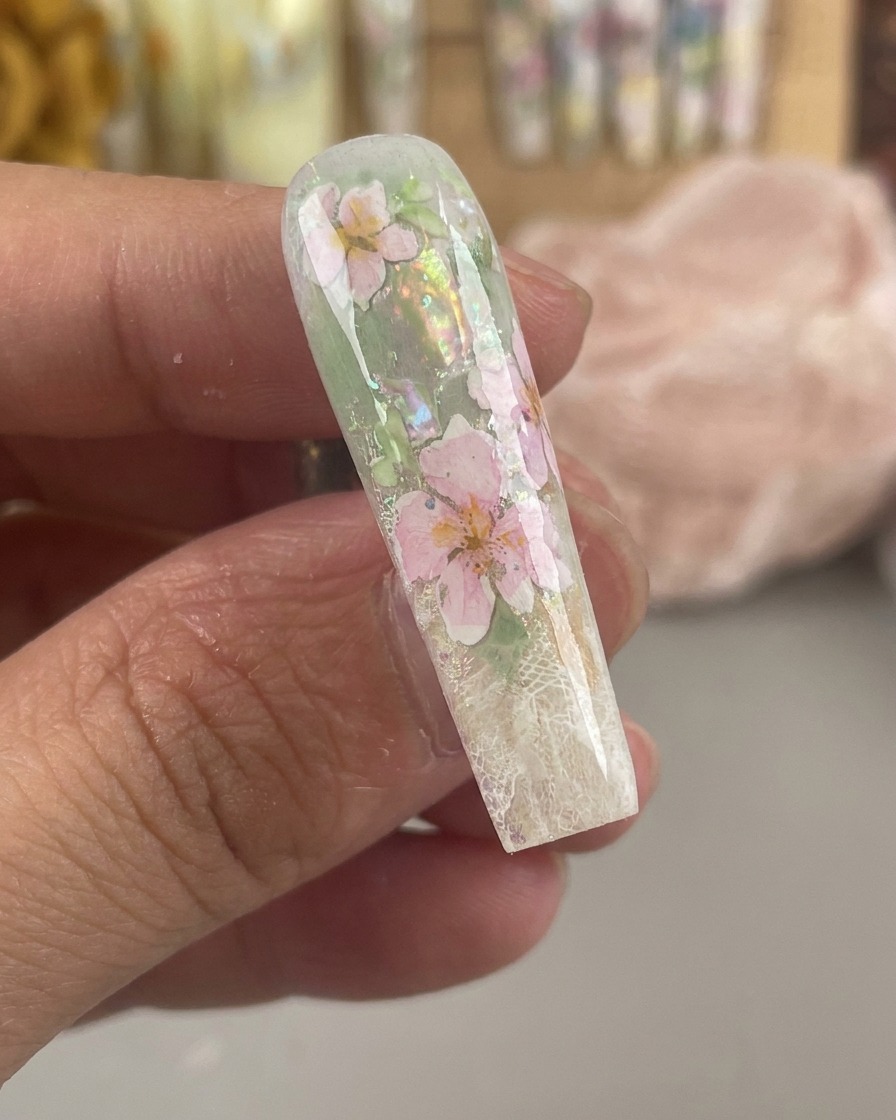
Apply a generous, even layer of clear builder gel over the entire nail surface to encapsulate the dried watercolor flowers. This step seals the delicate painting and adds a stunning, glass-like depth to the floral design. Cure fully under the lamp.
Tip: Let the clear builder gel self-level for a few seconds before curing to ensure a perfectly smooth and domed surface. - 18Draw second layer of petals
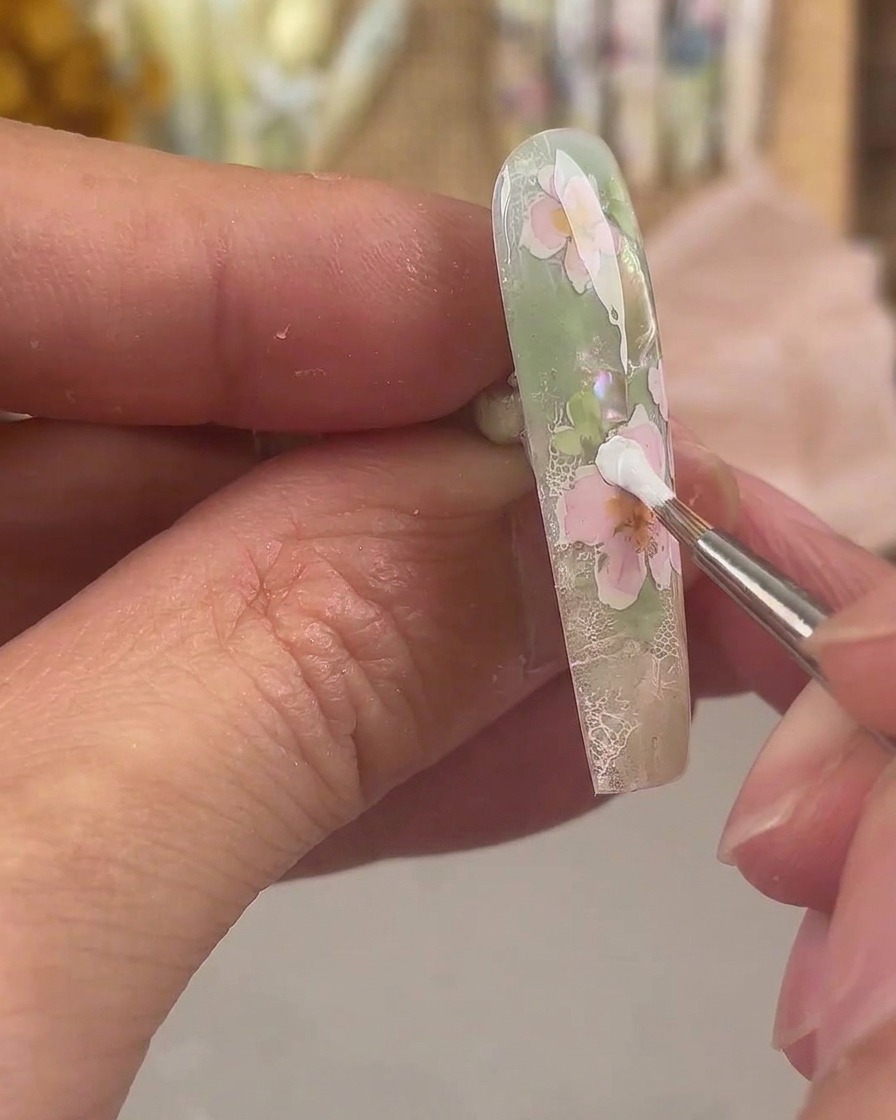
Using white painting gel, carefully draw a second and smaller layer of petals over the previously encapsulated pink flowers to create a dimensional 3D effect. Keep the strokes delicate and do not fill in this second layer too fully so the background remains visible.
Tip: Keep the strokes light and airy to maintain depth without overcrowding the nail design. - 19Draw flower centers and fine lines
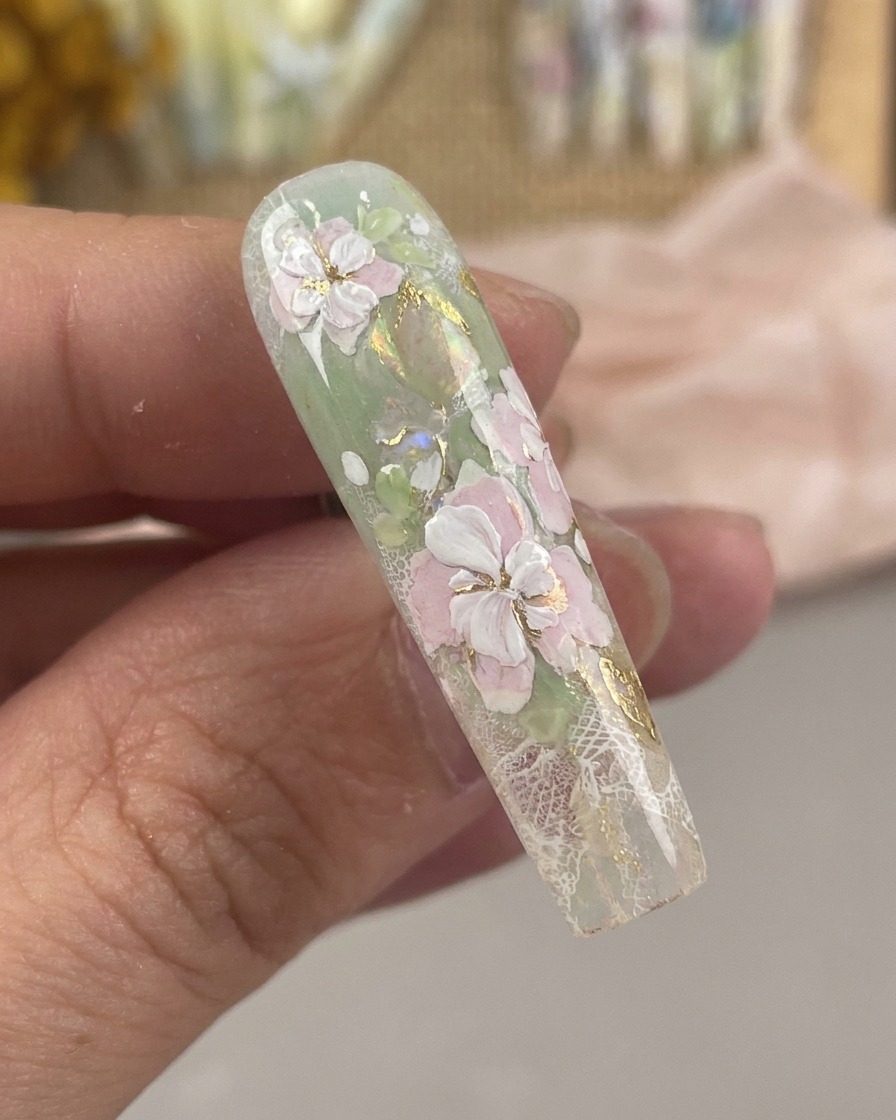
Using an ultra-fine liner brush and white painting gel, draw delicate stamen lines and tiny accent dots inside the centers of the flowers. This fine-detail work adds realism and depth to the painted floral design. Cure the nails under the UV/LED lamp to fully set the details.
Tip: Keep a light touch with the liner brush so the stamen lines remain thin and crisp.