Clear Autumn 3D Butterfly
Gem Extensions — Step-by-Step Tutorial
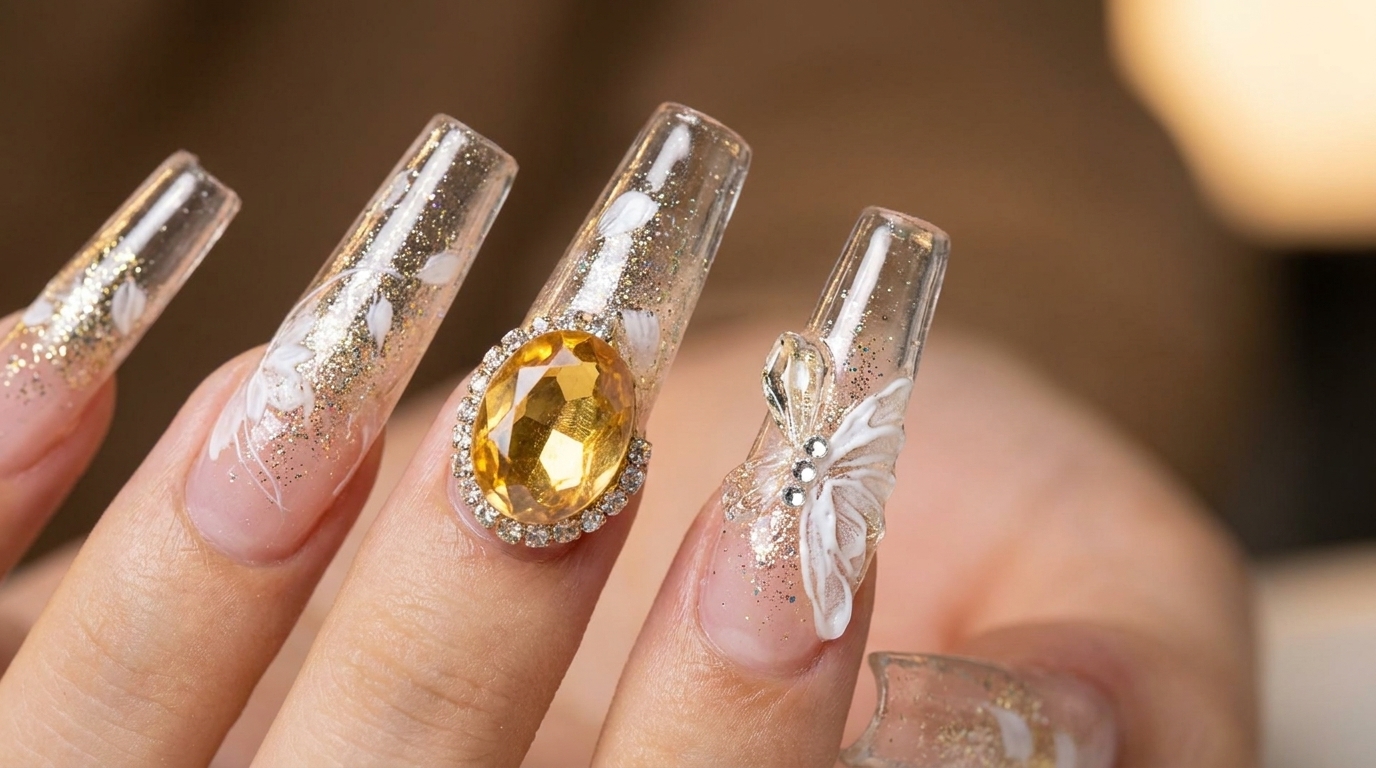
Master translucent clear coffin nail extensions featuring autumn glitter, stunning 3D white butterfly art, and a large central amber gem.
Translucent glass-like nails with encapsulated glitter and dimensional art are making waves this season. This tutorial guides you through building a strong clear extension, embedding autumn-toned glitter flakes, and crafting delicate 3D butterfly wings paired with dazzling rhinestones.
Steps
- 1Apply clear nail tip
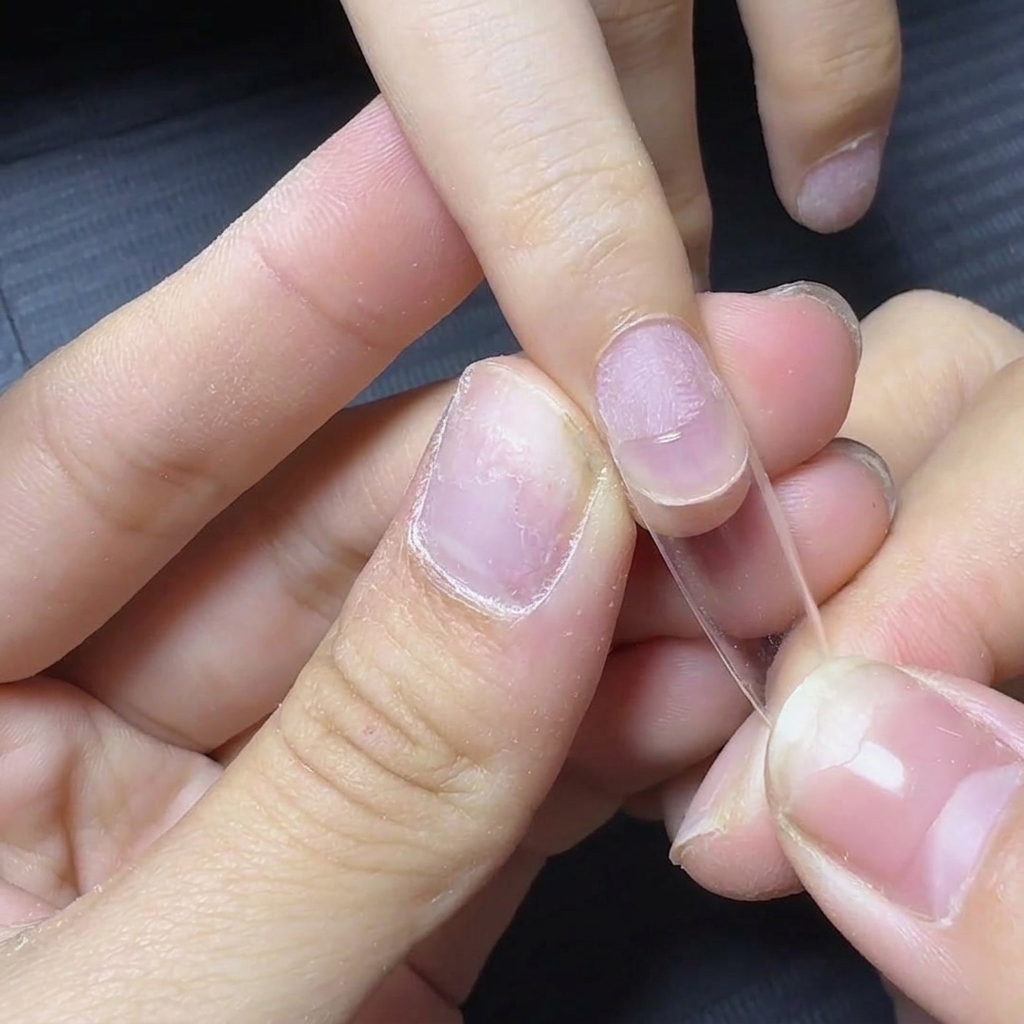
Select a clear D-curve nail tip and apply it to the prepped natural nail using nail tip adhesive gel, ensuring proper alignment along the nail bed without trapping air bubbles.
Tip: Make sure the adhesive layer is uniform to prevent lifting during the curing process. - 2Flash cure the nail tip
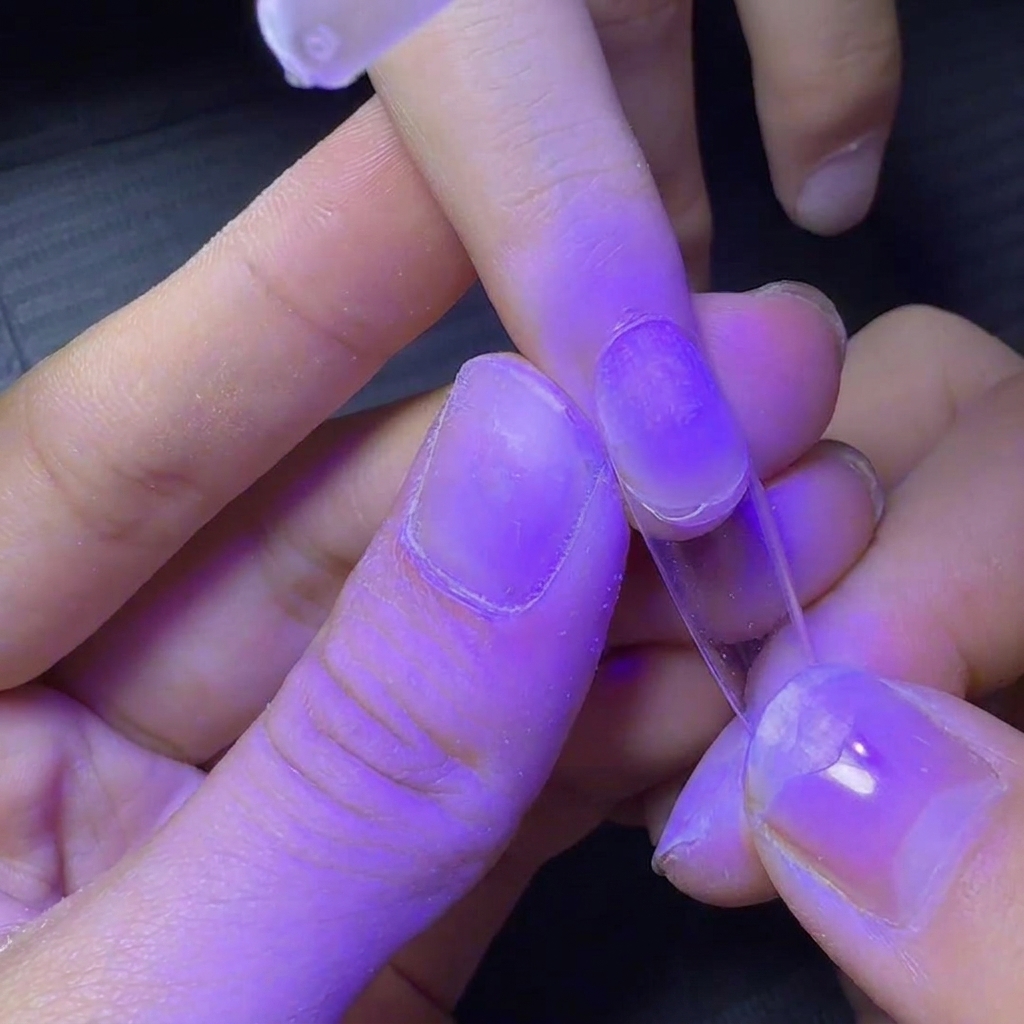
Hold the applied clear nail tip in place and flash cure it halfway under a purple UV lamp to secure the position before performing the next structural steps.
Tip: Only flash cure briefly so the tip remains stable while allowing room for subsequent adjustments and pinching. - 3Pinch the extension tip
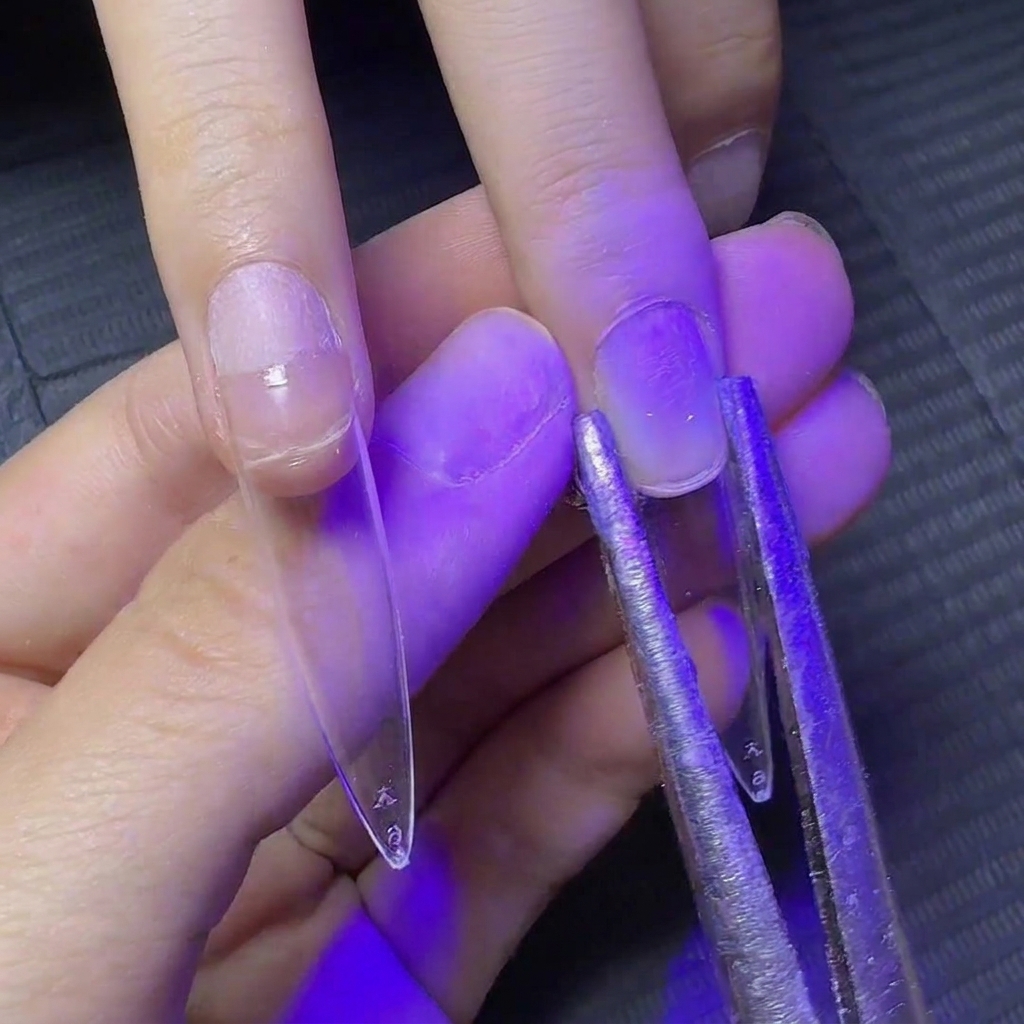
Use a metal pinching tool to gently hold and press the sides of the extension tip to give it a slim, curved shape while continuing the cure.
Tip: Pinching while the gel is warm from a partial cure helps create a sleek, narrow tunnel shape for the extension. - 4Blend the tip junction
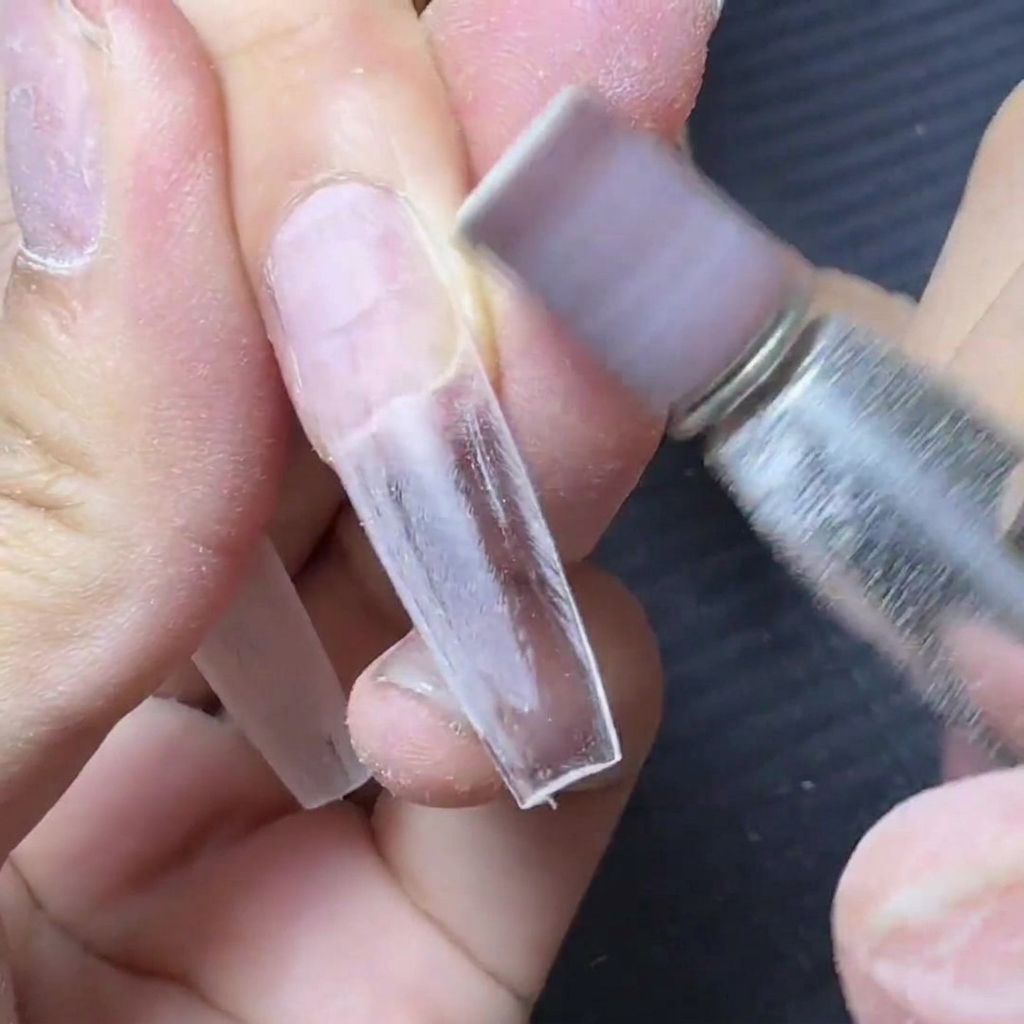
Take an electric file equipped with a sanding band to carefully smooth out and blend the boundary where the extension tip meets the natural nail bed.
Tip: Keep the e-file moving smoothly to avoid thinning out the natural nail plate too much. - 5Prep the surface and free edge
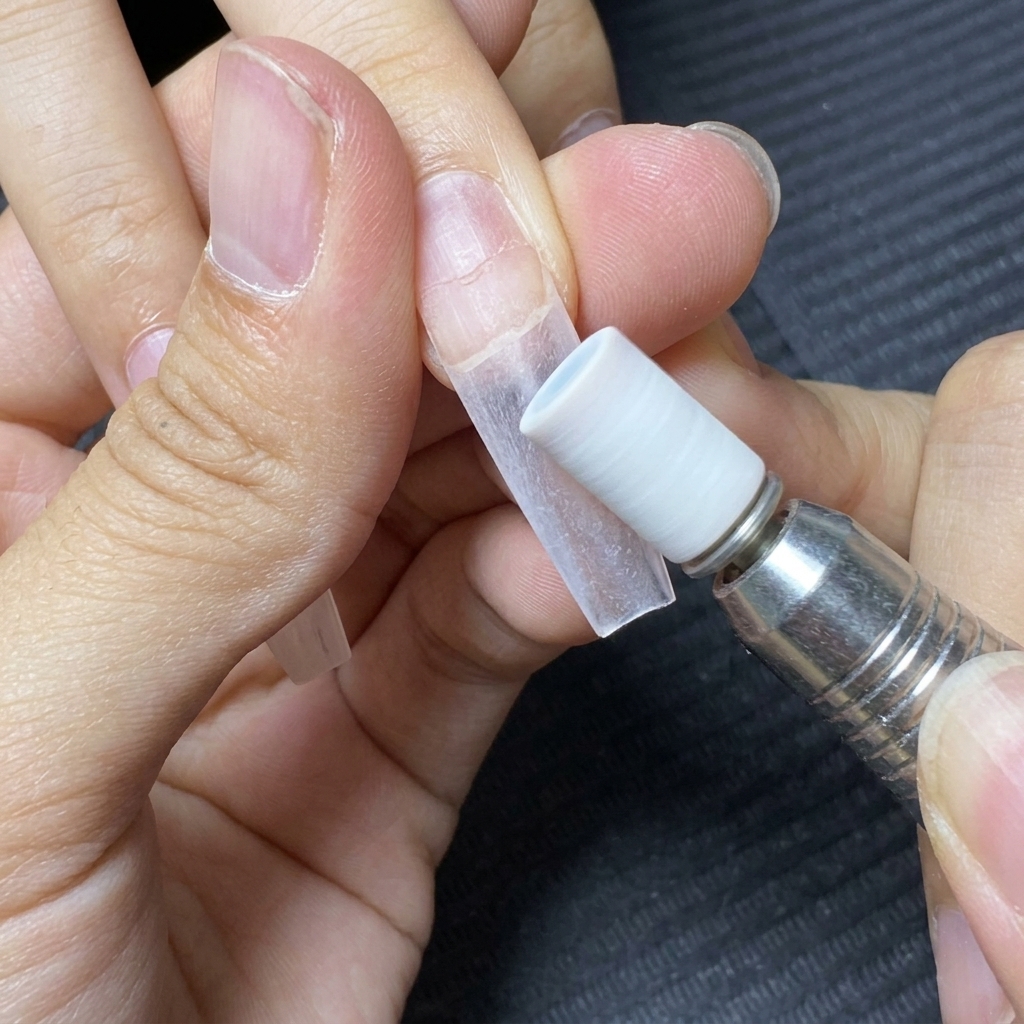
Use the electric file to refine the free edge and etch the overall surface of the clear tip to remove any remaining shine and create grip for overlay products.
Tip: Removing the shine completely ensures that subsequent gel layers adhere firmly without peeling. - 6Apply a clear base layer
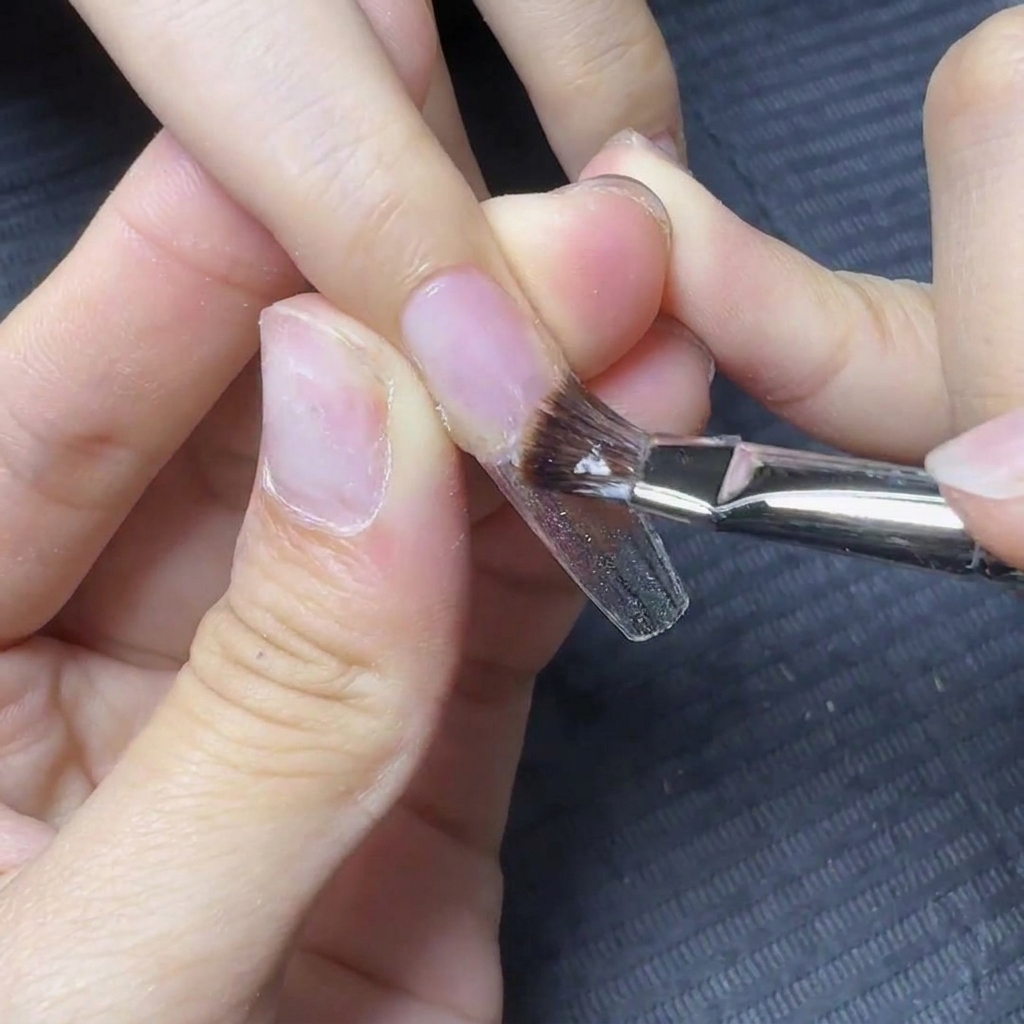
Apply a thin, even layer of clear gel over the natural nail area to create a strong foundation. This base layer helps protect the natural nail and ensures maximum adhesion for the thicker builder gel that will follow.
Tip: Be careful not to flood the cuticles; leave a tiny gap between the gel and the skin. - 7Place builder gel near the cuticle
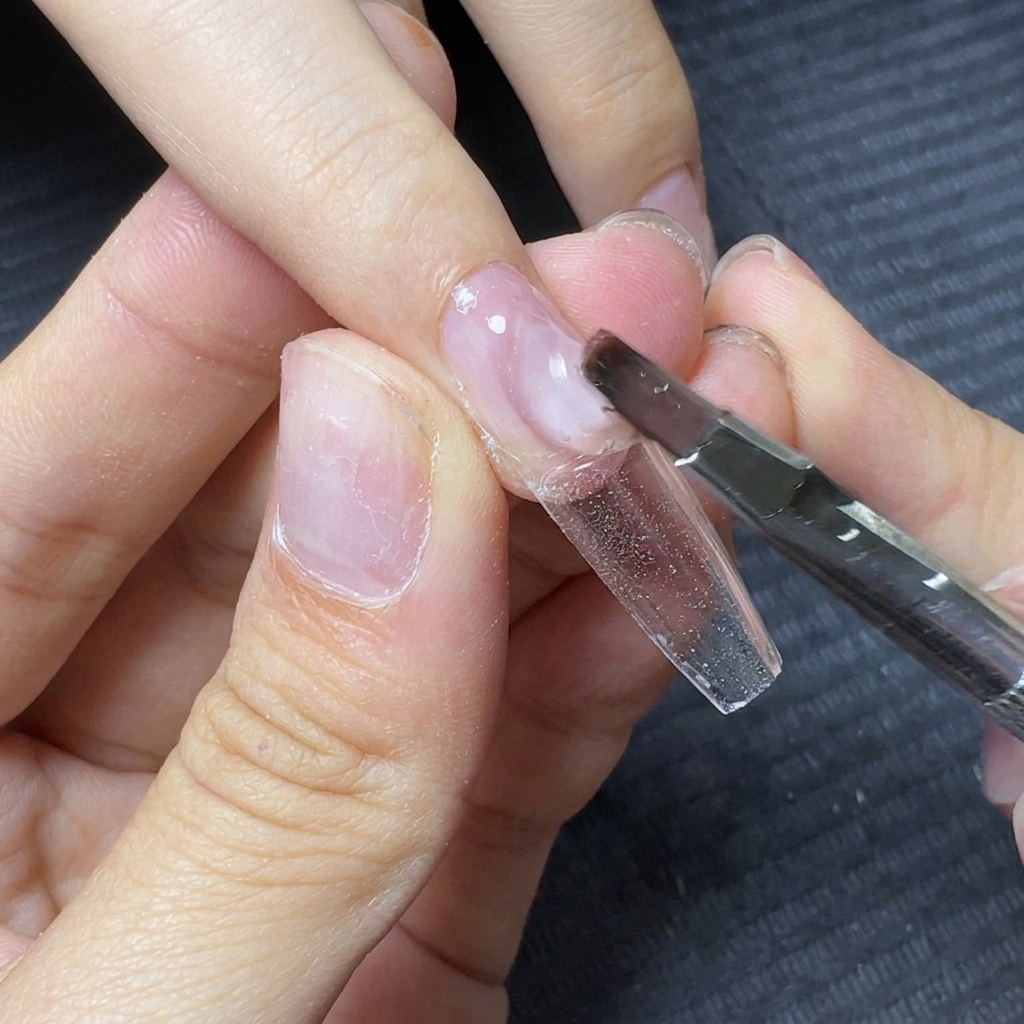
Pick up a thick bead of clear builder gel and place it gently near the cuticle area. Ensure there is enough product at the apex to provide structural support, which will help the extension look slim but remain strong.
Tip: If theres too little gel, it wont pinch properly later, compromising the slim shape of the final nail. - 8Float and drag the builder gel
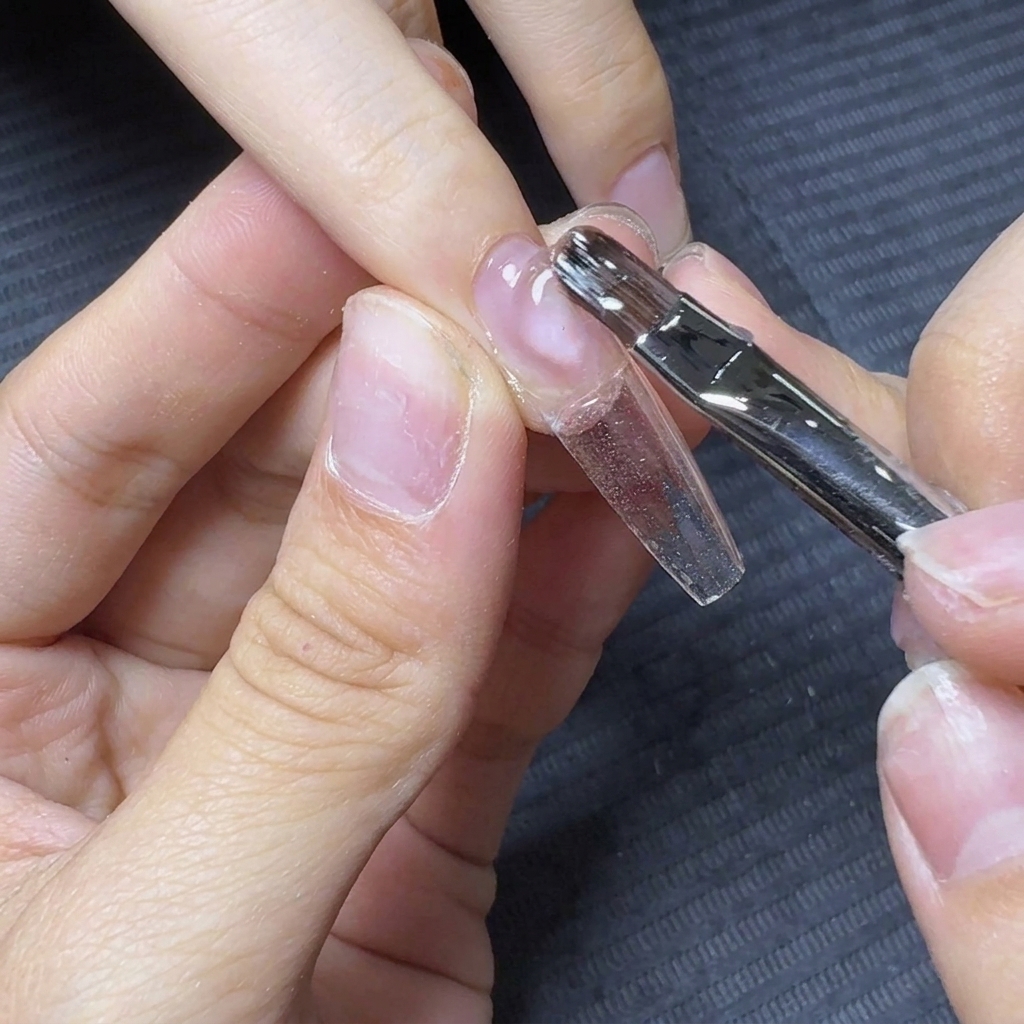
Using a light touch, float and drag the bead of builder gel down the length of the clear nail tip. Guide the product evenly to build the structure and thickness of the nail extension without pressing too hard with the brush bristles.
Tip: Keep the brush parallel to the nail and gently pull the gel downwards to avoid creating bubbles or uneven patches. - 9Refine builder gel shape
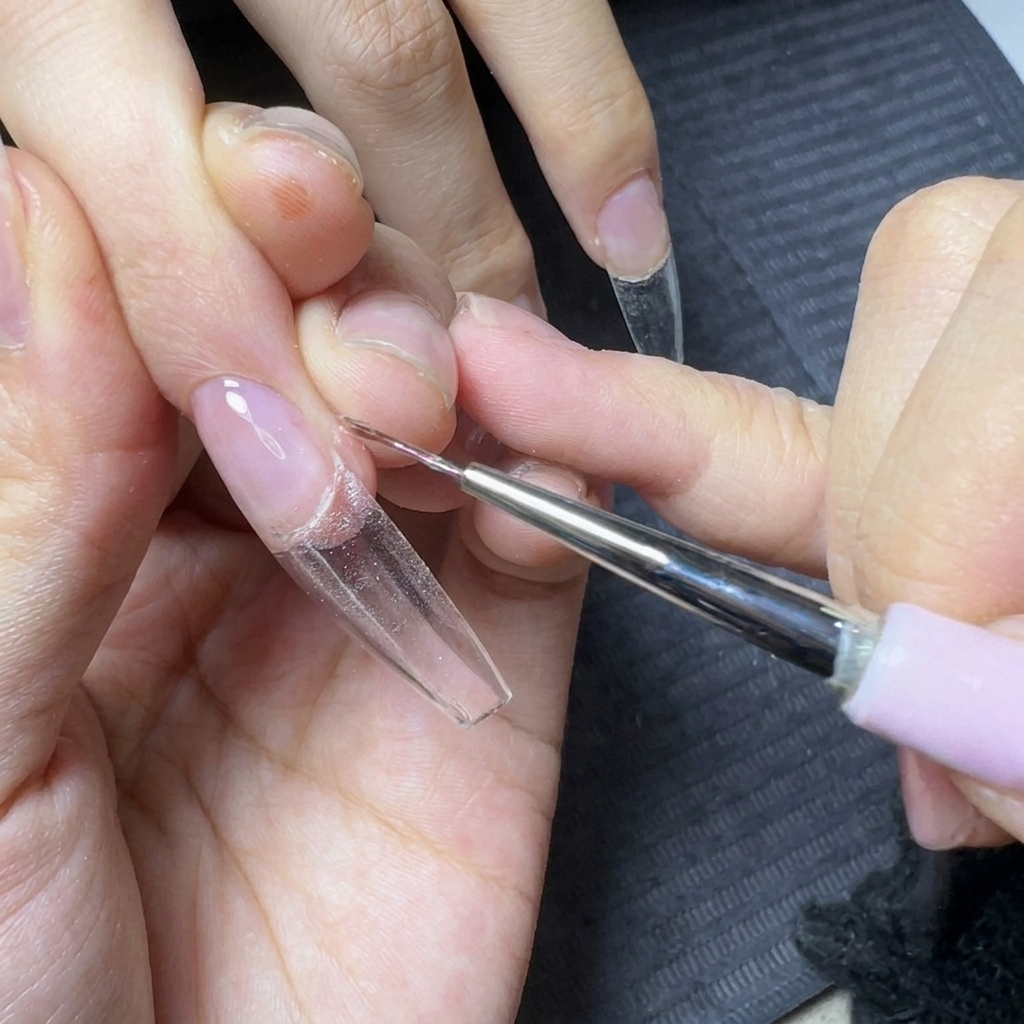
Use a fine detail brush to smooth and refine the builder gel shape near the free edge and cuticle area. This ensures clean lines and a neat foundation before moving on to the surface buffing and design stages.
Tip: Keep your brush lightly dampened with slip solution or alcohol if needed to easily glide over sticky gel surfaces without dragging. - 10Pinch and cure the extension
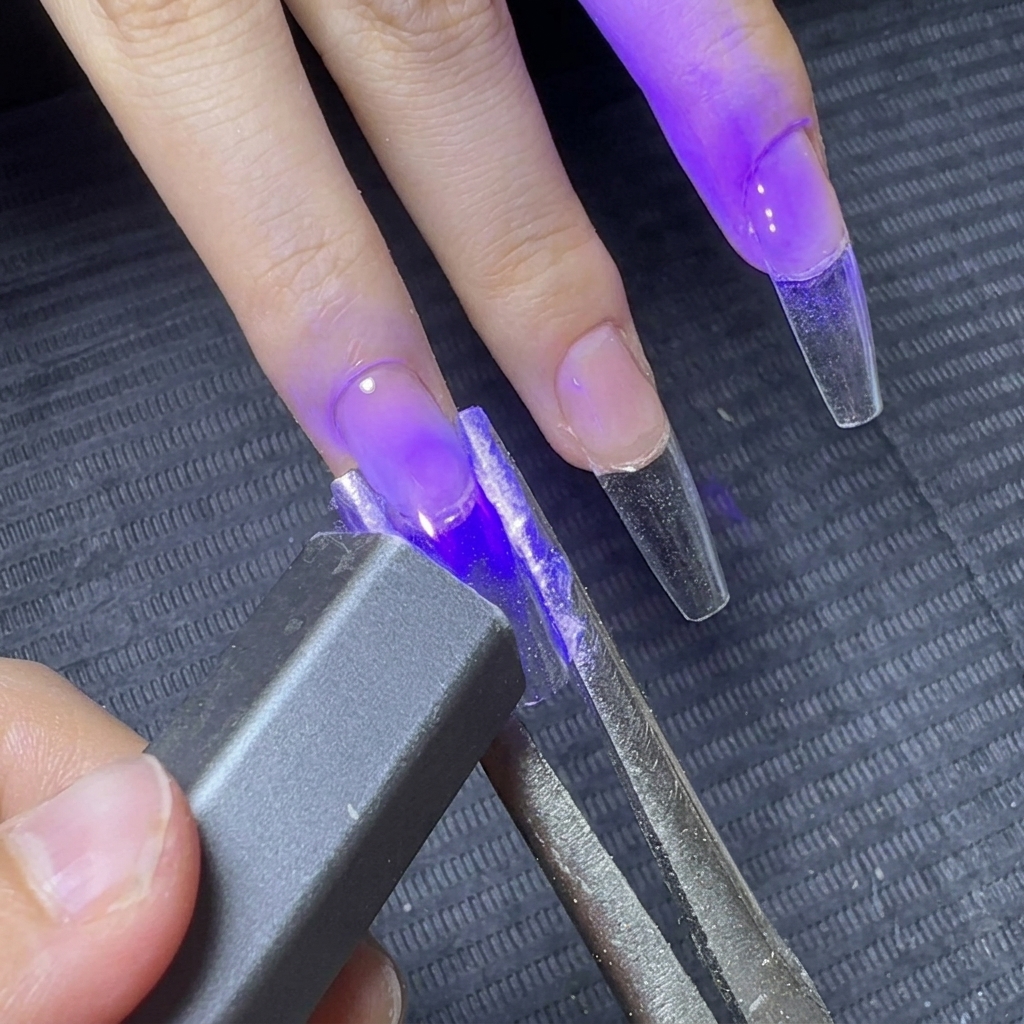
While the builder gel is still uncured, use a pinching tool or tweezers to hold the shape and slim the nail down. Flash cure the nail under a handheld UV light while maintaining the pinch to lock the narrow structure in place.
Tip: Hold the pinch firmly but gently to avoid causing discomfort or warping the nail tip. - 11Buff the builder gel surface
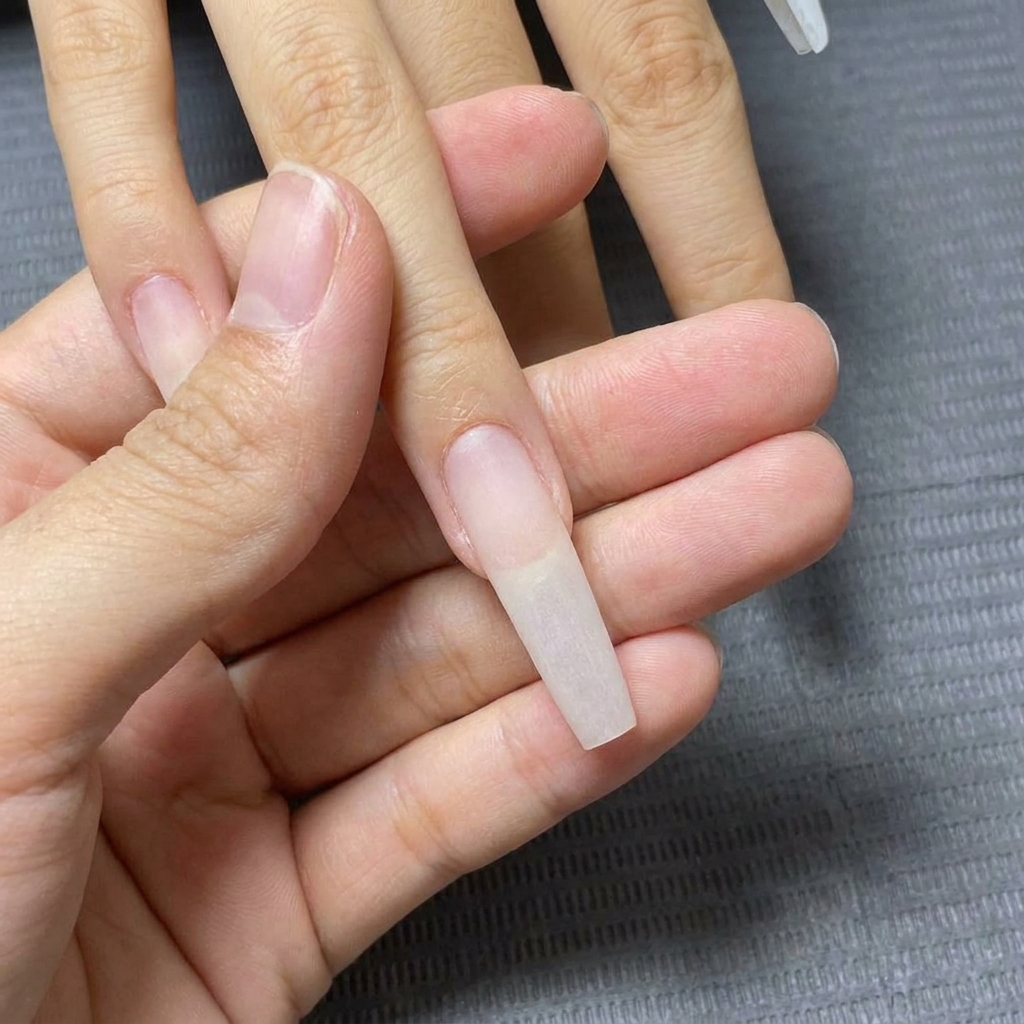
Buff the entire surface of the cured builder gel until it is completely matte and free of bumps or uneven spots. A smooth, matte base is essential for ensuring that subsequent gel layers and nail art adhere evenly without slipping.
Tip: Use a gentle hand and a fine-grit buffer to avoid filing down the apex or thinning out the structural strength of the extension. - 12Apply silver reflective glitter
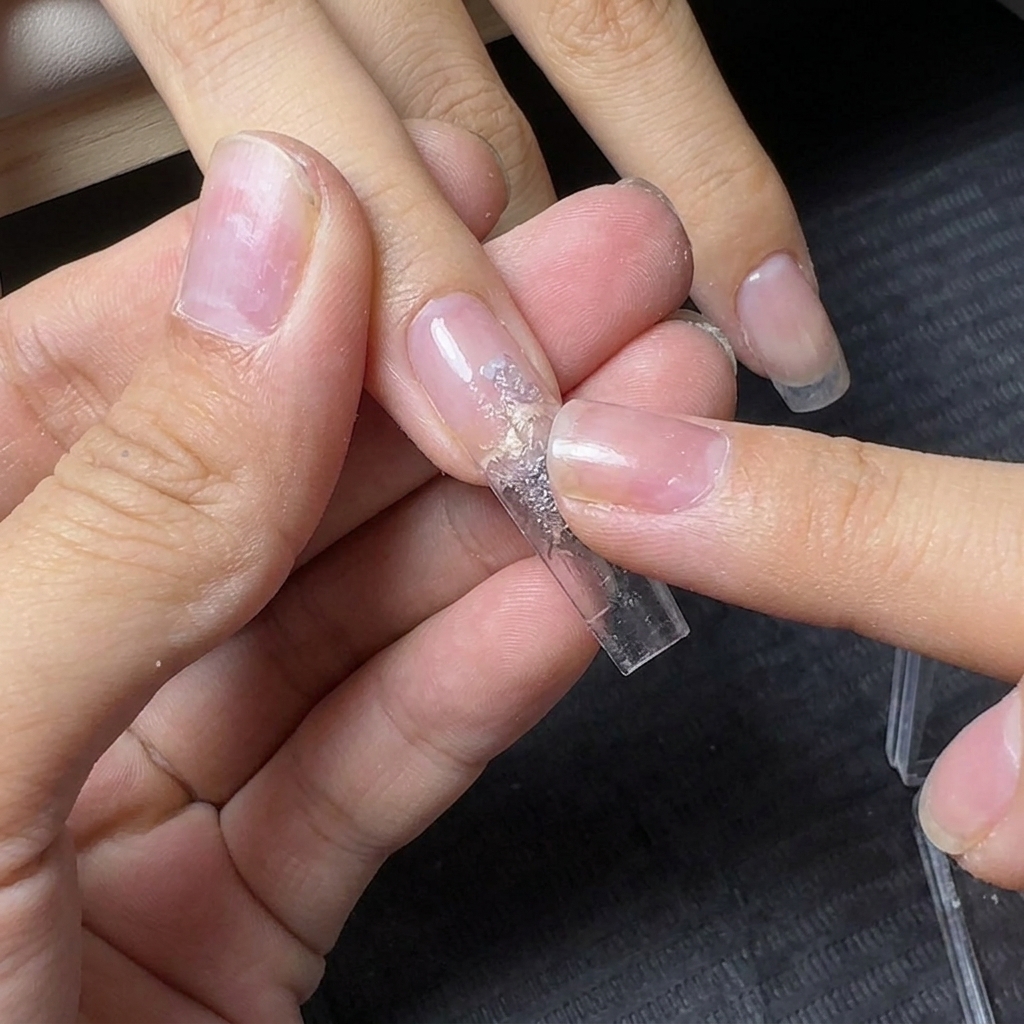
Take a small amount of silver reflective glitter gel, commonly known as bling mud, and gently dab it onto the nail plate using your fingertip. This technique disperses the glitter particles naturally and creates an effortless textured shimmer effect.
Tip: Using your finger instead of a brush gives you better control over placement and prevents thick, bulky clumps of glitter gel. - 13Layer yellow-gold glitter flakes
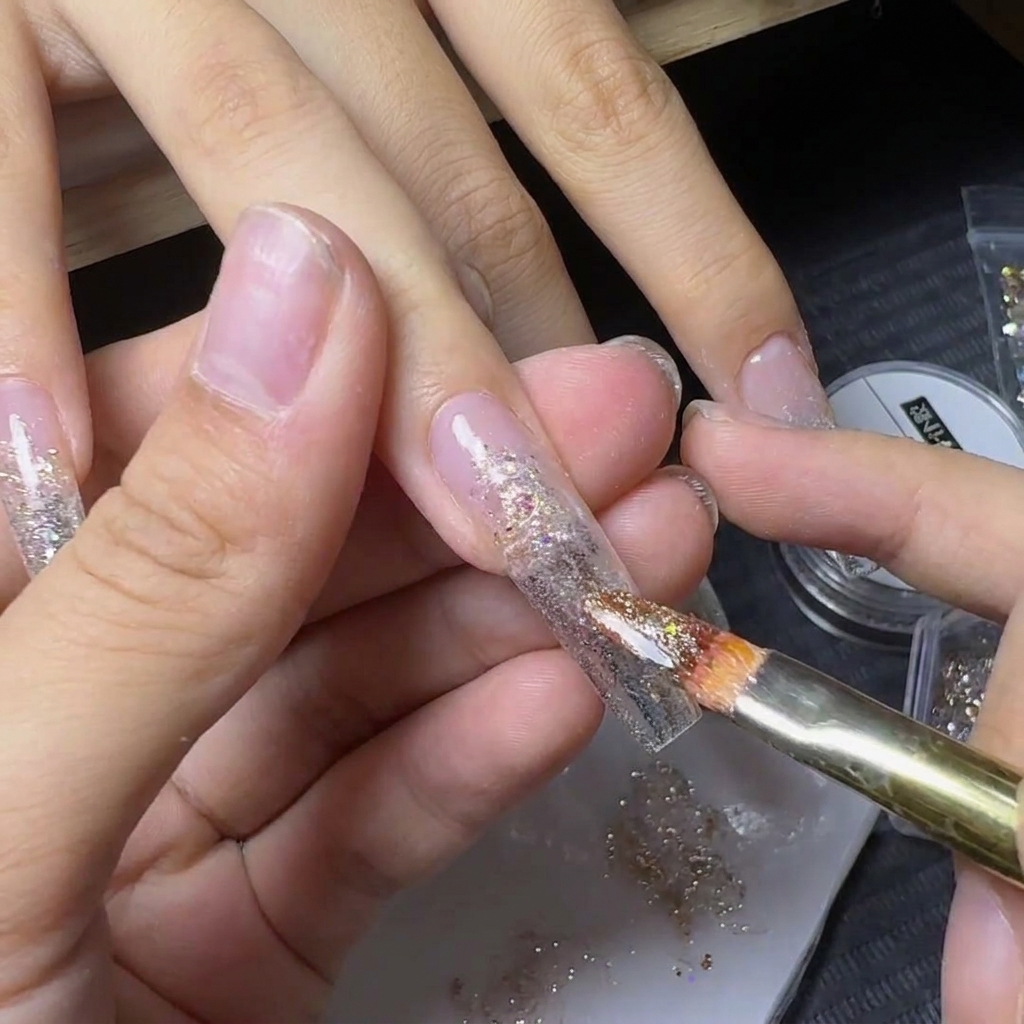
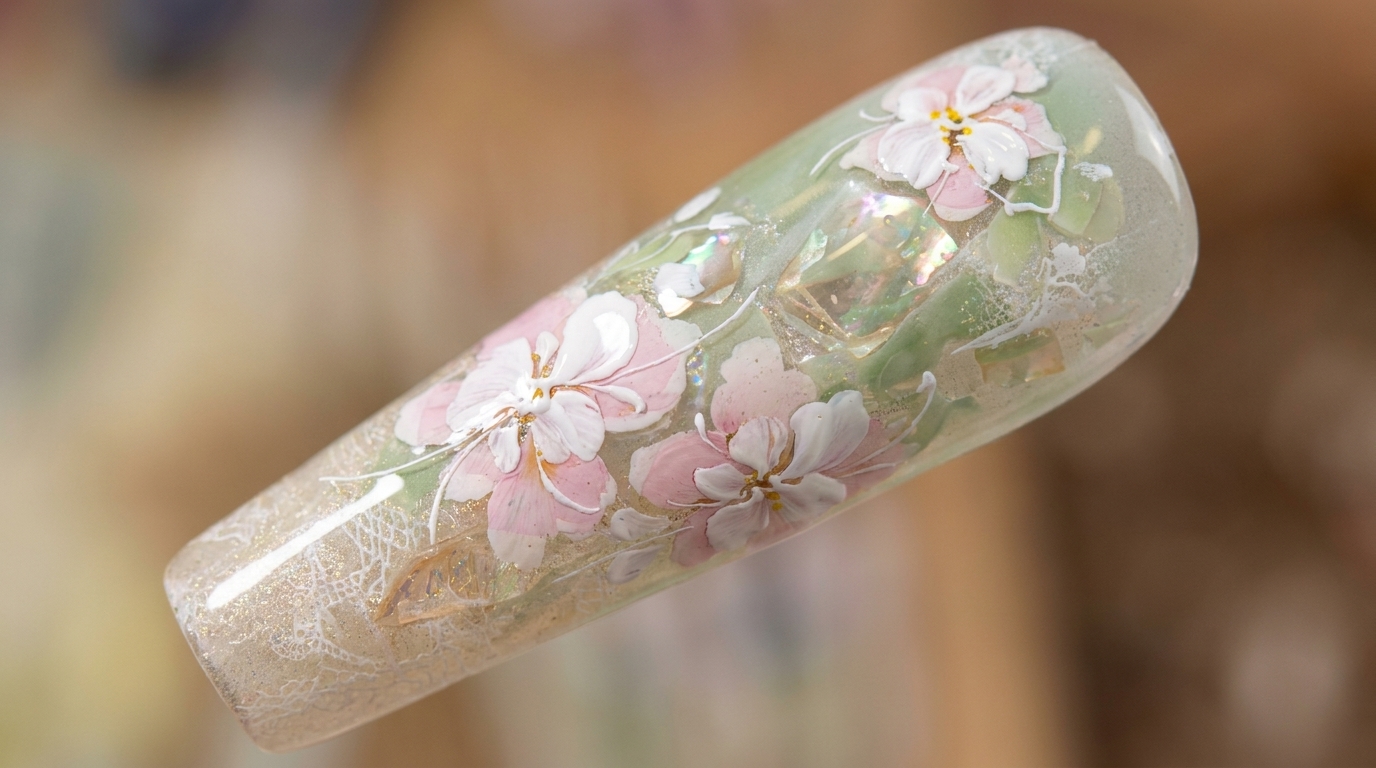
Using a nail art brush, carefully layer yellow-gold glitter flakes over the mid-section of the nail. This introduces warm tones that complement the silver base, perfectly capturing an cozy autumn aesthetic.
Tip: Tap the flakes gently into the uncured tacky layer so they lay flat and dont create sharp protruding edges. - 14Outline the top butterfly wing
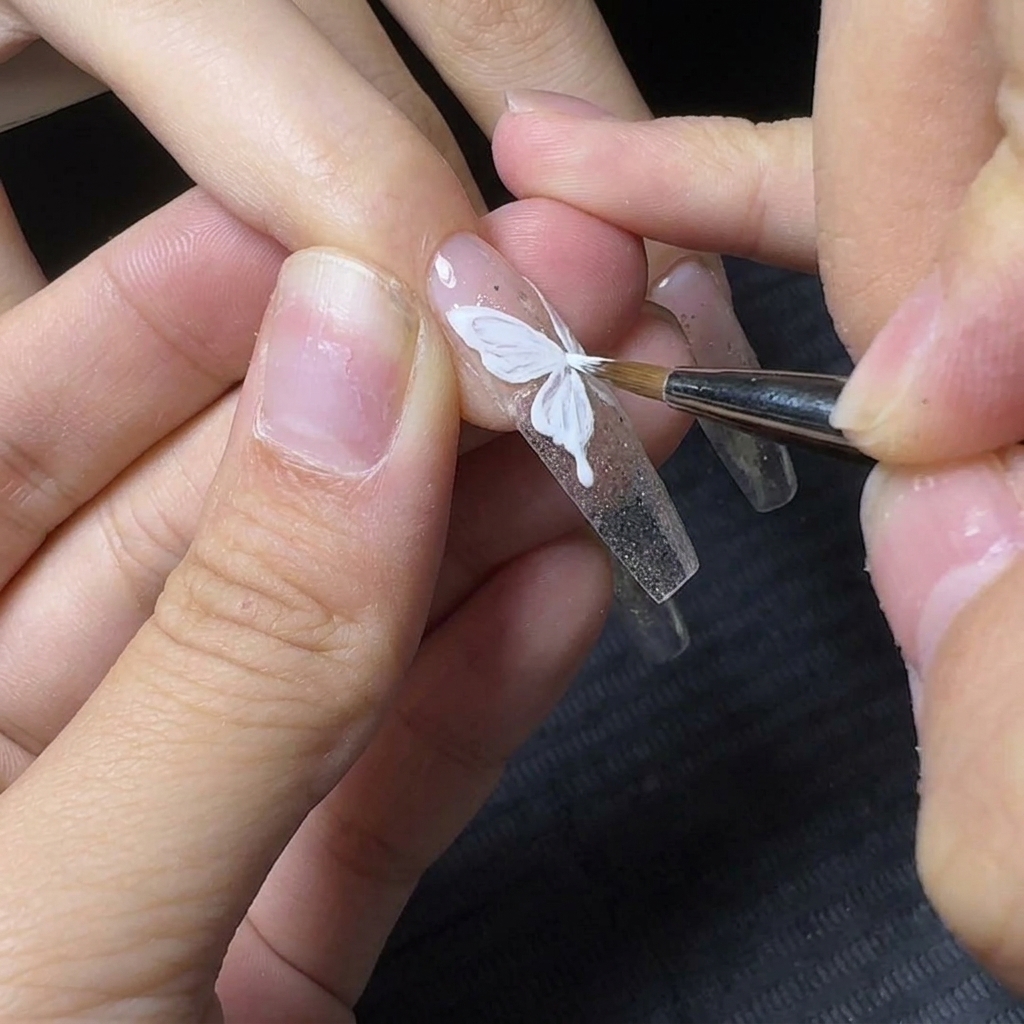
Using a fine long liner brush dipped in white painting gel, carefully draw the delicate outline of the top wing for a half-butterfly motif. Take your time to shape thin, elegant lines that curve gracefully toward the side of the nail.
Tip: Flash cure your lines for a few seconds if you are worried about the white gel running before you finish the full outline. - 15Fill in the bottom butterfly wing
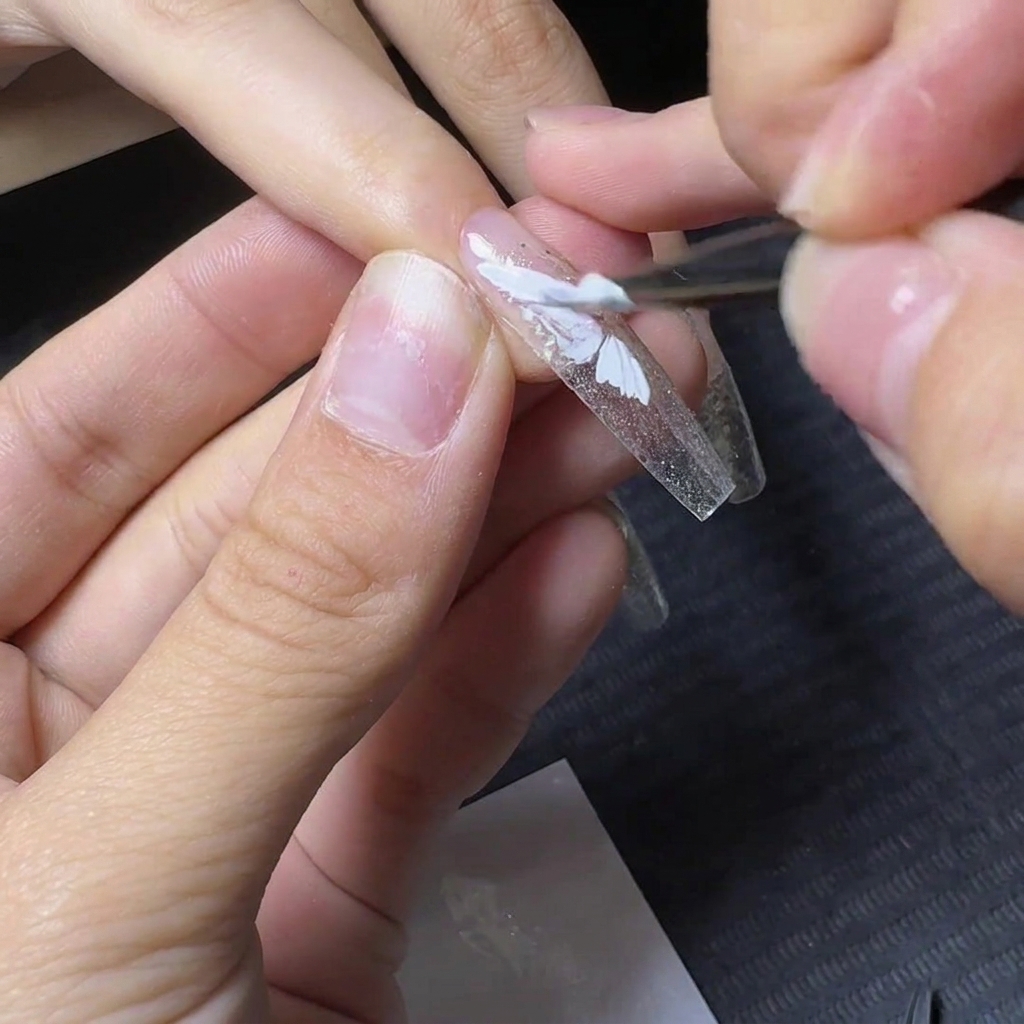
Continue the nail art by filling in and completing the bottom wing outline of the butterfly using the same white gel. Ensure the proportions match the top wing to create a balanced half-butterfly design on the side of the nail.
Tip: A clean detail brush can be used to pull and feather the white gel inward to achieve a smooth, semi-solid fill. - 16Paint random white flower petals
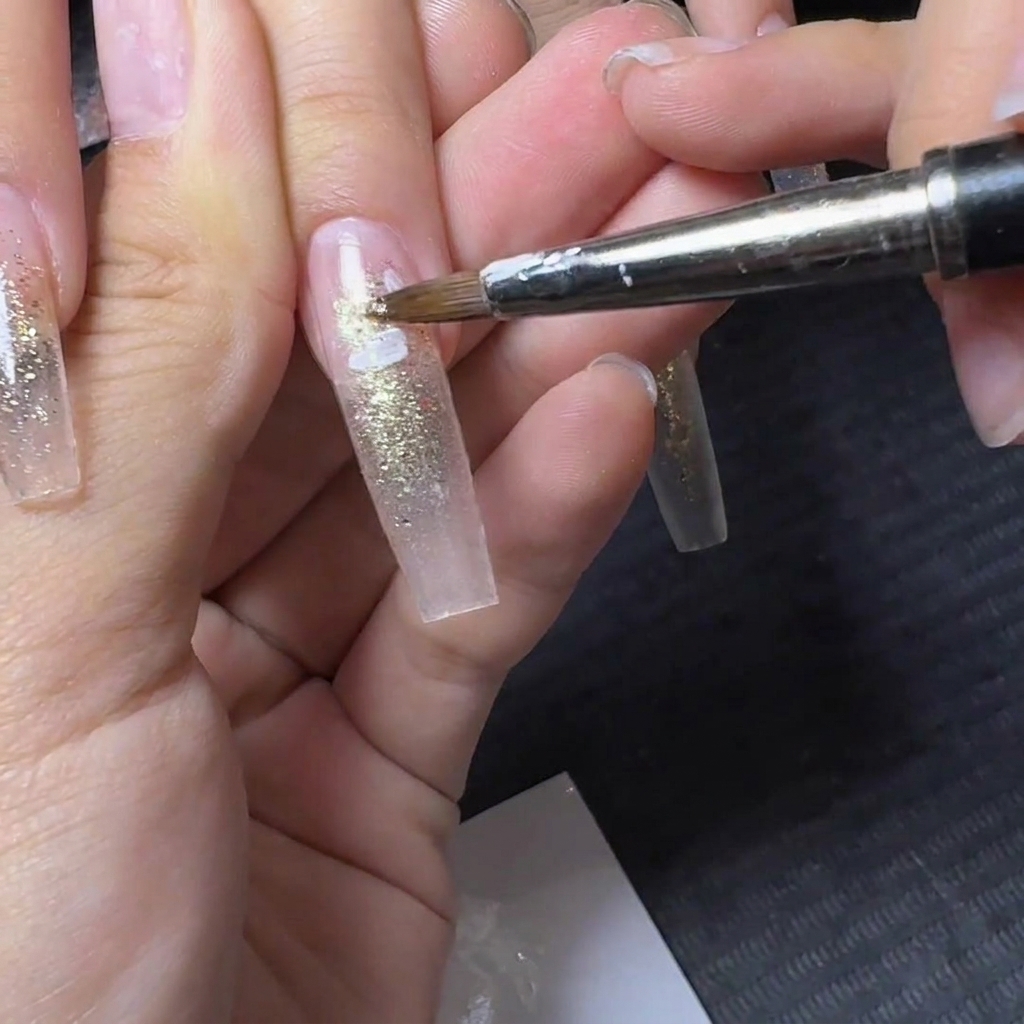
Using a fine detail brush and white painting gel, loosely draw random, messy flower petals onto the nail surfacecite: 1. Embrace an abstract, organic look by keeping the strokes spontaneous and imperfectcite: 1. This artistic style adds a trendy, effortless charm to the overall design.
Tip: Dont overthink the flower placement or symmetry; messy and random strokes look much more natural and modern. - 17Add a second petal layer
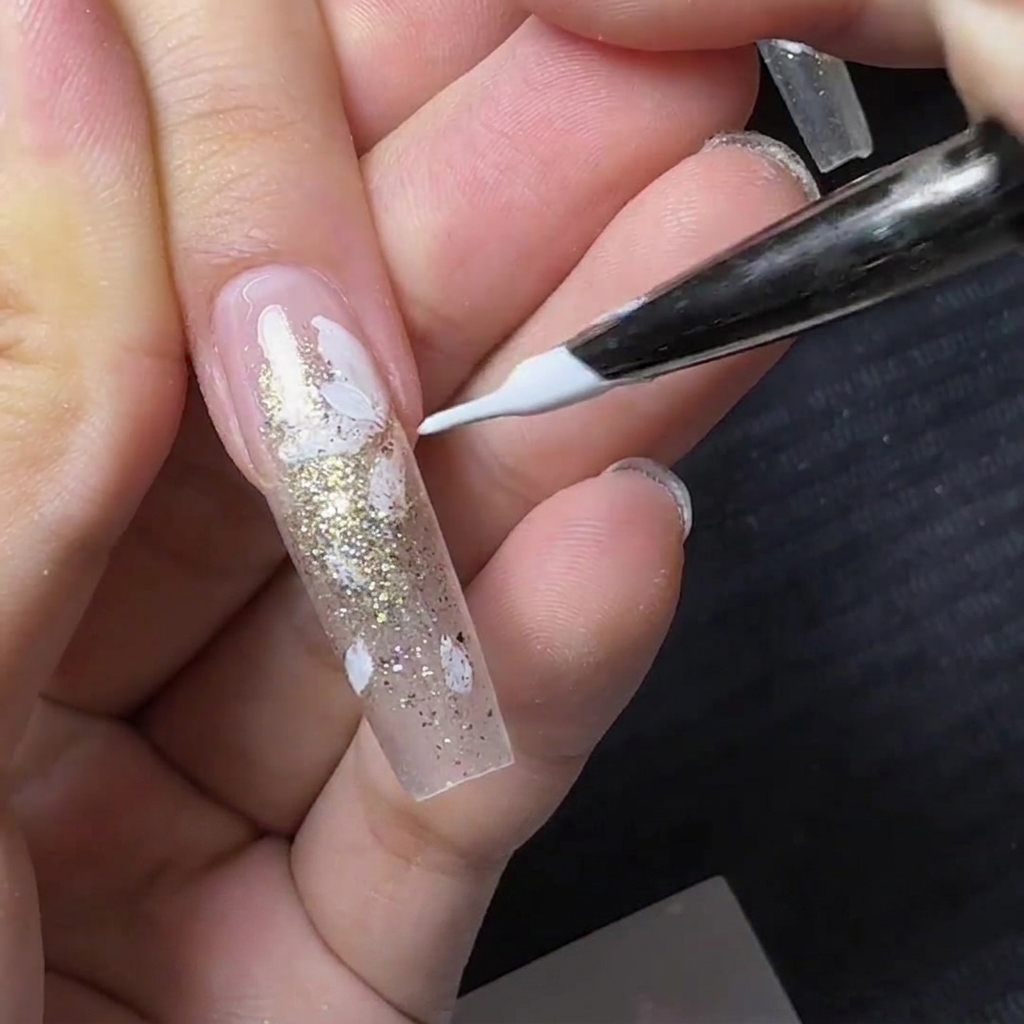
Using a fine liner brush and white painting gel, carefully draw a smaller, second layer of petals overlapping the center of your existing floral design. Keep the strokes loose and slightly messy to maintain that effortless, organic autumn vibe.
Tip: Flash cure the first layer of petals before adding the second to prevent the wet gels from blurring together. - 18Drape spider gel lines
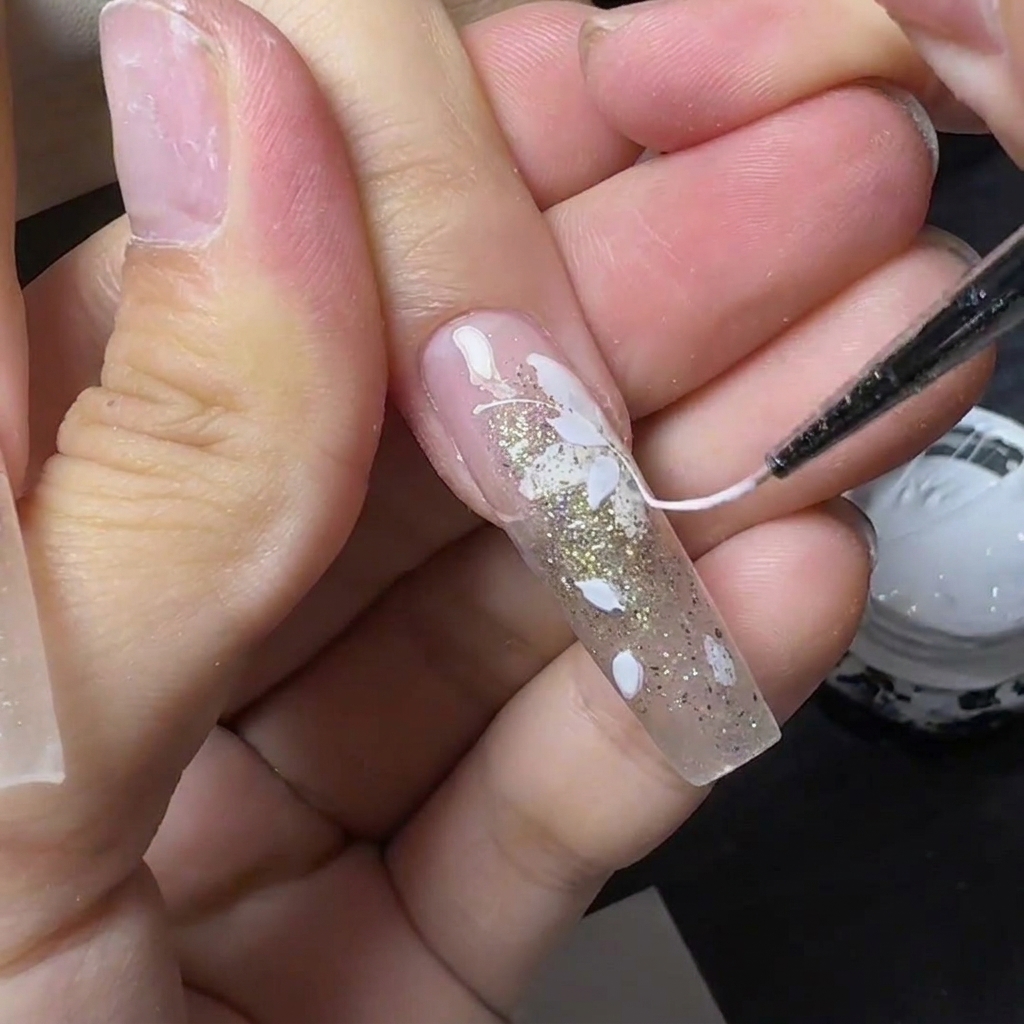
Dip a fine dotting tool or brush into white spider gel and pull it upward to create a thin string. Gently drape this stringy gel across the floral nail, creating fine, intersecting lines that add an abstract, textured element over the painted petals.
Tip: Use a no-wipe spider gel formula so you dont have to worry about top-coating these delicate 3D lines later. - 19Disguise the free edge
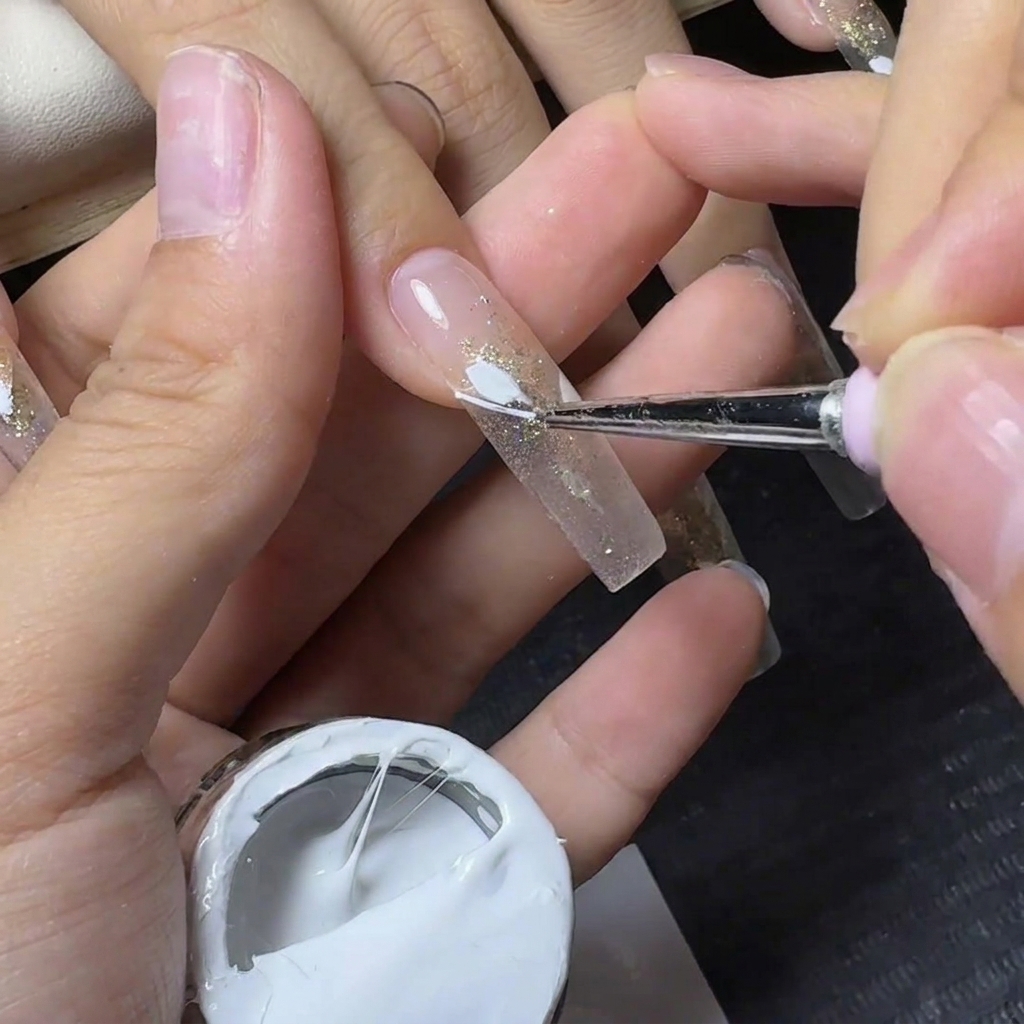
For the remaining nails, pick up a small amount of white spider gel and carefully drag it horizontally along the smile line. This simple, elegant detail effectively disguises the natural free edge underneath the clear extension while tying into the white floral theme.
Tip: Pull the spider gel string taut before laying it down on the nail surface to ensure a perfectly straight and crisp line. - 20Place a large clear square rhinestone
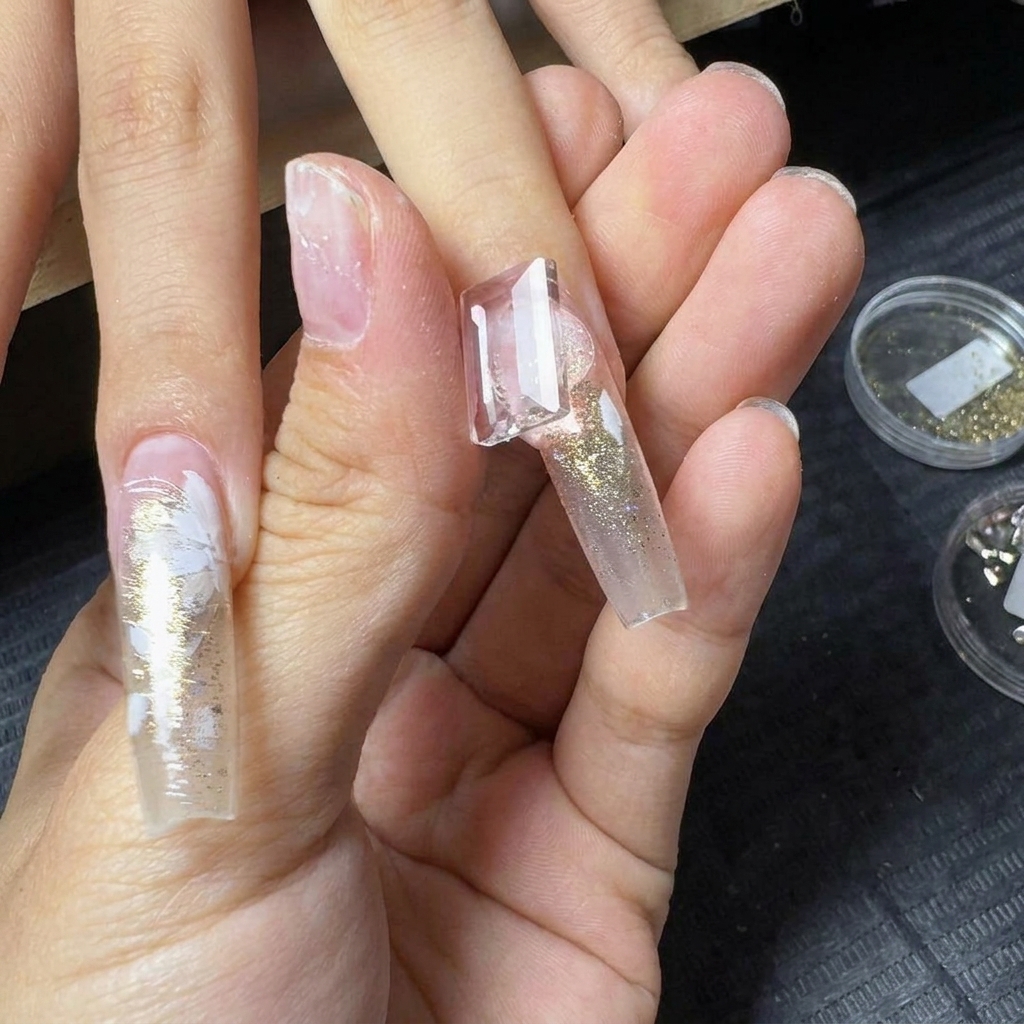
Using precision tweezers, pick up a large clear square rhinestone and carefully position it onto the nail bed over the gel basecite: 1. Press down gently to secure it firmly in the placement gel before curingcite: 1. This eye-catching centerpiece brings a brilliant, high-end sparkle to the manicure.
Tip: Always anchor large gems in a thick blob of builder gel or rhinestone glue so they dont slide around or pop off. - 21Apply an amber oval gem
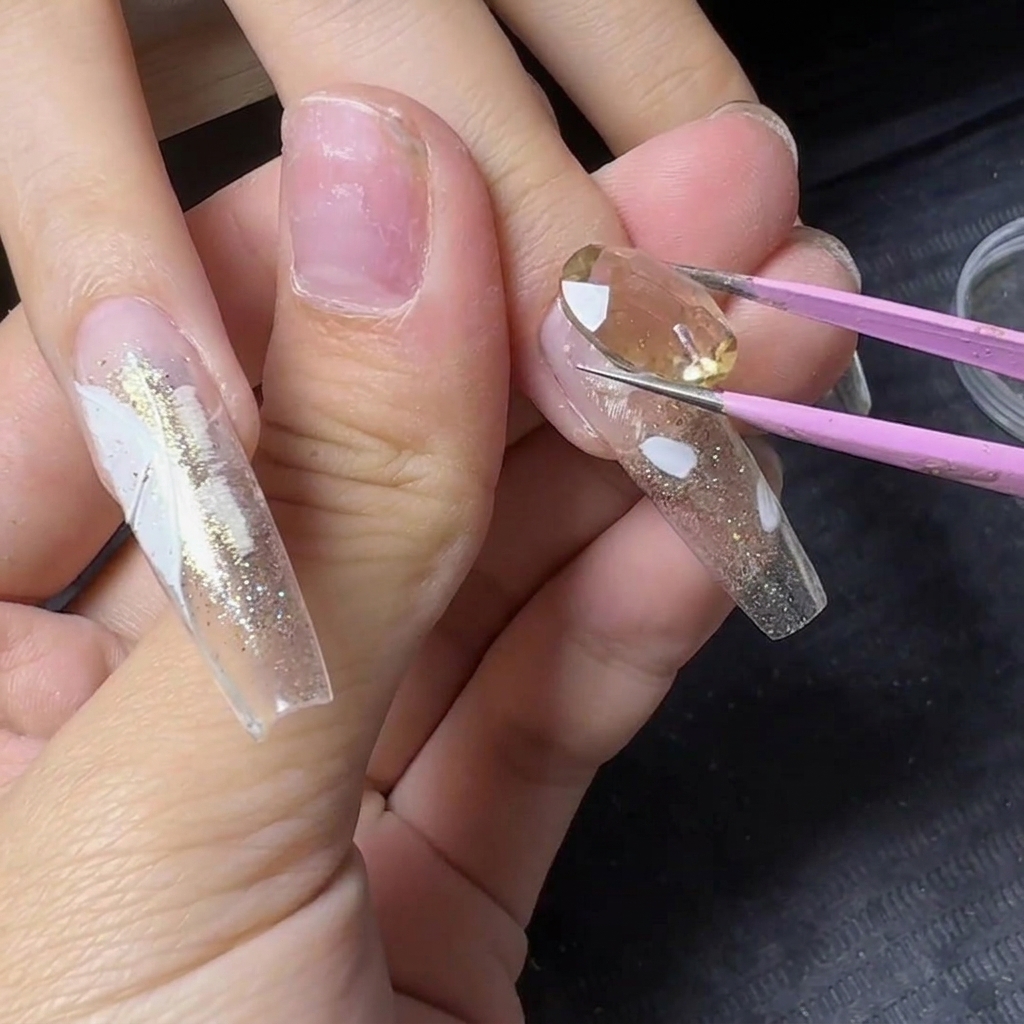
Using precision tweezers, pick up a large, transparent amber oval gem and carefully place it onto the thumbnail. Nestle the gem into a bead of strong clear gel or charm adhesive, adjusting its position before curing it securely under the lamp.
Tip: For large, clear-bottom gems, always seal the back side of the nail with top coat to maximize transparency and prevent dullness. - 22Add tiny clear rhinestones around the gem
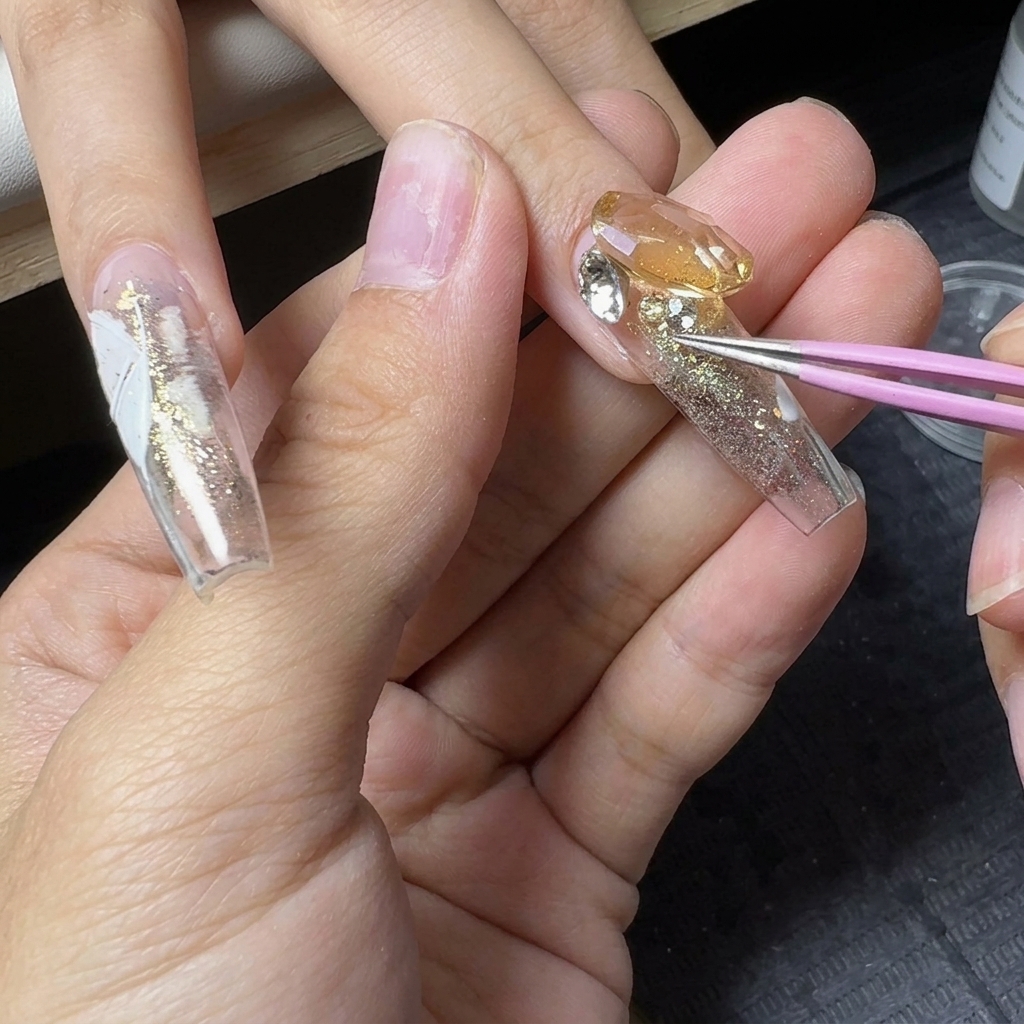
Using tweezers, pick up tiny clear rhinestones and arrange them snugly around the base of the large center gemcite: 1. This cluster detailing fills in empty gaps and creates a luxurious, multi-dimensional rhinestone groupingcite: 1. Make sure every little stone is well-embedded in the adhesive gel.
Tip: Work in small sections when clustering multiple small stones, and flash cure as you go to lock them in place. - 23Flash cure the attached gems
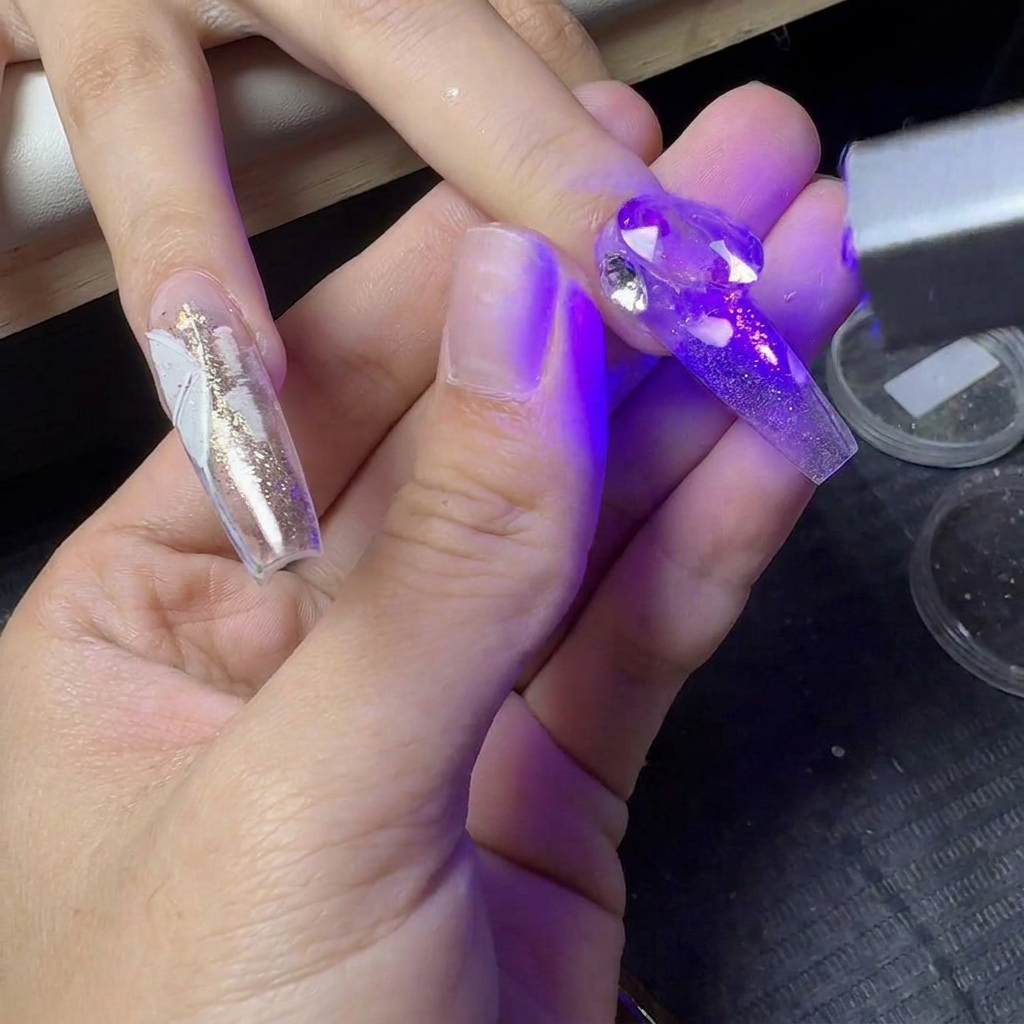
Hold a mini handheld UV flashlight closely over the decorated nail to instantly flash cure and lock the rhinestones in placecite: 1. This quick cure prevents the gems from shifting out of position before a full lamp curecite: 1. Ensure the light hits the stones from multiple angles.
Tip: A handheld flashlight is an essential tool for securing charms because it stops gravity from pulling your gems sideways. - 24Create 3D butterfly wings with clear gel
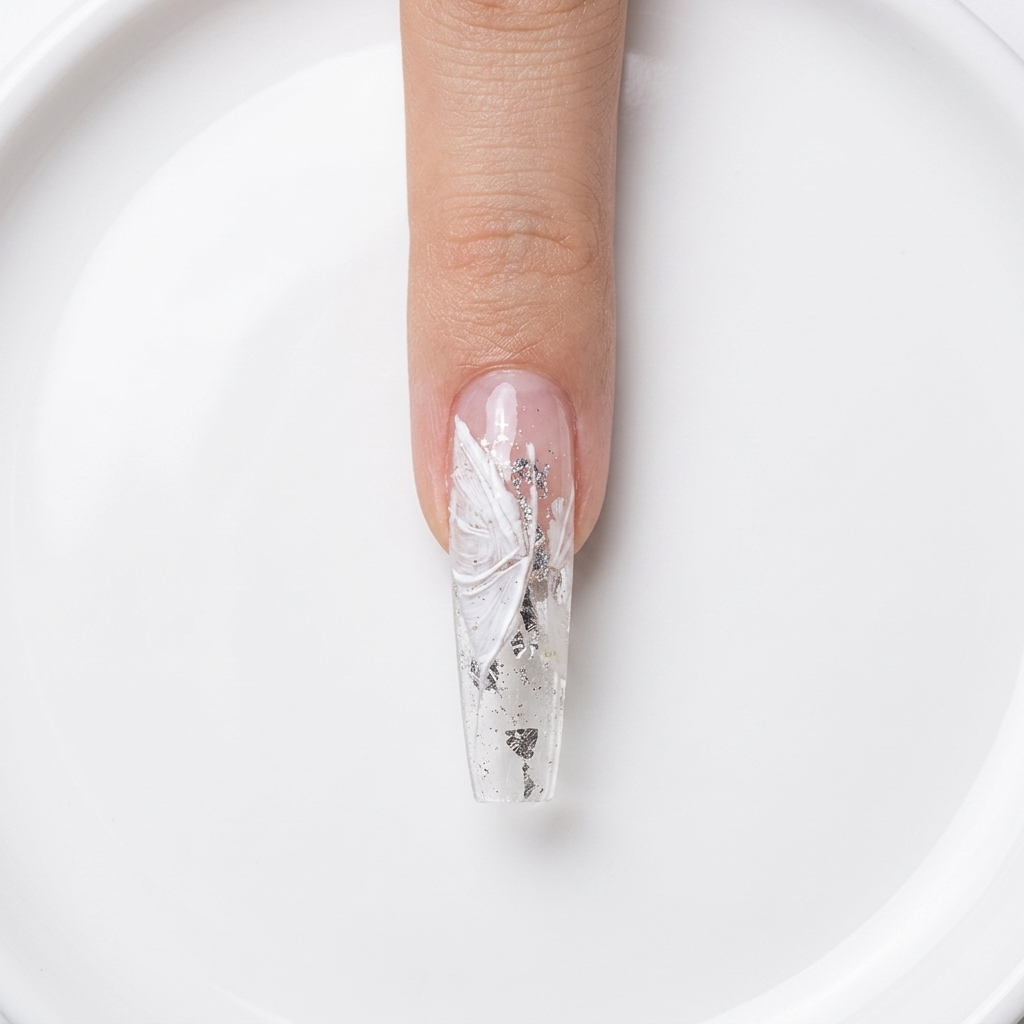
Using a fine brush and clear builder gel, meticulously trace over the previously painted white butterfly wing outlinescite: 1. This technique adds a raised, sculptural 3D effect that gives the design incredible depth and texturecite: 1. Flash cure each individual stroke immediately after drawing so the gel maintains its height.
Tip: Flash cure every single line right after you draw it; otherwise, the thick builder gel will self-level and flatten out. - 25Attach a small silver rhinestone to the butterfly
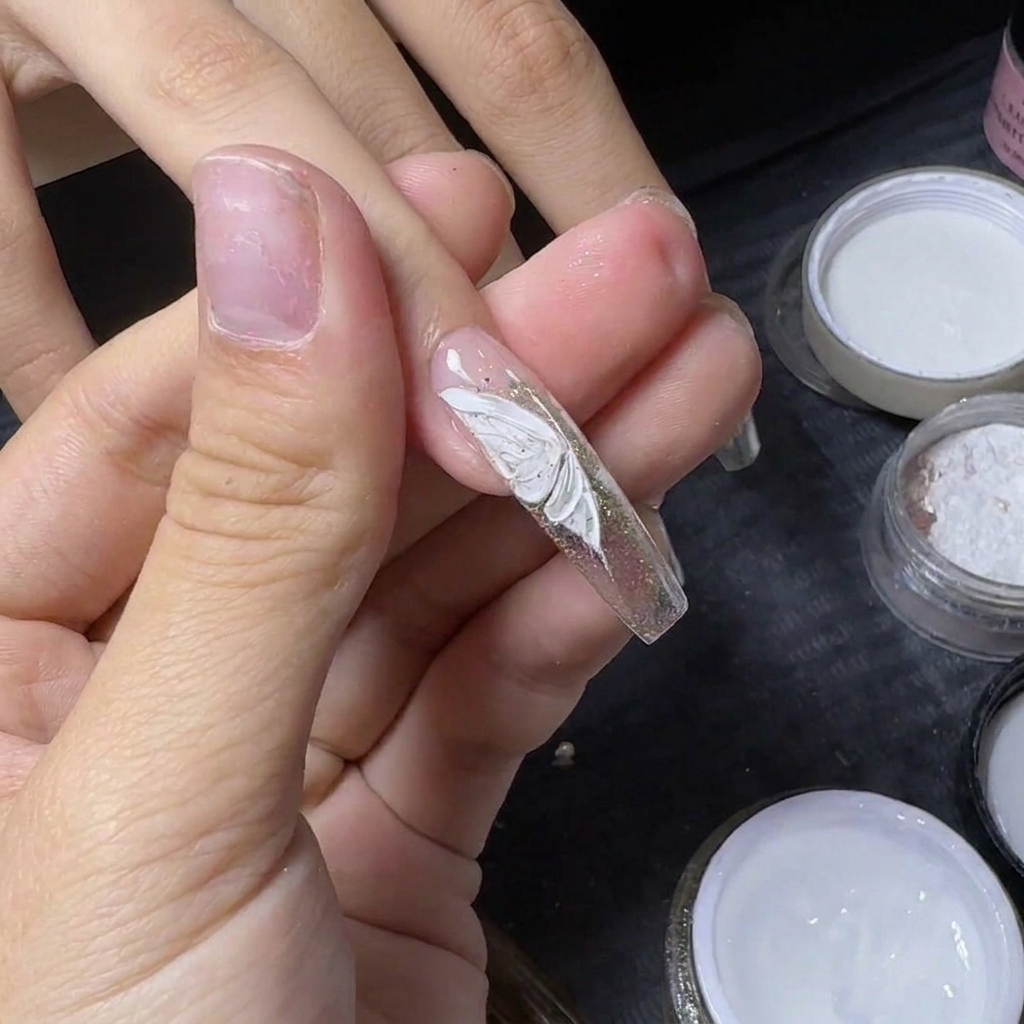
Using a detail tool or wax pencil, pick up a small silver flat-back rhinestone and place it right onto the center edge of the white butterfly wingcite: 1. This charming accent acts as part of the butterflys body, completing the intricate artworkcite: 1. Press it securely into the tacky gel before performing a final cure.
Tip: Use a tiny dab of clear gel underneath the small rhinestone to guarantee it stays locked onto the 3D wing surface. - 26Complete the butterfly body
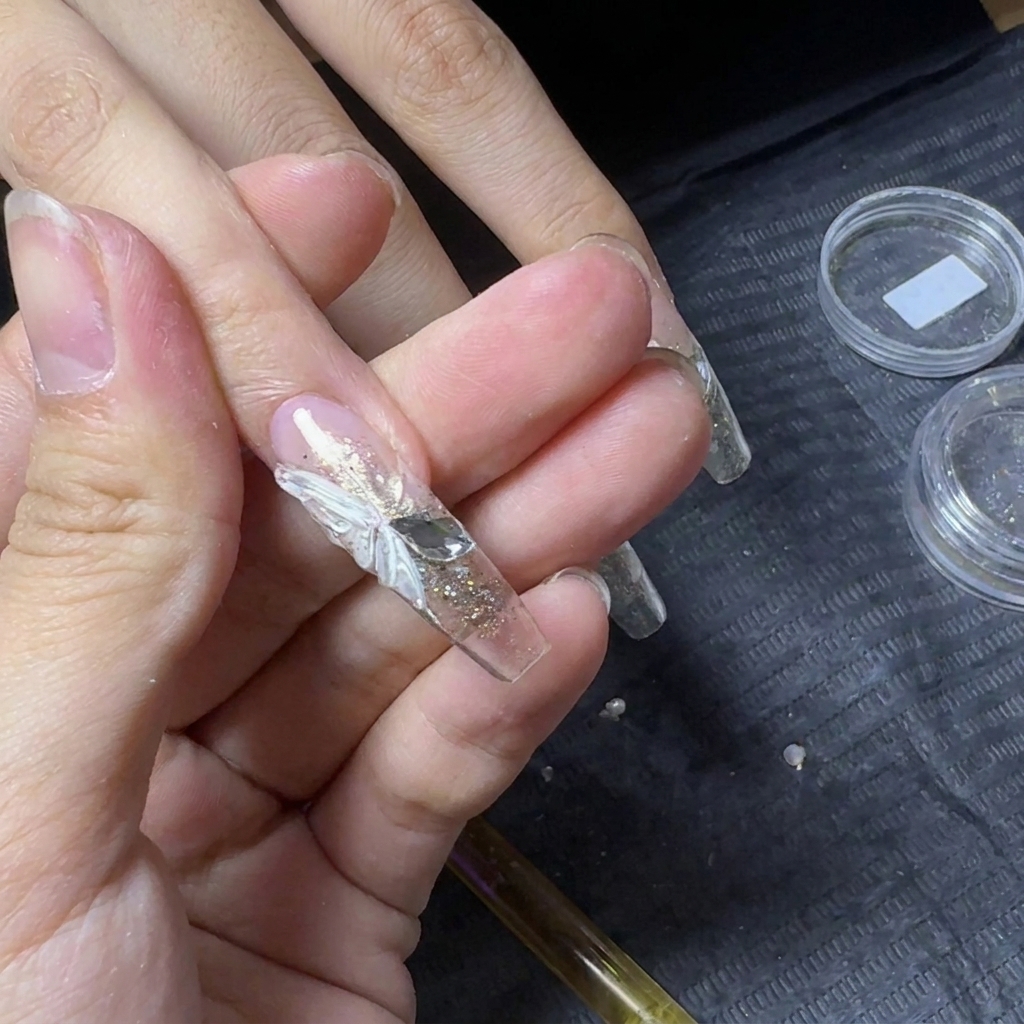
Using two flat-back rhinestones, place them side-by-side next to the 3D butterfly wing to form the bodycite: 1. These clear-bottom gems add a brilliant sparkle that perfectly complements the clear 3D gel design.
Tip: Ensure the rhinestones are securely seated in the gel before final curing so they dont slide out of place. - 27Seal the underside
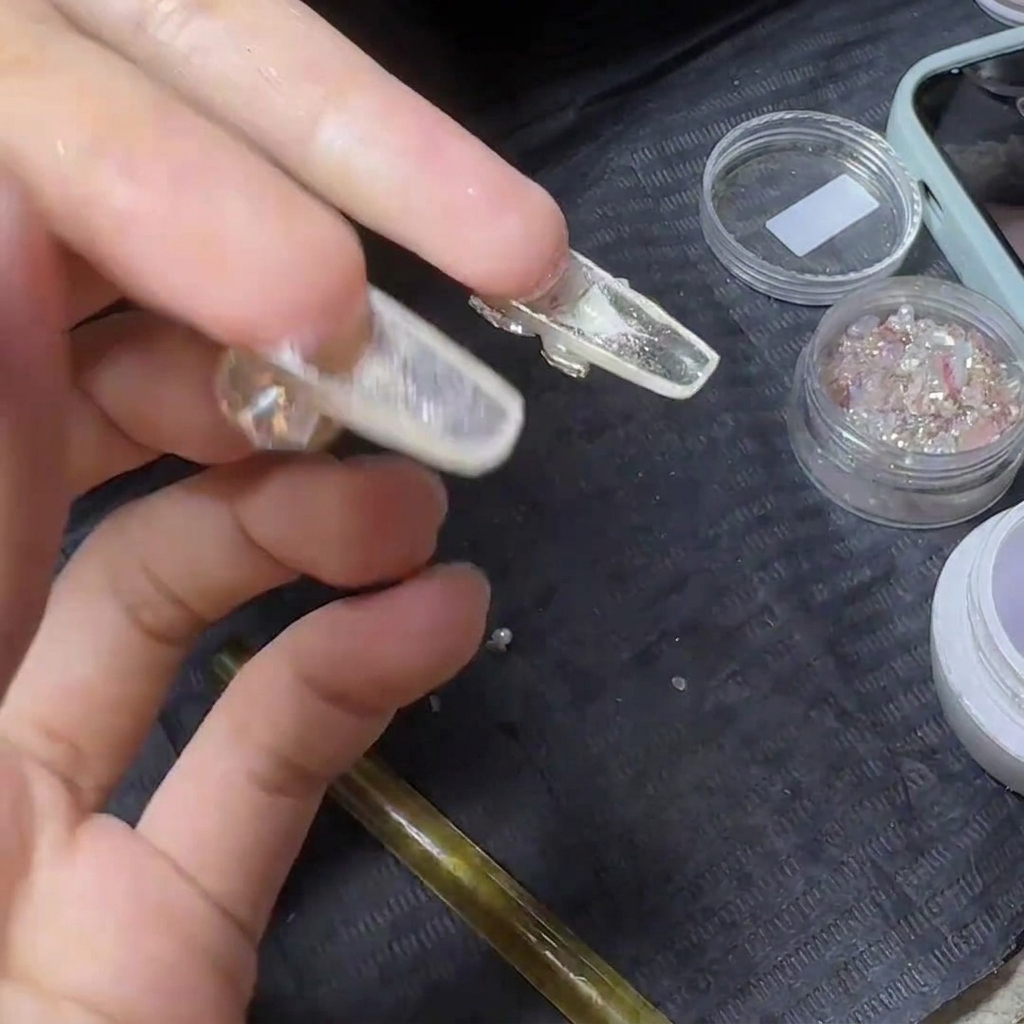
Turn the nail over and apply a layer of clear top coat to the underside of the clear extensioncite: 1. This simple step eliminates any cloudiness from filing or dust, maximizing the transparency and giving the nail a flawless, glass-like finish from every angle.
Tip: Applying top coat to the back of clear nail extensions is an essential trick for achieving that ultra-clear, autumn vibe.