Hand-Painted Daisy Nail Art — Beginner Step-by-Step Tutorial
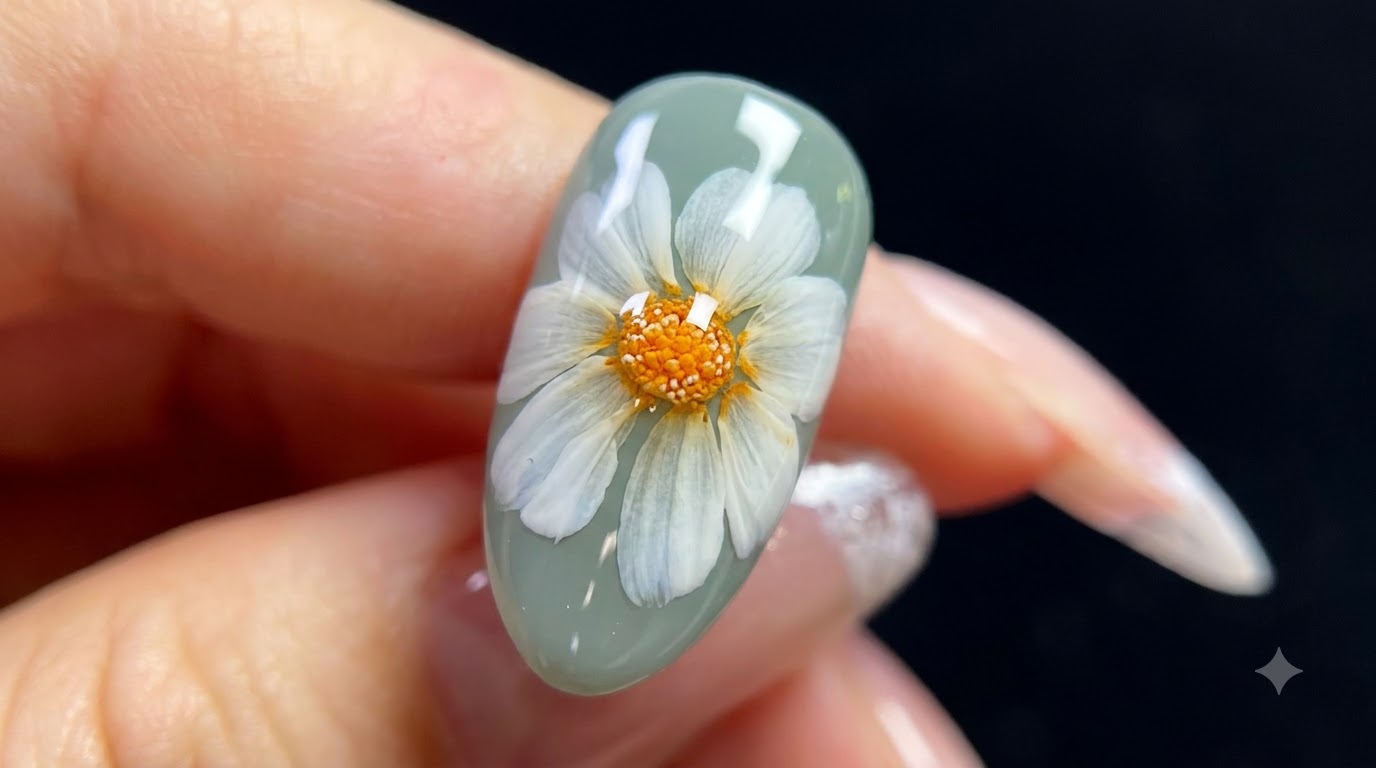
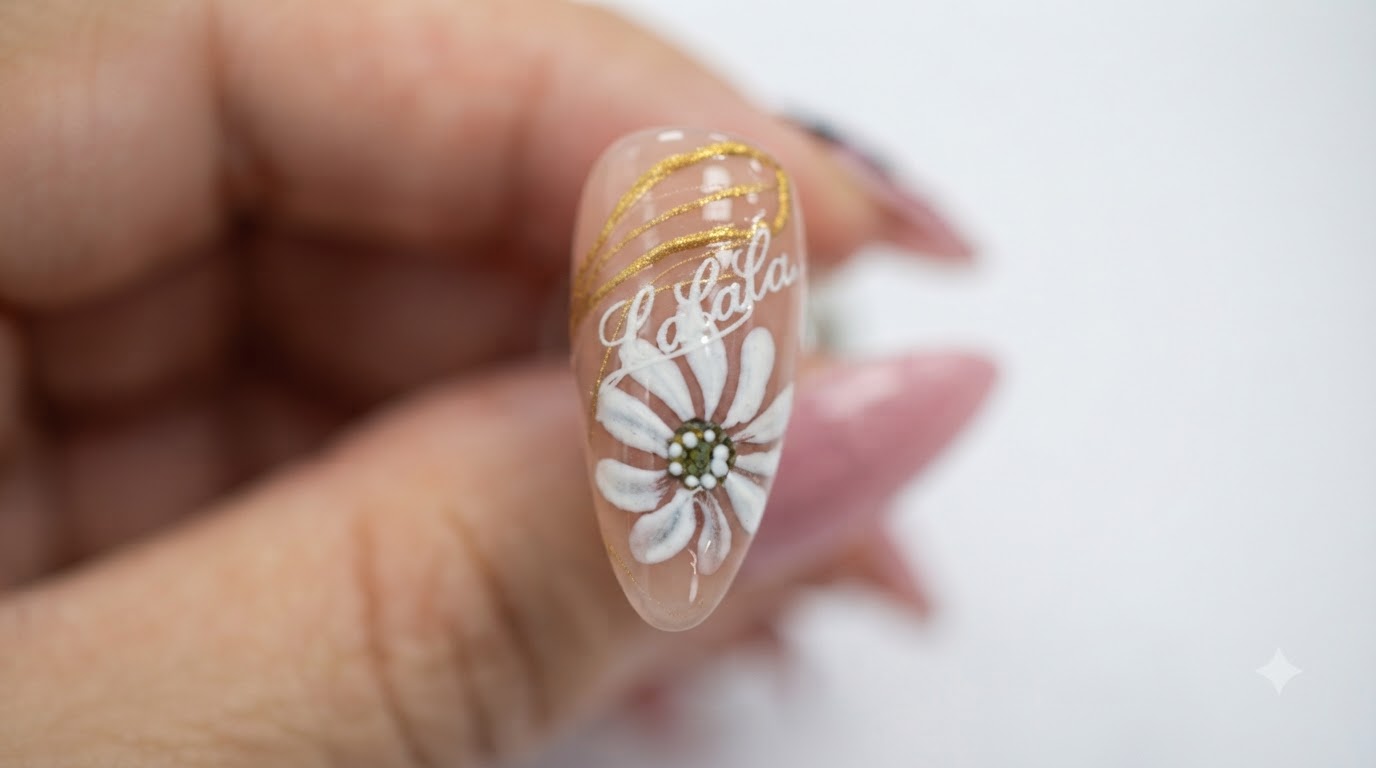
Learn how to paint charming white daisy nail art using a simple press-and-lift brush technique and a vibrant yellow center dot.
Floral nail designs are timeless, adding a fresh and delicate touch to any manicure. This beginner-friendly daisy tutorial guides you through mapping structural guide lines and using precise brush strokes to form perfect petals every single time.
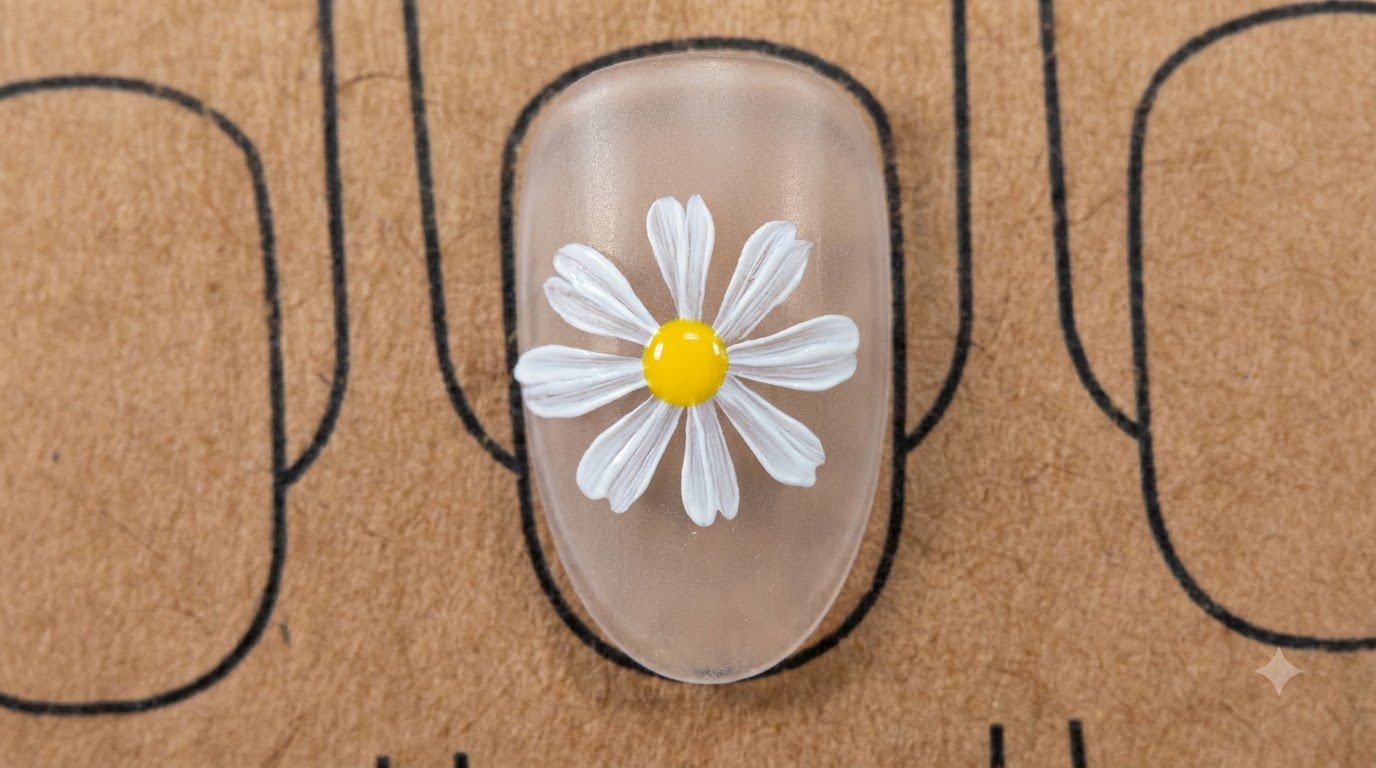
Steps
- 1Draw horizontal line
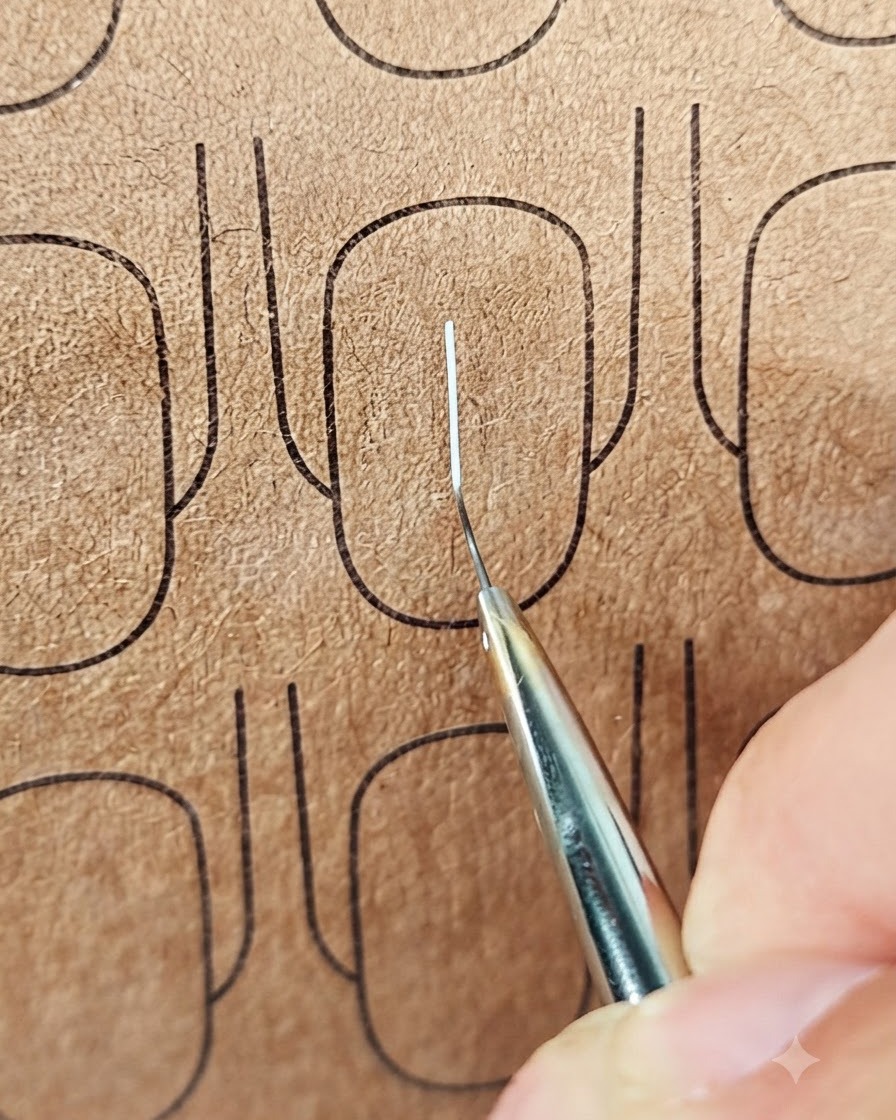
Using a thin liner brush with white gel, draw a horizontal line that intersects the vertical line precisely at the center to create a cross shape, which serves as the structural guide for the daisy petals.
Tip: Keep your hand steady and use only the tip of the liner brush to ensure the lines remain thin and crisp. - 2Draw first diagonal guide line
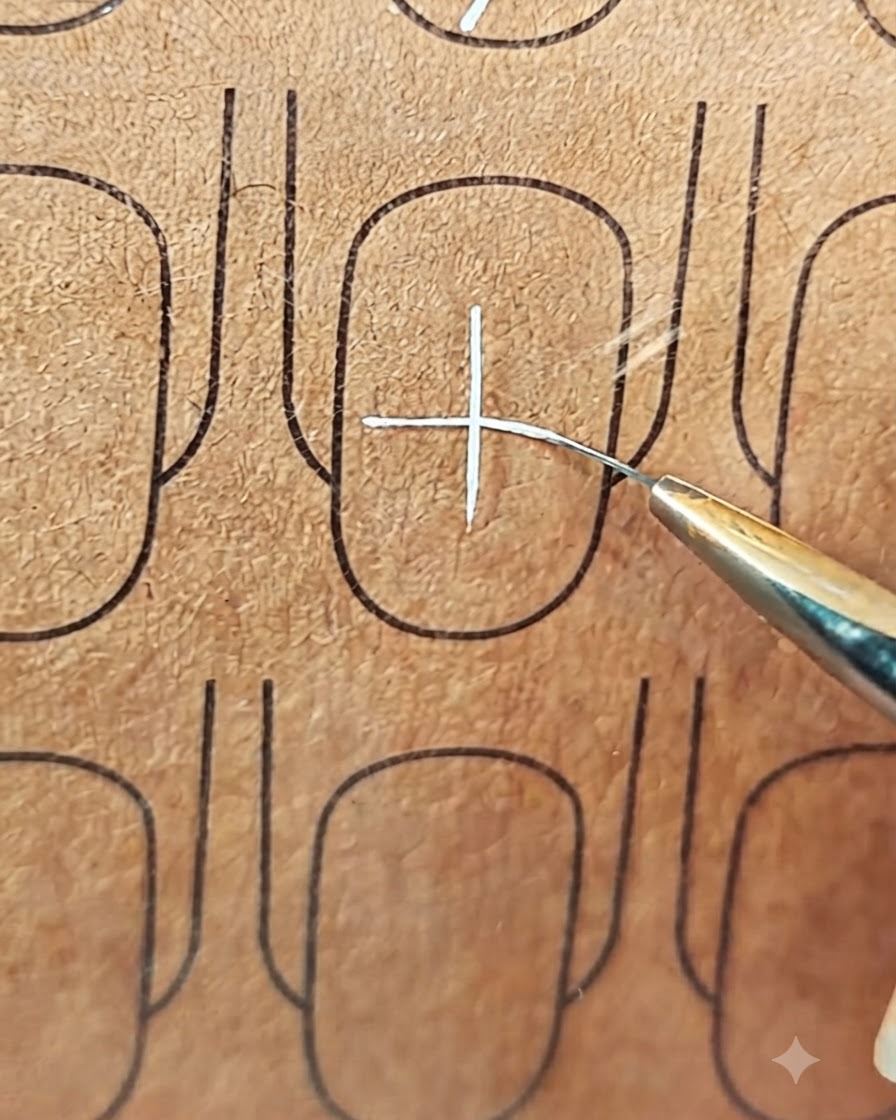
Draw a diagonal line passing directly through the center intersection of the cross to map out the positions for additional daisy petals.
Tip: Maintain a light touch so the intersection point doesnt get overloaded with too much gel product. - 3Complete the guide star shape
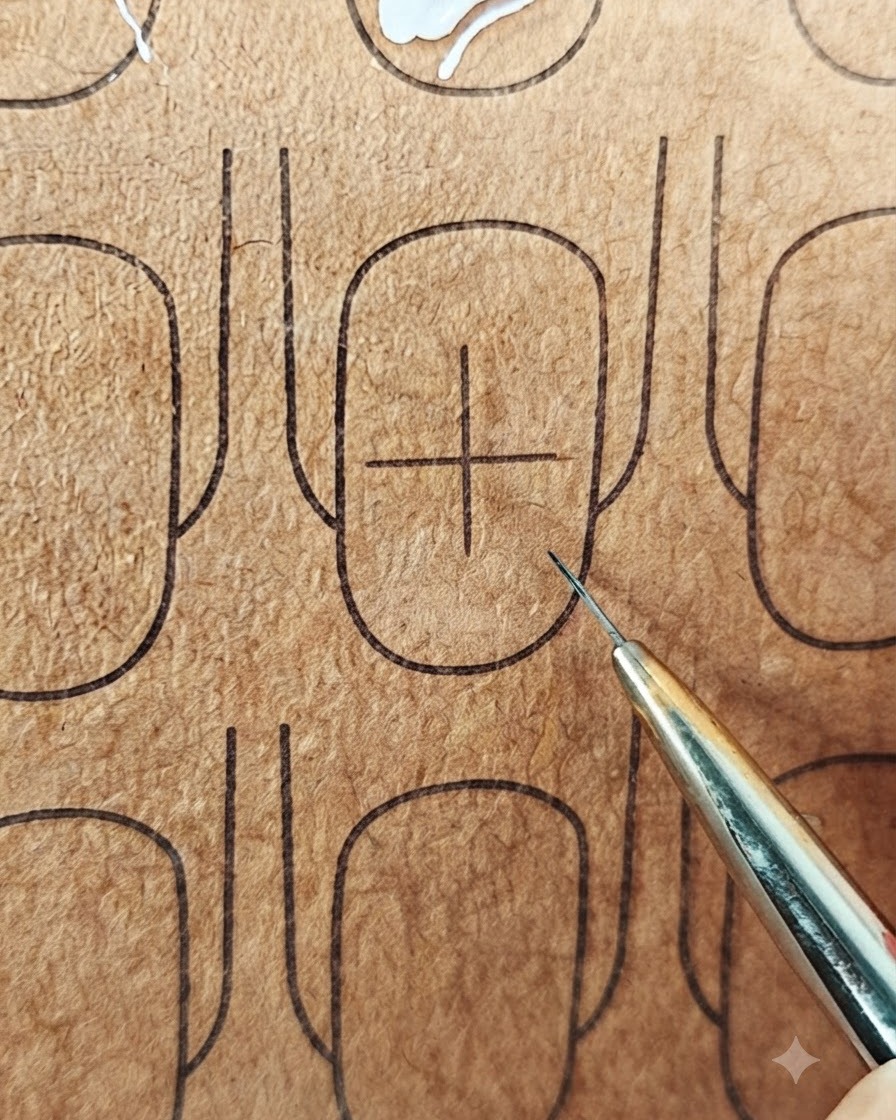
Draw the second diagonal line intersecting the center to complete an eight-pointed guide star shape, establishing the precise placement framework for all the flower petals.
Tip: Check that all lines intersect evenly at a single focal point before proceeding to paint the petals. - 4Paint first petal stroke
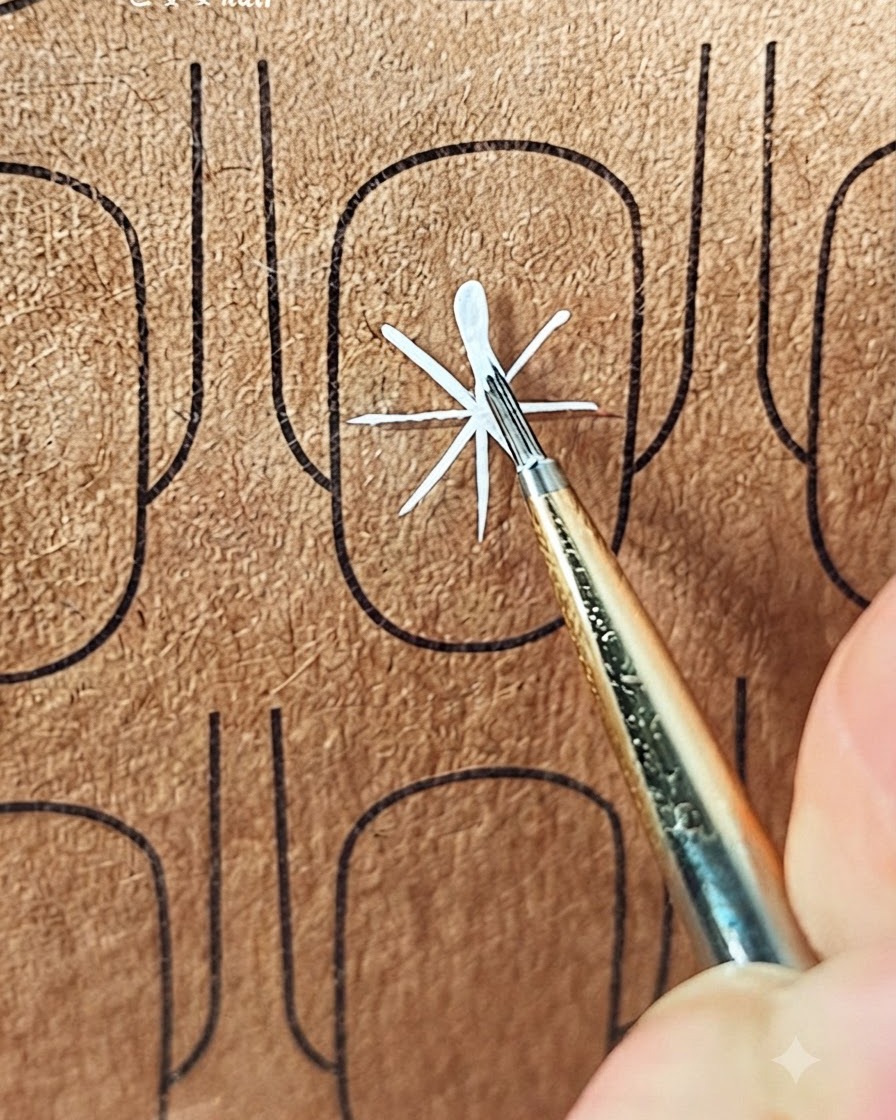
Using a liner brush with white gel, begin painting the first petal by placing the brush at the center point and pressing outward along one of the guide lines, then lifting gently to form a tapered end.
Tip: Use the press-and-lift brush technique to create a natural petal shape with a wider base near the center and a fine tip outward. - 5Complete petal with second stroke
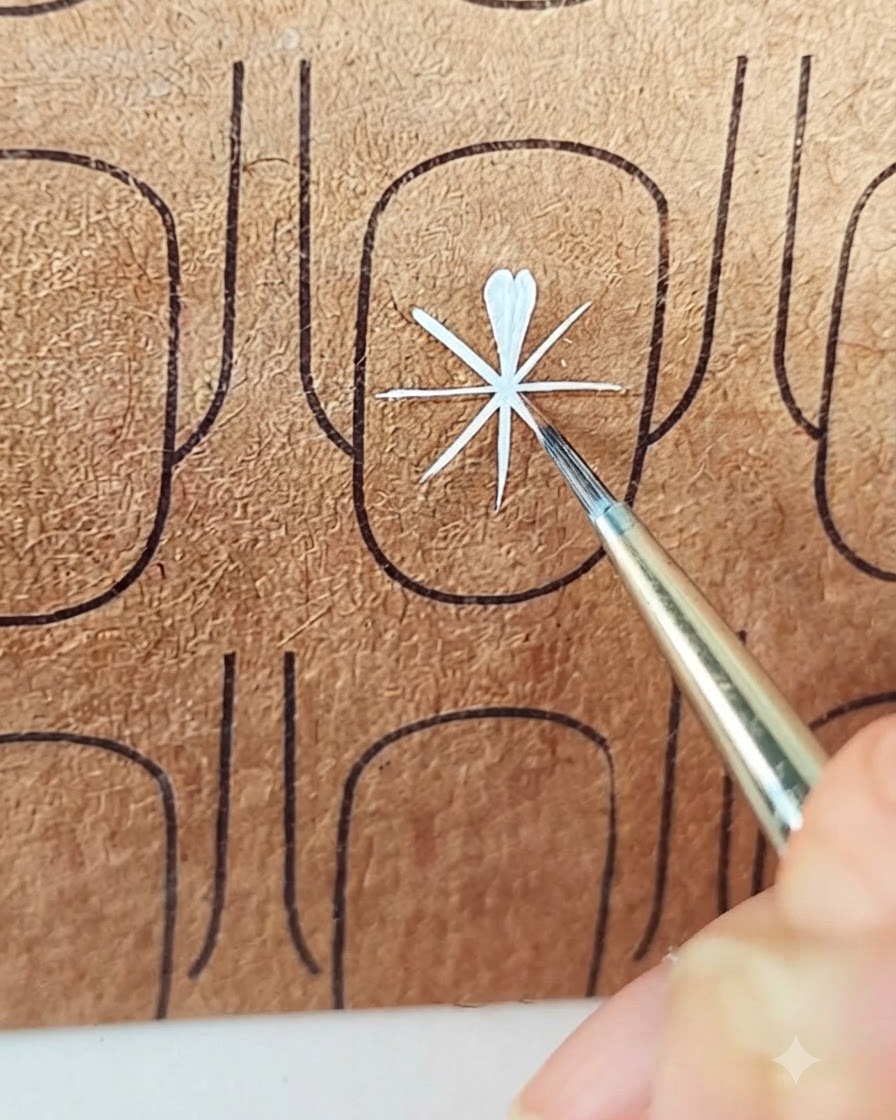
Apply a second adjacent stroke right next to the first one to fill out the petal, resulting in a soft teardrop shape that mimics a real daisy petal.
Tip: Ensure both strokes merge smoothly at the center while keeping the outer edges clean and distinct. - 6Paint the second daisy petal
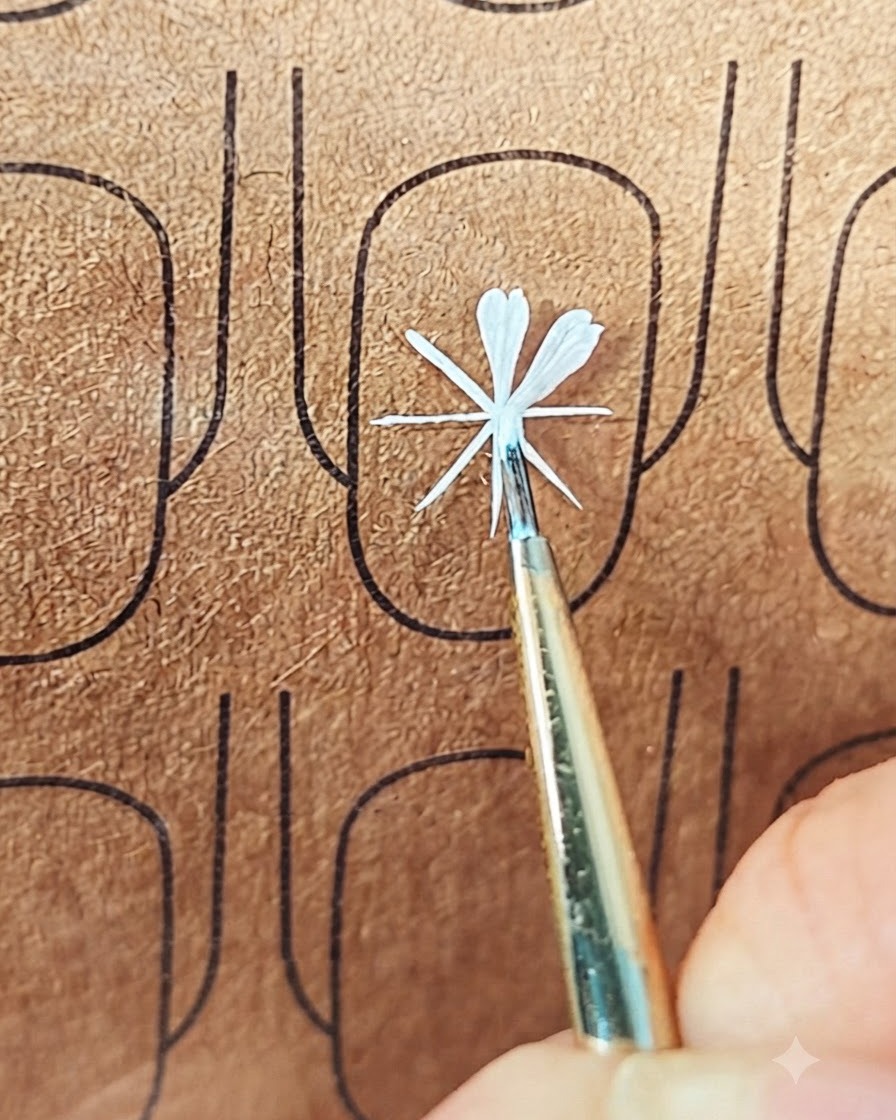
Using the same press-and-lift brush technique with white gel, paint a second petal in a different quadrant opposite or adjacent to the first one. Maintain consistent pressure to ensure uniformity in size and shape.
Tip: Pay close attention to your brush angle to match the symmetry of the flower as it builds. - 7Continue painting flower petals
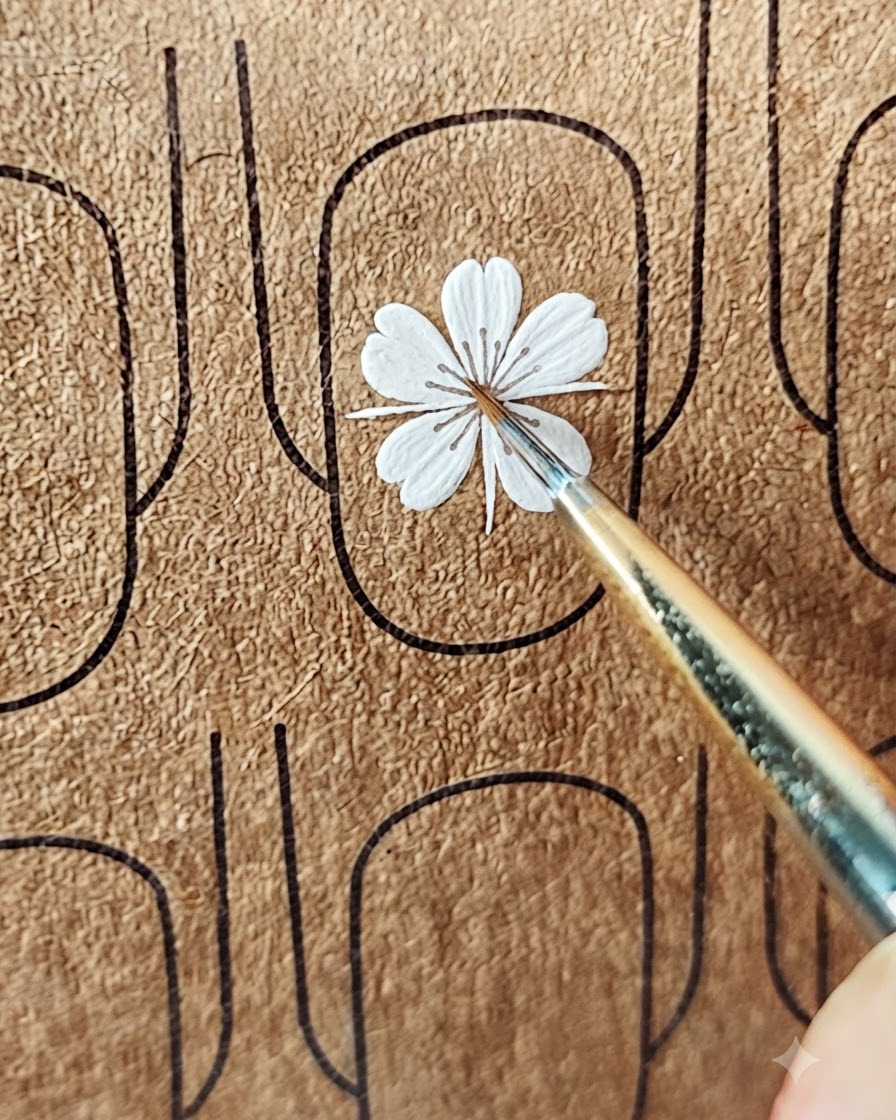
Proceed to paint additional petals all the way around the central guide lines. Carefully adjust the angle of your brush for each position to ensure the petals radiate evenly outward from the center point.
Tip: Rotating your practice board or finger can help you keep your hand in a comfortable working angle. - 8Fill in remaining petals
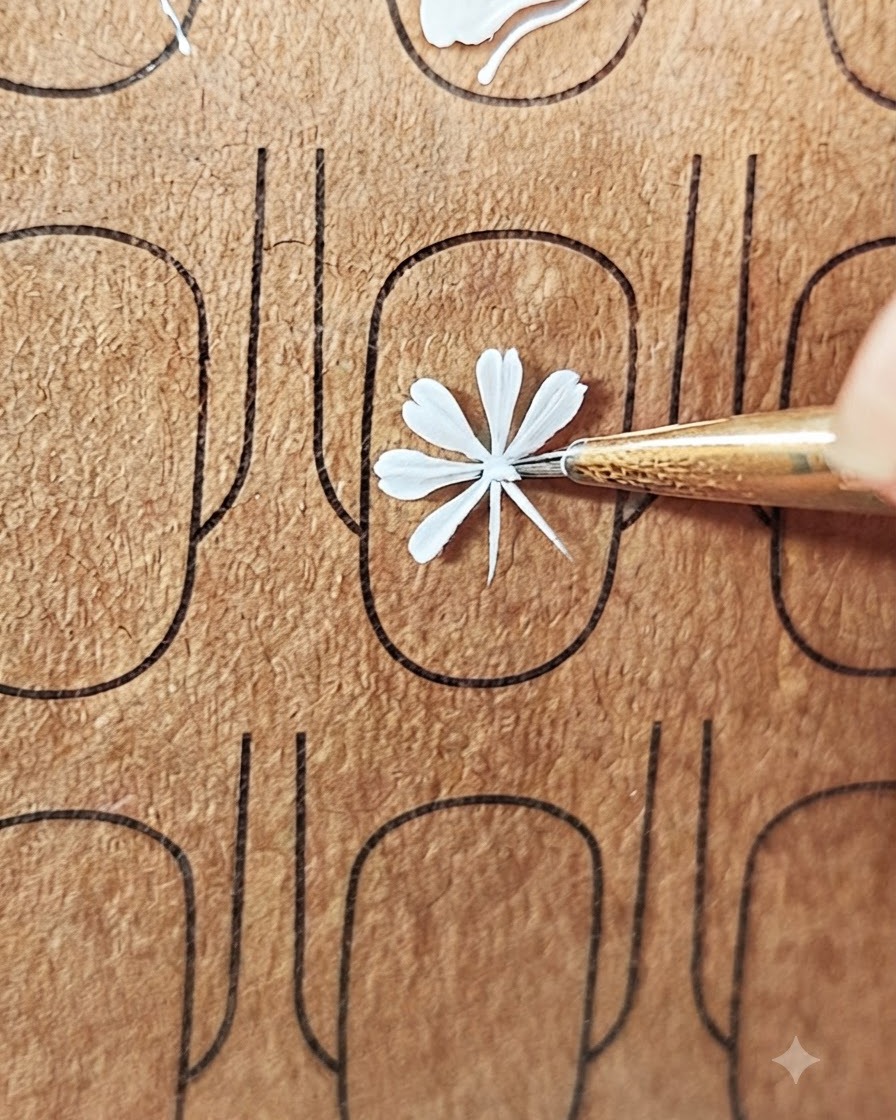
Fill in any remaining empty spaces to complete the daisy shape. Rotate the practice board as needed so you can maintain steady, consistent brush pressure for every single stroke.
Tip: Consistent pressure ensures all petals share the same delicate texture and thickness. - 9Add the flower center
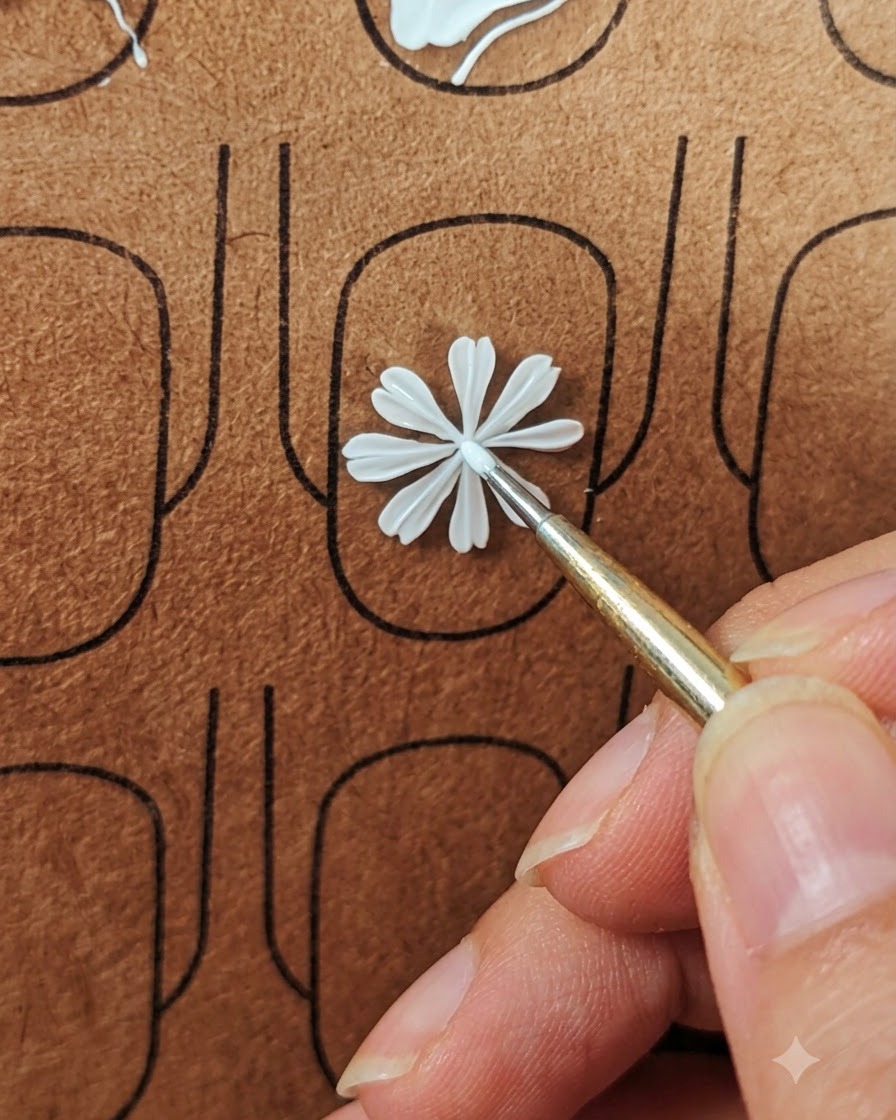
Dip a small dotting tool into yellow gel polish and place a tiny dot right in the center of your white petals. This completes the daisy design by adding the characteristic yellow stamen. Cure the gel under your lamp to set the center dot permanently.
Tip: Keep the dot small and precise so it sits neatly in the middle without spilling over onto the white petals.