Ink Wash Style Small Daisy Nail Art — Step-by-Step Tutorial
Create an artistic ink wash green background adorned with delicate white daisies, fine botanical details, and glossy 3D dewdrop accents.
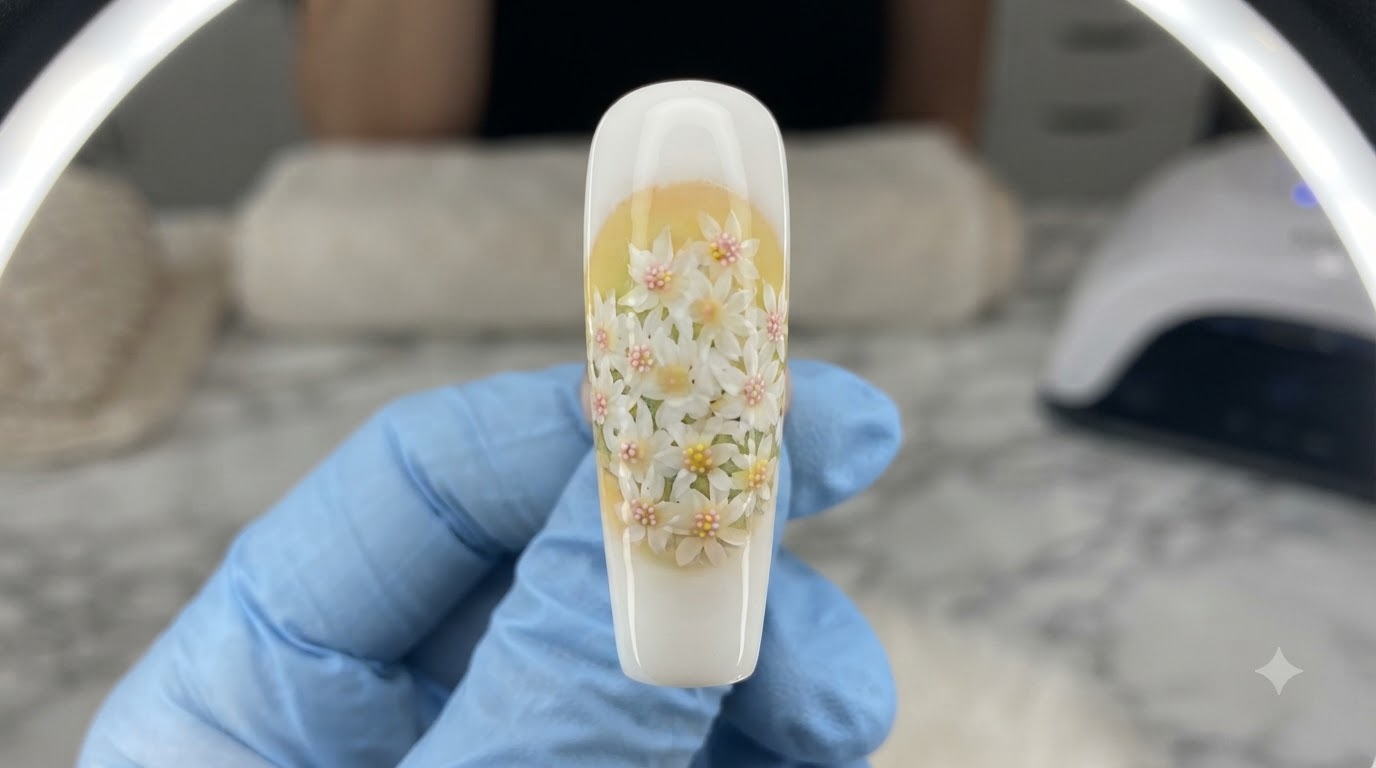
Embrace a mesmerizing botanical aesthetic with this ink wash style small daisy nail art design. Combining fluid green and black watercolor backgrounds with multi-layered white daisies and realistic dewdrops, this tutorial guides you through creating a miniature masterpiece on your nails.
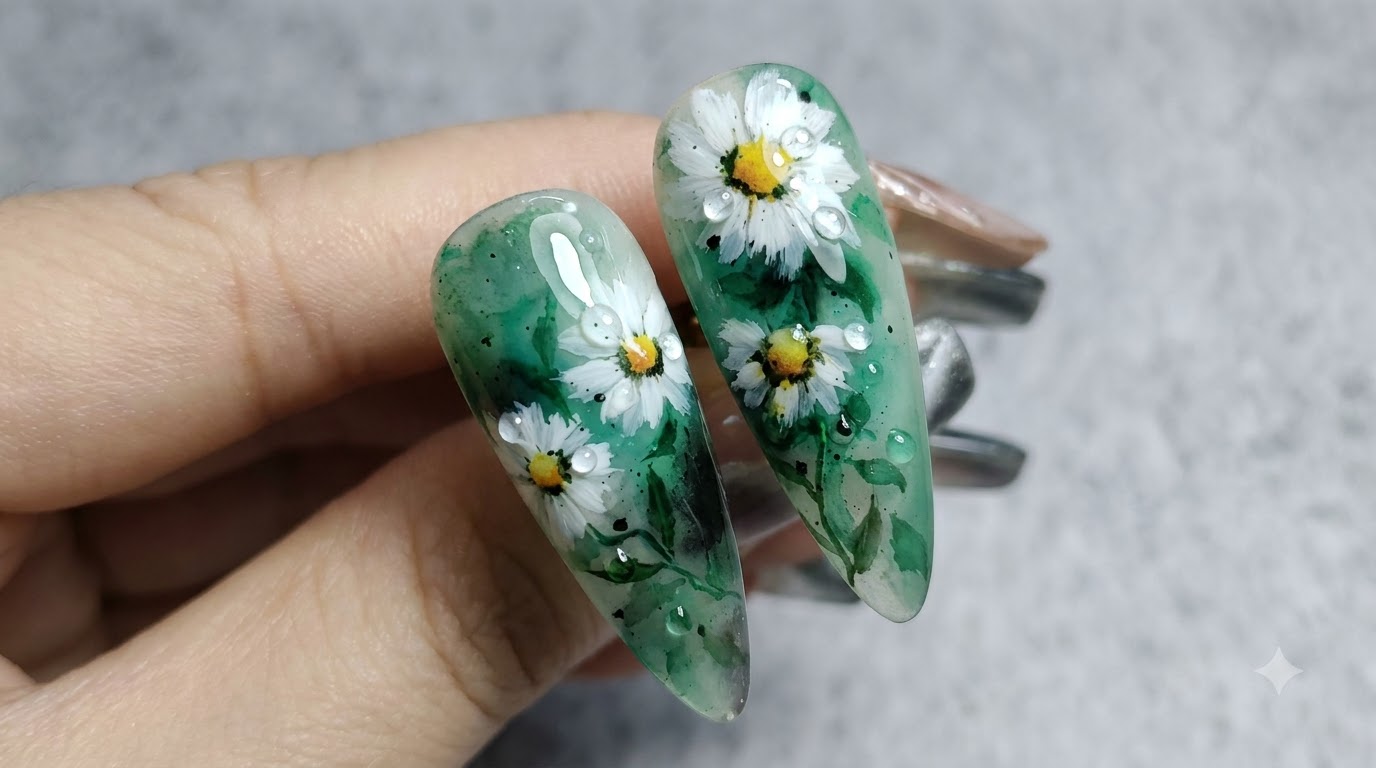
Steps
- 1Apply Matte Top Coat
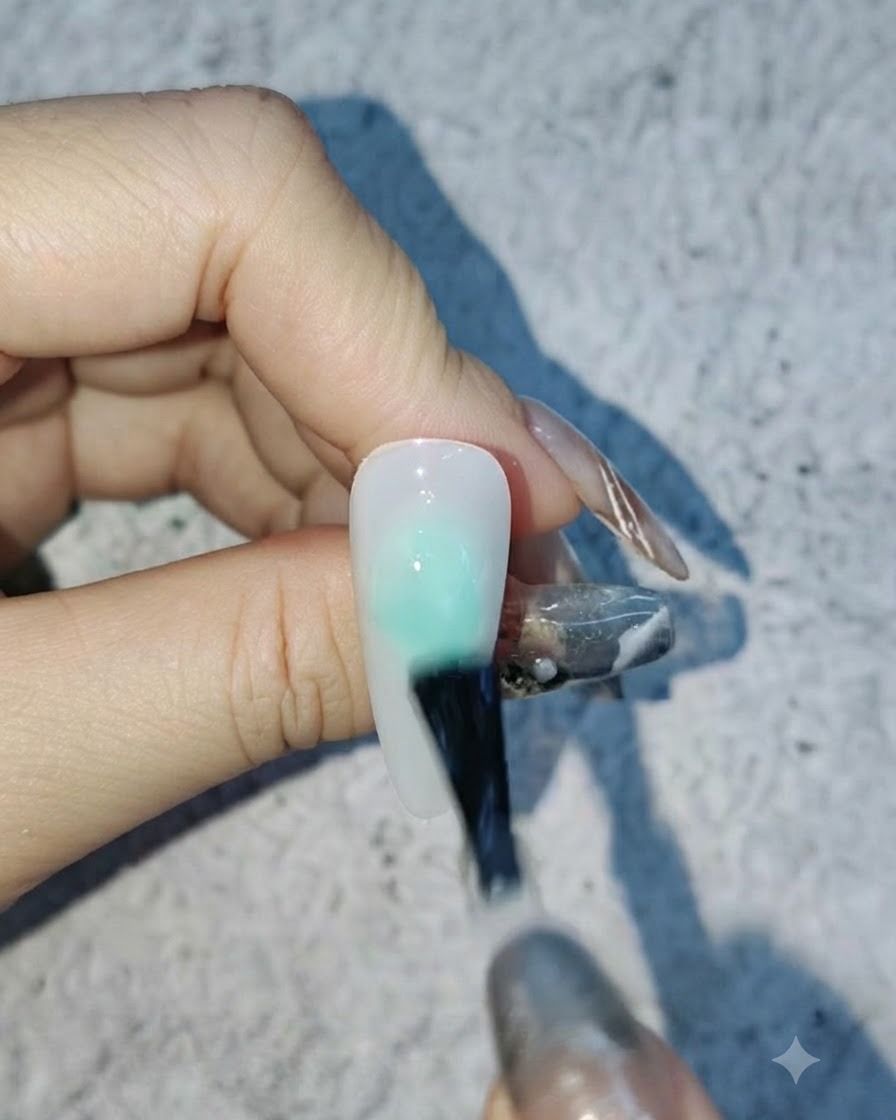
Apply a layer of matte top coat to the prepared white nail surface using a brush to create a smooth base for blooming effects.
Tip: Ensure the top coat covers the entire nail evenly for proper blooming fluid dispersion. - 2Apply Green Blooming Liquid
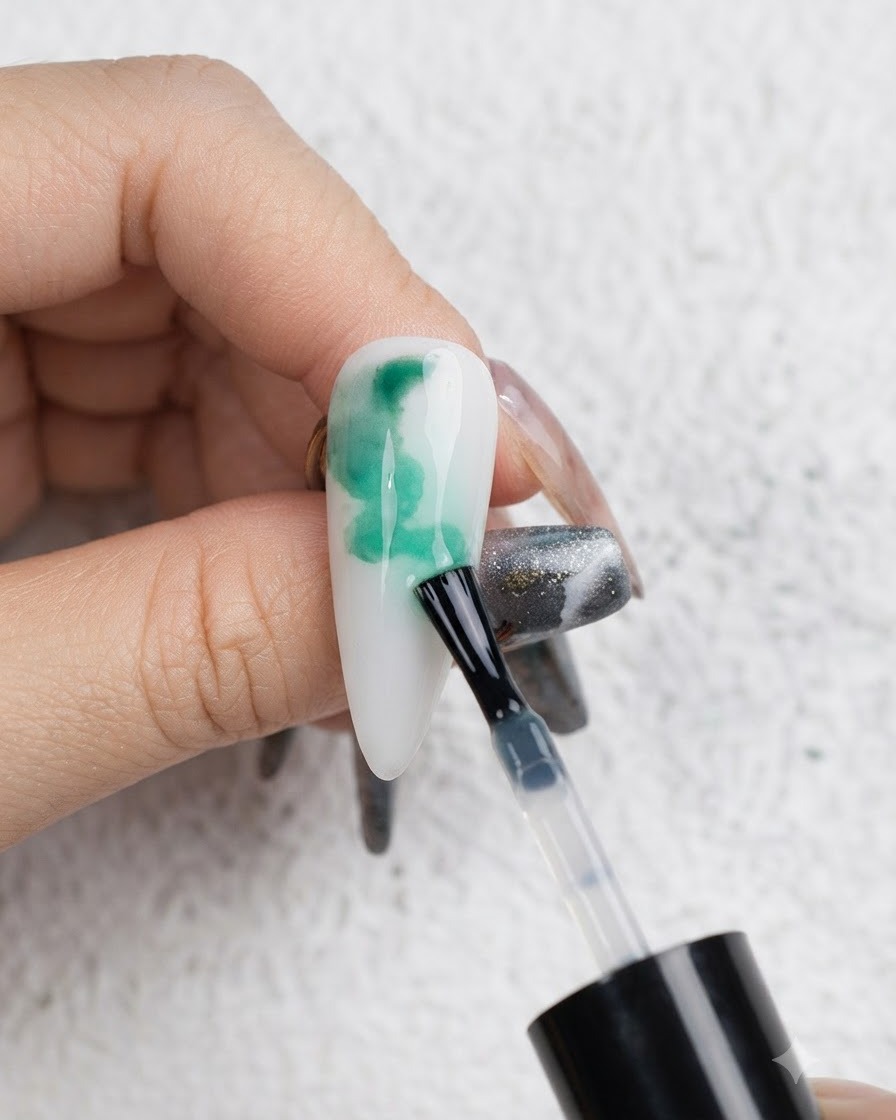
Randomly dot and blend green blooming liquid across the nail surface to create soft, watercolor-like patterns.
Tip: Work quickly while the liquid is wet to achieve a natural, diffused look. - 3Add Black Details
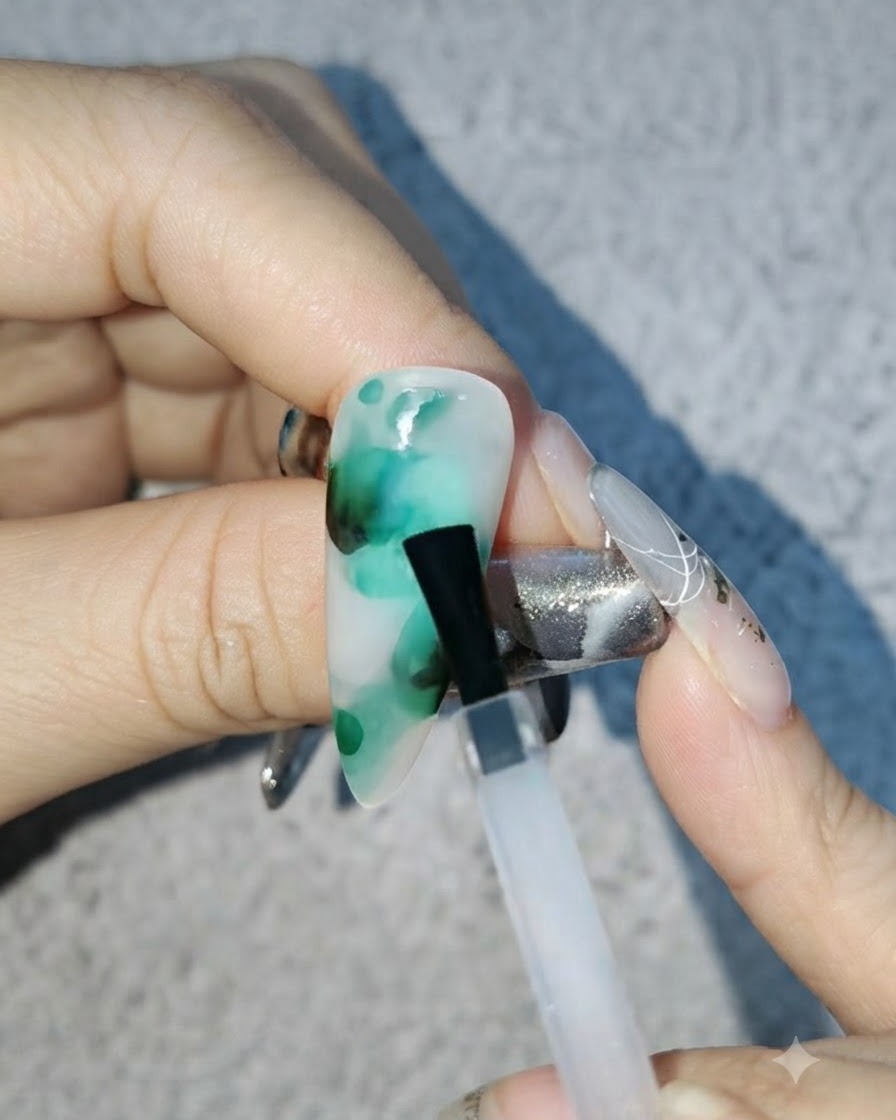
Partially add black color in specific areas and blend it smoothly into the existing green background to add depth.
Tip: Use a minimal amount of black to avoid overpowering the green tones. - 4Fill with Milky White
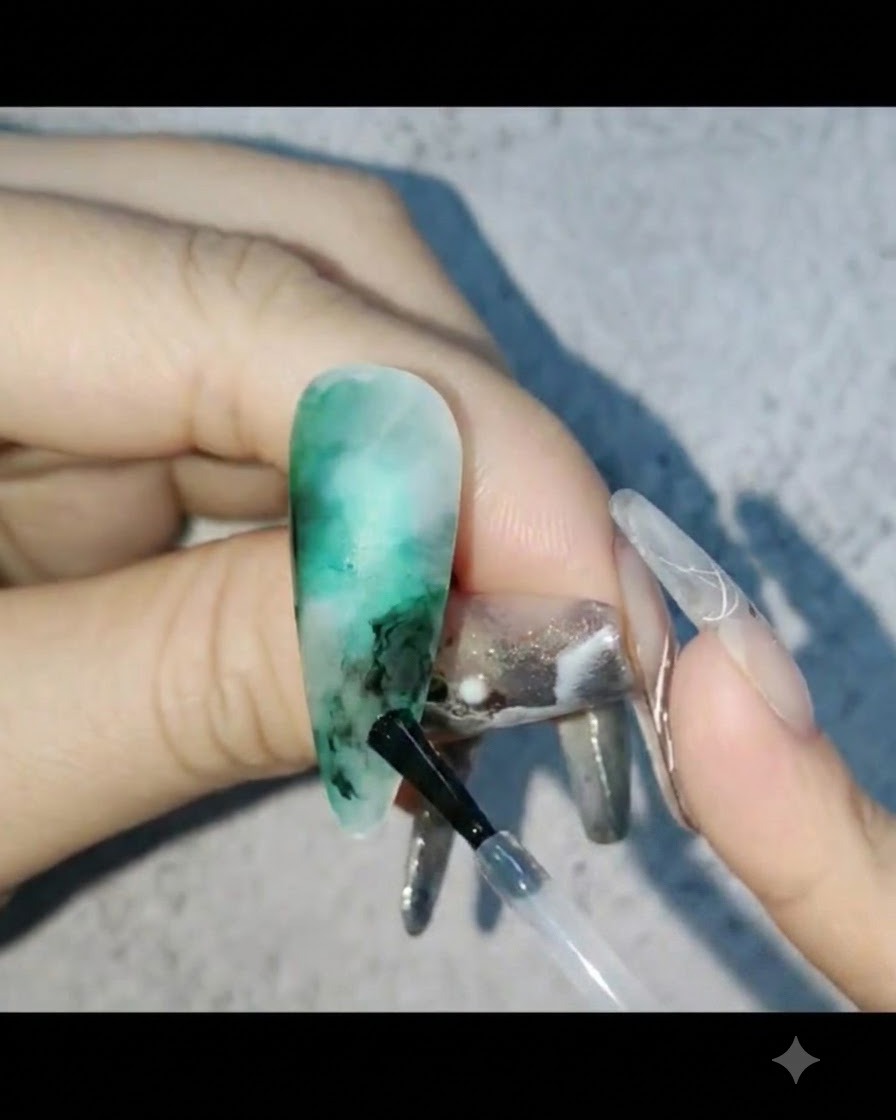
Apply milky white polish into the remaining blank spaces on the nail and blend it outwards to soften the design.
Tip: Keep the edges soft where the white meets the green and black colors. - 5Apply Reinforcing Gel
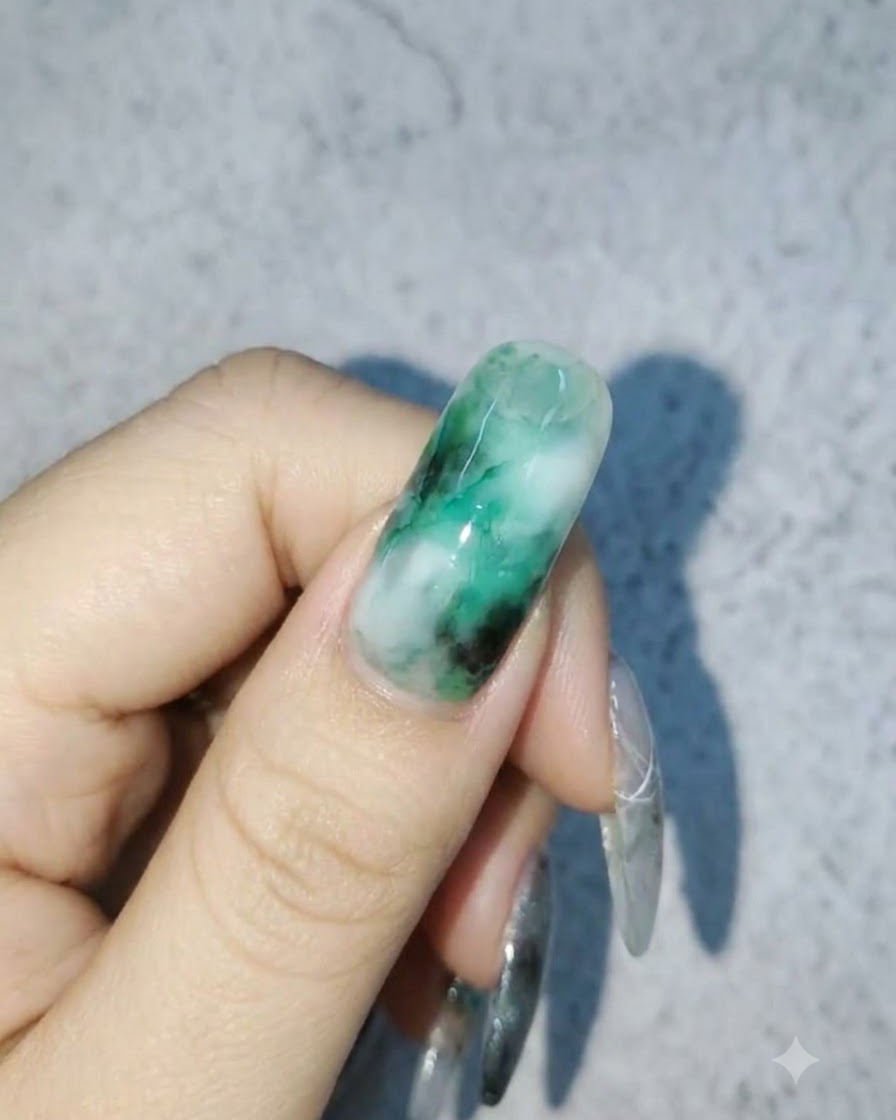
Apply a layer of reinforcing gel over the entire nail surface to encapsulate the design and add structural strength.
Tip: Ensure an even apex to give the nail a professional, durable finish. - 6Paint First Layer of Daisies
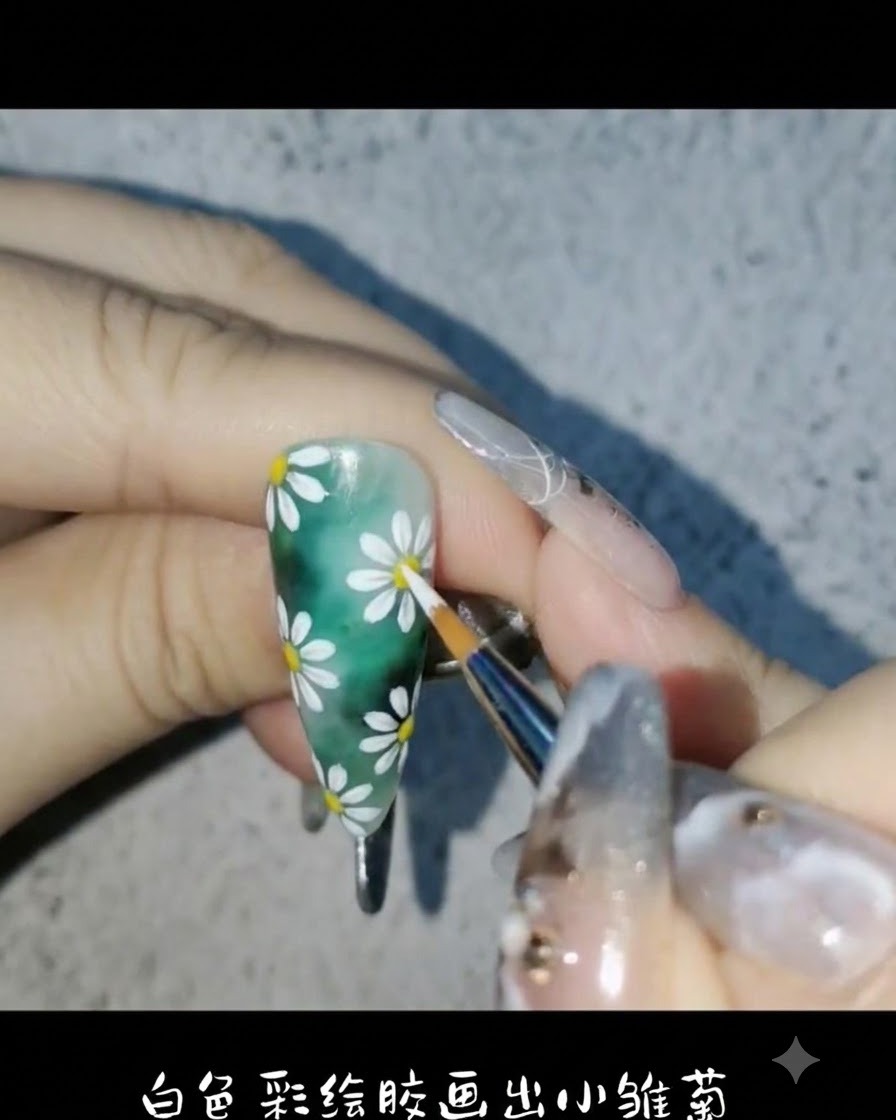
Use white painting gel and a liner brush to draw small daisies with a lighter first layer of petalscite: 1.
Tip: Keep the first layer of petals lighter in tone so the second layer can create a sense of depthcite: 1. - 7Add Second Layer of White Petals
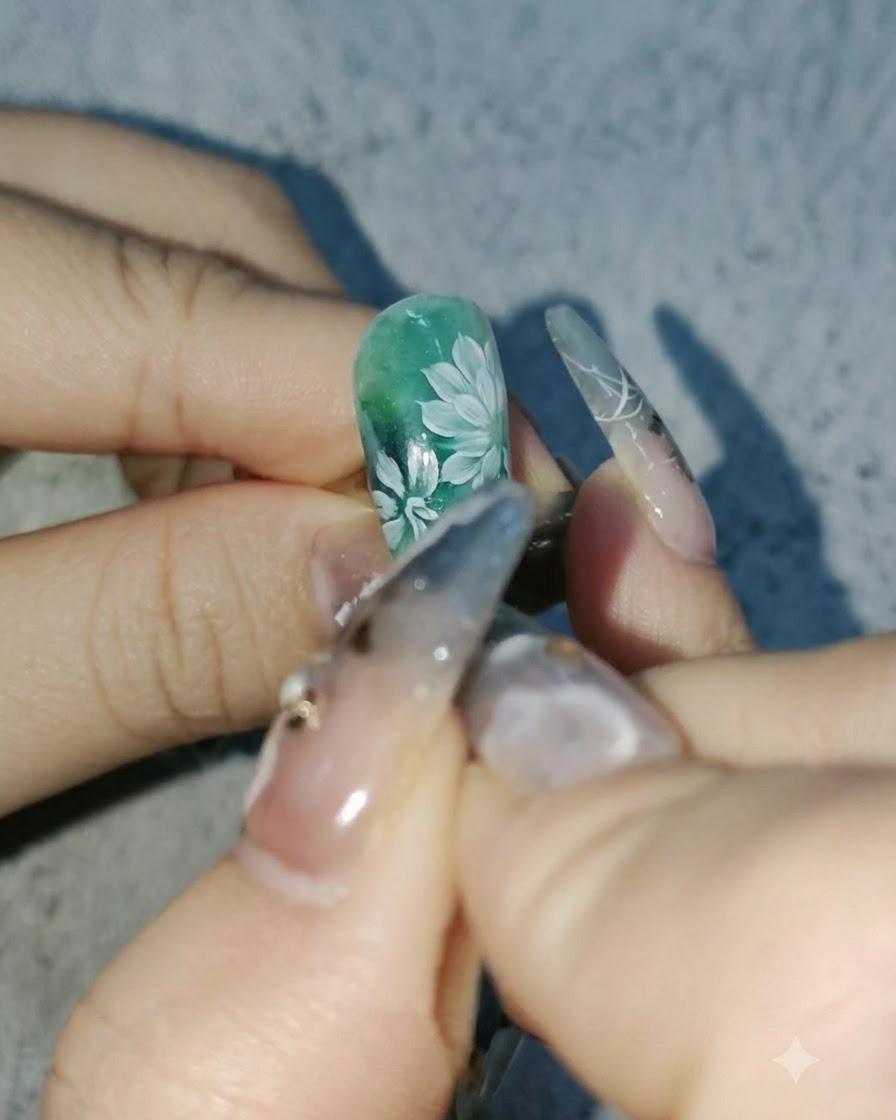
Apply a second layer of white petals using the painting gel over the existing ones, keeping the color intensity deeper to create a strong sense of depth and dimension. Cure the design under the UV or LED lamp to set the petals securely.
Tip: Varying the depth of color between the petal layers creates a more realistic and multidimensional floral effect. - 8Apply Reinforcing Gel
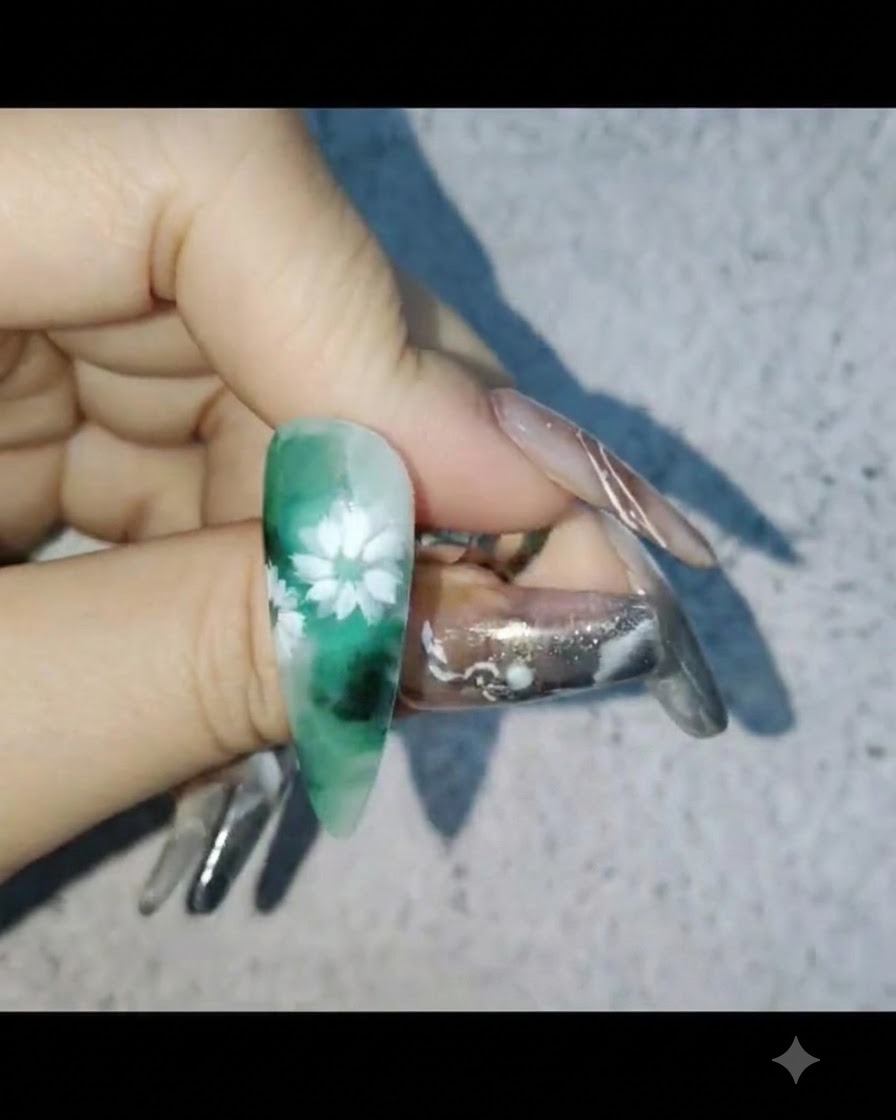
Apply a layer of reinforcing gel over the completed nail art to encapsulate the design, provide structural strength, and smooth out any uneven surfaces created by the painted layers.
Tip: Reinforcing gel is crucial for encapsulating raised nail art elements so they stay protected and chip-free. - 9Apply Matte Top Coat
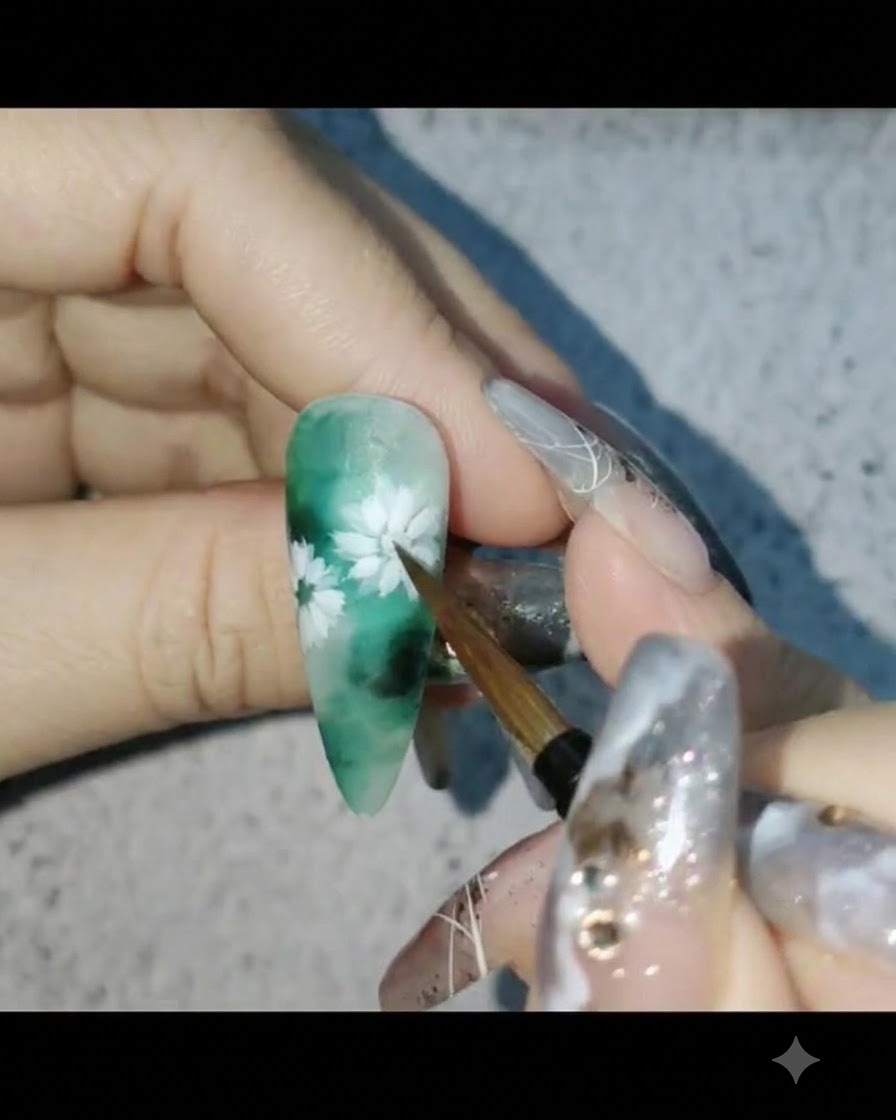
Apply a matte top coat over the cured reinforcing gel to create a velvety, non-shiny finish that provides a unique contrast to the upcoming watercolor and water droplet details.
Tip: Make sure the surface is fully cured and wiped if necessary before applying the matte top coat for an even finish. - 10Paint Yellow Flower Centers
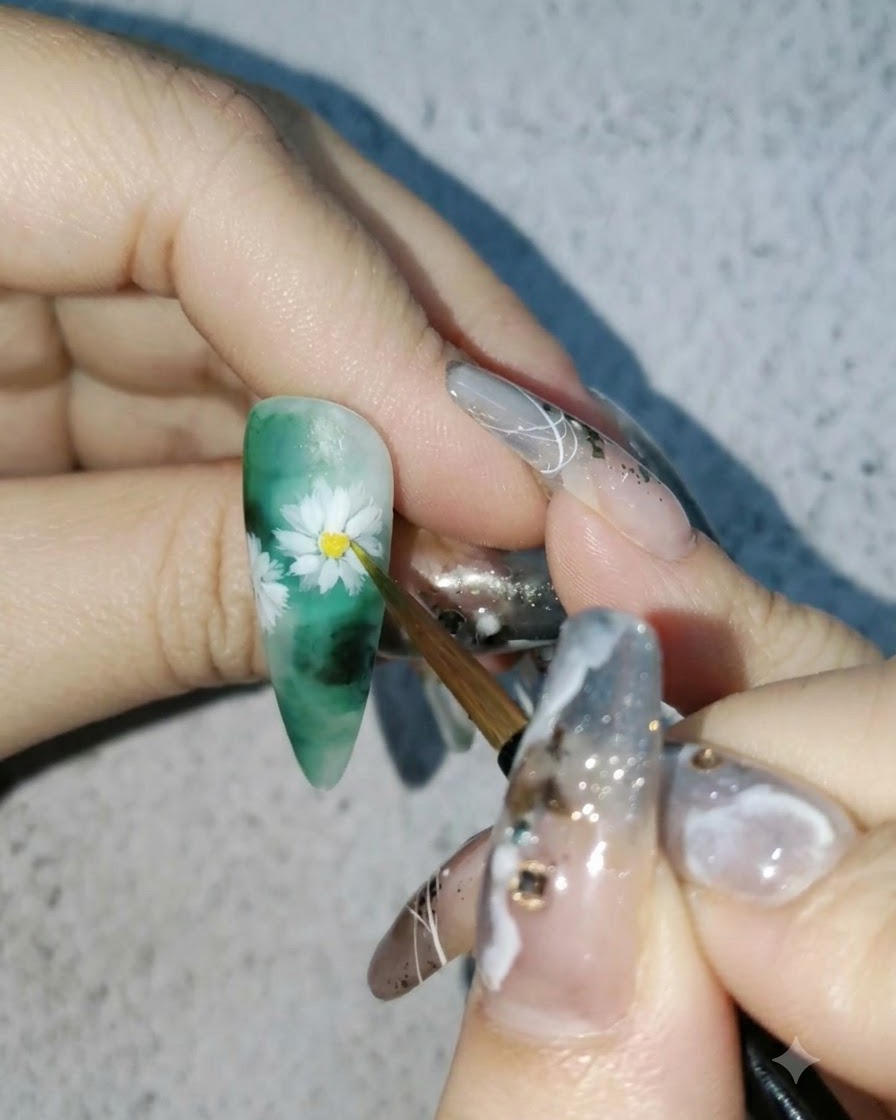
Use a fine detail brush with yellow watercolor paint to carefully dab and paint the center of each small daisy, bringing the flowers to life against the white petals.
Tip: Keep watercolor applications thin so they dry quickly and blend smoothly on top of the matte surface. - 11Paint leaves and stems
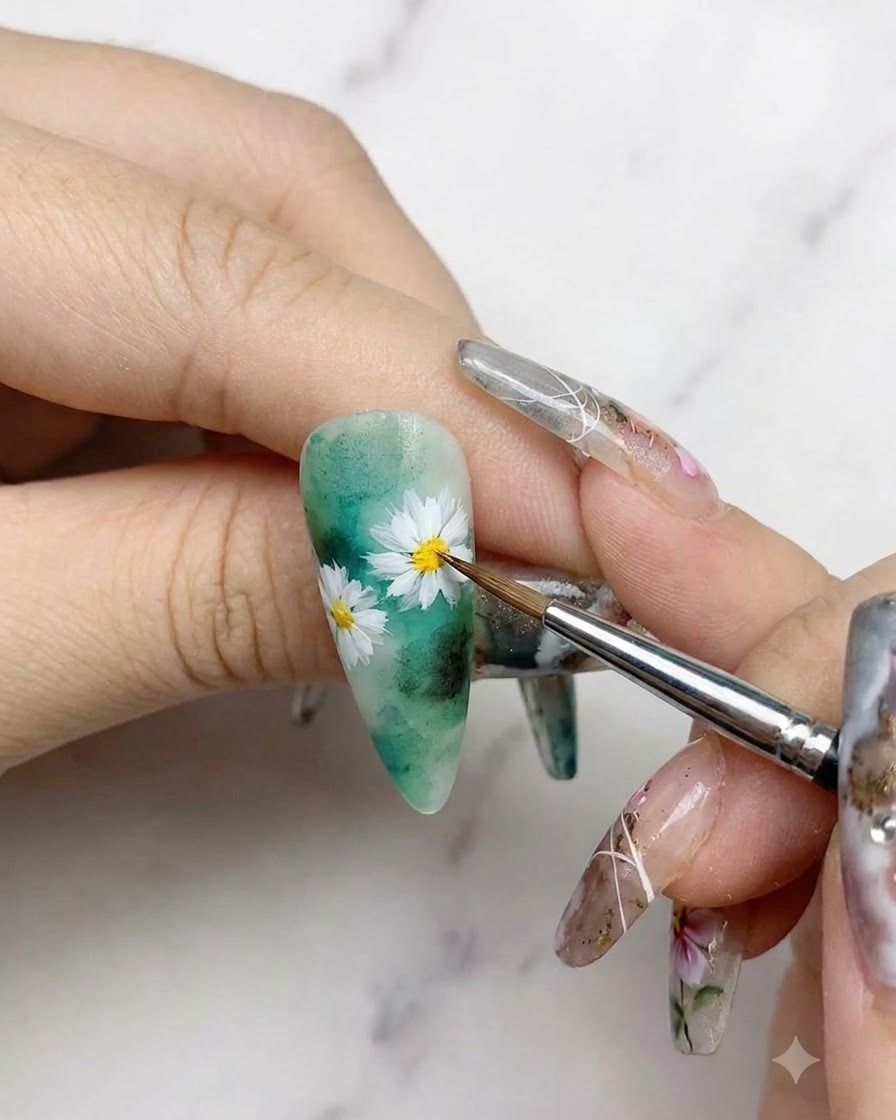
Using watercolor paint, carefully draw delicate leaves and thin stems around the white daisy flowers to create a natural botanical arrangement. Build up the foliage with light strokes to complement the background design.
Tip: Keep your brush strokes light and fluid so the botanical details look soft and organic. - 12Flick Black Watercolor for Texture
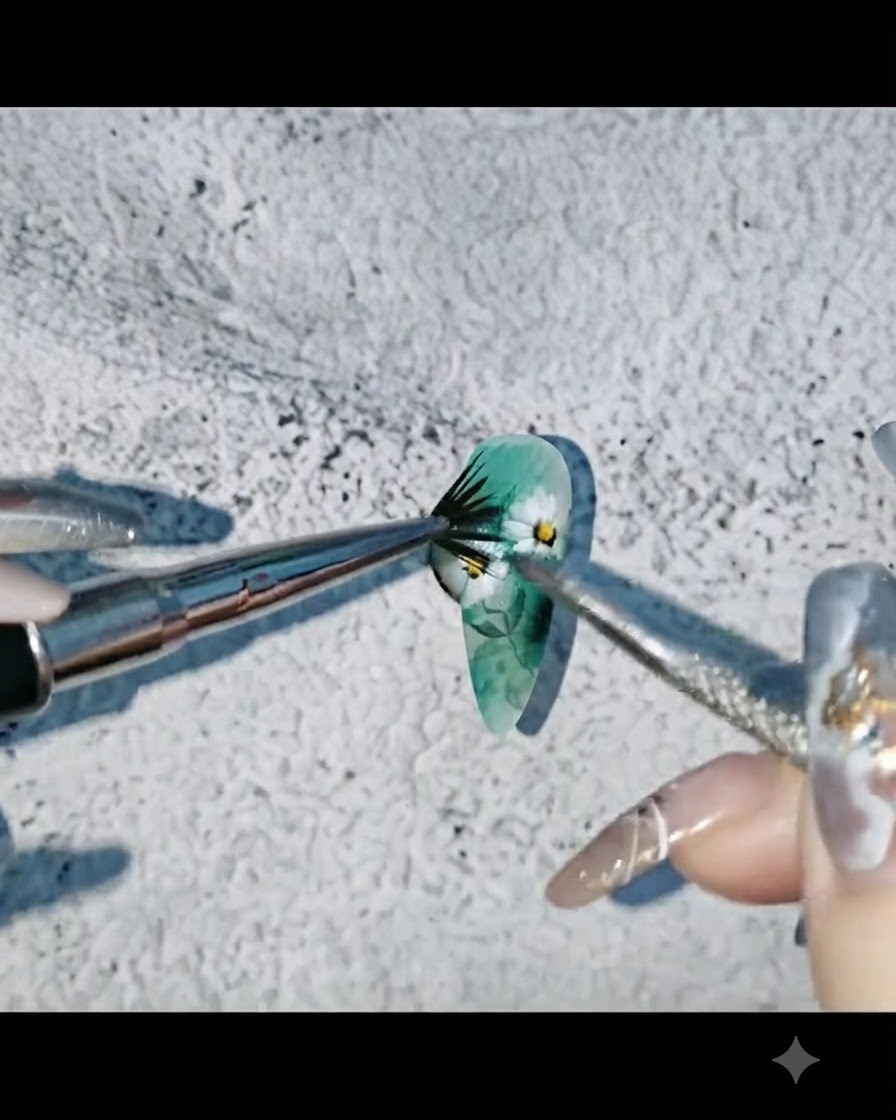
Lightly flick black watercolor paint onto the nail surface using a brush or tool to create fine splatter details, adding artistic texture and depth to the background.
Tip: Tap your brush gently from a short distance to control the spread and size of the black watercolor splatters. - 13Apply top coat and water droplets
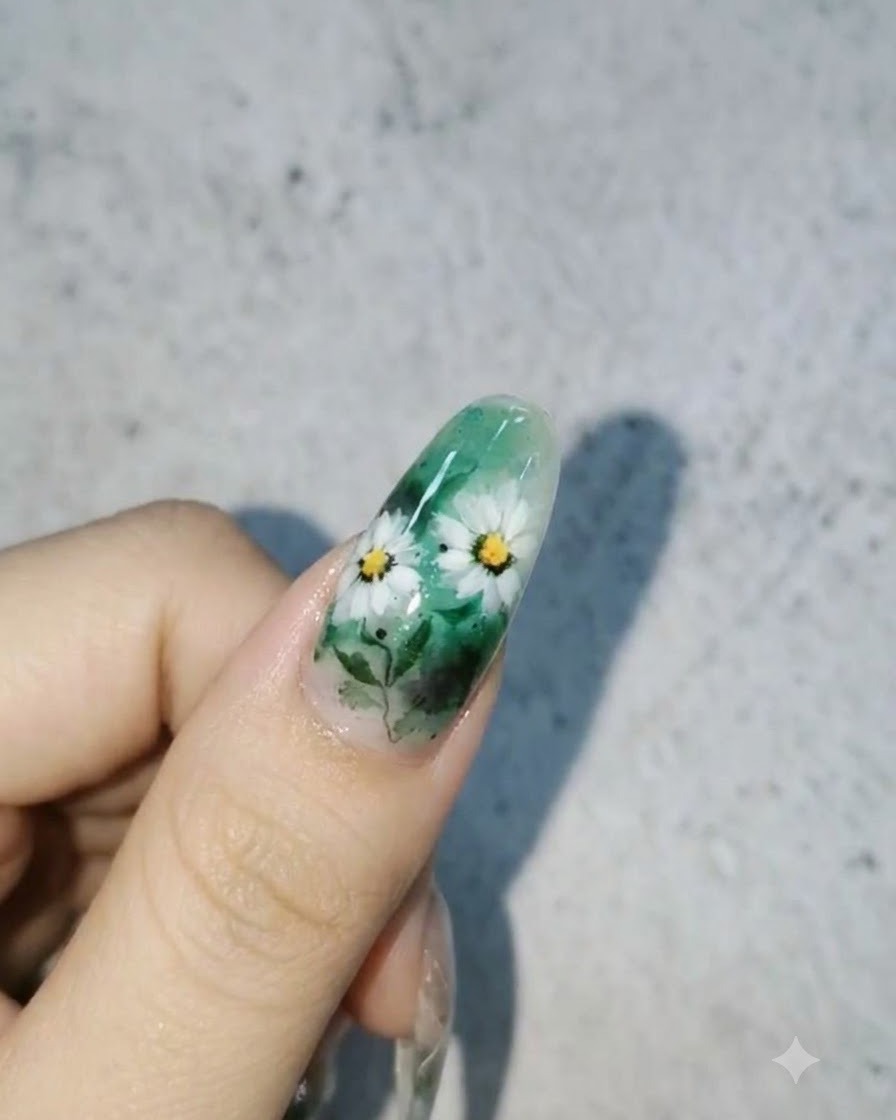
Apply your final top coat and cure under the lamp. Then, use no-wipe rhinestone adhesive to dot small raised beads onto the nail surface to simulate realistic dewdrops or water droplets, completing the look.
Tip: Place the water droplets in random, natural spots over the leaves and empty spaces for a realistic dewy effect.