Festive Christmas Santa
3D Tree Gel Nail Tutorial
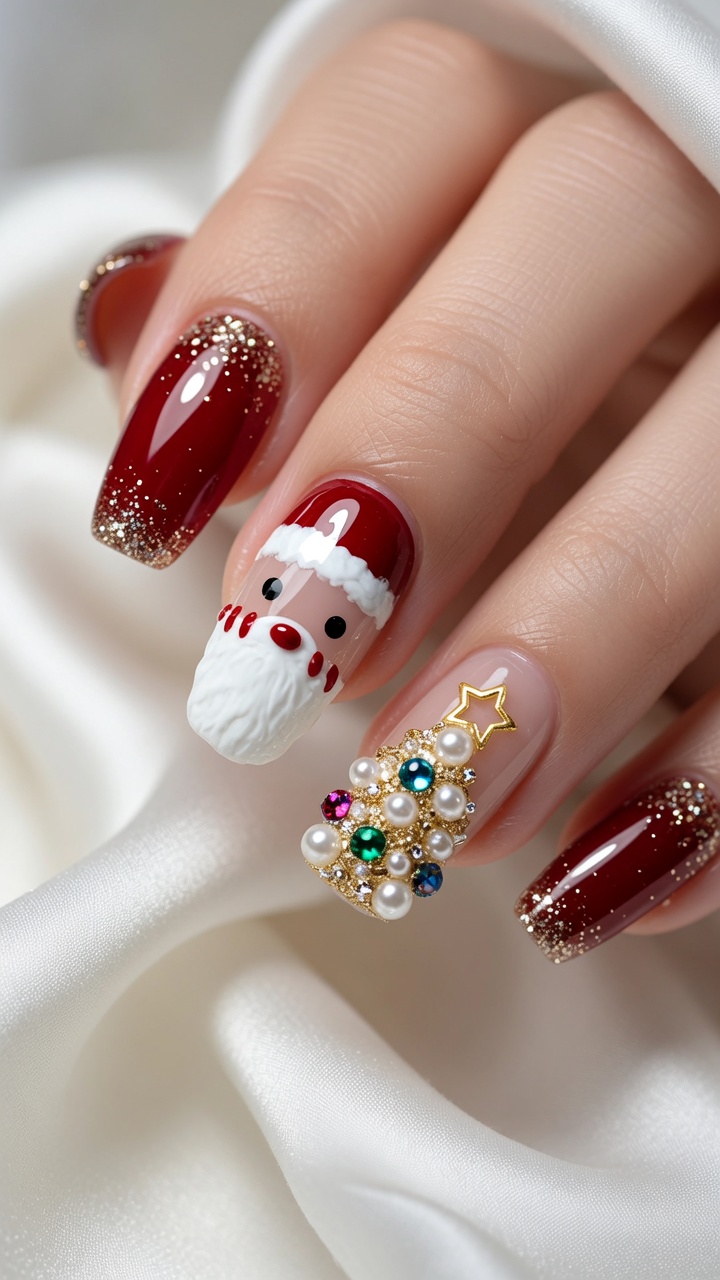
Create a stunning festive manicure featuring a cute Santa Claus design and an intricate 3D Christmas tree adorned with pearls and rhinestones.
Celebrate the holiday season with this festive manicure that perfectly blends charm and elegance. The combination of a cheerful Santa character and a sparkling 3D Christmas tree adds a festive touch to any winter look. This tutorial breaks down the process of creating these detailed embellishments, helping you achieve a salon-quality result at home.
Steps
- 1Apply dried rose base
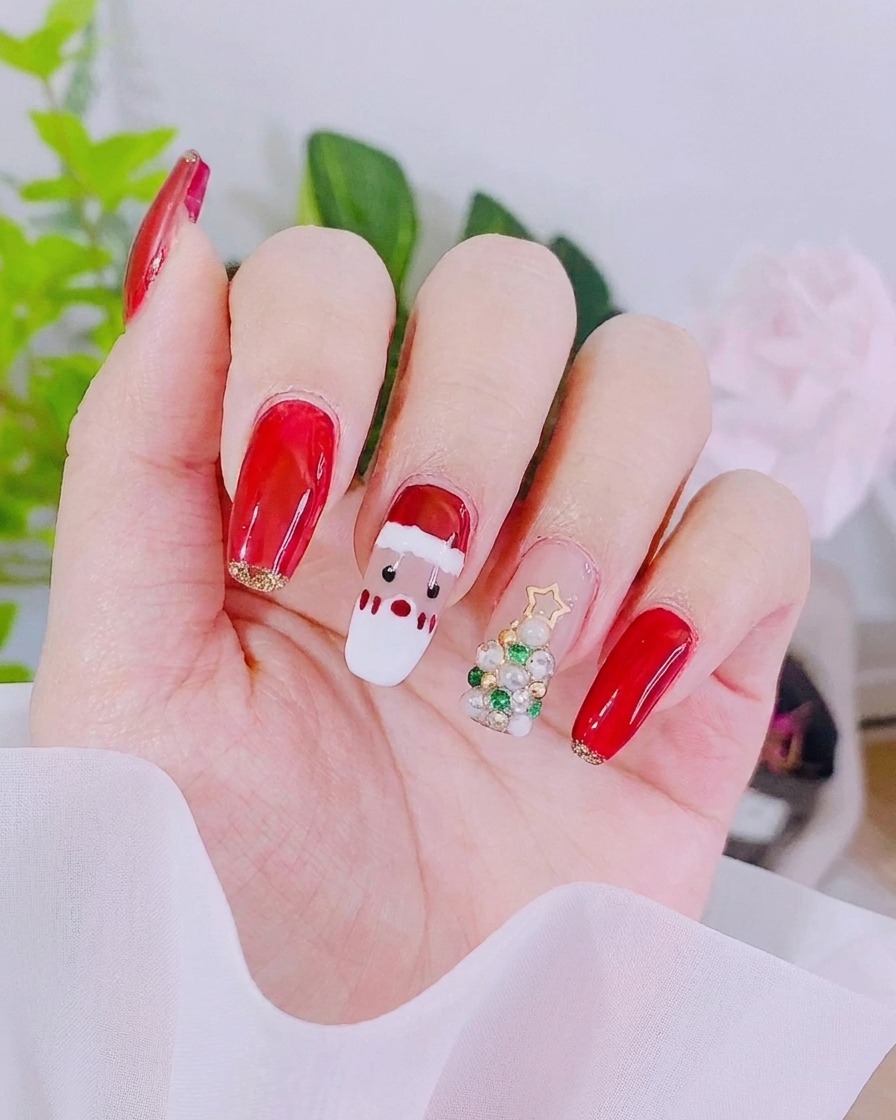
Apply a thin, even layer of dried rose color gel to the middle and ring finger nails as the base for your Christmas design. Ensure the gel is applied smoothly and covers the nail plate evenly, then cure under a UV lamp.
Tip: Applying thin coats prevents the gel from pooling at the cuticles and ensures a smoother cure. - 2Apply vintage red gel
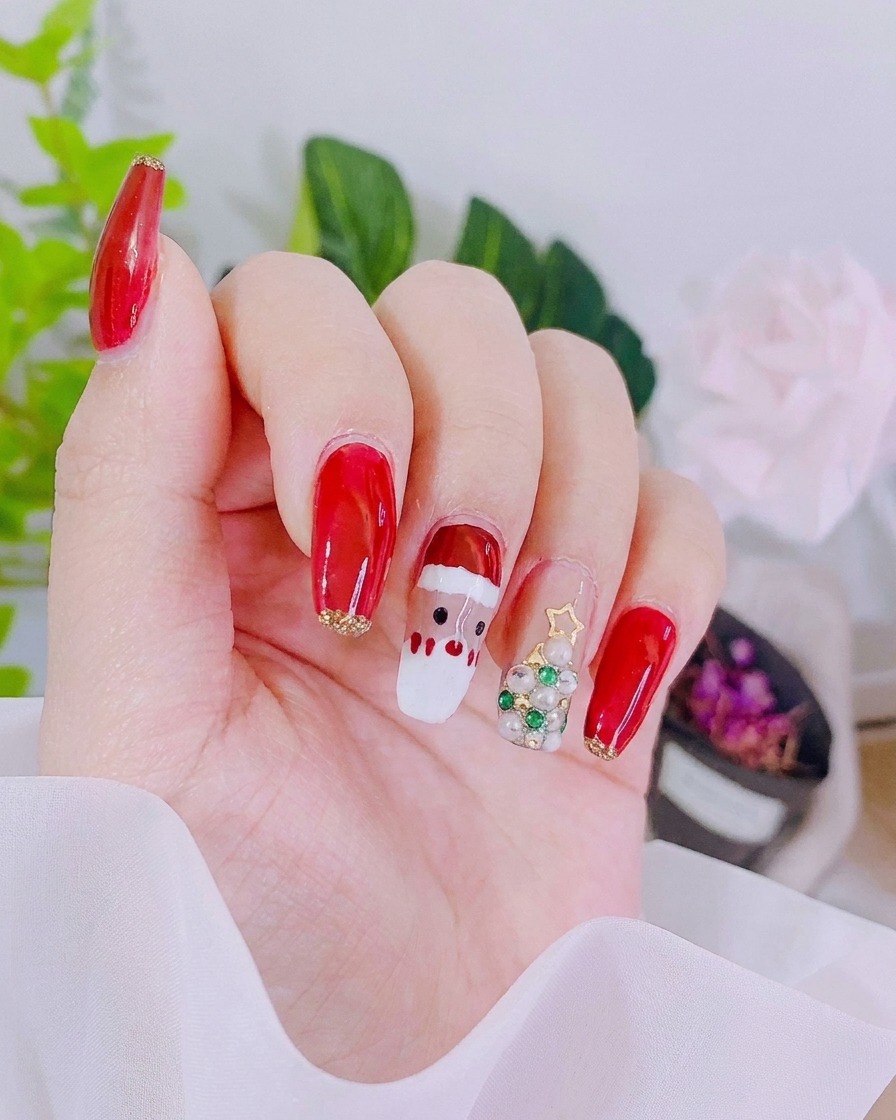
Apply a coat of vintage red color gel to the upper portion of the nail plate to begin creating the Christmas aesthetic. Use controlled strokes to achieve a clean line, then cure to set the color.
Tip: Keep the red application consistent in thickness to ensure a professional, saturated finish. - 3Create Santas base
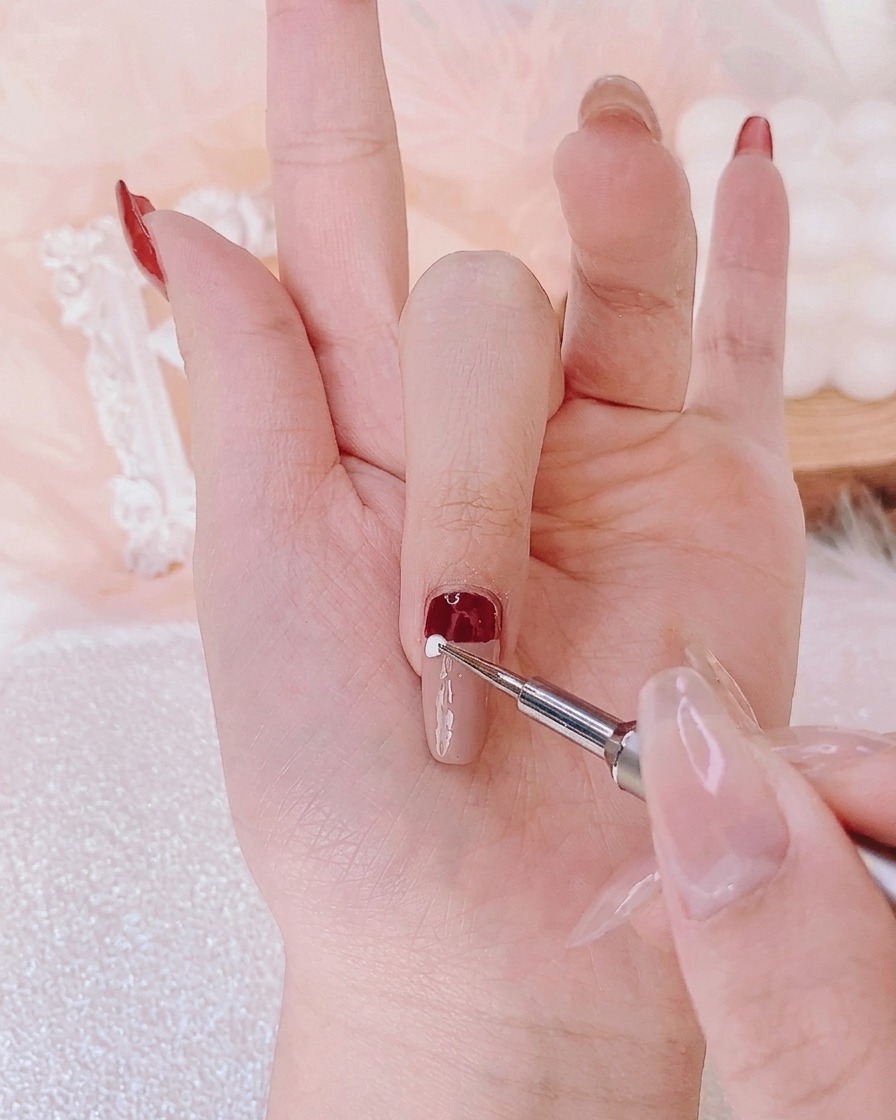
Using a dotting tool, carefully apply white gel to create the base for Santas beard and the trim on his hat. This layer provides the foundation for the facial details to be added later.
Tip: A smaller dotting tool allows for more precision when shaping the rounded edges of the beard and hat trim. - 4Detail Santas eyes
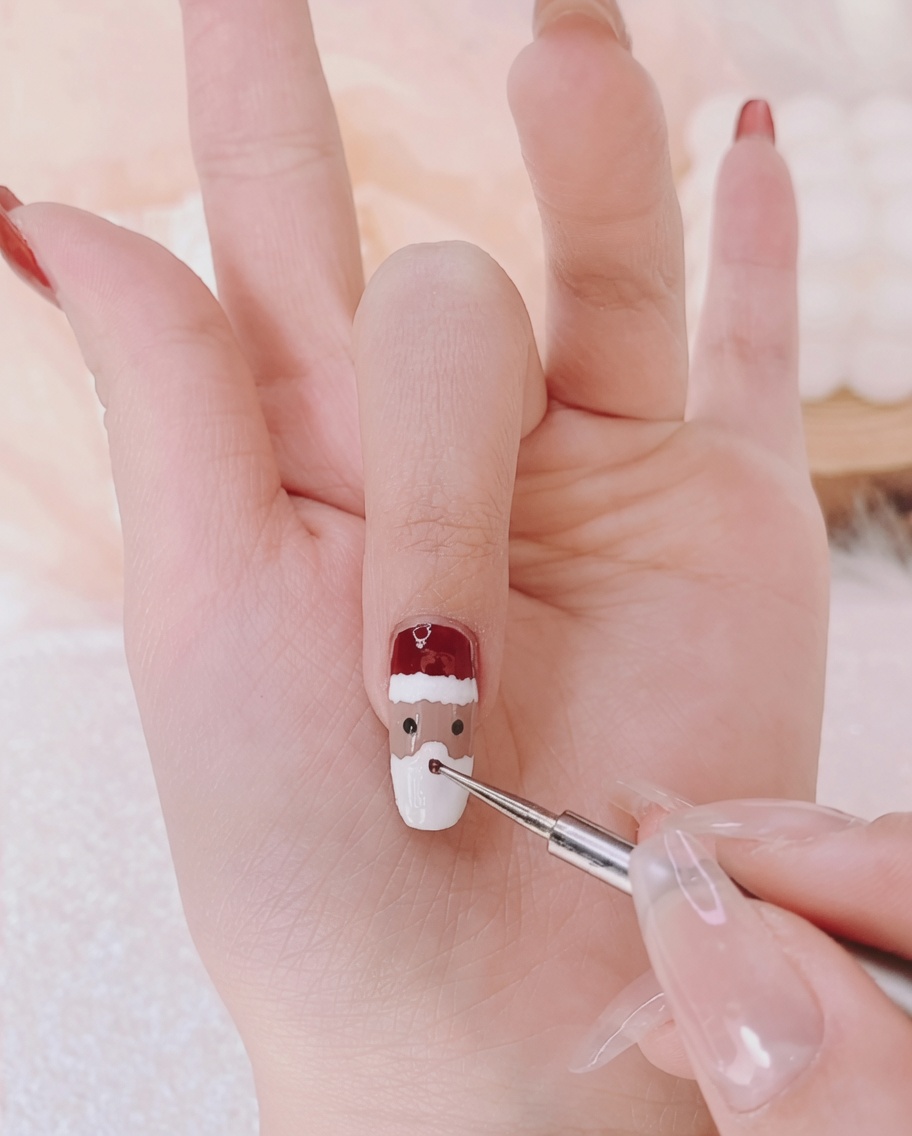
With a fine liner brush and black gel, carefully paint two small dots to create Santas eyes. Place them symmetrically on the tan-colored section of the nail to bring the character to life.
Tip: Use very little pressure with the liner brush to create crisp, small dots for the eyes. - 5Add nose and blush
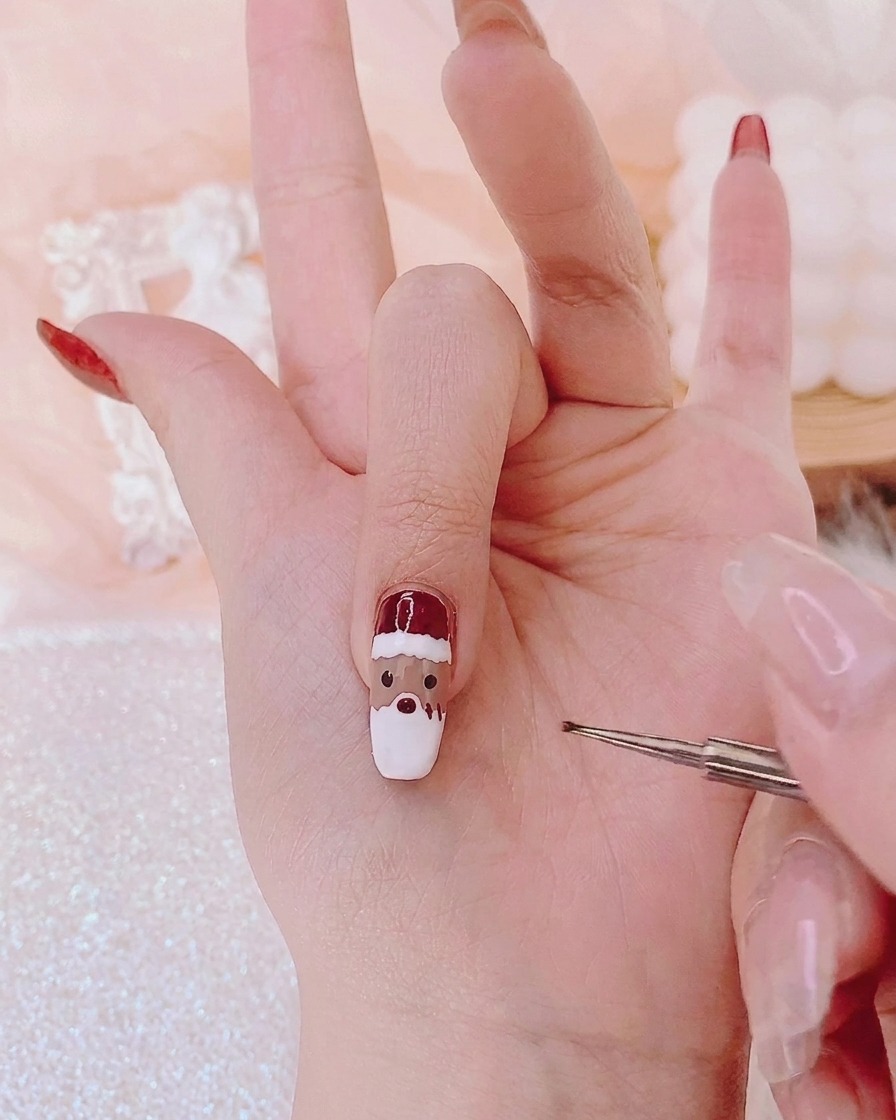
Using the same vintage red gel, use a fine detail tool to add a small dot for the nose and soft touches for the blush on Santas cheeks. Cure the nail to lock in these features.
Tip: Make the nose dot slightly larger than the blush marks to create visual depth. - 6Apply gold tree base
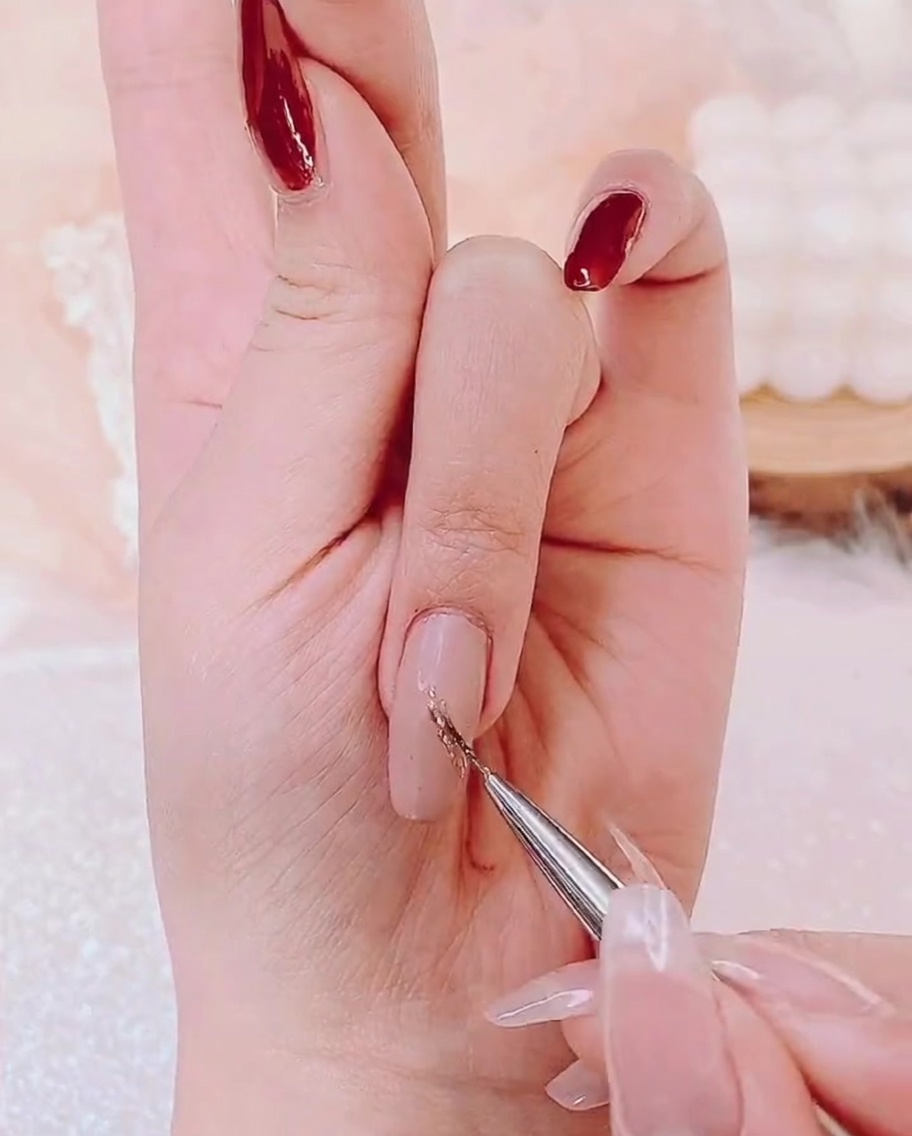
Apply a layer of shimmering thin gold gel to the remaining nail to serve as the base for the Christmas tree design. This gold layer will provide a sparkling backdrop for the rhinestones and beads.
Tip: Ensure the gold gel is spread evenly for a uniform shimmer across the entire area. - 7Cure the gold base
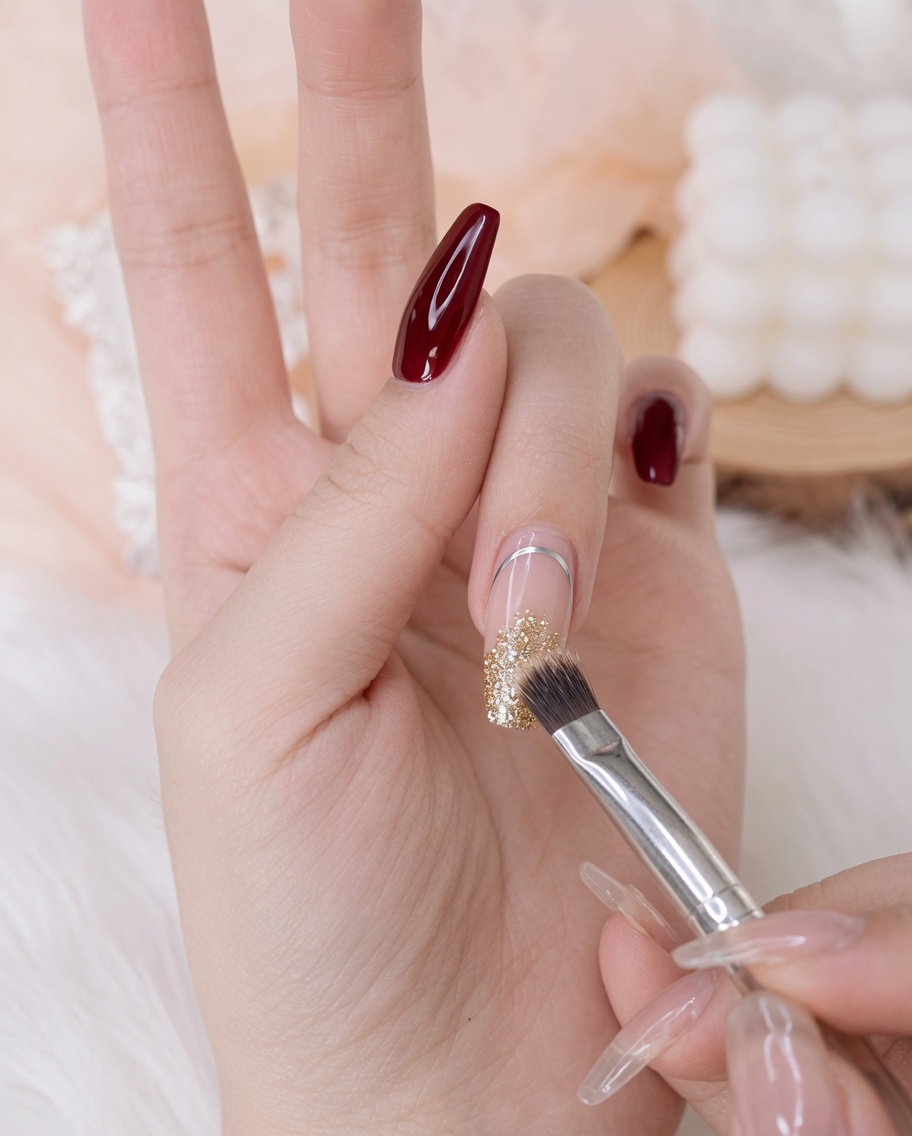
Place your hand under the UV or LED lamp to cure the gold shimmer base. This step ensures that the base layer is completely set and provides a durable foundation for the rhinestone glue and embellishments that follow.
Tip: Ensure your fingers are positioned flat in the center of the lamp to allow even light distribution across the entire nail. - 8Apply rhinestone glue
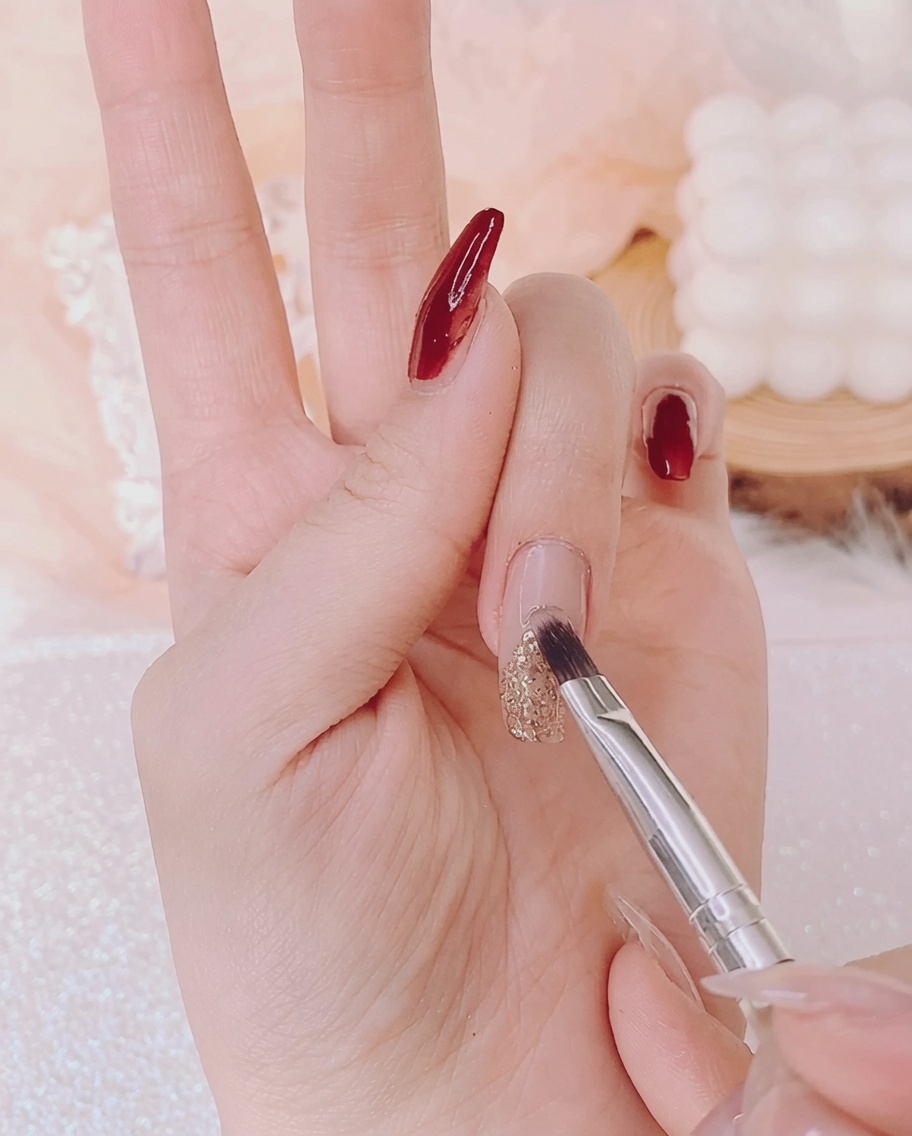
Using a flat gel brush, apply a generous layer of rhinestone glue directly over the cured gold glitter base. This thick adhesive layer will serve as the foundation to securely hold all the 3D embellishments for the Christmas tree design.
Tip: Do not cure the rhinestone glue yet; you need it wet to anchor the charms and beads. - 9Attach the star charm
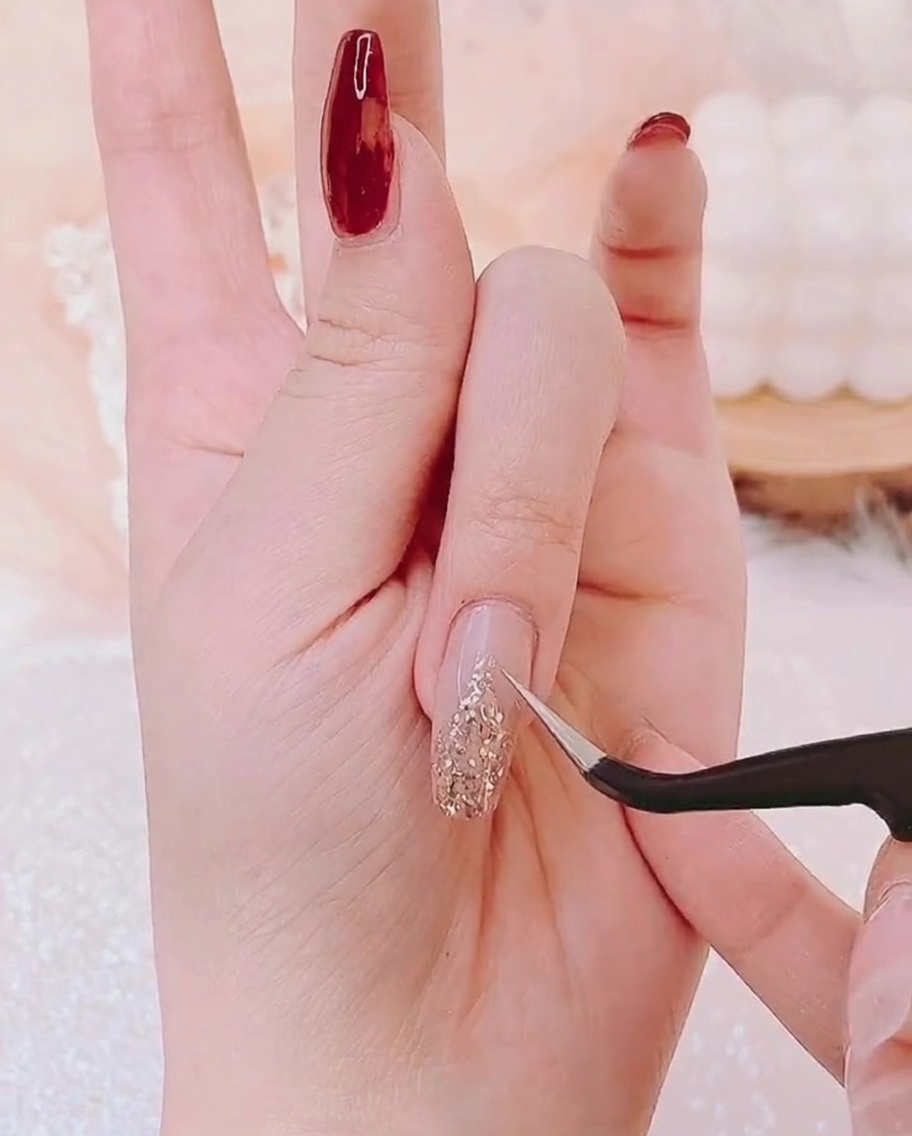
Using a pair of precision tweezers, pick up a small gold star charm and carefully place it at the very top of the gold glitter tree base, pressing it gently into the wet rhinestone glue.
Tip: Positioning the star first provides a strong visual anchor for the rest of your tree decorations. - 10Decorate with beads and pearls
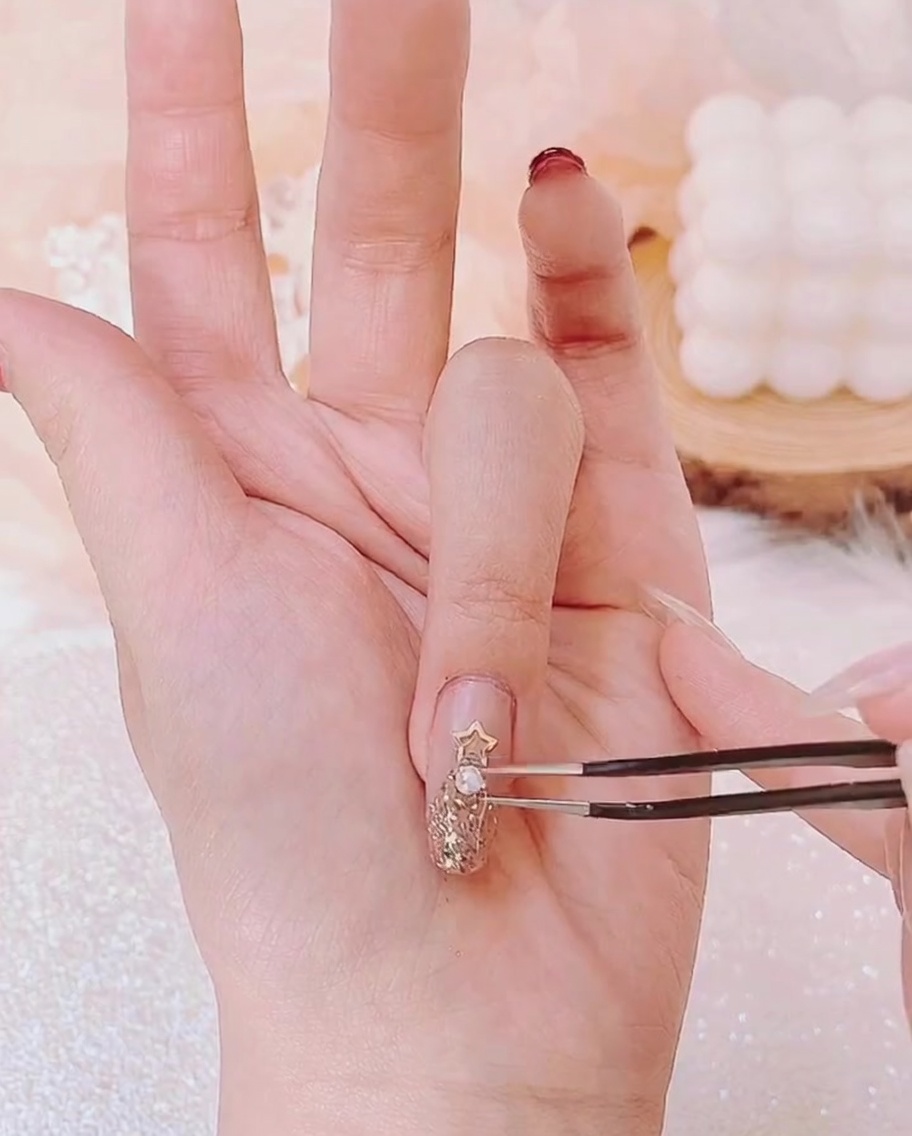
Continue using your tweezers to carefully place small pearls, steel beads, and green and clear rhinestones onto the wet glue. Arrange them closely together below the star to fill in the body of the Christmas tree.
Tip: Mix different sizes and colors of embellishments to give the tree a dimensional, textured ornament effect. - 11Seal the embellishments
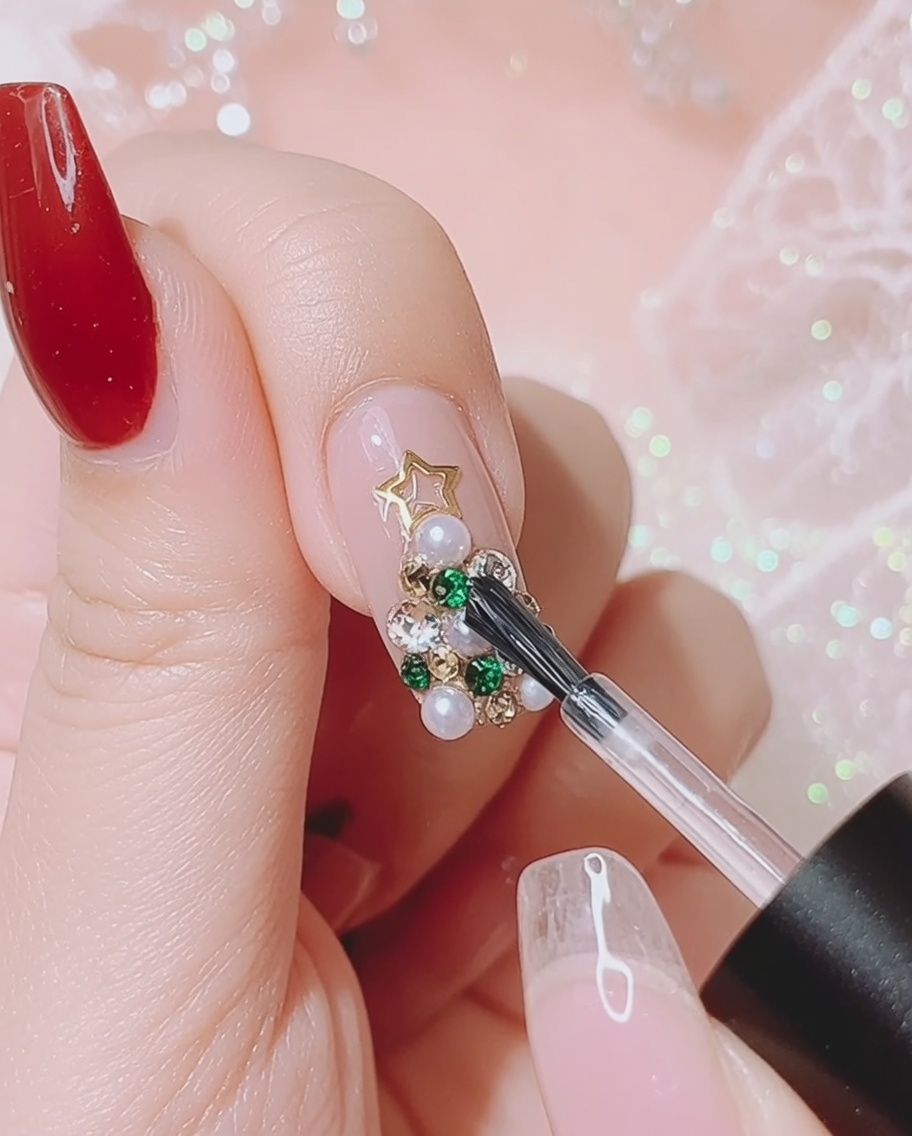
Once you have cured the tree design, use a brush to apply additional rhinestone glue around the base and edges of the beads, pearls, and steel beads. This wraps and secures the embellishments, ensuring they stay firmly in place.
Tip: Avoid covering the tops of the colored rhinestones with glue, as this will dull their faceted sparkle. Only apply around their edges. - 12Apply top coat
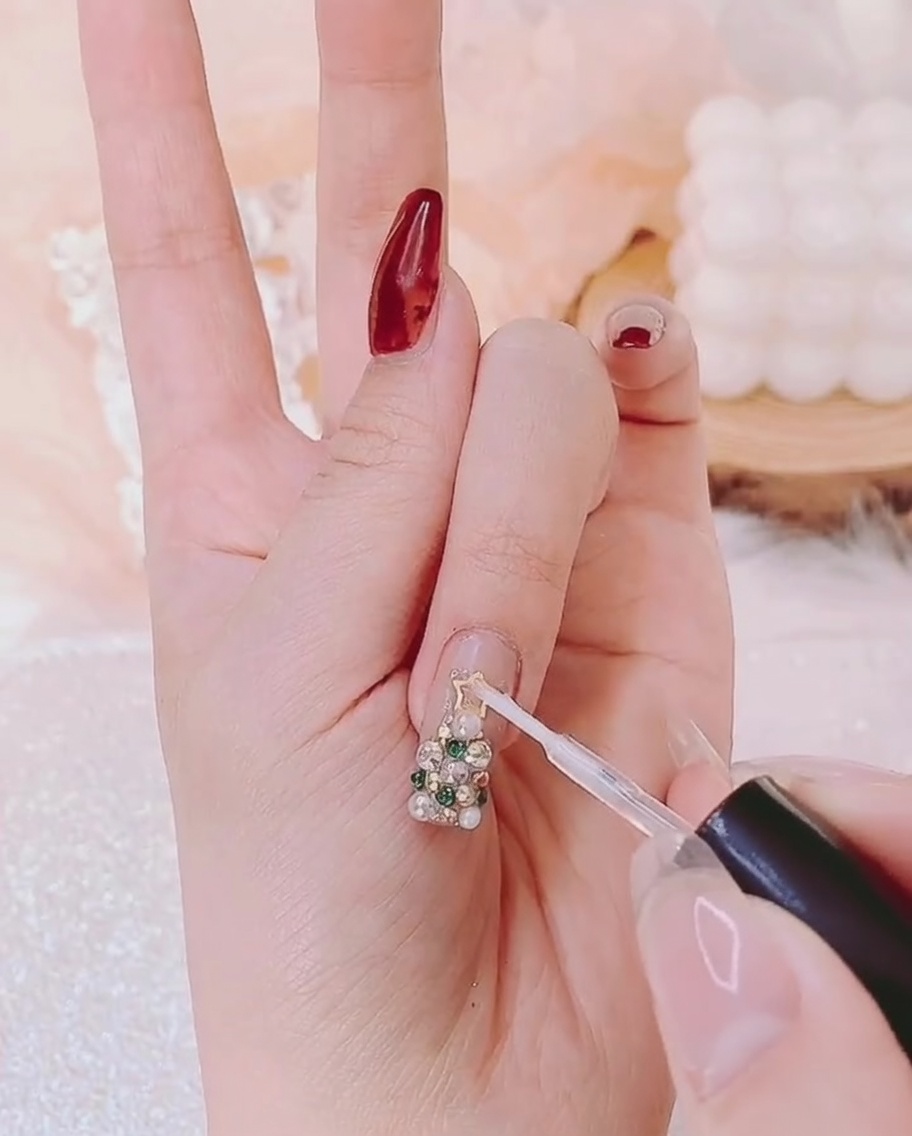
Finish the manicure by applying a glossy top coat over the entire nail design. Use a fine detail brush or a thin striping brush from the bottle to carefully outline and seal the edges of the 3D elements without painting over the shiny gems.
Tip: Make sure to cap the free edge of the nail with the top coat for maximum durability and a smooth finish.