Fairy-Style Pink Crystal Cat-Eye Nails — Step-by-Step Tutorial
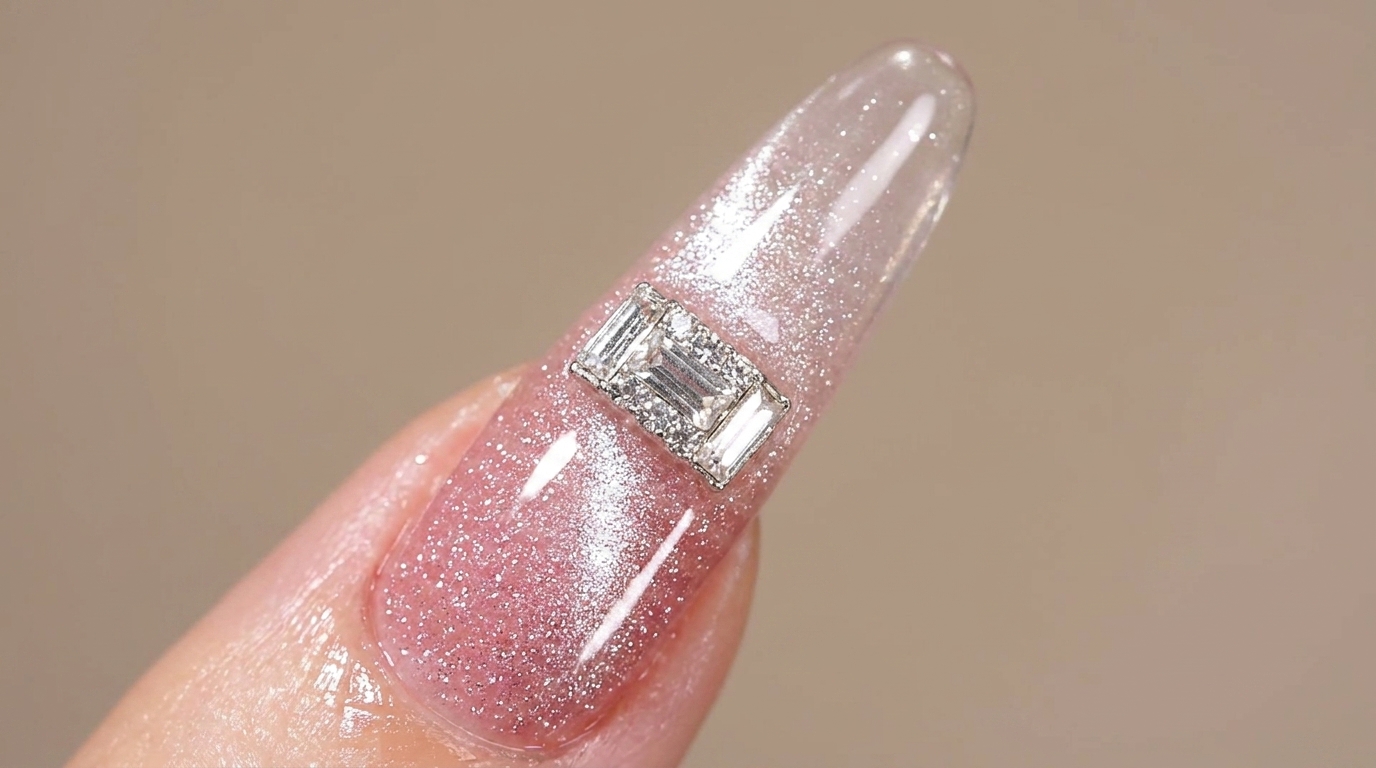
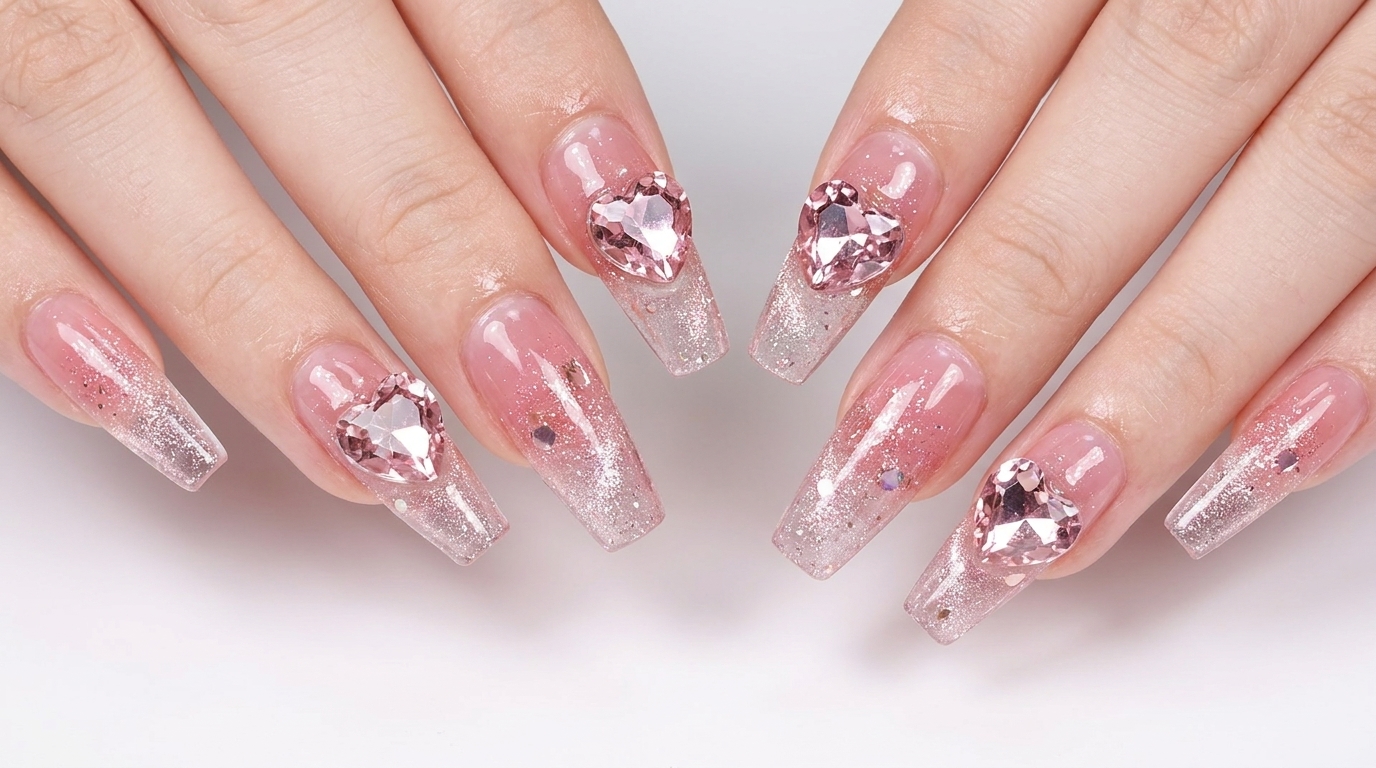
Master this dreamy, fairy-style nail look featuring a transparent pink blush gradient, shimmering cat-eye depth, and a statement heart crystal.
This look brings a magical, ethereal quality to your manicure, blending the soft allure of a blush base with the mesmerizing movement of cat-eye glitter. Finished with a charming heart-shaped crystal, this design is perfect for those who want a romantic yet sophisticated, high-shine aesthetic.
Steps
- 1Apply blush gel base
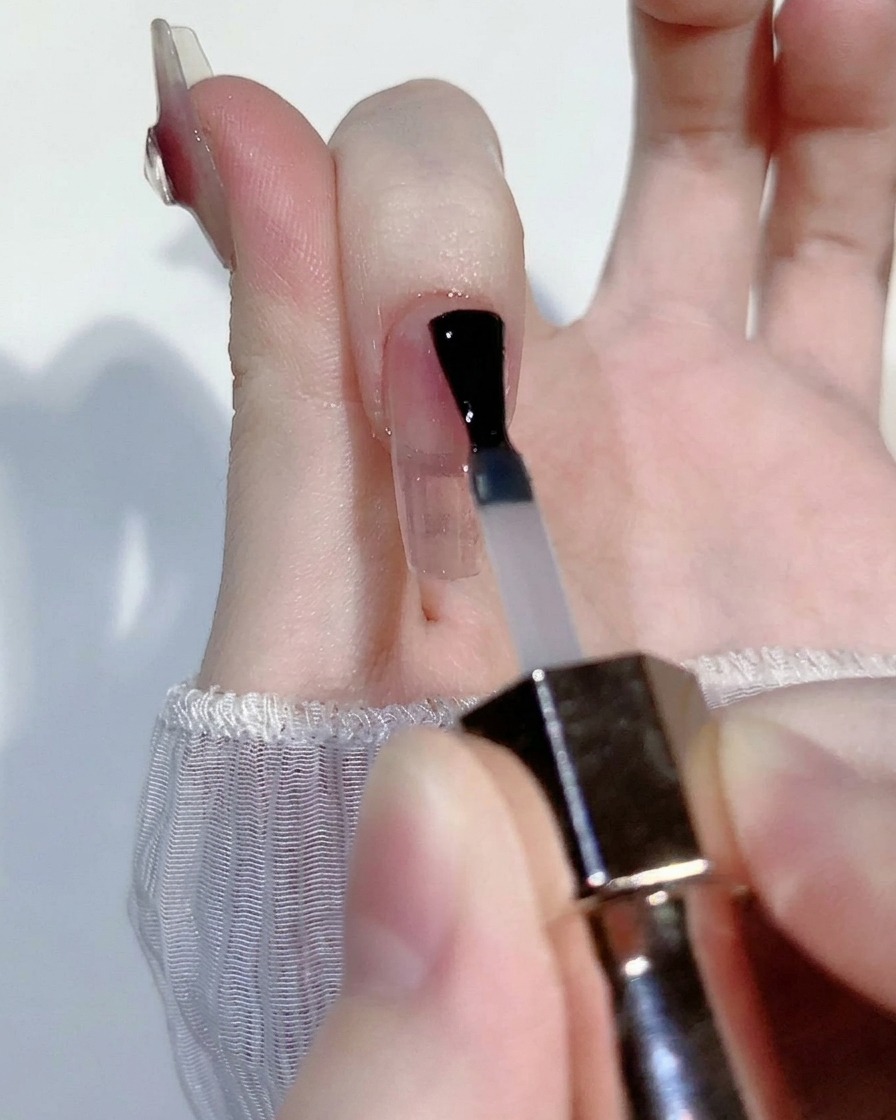
Apply a thin layer of transparent pink blush gel to the nail surface. Use a small brush to gently spread the color, ensuring an even, translucent finish that acts as the base for the fairy-style design.
Tip: Work in thin layers to maintain the transparency and avoid flooding the cuticles. - 2Blend the blush gel
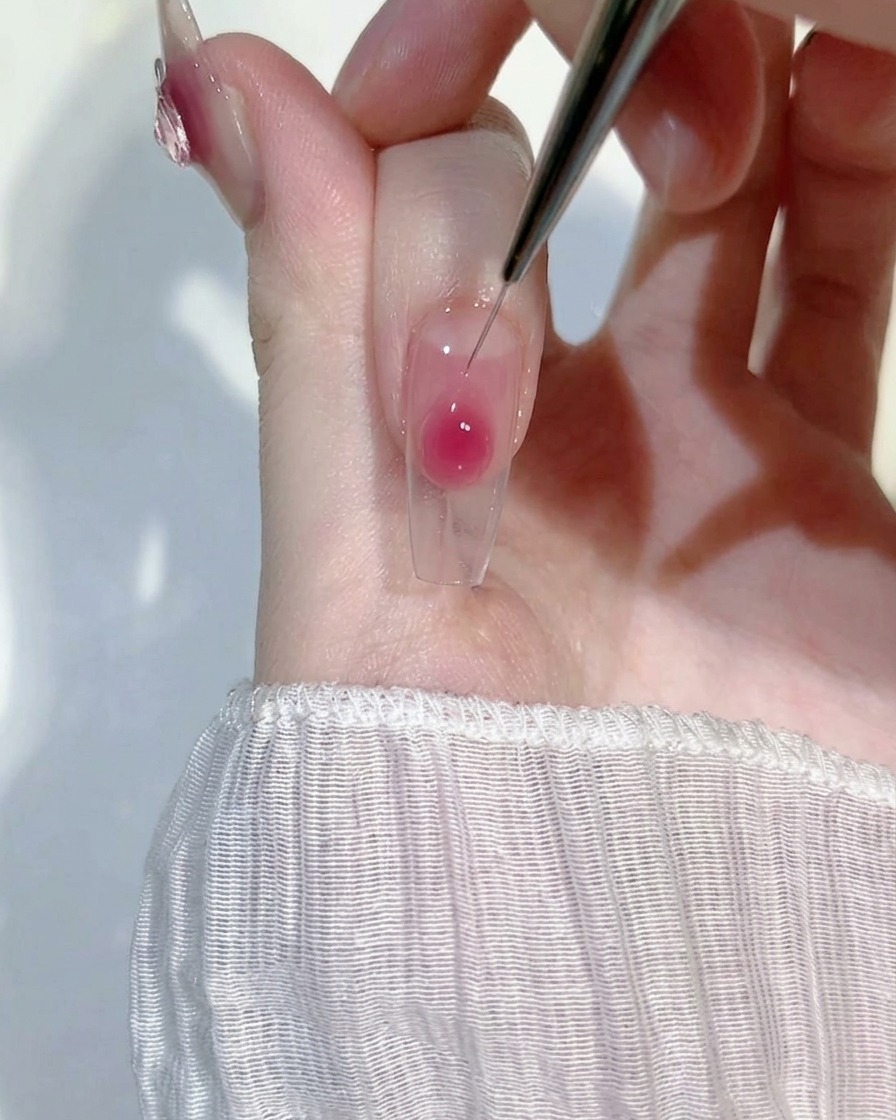
Using a fine liner brush, gently blend the transparent pink blush gel outwards in soft circular motions. This technique diffuses the edges of the gel to create a seamless, natural-looking gradient effect that concentrates the color perfectly in the center of the nail.
Tip: Work with a very light touch to avoid moving too much product at once, ensuring the transition from pink to clear remains smooth and seamless. - 3Deepen the blush effect
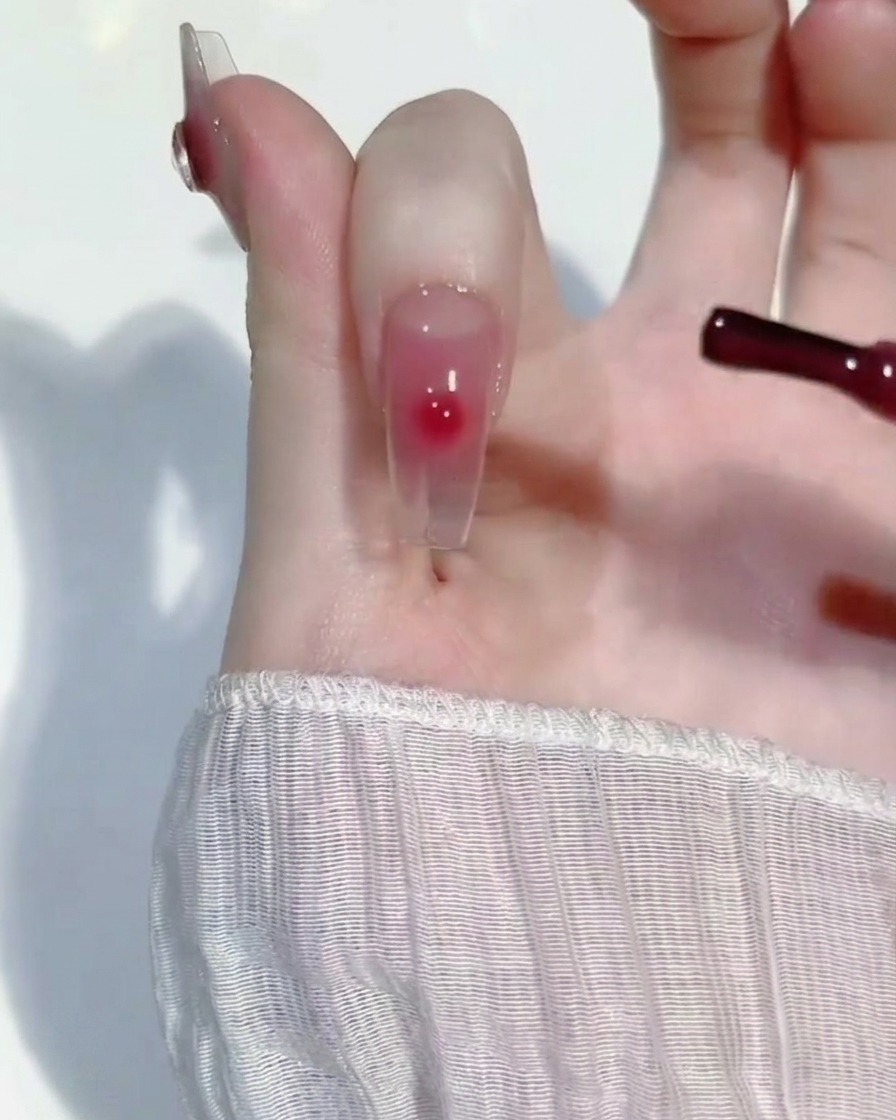
Apply a second, smaller amount of the blush gel to the center of the nail. Use a clean liner brush to blend the edges outward in soft, circular motions to create a seamless gradient with more depth.
Tip: Keep the circular blending motions light to prevent streaks in the gel layer. - 4Apply cat-eye glitter gel
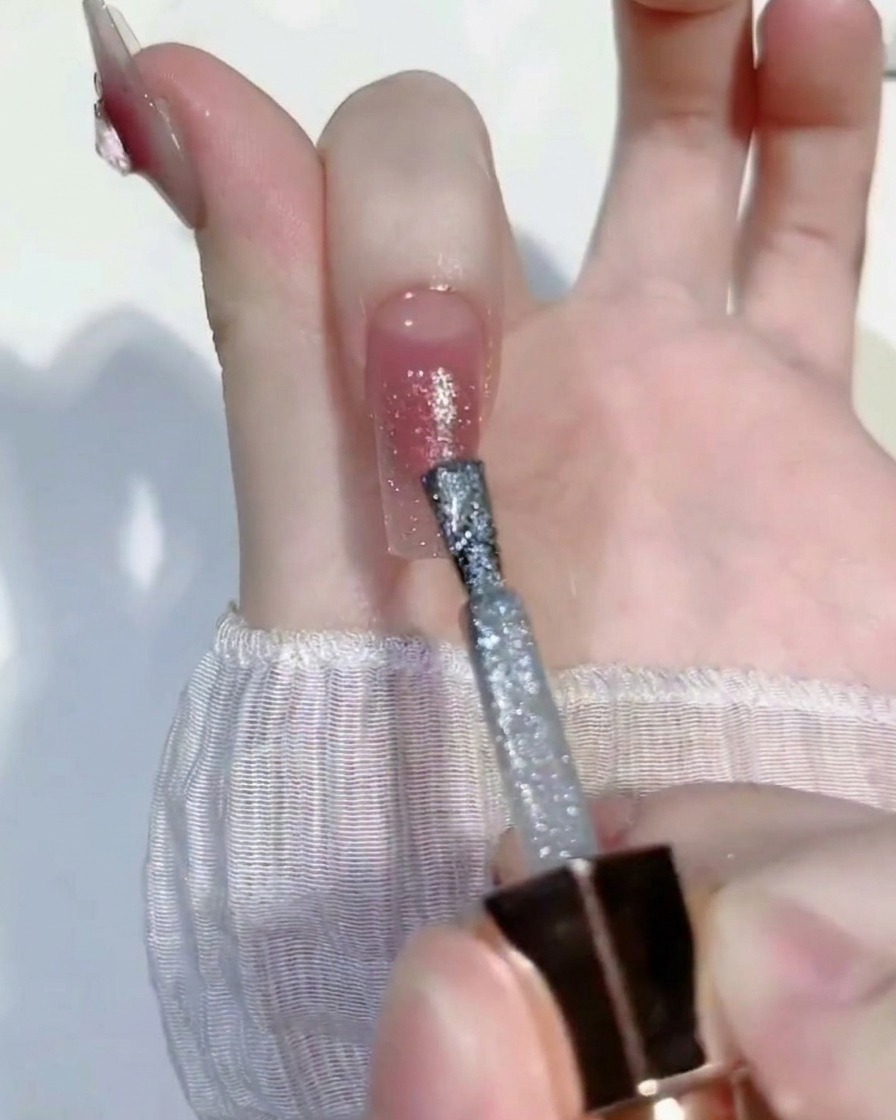
Brush on a layer of fairy-style cat-eye glitter gel directly over your blended blush base. Ensure you cover the entire nail evenly, as this will provide the magical, shimmering foundation for the magnetic effect in the upcoming steps.
Tip: Apply the cat-eye gel evenly and avoid making the layer too thick, which can interfere with the magnetic pull and cause pooling at the side walls. - 5Sweep with a fan brush
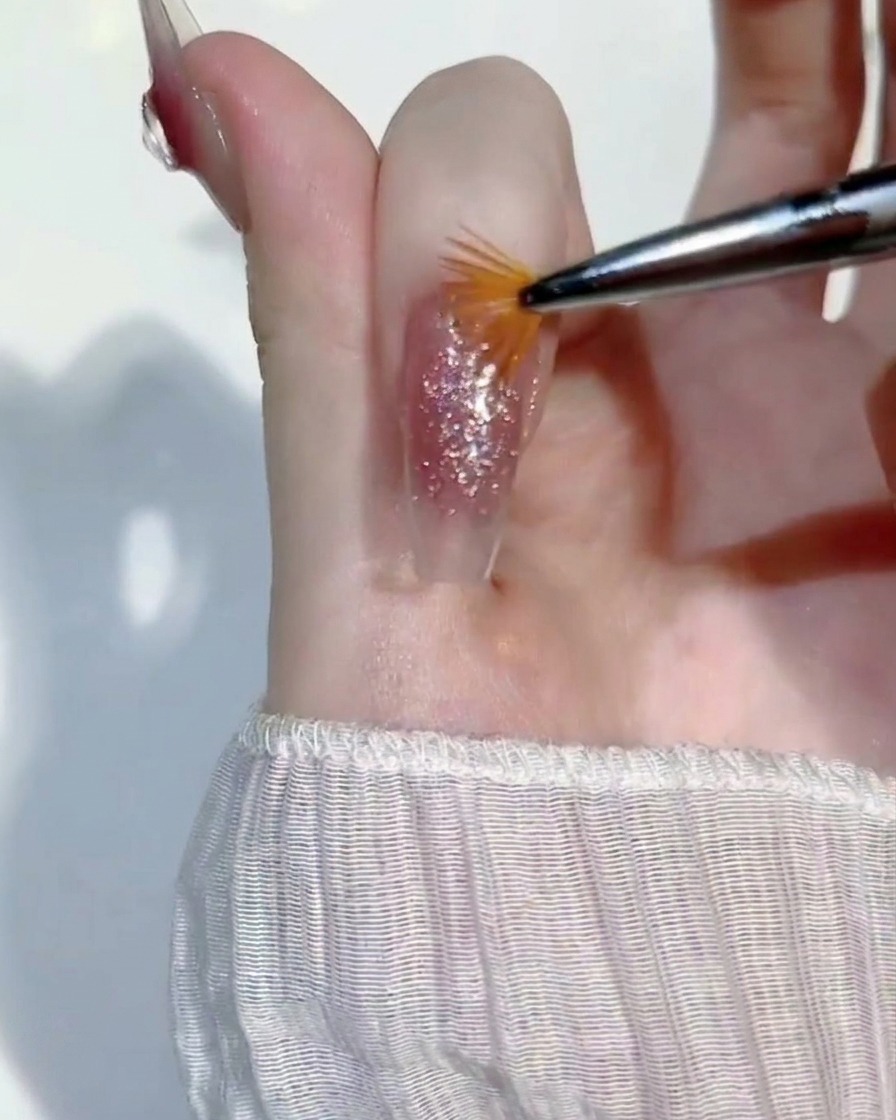
Take a clean, small fan brush and lightly sweep it across the surface of the wet cat-eye gel. This gentle sweeping motion helps to evenly distribute the magnetic glitter particles and smooth out any uneven lines left by the polish brush.
Tip: Use barely any pressure with the fan brush—just let the tips of the bristles lightly glide over the gels surface to maintain the product placement. - 6Create magnetic cat-eye effect
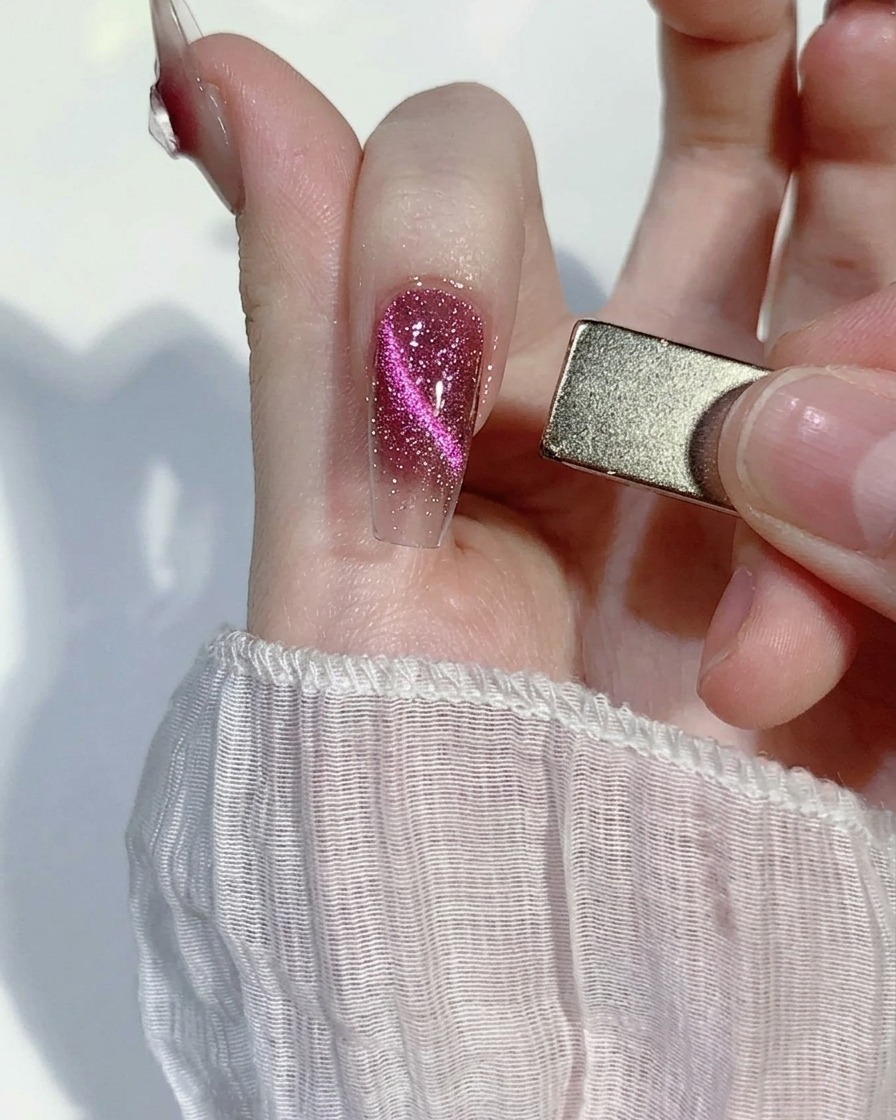
While the cat-eye gel is still wet, hold a rectangular magnet near both sides of the nail. This movement attracts the metallic particles, creating a sharp, glowing line through the center of the nail.
Tip: Hold the magnet steady for a few seconds on each side to ensure the magnetic particles are fully activated. - 7Add purple cat-eye dimension
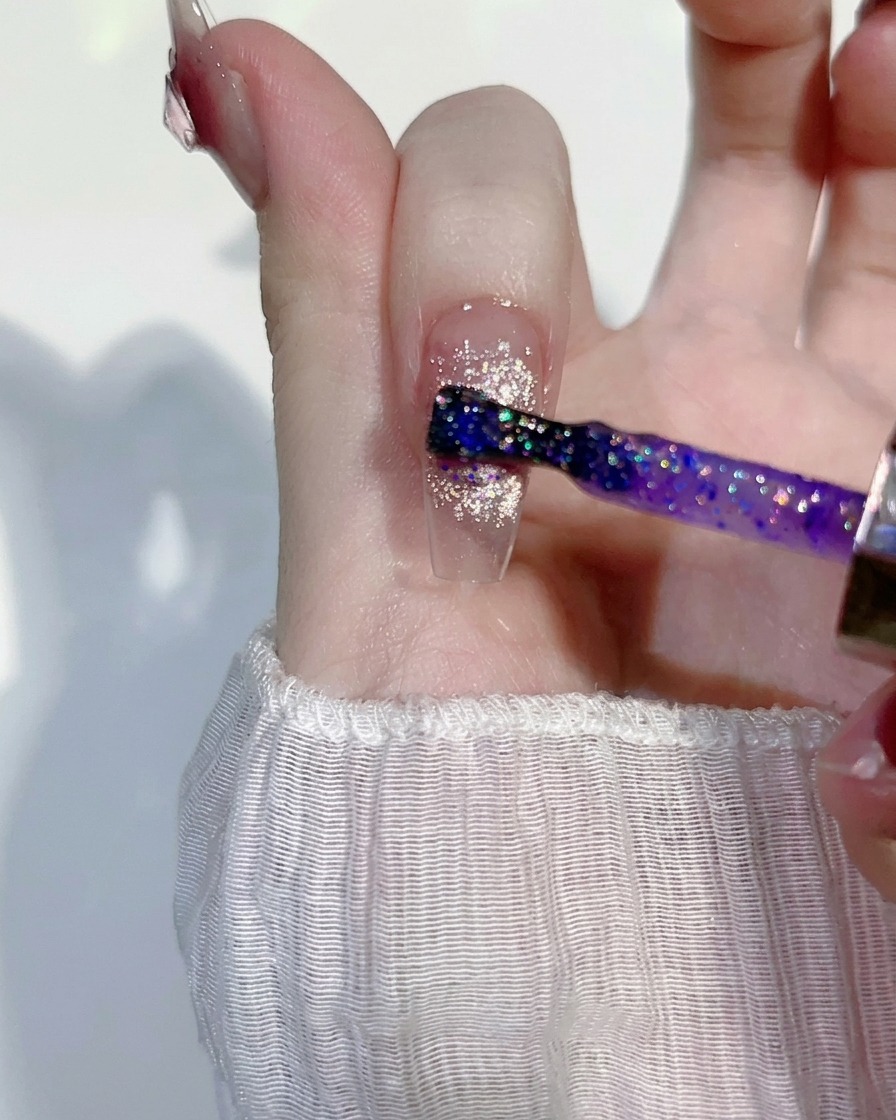
Apply a thin, sparse amount of purple-toned cat-eye gel over the existing design. This layer adds a multi-dimensional shimmer that contrasts beautifully with the pink base.
Tip: Apply this layer very lightly so you dont completely cover the underlying cat-eye effect. - 8Apply clear gel base for crystal

Apply a small amount of clear gel to the area where you intend to place the crystal. This acts as a sticky base to hold the embellishment in place before final curing. Ensure the layer is smooth to prevent bumps under the crystal.
Tip: Do not over-apply the clear gel, as too much product can cause the crystal to slide around or look uneven. - 9Place crystal embellishment
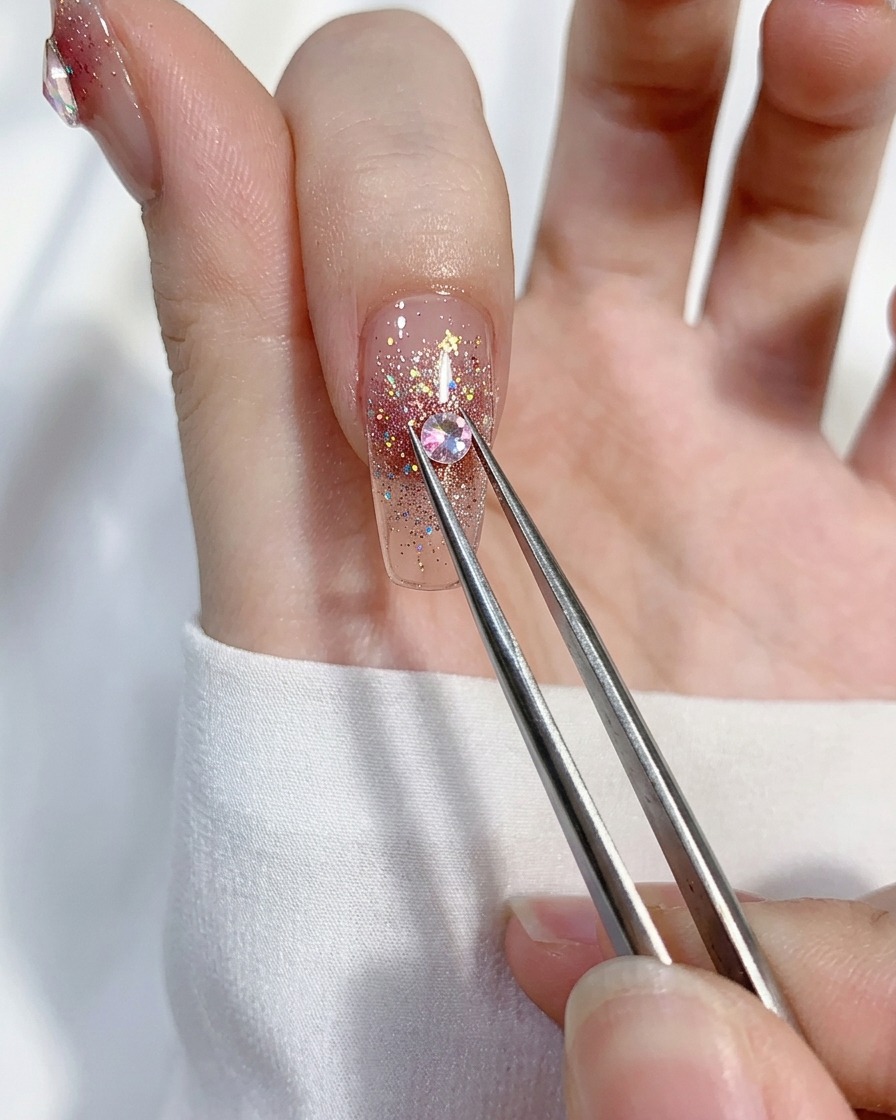
Using precision tweezers, pick up a pink heart-shaped crystal and place it into the clear gel base you applied earlier. Gently press it down to ensure it is seated firmly on the nail surface.
Tip: Position the gem centrally or slightly off-center depending on your desired aesthetic. - 10Secure the crystal
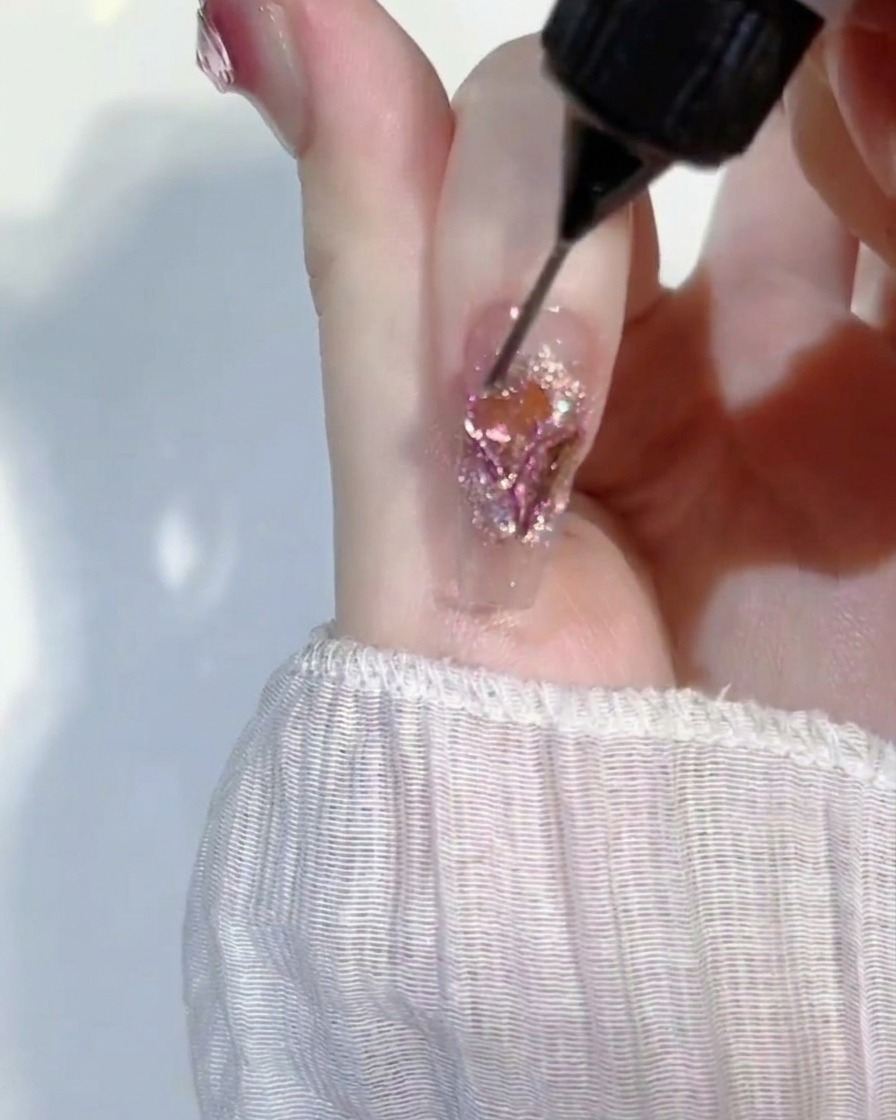
Apply a small amount of clear gel around the base of the crystal embellishment to secure it firmly to the nail. This step is essential to fill in any gaps and ensure the edges are smooth, preventing the gem from snagging on clothing or hair.
Tip: Be careful not to cover the surface of the crystal with gel, as this can dull its sparkle. - 11Apply top coat
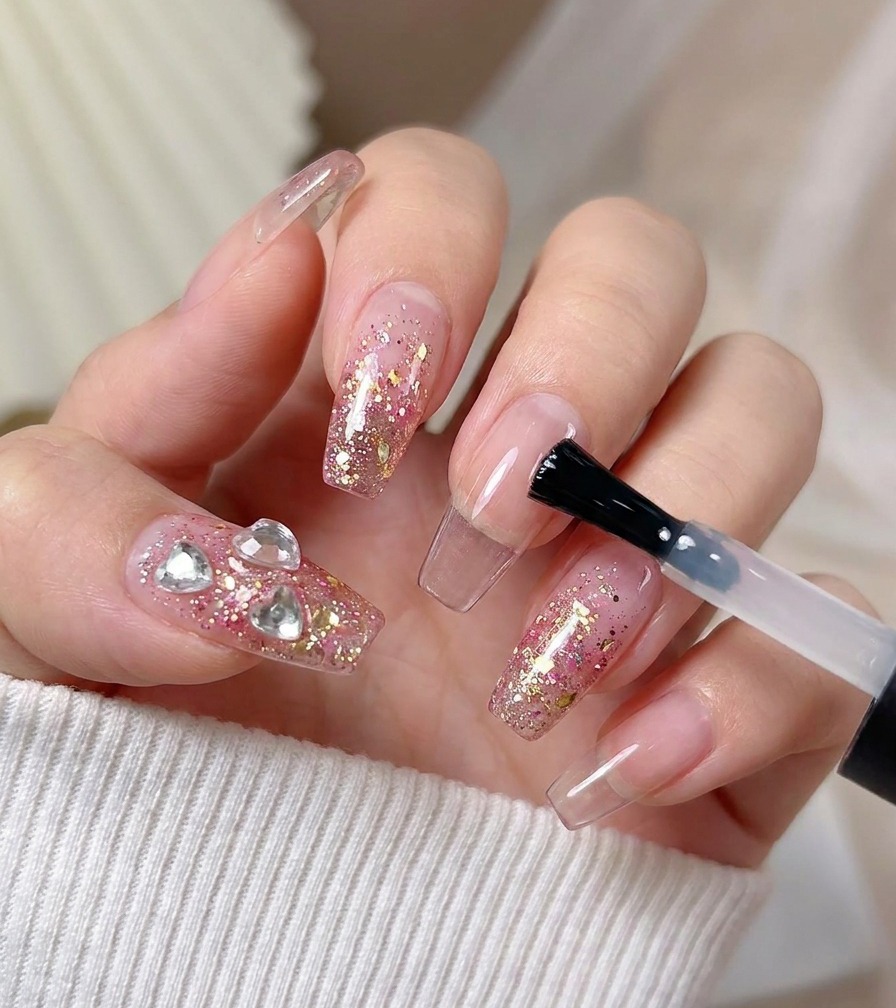
Apply a final layer of clear top coat over the entire nail to seal the design, lock in the embellishments, and provide a durable, high-gloss finish. Ensure you cap the free edge to protect the manicure from premature chipping.
Tip: Ensure the top coat is applied smoothly to avoid creating bubbles over the textured art.