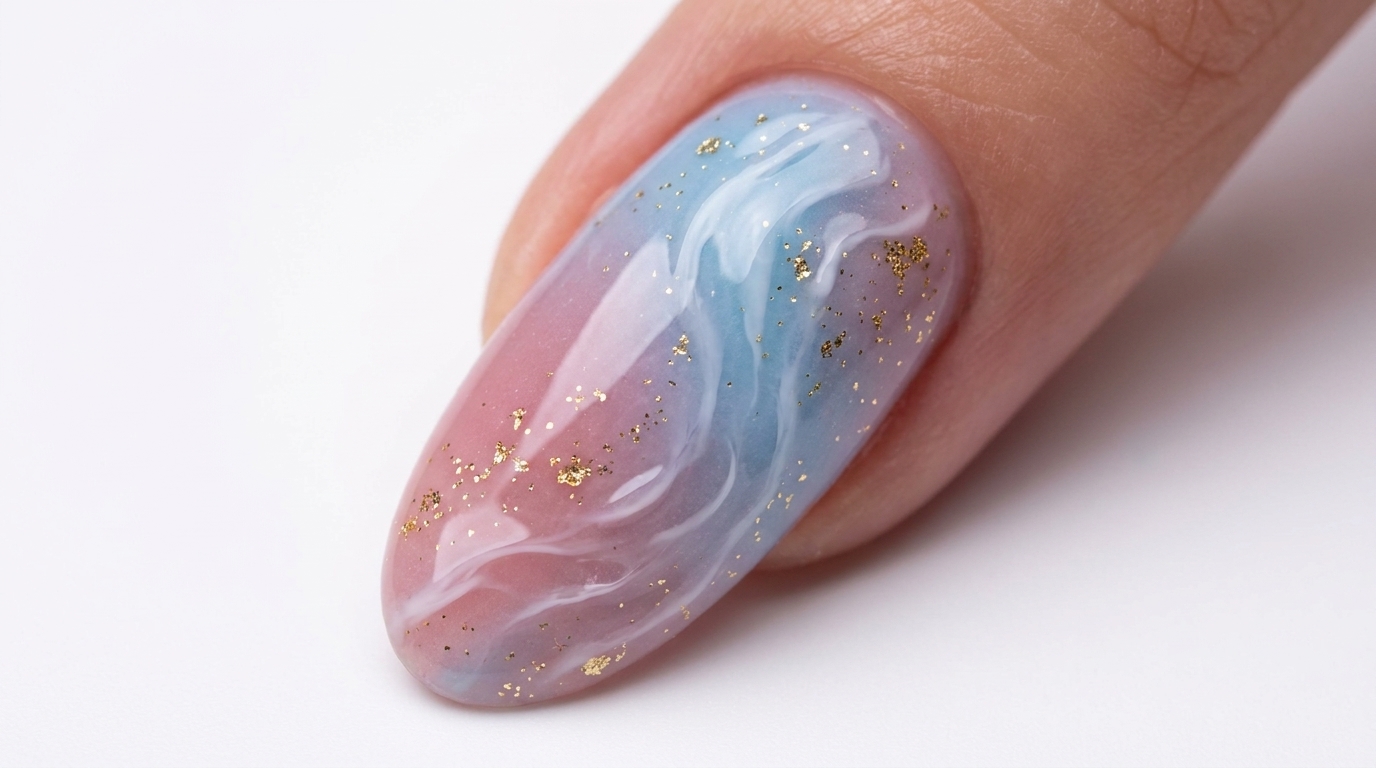
Dreamy Pink
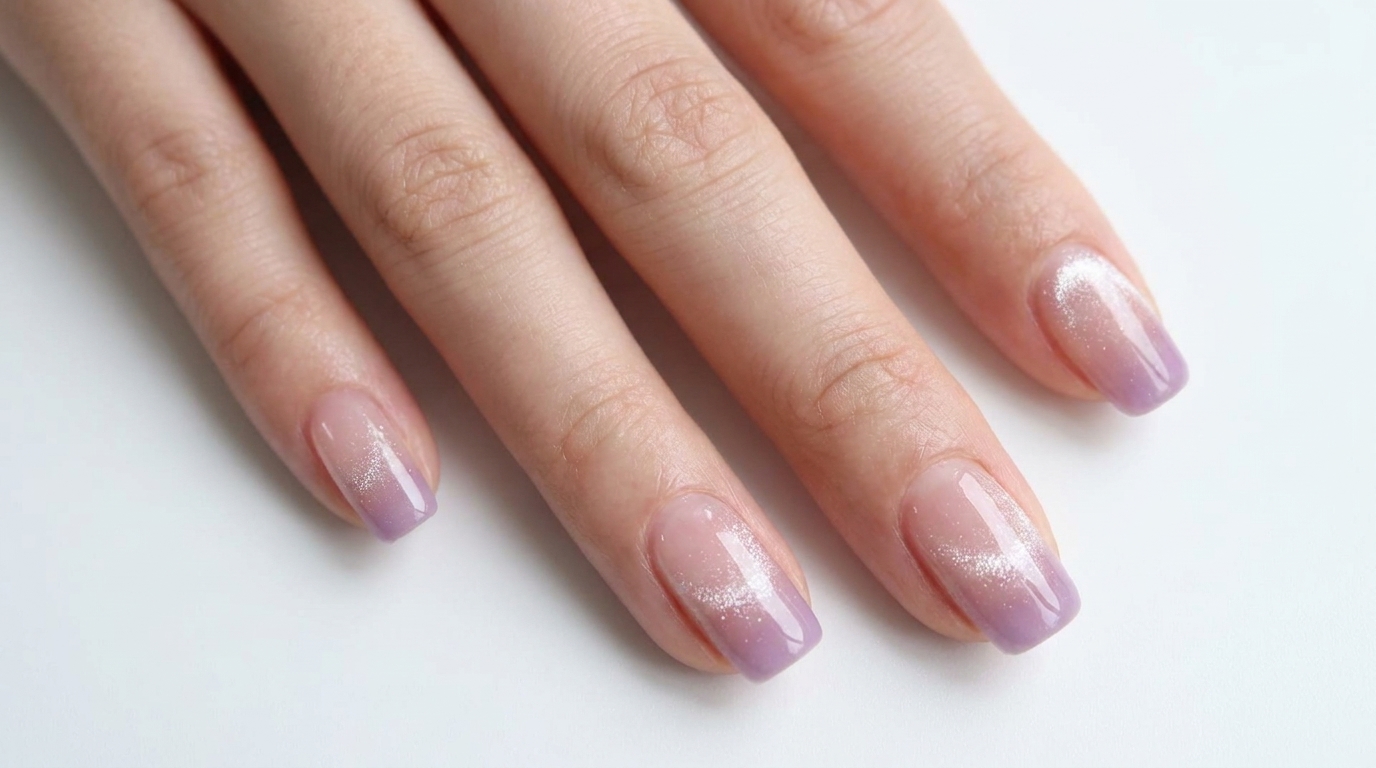
Blue Water Ripple Nails — Step-by-Step Tutorial
Create a mesmerizing, fairy-like manicure with this pink and blue gradient design. Follow our easy steps to master the blooming gel water ripple effect.
This dreamy Luoling Water紗 nail design blends soft pink and blue hues to create an ethereal, cloud-like gradient. By incorporating blooming gel and delicate gold glitter, you can achieve a sophisticated water ripple texture that looks complex but is surprisingly simple to create at home. It is the perfect choice for anyone looking to add a touch of magic and artistry to their everyday manicure.
Steps
- 1Apply milky white base
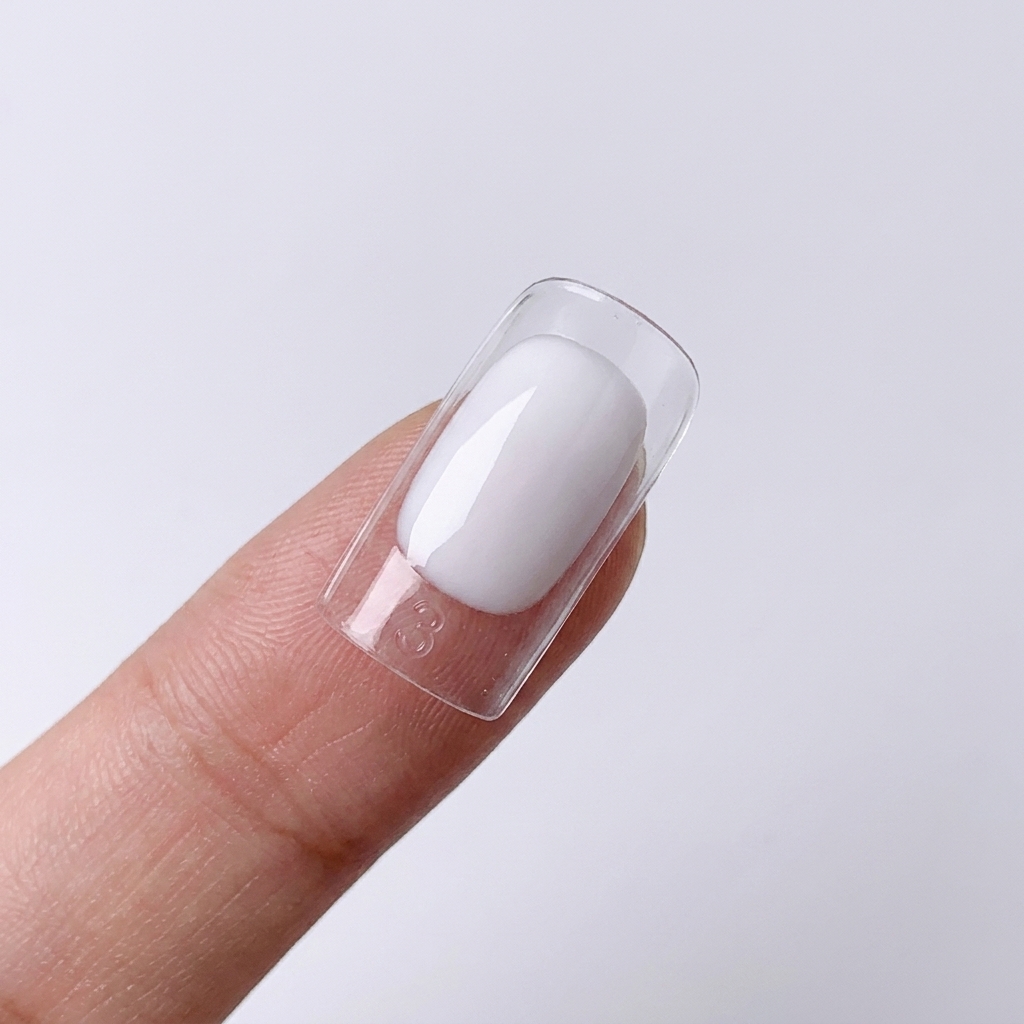
Apply an even layer of milky white gel base coat over the entire surface of the nail. This creates the essential canvas for the dreamy, translucent effect of the Luoling Water紗 design. Ensure the edges are neat before curing under your LED or UV lamp.
Tip: Keep the layer thin to ensure a smooth, semi-sheer finish that allows the later gradients to blend beautifully. - 2Add nude pink gradient
Using a brush, apply nude pink gel polish specifically to the corners of the nail. Create a soft gradient effect by blending the color toward the center. Repeat this process with a second layer to intensify the depth and richness of the pink tone.
Tip: Use light, feathered strokes to blend the edges of the pink polish, ensuring a seamless transition into the white base. - 3Incorporate blue accents
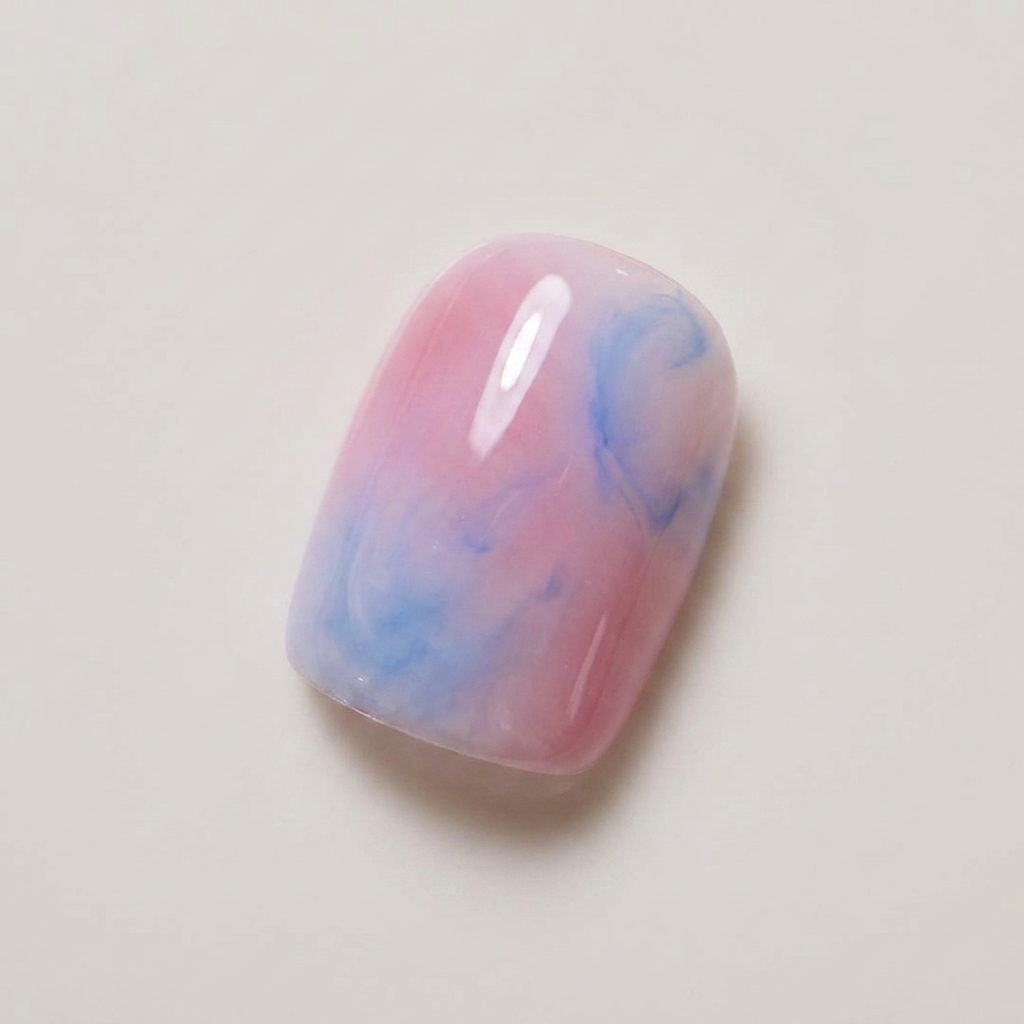
Apply blue gel polish to the remaining empty spaces on the nail. Carefully blend the blue outward to merge with the existing pink gradient, creating a soft, ethereal cloud-like transition. The harmonious combination of these pink and blue hues forms the signature base for this style.
Tip: Work quickly while the gel is still wet to achieve a soft, smoky blend between the pink and blue colors. - 4Add sparkling glitter
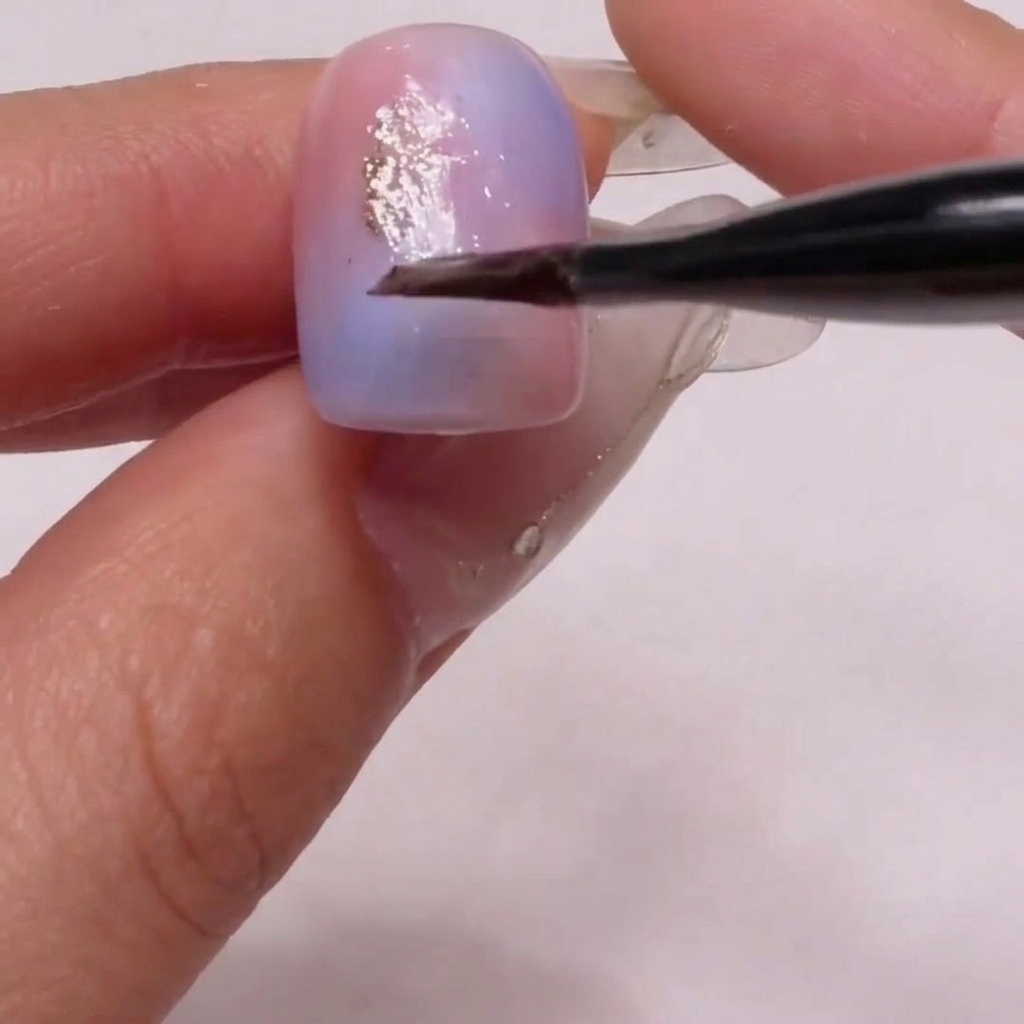
Gently apply sparkling gold glitter particles over the surface of the gradient. Focus the placement to create a dreamy, fairy-like effect that catches the light. This adds texture and a magical touch to the overall design.
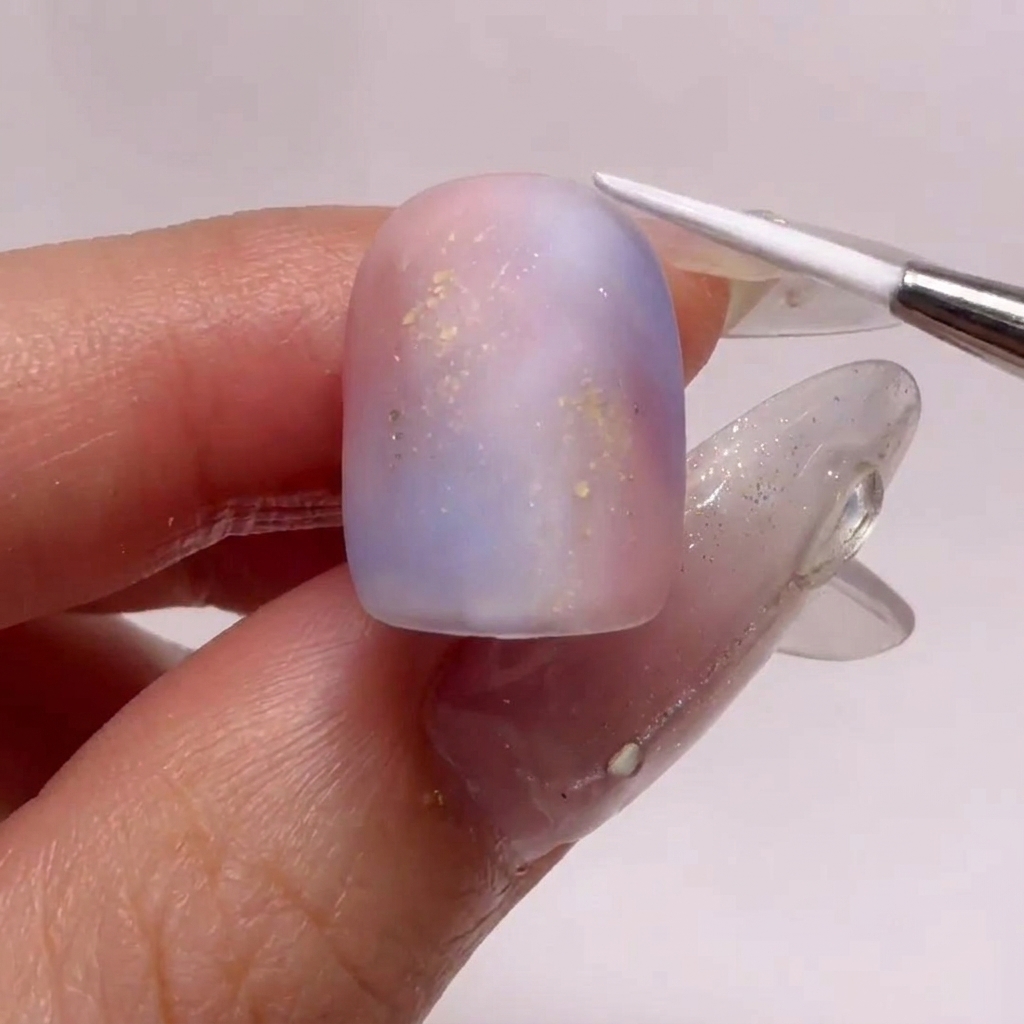
Tip: Distribute the glitter unevenly to maintain a natural, whimsical look rather than a dense, uniform coating. - 5Apply matte top coat
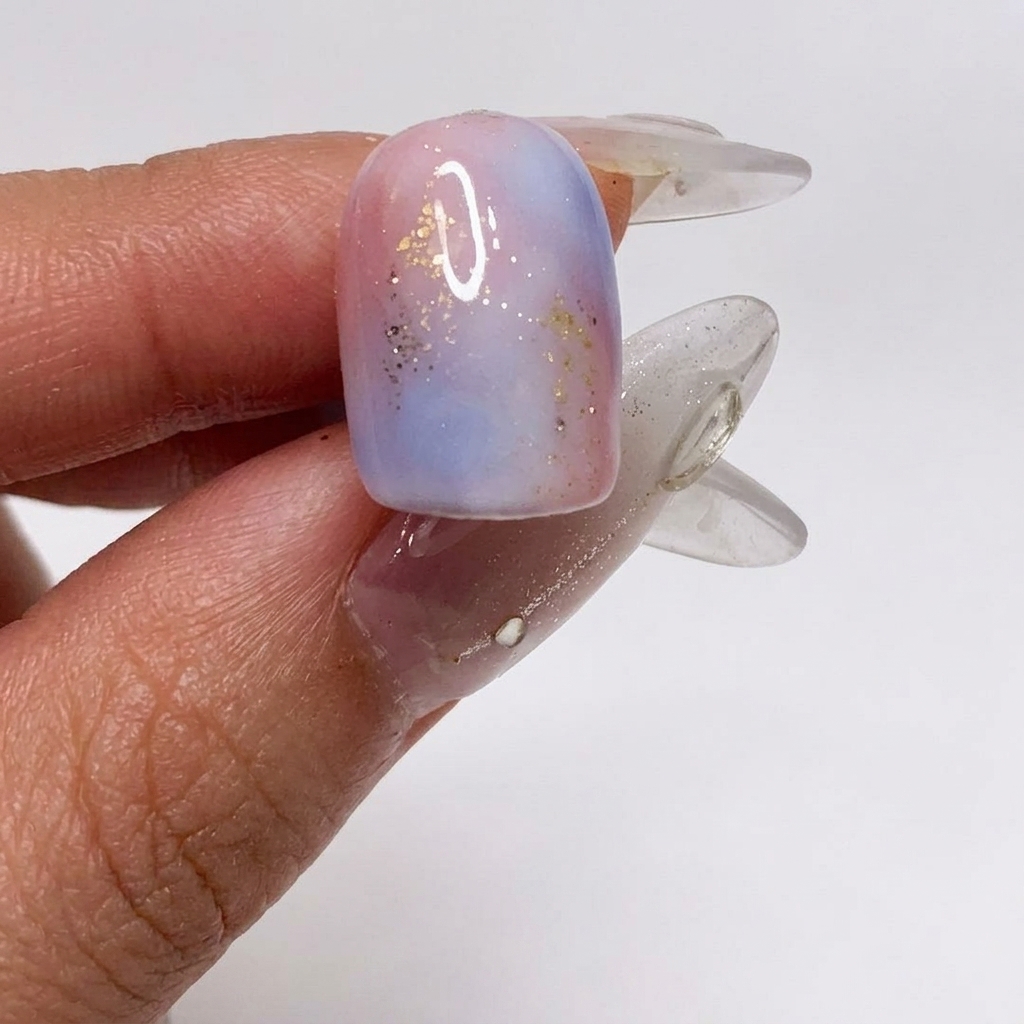
Apply a layer of matte top coat over the entire nail to seal the design. The matte finish provides a sophisticated, velvety texture that enhances the delicate colors and glitter underneath.
Tip: Ensure the matte top coat is applied evenly to prevent any glossy spots from disrupting the finish. - 6Draw ripple texture
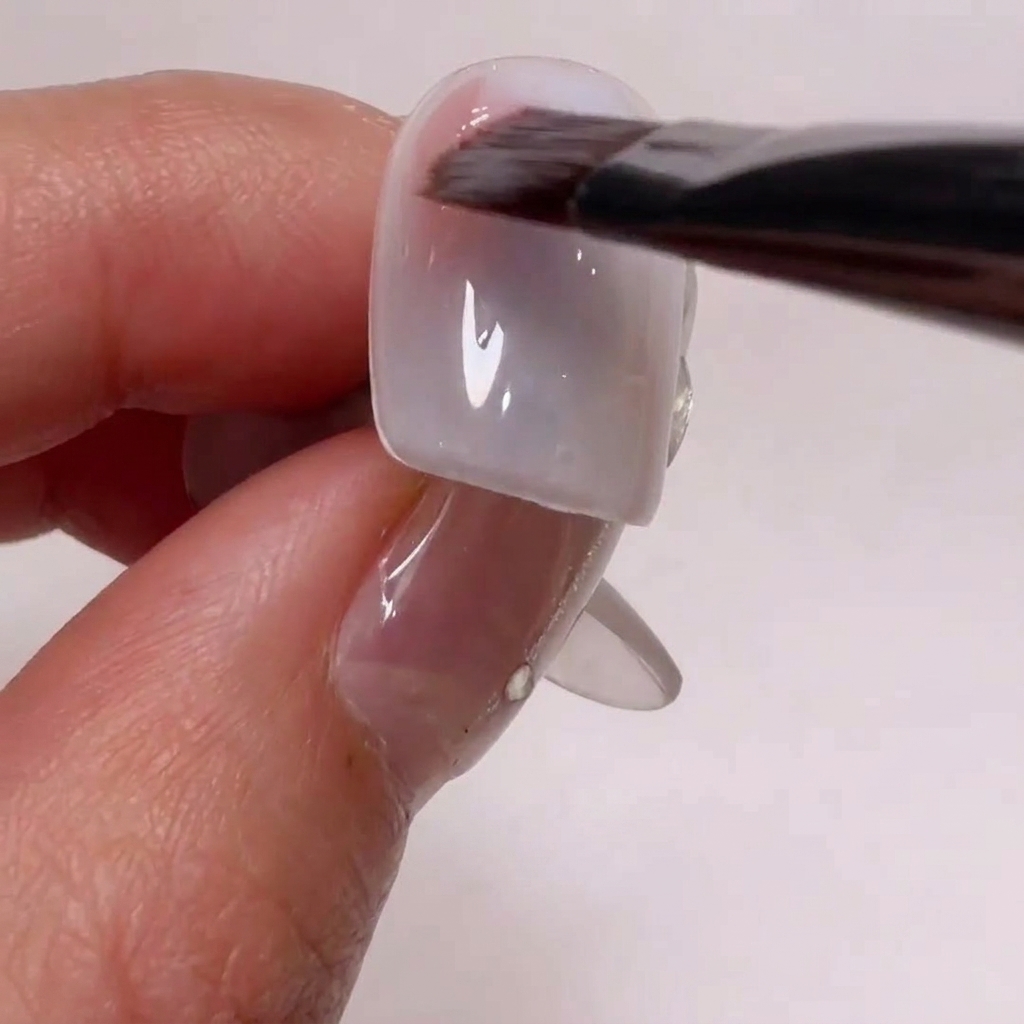
Using a fine-liner brush, apply white blooming gel to draw random, fluid ripple textures across the nail surface. The blooming gel allows the lines to organically expand and soften into a water-like appearance before you cure them under your lamp.
Tip: Be light-handed when using alcohol to ensure you only soften the edges without removing the design. - 7Soften the gel texture
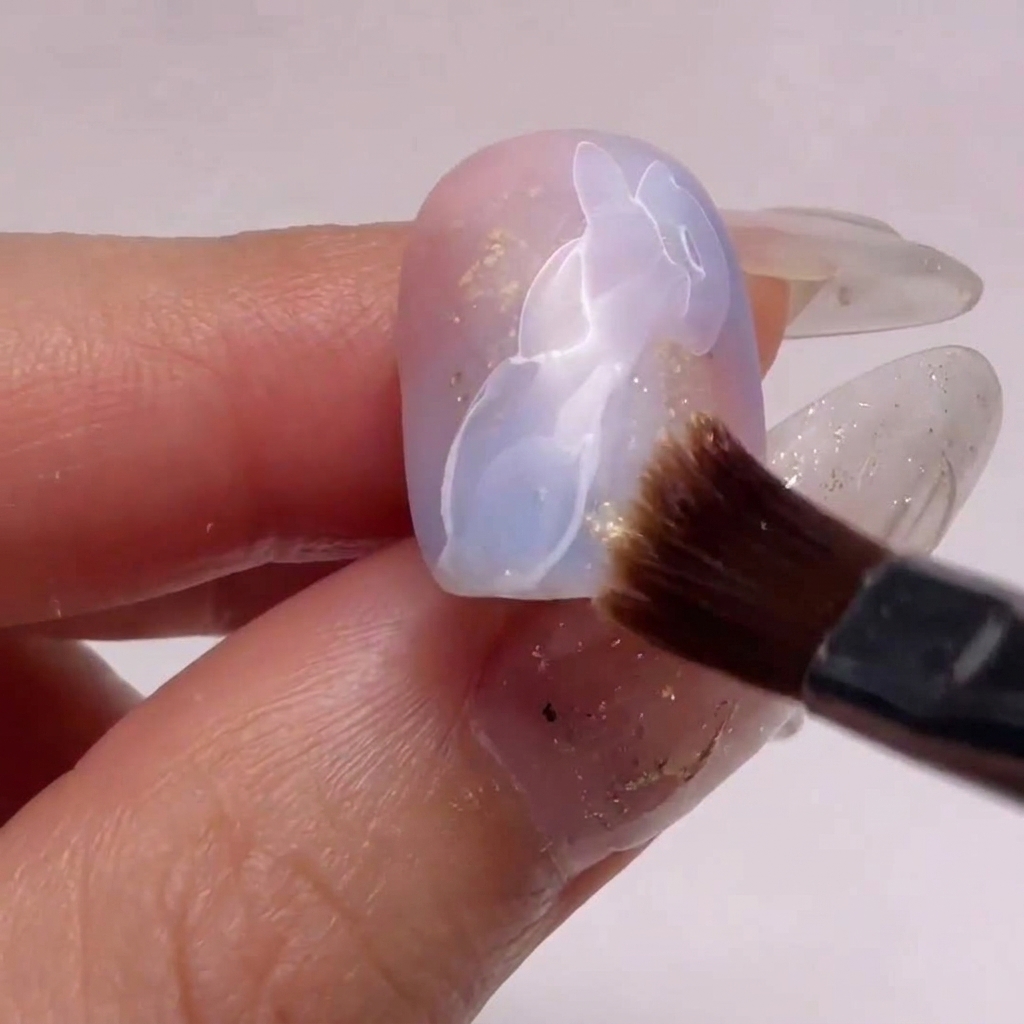
Dip a clean nail brush into a small amount of alcohol and gently tap along one side of the white blooming gel lines. This technique softly diffuses the edge to create a dreamy, cloud-like gradient while keeping the opposite side crisp.
Tip: Ensure your brush is only slightly damp. Using too much alcohol can cause the gel design to run or completely lose its shape.