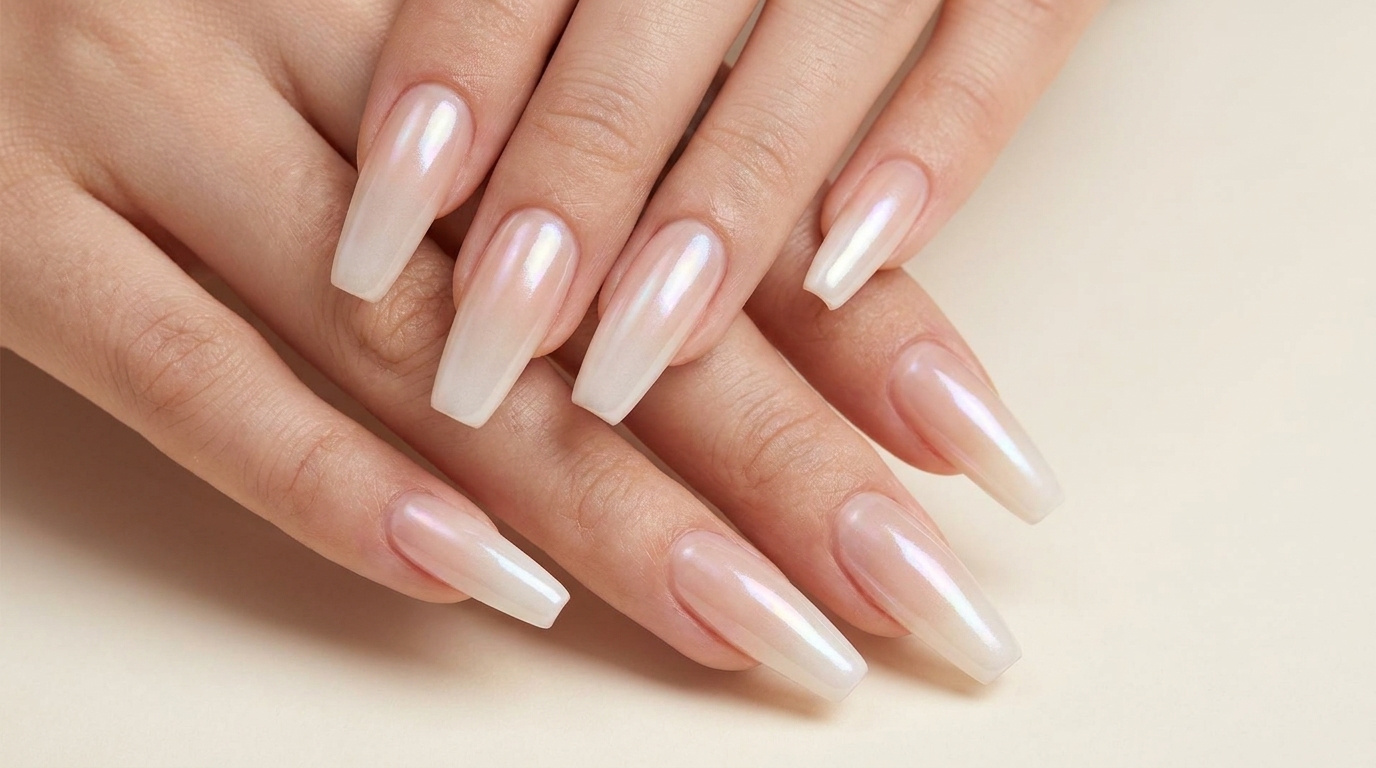
Milky White Ombre Chrome Nails — Sophisticated Step-by-Step Tutorial
Elevate your manicure with this chic milky white ombre and pearlescent chrome finish. Follow our simple tutorial for a pure, alluring, and professional look.
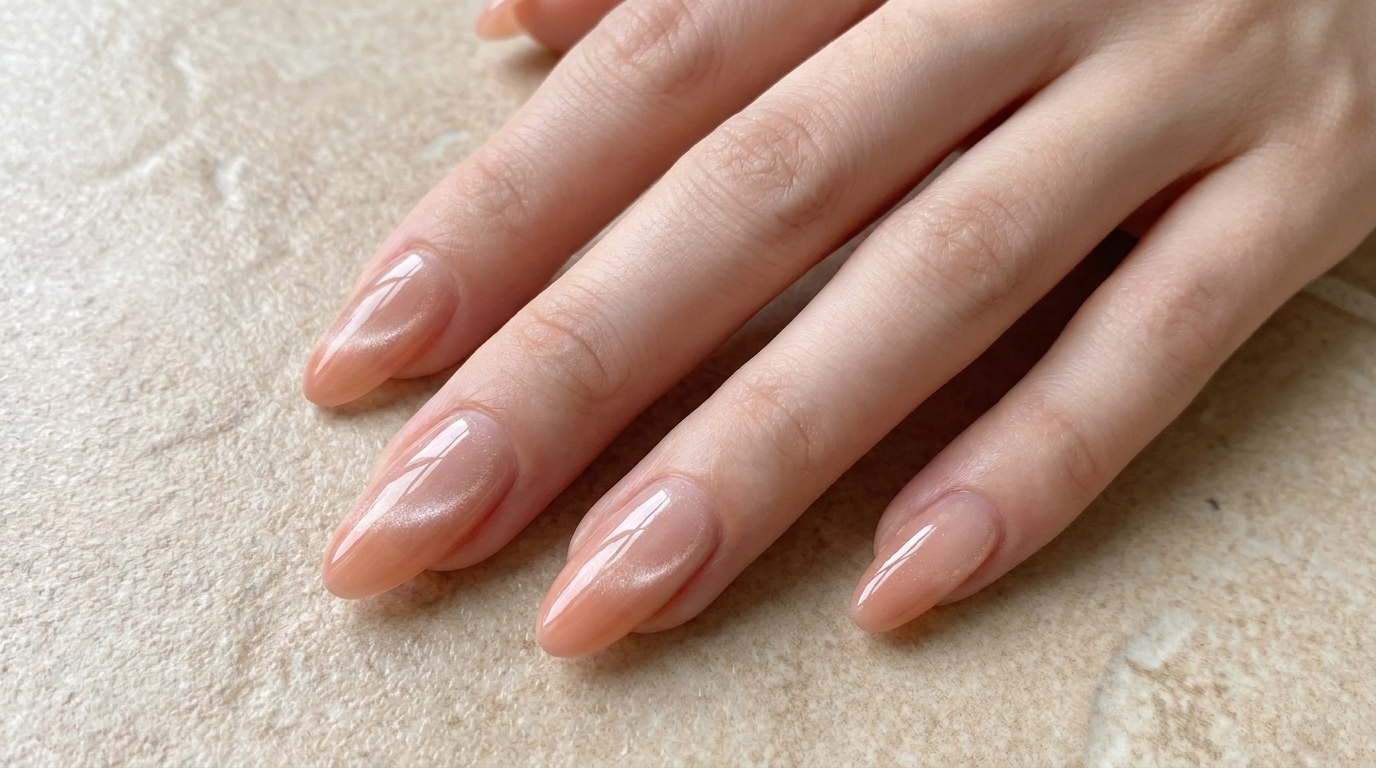
The milky white ombre trend continues to dominate because of its clean, elegant, and versatile aesthetic. By adding a soft chrome powder finish, you transform a classic gradient into a modern, pearlescent masterpiece that looks incredibly hydrated and slender. This tutorial walks you through achieving this sophisticated look, from meticulous nail plate preparation to the final shimmering application.
Steps
- 1Prepare the nail plate
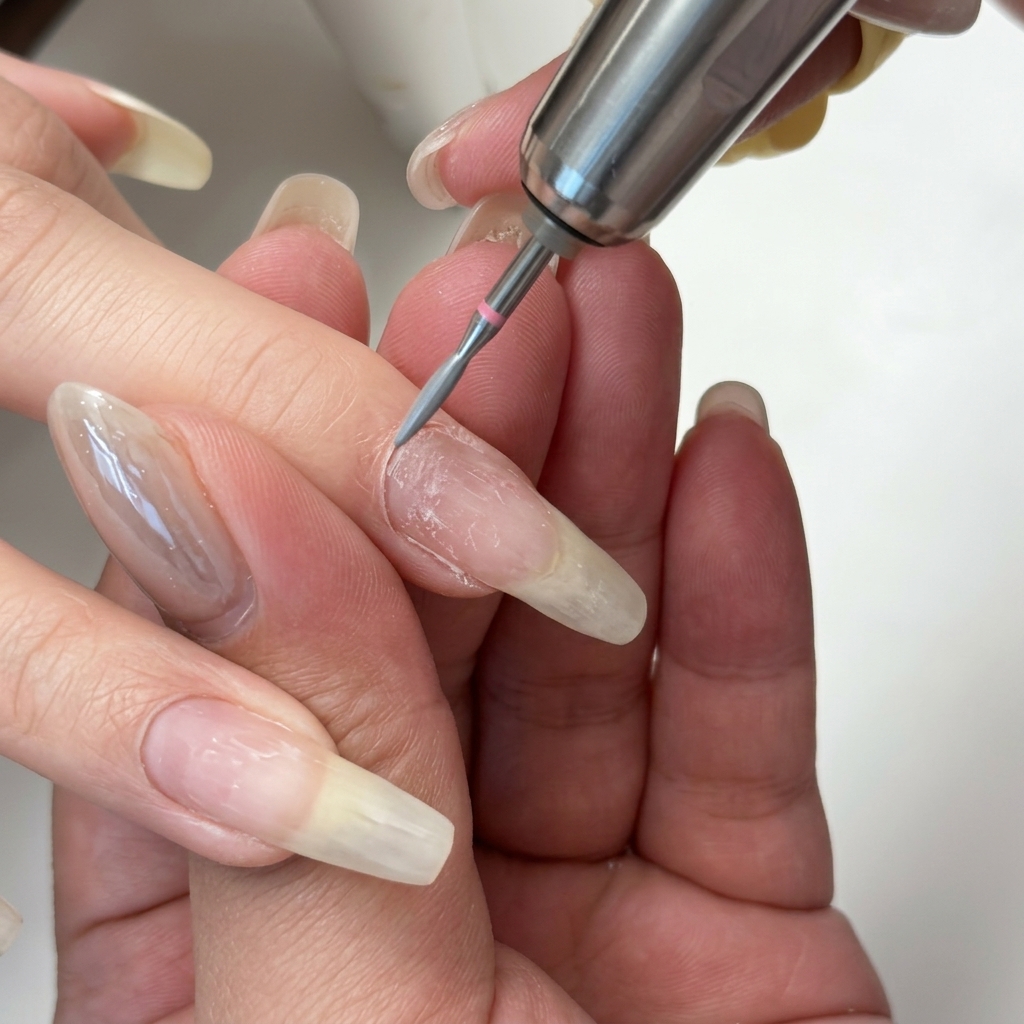
Use an e-file with a fine-grit bit to gently remove excess cuticle skin and prepare the nail plate for product application. Maintain a light touch, moving in one direction around the cuticle area to smooth out any rough skin and create a clean surface for adhesion.
Tip: Keep the handpiece at a slight angle to the nail surface to prevent rings of fire or accidental cutting. - 2Trim dead skin
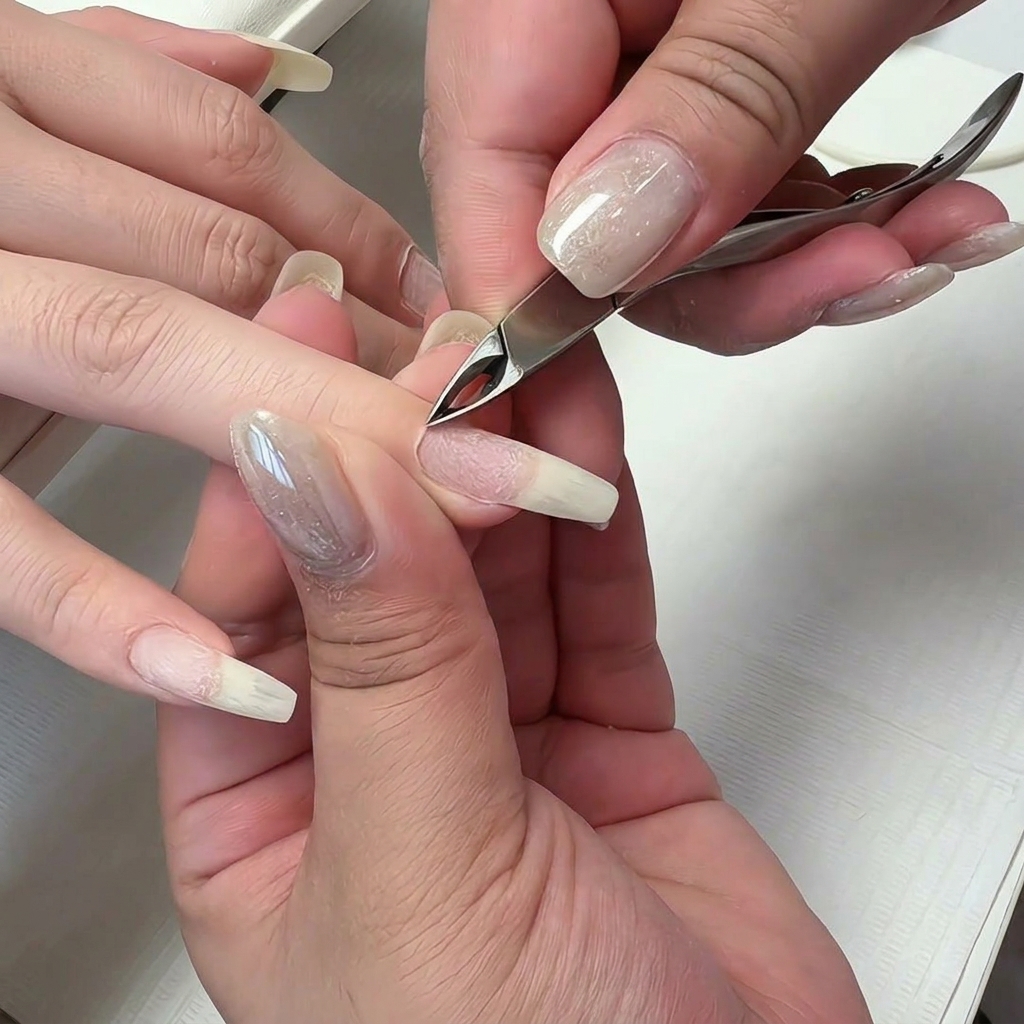
Carefully use cuticle nippers to trim away any lifted dead skin around the cuticle area that was loosened by the e-file. Ensure you only cut the loose, non-living skin to avoid damaging the healthy eponychium.
Tip: Place the nippers flat against the skin to avoid accidental nicks and follow the natural curve of the cuticle. - 3Refine the cuticle area
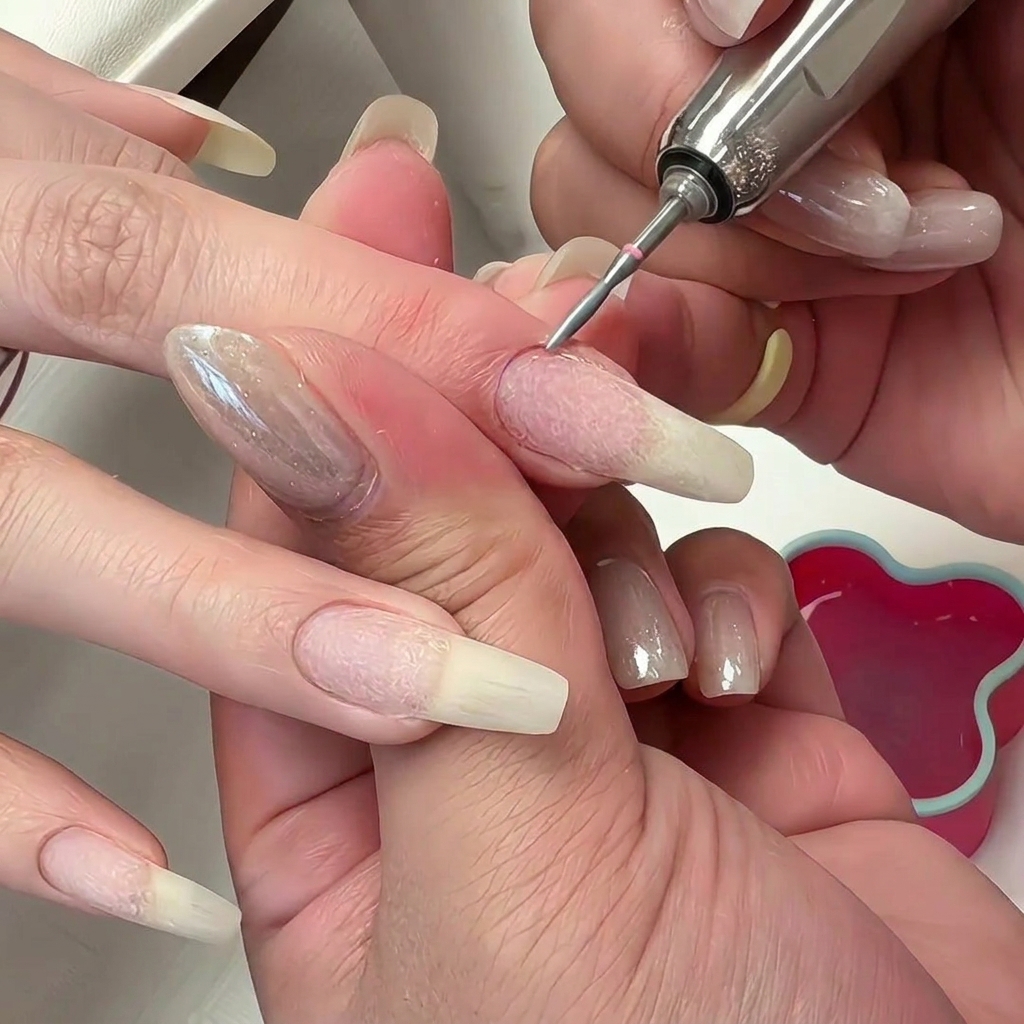
Use a small, flame-shaped e-file bit to gently clean up any remaining dry skin or debris around the cuticle area. This final refinement ensures the skin is perfectly smooth and the nail plate is pristine for the upcoming product application.
Tip: Use a low speed on the e-file for better control and to avoid heating up the natural nail. - 4Build nail structure
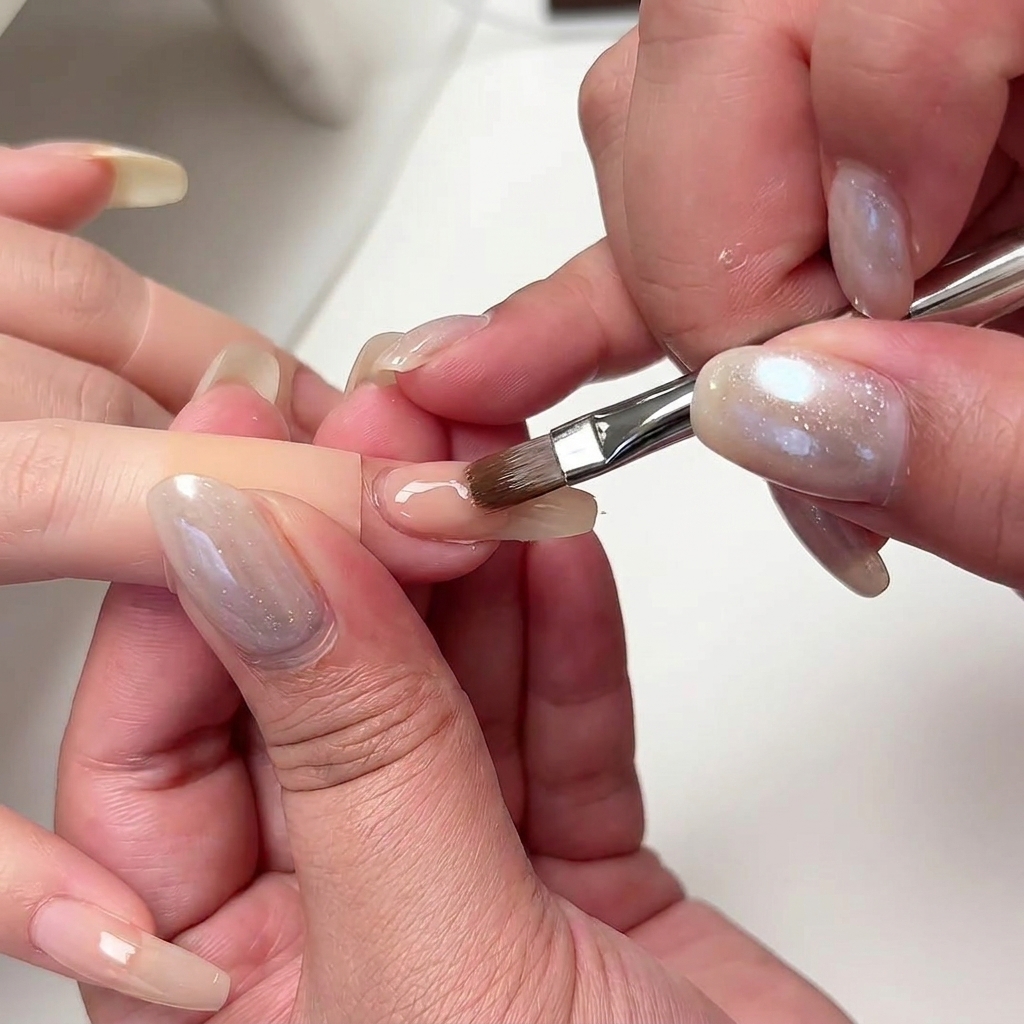
Apply a coat of nude-colored builder gel to the nail. This step provides structural support and strength, creating a hydrated, healthy look that blends seamlessly with the natural nail bed.
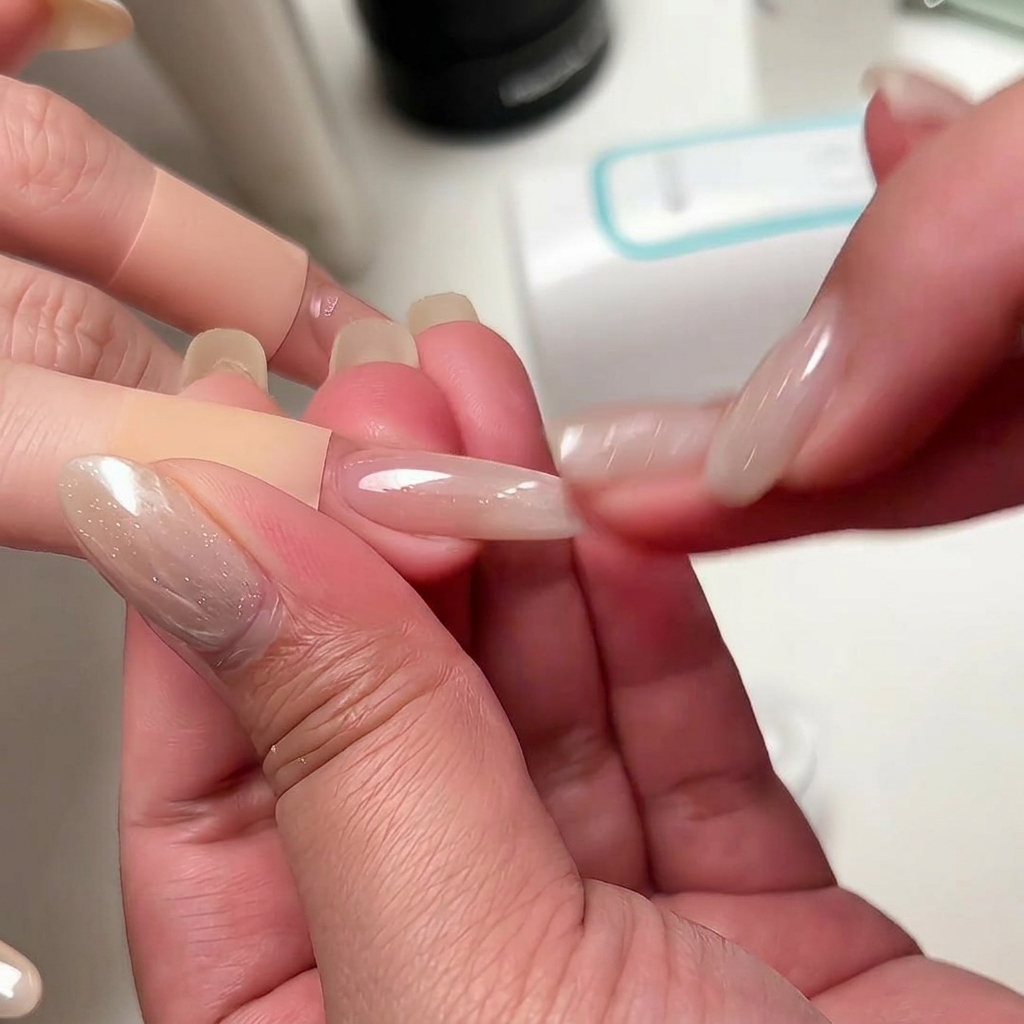
Tip: Apply the gel in thin layers, building up the apex to provide the necessary strength for the long nail length. - 5Buff and refine
After curing the builder gel, use a fine-grit buffer to smooth the surface of the nail. This refinement step ensures the nail shape is slender and even before you move on to the ombre color application.
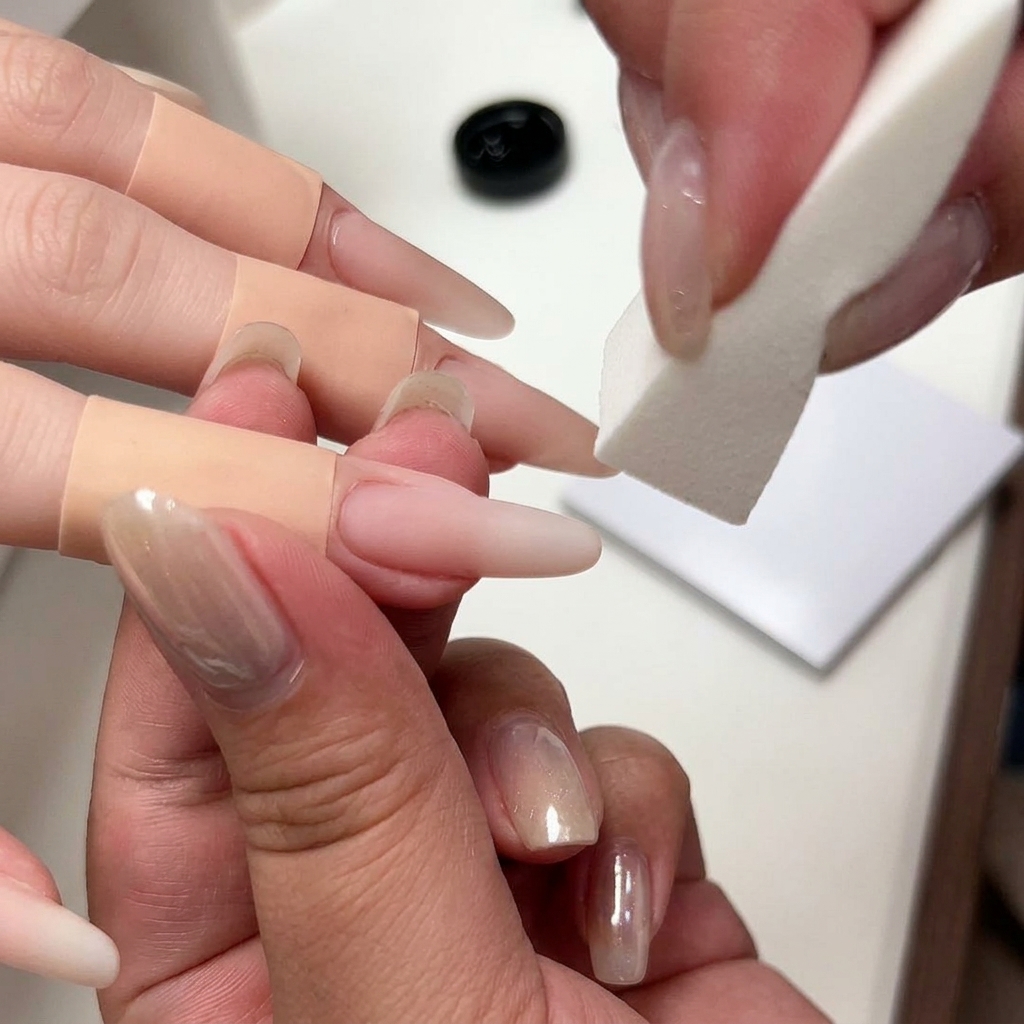
Tip: Gently buff the surface until it is smooth to the touch, which helps the ombre color apply more evenly. - 6Create white ombre
Apply a thin layer of white gel polish onto a cosmetic sponge and lightly dab it onto the tip of the nail. Gently blend the white gel toward the center of the nail to create a soft, pure, and alluring ombre transition.
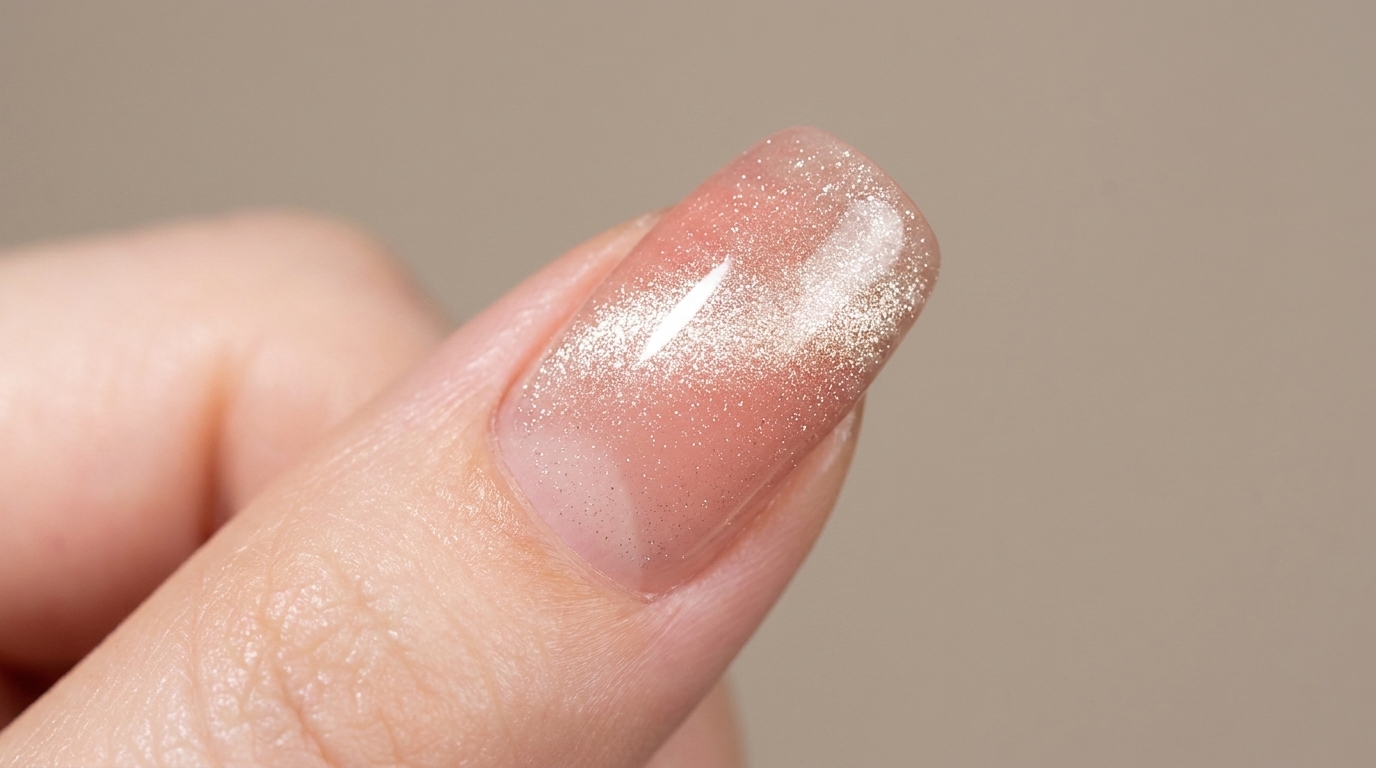
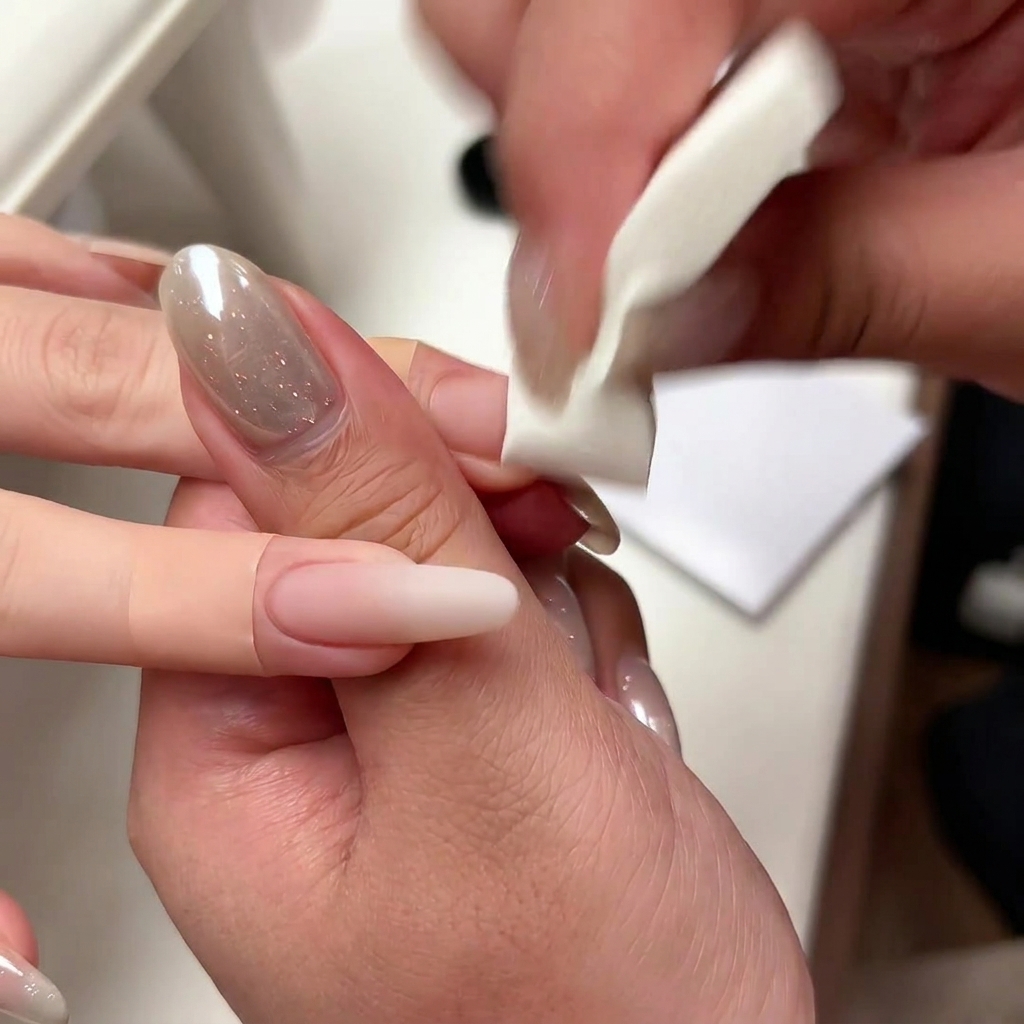
Tip: Use a light tapping motion with the sponge to avoid creating visible bubbles or streaks in the gradient. - 7Apply chrome powder
Gently rub the chrome powder over the cured nail surface using your fingertip or a sponge applicator to achieve a stunning pearlescent finish. Ensure the powder is buffed smoothly and evenly across the entire nail for maximum shine, beautifully enhancing the milky white ombre.
Tip: Apply the chrome powder while the no-wipe top coat is still slightly warm from the lamp for the best adhesion and a flawless mirror-like effect.