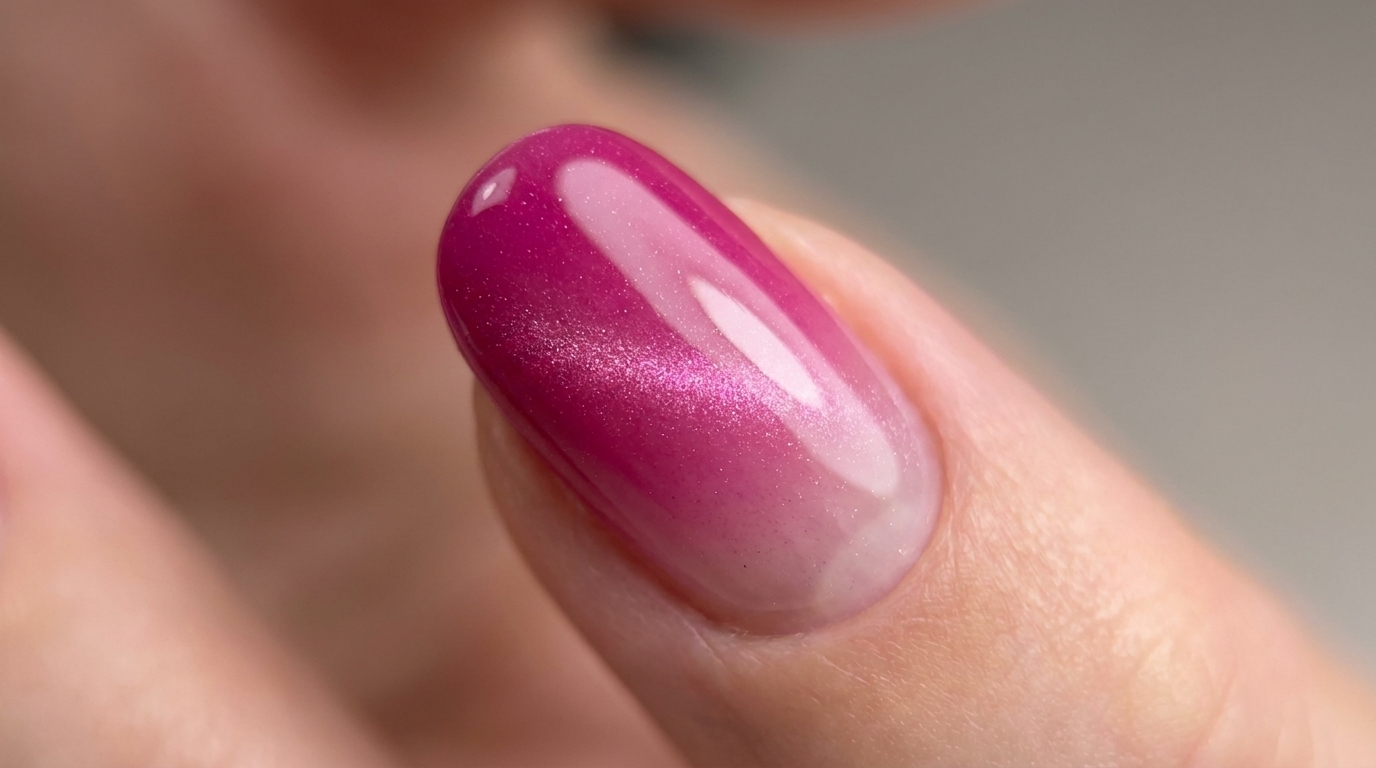
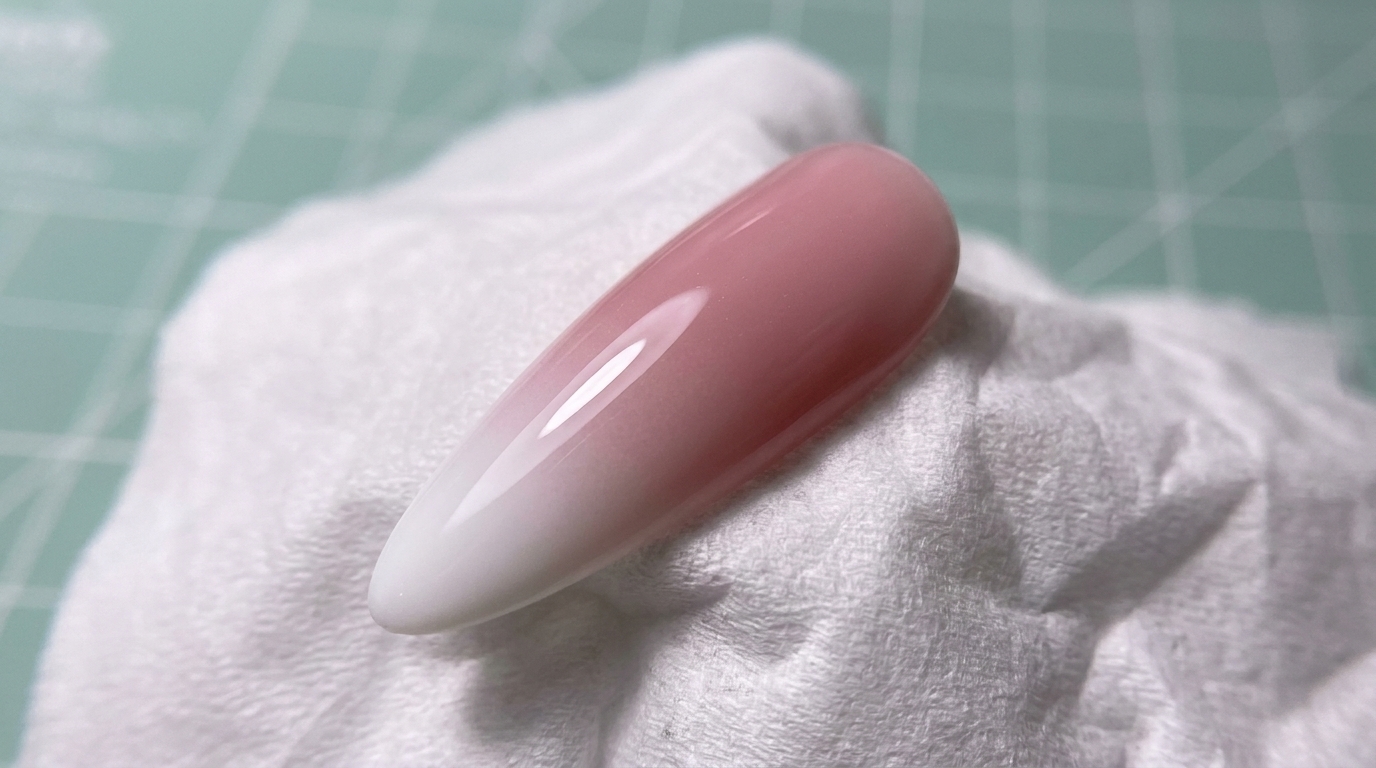
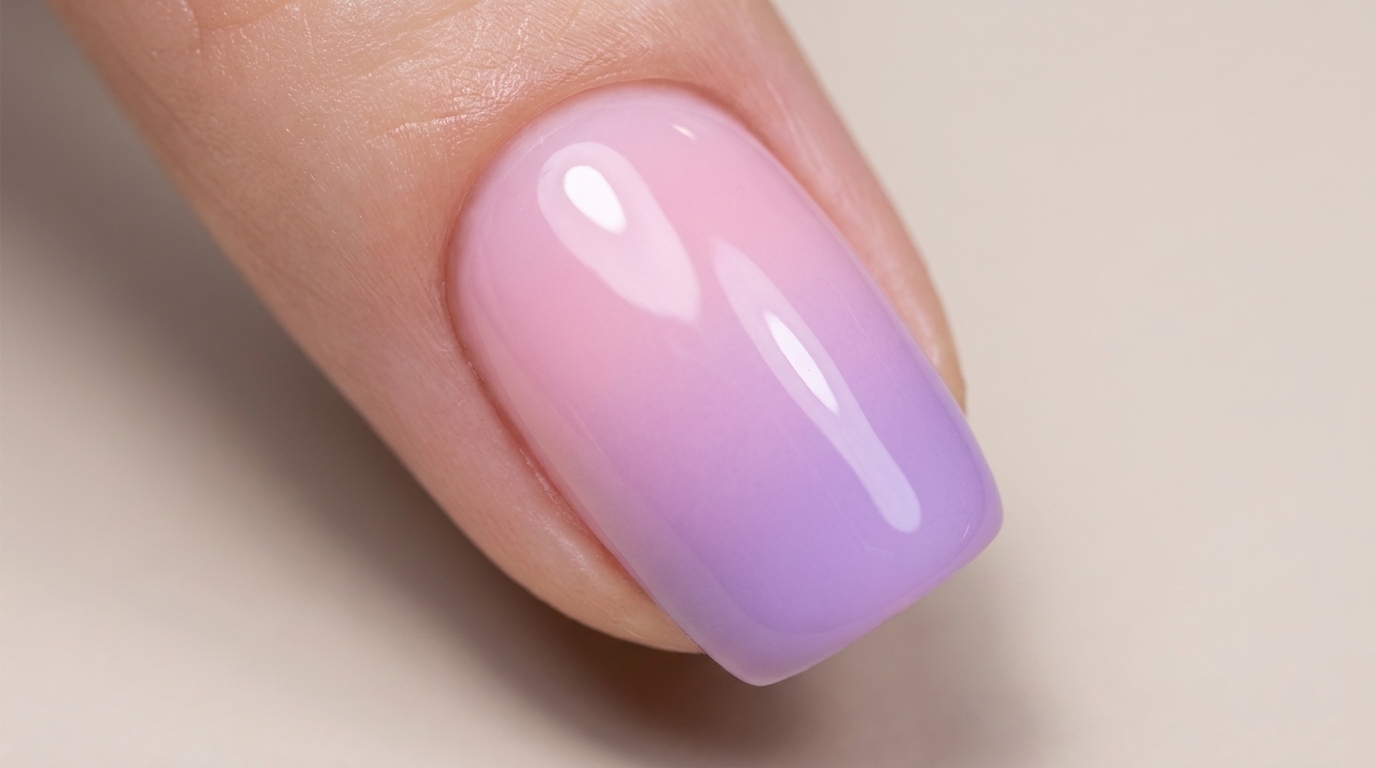
Soft Pink and Purple Gel Gradient Nails — Easy Step-by-Step Tutorial
Create a dreamy pink-to-purple gradient with ease. This simple layered gel technique ensures a seamless, professional-looking fade every time.
Gradient nails offer a sophisticated look that transitions beautifully from day to night. By layering thin coats of color and focusing your blending near the tip, you can achieve this soft, airbrushed effect right at home. This technique relies on patience and light pressure to create a smooth, streak-free transition.
Steps
- 1Apply the first layer of color
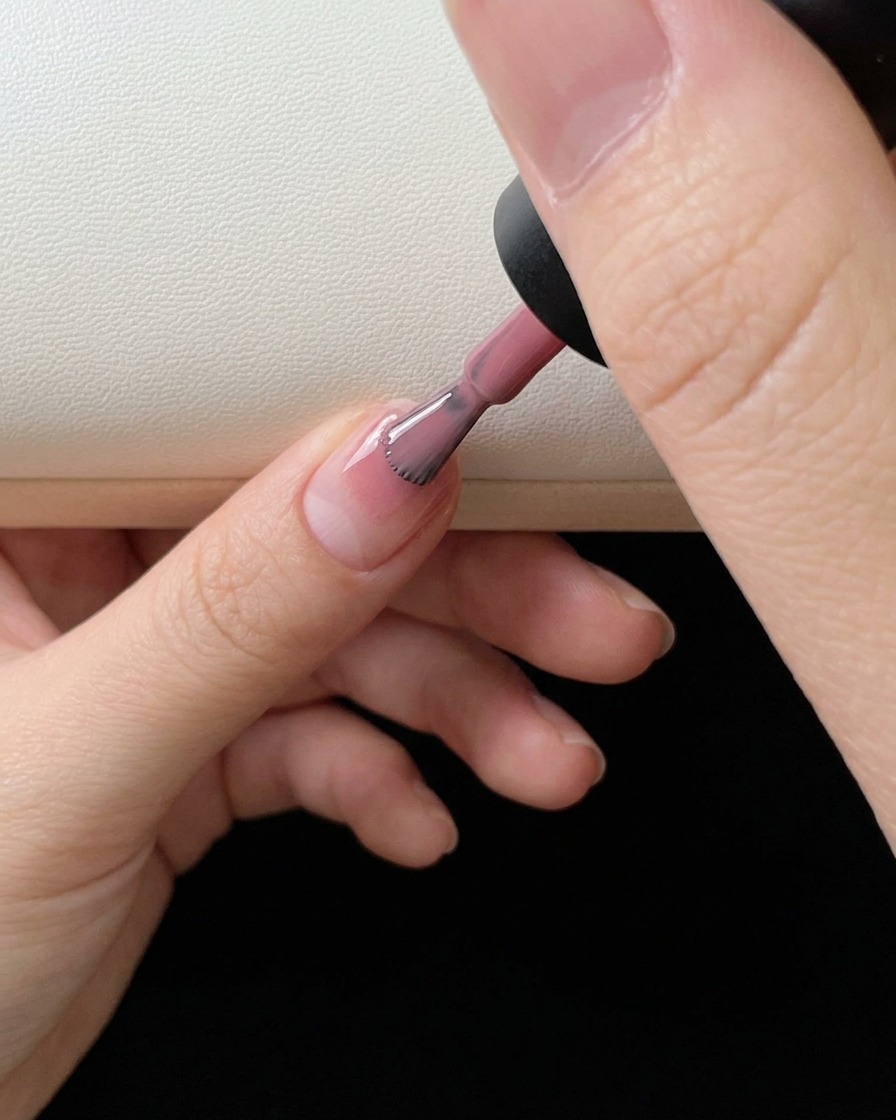
Start by applying a thin layer of color gel directly to the tip of the nail. Using your brush, gently pull and blend the color downwards toward the base of the nail to begin creating a seamless, soft gradient effect. Wait for this first coat to fully dry or cure it before moving on.
Tip: Keeping the polish layer extremely thin at this stage makes blending much easier and prevents a bulky tip. - 2Build the gradient with a second layer
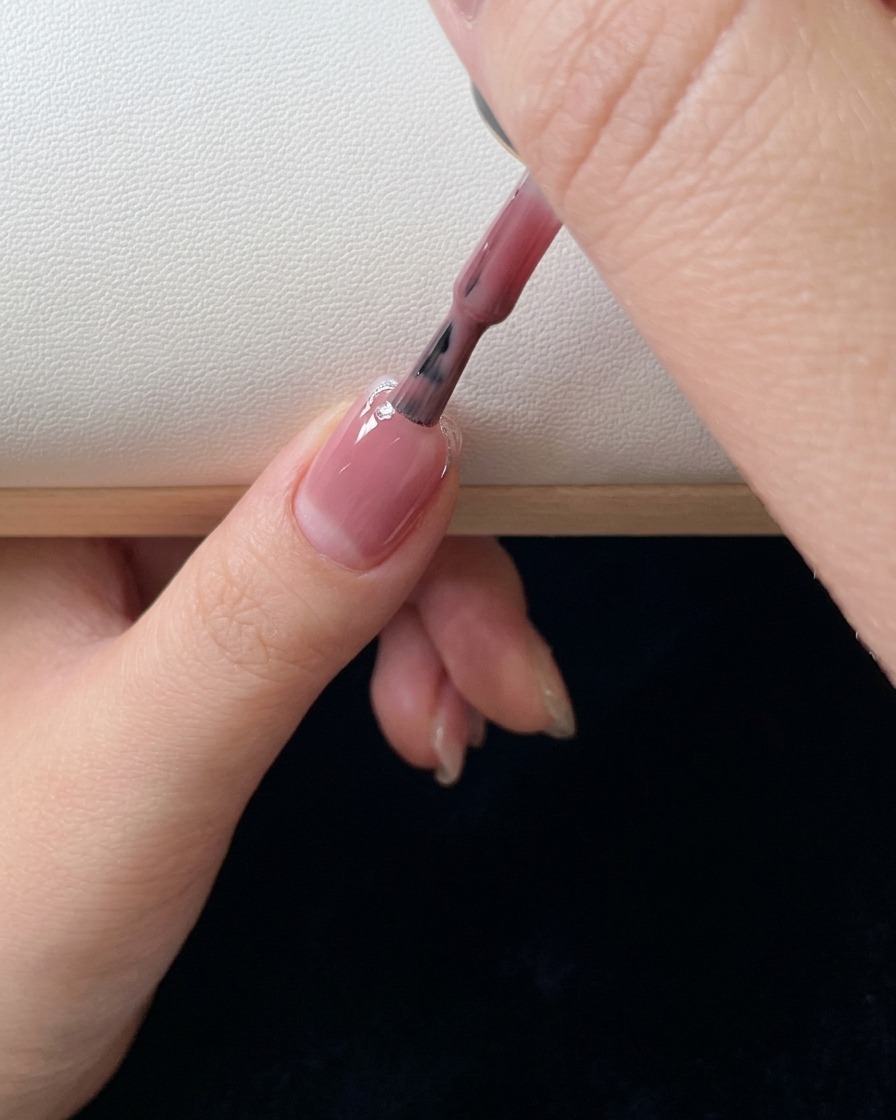
Once the first layer is dry, apply a second coat of your color gel. Focus the bulk of the color near the tip again, then use light, feathery strokes to blend it downwards over the previous layer. This builds opacity and deepens the gradient transition.
Tip: Use very light pressure on the brush as you feather the polish downward so you dont create harsh lines. - 3Perfect the look with a third layer

After the second coat has dried, layer on a third and final coat of color gel. Blend it smoothly just like the previous steps to ensure even, smooth coverage across the nail. This final color application refines the gradient fade for a flawless finish.
Tip: Building opacity gradually with three thin coats will last longer and look smoother than applying one or two thick coats.