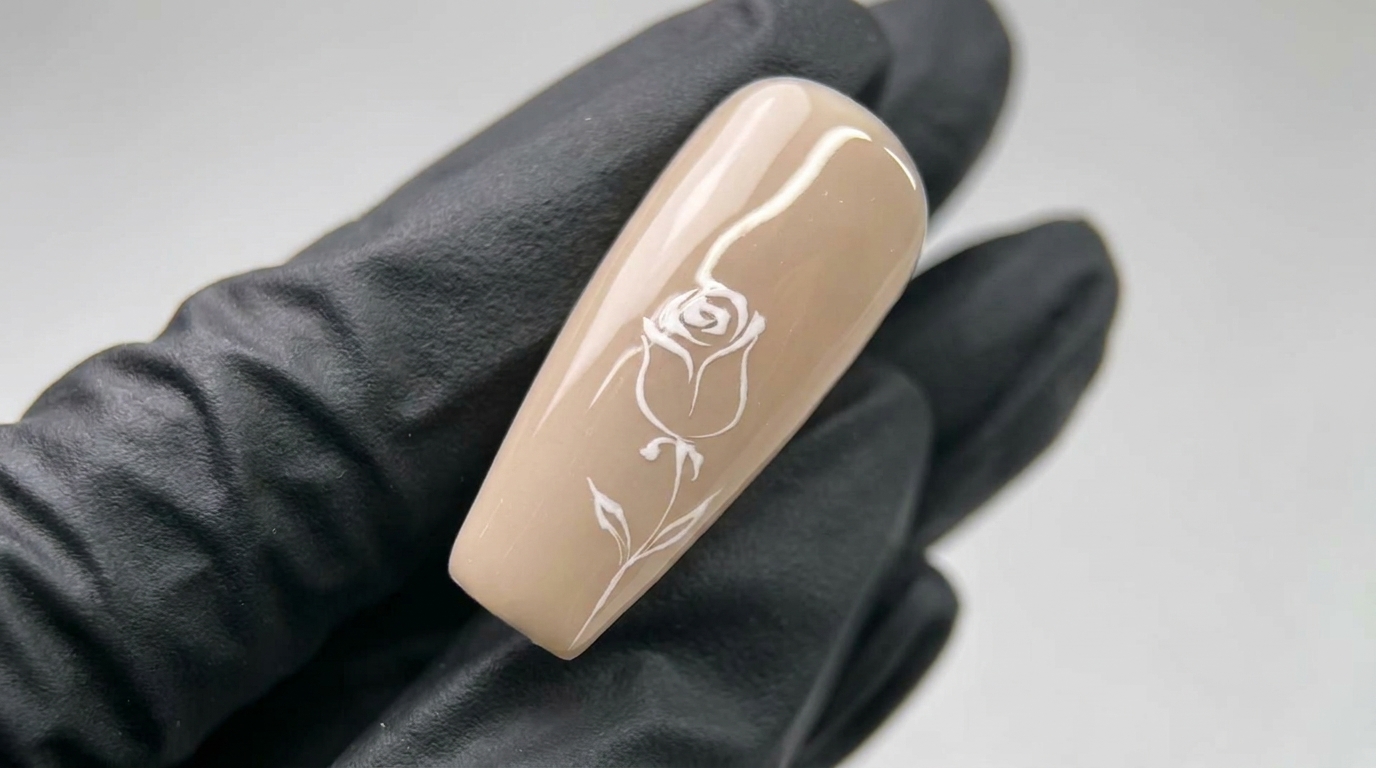
3D Chrome Rose Nail Art — Elegant Metallic Tutorial
Elevate your manicure with this stunning 3D chrome rose design. Learn how to combine sculpting gel and metallic powder for a sophisticated, high-shine finish.
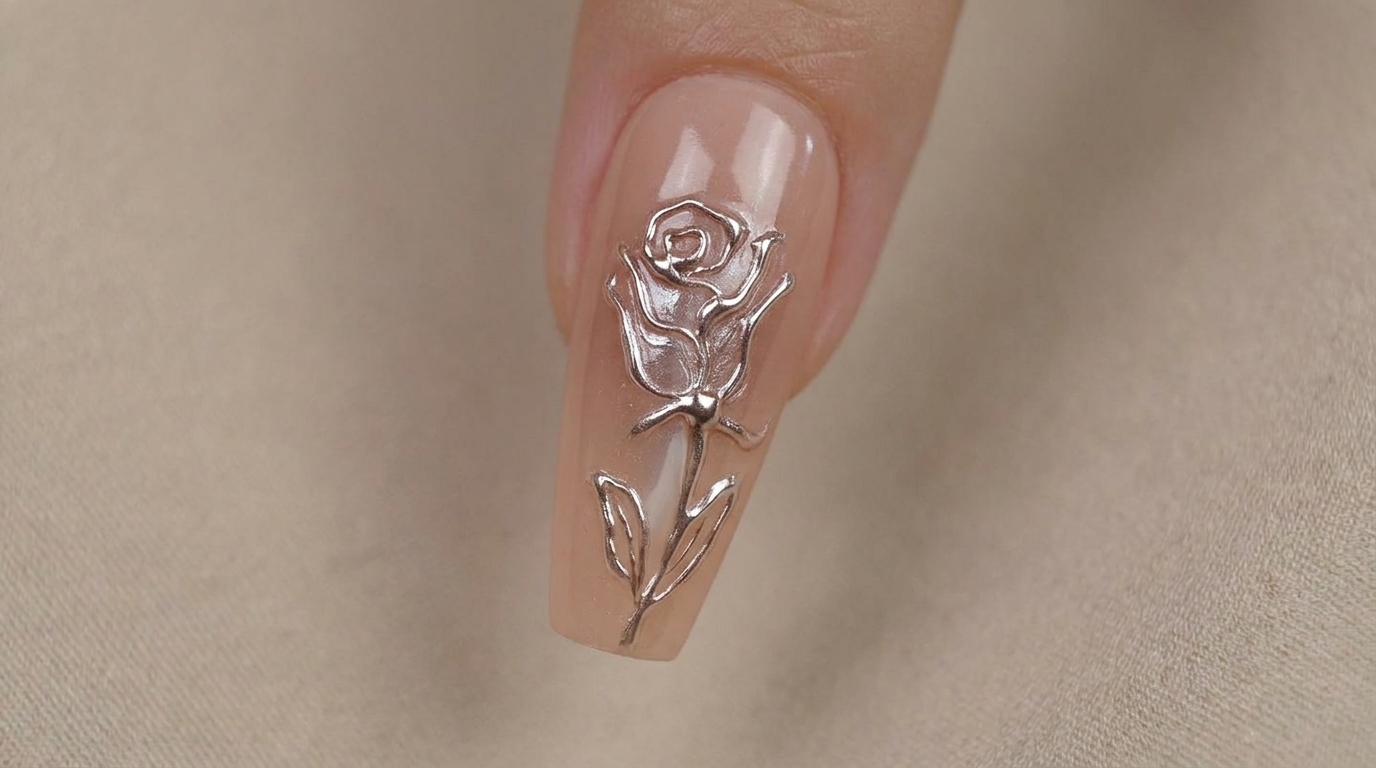
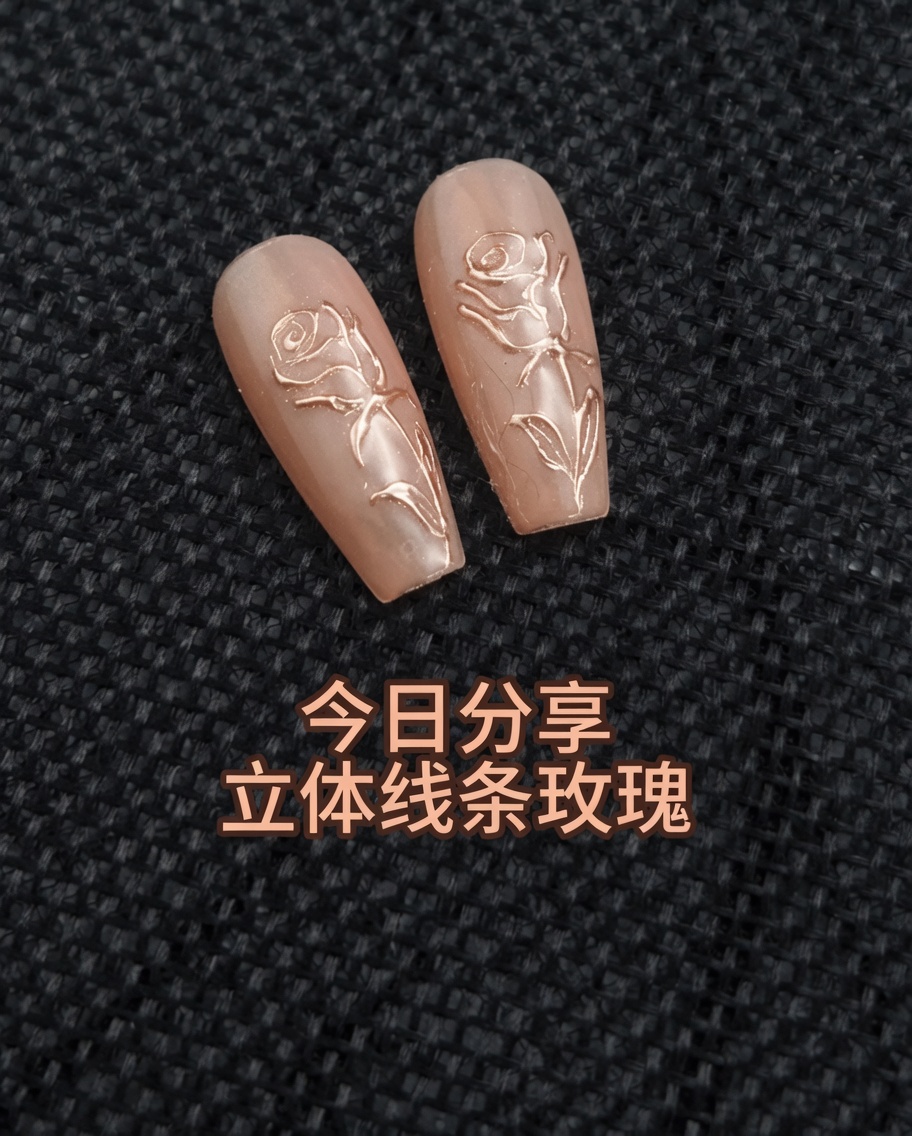
The 3D chrome rose look brings a touch of luxury and modern art to your fingertips. By pairing a subtle nude base with raised metallic detailing, this design creates a beautiful contrast that is perfect for special occasions or whenever you want to feel a little extra glamorous. It is a fantastic way to master the combination of sculpting gel and chrome powder techniques.
Steps
- 1Cure the matte top coat
After applying your no-wipe matte top coat to the nude base, place your nails under the UV or LED lamp. Ensure they are positioned correctly to fully cure the surface, creating the perfect matte foundation for the 3D rose design.
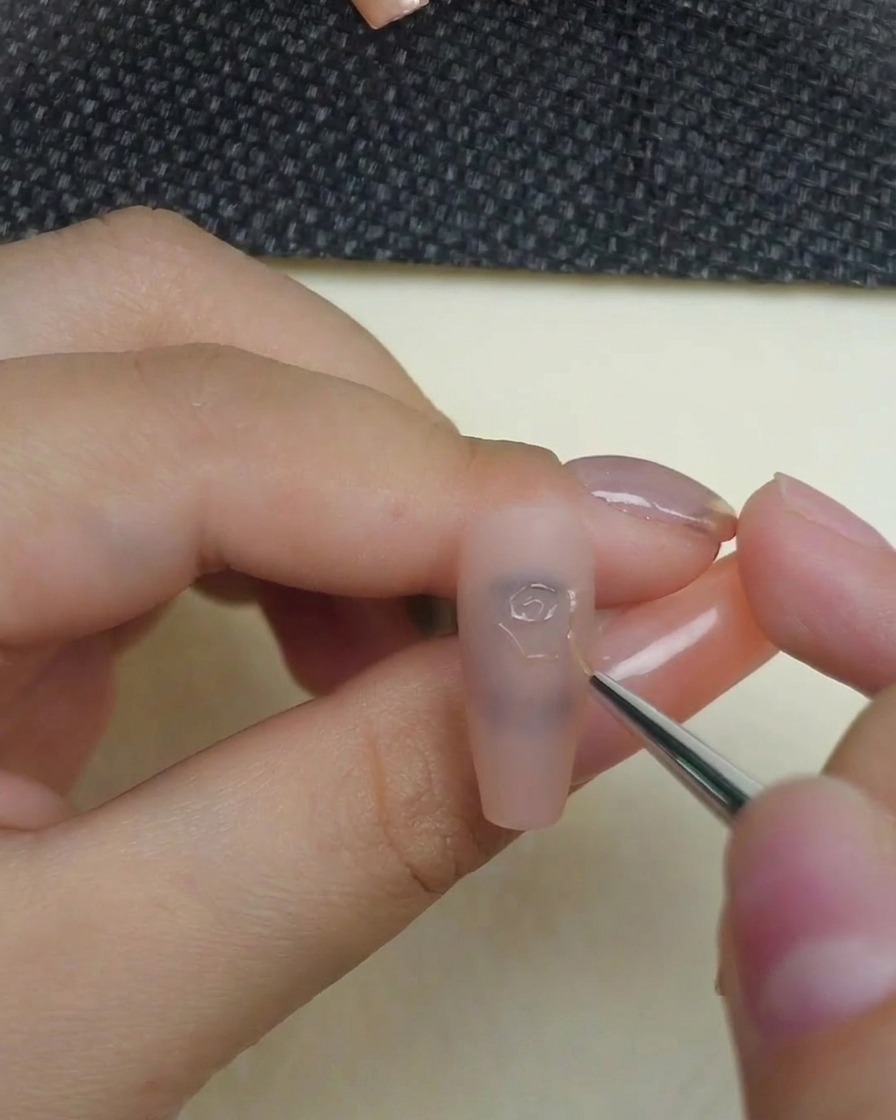
Tip: Make sure your fingers are flat and evenly spread under the light to avoid curing dead spots. - 2Draw the 3D rose outline

Using a fine liner brush and a thick 3D sculpting gel, carefully draw the petals and stem of a rose onto the cured matte surface. Take your time to build the desired texture, as this will determine the final shape once the chrome powder is applied.
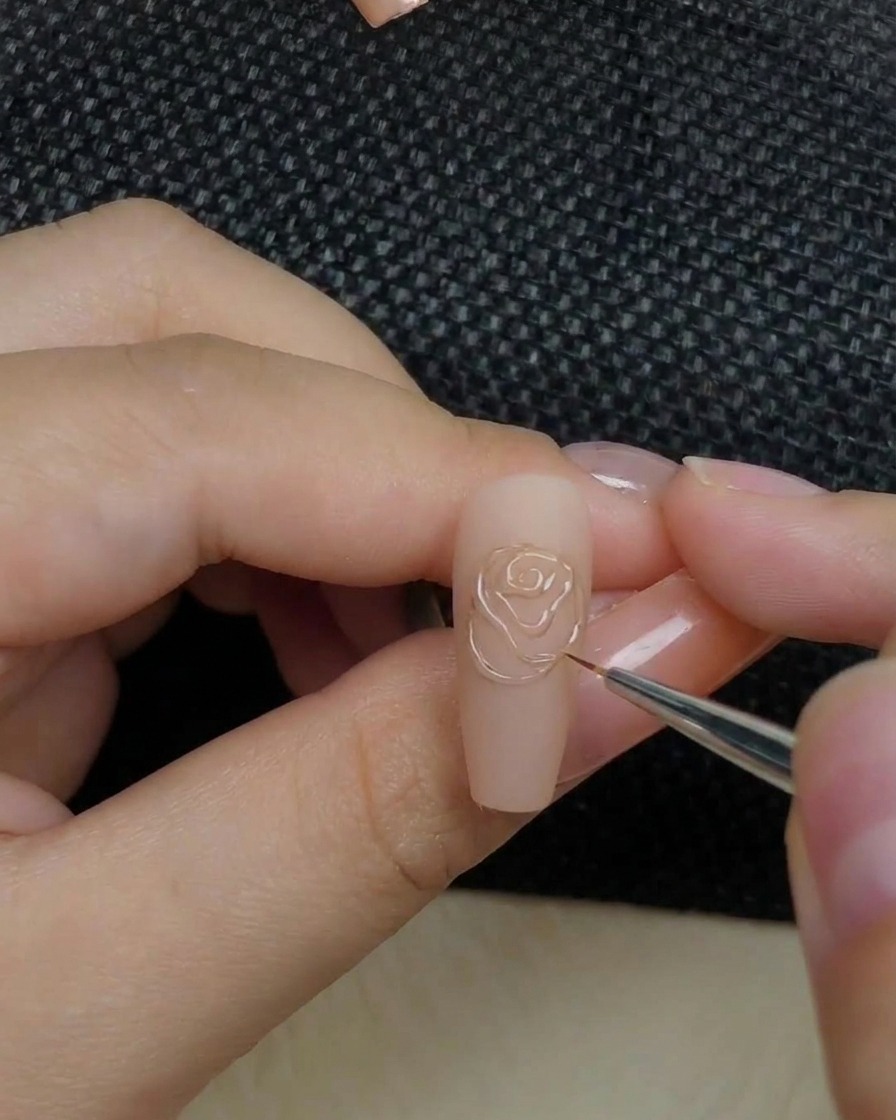
Tip: Use a light touch to keep the lines crisp and maintain the dimension of the gel. - 3Add inner rose details
Using a fine liner brush and clear 3D sculpting gel, carefully draw the internal swirls and delicate petals of the rose design. Keep a steady hand to ensure the lines remain raised and crisp on the matte surface. These elevated ridges are essential, as they act as a base to catch and hold the chrome powder beautifully in the final steps.
Tip: Keep the gel lines relatively thin but distinctly raised. If the gel flattens out, the final 3D metallic effect will be much less pronounced. - 4Cure the 3D design
Once the rose pattern is complete, place the nail back into the lamp to cure the 3D sculpting gel. This step hardens the design so it is ready to hold the chrome effect.
Tip: Ensure the gel is fully cured to prevent the design from smudging during the powder application. - 5Apply chrome powder
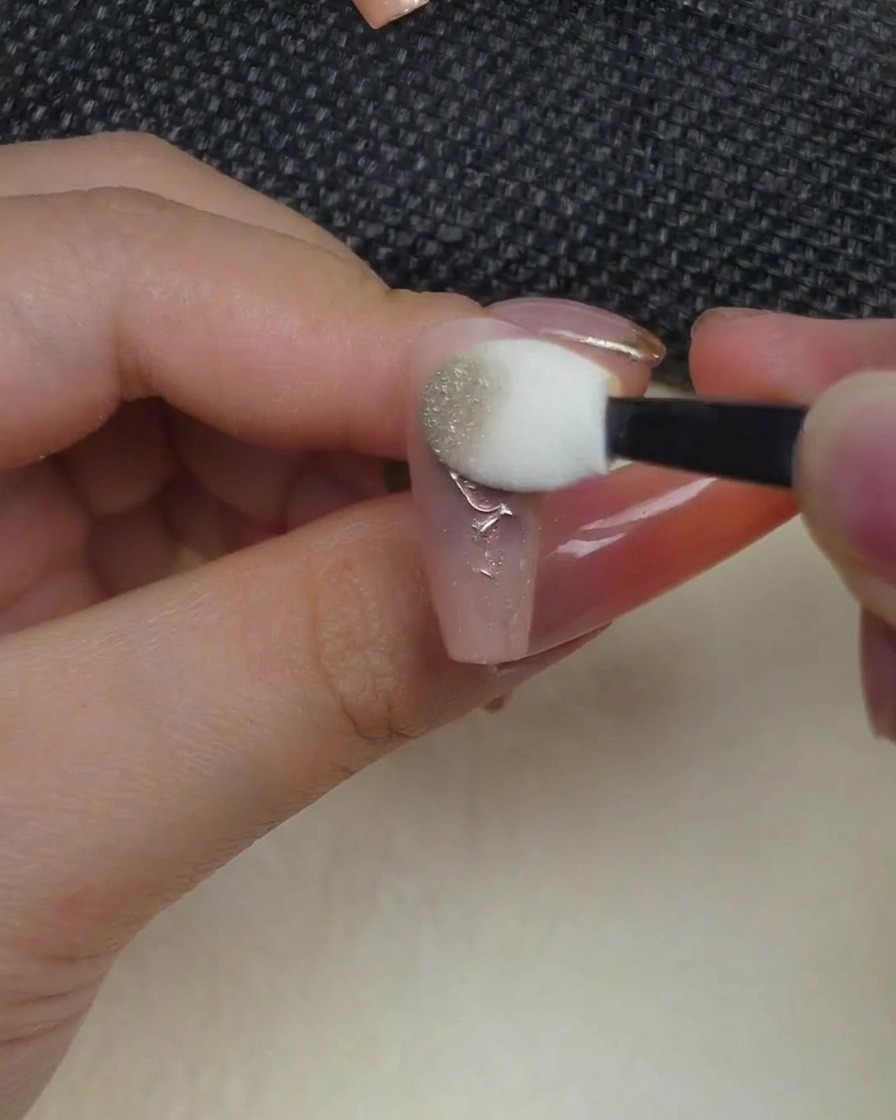
Dip your applicator sponge into the chrome powder and gently press it onto the cured 3D rose design. Ensure the powder covers every part of the raised gel lines to achieve an even, metallic effect.
Tip: A little powder goes a long way; start with a small amount and build coverage as needed. - 6Buff to a mirror finish
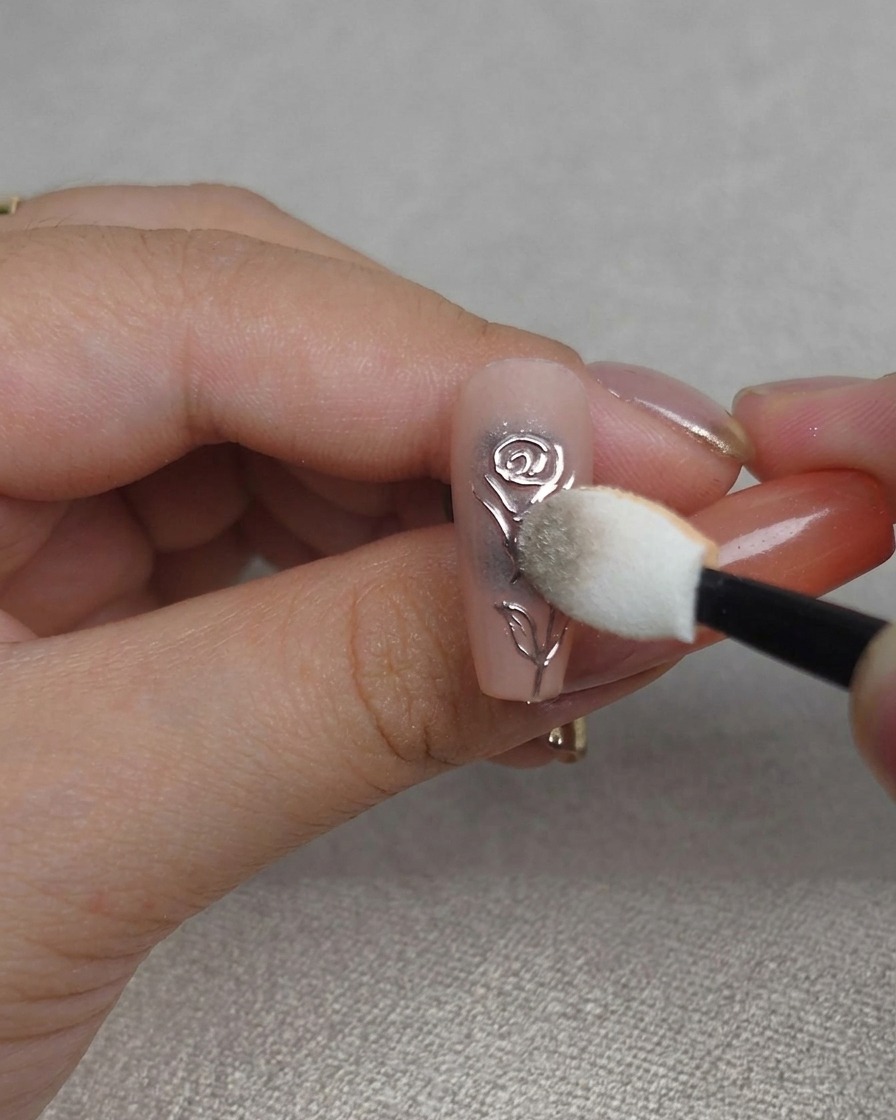
Using the applicator sponge or a clean finger, buff the chrome powder into the rose design using gentle, circular motions. Continue until the surface is smooth and achieves a high-shine, mirror-like metallic finish.
Tip: Buff thoroughly to ensure no dull spots remain on the rose design. - 7Apply the final top coat
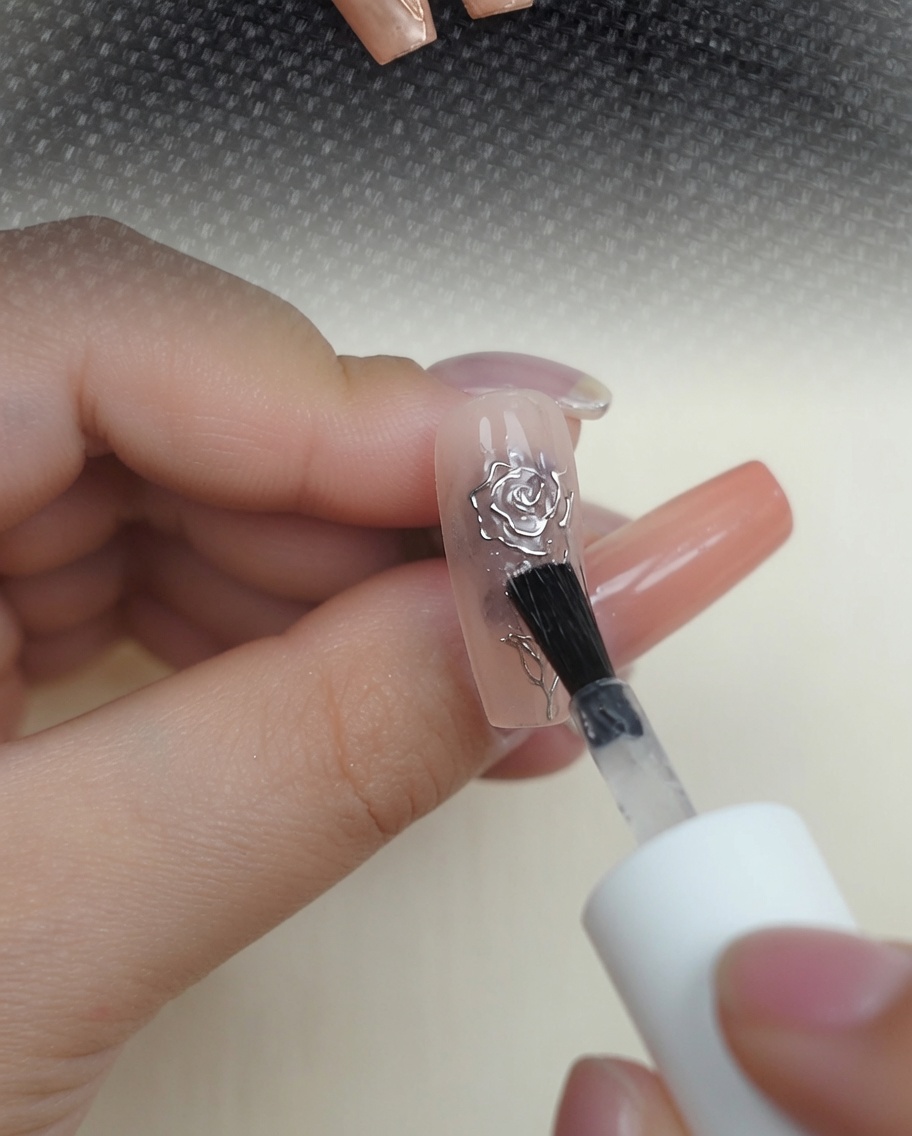
Finish your manicure by applying a final layer of top coat over the entire nail surface, including the chrome-covered rose. This seals the metallic design, prevents chipping, and adds a beautiful, protective glossy finish.
Tip: Avoid over-brushing the top coat over the chrome design to prevent dulling the mirror finish.