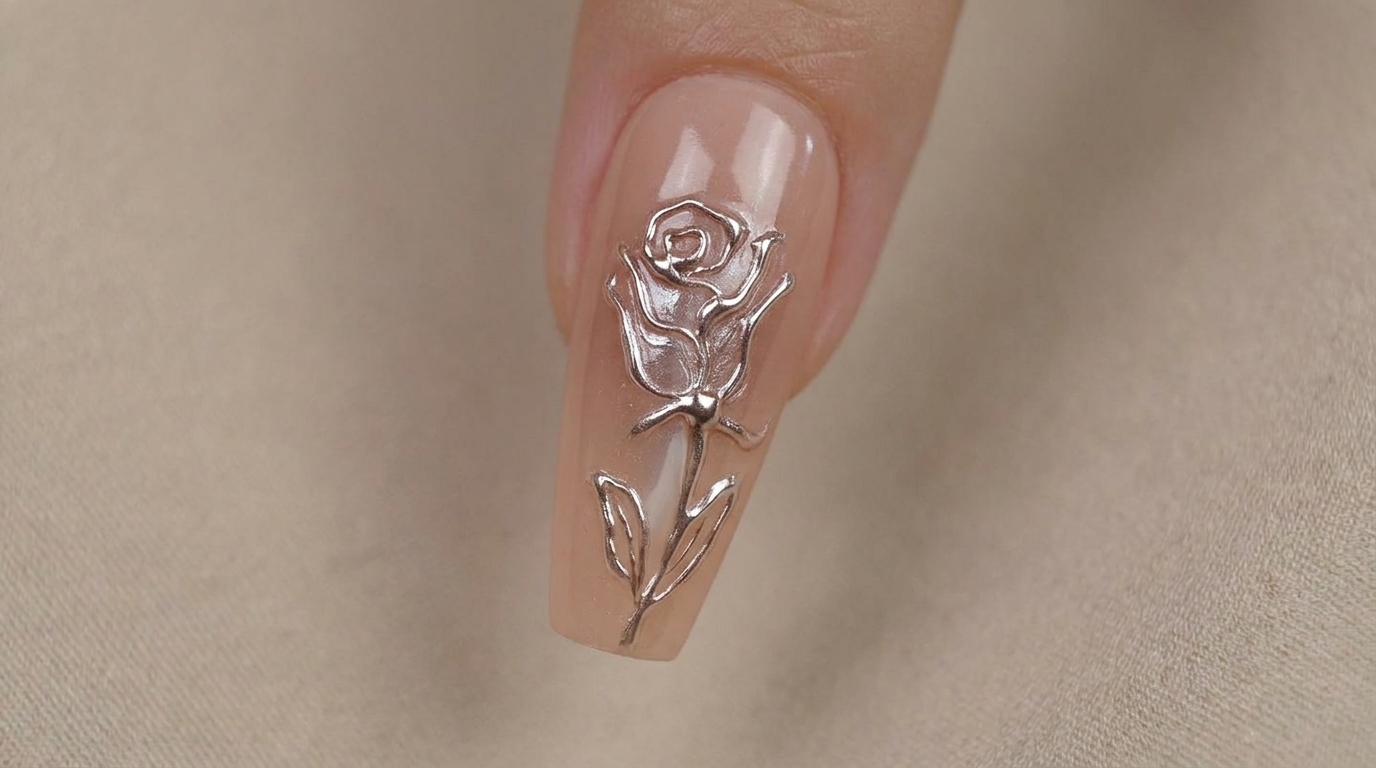
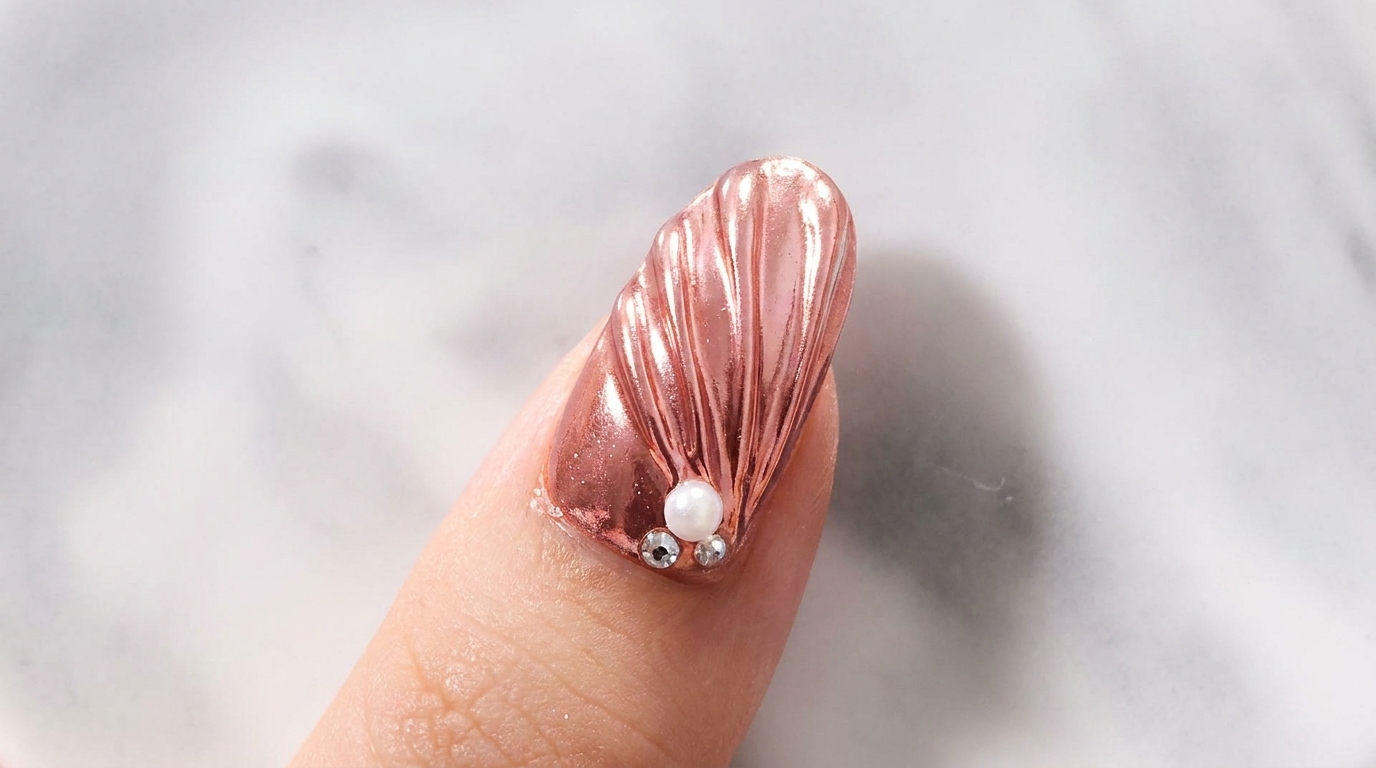
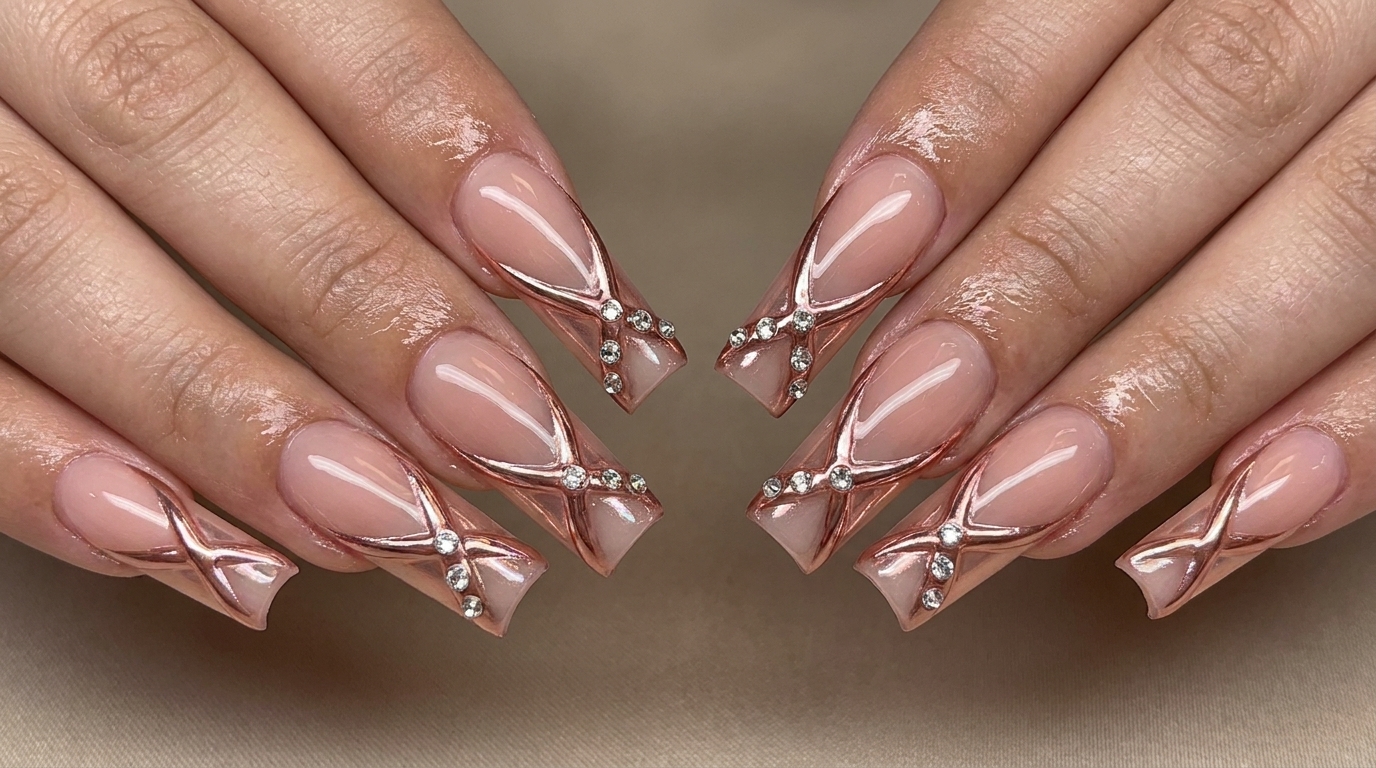
Rose Gold Chrome
Rhinestone 3D Line Nails — Step-by-Step Tutorial
Elevate your manicure with this stunning 3D chrome line design. We show you how to combine a soft nude gradient base with rose gold metallic details.
This sophisticated nail look brings together the elegance of a soft nude gradient with the modern edge of 3D chrome detailing. By using builder gel to create raised lines, you add a beautiful tactile dimension that catches the light perfectly. It is a fantastic way to level up your nail art game and achieve a high-end salon finish right at home.
Steps
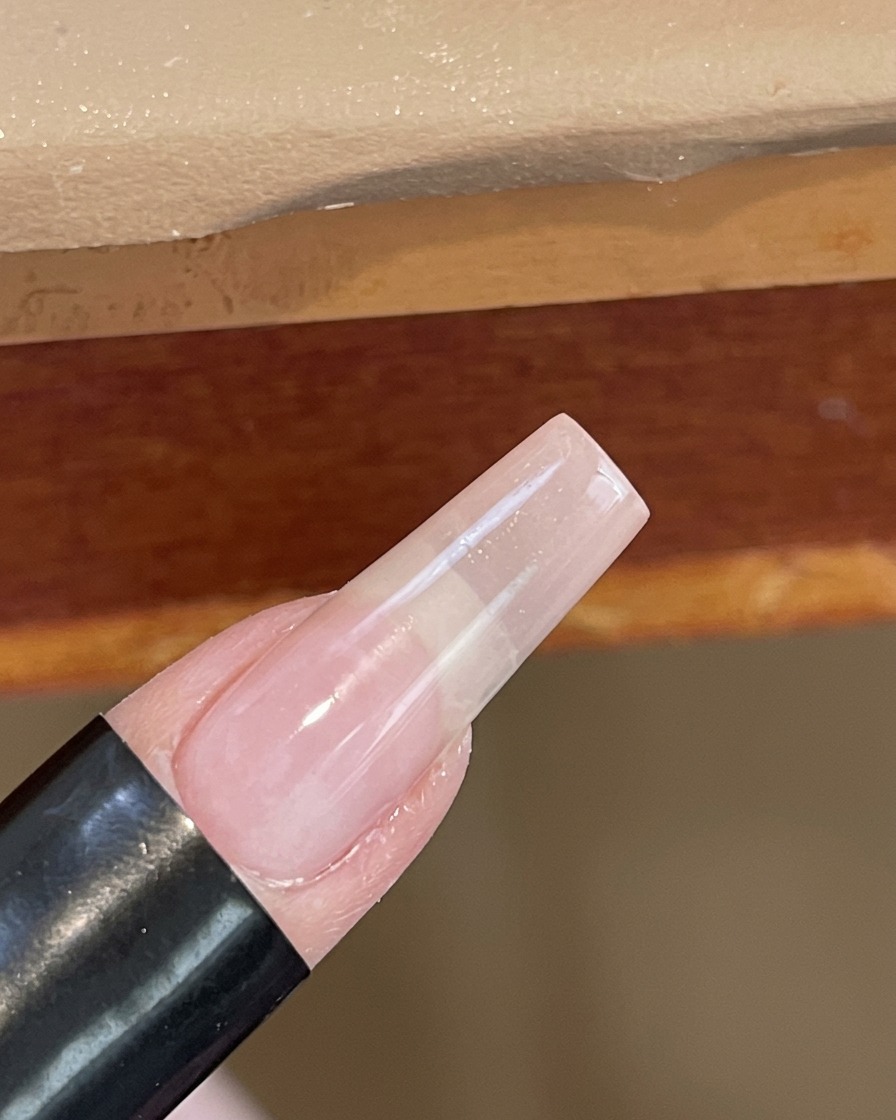
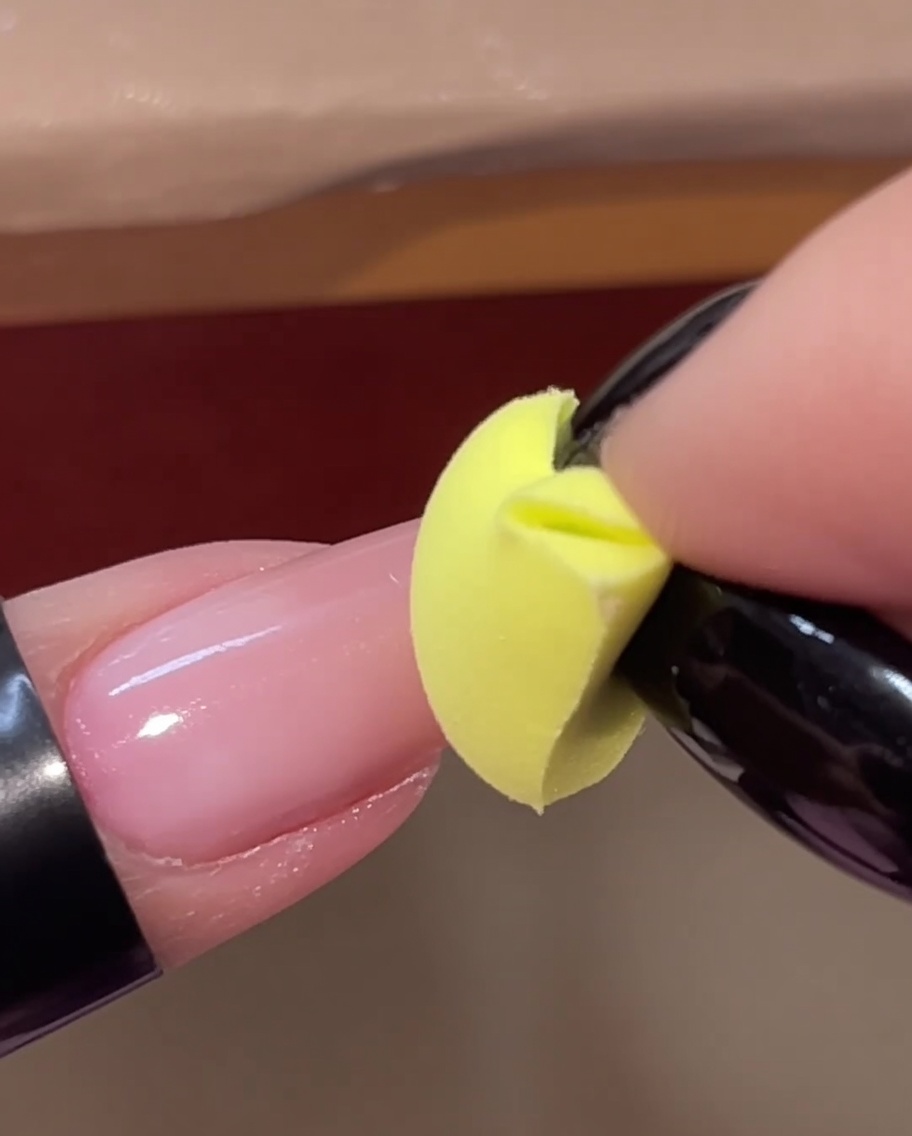
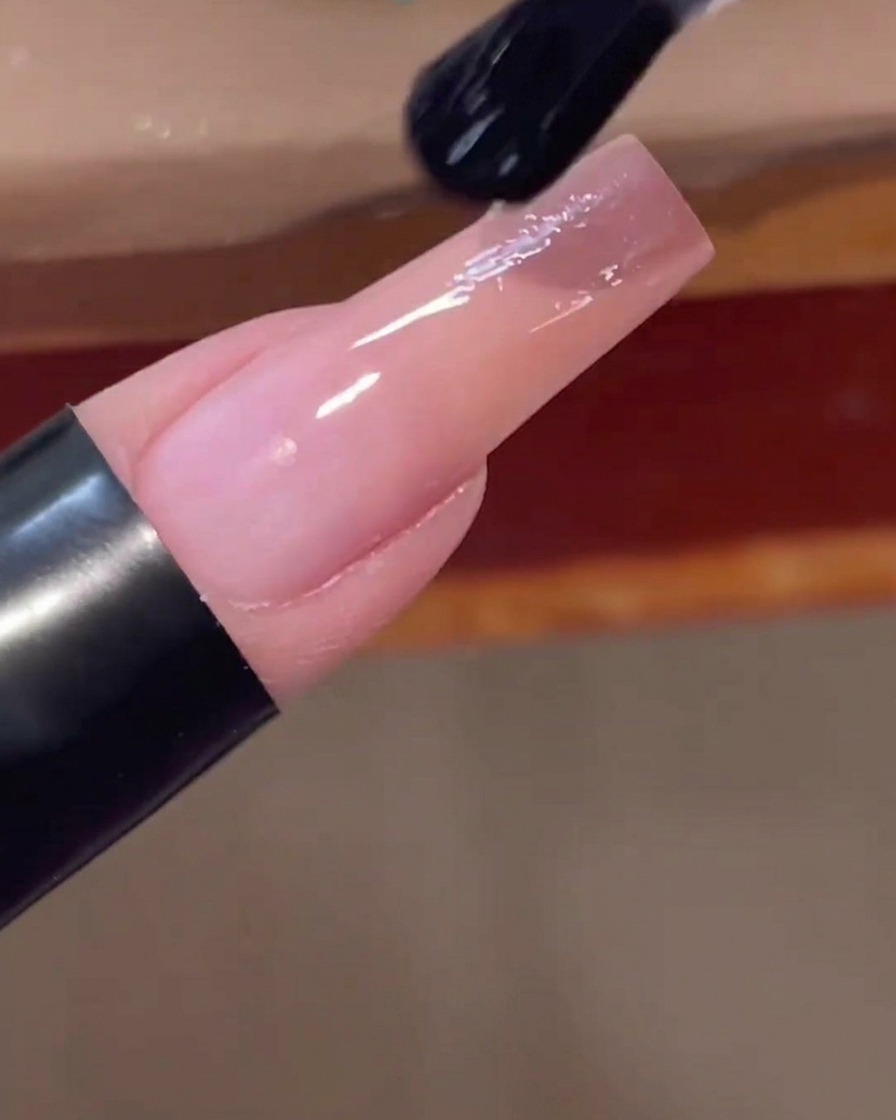
- 1Create a gradient tip
Apply a small amount of sheer pink gel polish onto a yellow sponge wedge. Gently pat the sponge onto the tip of your clear nail tip, focusing on building a smooth, even gradient from the free edge upward. This creates a soft, diffused transition.
Tip: Use a light patting motion to avoid creating air bubbles or visible sponge textures in the gel. - 2Cure the gradient layer
Place your nail under a mini handheld UV/LED lamp to cure the first layer of the pink gradient. Ensure the lamp is positioned directly over the nail tip to guarantee an even cure across the surface. Follow your specific gel polish manufacturers time guidelines.
Tip: Keep your finger steady while curing to ensure the gradient stays perfectly in place. - 3Apply second gradient layer
Using the same yellow sponge wedge, apply a second layer of sheer pink gel. Continue the patting technique, building up the opacity gradually until the free edge line is sufficiently covered and the gradient transition is smooth.
Tip: Building the color in thin, layered applications is key to a seamless, professional-looking ombre effect. - 4Apply top coat
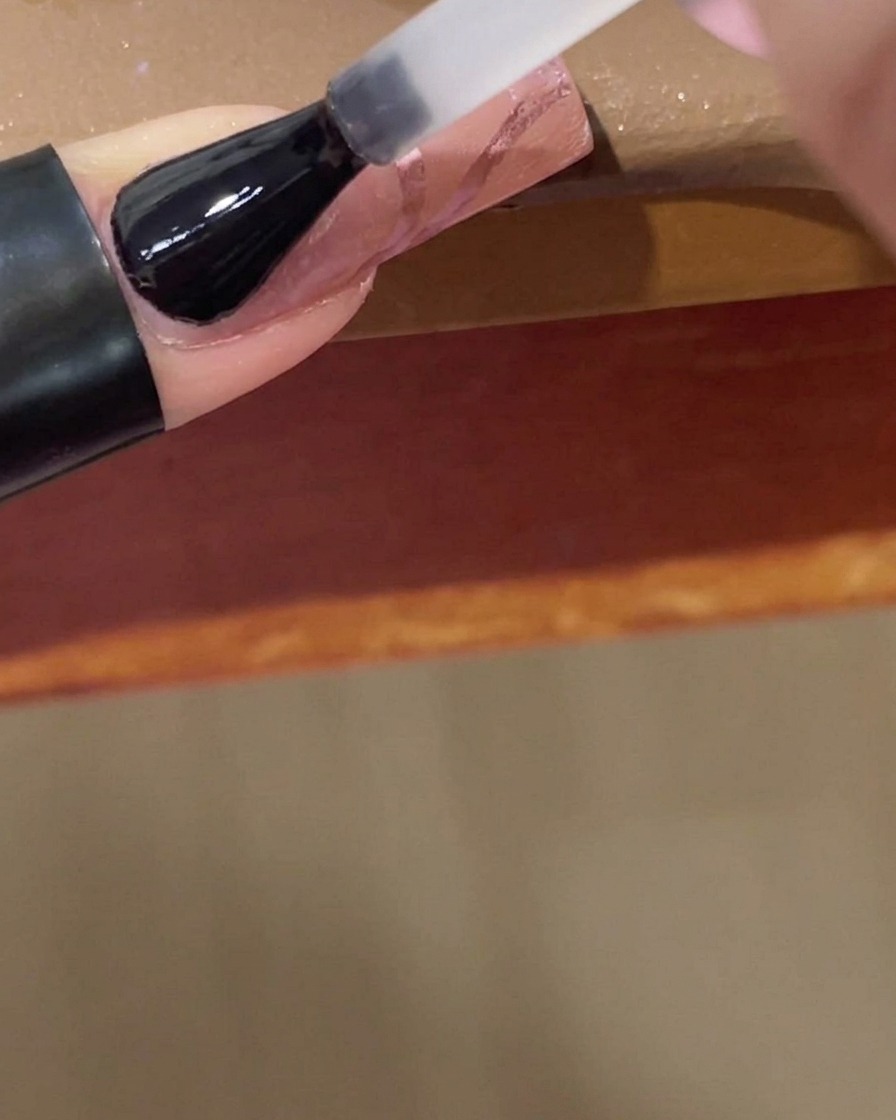
Apply a smooth, even layer of clear glossy top coat over the entire nail, ensuring the pink gradient is completely covered. This step seals the color and creates the necessary smooth base for the application of the chrome powder.
Tip: Cap the free edge with the brush to increase durability and prevent chipping. - 5Apply chrome powder
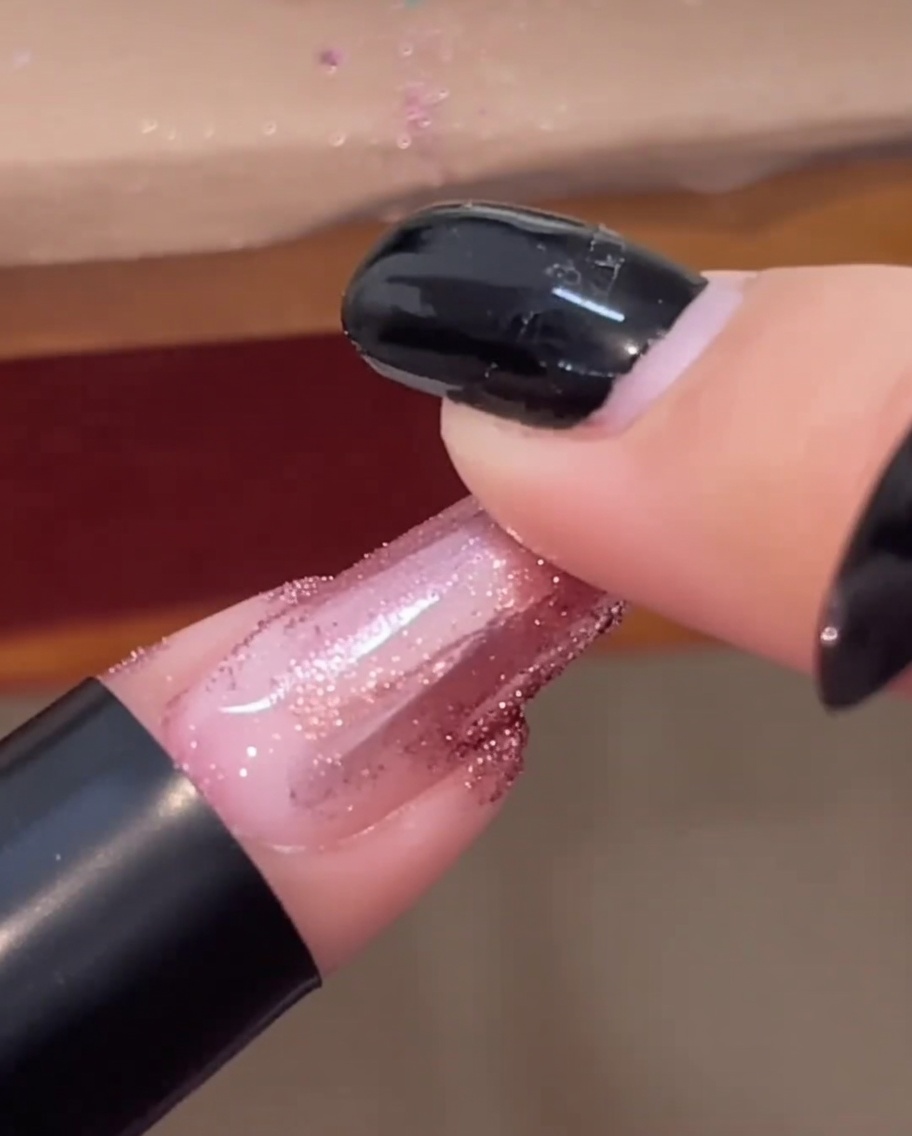
Using your fingertip or a soft applicator, gently rub the metallic rose gold chrome powder onto the cured top coat. Work it over the entire surface of the nail until you achieve a smooth, mirror-like finish.
Tip: For the best chrome effect, ensure the surface is completely cured and free of any sticky residue before application. - 6Add 3D gel detailing
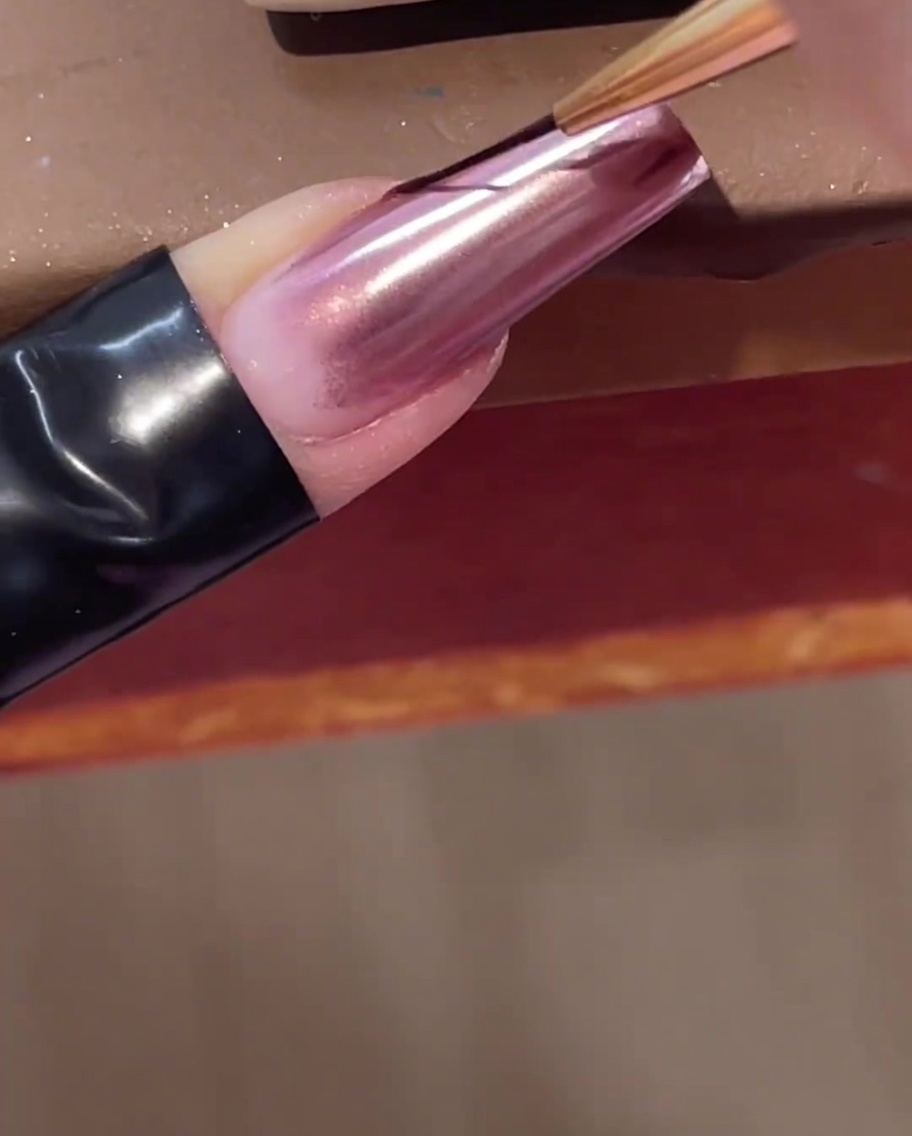
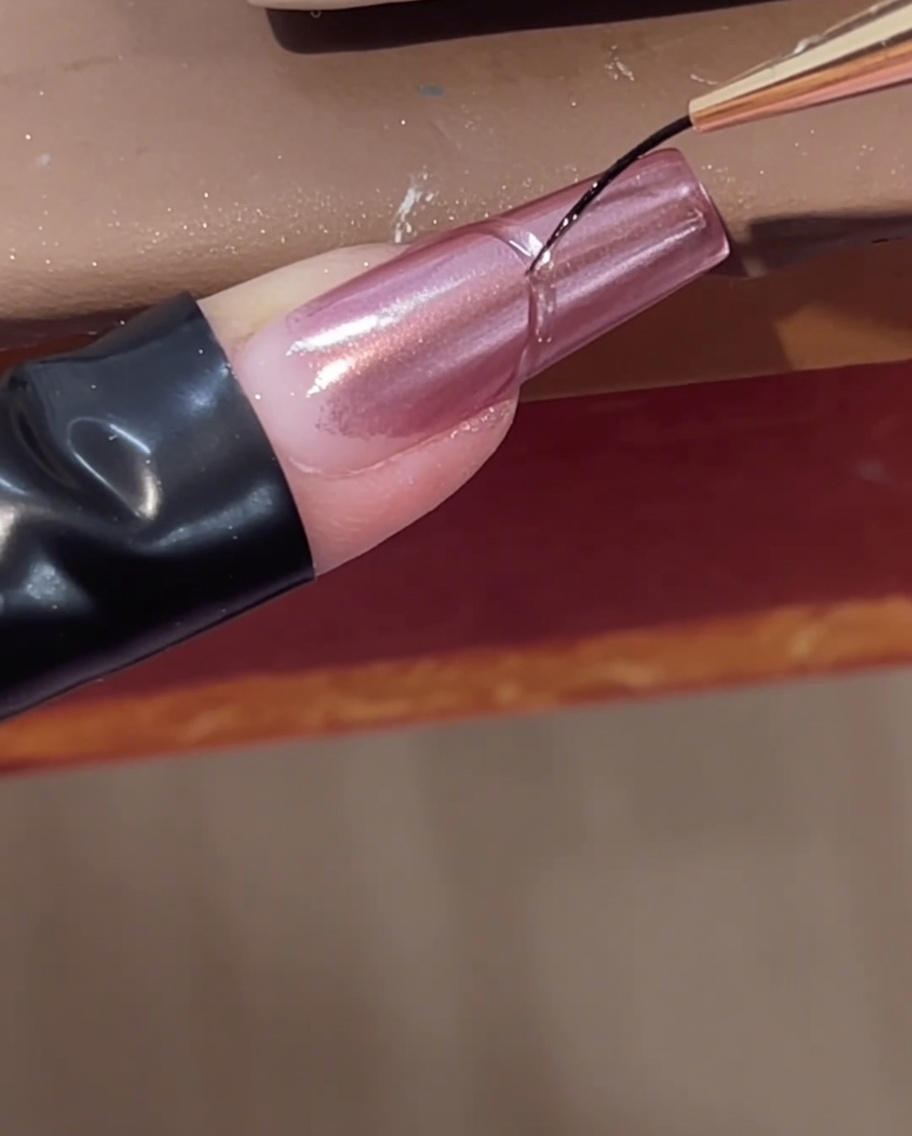
Dip a fine liner brush into clear builder gel and draw a raised, diagonal 3D line across the nail. This adds texture and dimension to the chrome design. Cure under a lamp once the design is complete.
Tip: Use a light touch with the liner brush to maintain a consistent line thickness for a polished 3D effect. - 7Draw intersecting 3D lines
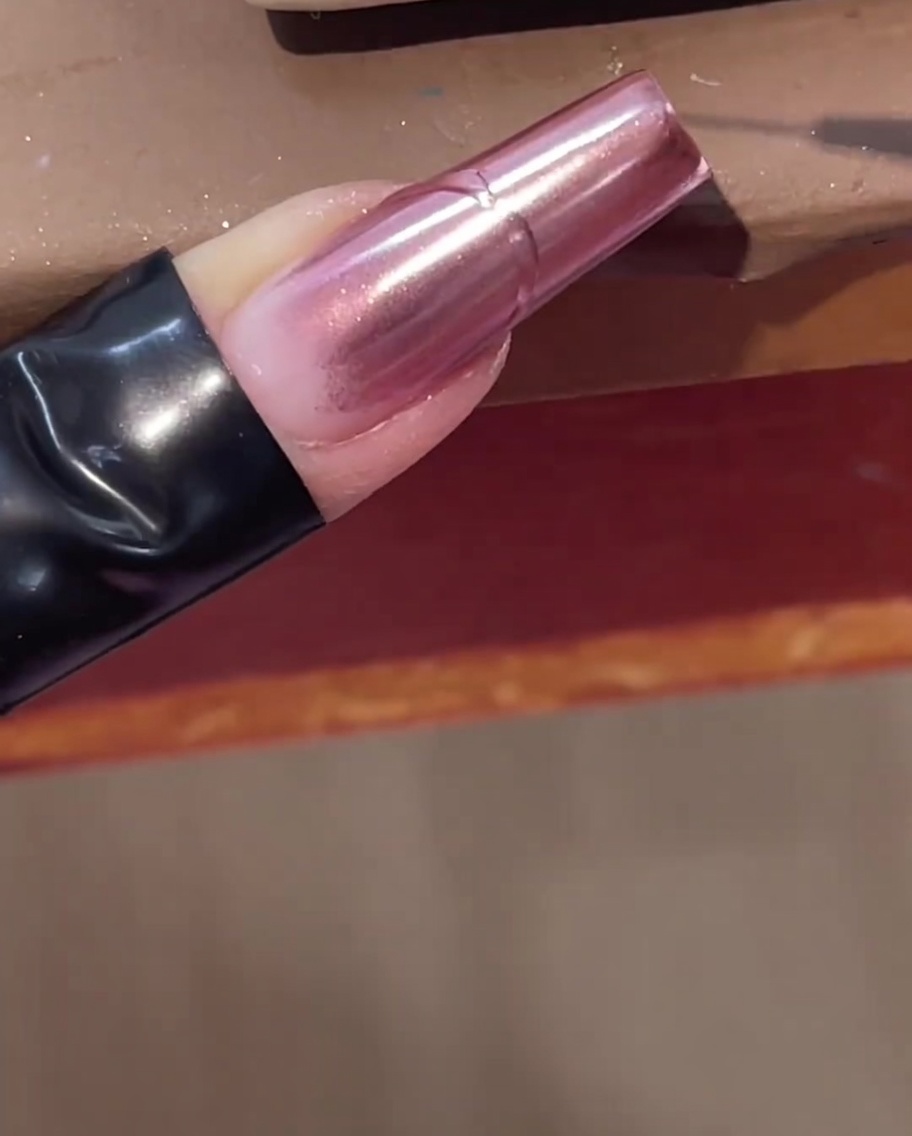
Continue using your fine liner brush loaded with clear builder gel to draw a second raised line over the chrome surface. Intersect this line with the first one to create a striking 3D geometric or abstract design on the nail.
Tip: Work lightly with the liner brush to ensure the builder gel stays raised and doesnt flatten out. - 8Add curved gel lines
Apply another curved clear builder gel line near the cuticle area using the fine liner brush. This adds balance to the design and creates an elegant border around the base of the nail, enhancing the overall 3D chrome effect.
Tip: Leave a tiny gap near the cuticle to avoid the gel flooding into the skin before curing. - 9Cure the 3D lines
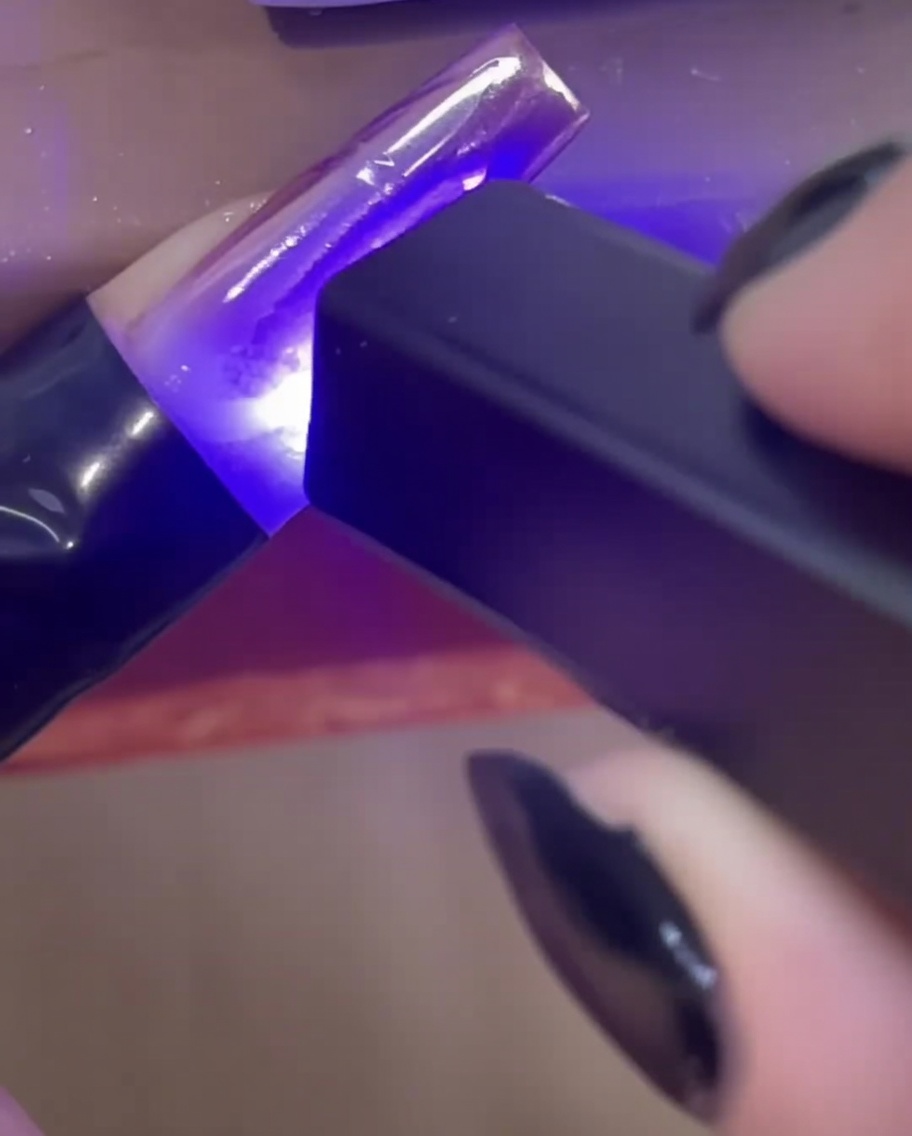
Cure the clear 3D gel lines using a mini handheld UV/LED lamp. Ensure the builder gel is fully set so that the chrome powder sealed underneath remains locked in place for the cleanup process in the next step.
Tip: A flash cure with a handheld lamp is great to freeze the 3D shape in place before doing a full cure in a larger lamp. - 10Wipe away excess powder
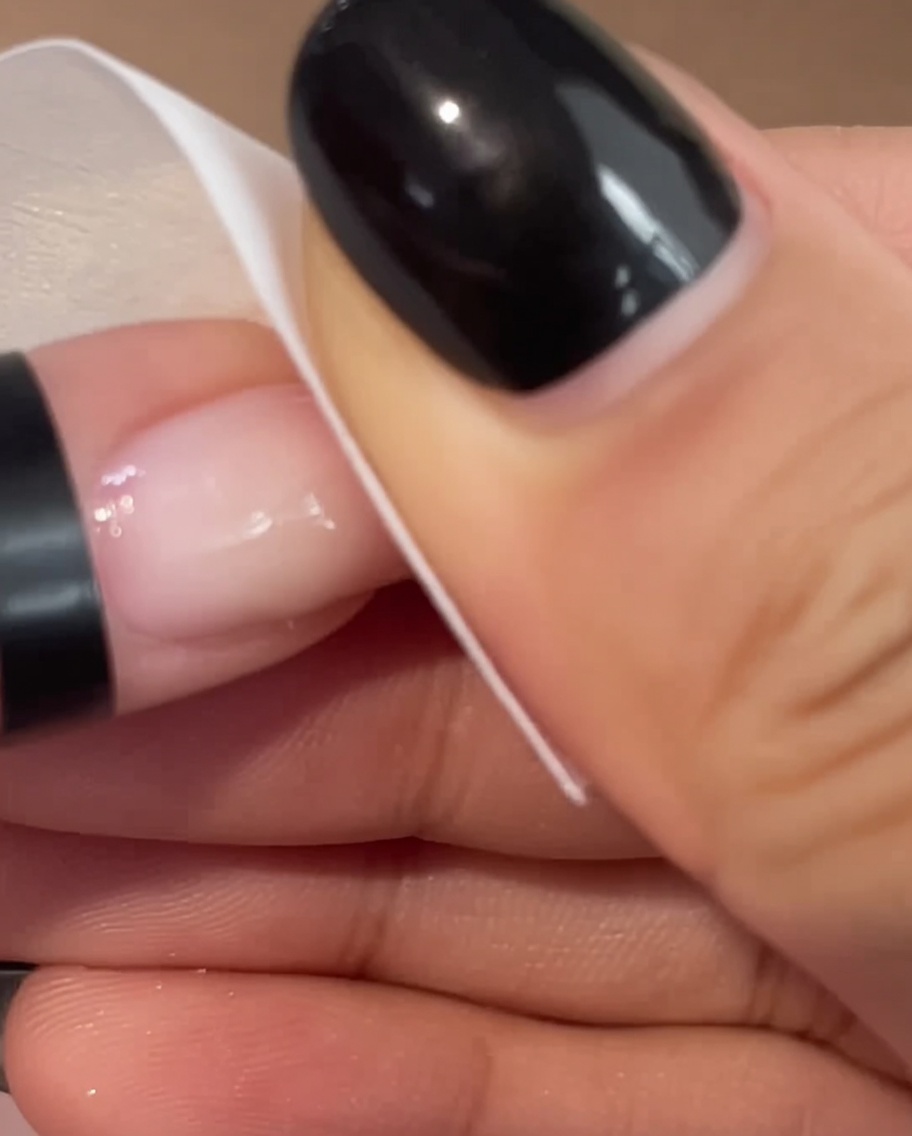
Take a lint-free wipe saturated with nail cleanser and gently wipe the entire surface of the nail. This will effectively clean off all the loose rose gold chrome powder from the base color, leaving the brilliant metallic finish only where it bonded to the cured 3D builder gel lines.
Tip: Using a completely lint-free wipe is essential to prevent tiny fibers from sticking to the nail before your final top coat. - 11Apply top coat
Apply a final layer of clear top coat over the entire nail to seal the complete design. This step provides a glossy, protective finish while smoothing out any minor imperfections around the 3D lines and remaining chrome details.
Tip: Float the top coat gently over the 3D lines so you do not lose the dimension youve created. - 12Apply rhinestones
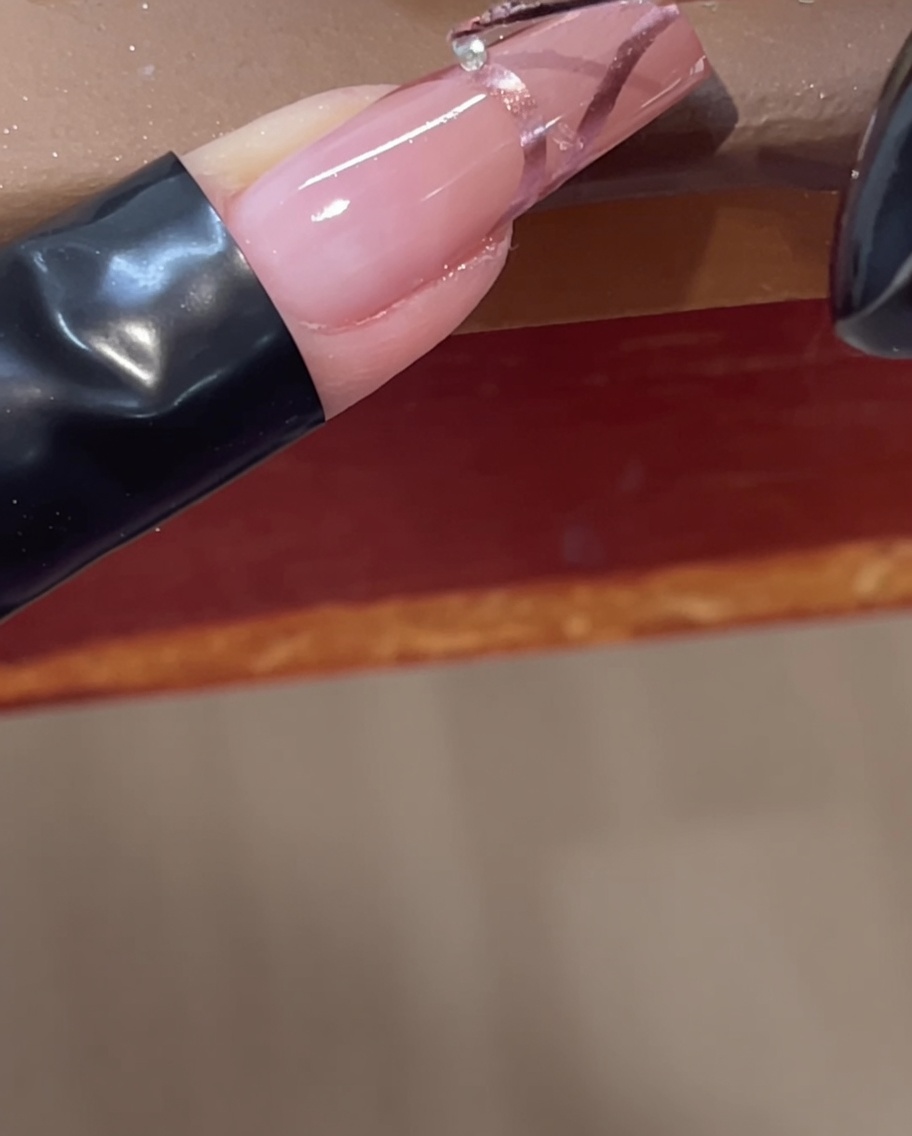
Use tweezers or a wax pickup tool to carefully place small clear rhinestones along the raised chrome lines. Gently press them into the wet top coat or use a tiny bit of rhinestone glue for extra secure adhesion before the final cure.
Tip: Placing rhinestones at the intersections of the 3D lines creates a beautiful focal point for the finished design.