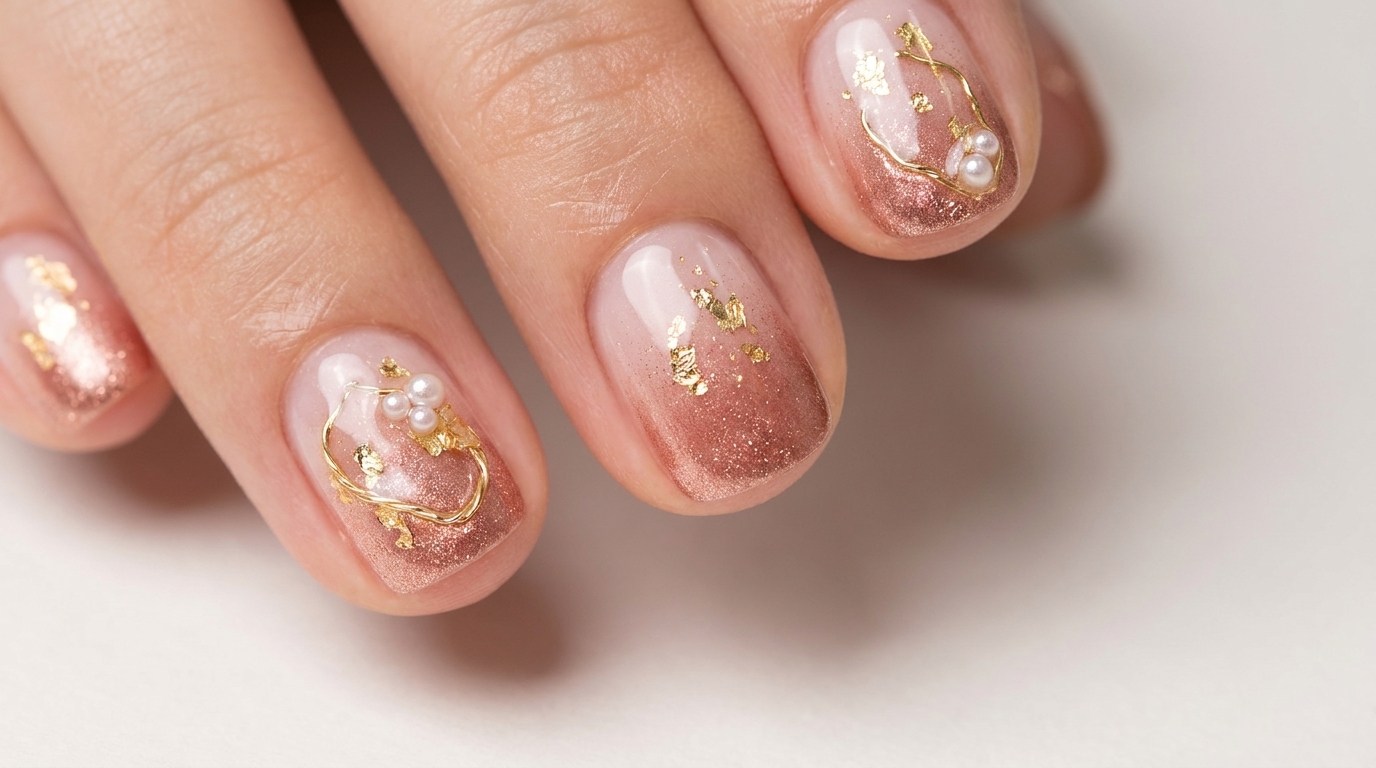
Rose Gold 3D Shell Nail Art — Elegant Textured Tutorial
Learn to create stunning 3D seashell-inspired nails with a luminous rose gold finish and delicate pearl embellishments. This sophisticated look is perfect for any occasion.
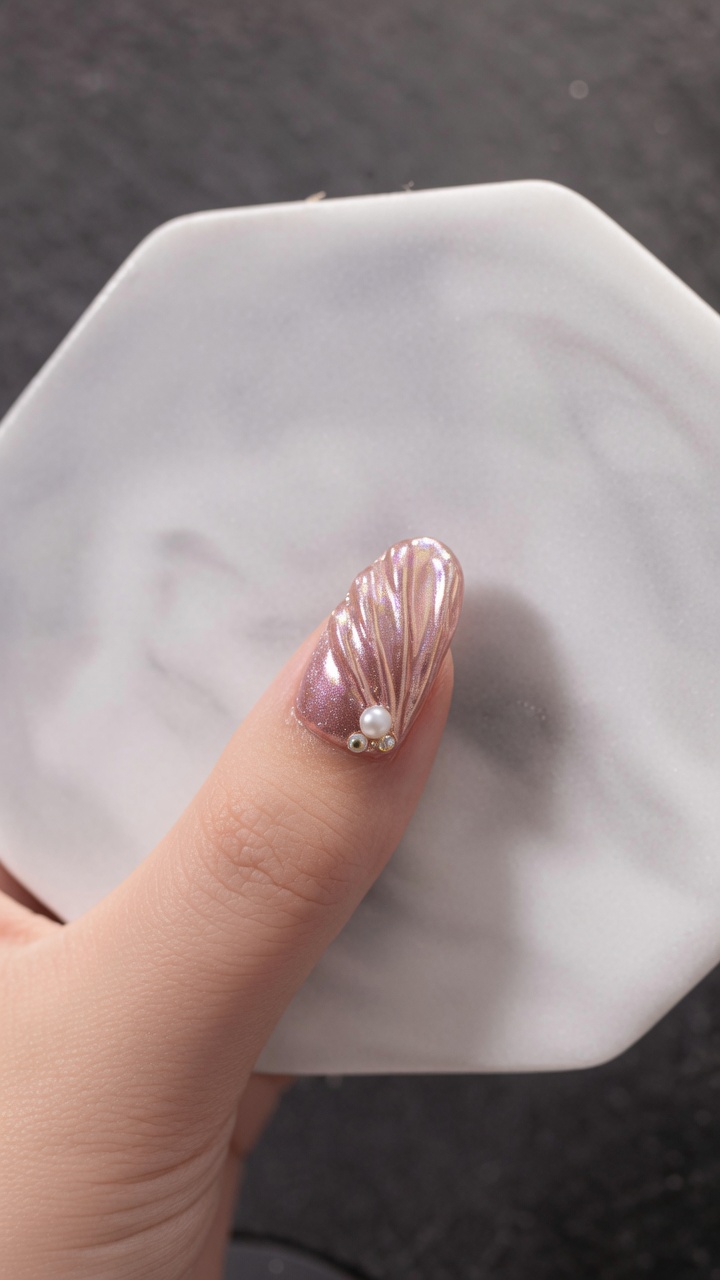
The 3D seashell design has become a sophisticated favorite in modern nail art, blending sculptural texture with high-shine chrome finishes. This tutorial demonstrates how to achieve that elegant ripple effect on a rose gold base, topped off with a classic pearl cluster for a luxurious, ocean-inspired aesthetic.
Steps
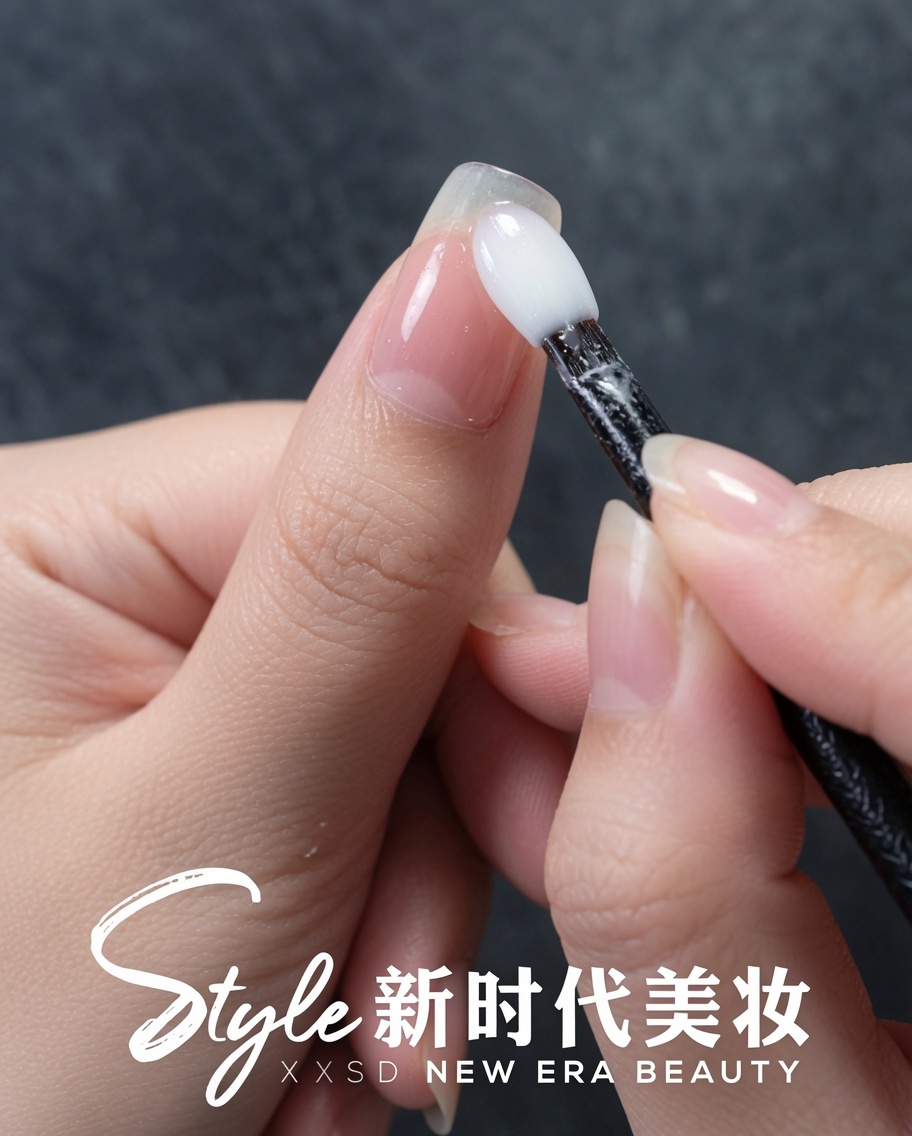
- 1Draw shell ridge outlines
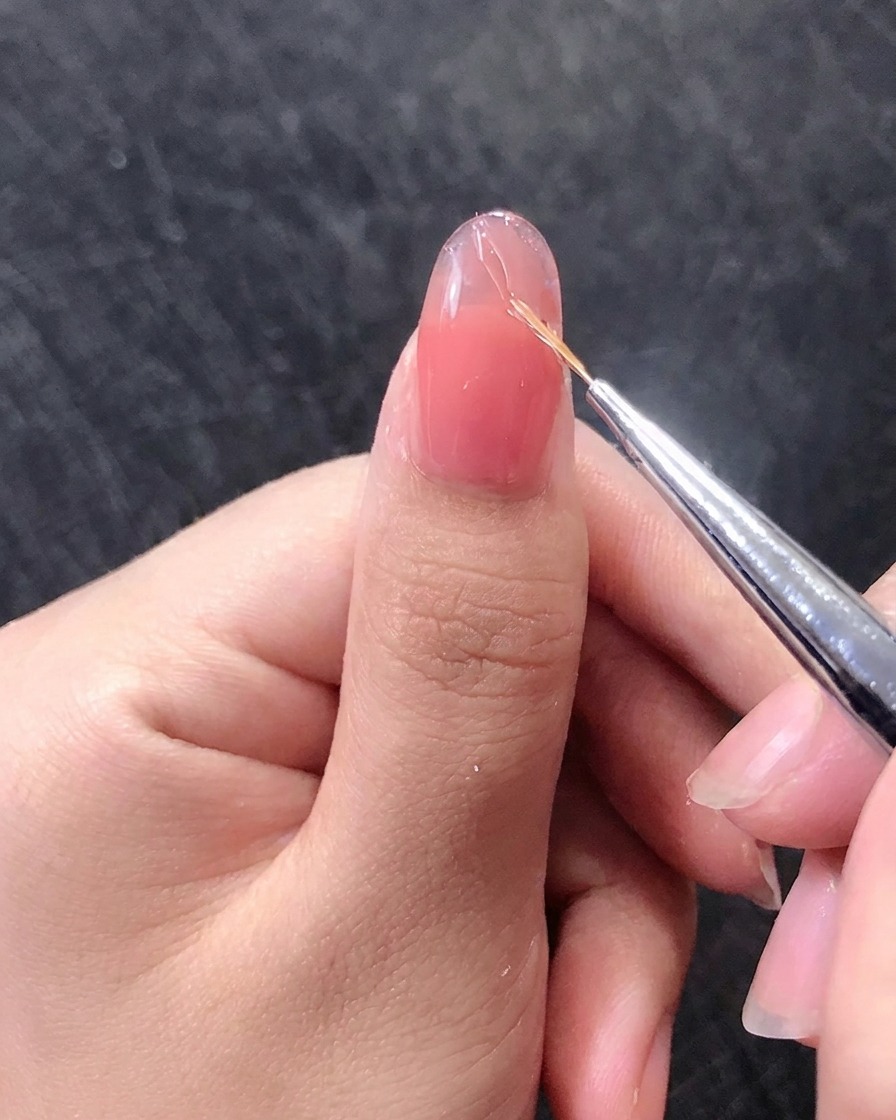
Using a fine liner brush and gold gel, draw thin, curved lines diagonally across the nail. These lines act as the foundation for the 3D seashell texture. Ensure the lines are precise to create a clear, defined pattern.
Tip: Keep a light hand to ensure the lines remain thin and delicate. - 2Complete the seashell pattern
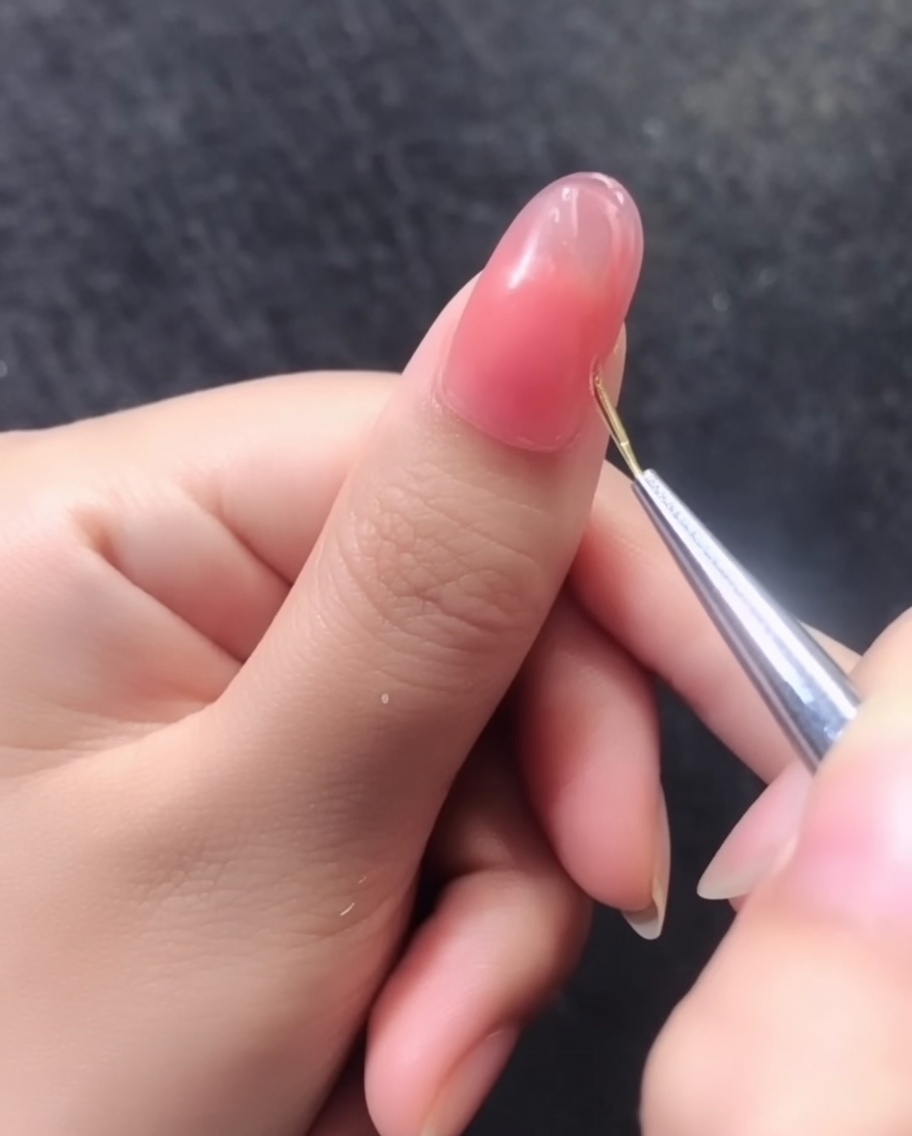
Continue adding curved lines to build out the 3D seashell texture across the entire nail plate. Gradually fill the space until the desired ridge effect is achieved.
Tip: Vary the curvature slightly to give the seashell ridges a more natural, organic look. - 3Apply clear coat base
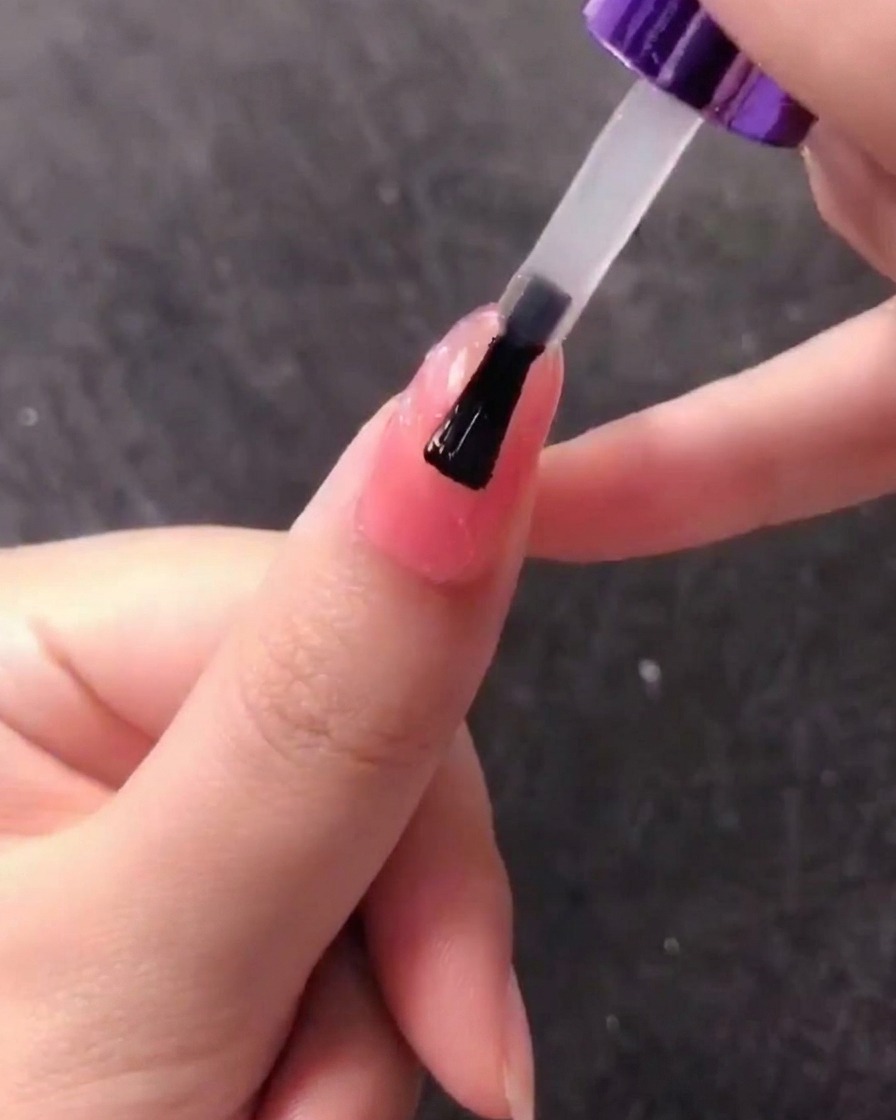
Apply a layer of clear gel or top coat over the cured 3D lines. This creates a smooth surface and ensures the chrome powder adheres evenly.
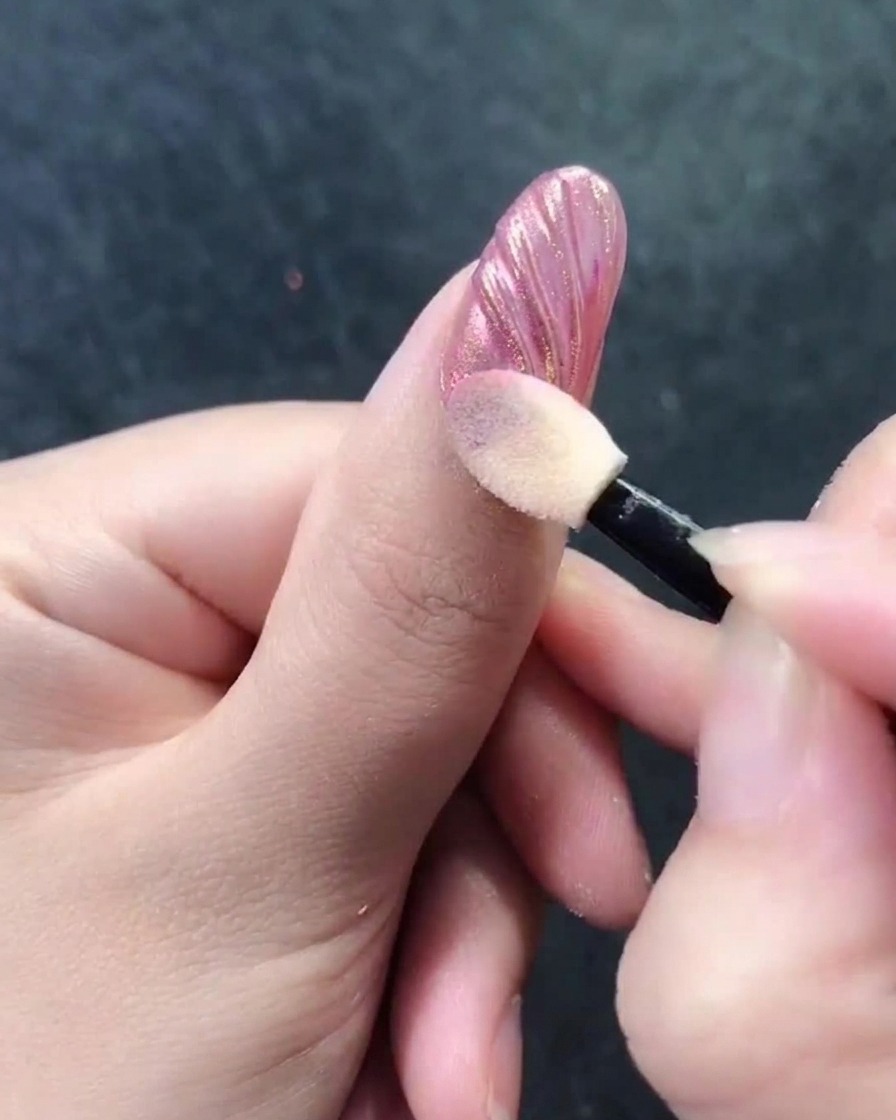
Tip: Ensure the gel is applied thinly to prevent pooling around the 3D lines. - 4Apply chrome powder
Using a sponge-tip applicator, gently dab iridescent pearl chrome powder onto the surface of the nail. Focus on pressing the powder into the clear gel layer for an even application.
Tip: A little powder goes a long way; start with a small amount and build up coverage as needed. - 5Buff and highlight the texture
Firmly rub the pearl chrome powder into the nail surface using the sponge applicator. This action highlights the 3D ripple effect, making the seashell ridges stand out with a reflective finish.
Tip: Apply extra pressure on the ridges to ensure they are fully coated and highlighted. - 6Seal with top coat
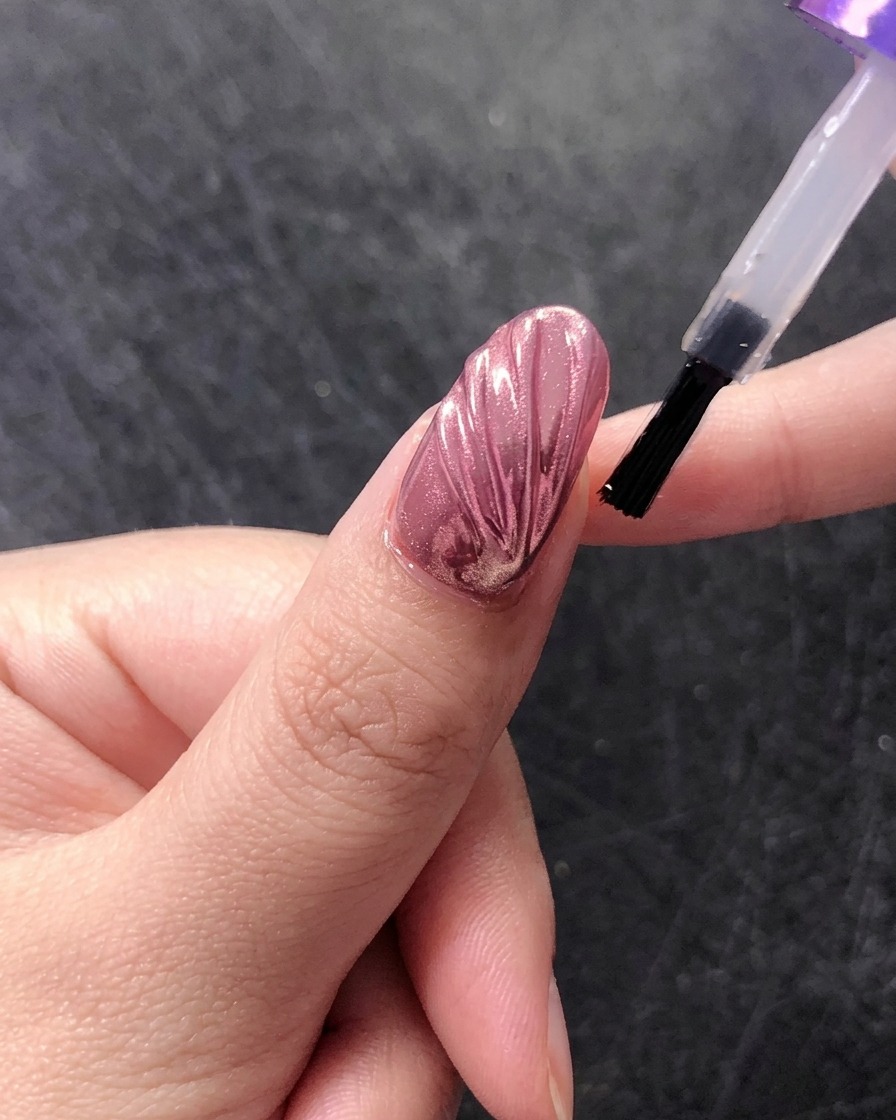
Apply a final layer of clear glossy top coat over the entire nail plate. This step seals in the chrome powder and protects the intricate seashell design from chipping or fading.
Tip: Cap the free edge with the top coat to ensure the design lasts longer. - 7Place the pearl embellishment
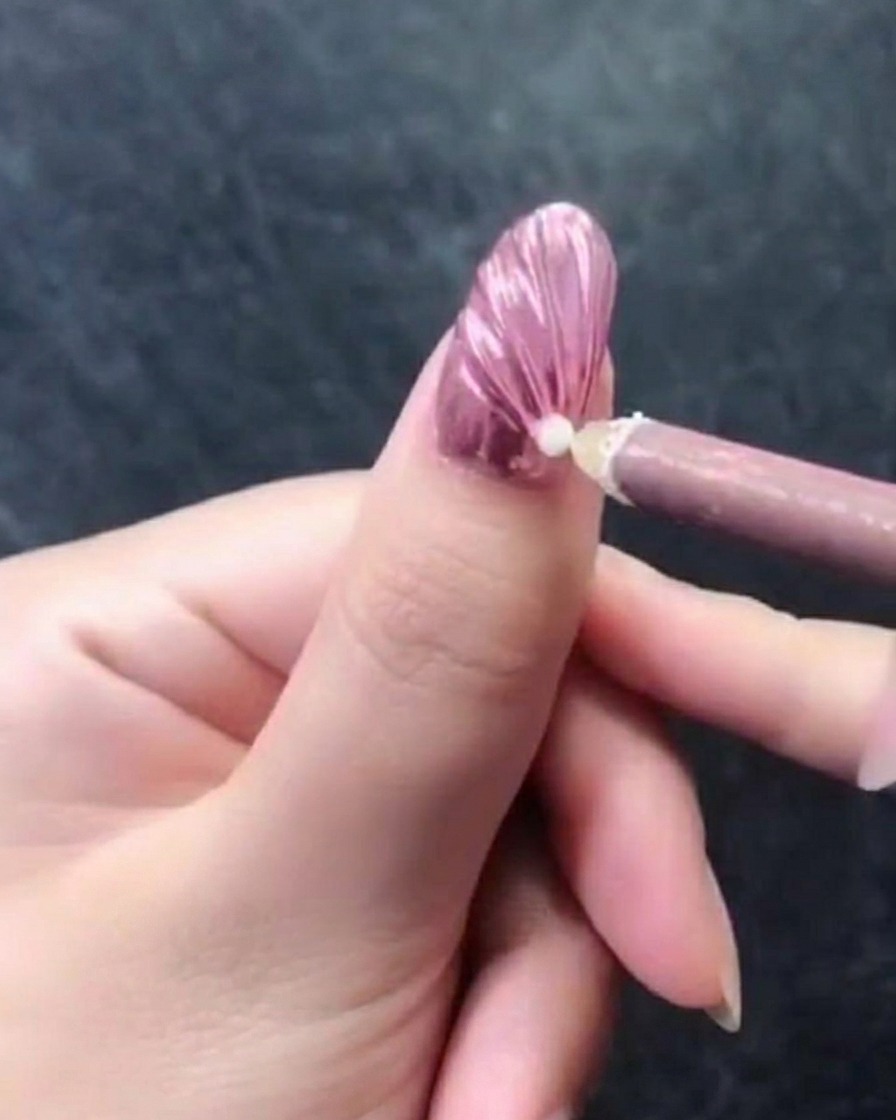
Using a wax picker pen, carefully pick up a small white pearl embellishment and place it at the cuticle area of the nail. Press it gently into the uncured gel or top coat to secure its position before curing.
Tip: A wax picker pen provides much better control and precision when handling tiny nail embellishments compared to standard tweezers. - 8Finish the jewelry cluster
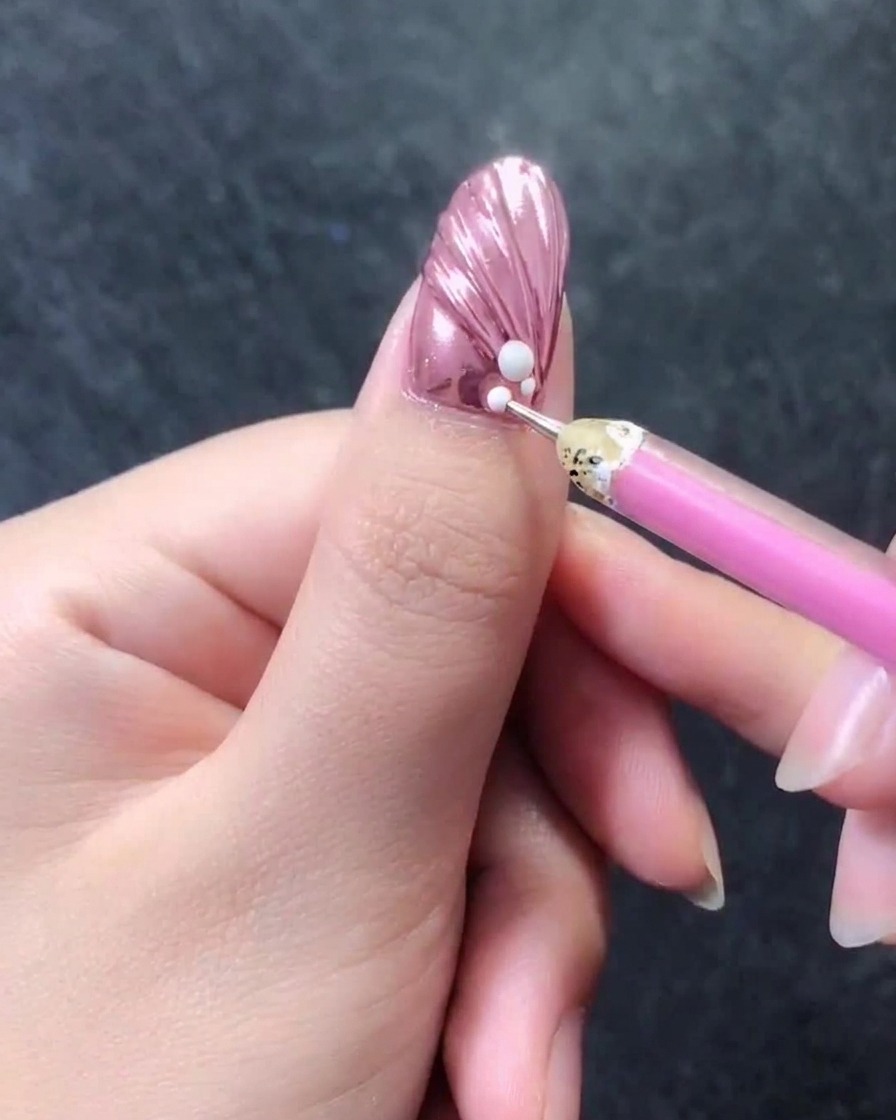
Use the wax picker pen to pick up tiny microbeads or smaller pearls and place them directly next to the main pearl. Arrange them tightly to complete the cuticle jewelry cluster, then fully cure the nail to lock the design in place.
Tip: Clustering smaller beads around a larger central gem helps anchor the embellishments visually and creates a more cohesive, professional look.