New Chinese Style Irregular French
Rose Nail Art Tutorial
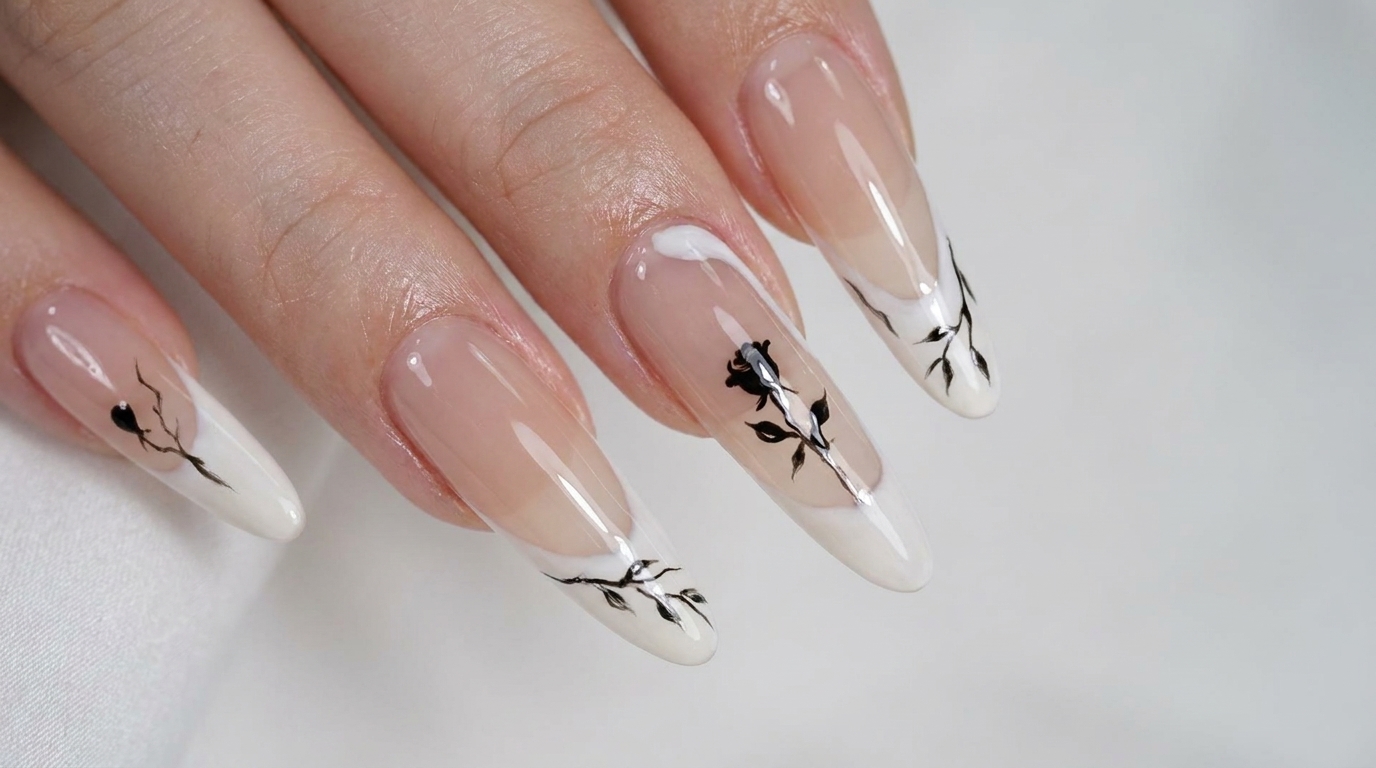
Create a stunning New Chinese style nail look featuring delicate black rose and branch illustrations paired with organic, wavy white French tips over a sheer nude base.
The New Chinese style nail trend beautifully blends traditional ink wash aesthetics with modern nail art techniques. This look combines delicate, hand-painted black roses and sweeping branches with stark white, irregular French tips over a sheer, natural base. Adding subtle metallic silver highlights elevates the design, giving it a sophisticated, porcelain-like finish that is both elegant and highly artistic.
Steps
- 1Apply a nude gel base coat
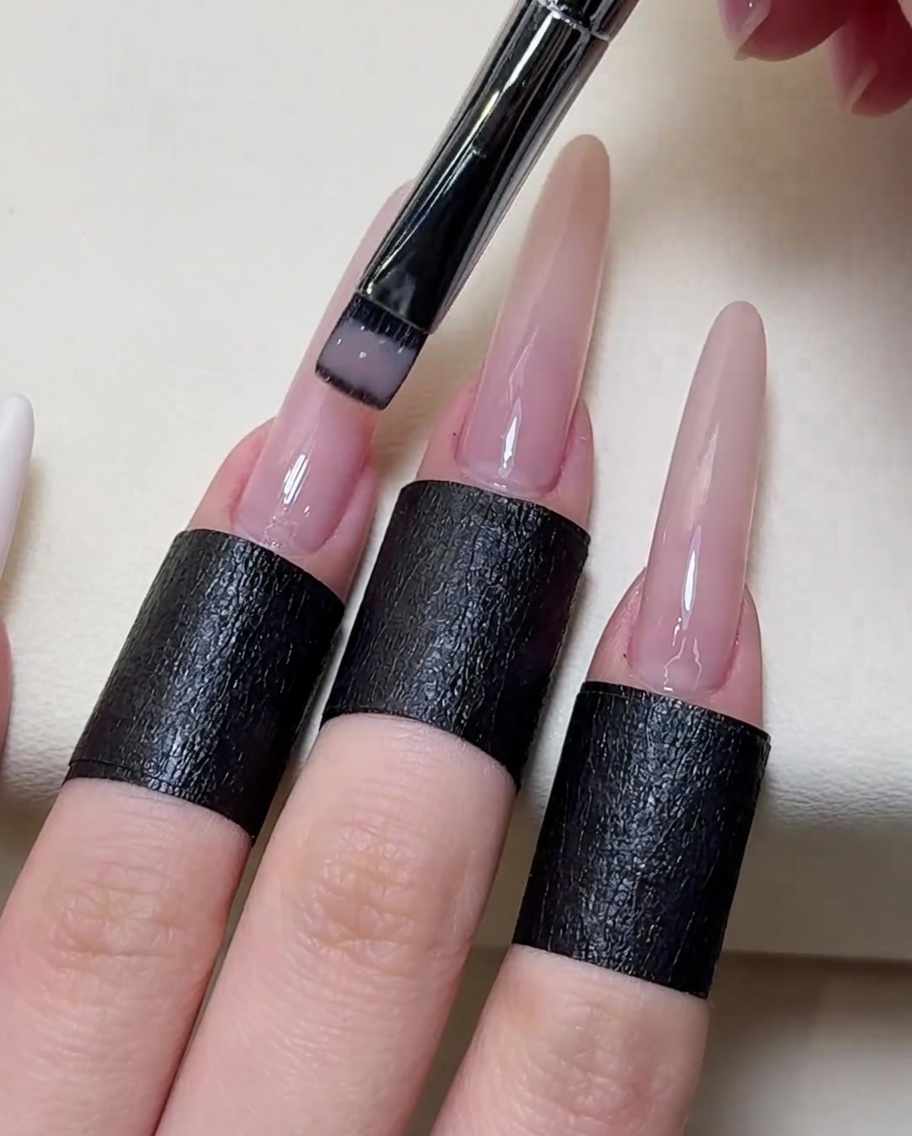
Begin by applying a thin, even layer of nude gel polish to the nail plate. Ensure you cover the entire nail surface while maintaining a clean cuticle line for a professional finish. Cure the gel under a UV or LED lamp as specified by the product instructions to set the base.
Tip: Applying thin layers helps prevent pooling at the edges and ensures a smoother, more durable base. - 2Position the rose stencil
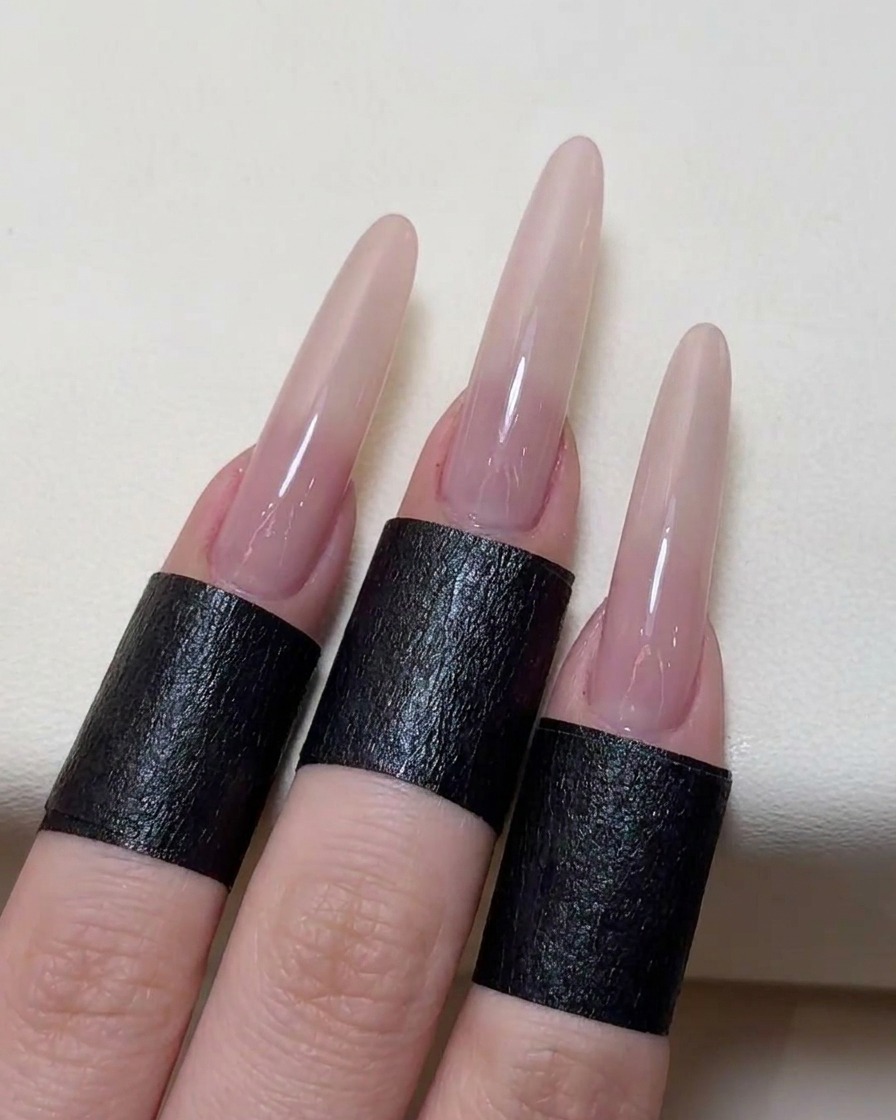
Carefully peel the rose-shaped sticker stencil and place it onto the center of the nail. Press down firmly on all edges of the sticker to ensure it is completely flush against the nail surface, which will prevent the polish from bleeding underneath during application.
Tip: Using tweezers can help you place the stencil more precisely without touching the sticky side with your fingers. - 3Imprint the rose design
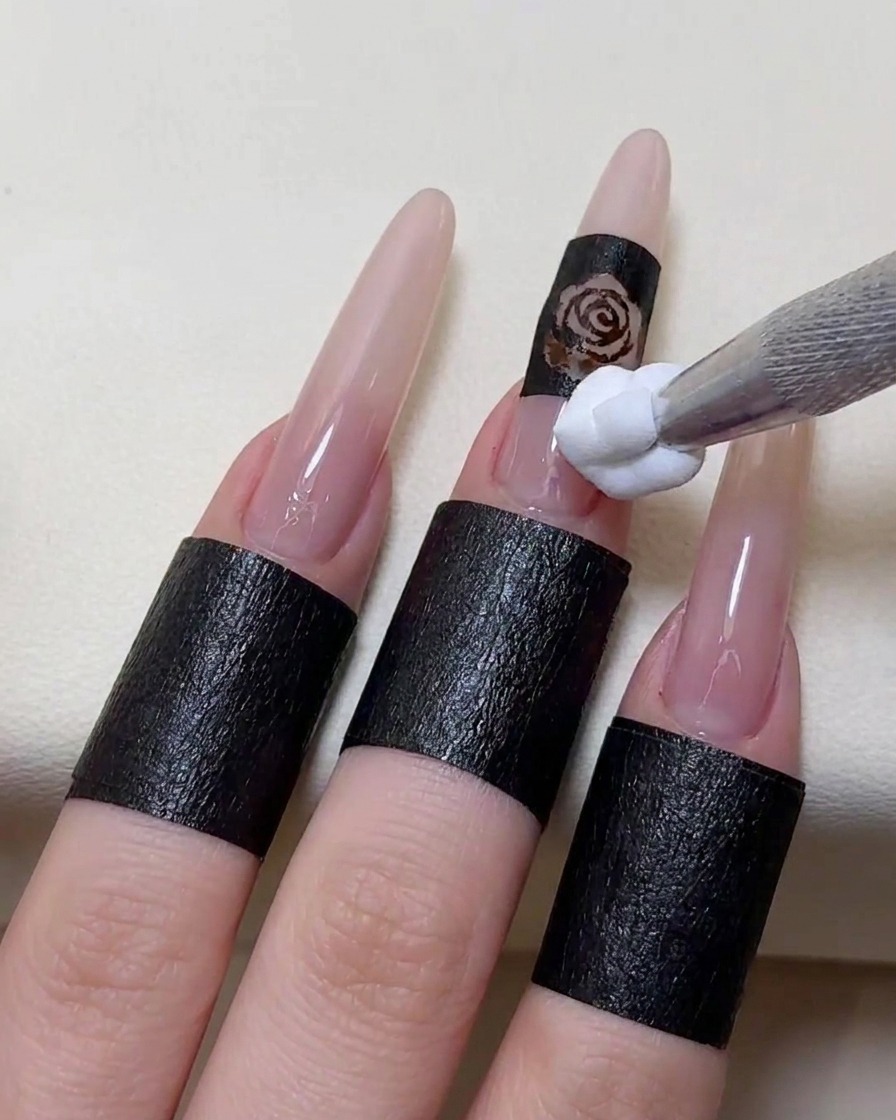
Apply a small amount of white gel polish onto a sponge-tipped applicator. Gently dab and pat the polish over the stencil area. This technique ensures that the white gel fills the cutouts of the stencil evenly without creating thick, textured bumps.
Tip: Use a light, stippling motion rather than a dragging motion to ensure the design remains crisp and clear. - 4Remove the stencil
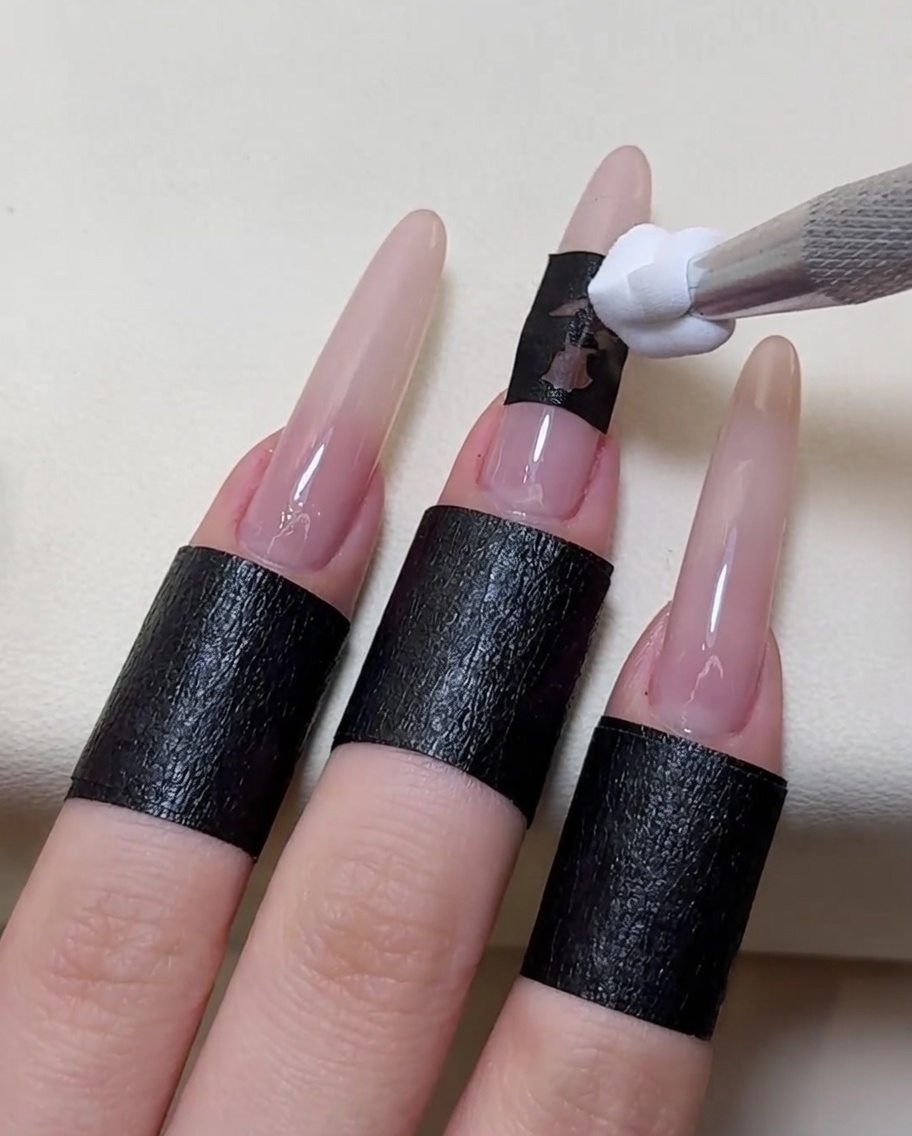
Once the white gel is applied, carefully peel away the stencil sticker while the polish is still wet. Use steady, slow motions to pull the sticker back, revealing the sharp, clean outline of the rose design on the nail.
Tip: Peel the sticker off immediately after dabbing the polish to avoid the gel drying and pulling away from the design. - 5Refine the rose with black gel
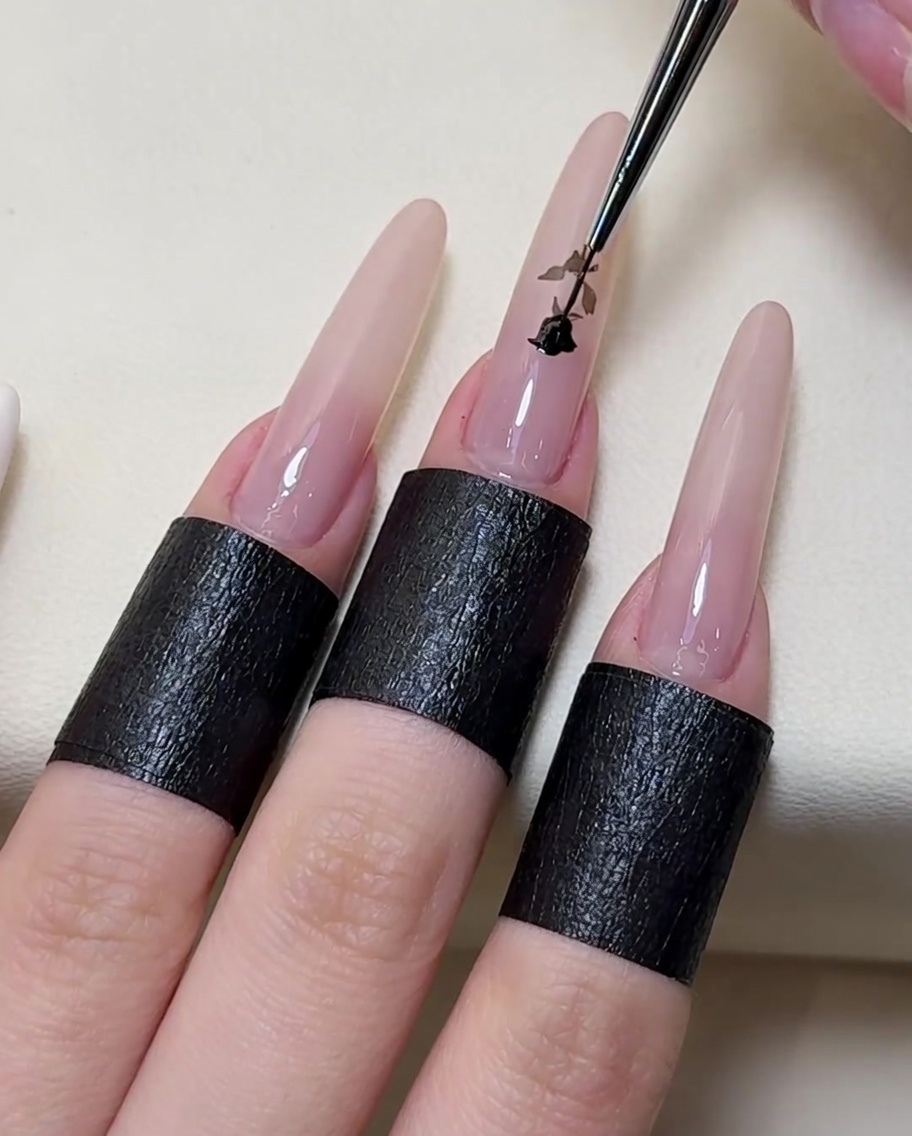
With a fine-detail brush and black painting gel, go over the white rose outline to add depth and definition. Fill in specific areas or trace the edges to make the rose design stand out vividly against the nude background.
Tip: Keep your hand steady by resting your pinky finger against the other hand for stability when working on fine details. - 6Paint irregular French tips
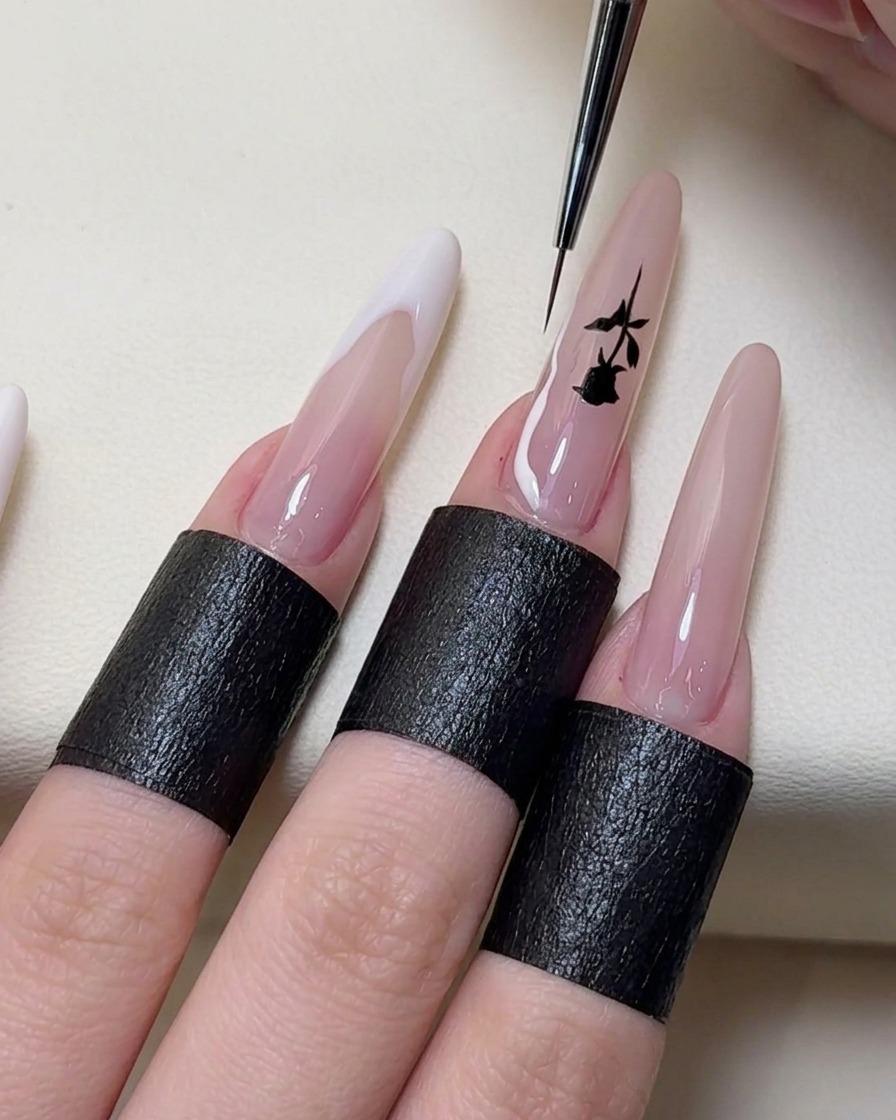
Using a thin brush and your chosen color paint wavy and uneven French tip lines on the remaining nails. The irregular style allows for a modern artistic look so vary the thickness and curvature of the lines across the different nails.
Tip: Start with a thin line to map out the shape then build up the thickness as needed for the desired irregular effect. - 7Draw delicate tree branches
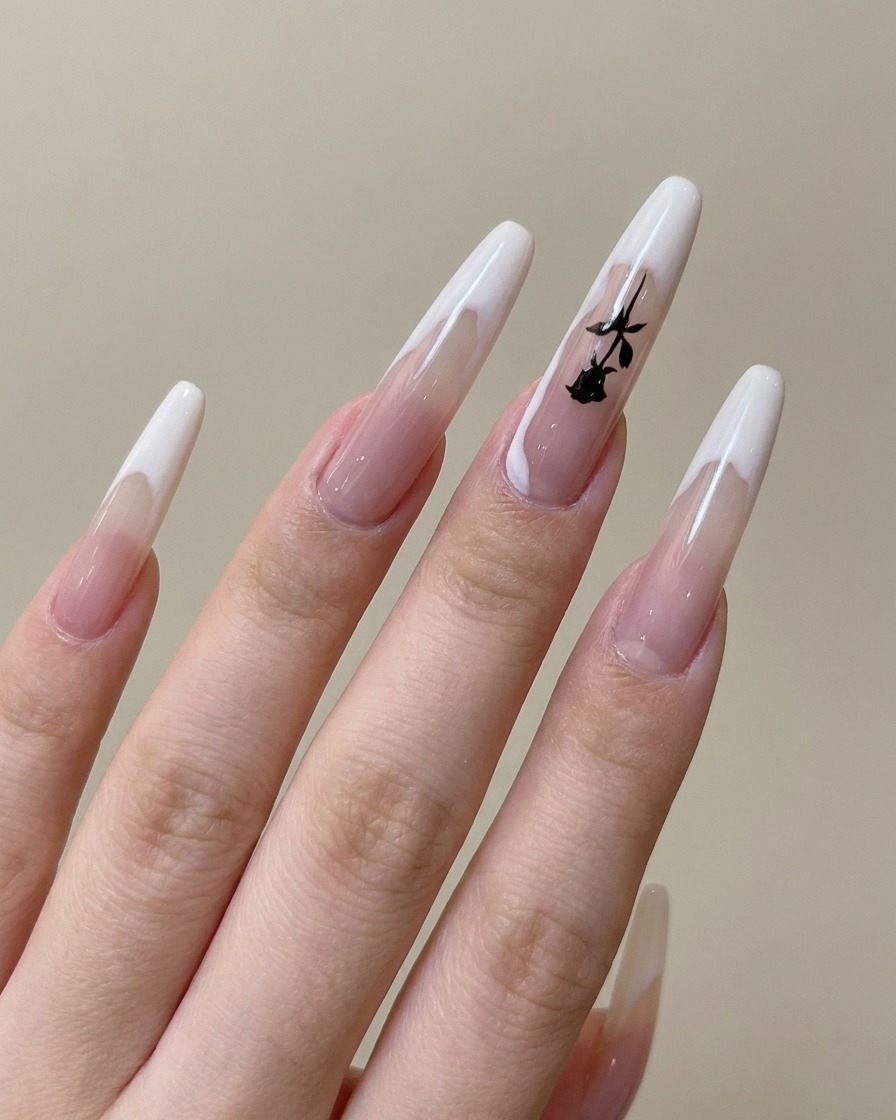
Using a fine liner brush and black painting gel, carefully draw delicate, thin tree branch patterns extending from the sides of the nail, originating from the French tip line. Ensure the strokes are light and tapered for a natural, artistic appearance.
Tip: Keep a light hand to achieve thin, elegant lines. If the gel is too thick, wipe the brush on a lint-free pad before applying. - 8Add detailed branch patterns
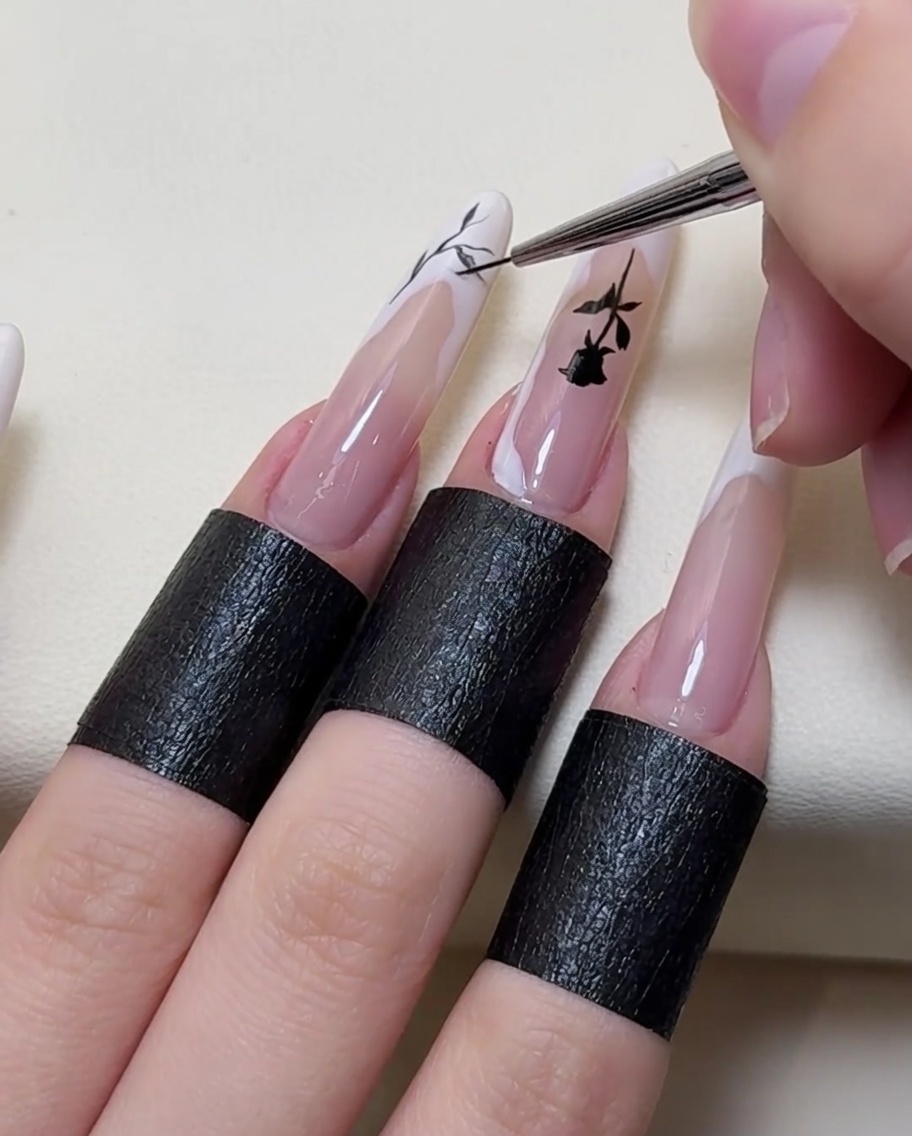
Enhance the design on the index finger by adding more detailed or layered branch patterns using the fine liner brush and black painting gel. This increases the complexity of the art while maintaining the cohesive theme established on the other nails.
Tip: Varied branch lengths and directions can help balance the design on larger nail surfaces. - 9Outline with metallic silver
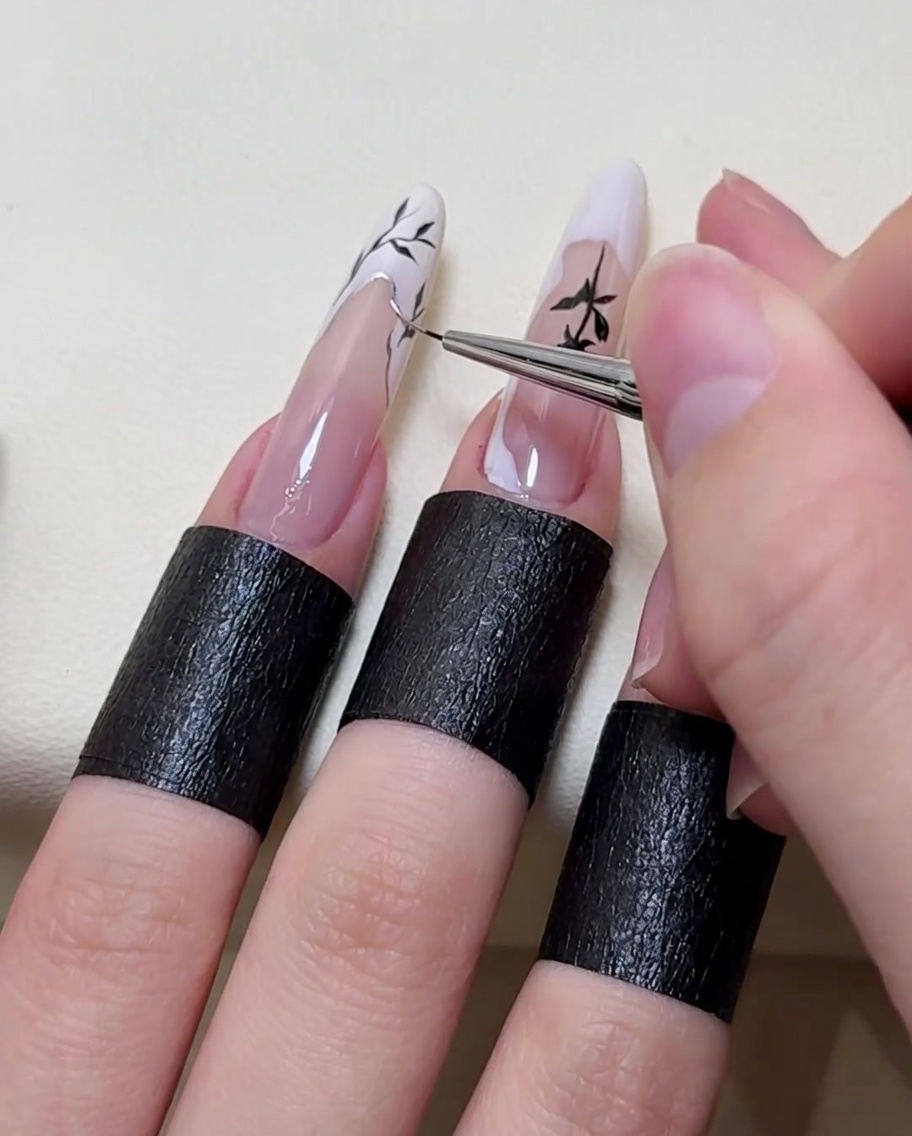
Using a fine liner brush and metallic silver gel, trace or outline specific parts of the black branch designs and the French tip edges. This adds a subtle shimmer, highlights the art, and provides dimension to the overall New Chinese style look.
Tip: Apply the metallic gel sparingly to highlight the edges rather than covering the existing art. - 10Seal with top coat
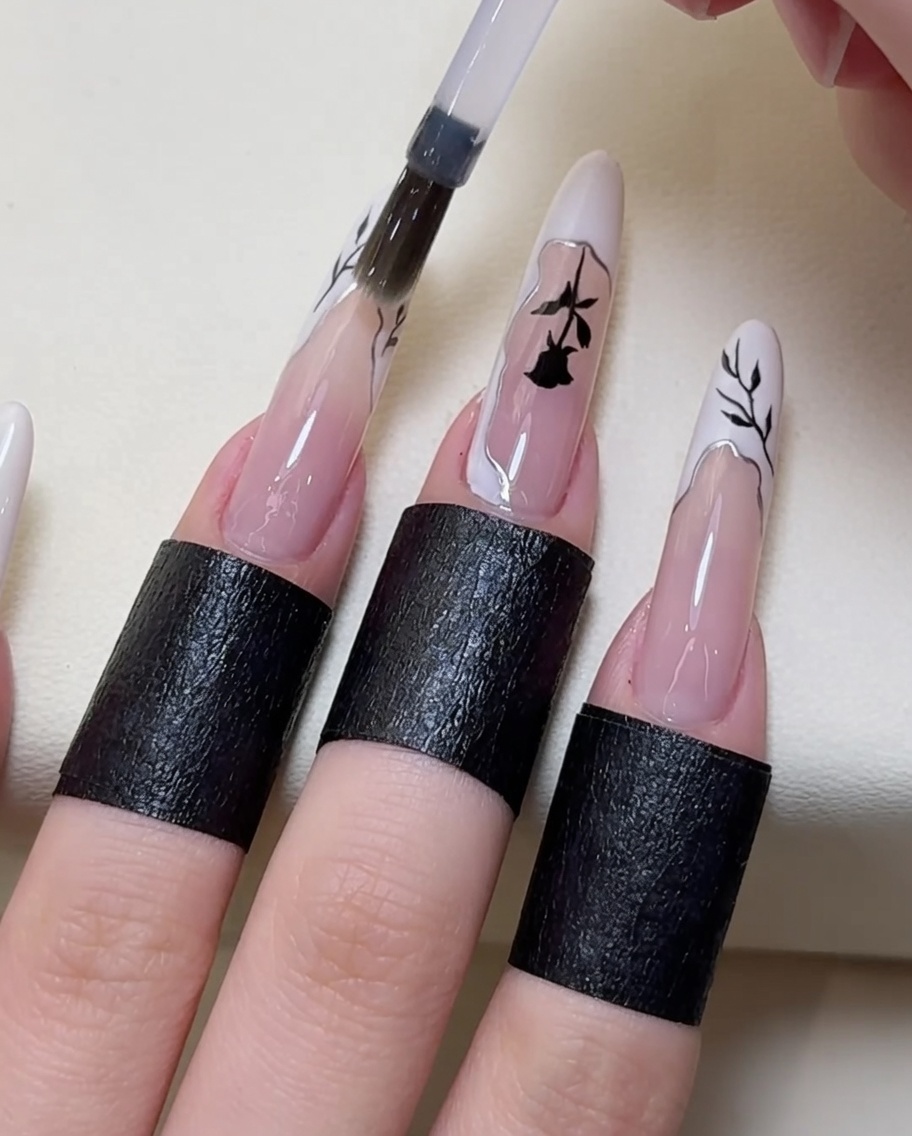
Apply a generous, even layer of clear gel top coat over the entire nail, ensuring all art is covered and the free edge is capped. Cure the nail completely under your lamp to seal the design, prevent peeling, and provide a smooth, high-gloss professional finish.
Tip: Ensure the top coat covers the entire nail surface, including all painted details, for a long-lasting, durable finish. - 11Apply irregular white French tips
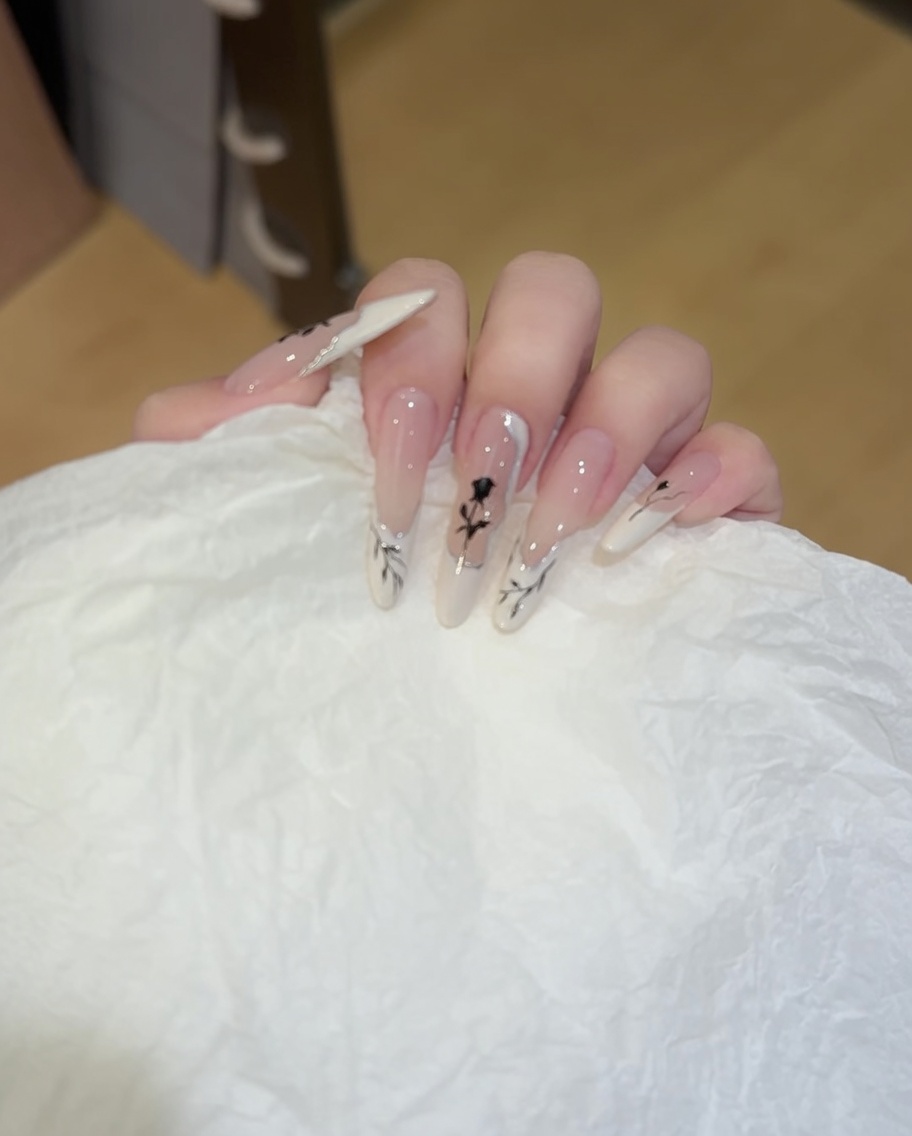
Using a white gel polish, draw irregular, wavy French tip lines across the free edge of each nail. The lines should look organic and slightly uneven to fit the artistic New Chinese style. Cure the nails under your UV/LED lamp to set the polish before adding further details.
Tip: Keep your brush movements fluid to achieve the wavy look; dont worry about perfect symmetry, as the style is meant to look natural and artistic.