Dark Floral Black French Tip
Cat-Eye Stiletto Nails — Step-by-Step Tutorial
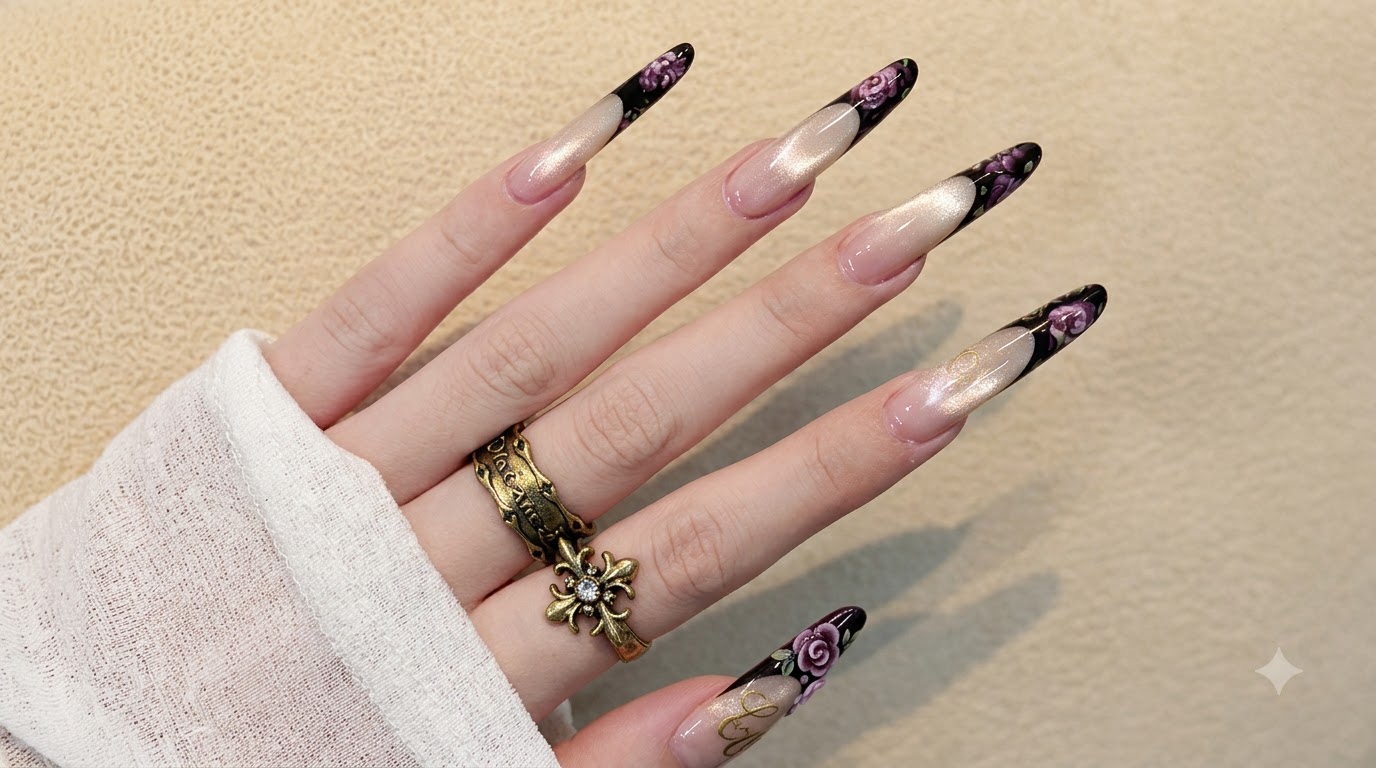
Elevate your stiletto nails with a grey cat-eye base, dramatic black French tips, and hand-painted dark plum and pink 3D-style roses.
Moody floral nail art combined with high-contrast French tips creates an exceptionally striking, gothic-chic aesthetic. This look pairs a pearlescent grey cat-eye shimmer base with precision black French lines, finished off with whimsical hand-painted roses and delicate green leaves.
Steps
- 1Apply protective tape
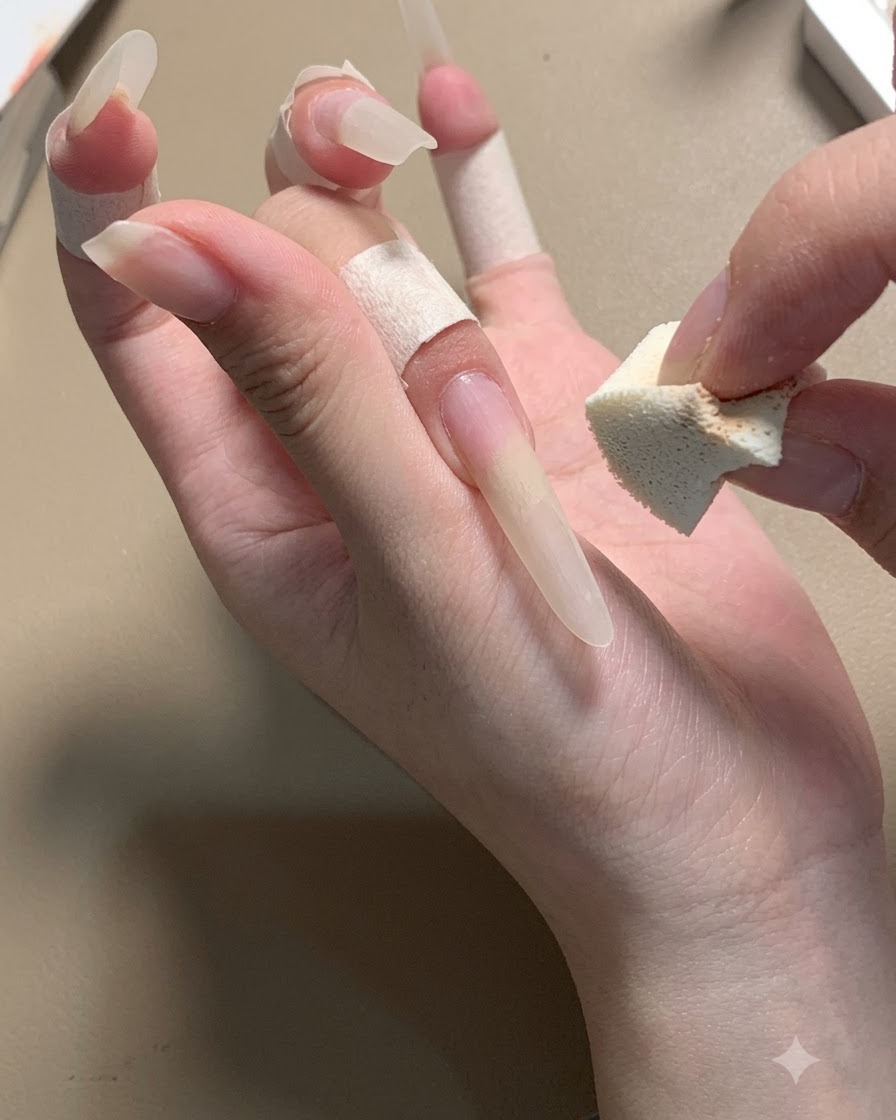
Apply protective tape to the skin under and around the long stiletto nail tip to prevent any accidental gel or product contact during the application process. This ensures clean edges and protects the surrounding skin from irritation.
Tip: Make sure the tape is pressed down firmly to prevent liquid gel from seeping underneath. - 2Brush nude color gel
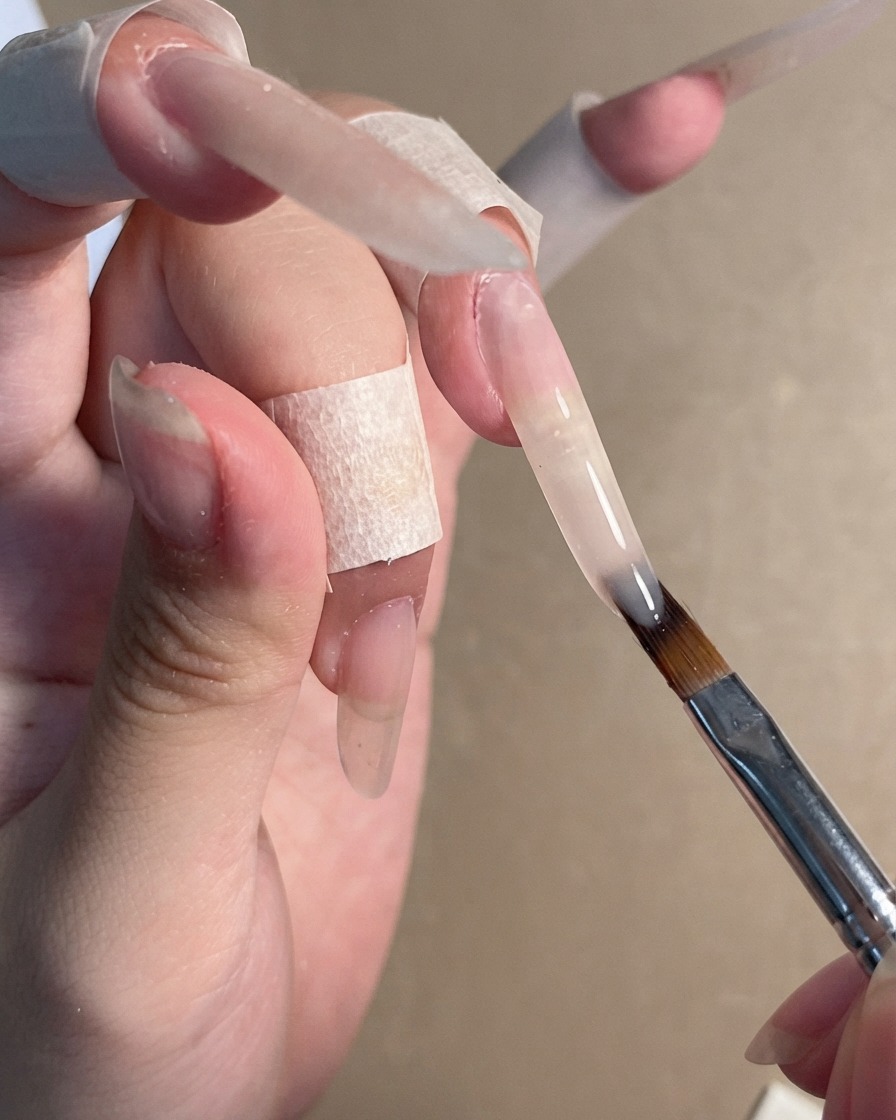
Brush a sheer nude color gel evenly onto the entire nail plate, starting from the cuticle area down to the free edge. Ensure a smooth and consistent layer to serve as the foundation for the upcoming nail art steps.
Tip: Keep the brush strokes light and even to avoid streaking with sheer nude gels. - 3Apply grey-toned cat-eye gel
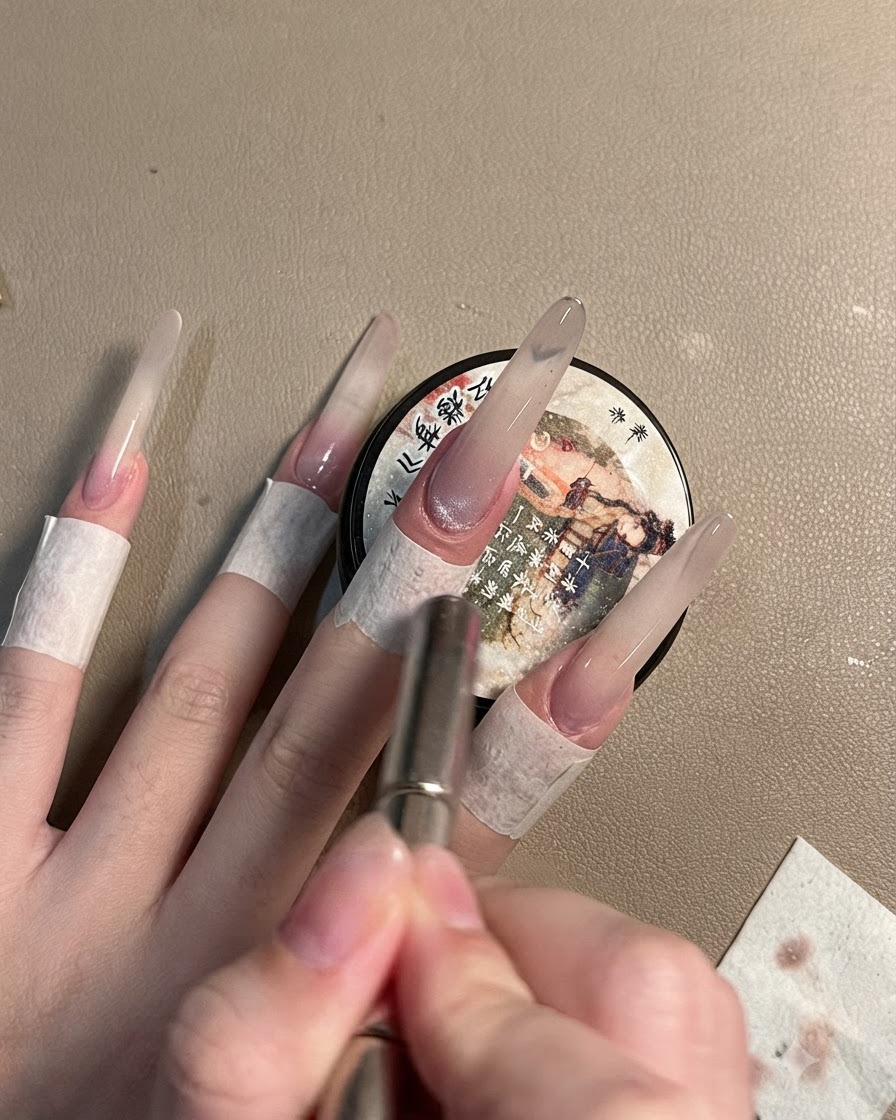
Apply a grey-toned cat-eye shimmer gel over the cured nude base layer, and use a magnet tool to manipulate the shimmer particles into a centered glowing beam effect.
Tip: Hold the magnet steady close to the nail for a few seconds to achieve a sharp and defined magnetic line. - 4Display cat-eye shimmer effect
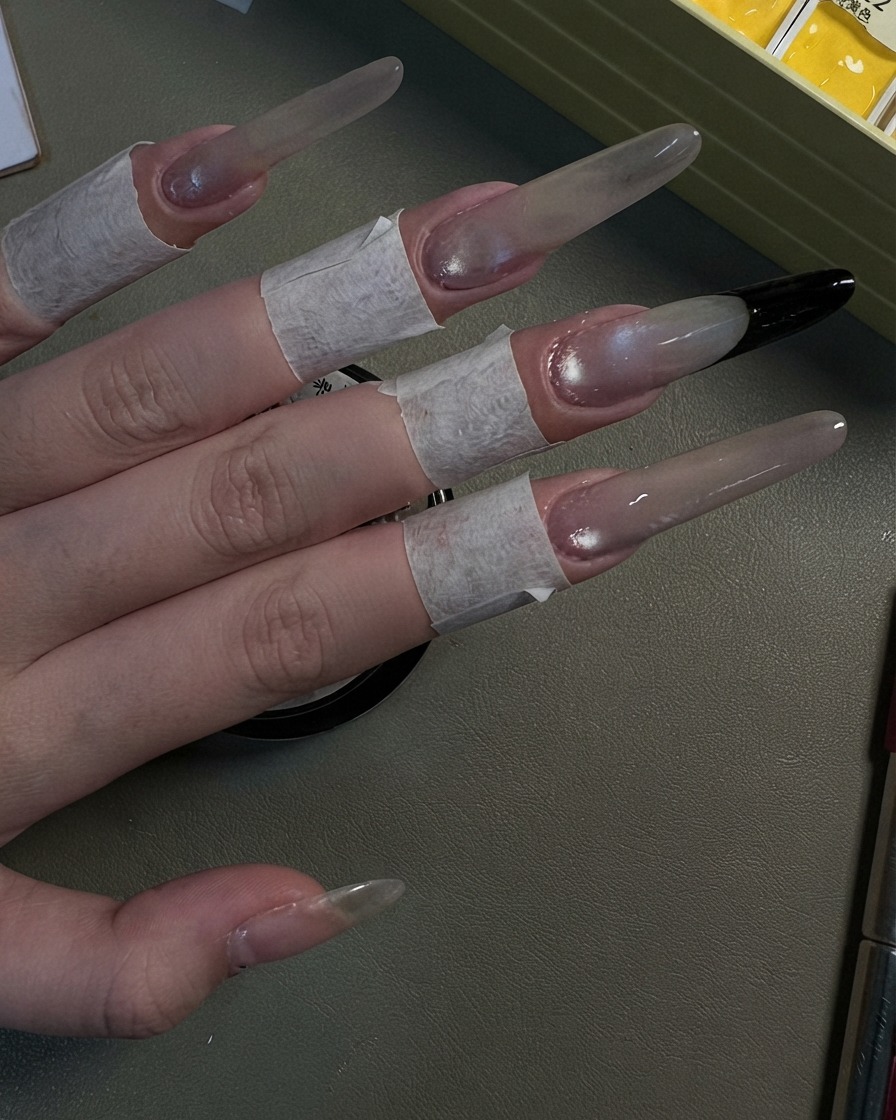
Display the finished pearlescent cat-eye shimmer effect across the four fingers to inspect the magnetic light reflection before moving on to the next styling steps.
Tip: Check the shimmer under different angles to ensure the cat-eye effect looks uniform across all nails. - 5Draw black French smile line outline
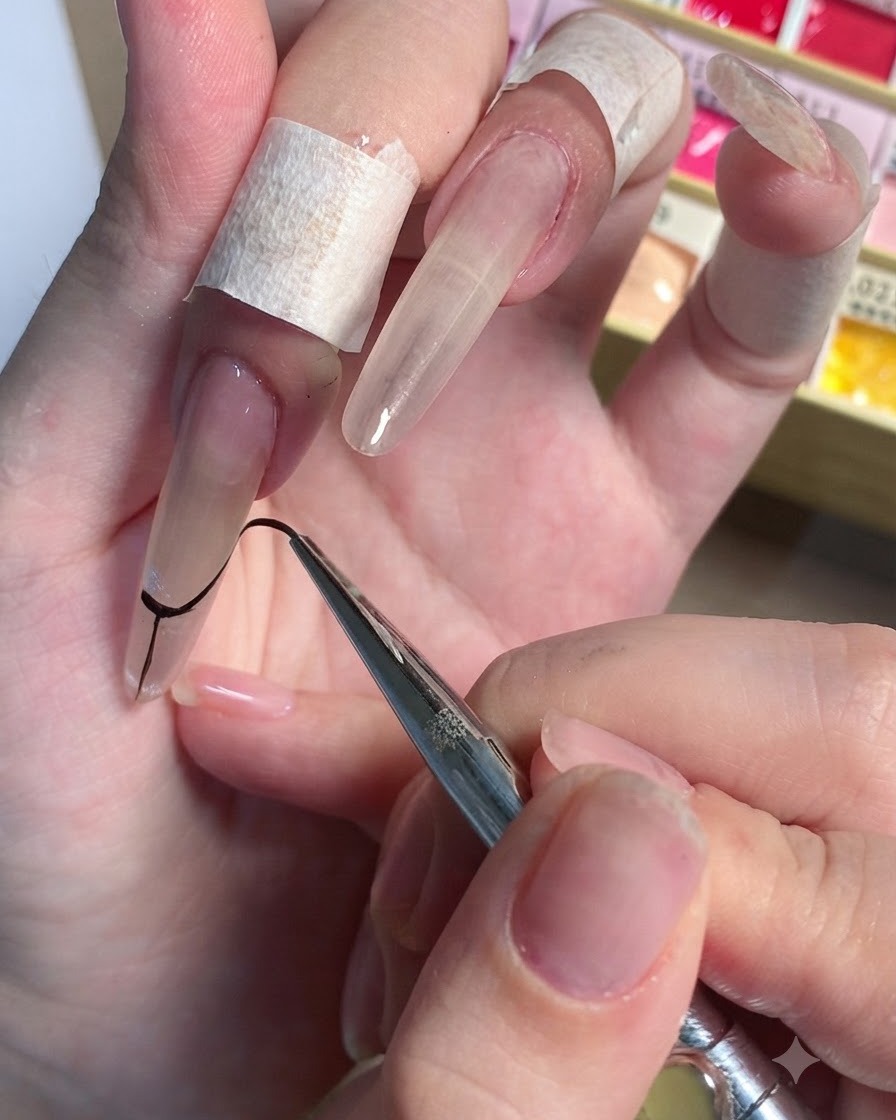
Using a fine liner brush dipped in black gel, carefully draw a deep, curved French smile line outline near the tip of the long stiletto nail.
Tip: Stabilize your hand against your finger or clients hand to maintain a smooth, steady line. - 6Refine black French line edges
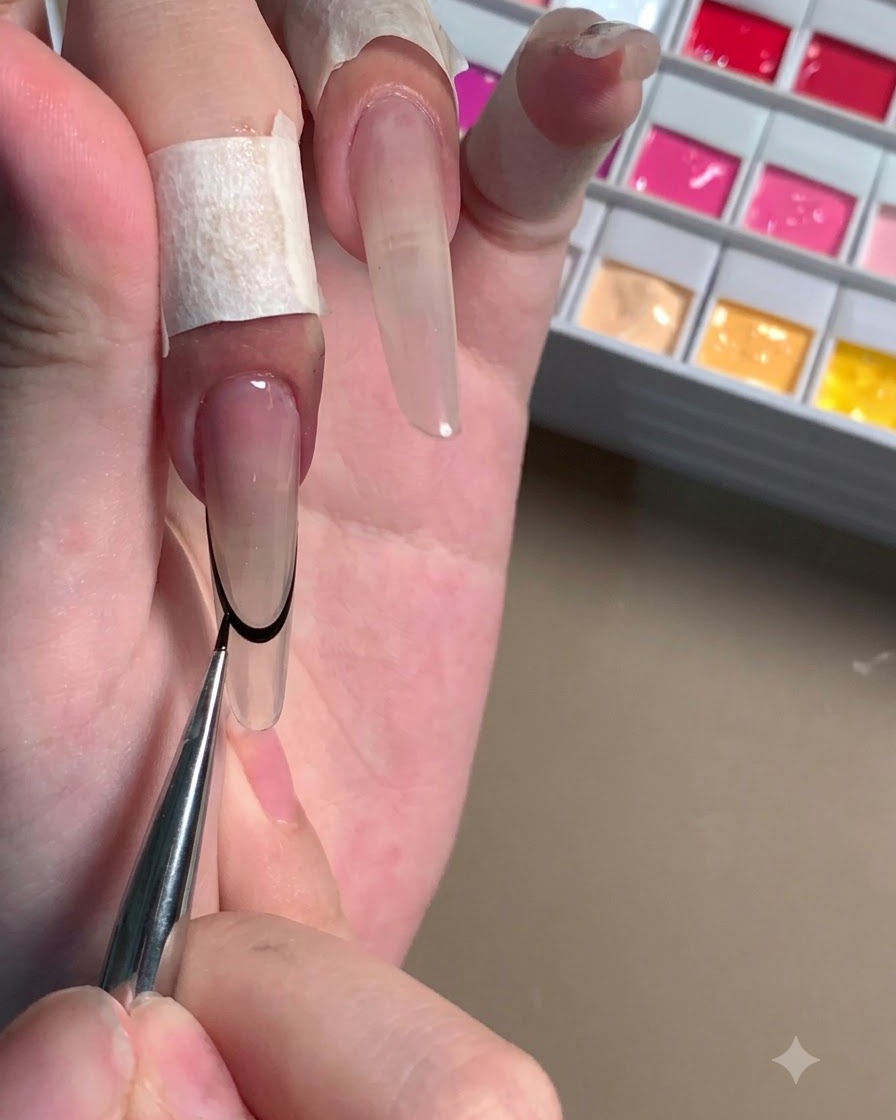
Refine and straighten the edges of the black French smile line outline using a fine detailing brush to ensure symmetry and clean contours before filling.
Tip: Clean your liner brush with a tiny bit of alcohol to easily wipe away minor mistakes along the smile line. - 7Fill the French tip
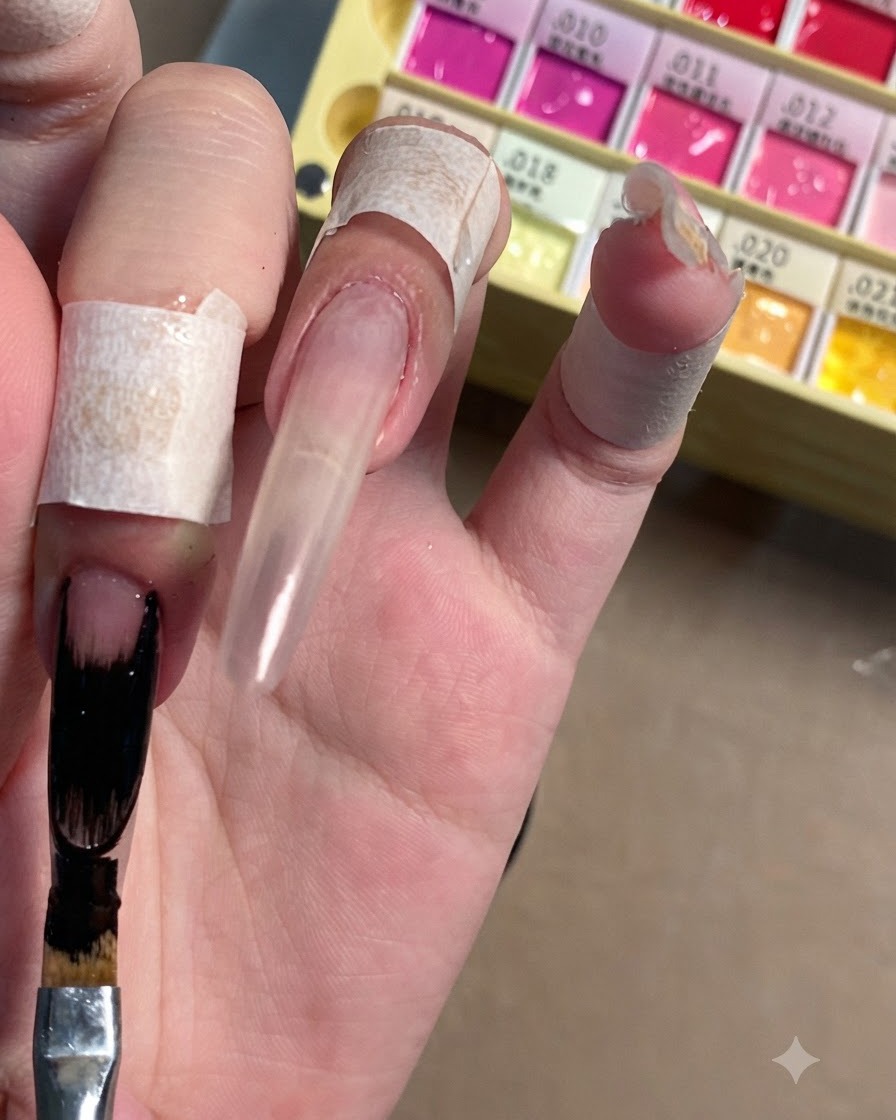
Using a wider flat gel brush, completely fill in the free edge of the nail with black gel, working carefully below the smile line outline you just created.
Tip: Make sure to time your application and curing right, otherwise the black gel may shrink or pull away from the edges. - 8Refine black gel coverage
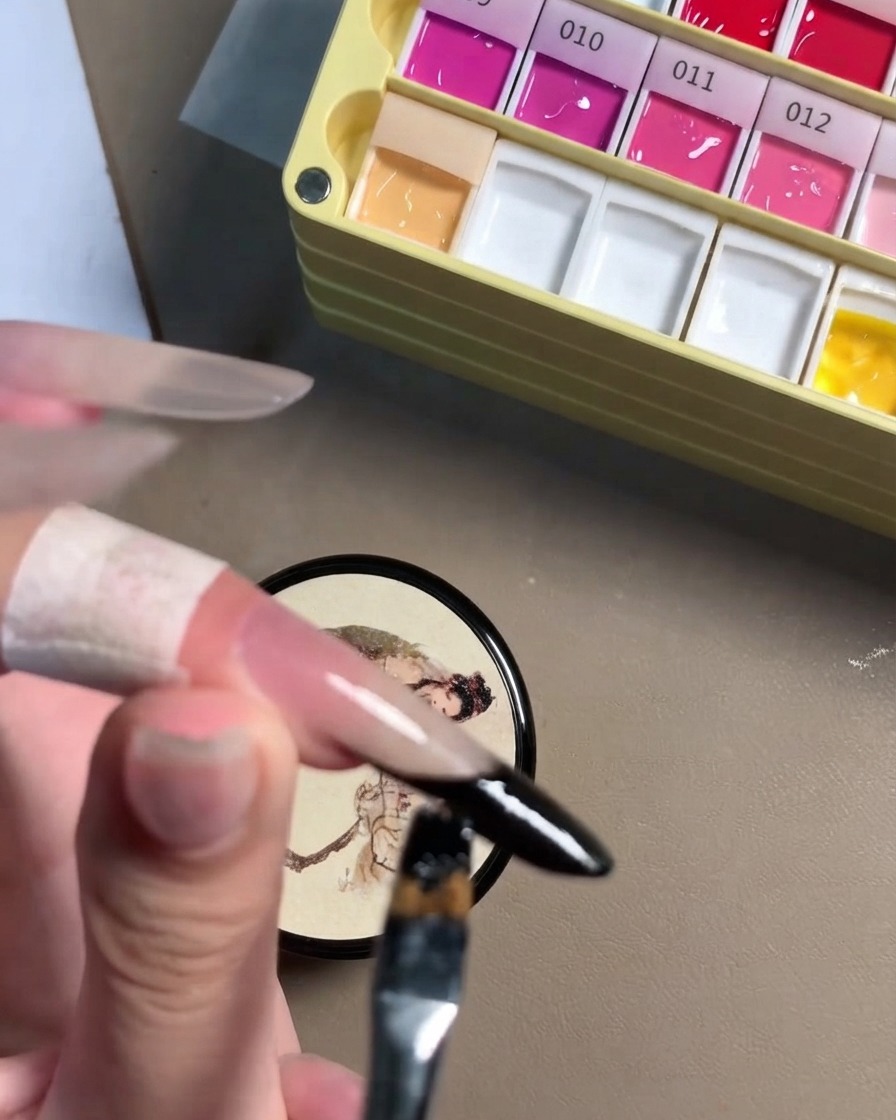
Carefully go over the black gel on the sidewalls and tip of the stiletto nail to ensure complete, opaque coverage. Clean up any uneven lines along the smile line to keep the French tip looking sharp and crisp before curing.
Tip: Taking extra time to perfect the edges here prevents patchy spots and ensures a professional finish. - 9Review the completed French tips
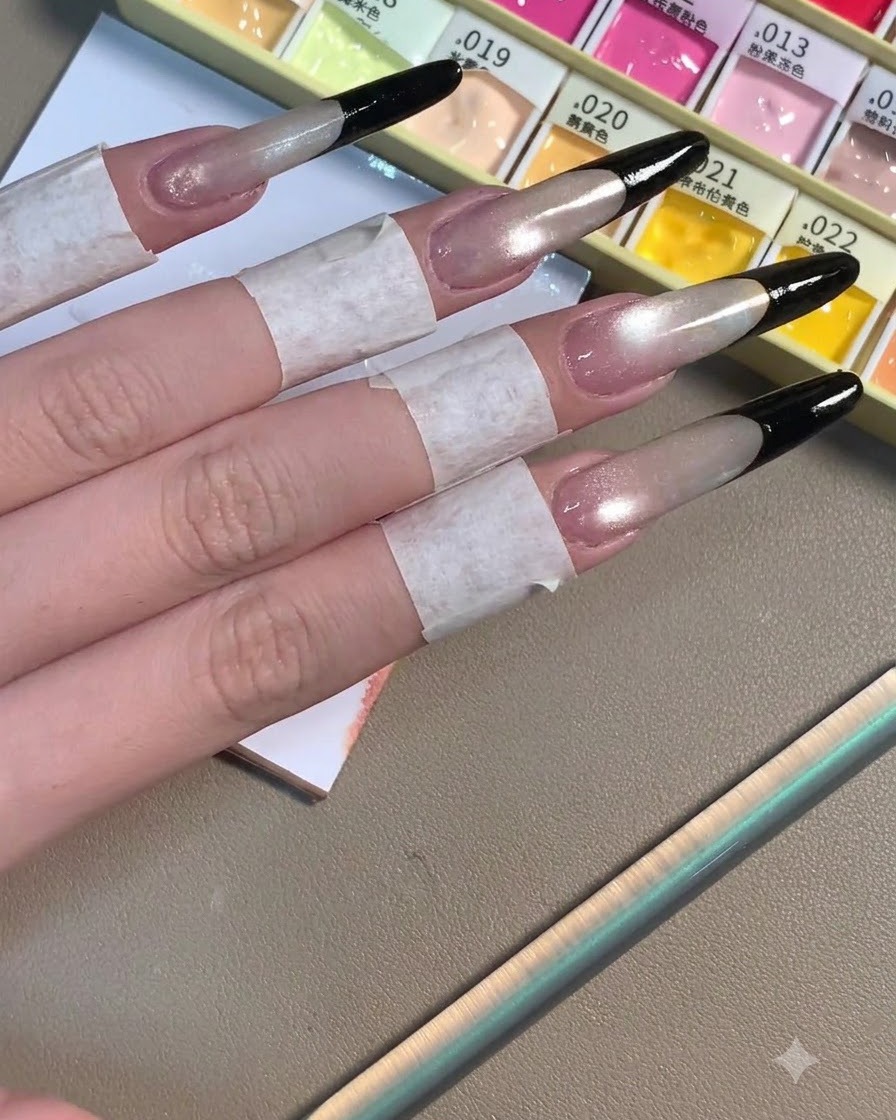
Take a moment to check all your nails to ensure the black French tips are even and fully opaque. The sharp contrast against the nude, grey-toned cat-eye base creates a sleek and striking look.
Tip: If any edges look sheer or uneven, gently touch them up with a liner brush before fully curing. - 10Prepare the rose red base
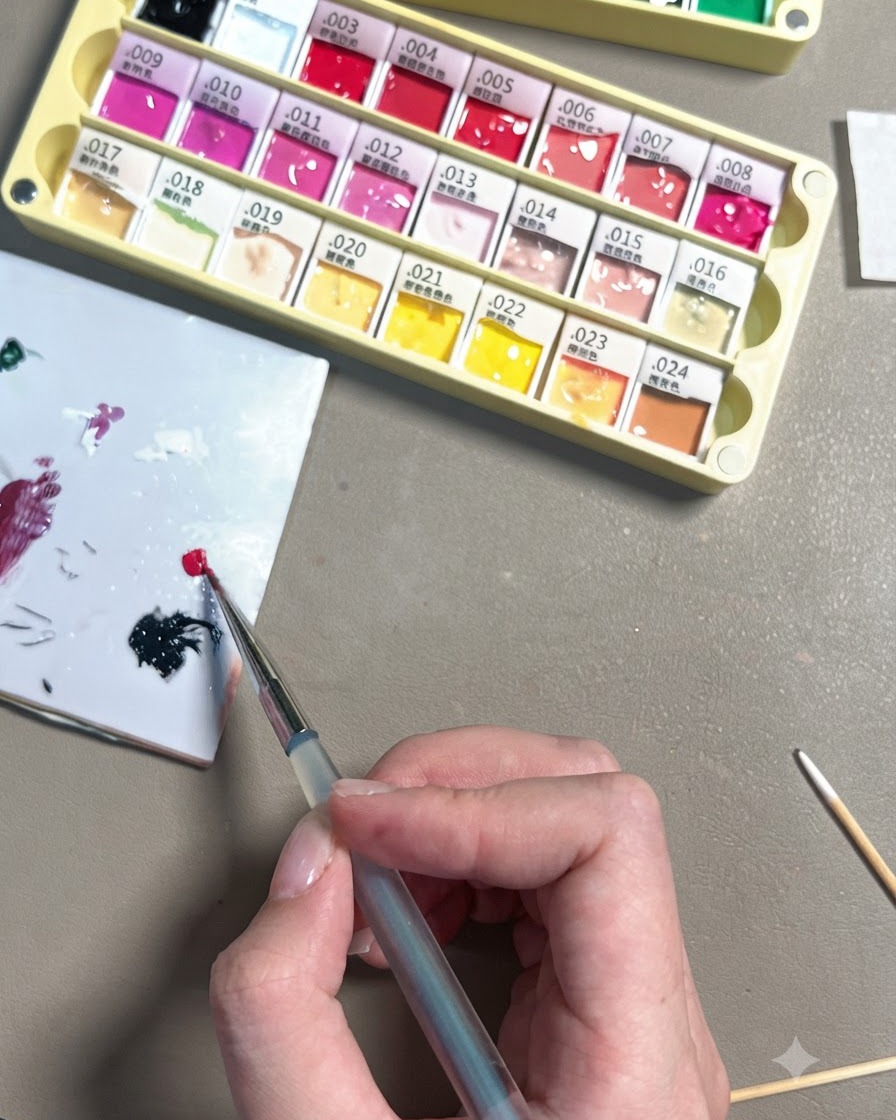
To begin creating the signature flower design, take a small dab of bright rose red gel and place it onto a clean white mixing palette.
Tip: Start with a small amount of color to avoid wasting product; you can always dispense more if you decide to add more petals later. - 11Add black for depth
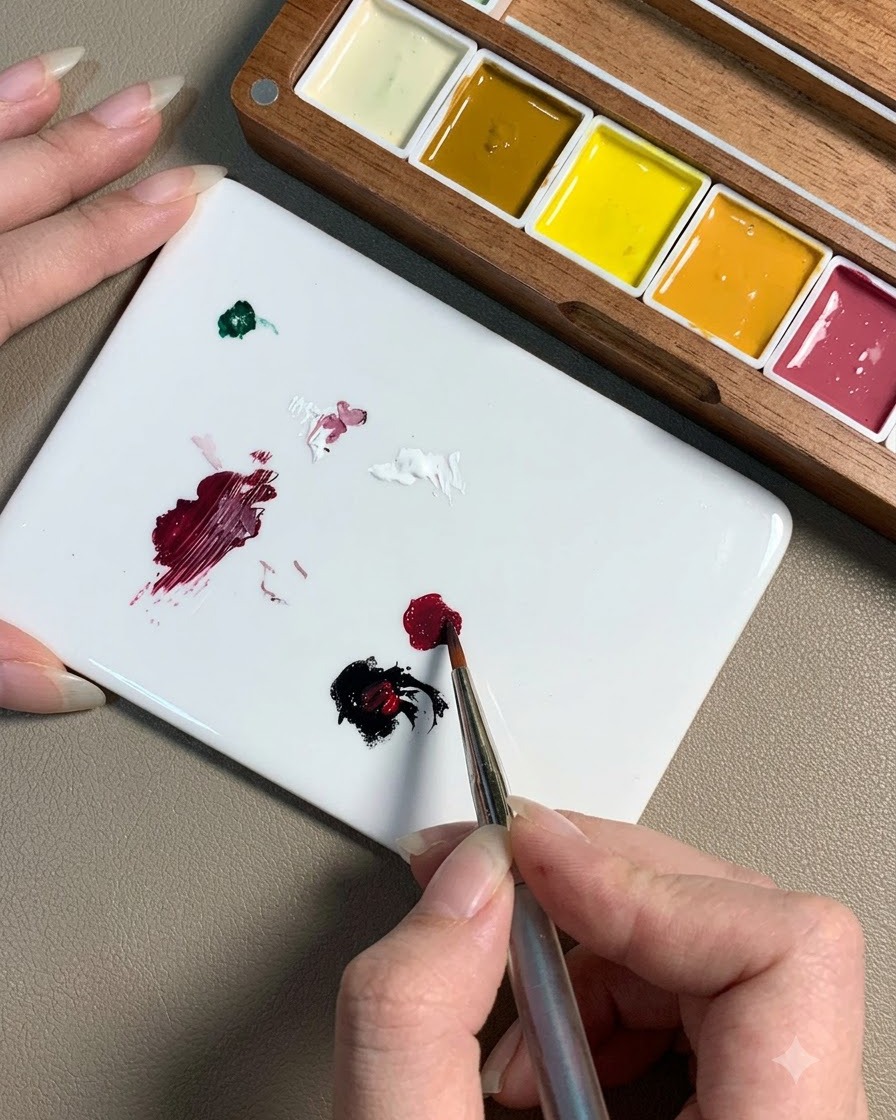
Place a tiny amount of black gel next to your red on the palette. Slowly begin to mix a small fraction of the black into the bright rose red to deepen the color and create a moodier tone.
Tip: Black gel is intensely pigmented. It is much easier to add more black incrementally than to try and fix a mix that has become too dark. - 12Blend the perfect plum shade
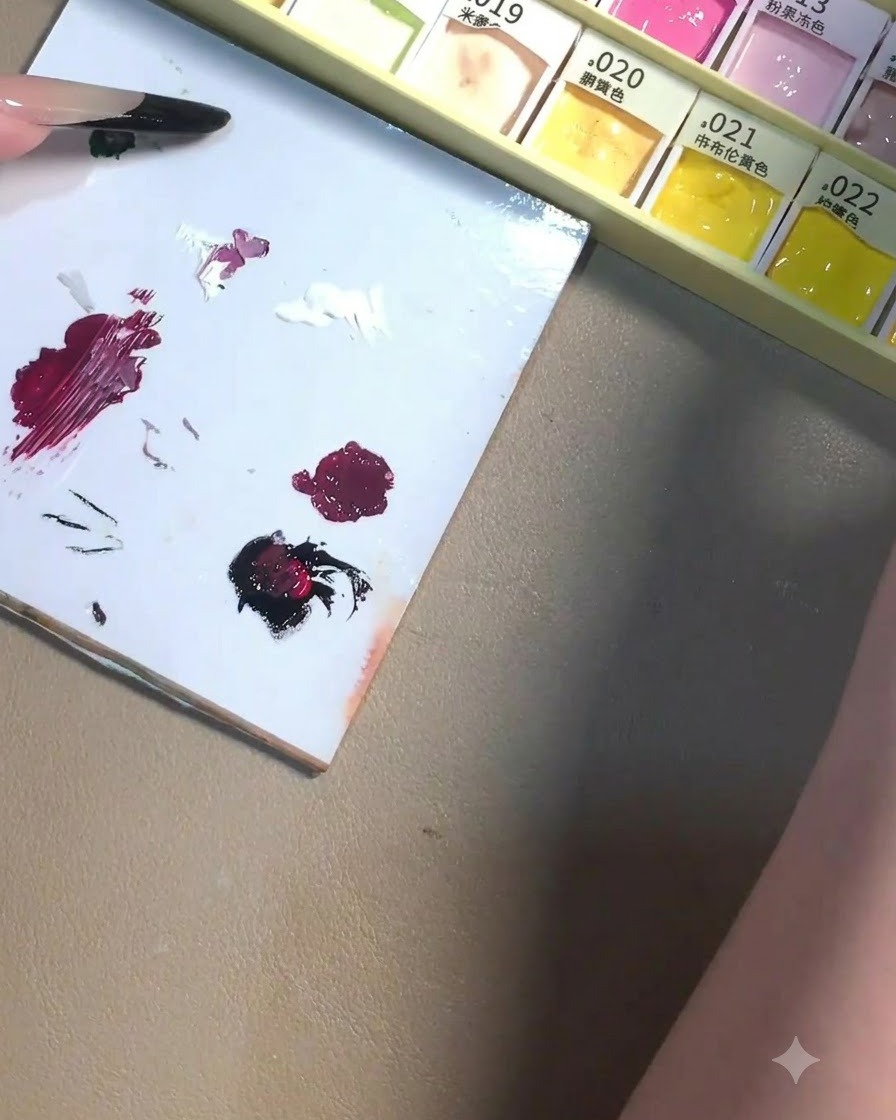
Thoroughly blend the red and black gel colors together on the palette until you achieve a uniform, deep plum shade. This rich, dark color will serve as the base silhouette for your rose petals.
Tip: Ensure the mixture has no streaks of unmixed red or black to maintain a consistent color profile across all your nails. - 13Paint abstract dark plum roses
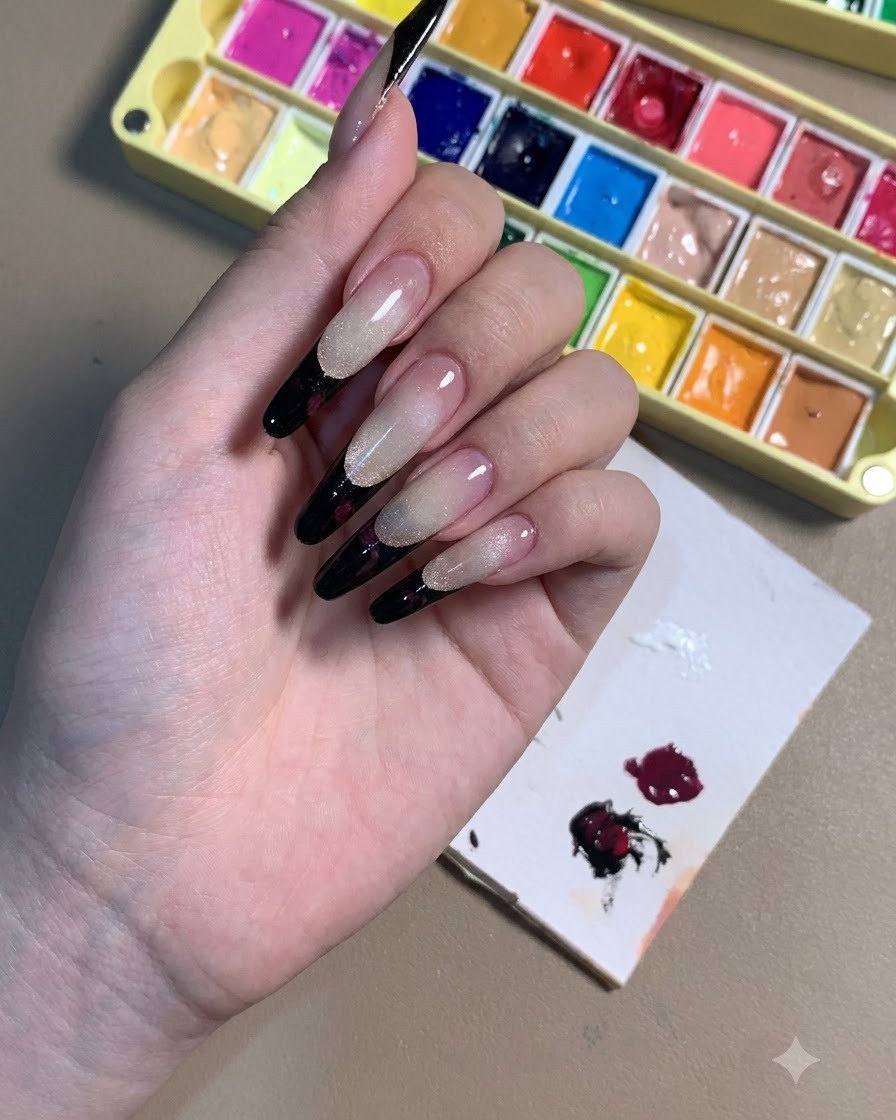
Mix rose red and a touch of black to create a deep plum shade. Using a fine liner brush, paint rough and abstract rose shapes directly onto the black French tips with a slightly shaky hand for an organic look.
Tip: A slightly loose, sketchy hand motion makes the floral art look more artistic and natural rather than overly rigid. - 14Add secondary plum petals and details
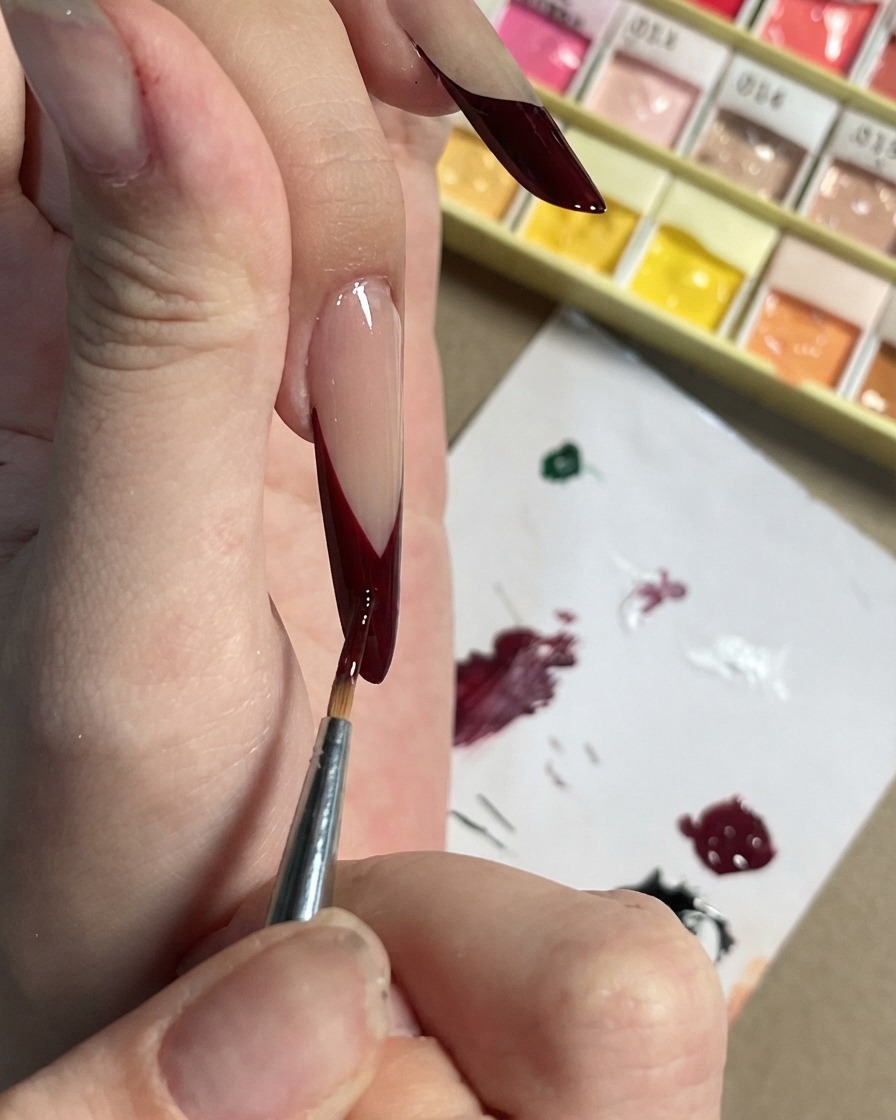
Using the same dark plum mix, dot smaller shapes and abstract petaled accents around the main rose outlines to fill out the composition. Keep the placement varied and spontaneous across the black tip.
Tip: Varying the size of the dots and petals adds depth and dimension to the floral clusters. - 15Cure the first floral layer
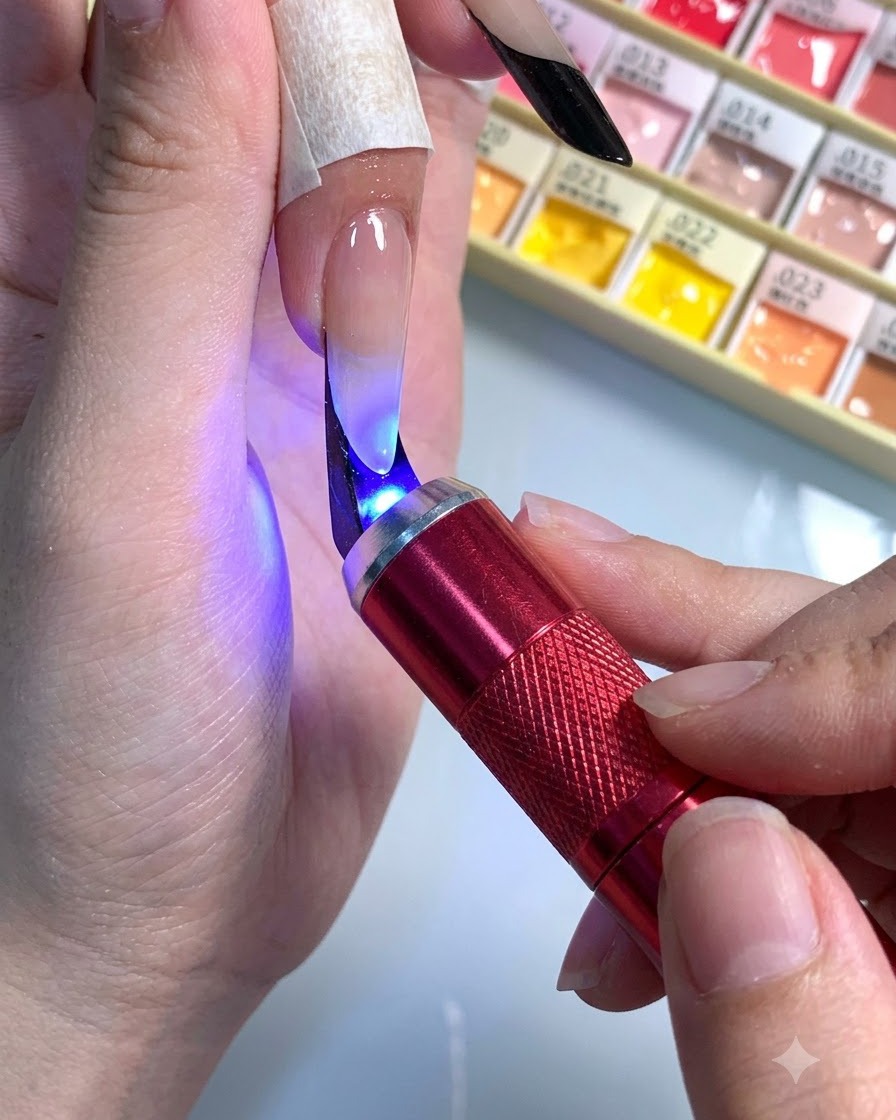
Place the nail under a portable pink UV/LED flashlight lamp to flash cure the newly painted dark floral layer. Ensure the gel is fully set so it does not smudge when applying the next highlight layer.
Tip: Flash curing detailed art piece-by-piece prevents accidental smudging while working on intricate designs. - 16Mix light pink highlight shade
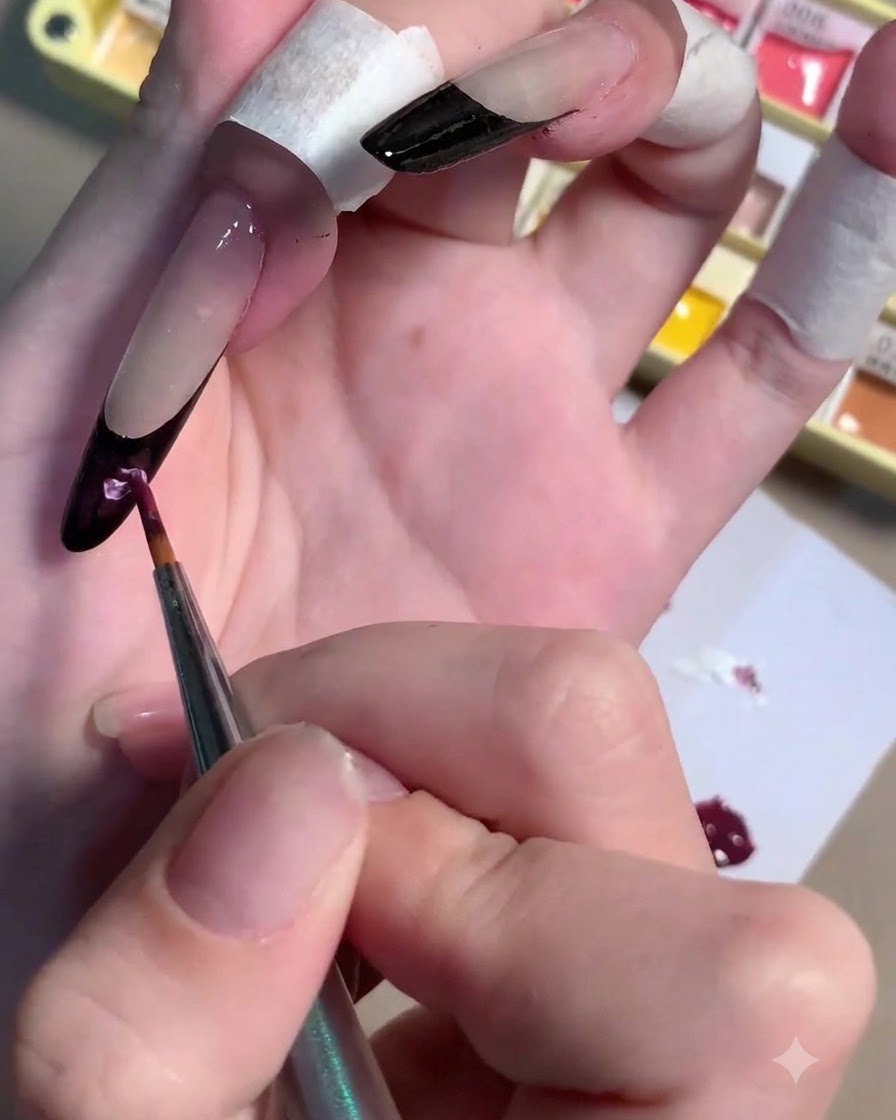
Incorporate a small amount of white gel directly into the leftover dark plum mixture on your palette without cleaning your brush. Blend them together to achieve a softer, lighter pink tone for the flower highlights.
Tip: Keeping a bit of the original dark shade in the mix helps maintain color harmony for the gradient effect. - 17Paint overlapping light pink petals
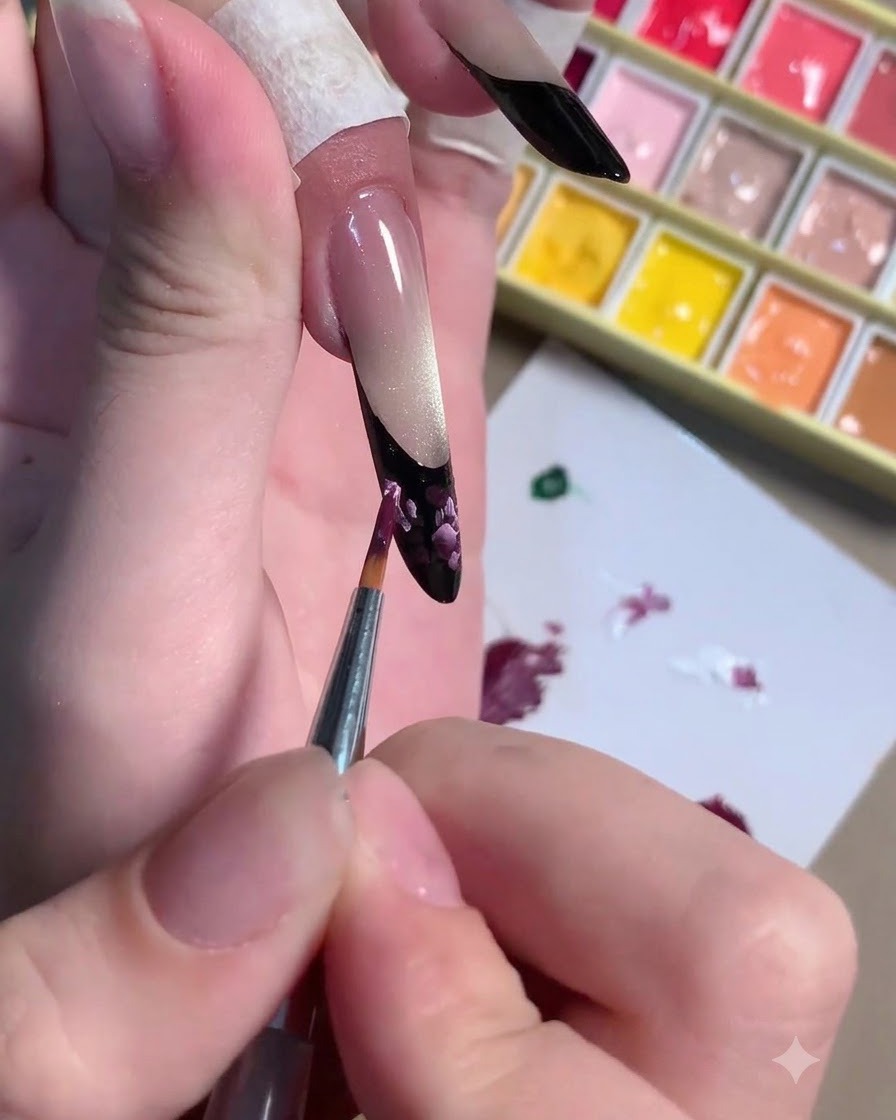
Using the light pink mixture, layer random, overlapping petals directly over the cured dark plum rose base. Random placement creates a rich, multi-dimensional gradient look with organic depth.
Tip: Embrace asymmetry and randomness here; the more varied the petal strokes, the more natural the flower appears. - 18Create a 3D petal gradient
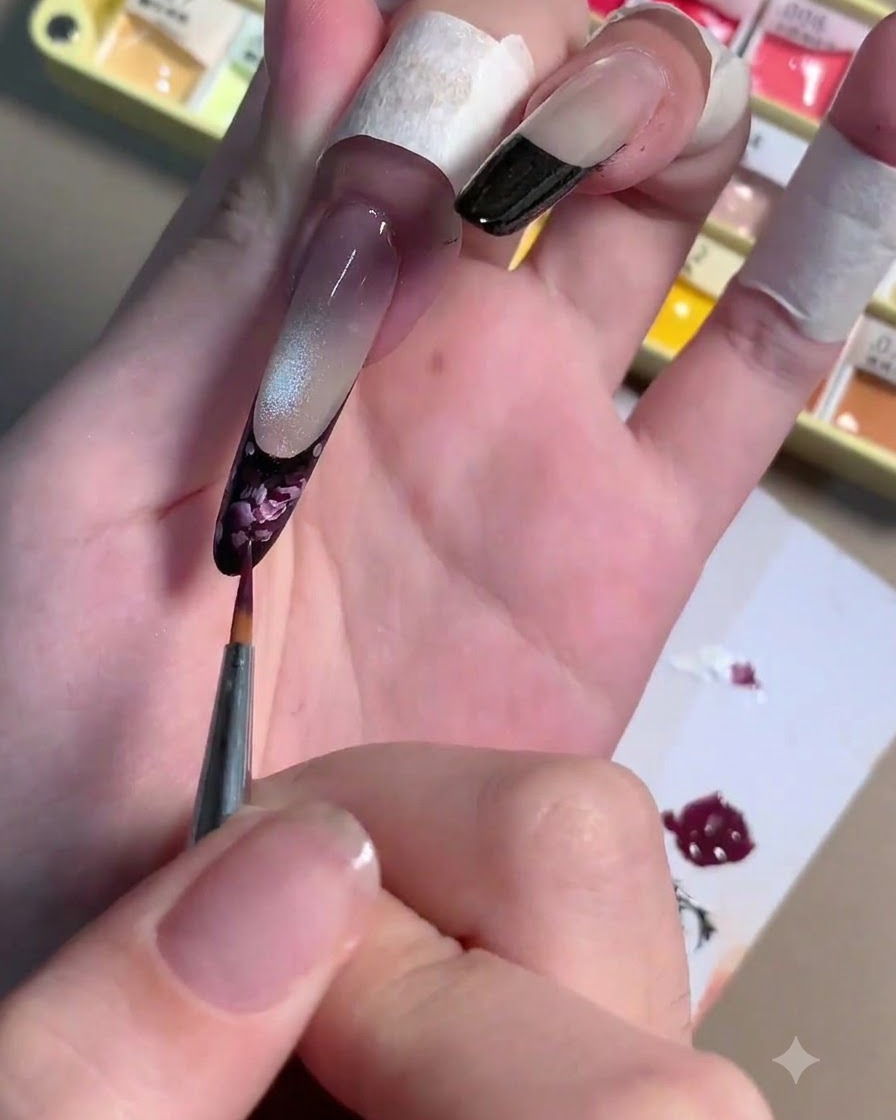
Without washing your brush, mix a small amount of white gel into your remaining plum color to create a lighter pink. Randomly apply strokes of this lighter shade over the cured first layer of your roses. Placing the petals randomly and using a slightly shaky hand creates a more organic, realistic 3D gradient effect.
Tip: Dont overthink the placement—the more random and loose your strokes are, the more natural the flower will look. - 19Dot accents into empty spaces
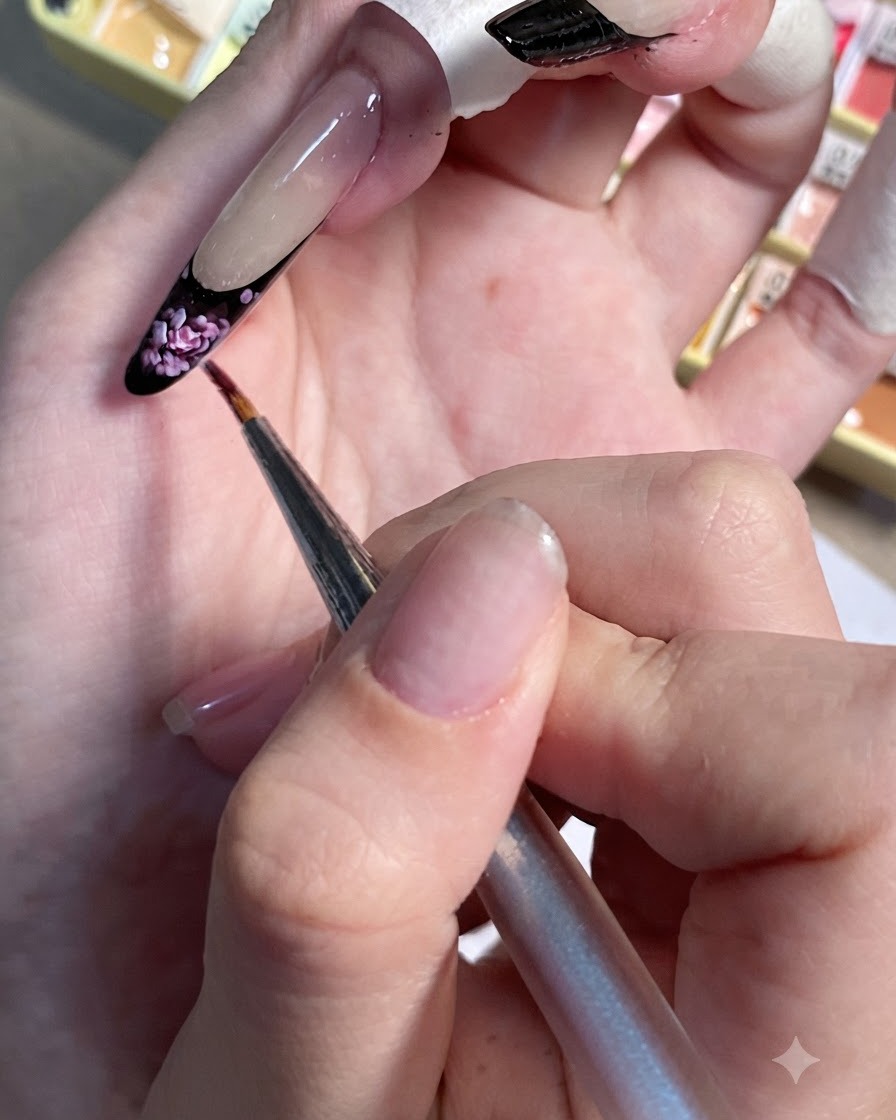
Using the same light pink mixture, dab a few tiny dots of gel into any blank areas on the black French tip that feel too empty. This helps to balance the overall design and distributes the color beautifully across the dark background.
Tip: Keep the accent dots small and sparse so they complement the main roses without overcrowding the design. - 20Cure the second layer
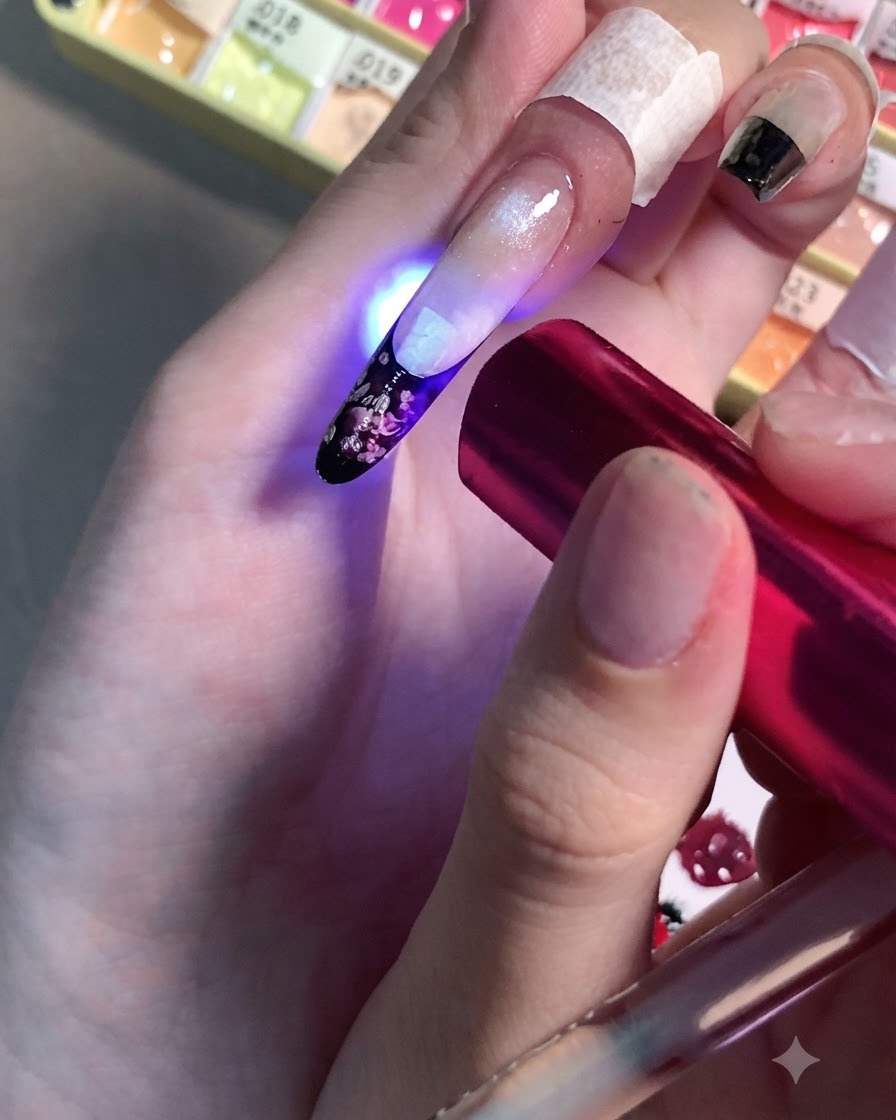
Once you are satisfied with the lighter pink petals and accent dots, cure the nail under your lamp. It is crucial to fully cure every single layer of the floral design before moving forward to prevent the colors from bleeding or shifting.
Tip: A handheld LED lamp is perfect for flash-curing intricate nail art details quickly. - 21Add depth to the flower centers
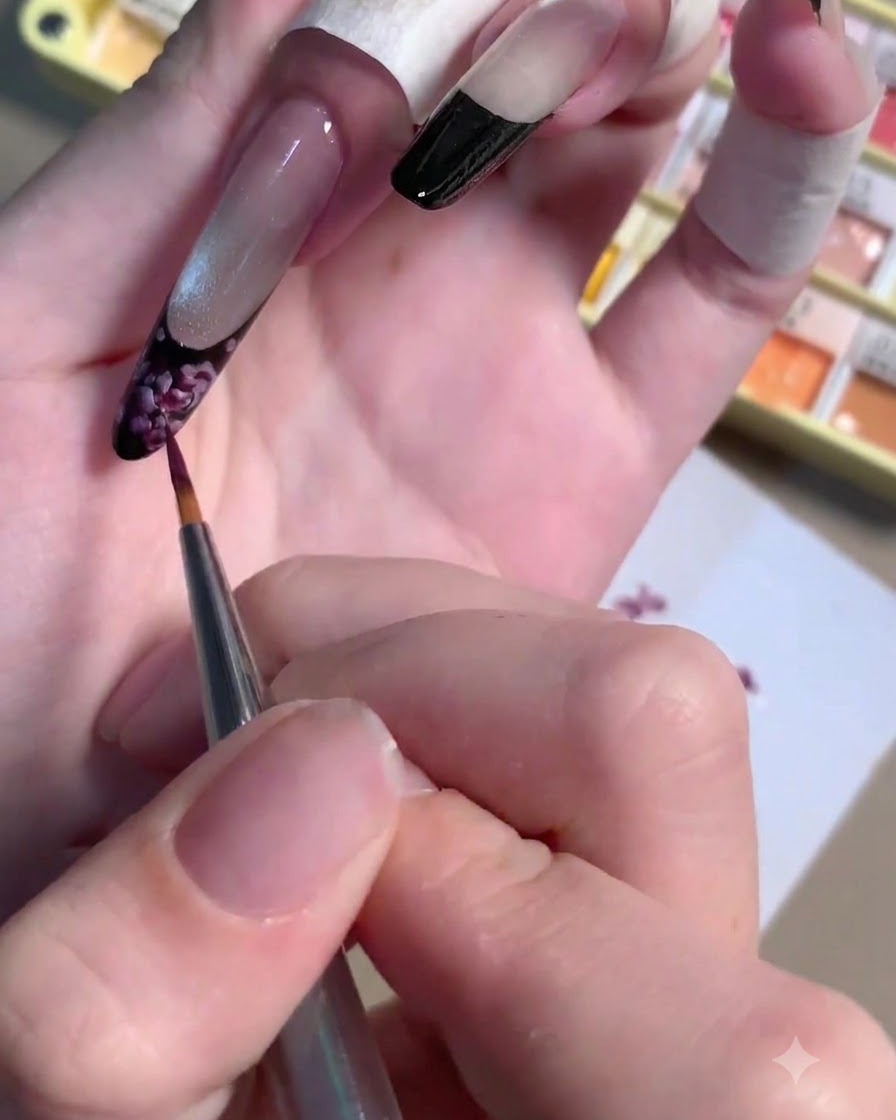
Go back to your original dark plum gel from the first layer. Using your liner brush, carefully dab a tiny amount of this dark color directly into the center of each rose. This instantly adds depth and creates a shadow effect that makes the lighter petals pop.
Tip: Adding a darker core grounds the flower and significantly enhances the 3D illusion. - 22Refine the floral details
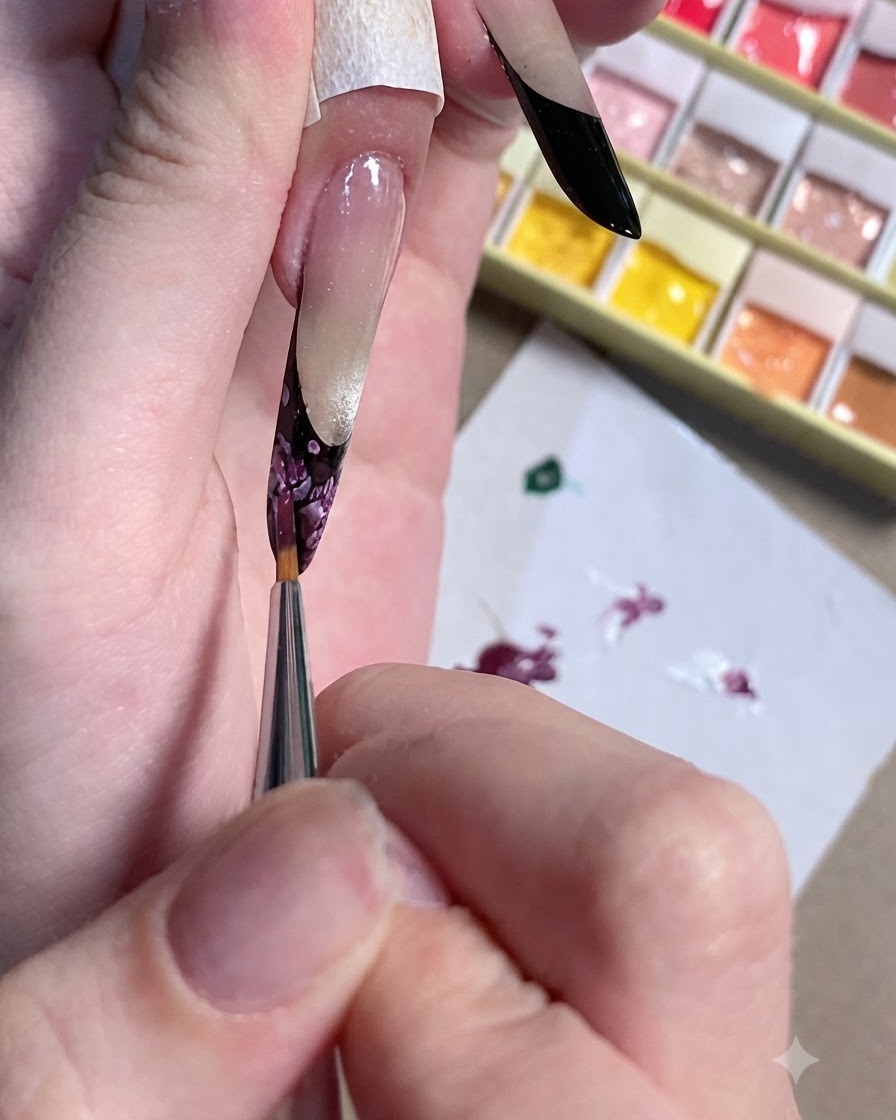
Continue using your liner brush to gently refine the dark centers of the blossoms. Ensure the dark plum gel is placed just right to give the floral pattern a defined core and maximize the visual depth of the design.
Tip: Use a very light touch with the tip of the brush; you only need a microscopic amount of dark gel here. - 23Cure the center details
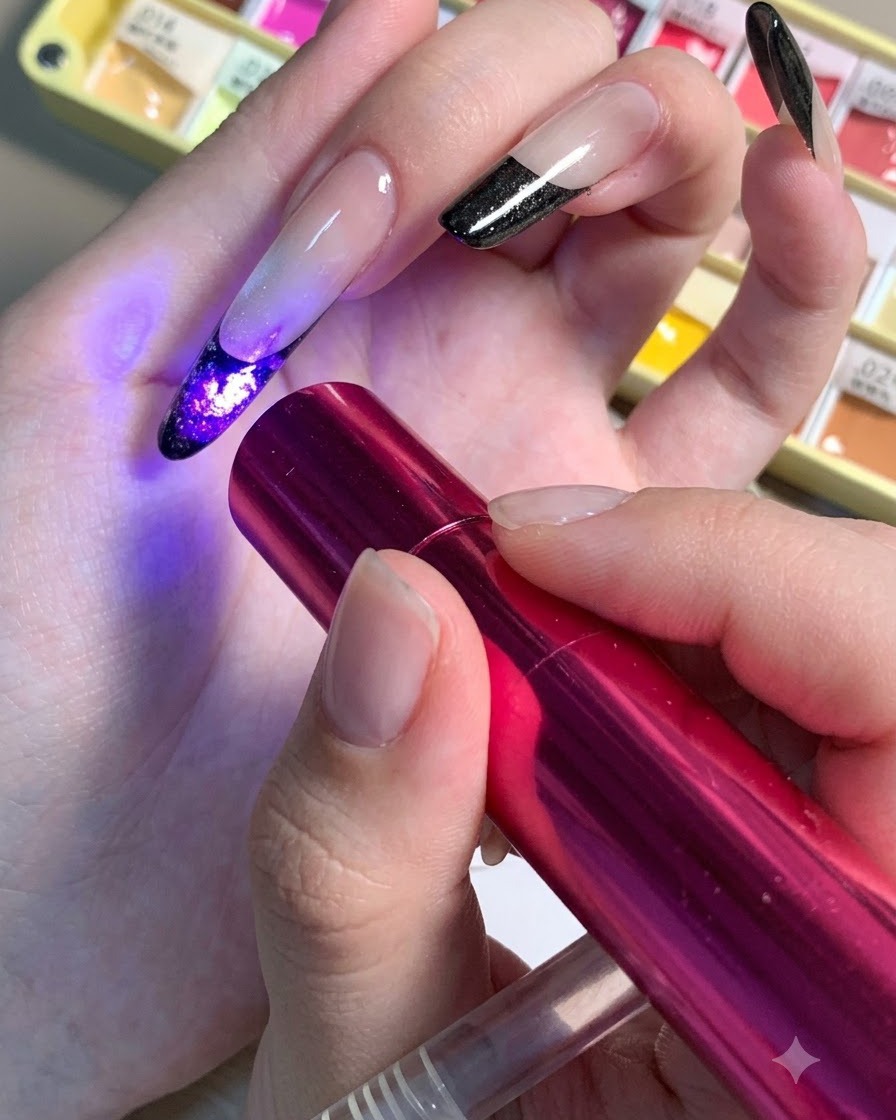
After perfecting the dark plum centers of your roses, flash cure the design once more using your handheld lamp. Setting this delicate layer ensures the highly pigmented dark gel stays exactly in place.
Tip: Always cure dark, highly pigmented details thoroughly, as they can sometimes take slightly longer to set completely. - 24Paint tiny green leaves
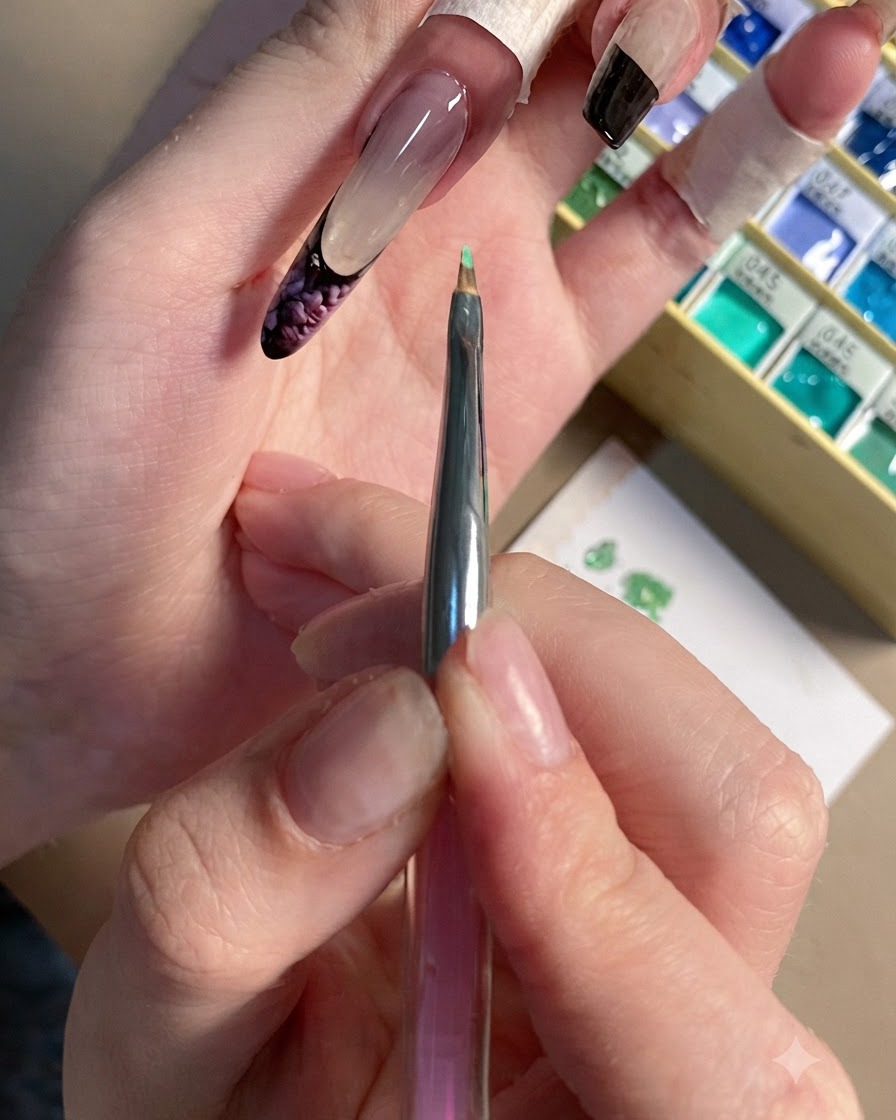
Using a fine liner brush, carefully paint small green leaves into the remaining empty spaces around your plum-colored roses. This adds a nice contrast and balances out the floral nail art design. Ensure your brush strokes are light and controlled to keep the leaves looking delicate.
Tip: Keep the paint on the very tip of your liner brush for maximum control over the leaf shape and size.