Vintage Gold Wire Rose Watercolor Nail Art — Step-by-Step Tutorial
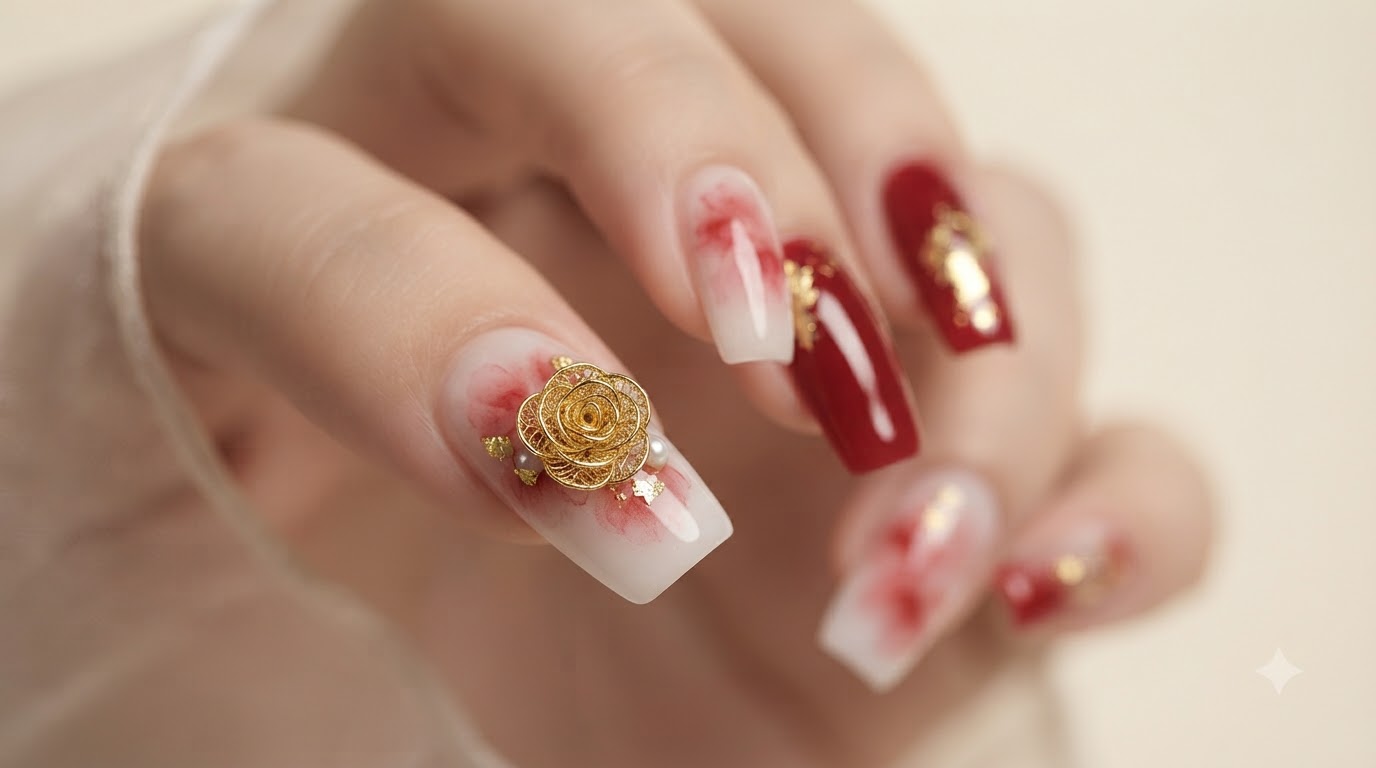
Create an exquisite vintage nail look featuring watercolor blooming red roses, delicate gold leaf foil, and intricate 3D gold wire rose accents.
Vintage-inspired nail art combining soft watercolor blooming gels and metallic embellishments creates a luxurious, romantic aesthetic. This tutorial guides you through layering milky white bases, blooming red pigments, and sculpted gold wire elements to achieve a high-end salon finish right at home.
Steps
- 1Apply milky white base coat to thumb
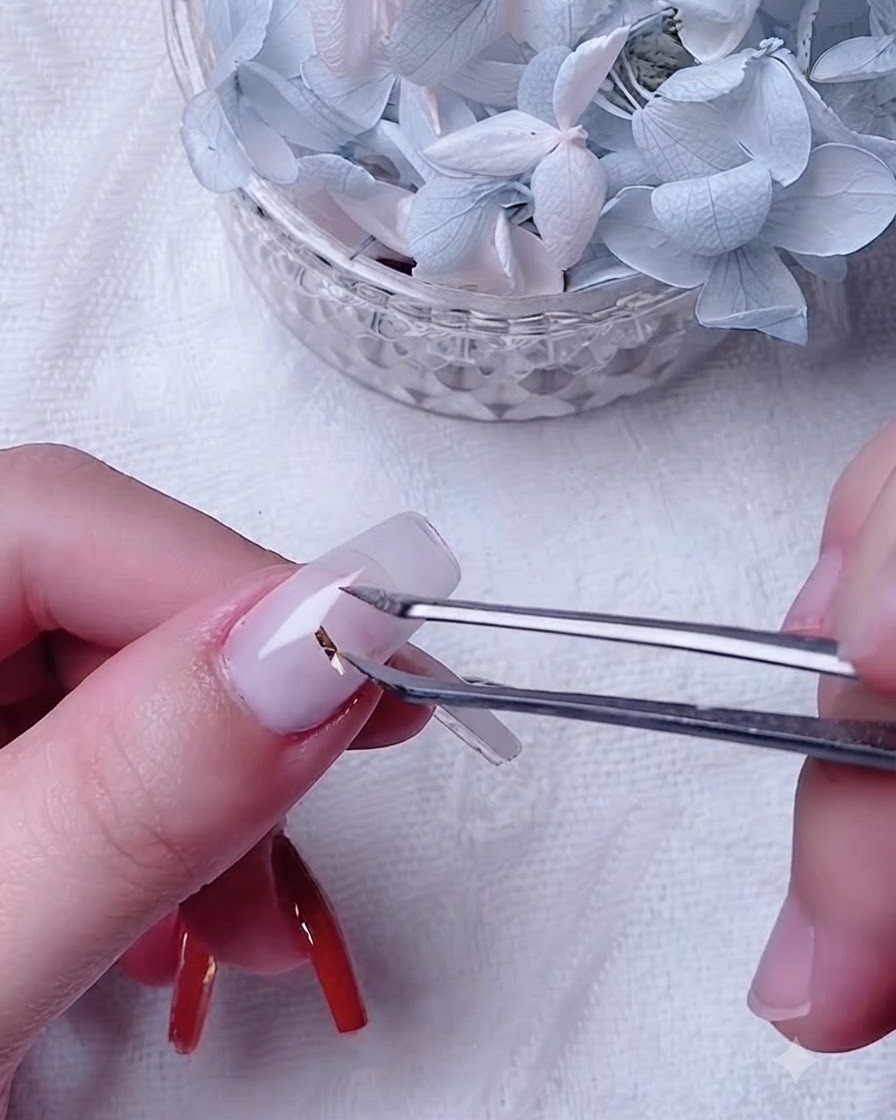
Apply a coat of milky white base gel evenly across the entire surface of the thumb nail. Ensure the edges are neat and properly capped before moving on to the next step of the nail art design.
Tip: Make sure the milky white base layer is applied smoothly to create an even background for the foil and blooming gel elements. - 2Apply gold foil flakes
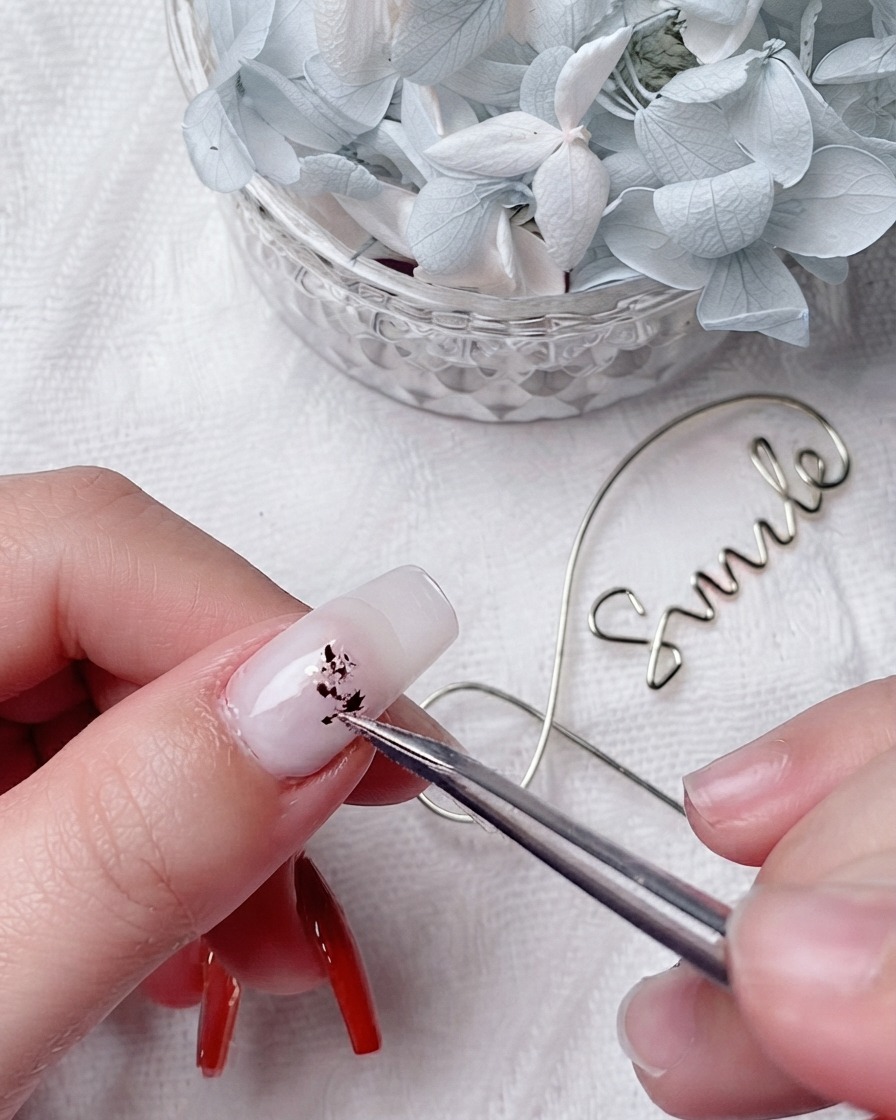
Using fine tweezers, pick up small pieces of gold leaf foil and gently press them onto the uncured milky white base gel. Scatter the flakes near the center of the nail where the floral design will be placed to add a subtle metallic shimmer underneath.
Tip: Place the foil onto slightly wet gel so it adheres securely without needing extra glue. - 3Apply blooming gel layer
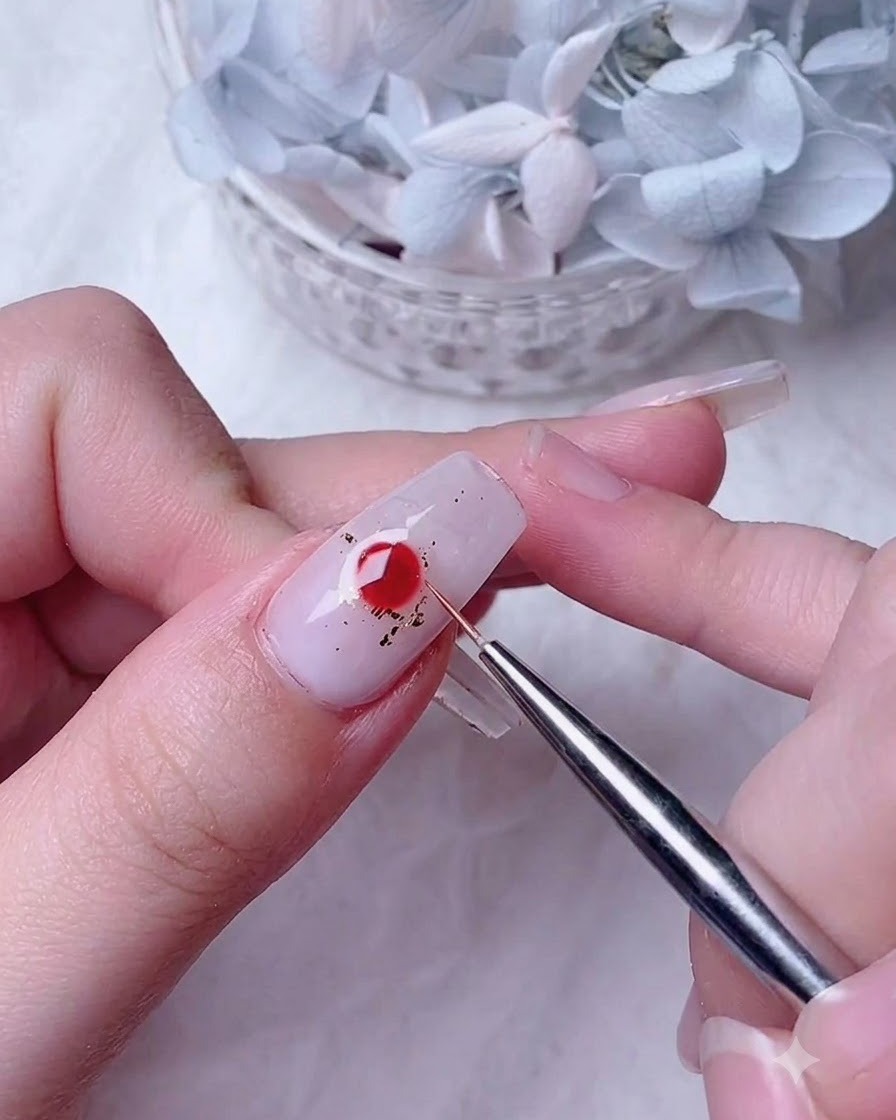
Brush an even layer of clear blooming gel over the entire nail surface, covering the gold foil pieces. Do not cure this layer yet, as its special formula is designed to make subsequent colored gels spread and diffuse naturally.
Tip: Apply a medium-thin layer of blooming gel; too thick can cause pooling, while too thin wont allow proper color spread. - 4Dot red gel for petals
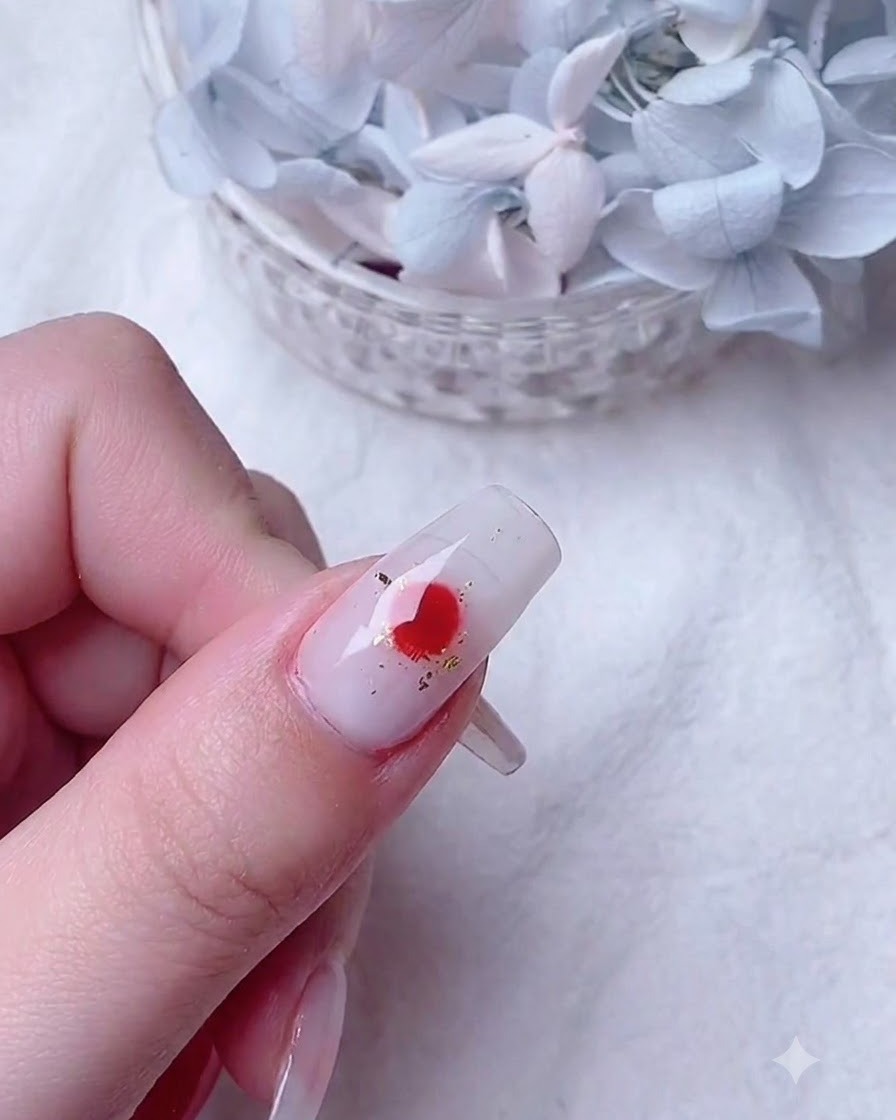
Dip a fine detail brush into red gel polish and place small dots or strokes onto the wet blooming gel layer. Watch as the red pigment naturally begins to expand and soften outward, forming the organic shape of blooming rose petals.
Tip: Work quickly once the red gel touches the blooming layer, as it will start diffusing immediately. - 5Shape and blend the red gel rose petals
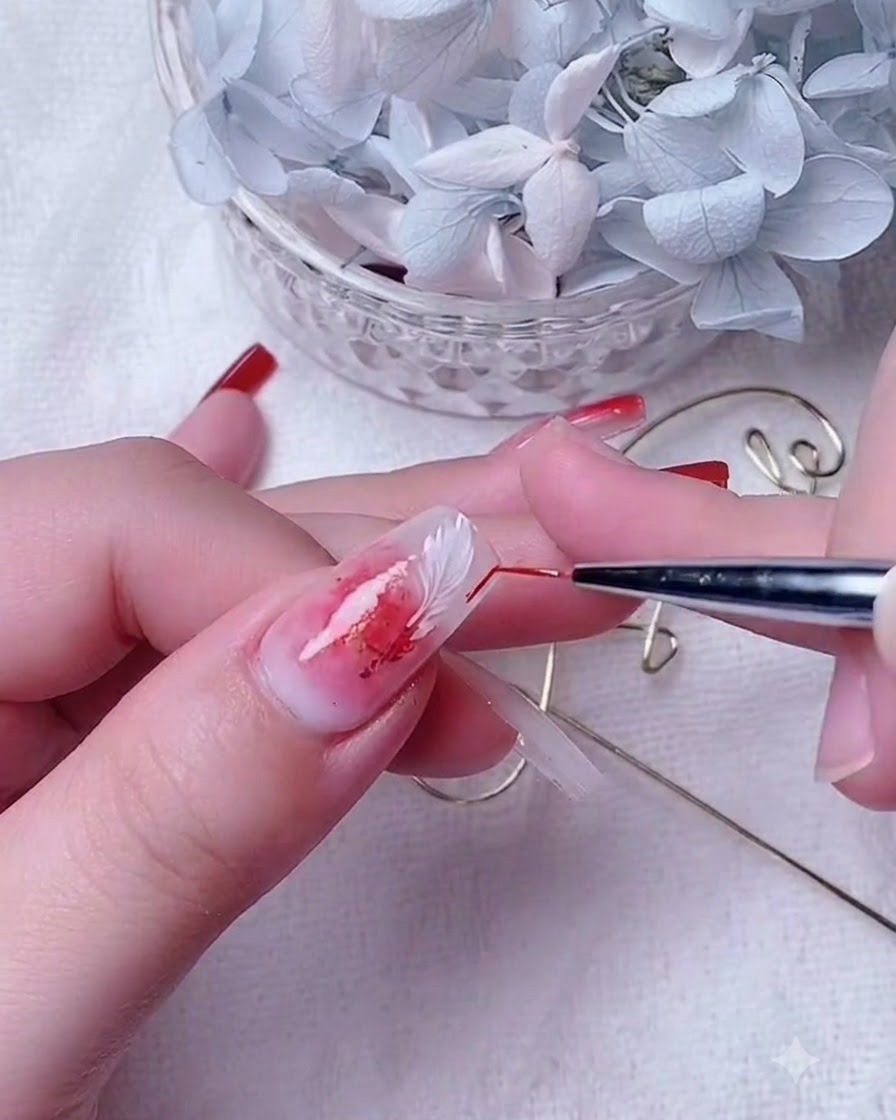
Using a fine detail brush, delicately work around the red gel areas to diffuse the edges and refine the shape of the blooming rose petals. This blending process creates a soft, watercolor-like depth and dimension that mimics natural flower petals. Take your time to soften the transitions before moving on to add decorative wire elements.
Tip: Keep your brush clean and lightly damp with alcohol or cleansing fluid if you need to soften harsh edges without wiping away too much pigment. - 6Place the gold wire rose
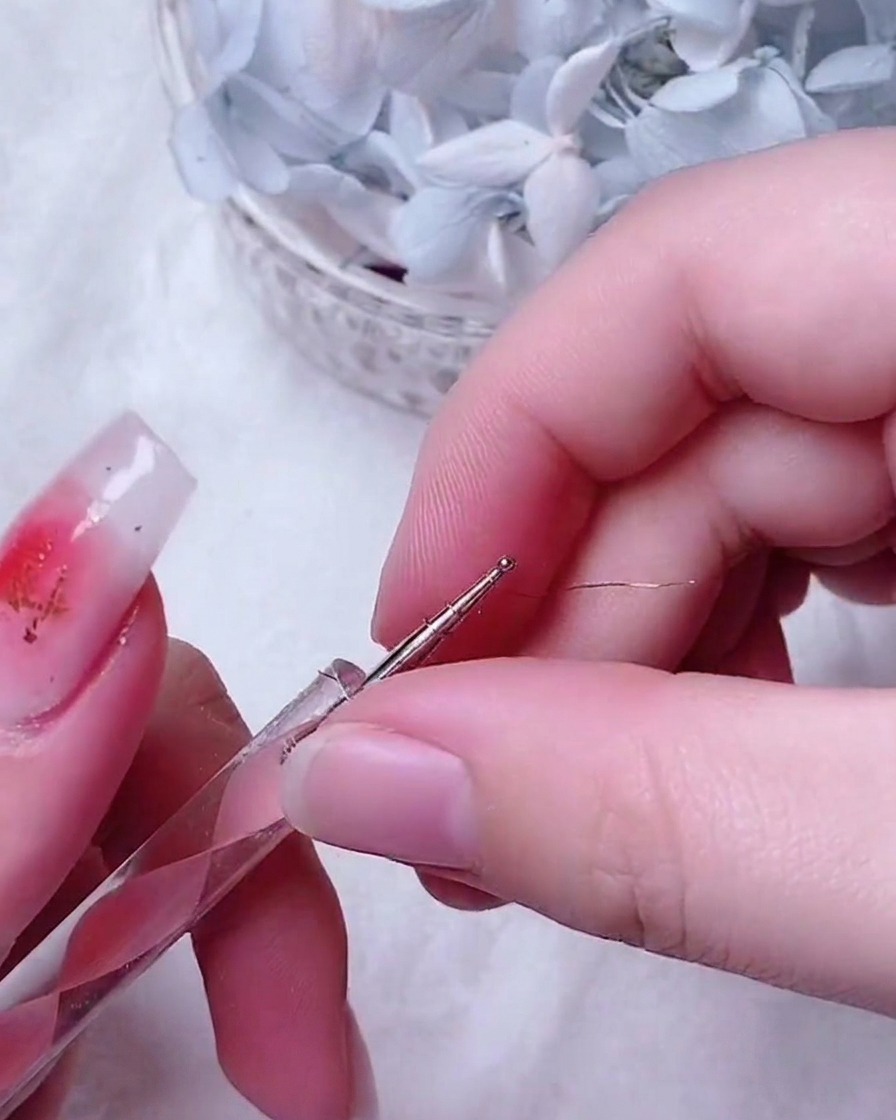
Using fine tweezers, carefully pick up the pre-wound small gauge gold wire rose and position it onto the center of the prepped nail surface. Gently press it down so it adheres securely to the tacky gel base before final curing.
Tip: Handle the delicate wire shape gently with precision tweezers to avoid bending or distorting the rose petals. - 7Place the pre-wound gold wire rose
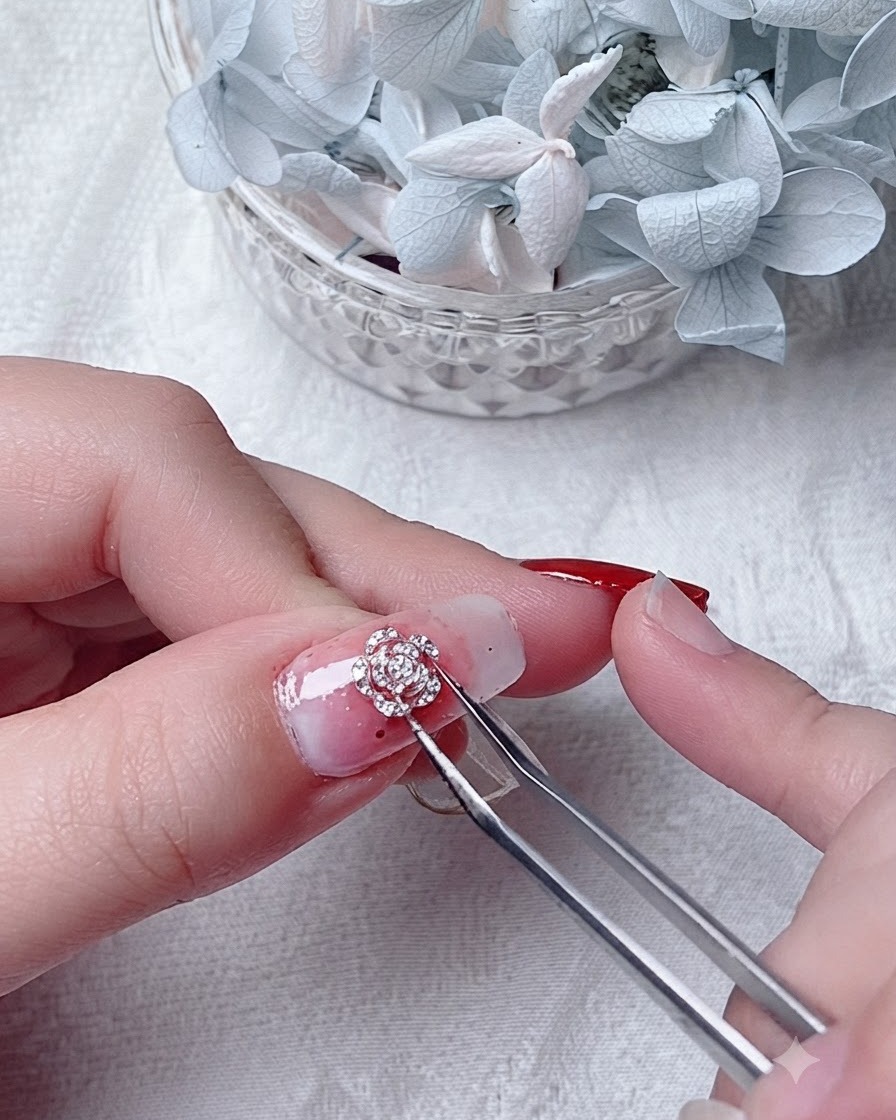
Using precision tweezers, carefully pick up the pre-wound gold wire rose and position it directly onto the center of the nail over the cured blooming gel design. Press down gently to set it into the tacky layer or a small bead of clear gel adhesive. Ensure the wire piece sits securely before final curing.
Tip: Pre-shape and measure your wire components on a stand or practice surface beforehand to ensure they conform nicely to the natural curve of the nail. - 8Add secondary gold accents and charms
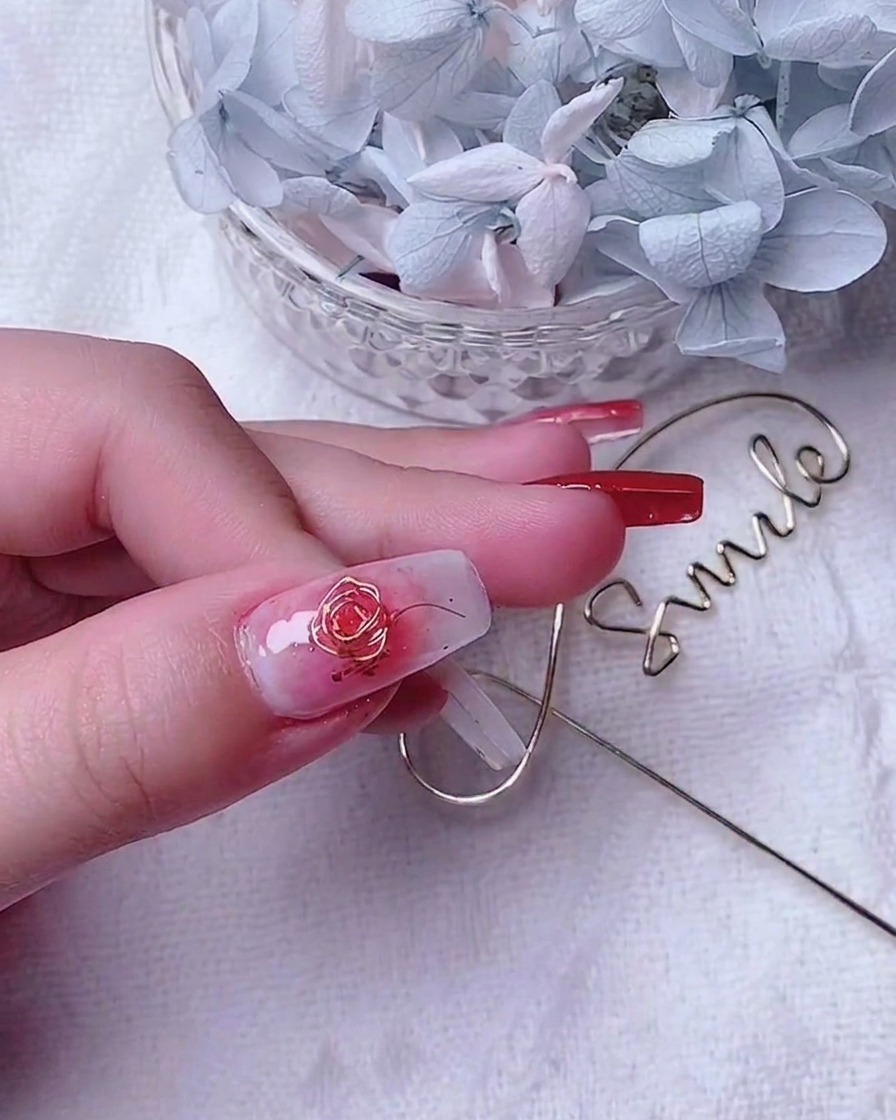
Position a small piece of gold wire or an accent charm right along the edge next to the central rose wire design to complement the vintage look. Secure the element with a dab of builder gel or top coat, ensuring all sharp ends are tucked in safely. Cure briefly to lock the embellishment in place.
Tip: Always encapsulate the edges of wire charms with a bit of clear gel or top coat to prevent them from snagging on clothing or hair. - 9Apply milky white base to the index finger
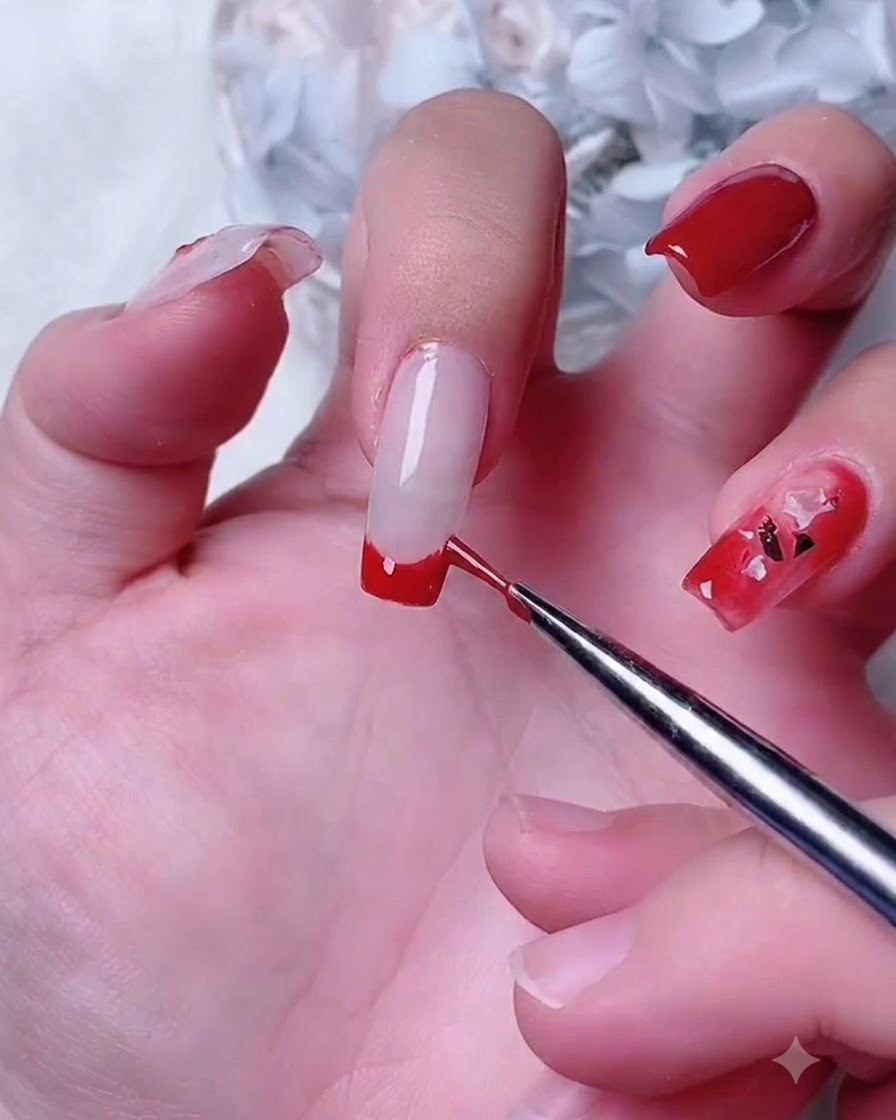
Take the milky white base gel and apply an even coat over the surface of the index fingernail. Make sure to achieve a smooth, semi-translucent finish that matches the look established on the thumb. Cap the free edge neatly and cure under the lamp as required.
Tip: Apply thin, even coats of milky white gel to avoid streakiness and ensure a uniform foundation for any subsequent nail art. - 10Apply blooming gel and red gel on index finger
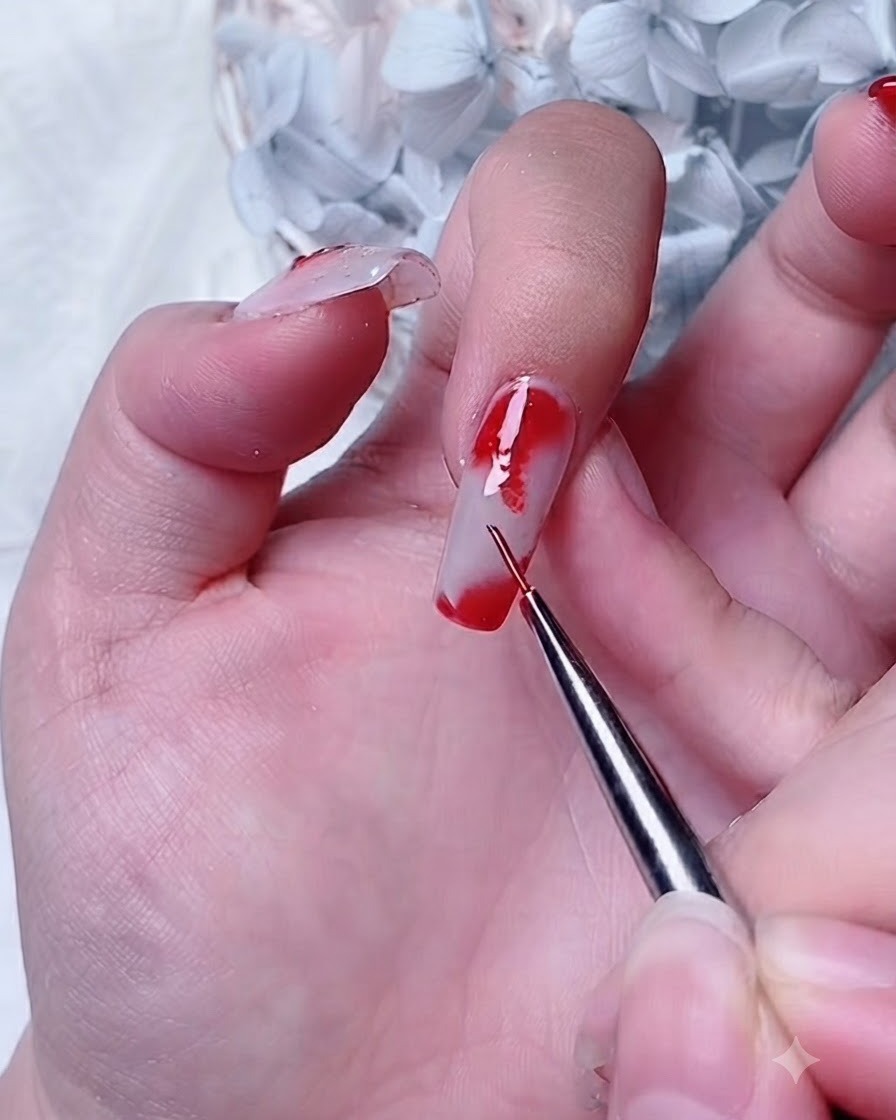
Apply a layer of blooming gel onto the index finger, then use a fine detail brush to apply red gel at the corner of the nail. Allow the red gel to interact with the blooming gel to create a soft, diffused gradient effect.
Tip: Work quickly when placing the red gel so it can diffuse naturally across the blooming gel layer. - 11Add leaf-shaped gold foil pieces
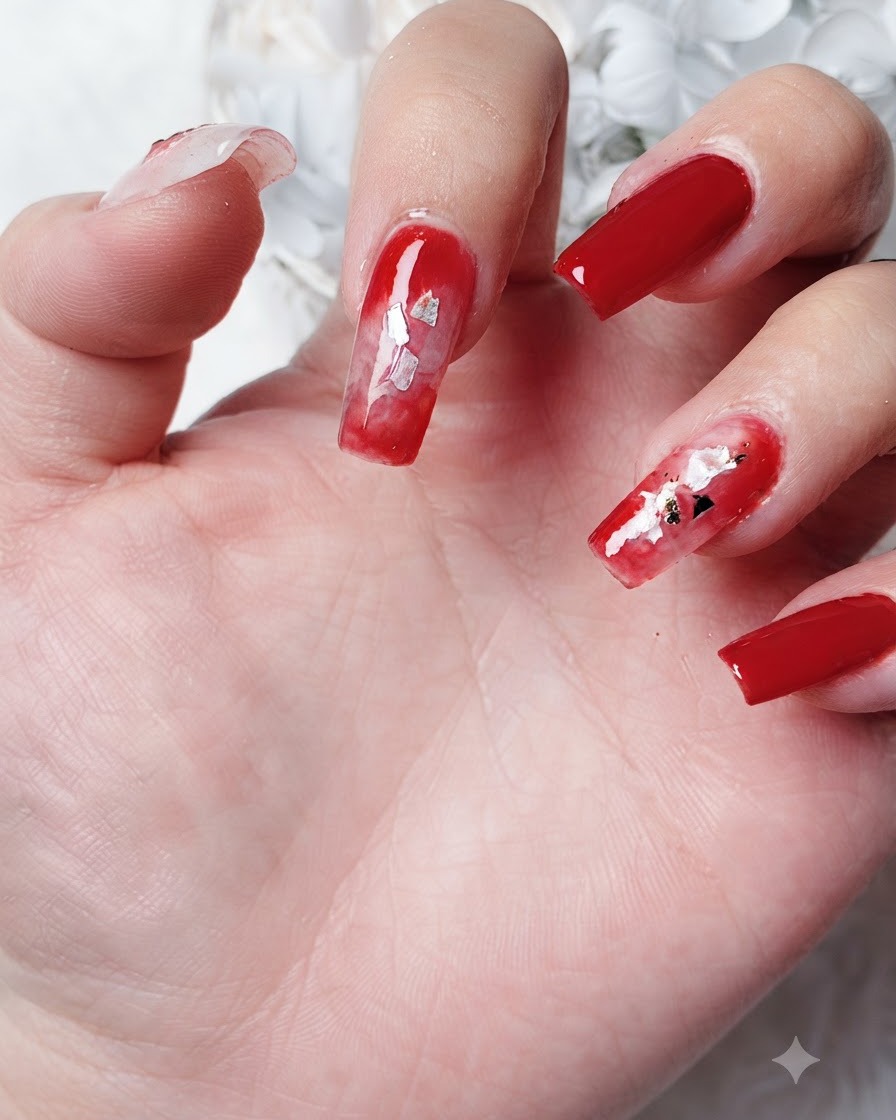
Carefully pick up small leaf-shaped gold foil pieces and embed them directly into the wet red blooming area on the nail. Position them artistically around the design to complement the vintage floral aesthetic.
Tip: Use the tip of your tool or tweezers slightly dampened to easily pick up and transfer individual gold foil flakes.