Yellow Flower 3D Gel Nail Art — Beginner Step-by-Step Tutorial
Learn how to sculpt charming 3D yellow floral nail art using simple rolling and pressing techniques that make carving easy for absolute beginners.
Nail carving often feels intimidating for beginners who struggle to turn flat blobs into structured, delicate shapes. This step-by-step tutorial breaks down the process of creating vibrant 3D yellow flowers using simple rolling and shaping methods. By mastering how to control your pressure near the center and edges, you can easily achieve beautifully plump and uniform floral nail art.
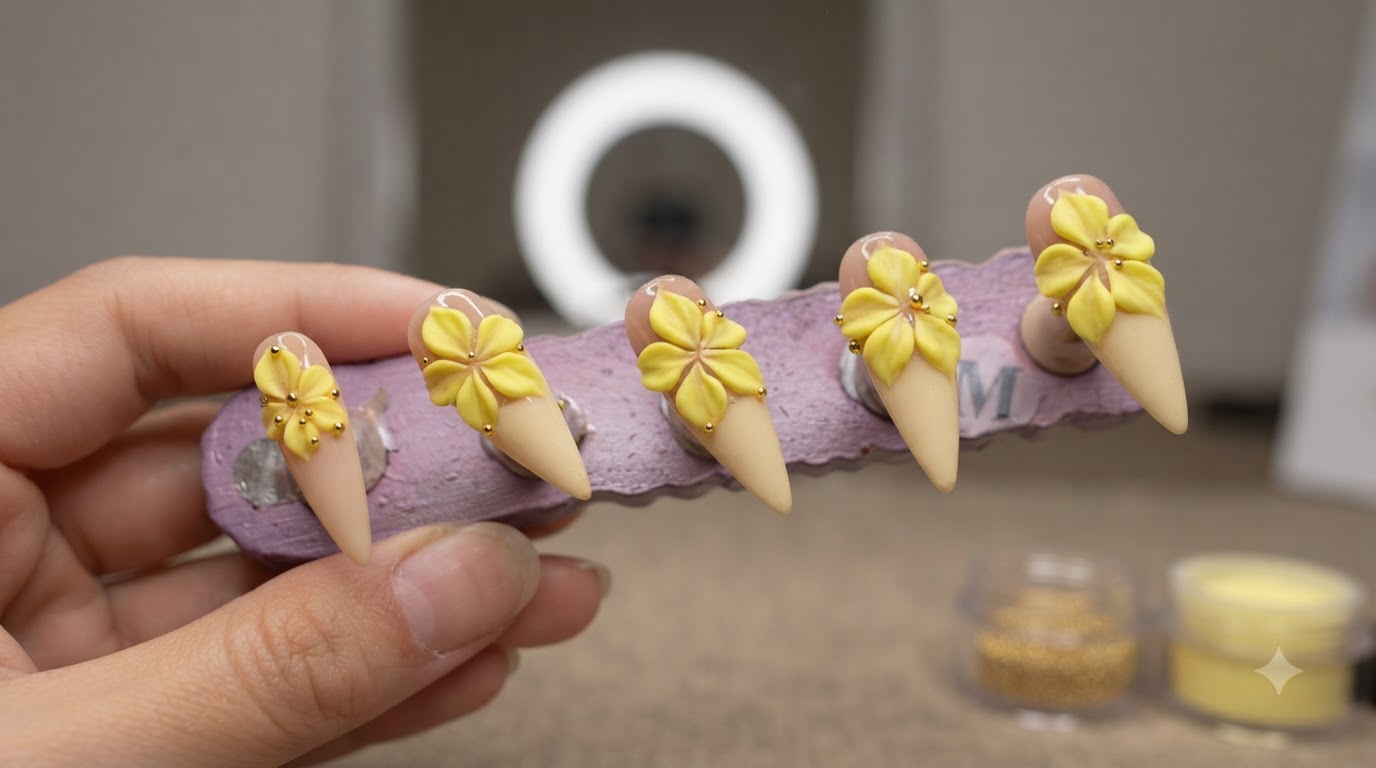
Steps
- 1Cut and roll the gel pieces
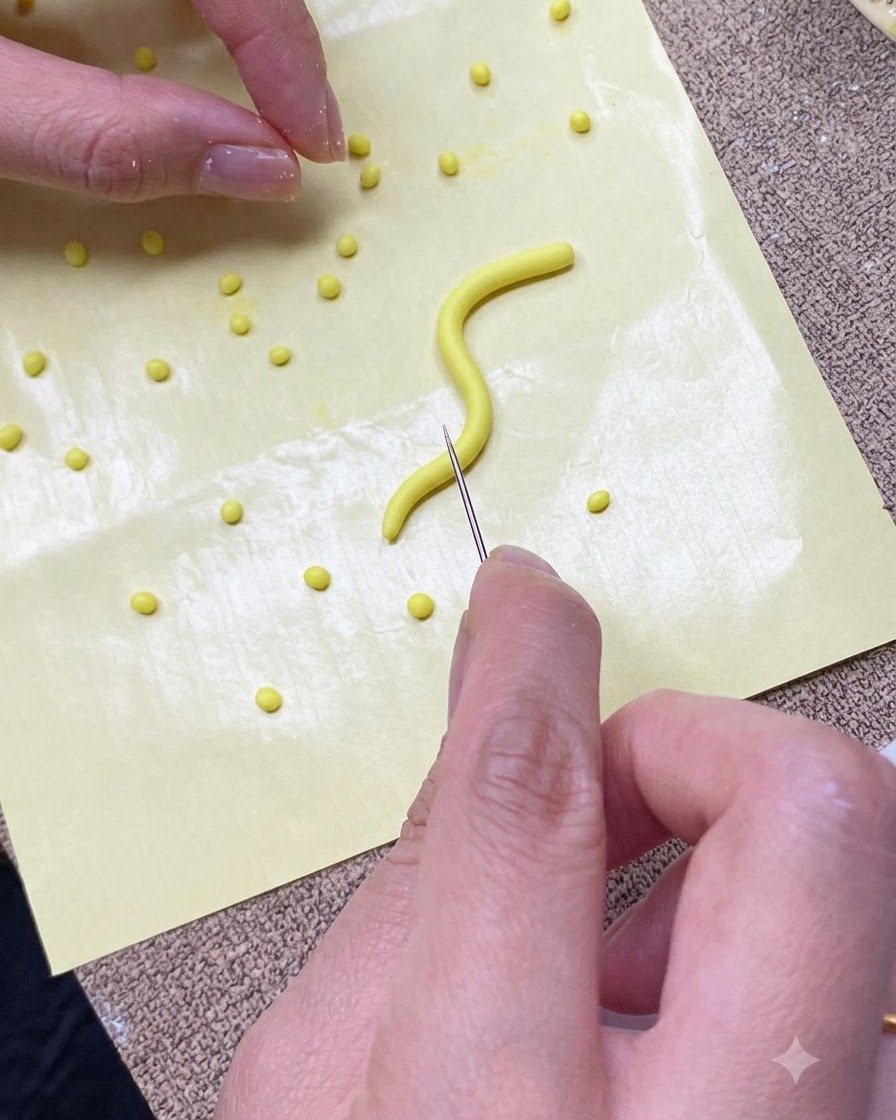
Using your tool, section the yellow gel strip into small, equal-sized pieces. Roll each piece into a small round ball on your silicone practice mat to prepare them for petal creation.
Tip: Keep the ball sizes consistent to ensure your flower petals turn out even and symmetrical. - 2Place the gel ball onto the nail
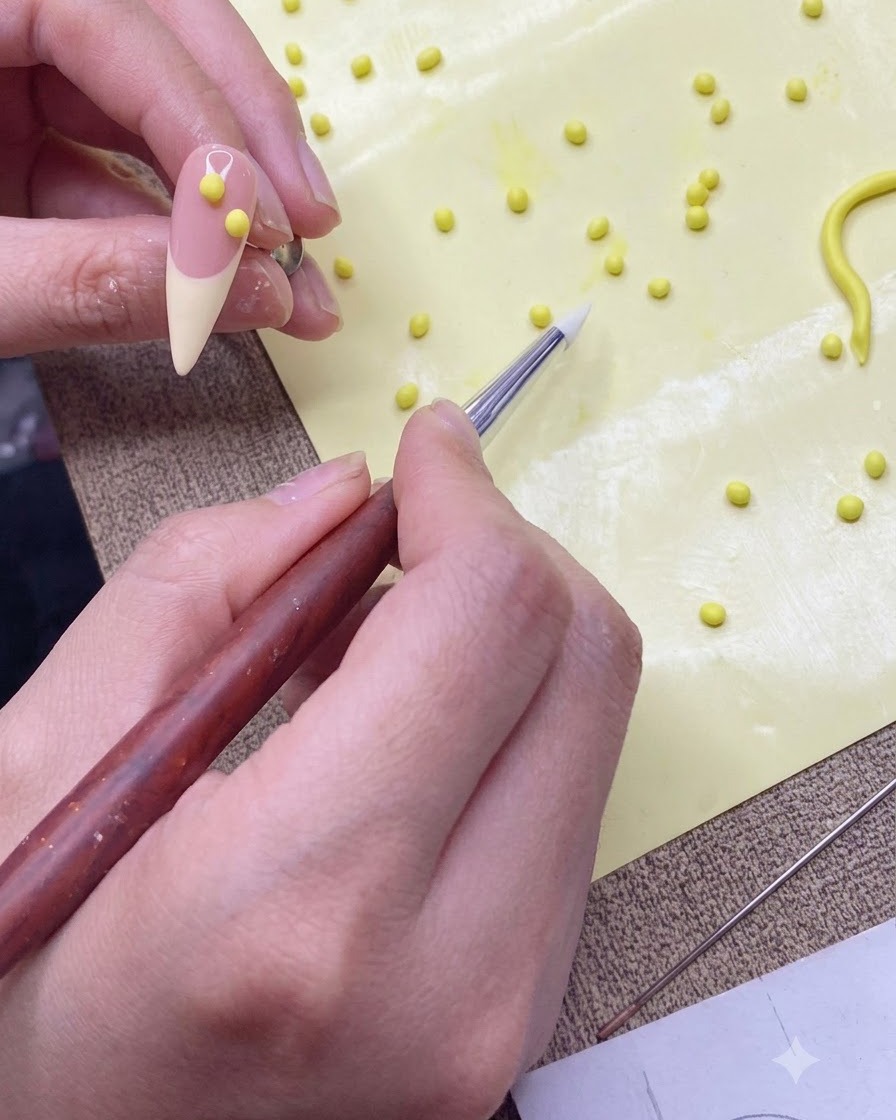
Pick up one of the small yellow gel balls using a silicone shaping pen. Carefully place it onto the prepped nude practice nail tip where you want the flower to begin.
Tip: A silicone tool prevents the sticky gel from clinging too tightly, making placement precise. - 3Arrange the gel balls into a circle
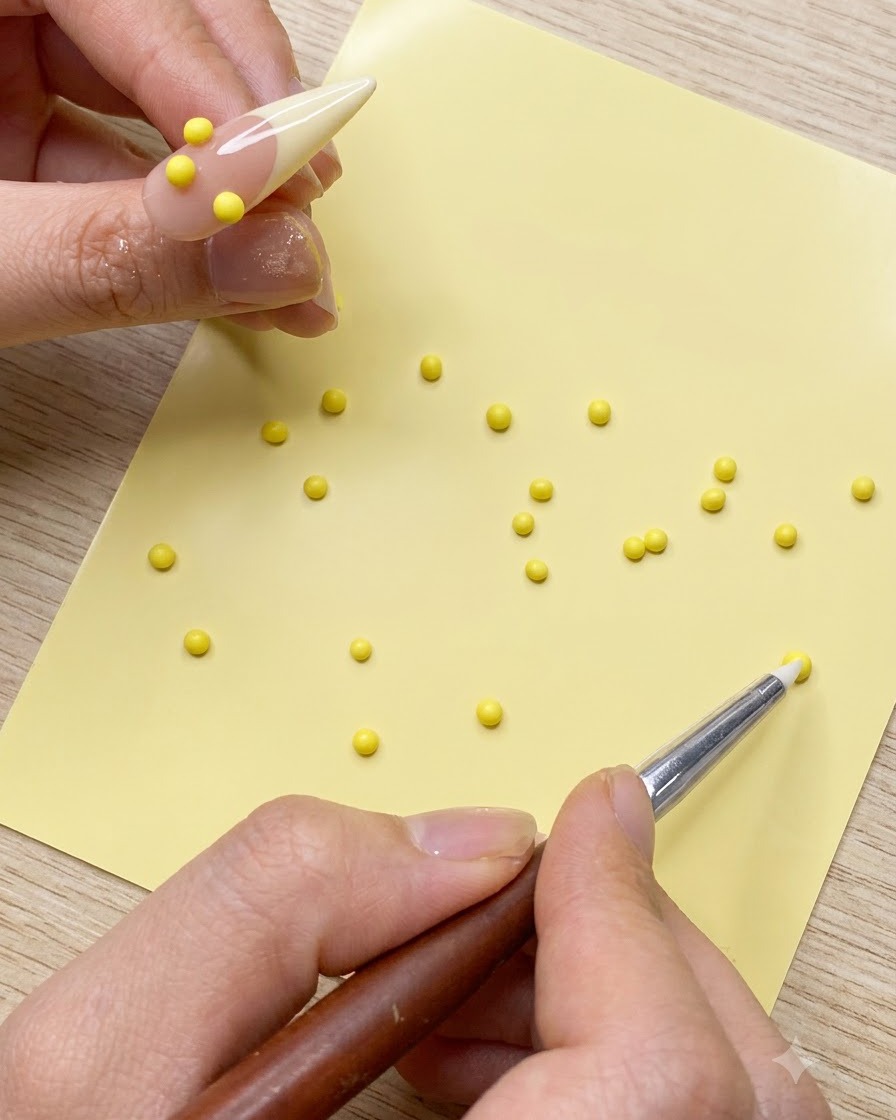
Position five small yellow gel balls in an evenly spaced circle around an imagined central point on the nail tip. This forms the foundational layout for the 3D flower.
Tip: Leave a tiny empty space in the exact center so the petals have room to expand inward when pressed. - 4Shape and press the petals
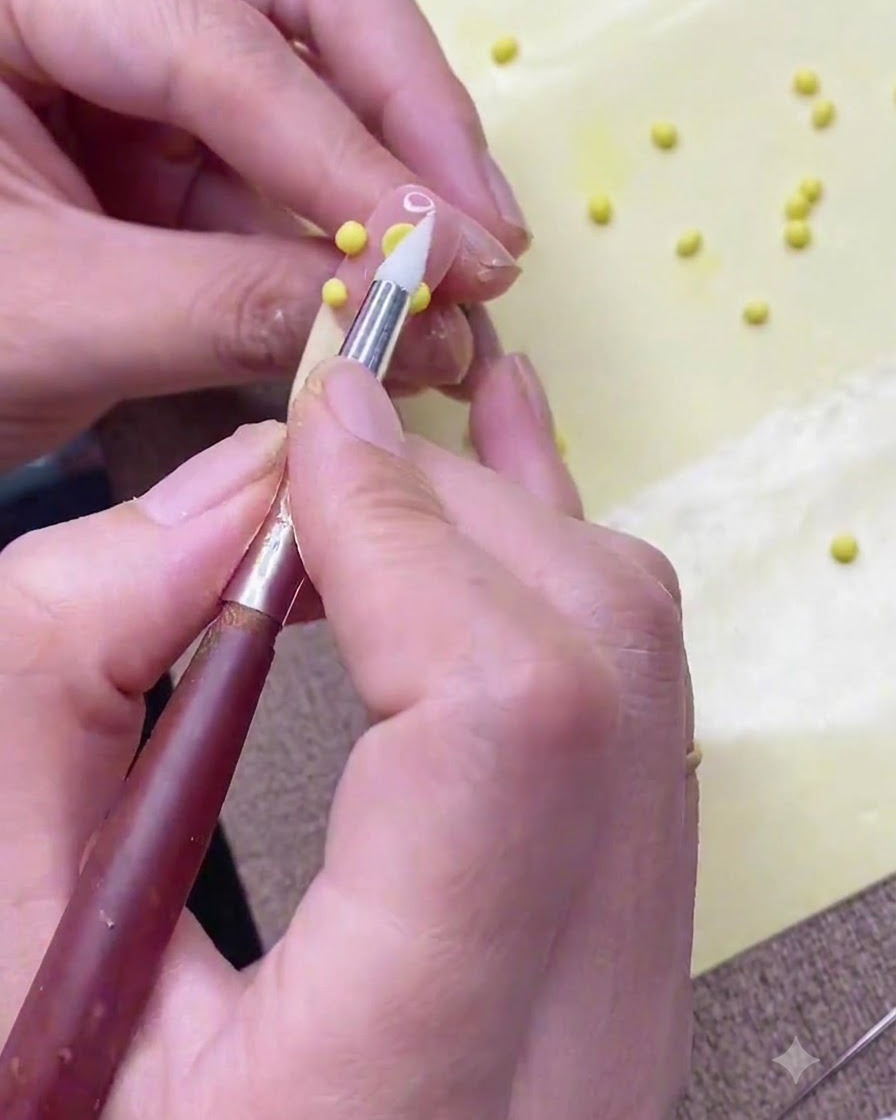
Using your silicone tool, gently press each ball. Push inward near the center and outward toward the edge to shape each individual petal while keeping the center intact and round.
Tip: Pay close attention to your pressure: push inward on the inside edge and outward on the outside edge to maintain a clean circular form. - 5Refine the flower structure
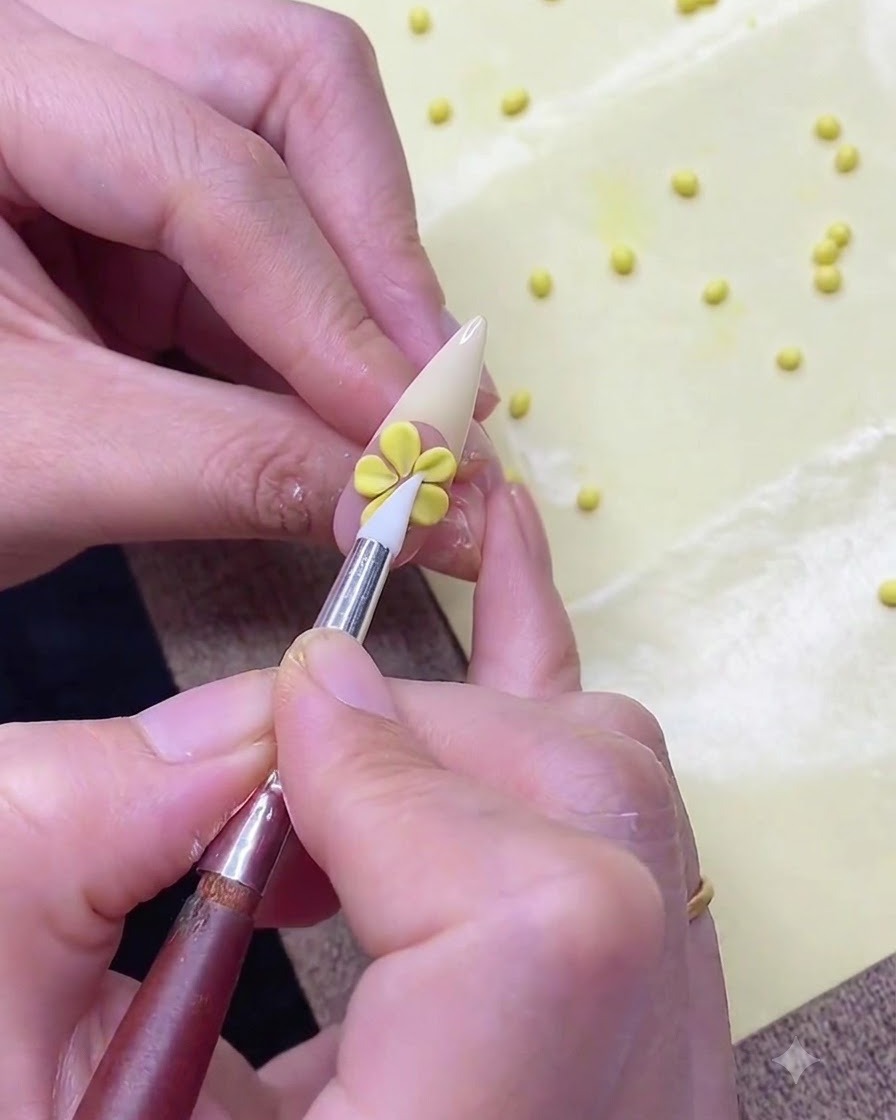
Inspect the flower and refine the center and edges to ensure all five petals look plump, well-rounded, and neatly structured before curing.
Tip: Take your time smoothing the connection points at the center so the flower looks organic and cohesive.