Secret Realm Chrome Hearts Cat Eye Nails — Step-by-Step Tutorial
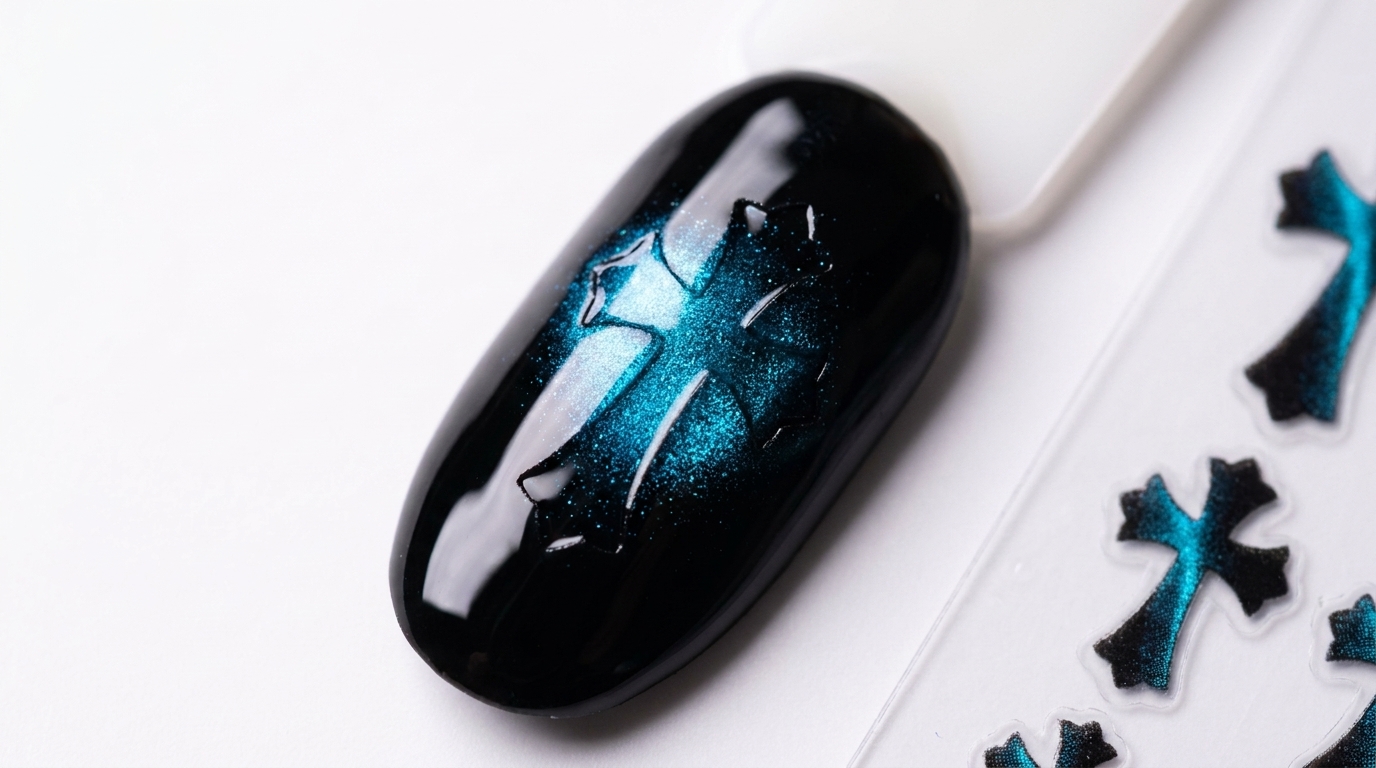
Discover how to create the stunning Secret Realm Chrome Hearts cat-eye look. This moody, multidimensional design combines deep teal magnetic gel with edgy cross art.
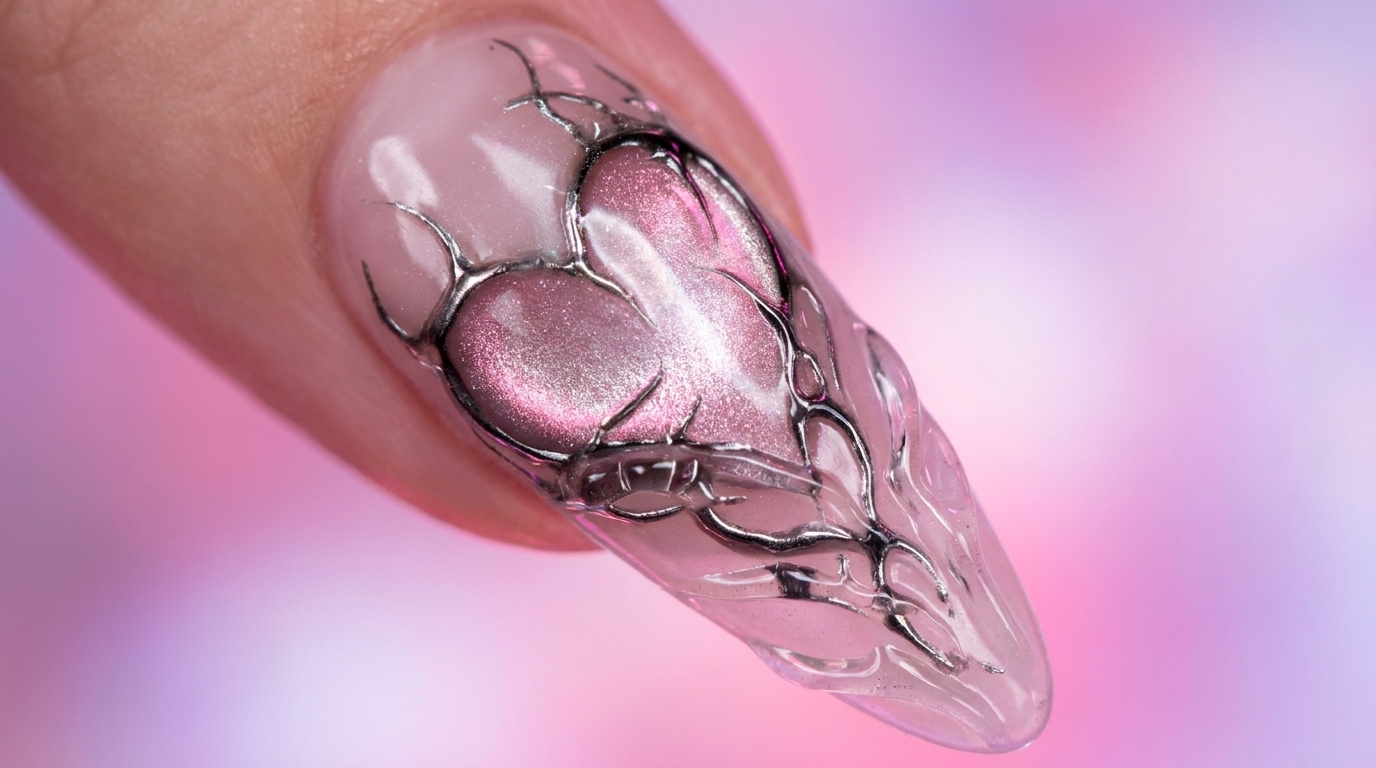
The Secret Realm Chrome Hearts look is a masterclass in texture and depth, perfectly blending the ethereal glow of magnetic cat-eye gel with the sharp, iconic aesthetic of gothic cross designs. This sophisticated nail art style creates a captivating, multidimensional effect that makes the skin appear bright and radiant. Perfect for those who love an edgy yet polished finish, this technique is surprisingly accessible once you master the magnetic manipulation.
Steps
- 1Apply Milky White Gel
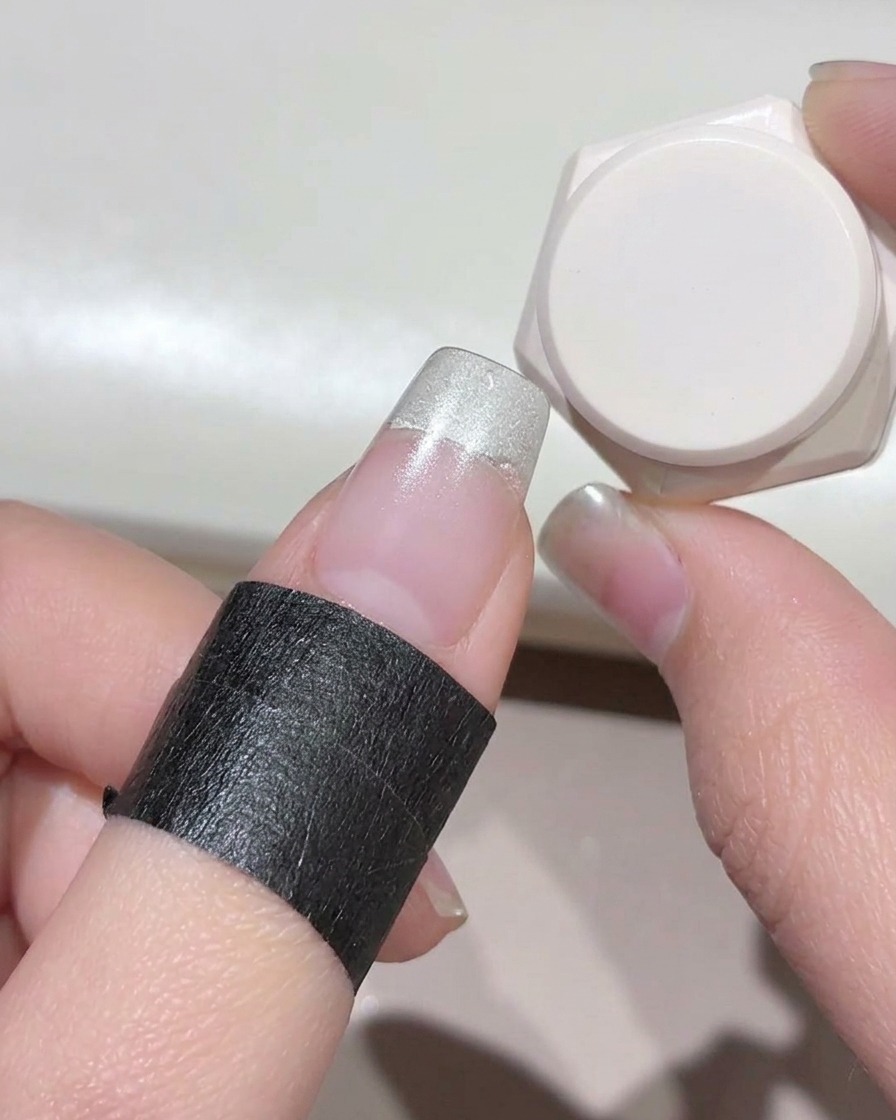
Start by applying a gentle milky white gel to the free edge of the nail. This step helps to conceal the natural nail line and creates a clean, brightened base for the upcoming design.
Tip: Only apply the white gel to the tip to avoid adding unnecessary thickness to the entire nail bed. - 2Blend the White Gel
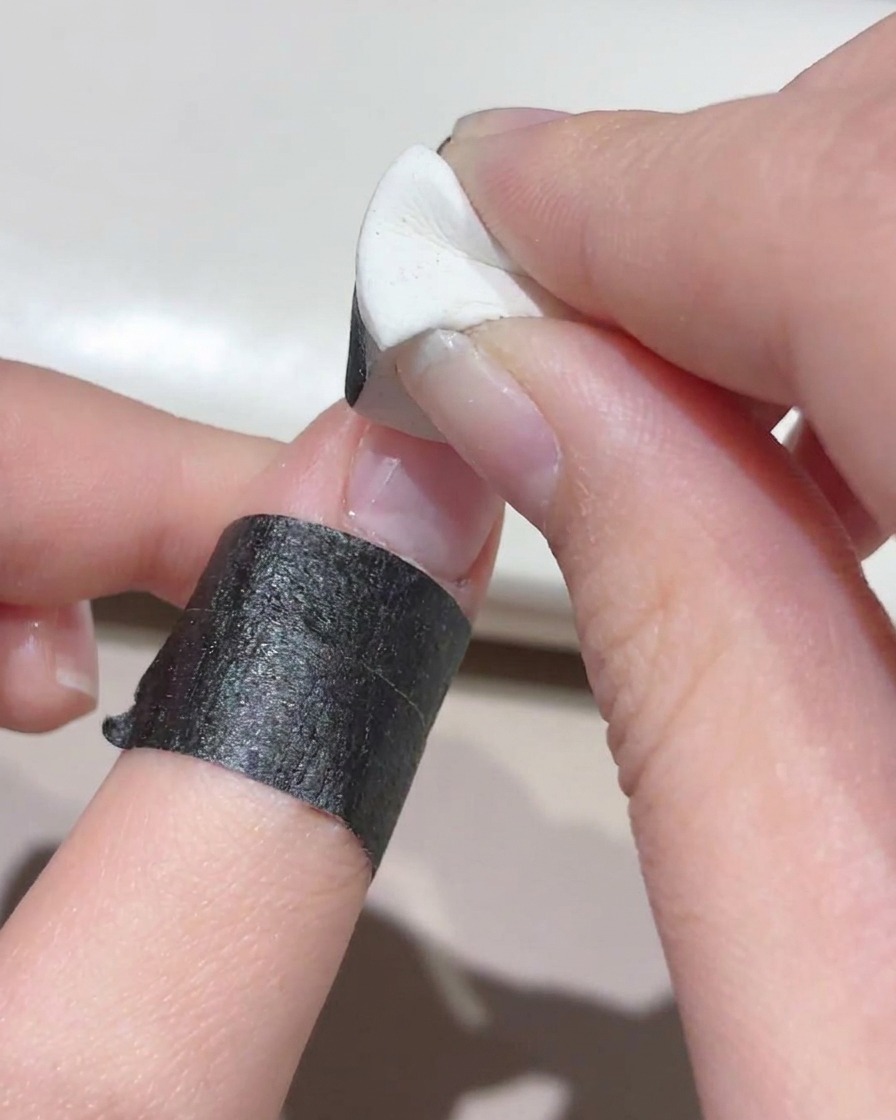
Using a small makeup wedge sponge, gently dab and pat along the inner edge of the milky white gel. This blurs the harsh line and creates a seamless, soft gradient transition towards the cuticle.
Tip: Use a light tapping motion rather than dragging to ensure a smooth gradient effect without removing the product. - 3Cure the base layer
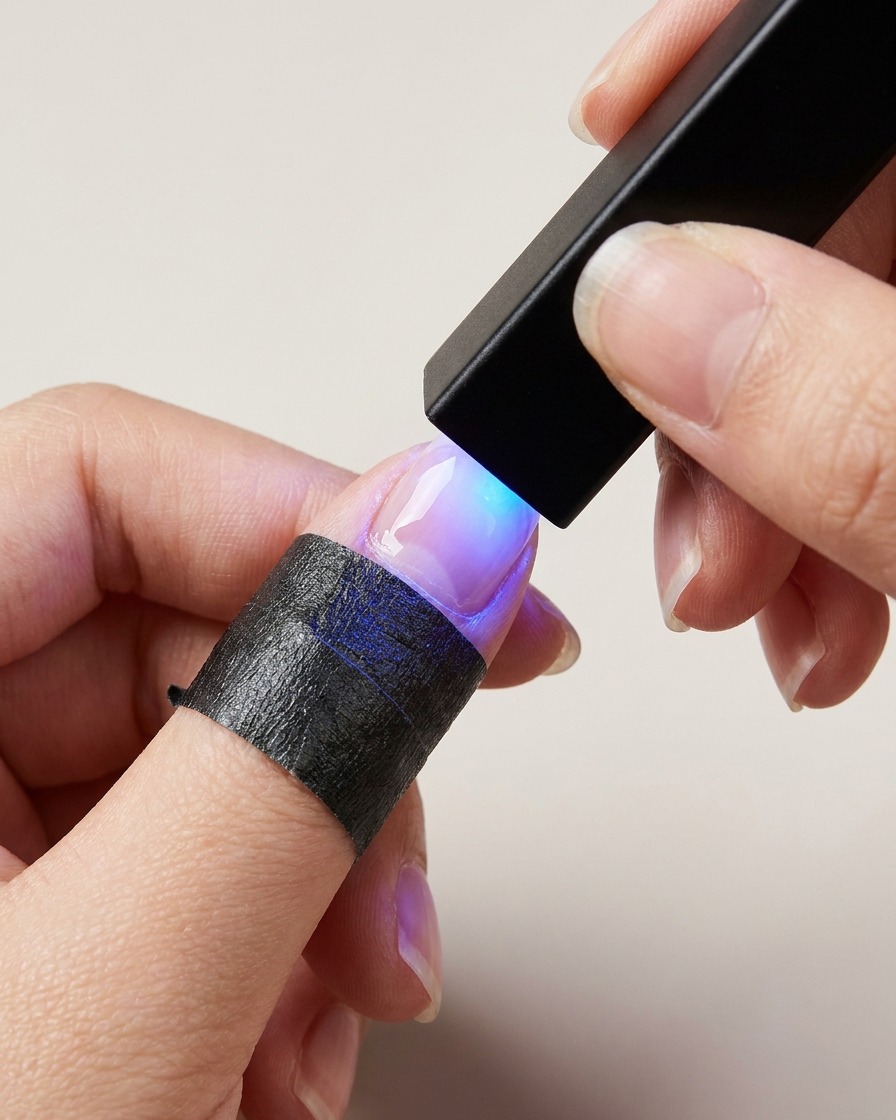
After applying the initial light shade to the free edge, hold a mini handheld UV/LED lamp directly over the nail to cure it. Ensure the light covers the entire nail surface for a complete and even cure before moving on to the next step.
Tip: A mini handheld lamp is perfect for flash-curing individual fingers, preventing the gel from shifting while you work. - 4Introduce Cat-Eye Gel
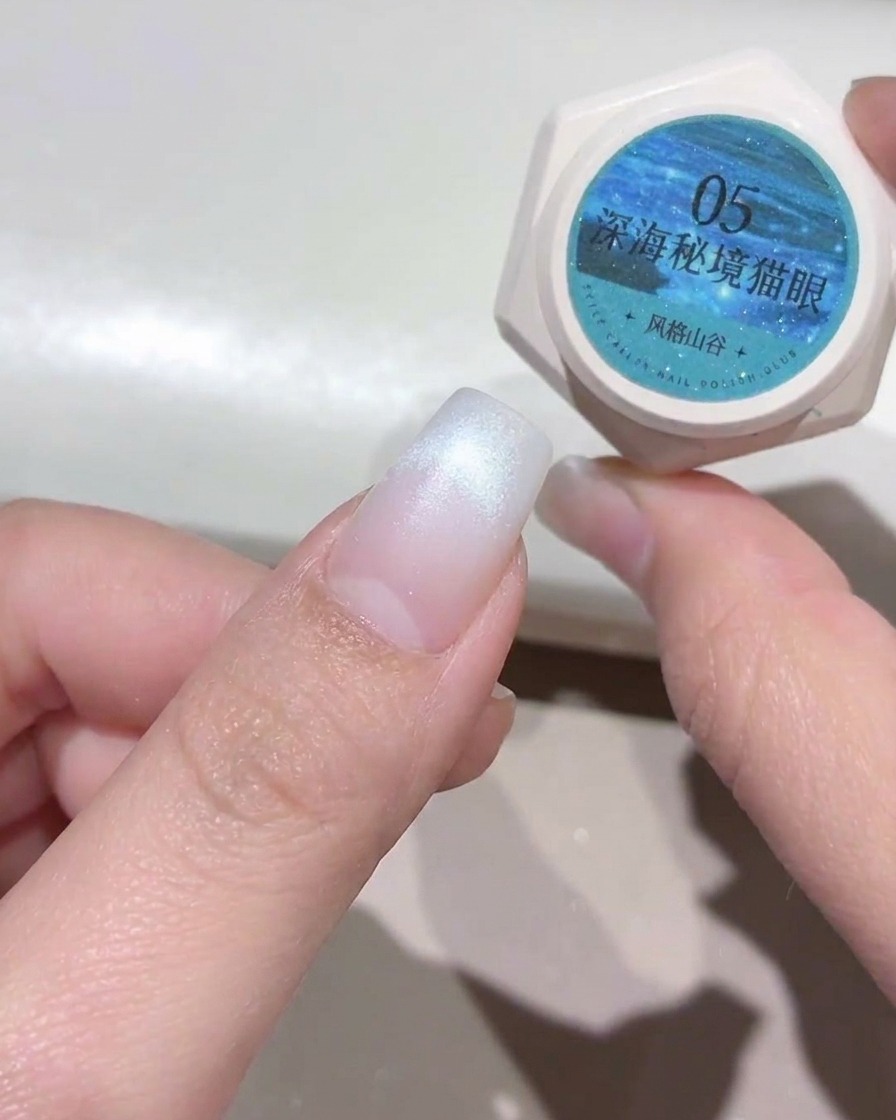
Prepare your deep sea teal-blue magnetic cat-eye gel. You will need to brush a full, even layer of this shade over the entire nail plate. Ensure the application is smooth so the magnetic particles can move freely.
Tip: Do not cure the gel immediately after application; it must remain wet to allow the magnetic particles to be manipulated. - 5Push Particles to Center
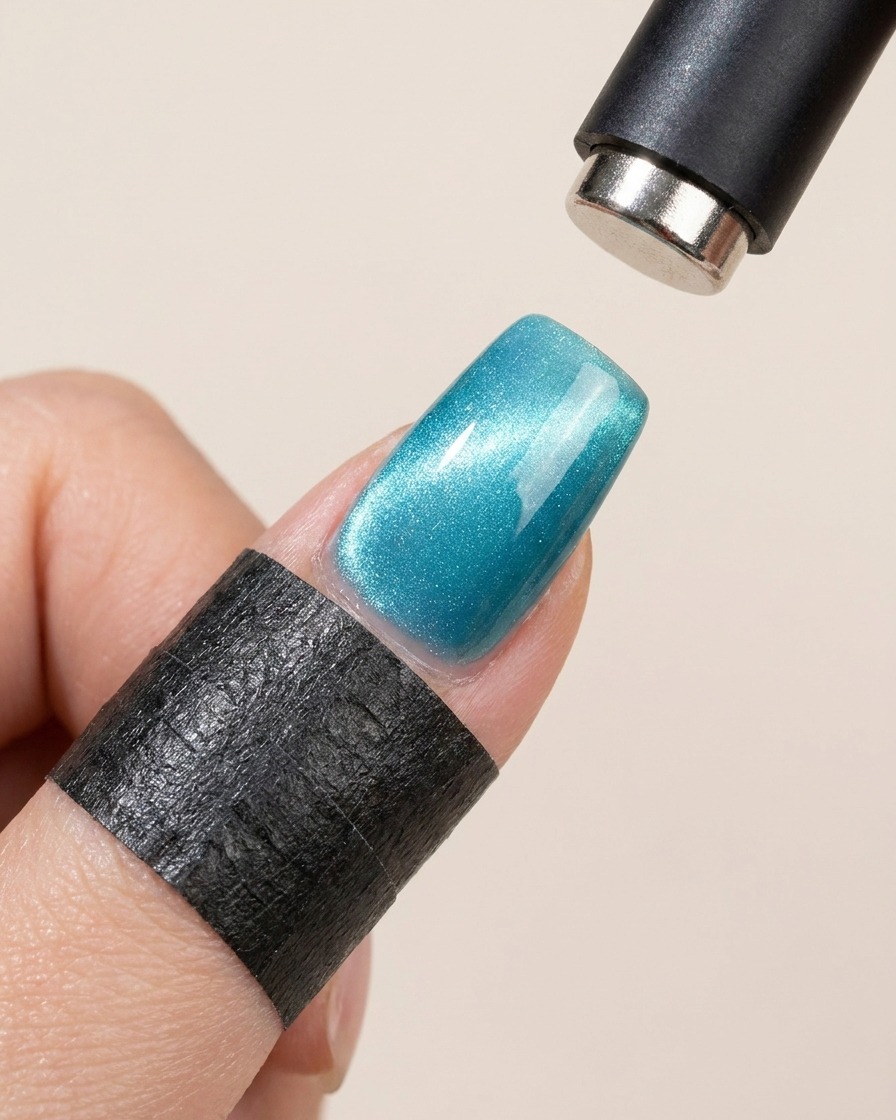
Hover a cylindrical magnet along both the left and right sides of the freshly painted nail. This action pushes the magnetic shimmer from the edges toward the center, creating a wide, luminous beam of light.
Tip: Hold the magnet steady for a few seconds on each side to pull the maximum amount of shimmer into your desired position. - 6Create Glass Bead Effect
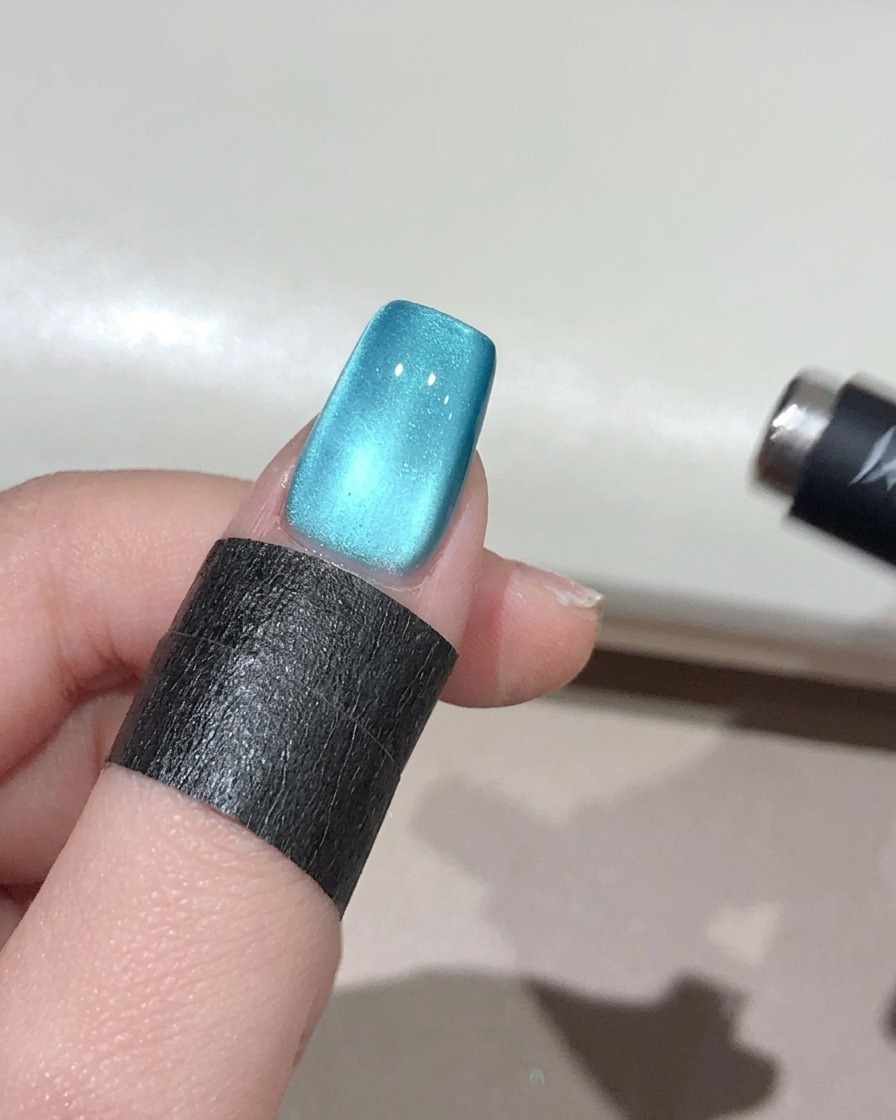
Switch to a small spherical magnet and carefully move it in circular motions around the perimeter of the nail. This pushes the magnetic particles inwards, creating a striking 3D glass bead effect with intense depth.
Tip: Keep the magnet close to the nail without touching the wet gel to precisely control the magnetic field. - 7Cure the cat-eye gel
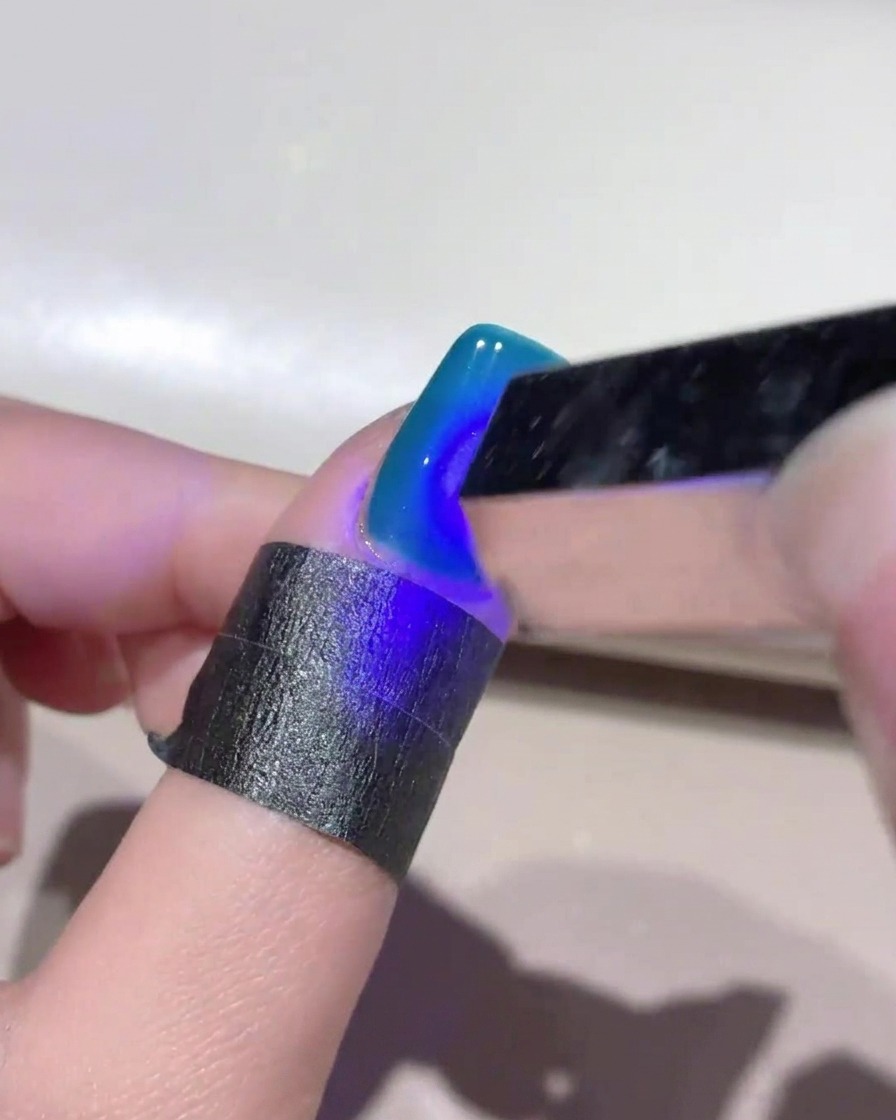
Once you have achieved the perfect wide beam and glass bead effect using your magnets, immediately cure the nail under your UV/LED lamp. Curing quickly locks the magnetic particles in place before they have a chance to disperse.
Tip: Always flash-cure cat-eye gel immediately after using the magnet, as the magnetic effect will slowly fade if left uncured. - 8Select the cross-shaped stencil
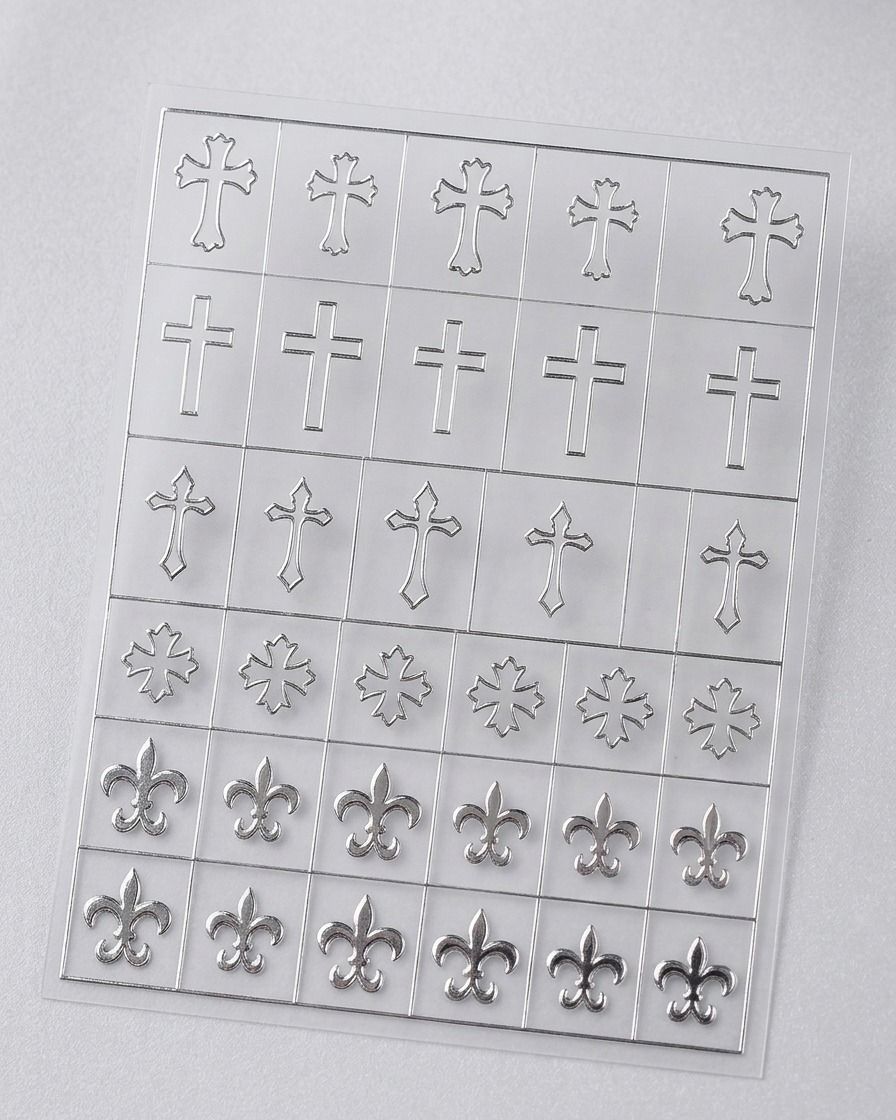
Using a pair of fine-tipped tweezers, gently lift your chosen cross-shaped stencil sticker from the backing sheet. Take care to grip the edges of the sticker to avoid bending or damaging the intricate shape, ensuring it remains flat and ready for precise placement on the nail surface.
Tip: If the sticker is difficult to lift, use the edge of a clean nail tool to slightly nudge one corner upward until you have enough surface area to grip with the tweezers. - 9Place the cross stencil sticker
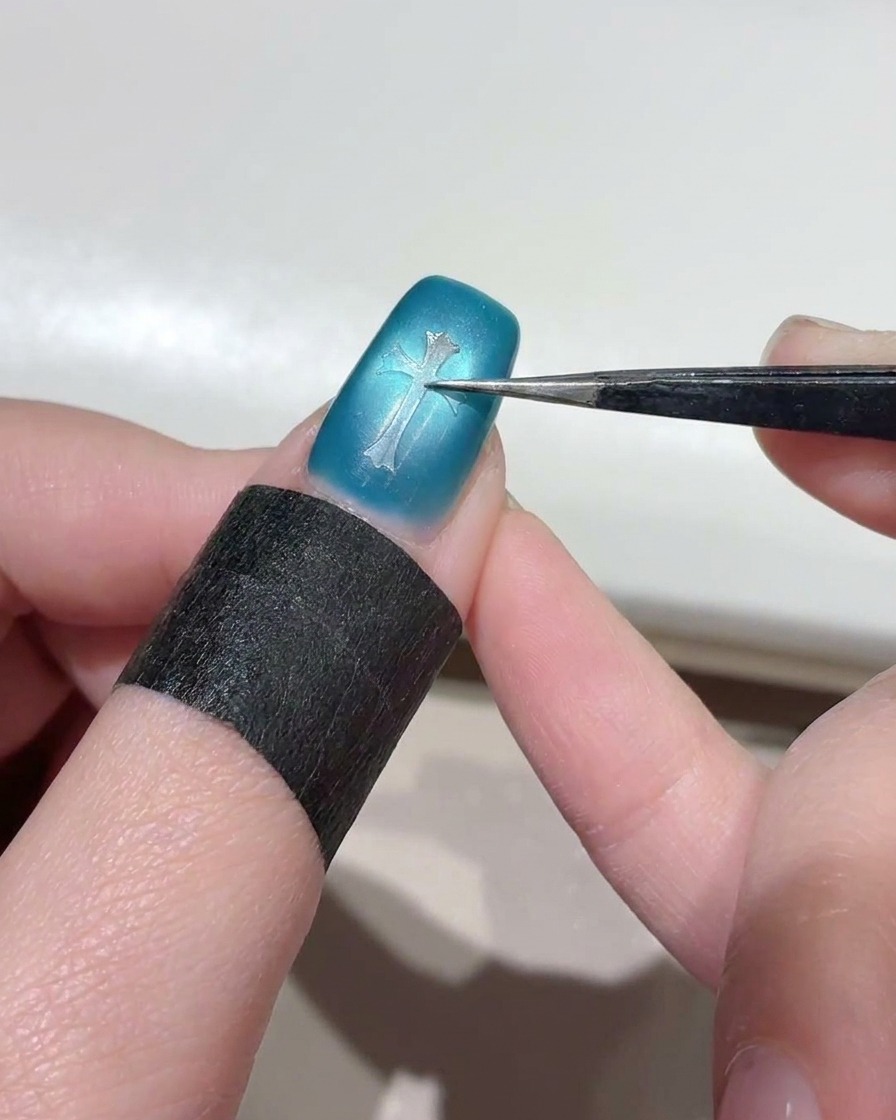
Using a pair of fine-tipped tweezers, pick up a suitably sized Chrome Hearts cross sticker and gently place it onto the center of the nail surface. Press down firmly across the entire sticker to ensure it sits perfectly flat against the cured cat-eye gel.
Tip: Make sure all the edges of the sticker are completely flush with the nail to prevent the black polish from bleeding underneath during the next step. - 10Sponge on black gel polish
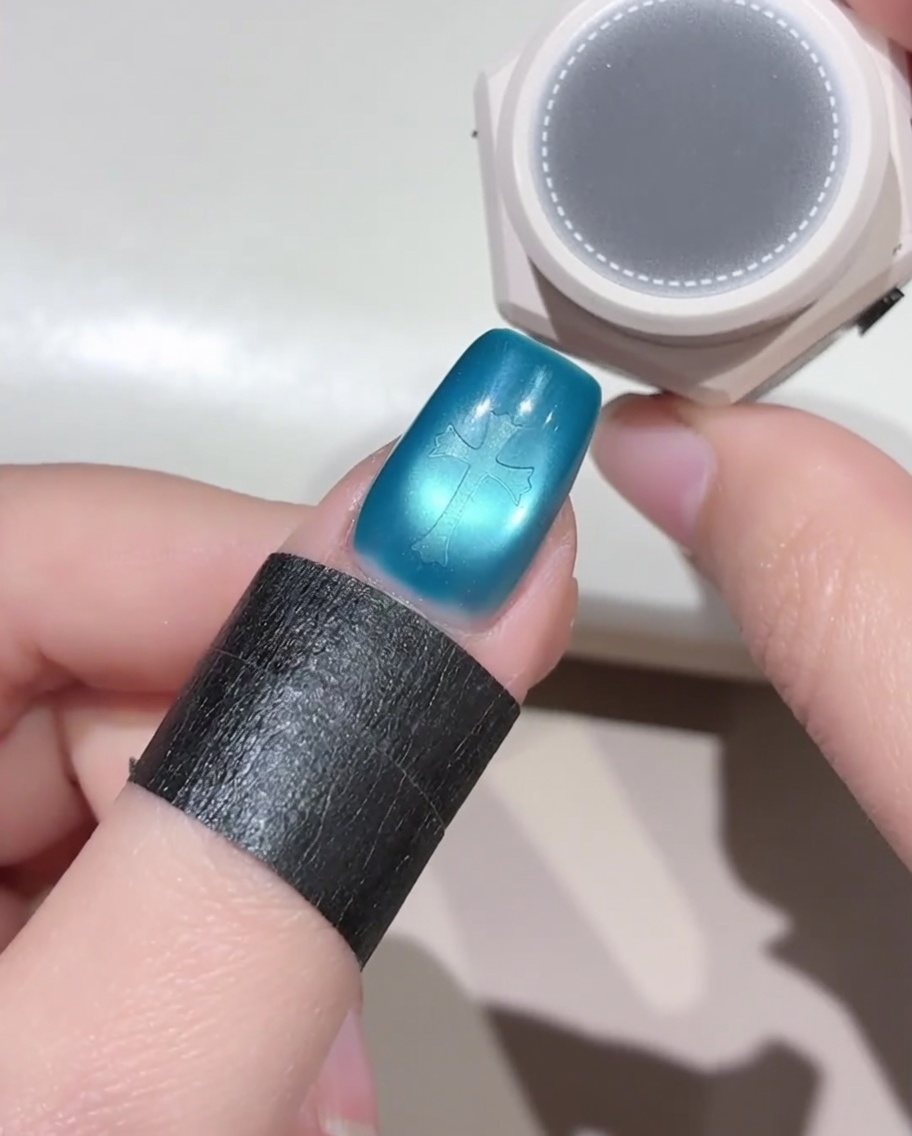
Pick up some black gel polish using a small sponge tool. Gently and repeatedly dab the sponge over the entire nail surface. Ensure you completely cover both the exposed blue base and the sticker to create a solid opaque layer.
Tip: Dabbing with a sponge rather than brushing prevents the sticker from lifting and creates a thinner, more even coat of black over the design. - 11Peel the sticker and reveal
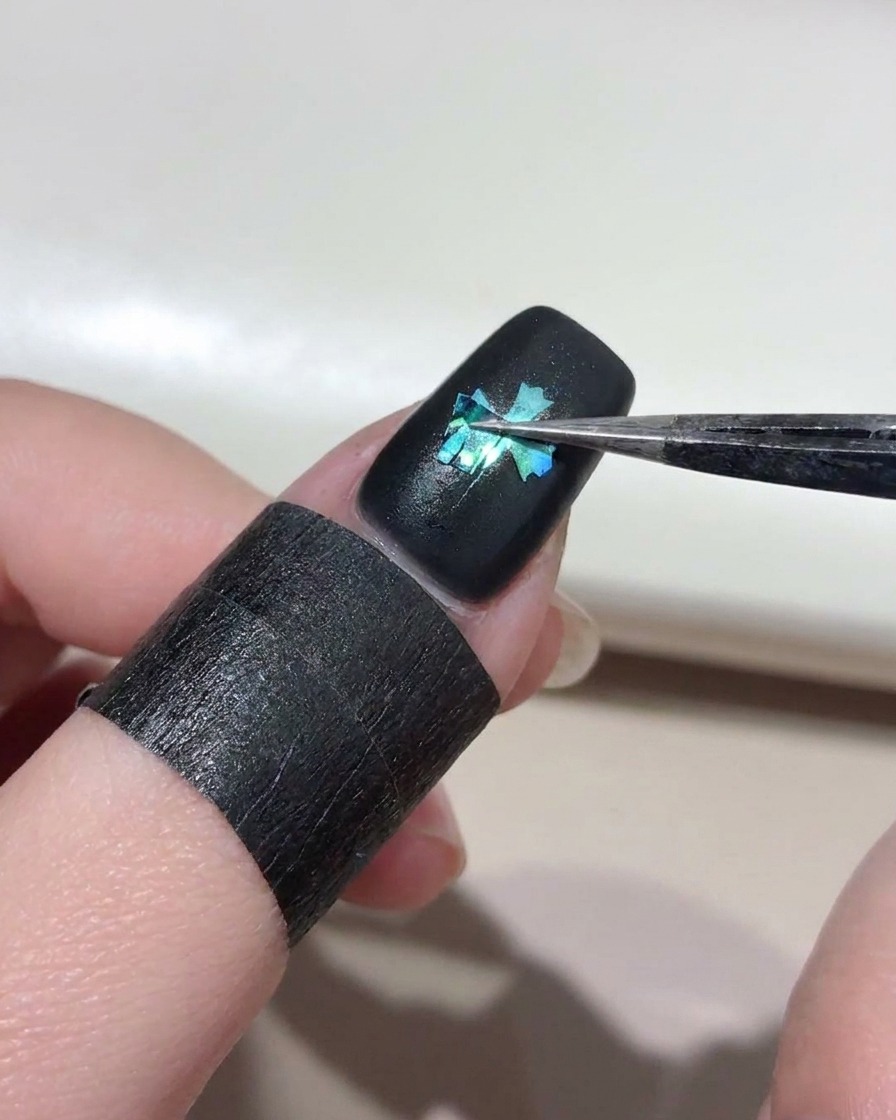
Before curing the black polish, use your tweezers to carefully pierce an edge of the cross sticker and peel it away. This removes the stencil and beautifully reveals the glowing teal cat-eye gel that was protected underneath. Once the sticker is off, cure the nail under your lamp.
Tip: Always peel the stencil off while the overlaying gel is still completely wet to ensure clean, crisp lines around the design. - 12Seal with a top coat
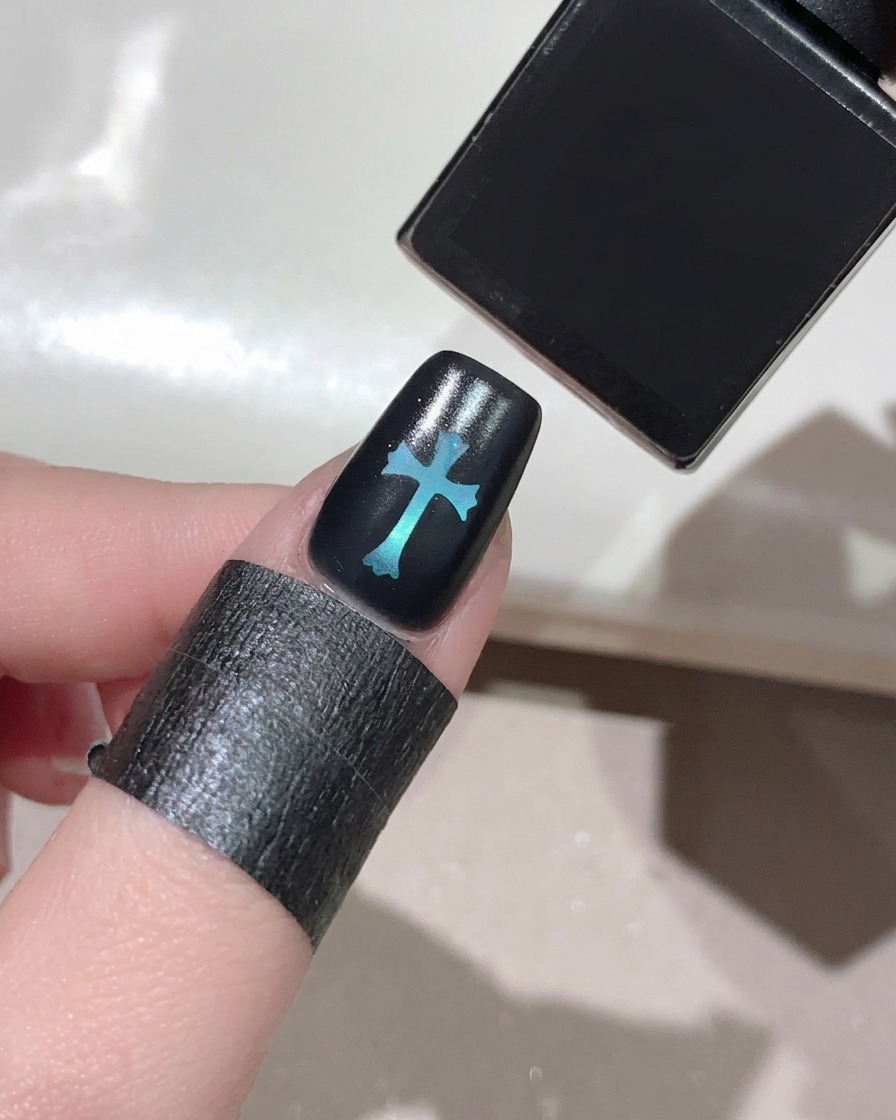
After removing the sticker to reveal the blue cross design beneath, apply a generous layer of glossy no-wipe top coat over the entire nail. This will smooth out any ridges left by the sticker and give the nail a beautiful, high-shine finish. Cure one final time.
Tip: Using a slightly thicker layer of top coat helps to self-level and completely encapsulate the design, ensuring a perfectly smooth surface.