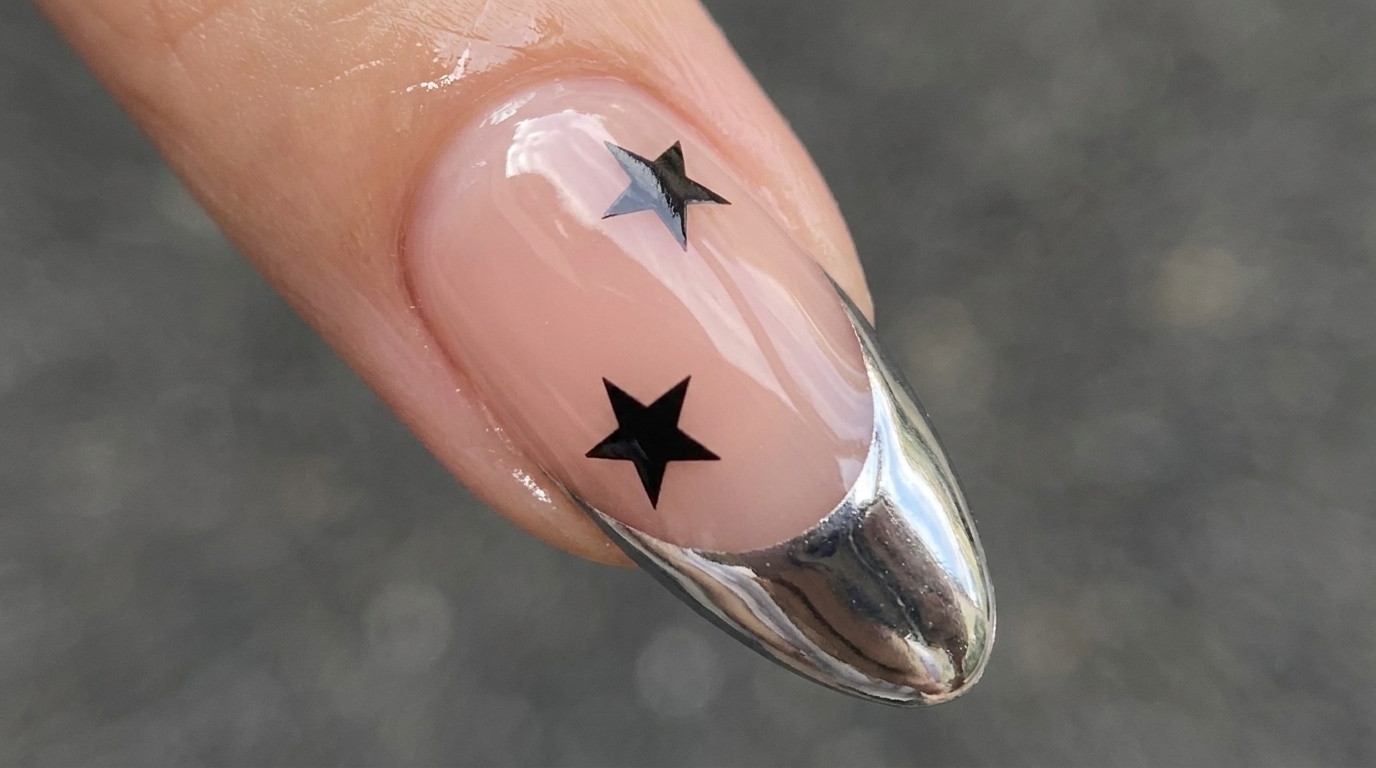
Silver Chrome French Tip
Black Star Nails — Step-by-Step Tutorial
Elevate your manicure with this chic silver chrome French tip design featuring playful black star accents. Perfect for a trendy, high-shine finish.
Chrome French tips are a sophisticated twist on a classic style, bringing a modern, metallic edge to your everyday look. Adding dainty black star decals creates a fun, celestial contrast that makes the design feel unique and expressive. This tutorial guides you through the layering and encapsulation techniques needed to achieve a professional, long-lasting mirror finish at home.
Steps
- 1Apply base color
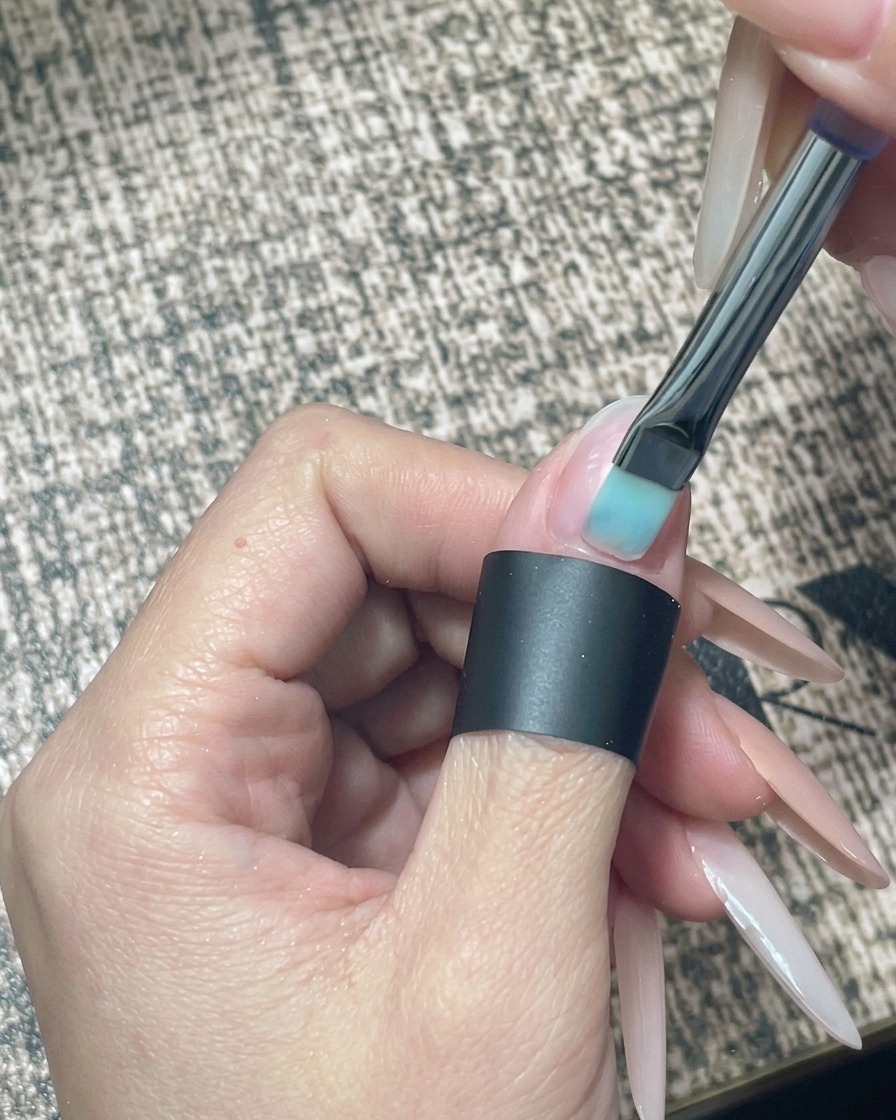
Apply a thin, even layer of sheer nude gel polish over the entire nail plate, ensuring you do not flood the cuticles. Cure under a UV/LED lamp as directed by your product instructions.
Tip: Apply in thin layers to ensure a smooth, professional finish without streaks. - 2Cure base color
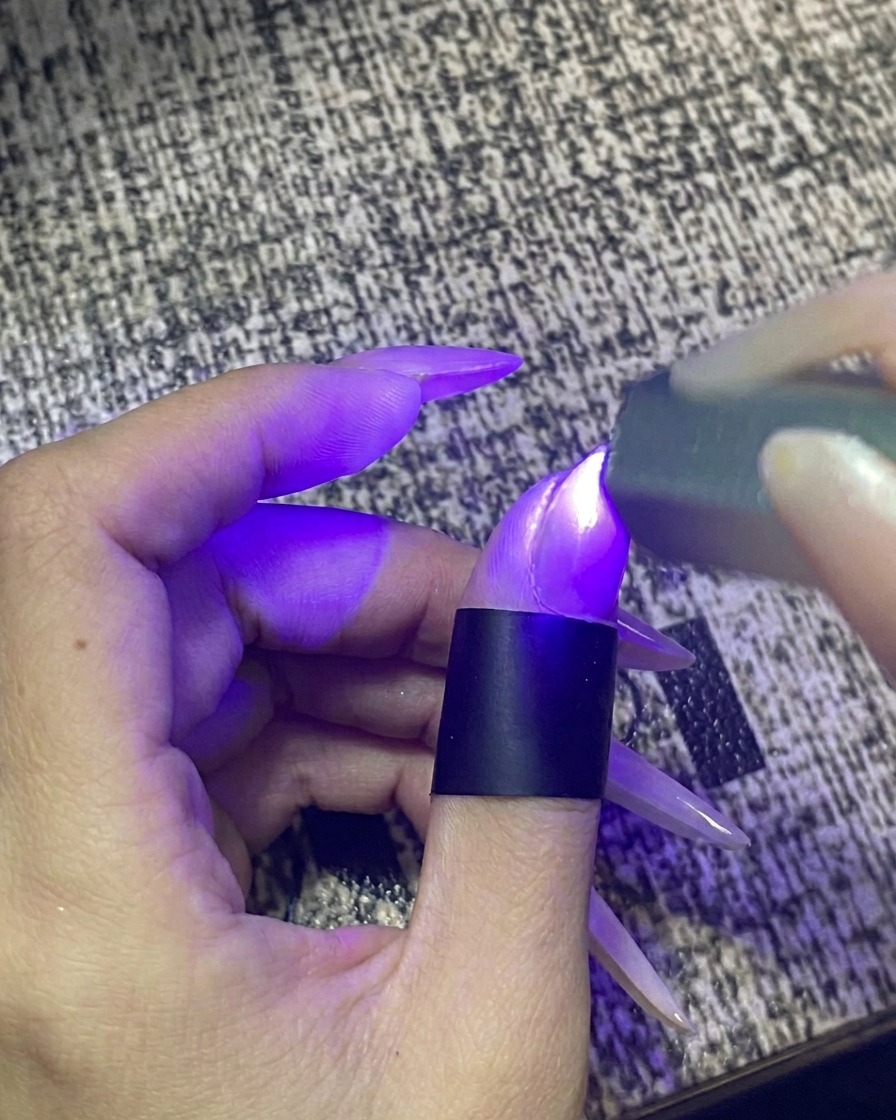
Place your finger into the UV/LED lamp and cure the nude gel base coat for the manufacturers recommended time. Ensure the finger is positioned directly under the light source for an even cure.
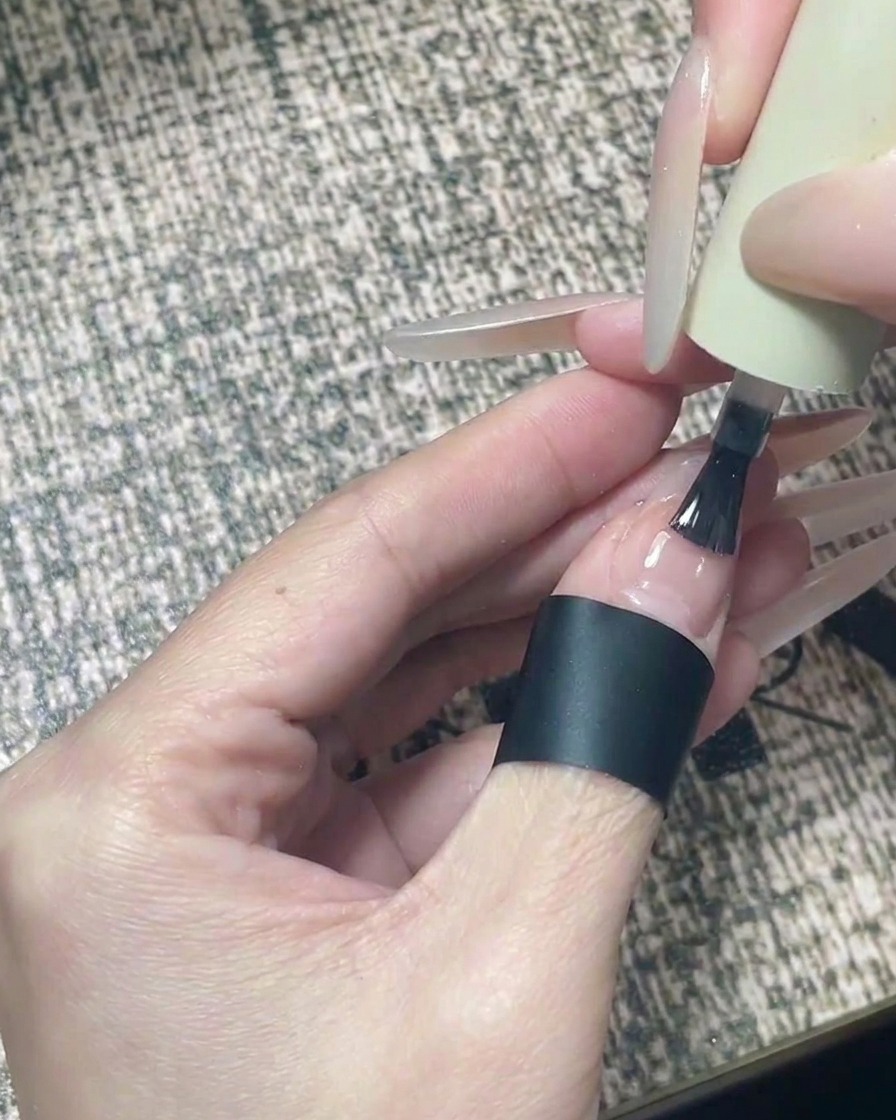
Tip: Do not rush the curing process; full cure time is essential for the longevity of your manicure. - 3Apply top coat to the tip
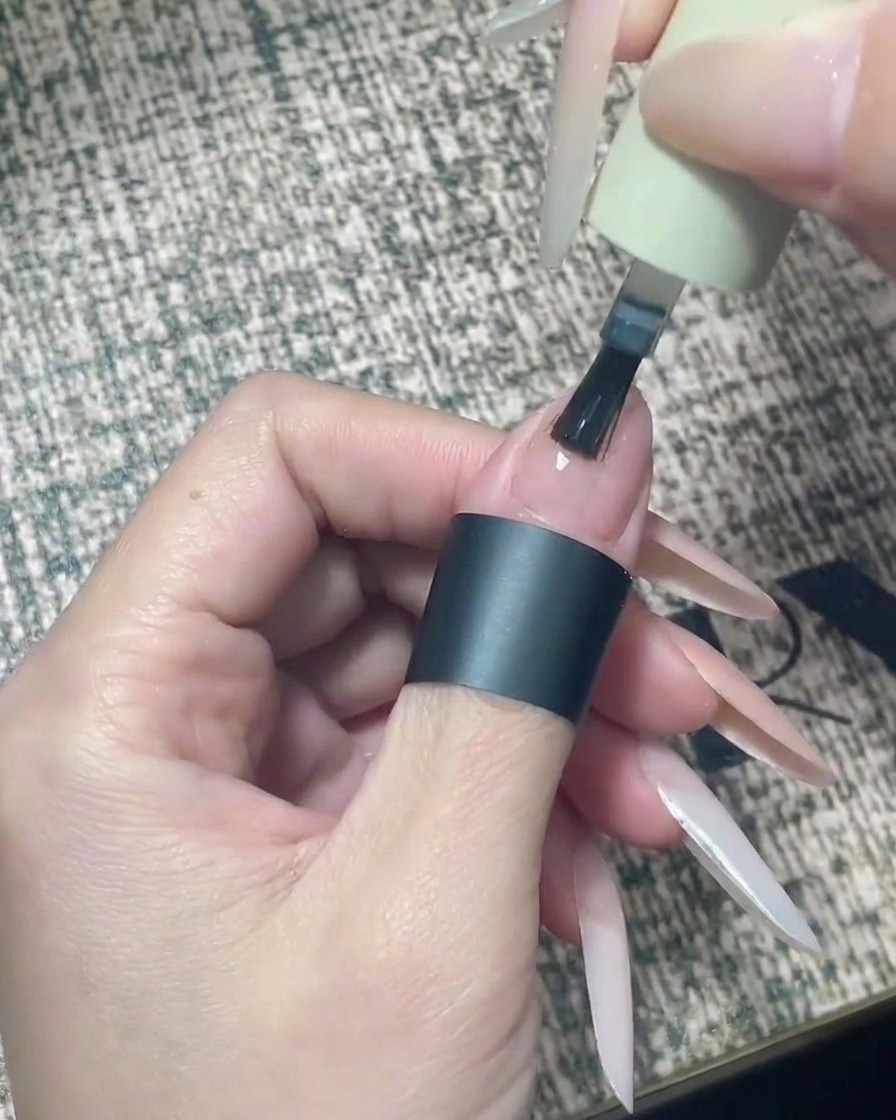
Using a no-wipe top coat, paint a thin layer only on the top half of the nail, covering the free edge area. This will create a tacky surface or base for the chrome application.
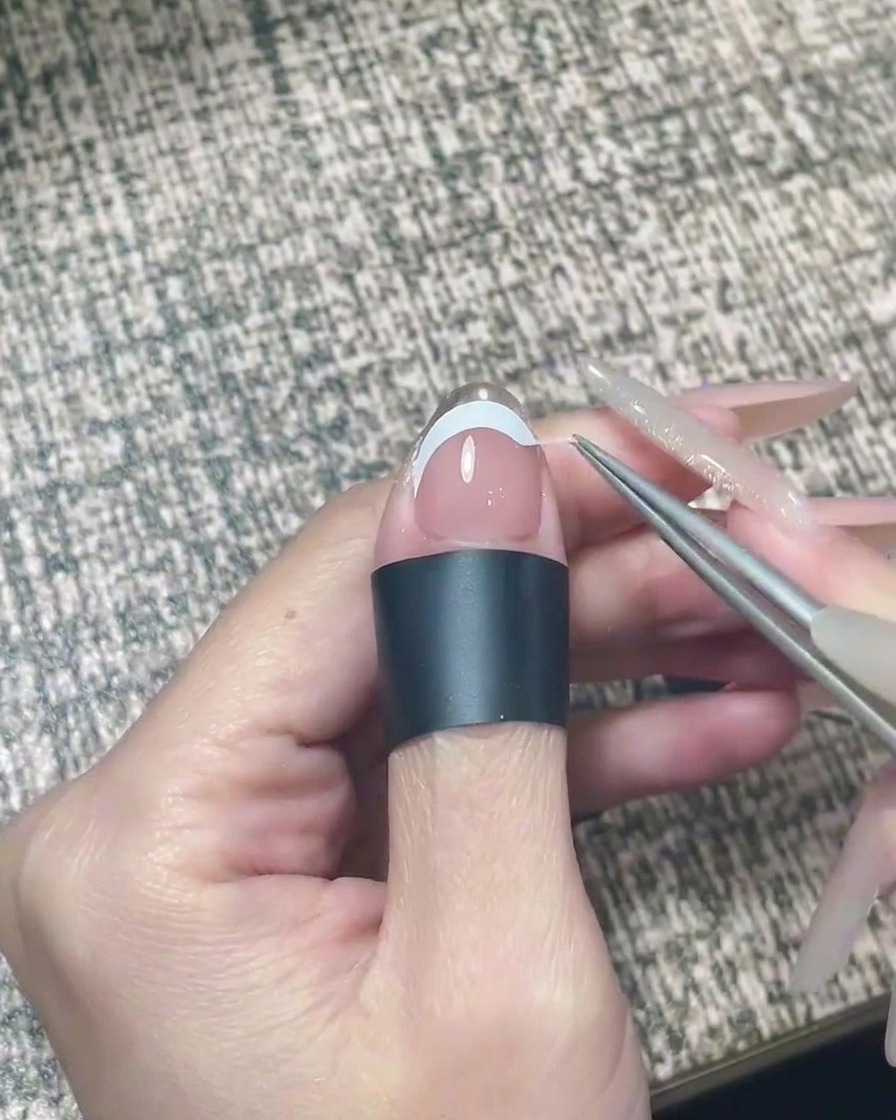
Tip: Be precise with your application to avoid getting top coat on the base area of the nail where the chrome shouldnt be. - 4Position French guide sticker
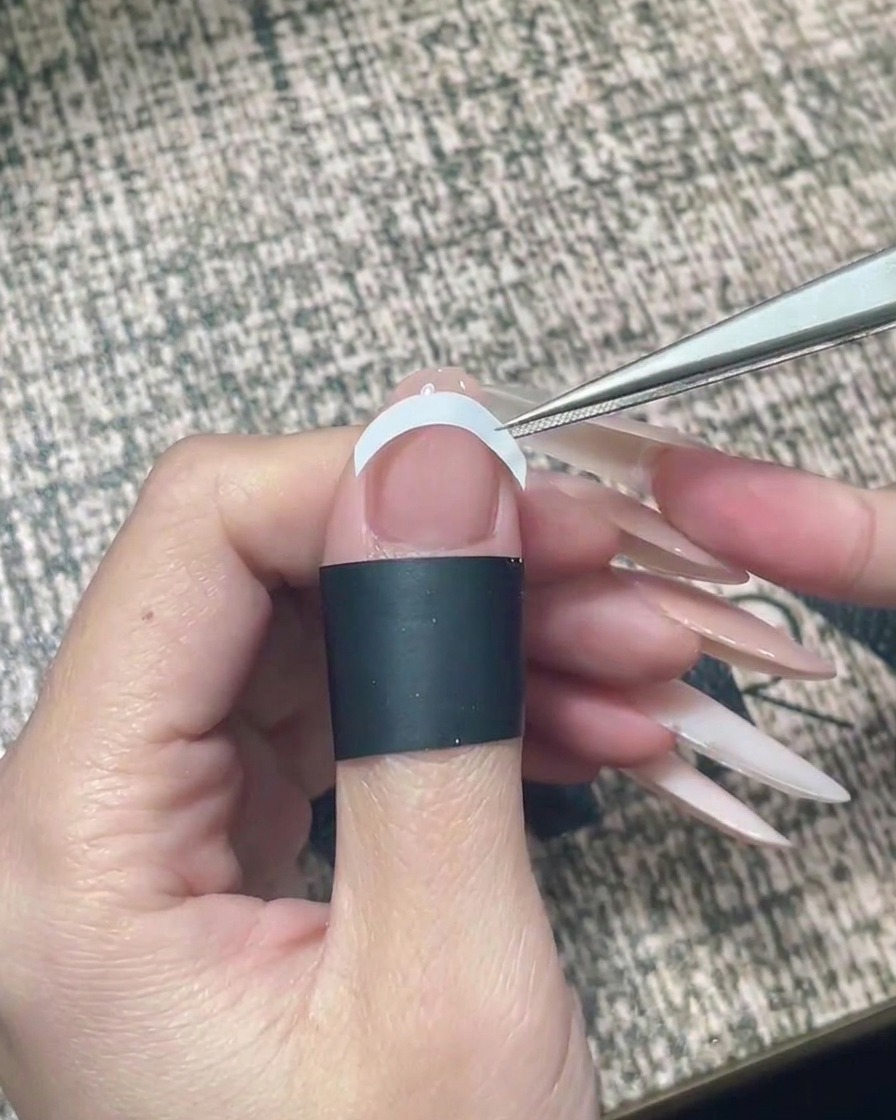
Carefully place a curved French manicure guide sticker across the middle of the nail. Use tweezers to press the edges of the sticker firmly against the nail surface to ensure a clean line.
Tip: Pressing the sticker down thoroughly prevents chrome powder from leaking under the guide. - 5Apply silver chrome powder

Using an eyeshadow sponge applicator, pick up a small amount of silver chrome powder and rub it onto the exposed tip of the nail, above the guide sticker. Continue buffing until the chrome is smooth and reflective.
Tip: Buffing thoroughly is the key to achieving a mirror-like finish on the chrome. - 6Clean up and refine chrome
Gently use a fine-grit nail file or buffer to smooth the side walls and free edge of the nail, removing any stray chrome powder and ensuring the edges are neat.
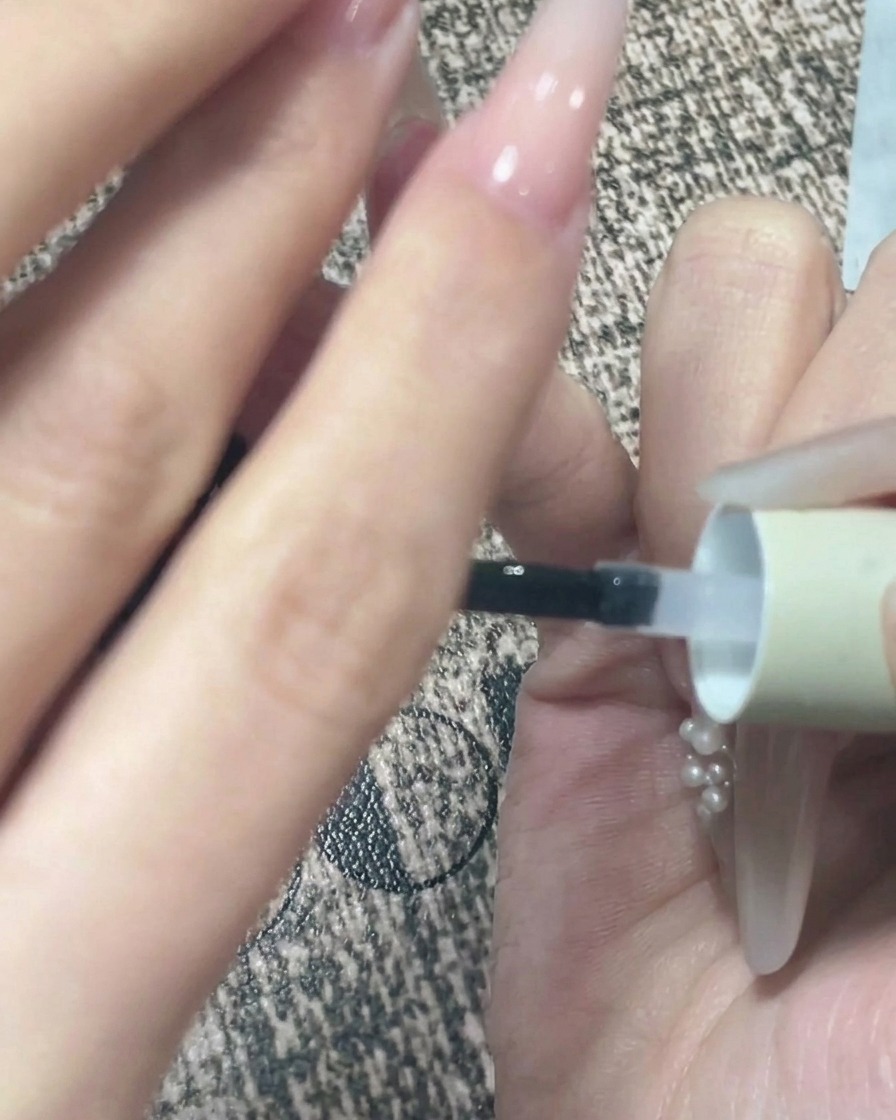
Tip: Use a soft touch to avoid damaging the chrome finish you have just applied. - 7Apply star stickers
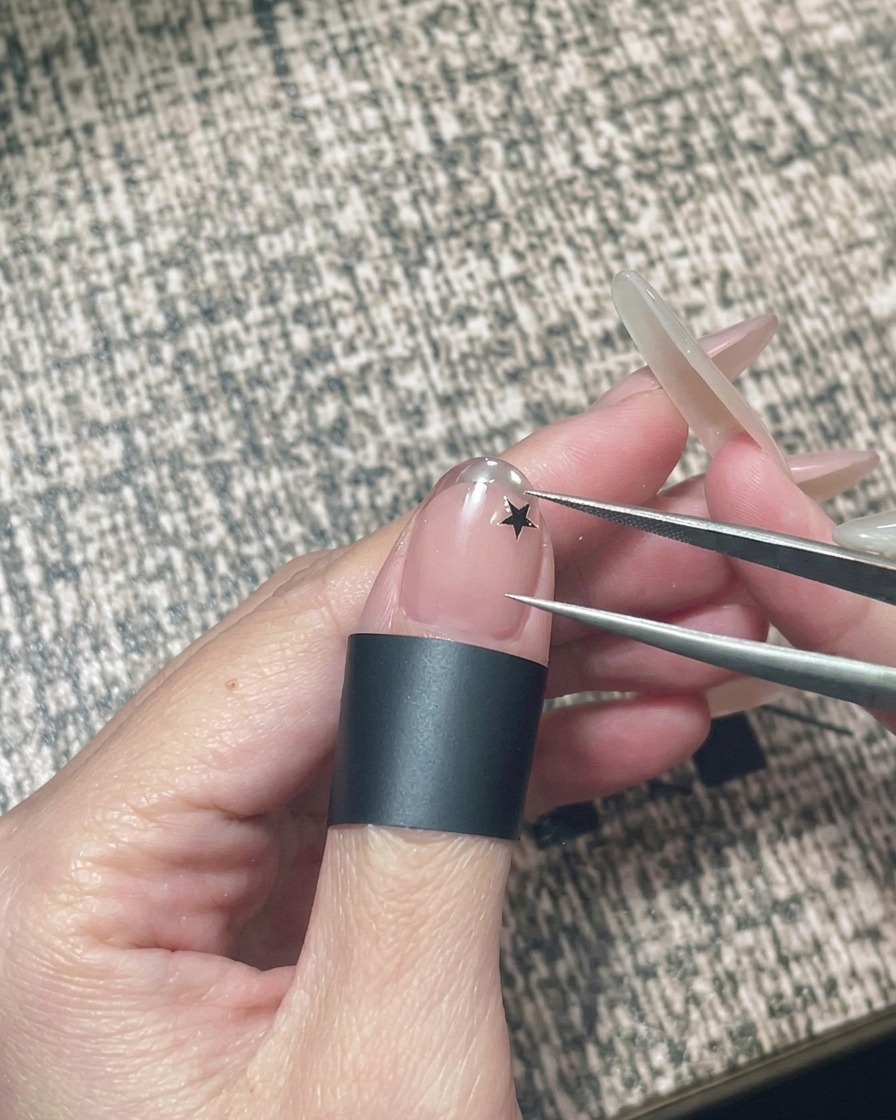
Using precision tweezers, carefully place the black five-pointed star stickers onto the nude base of the nail. Press them down flat to ensure the edges dont lift, which will make the encapsulation process much smoother.
Tip: Using tweezers gives you better control over placement and prevents oils from your fingers from affecting the stickers adhesion. - 8Encapsulate the design
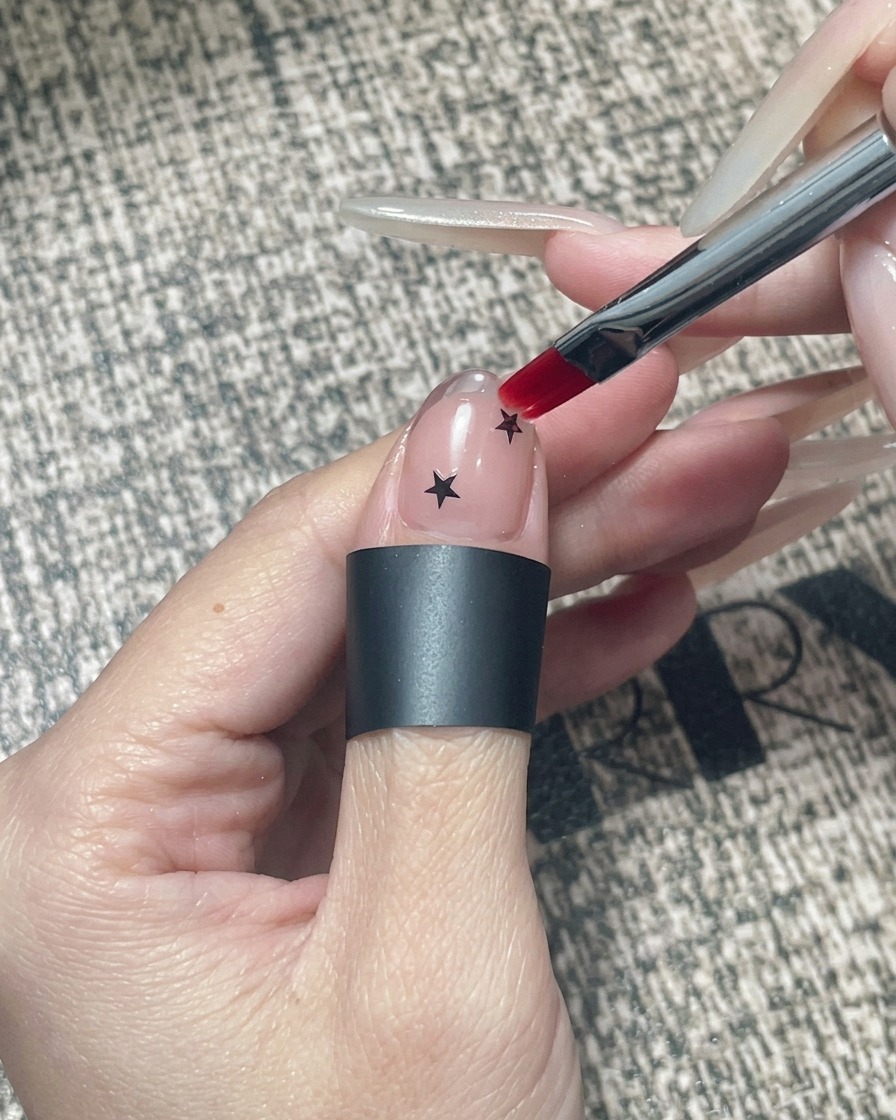
Apply a generous layer of clear base gel over the entire nail to encapsulate the chrome tip and star stickers. This step protects the delicate nail art and creates a smooth, even surface for the top coat.
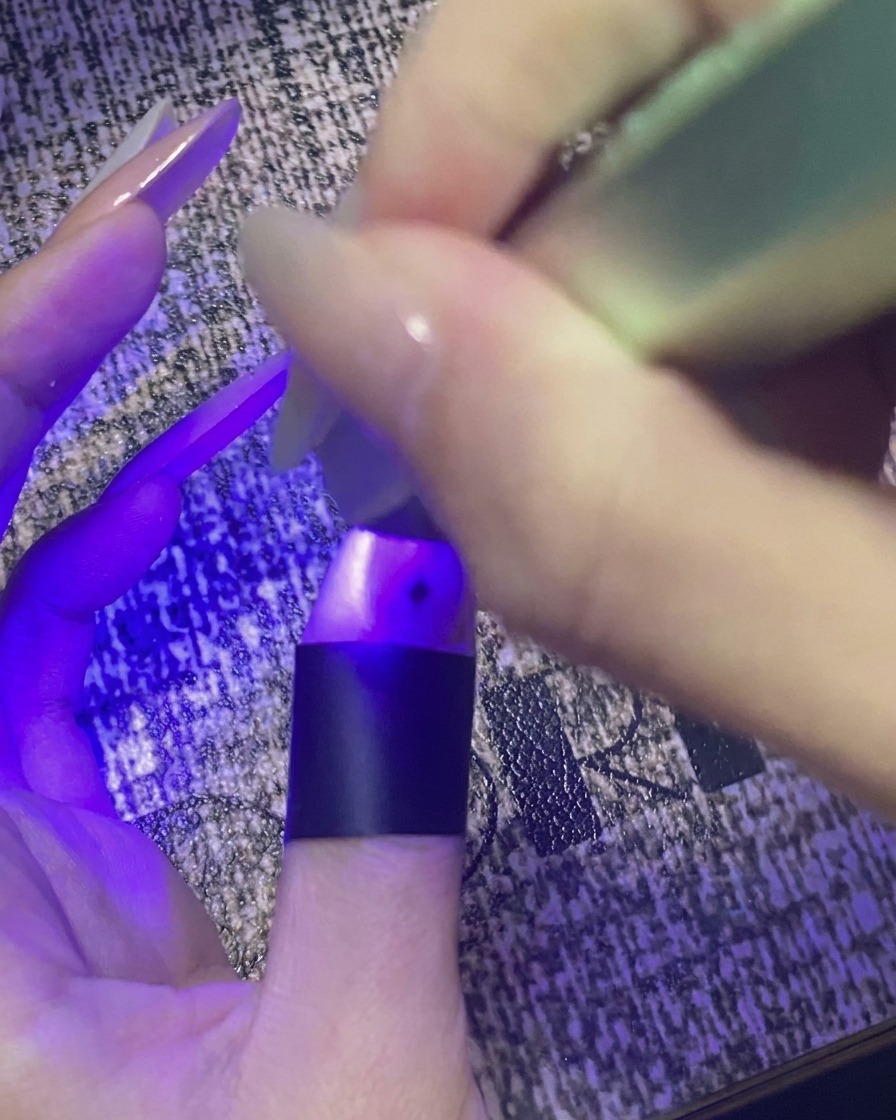
Tip: Ensure the base gel fully covers the edges of the stickers so they dont peel up over time. - 9Flash cure the encapsulation layer
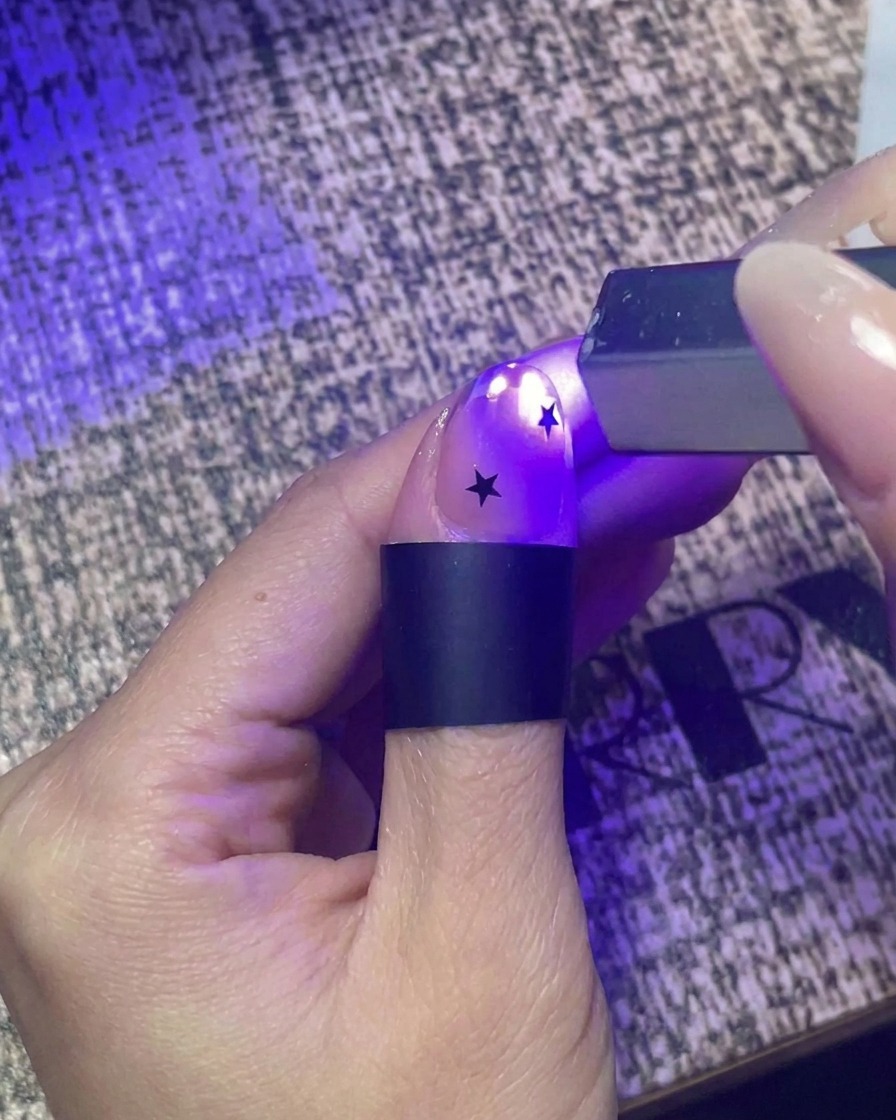
Using a small handheld mini UV light, perform a flash cure on the nail after applying the base gel to encapsulate the star stickers. Hold the light steadily over the nail for a few seconds to set the gel in place, preventing the stickers from shifting before the final full cure.
Tip: A quick flash cure is perfect for locking in intricate nail art placement before committing to a full cure in the main lamp. - 10Apply final top coat
Brush on a smooth, even layer of glossy top coat over the entire nail. Make sure to cap the free edge to seal in all the encapsulated elements and provide long-lasting shine and protection.
Tip: A slightly thicker layer of top coat can help smooth out any minor imperfections left from the encapsulation layer. - 11Self-level the top coat
After applying your final top coat, turn the finger upside down for a few seconds. This allows gravity to help the gel self-level, creating a smooth surface and a perfectly shaped apex before curing it in the lamp.
Tip: Inverting the nail helps prevent the gel from pooling at the cuticles and ensures an even, glossy finish. - 12Final cure under UV/LED lamp
Place the nail under your UV/LED lamp for a final, full cure. Make sure the light hits the entire nail surface evenly to properly set the top coat, leaving you with a durable, high-shine finish.
Tip: If you used a self-leveling technique, move the hand directly into the lamp without tilting it to maintain that perfect apex.