Silver Star Cat-Eye Nails — Elegant Celestial Nail Art Tutorial
Elevate your manicure with this dreamy silver star and cat-eye look. Learn how to blend magnetic shimmer with delicate glitter detailing for a celestial finish.
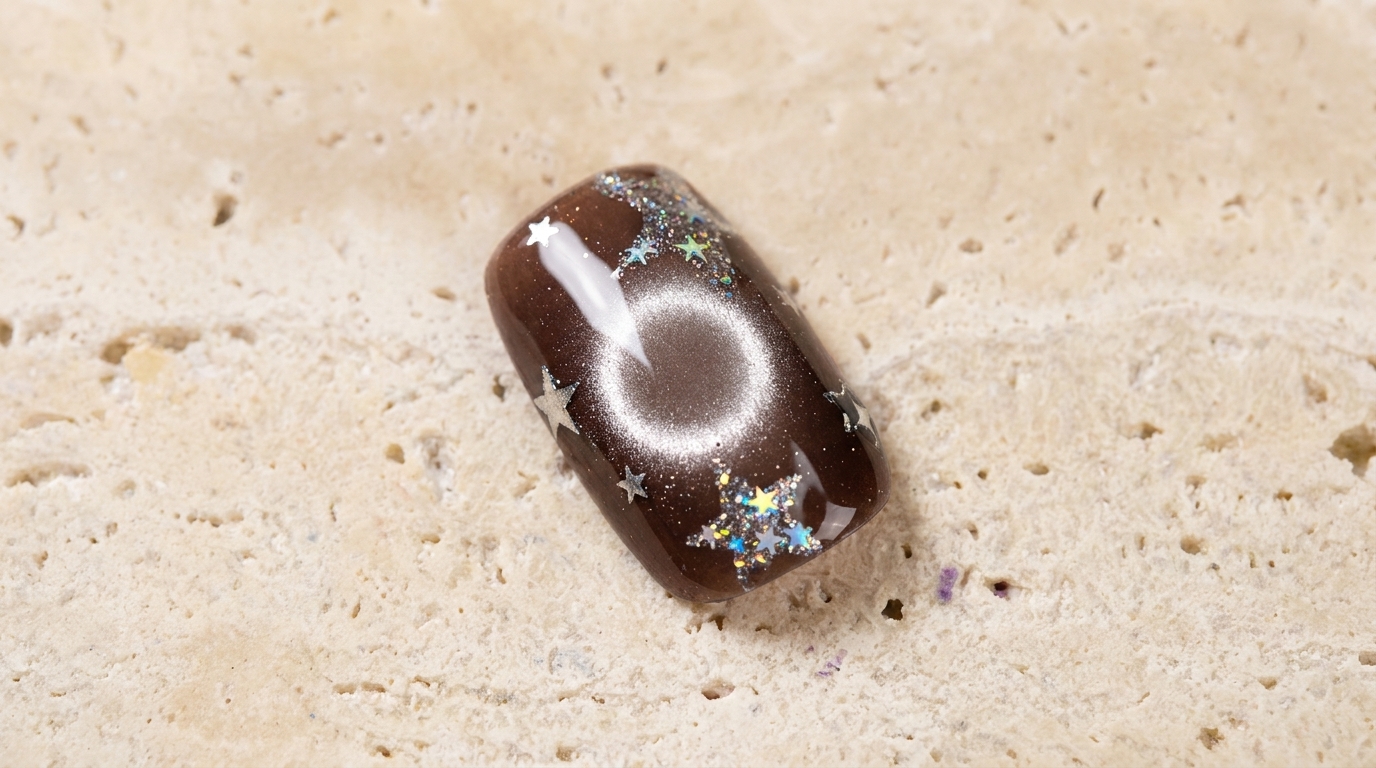
Celestial nail art continues to be a favorite for its whimsical yet sophisticated appeal. This look combines the depth of cat-eye magnetic polish with precise silver glitter lines and star embellishments, creating a luminous effect that catches the light beautifully from every angle.
Steps
- 1Apply cat-eye gel polish

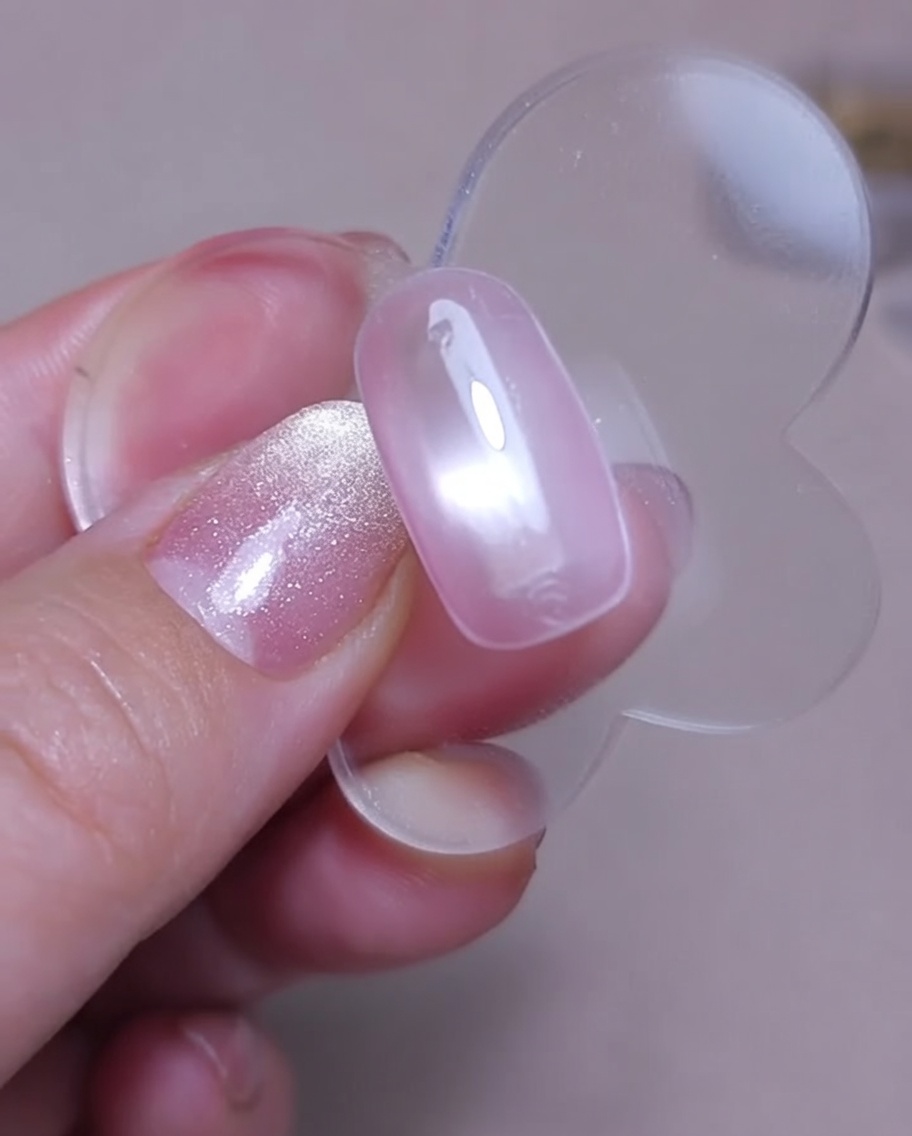
Apply an even layer of the pinkish-silver cat-eye gel polish to the entire nail tip. Work carefully to ensure smooth, uniform coverage, as this forms the base for the magnetic effect.
Tip: Do not cure the gel polish just yet; the magnetic particles need to be completely wet to be manipulated in the next step. - 2Create cat-eye shimmer
While the cat-eye gel polish is still wet on the nail, hover your magnet over the surface to manipulate the magnetic particles. Move the magnet to guide the particles into your desired light-chasing shimmer effect, then cure under the lamp once the design is achieved.
Tip: Keep the magnet close to the nail for a stronger, more defined line, but be careful not to touch the wet gel surface. - 3Cleanse the nail surface
After curing the cat-eye gel, use a lint-free wipe dampened with cleanser to remove the sticky inhibition layer. This ensures a clean, smooth surface for the subsequent nail art details.
Tip: Use a firm, singular swipe to remove the sticky layer completely without dulling the finish. - 4Prepare glitter for detailing
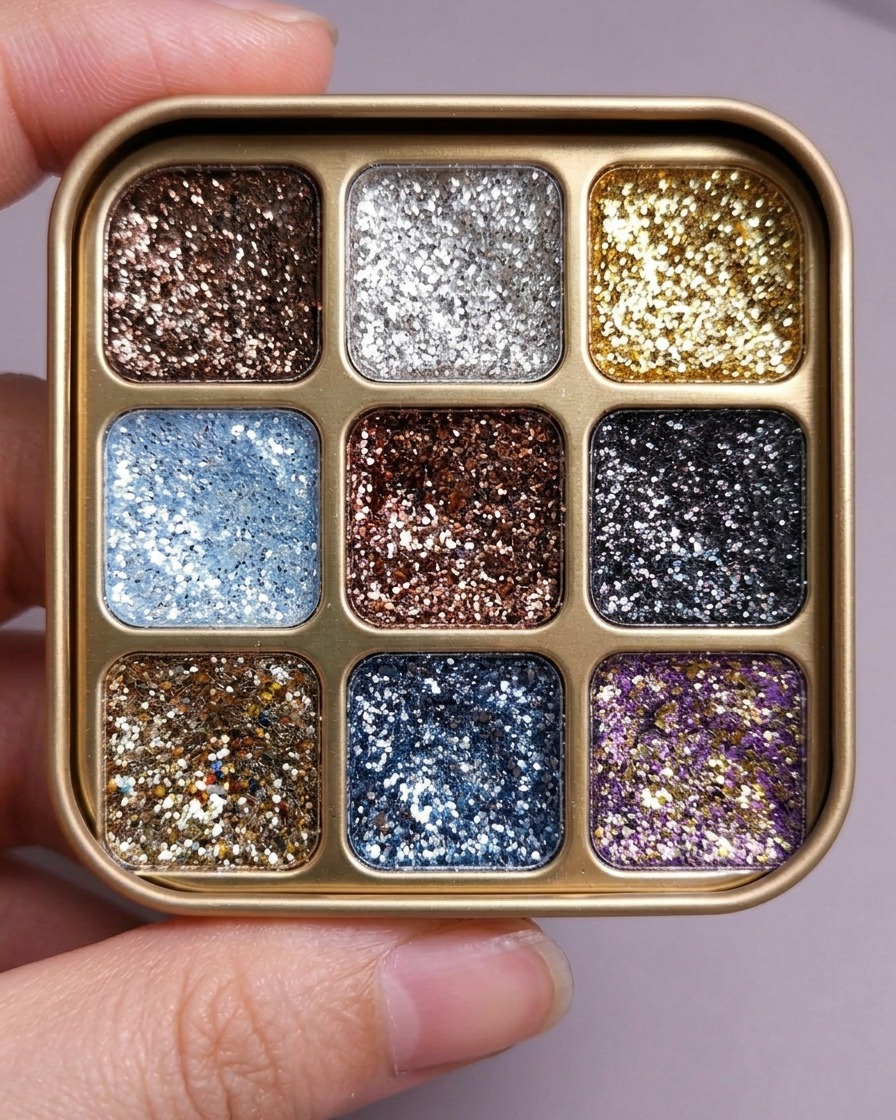
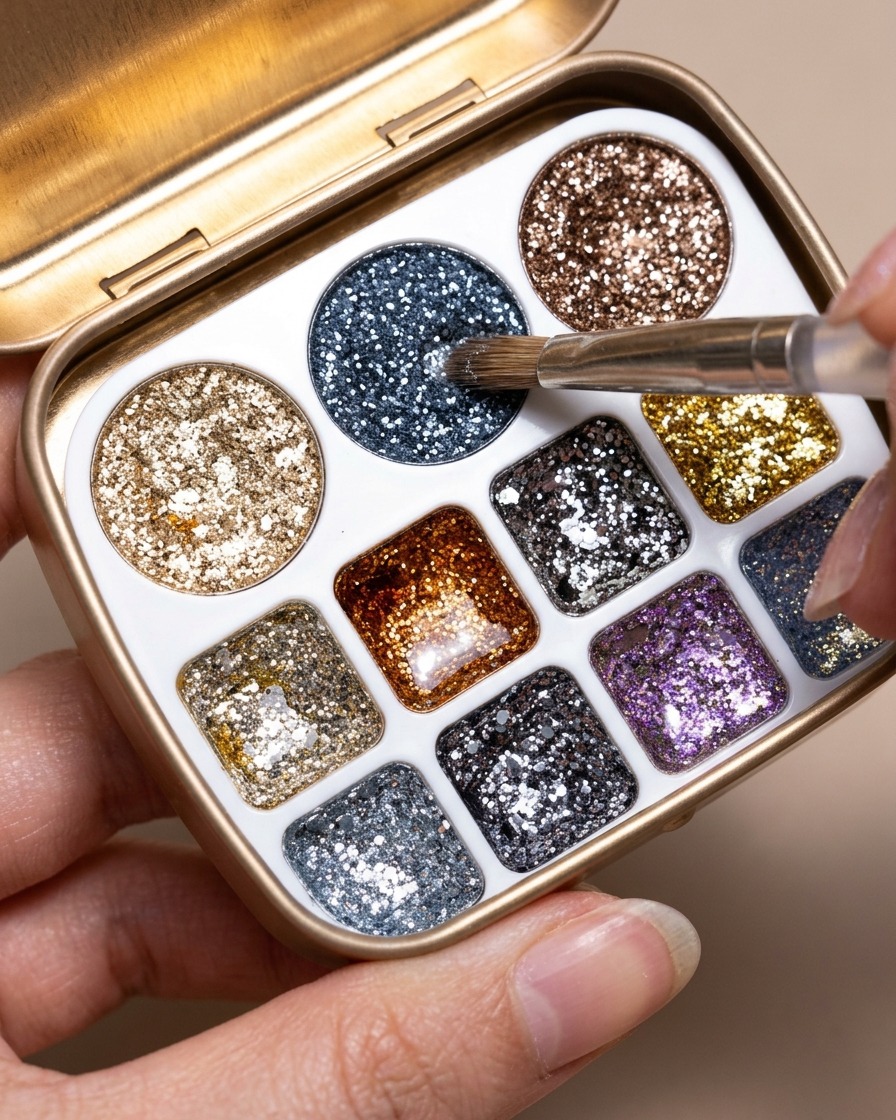
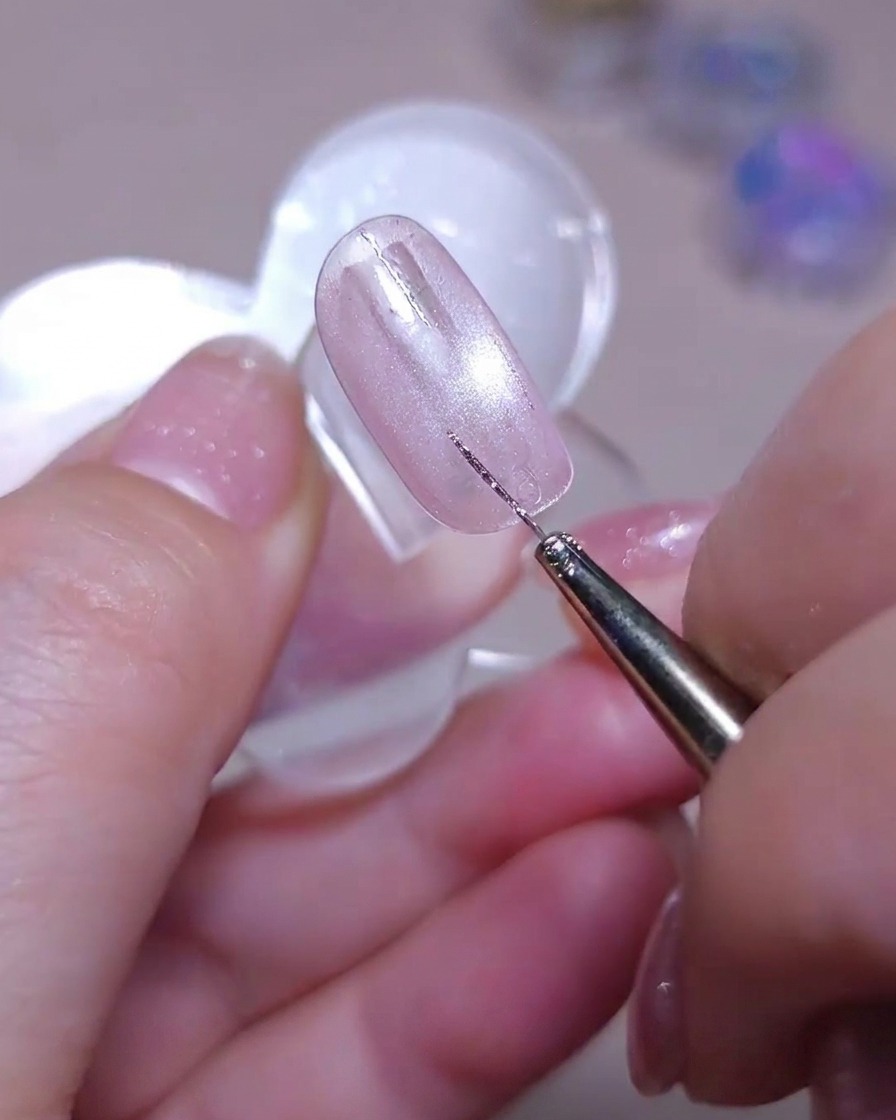
Dip a fine detailer liner brush into your chosen silver glitter gel from the palette. Ensure you have a consistent amount of glitter particles on the bristles to create clean, sharp lines.
Tip: Load only the very tip of the liner brush for the most precise application of glitter lines. - 5Draw the first glitter line
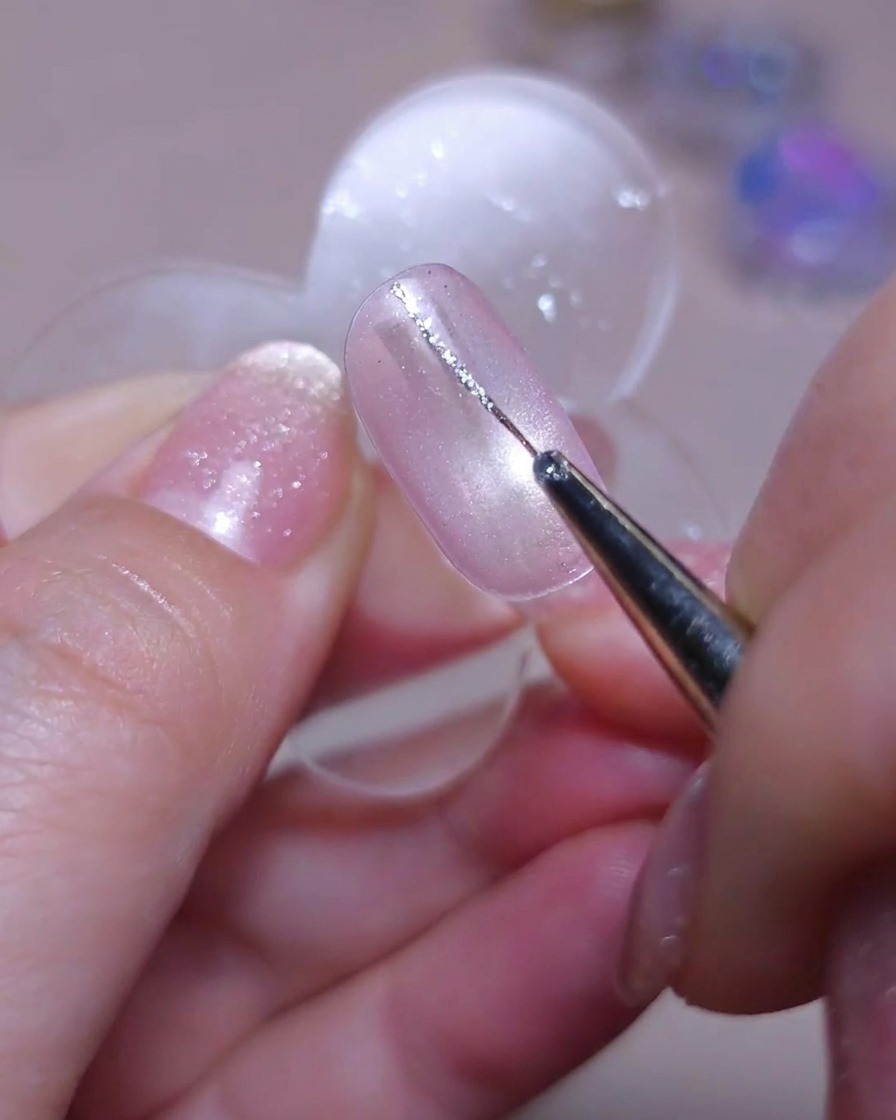
Using a fine detailer liner brush loaded with silver glitter gel, carefully paint a thin, straight vertical line down the left side of the nail. Keep your hand steady and use a light touch for a delicate result.
Tip: Anchor your pinky finger on a stable surface while drawing to maintain a steady hand and ensure perfectly straight lines. - 6Draw a second glitter line
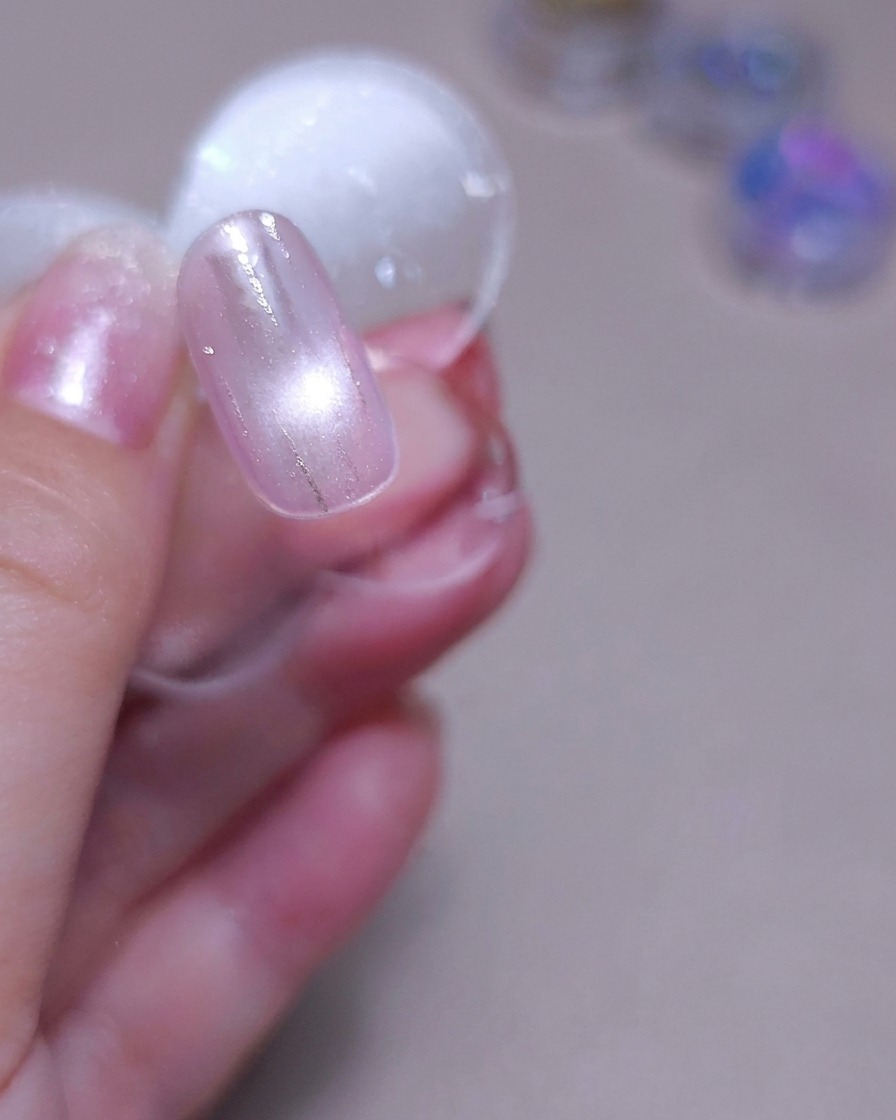
Using the same fine liner brush, draw a second, slightly thinner vertical line next to your first one. Keep a steady hand to ensure the lines run parallel and do not bleed into each other. This dual-line detail adds elegant dimension over the shifting cat-eye base.
Tip: Rest your pinky finger on a stable surface while drawing to minimize shaking and achieve perfectly straight lines. - 7Cure the glitter design
Place the nail under your UV or LED lamp to cure the silver glitter lines you have just drawn. Curing ensures the glitter gel is fully set and prevents it from smudging during the next steps.
Tip: Ensure the hand is placed flat inside the lamp to get even light coverage across the entire nail surface. - 8Apply adhesive gel
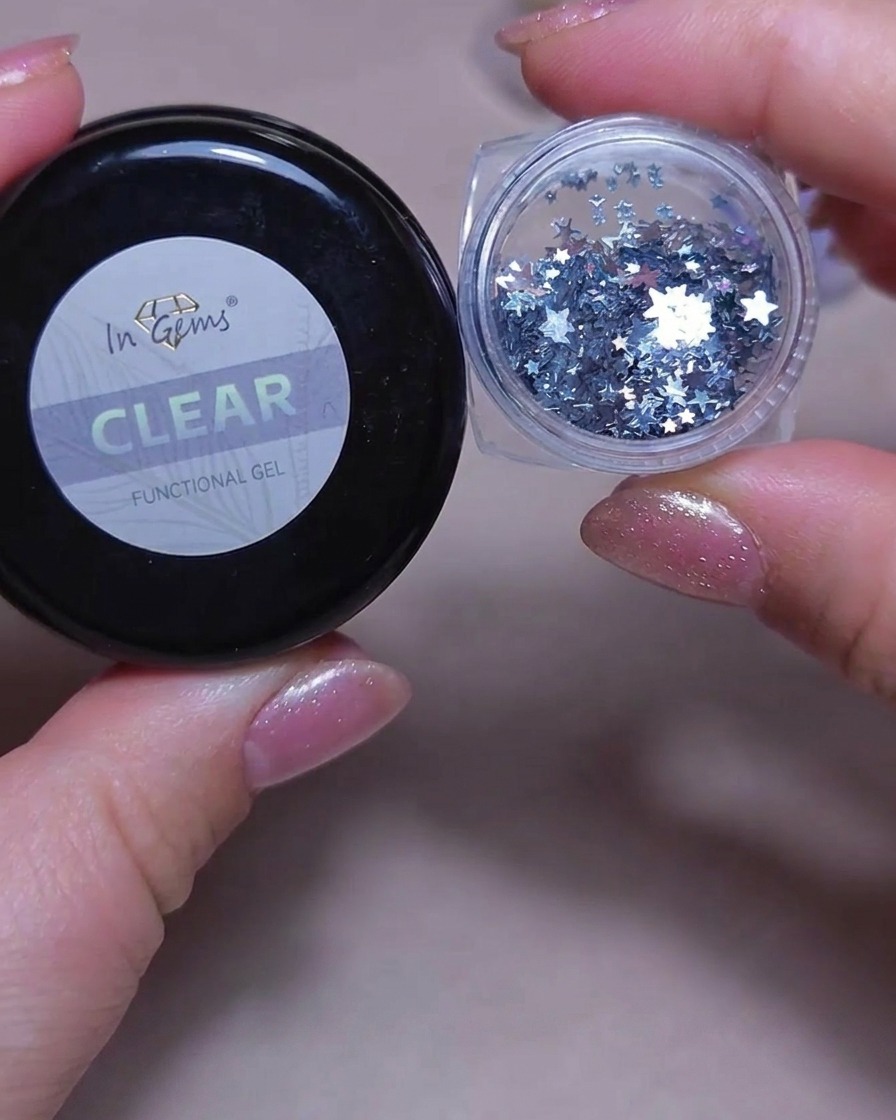
Using a fine brush, apply a small, precise drop of clear functional builder gel onto the nail where you intend to place the star sequin. This acts as the adhesive to secure your embellishment.
Tip: Use only a tiny amount of builder gel; too much will cause the sequin to slide or the gel to flood the sides. - 9Place the star sequin
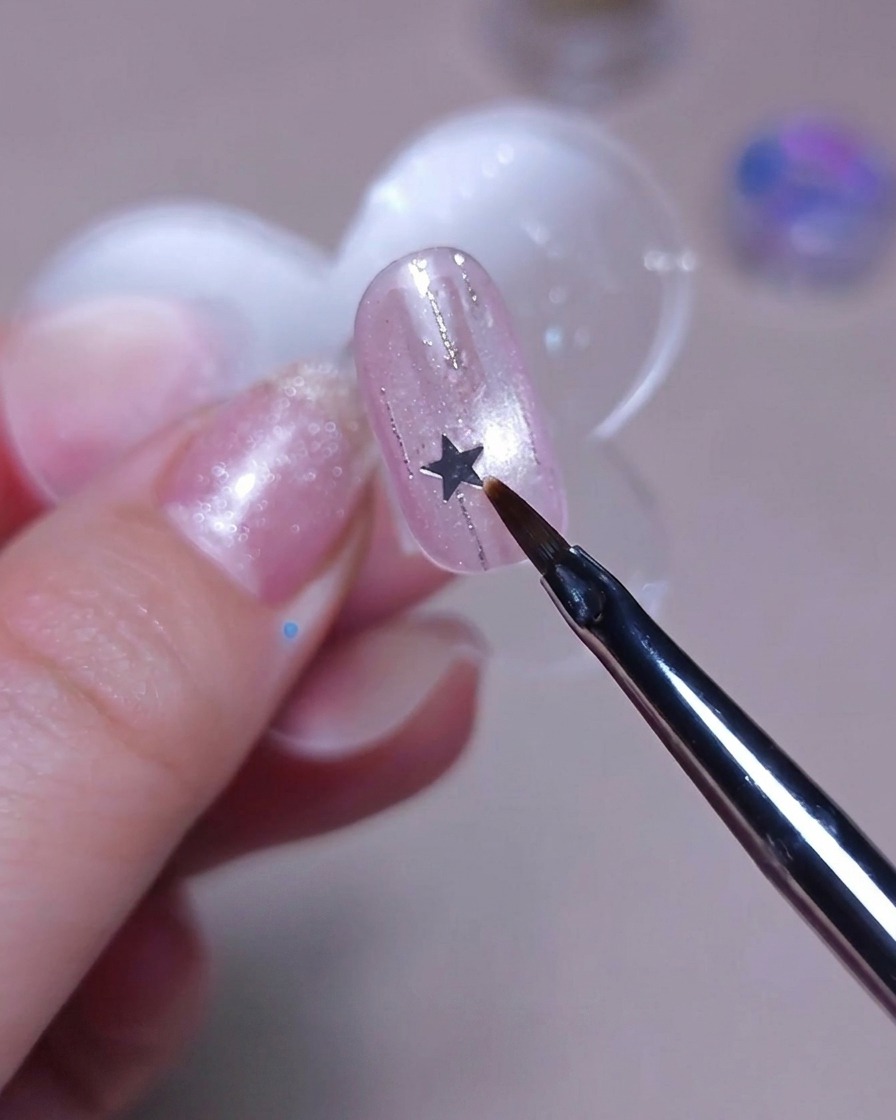
Using the tip of your fine brush, pick up a silver star sequin and carefully press it into the wet clear builder gel on the nail. Once positioned correctly, you can cure the nail to lock it in place.
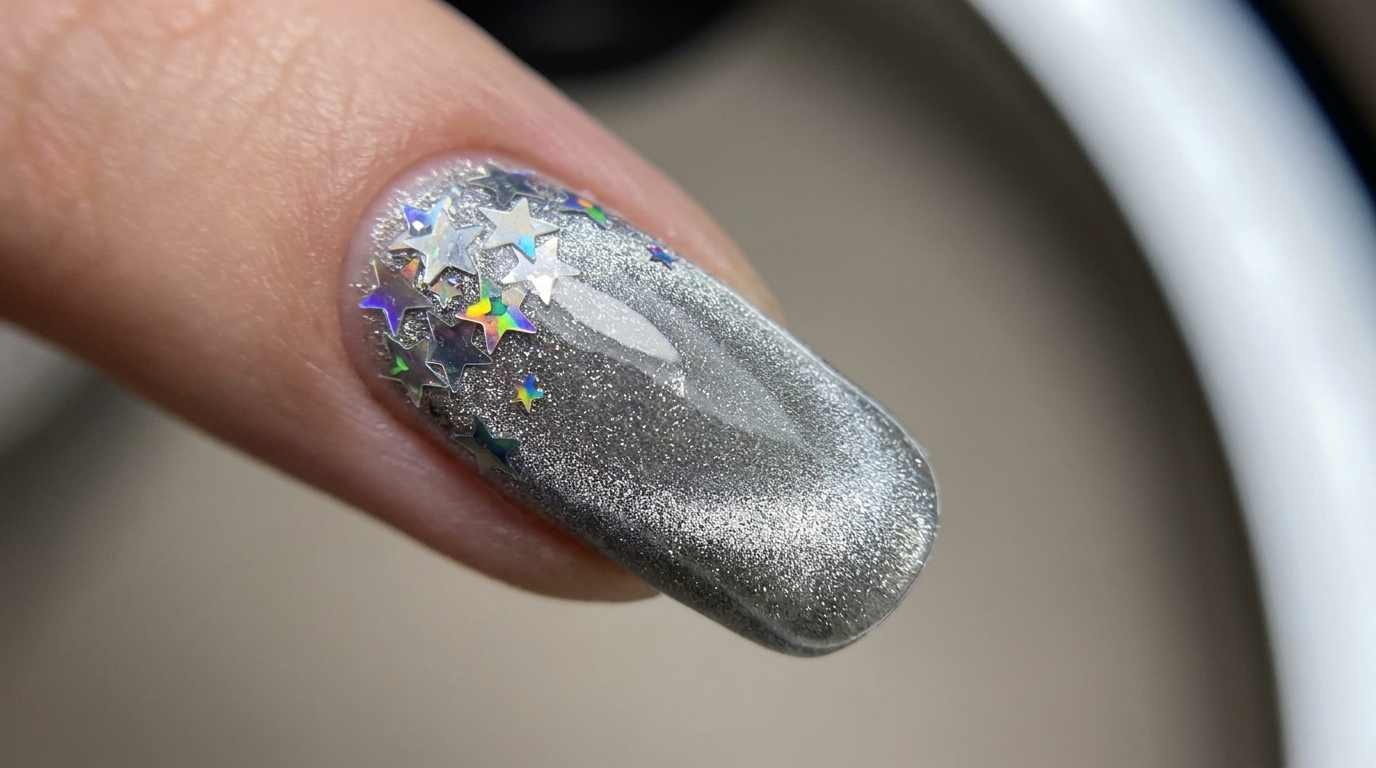
Tip: Gently press the edges of the star flat against the nail to ensure it stays down and doesnt snag. - 10Place silver star sequins
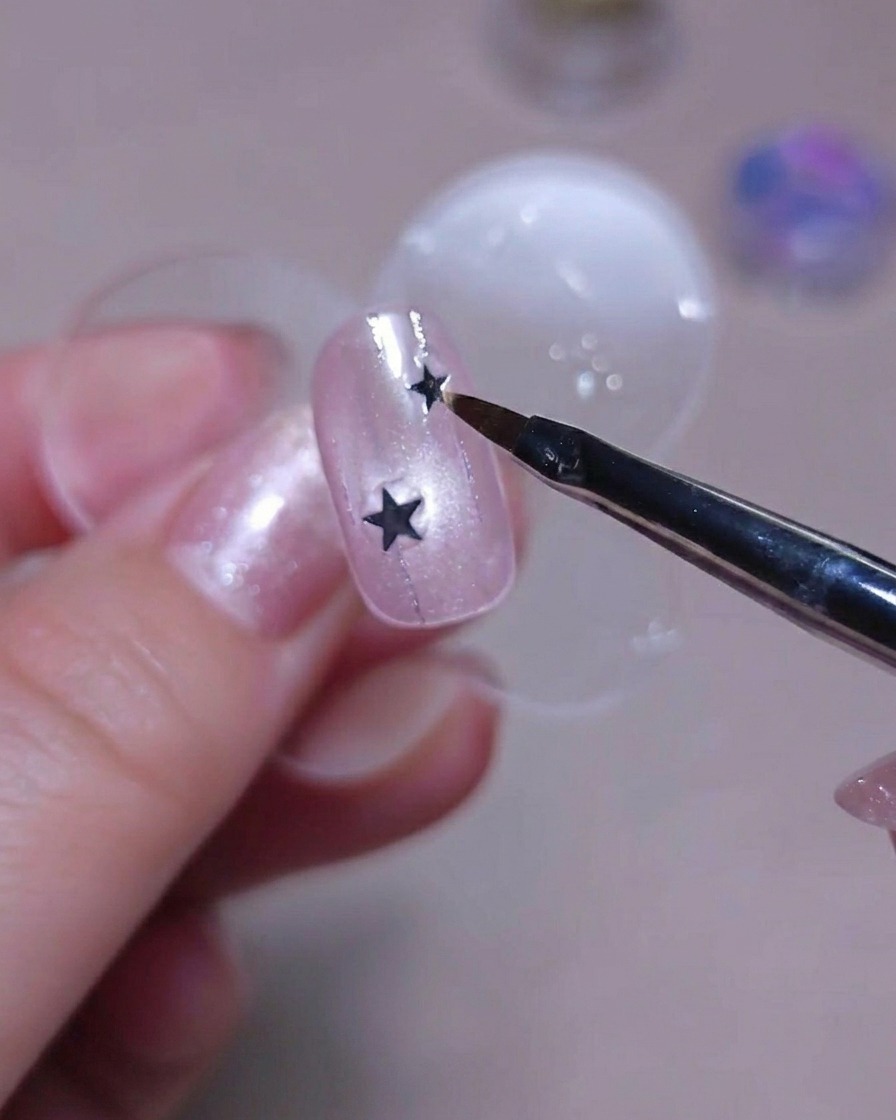
Using a small amount of clear builder gel as an adhesive, pick up a silver star sequin with your brush tip and place it onto the nail surface. Position it carefully according to your design, then gently press it down to ensure it is flat. Repeat this process for additional stars, then cure the nail under your UV or LED lamp to set the sequins in place.
Tip: If the sequins are moving, you can flash cure the nail for 5-10 seconds to lock them in place before adding more stars. - 11Apply top coat
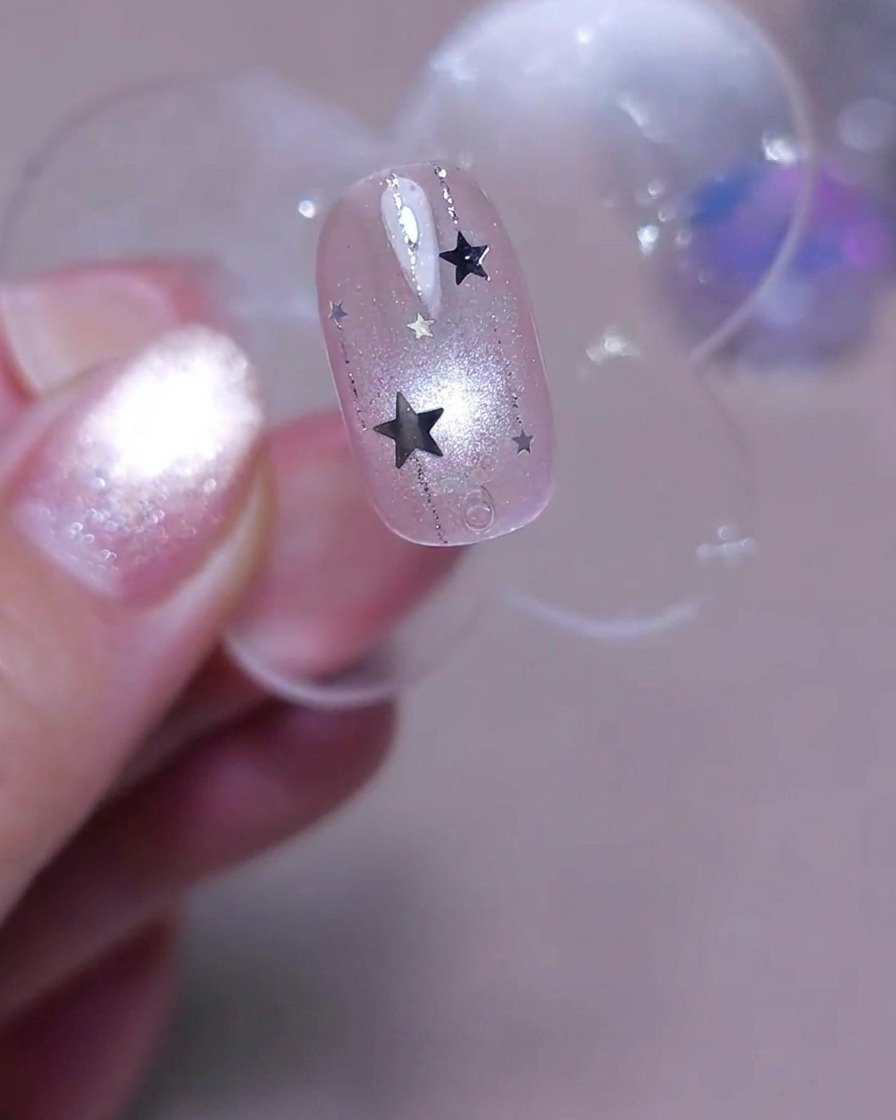
Apply a generous, smooth layer of hard top coat over the entire nail, ensuring you cover and encapsulate the star sequins completely to create a level, snag-free surface. Be sure to cap the free edge to prevent chipping and ensure longevity. Cure the nail in your UV or LED lamp for the full recommended time to achieve a high-gloss, durable finish.
Tip: Applying a slightly thicker layer of top coat is essential when working with embellishments like sequins to ensure they dont feel bumpy or catch on surfaces.