Island Style Sunset
Seashell Vacation Nail Art — Step-by-Step Tutorial
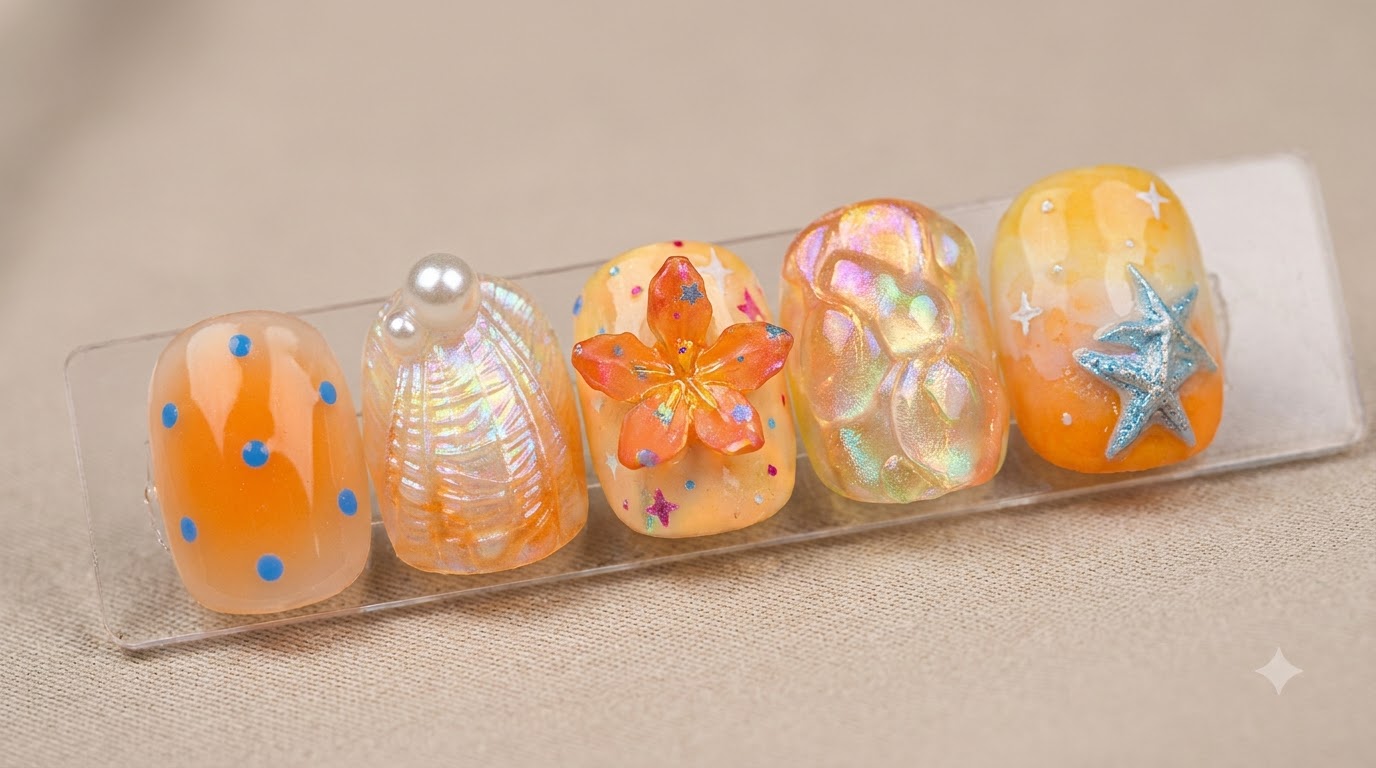
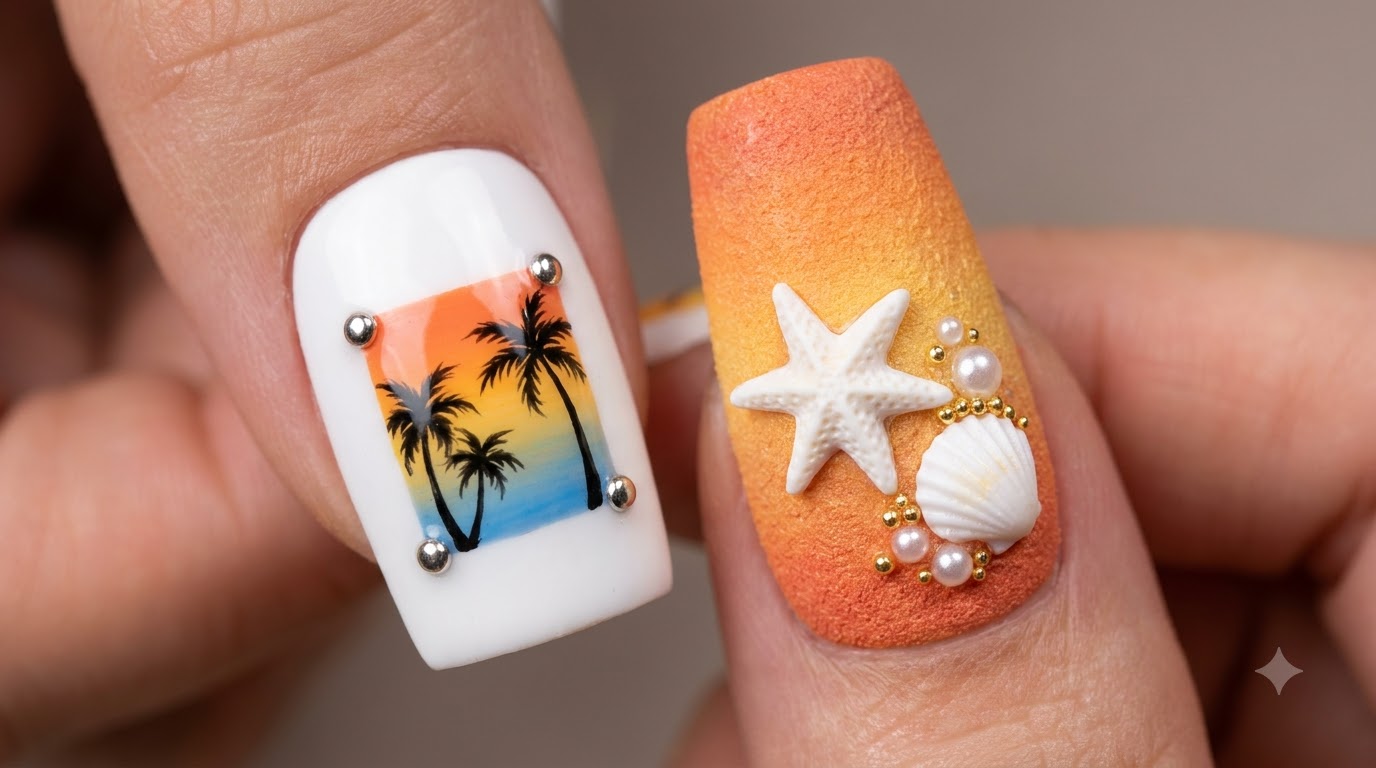
Bring the tropics to your fingertips with a vibrant sunset postcard design and 3D seashell and starfish vacation nail art.
Vacation season calls for nails that tell a story, and this island-inspired set delivers pure tropical magic. Combining a framed postcard gradient with textured coastal elements like 3D starfish, seashells, and shimmering aurora powder, this look captures the ultimate sunset getaway. Whether you are prepping for a beach trip or just dreaming of one, this step-by-step guide will help you create salon-worthy tropical nail art right at home.
Steps
- 1Apply pearl gel base
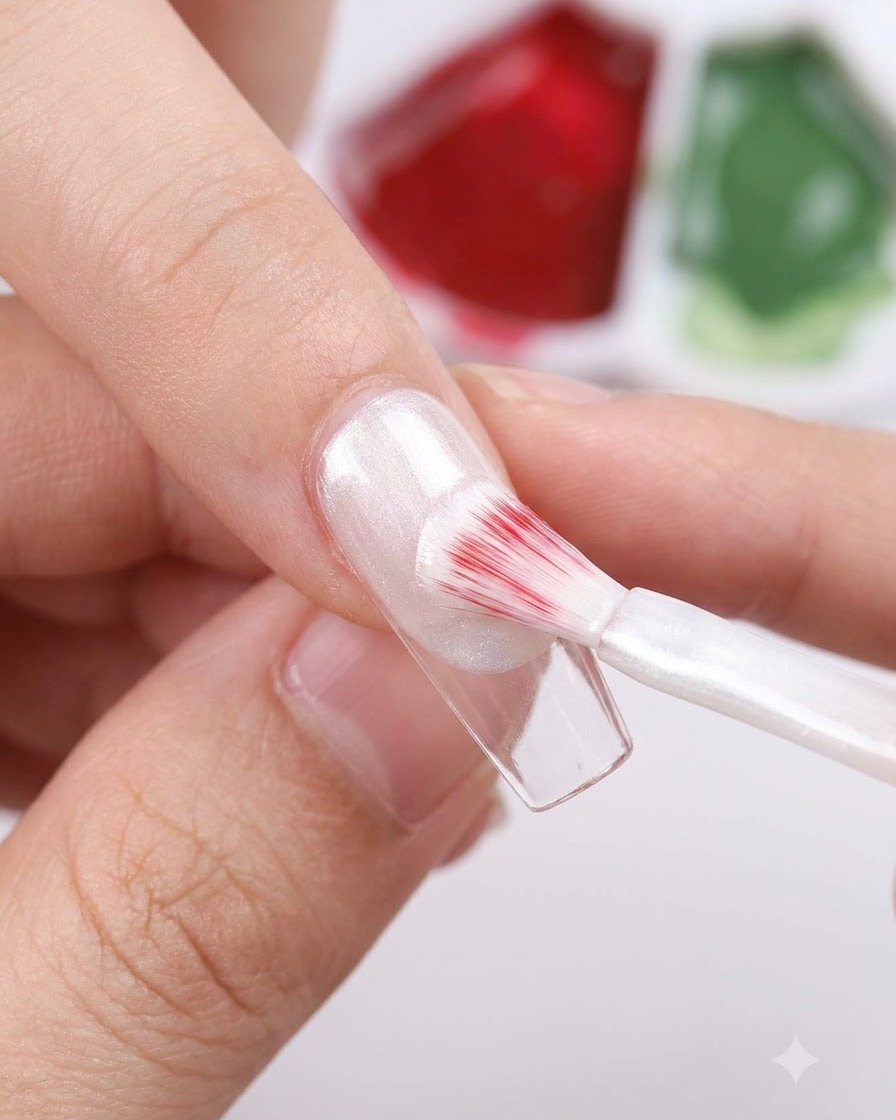
Start by applying a smooth, even layer of white pearl gel over the entire nail base. Use a flat nail brush to gently sweep the product from the cuticle down to the free edge. This shimmery, pearlized background will act as a luminous canvas for the sunset postcard design.
Tip: Keep your brush strokes light and parallel to prevent any streaks from showing up in the pearl finish. - 2Mask square postcard shape with tape
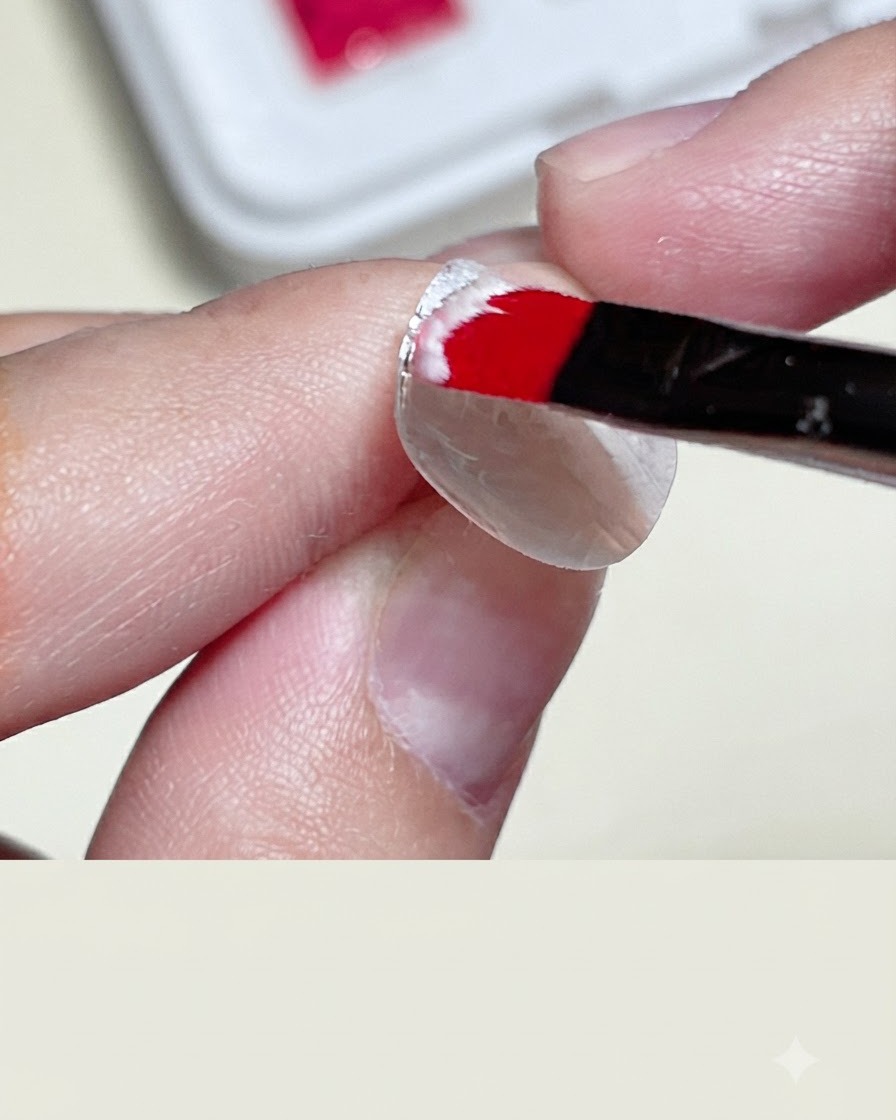
Apply clear tape strips onto the prepped white nail base to mask out a clean square postcard shape. Ensure the edges are pressed down firmly to prevent any gel or paint from bleeding underneath during the gradient application.
Tip: Press down the edges of the tape firmly with your finger or a silicone tool to get sharp, clean lines when you peel it off. - 3Place the red gel paint
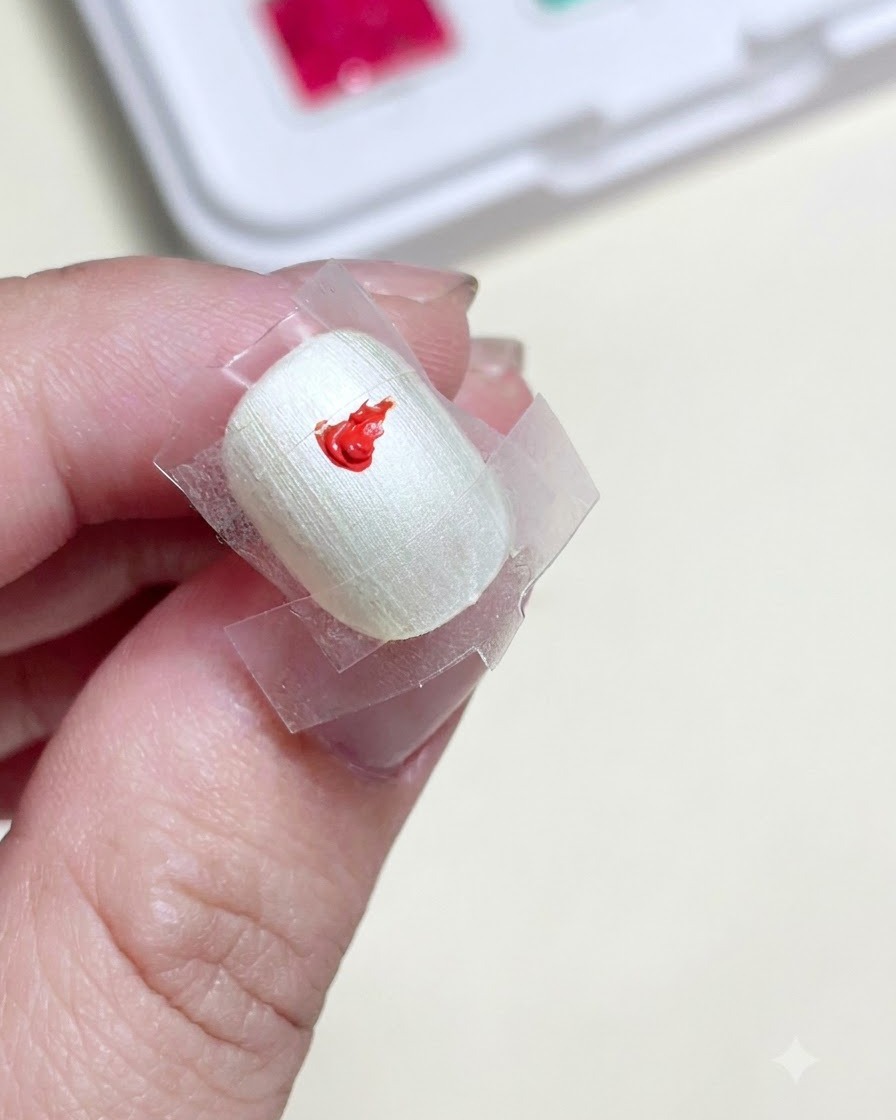
Add a small dab of highly saturated red gel paint inside the taped-off square area on the nail. Position it near the top so it serves as the deepest, most vibrant part of your sunset sky. Because the saturation is super high, you wont need a second layer to achieve full opacity.
Tip: Dont worry if the placement isnt perfectly neat inside the tape—it will be blended out shortly. - 4Add the yellow gel paint
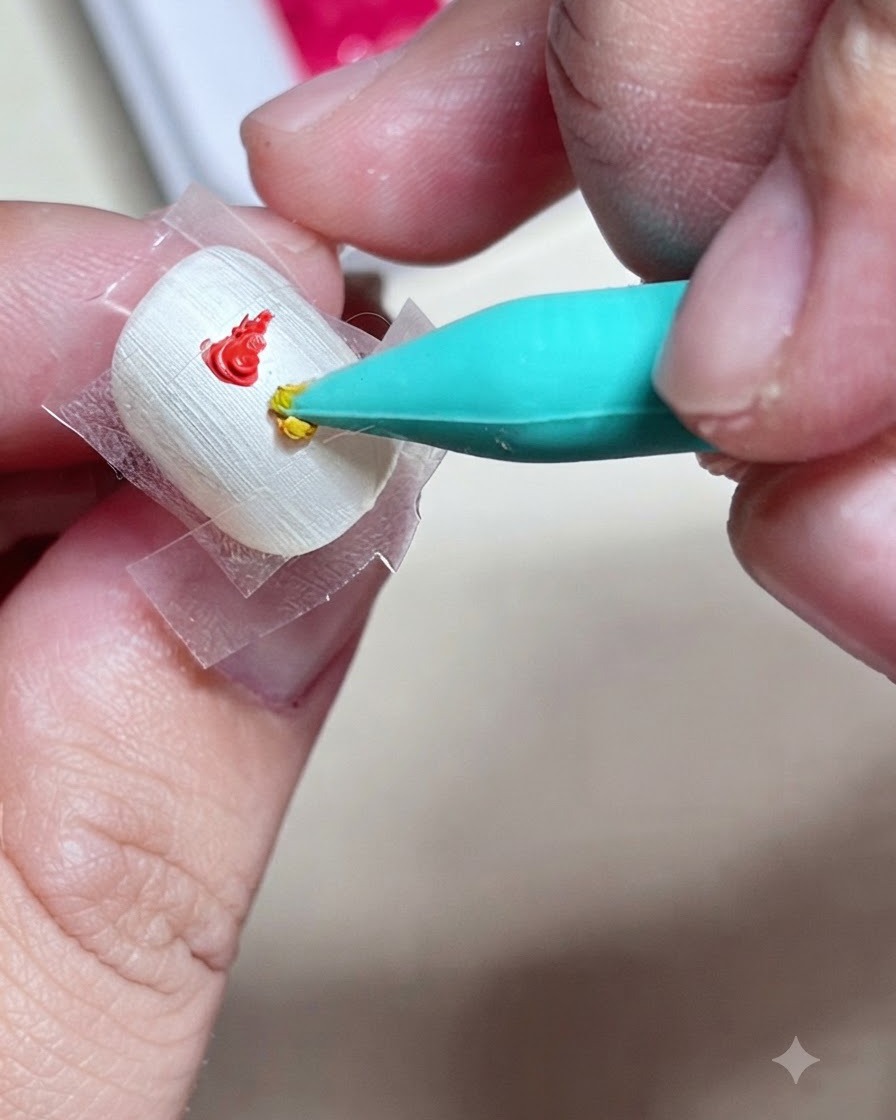
Using a precision silicone tool, place a dab of bright yellow gel paint directly adjacent to the red gel. The silicone tip makes it easy to deposit the color accurately without absorbing any product. Placing the yellow next to the red prepares the colors to be blended into a seamless, high-saturation sunset.
Tip: Keep the gel dabs relatively thick so there is enough product to blend smoothly into a gradient. - 5Blend the sunset gradient
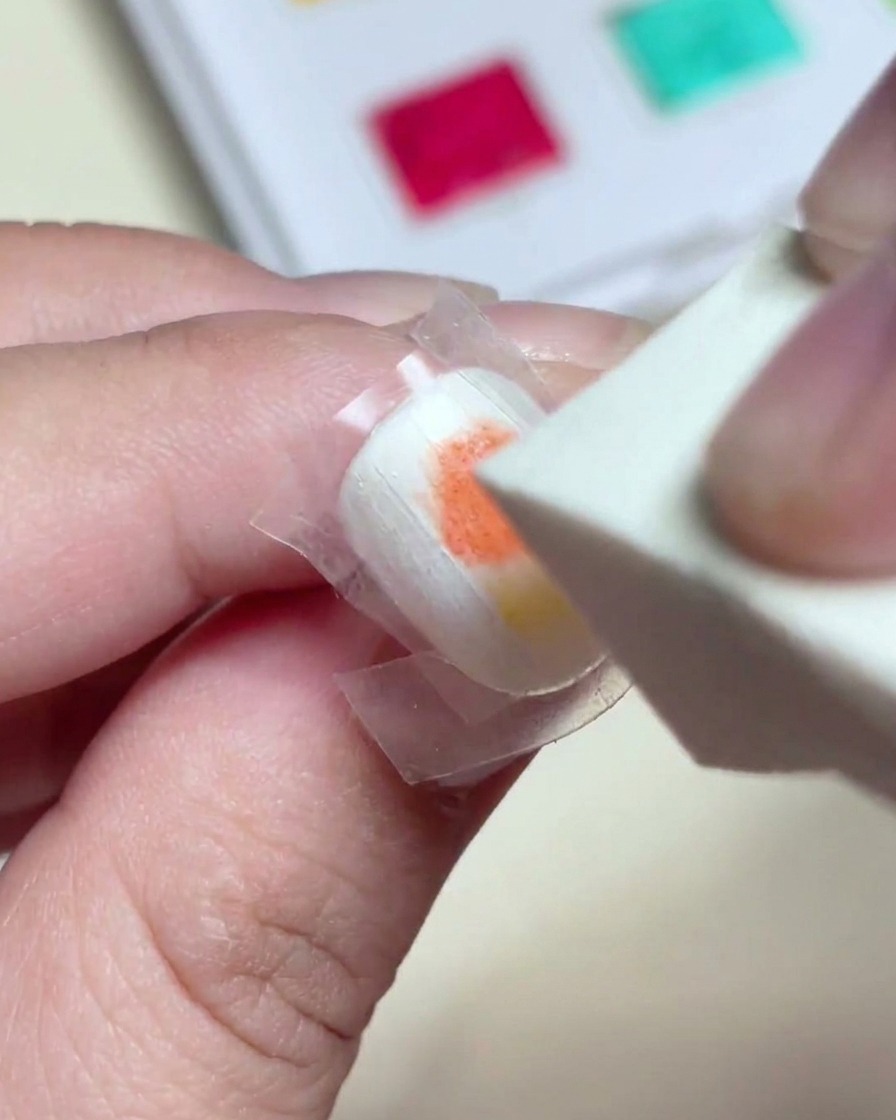
Take a small cosmetic sponge and gently tap over the red and yellow gel dots. Lightly dab and press the colors together so they diffuse into a perfectly smooth orange transition. Continue tapping lightly until you achieve a vibrant, Fanta-flavored sunset gradient within the masked square.
Tip: Tap gently in an up-and-down motion rather than dragging the sponge, which helps keep the pigment concentrated and avoids lifting the gel. - 6Reveal the postcard square
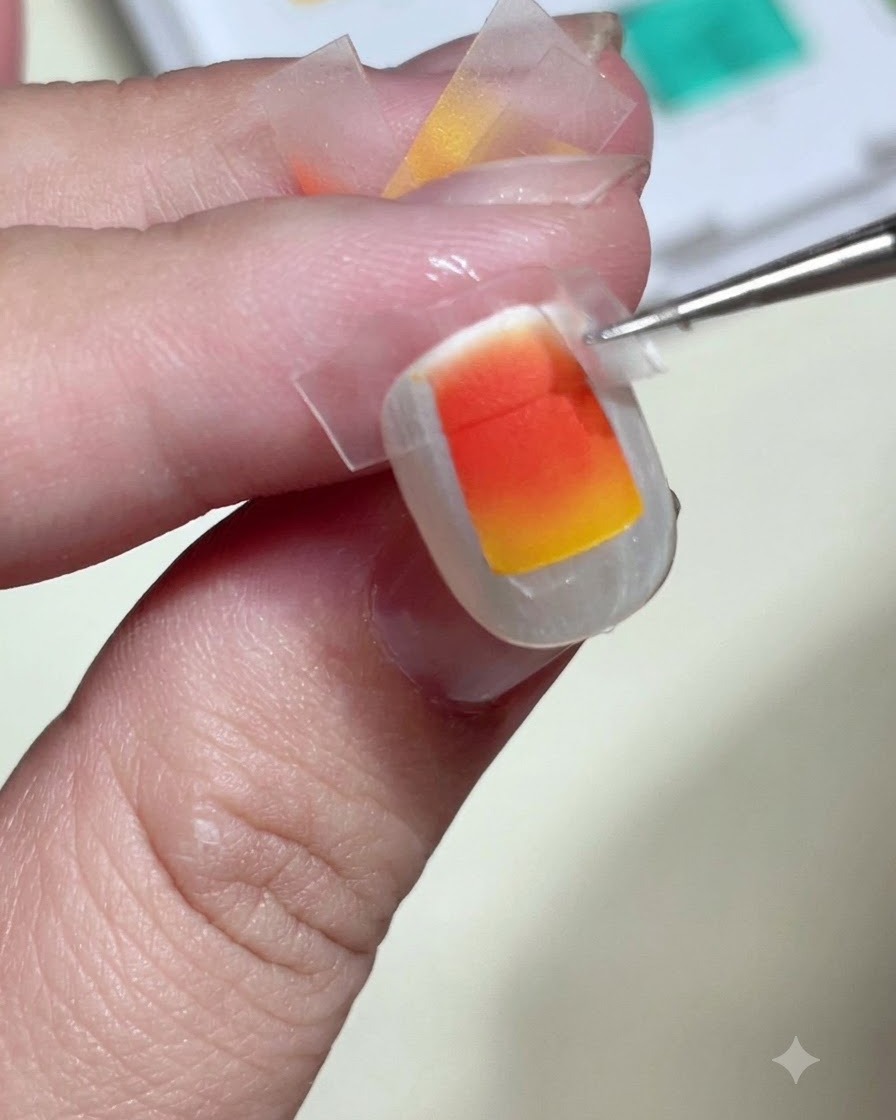
Using a pair of fine tweezers, carefully peel the clear tape strips off the nail. Pull the tape away slowly to reveal the clean, crisp edges of your sunset gradient. This sharp contrast against the shimmery pearl base instantly gives the nail a framed, picturesque postcard effect.
Tip: Remove the masking tape before curing the gradient in the lamp to ensure you get perfectly sharp edges without any gel chipping. - 7Sketch tree trunks with a colored pencil
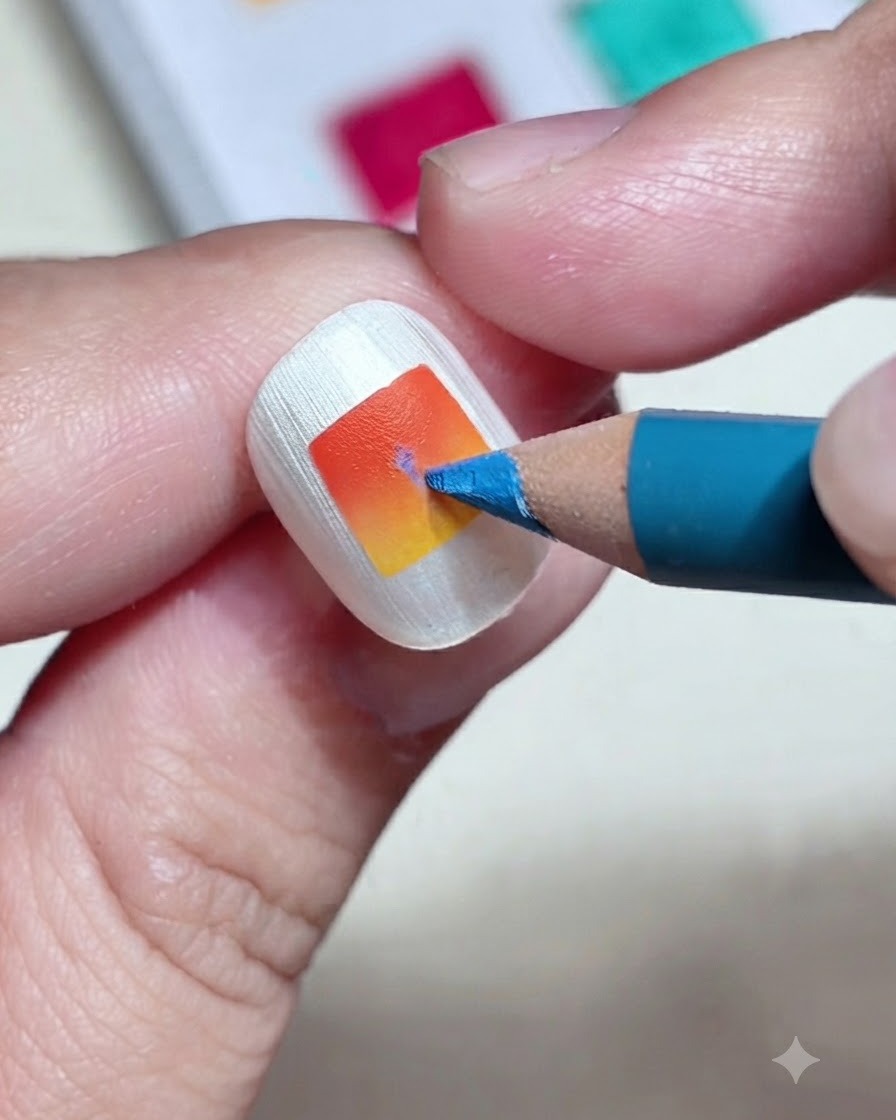
Using a fine blue colored pencil or a fine liner brush, gently sketch the vertical tree trunks inside the square gradient base. Keep the lines delicate and precise to map out the palm or tree details before applying the final paint layer.
Tip: A colored pencil works great here if the drawing surface is dry, allowing for quick and controlled preliminary sketches. - 8Paint palm fronds and flying birds
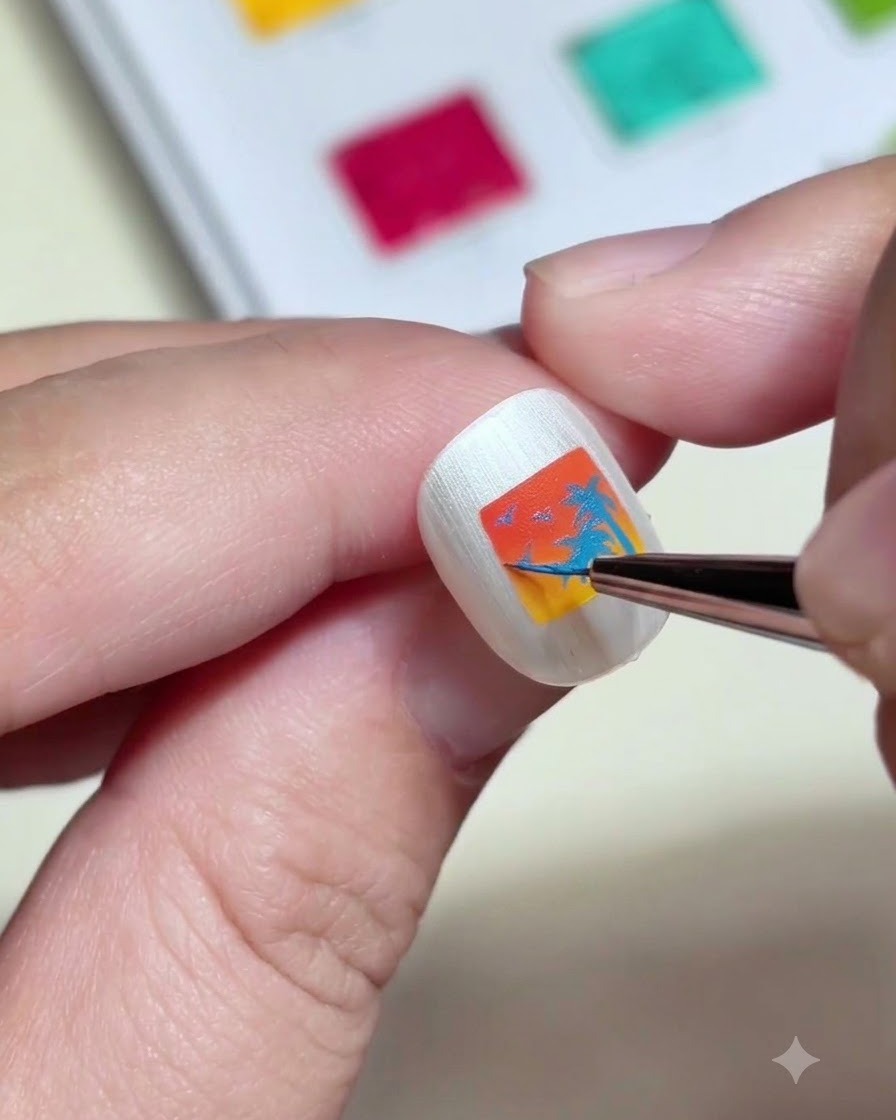
Fill in the palm tree fronds and add silhouettes of flying birds using blue and dark color paint with a fine liner brush. Take your time to build delicate, expressive lines within the postcard frame.
Tip: Use a very fine liner brush with minimal paint to keep the bird silhouettes and palm fronds sharp and realistic. - 9Add metal rivet studs to corners
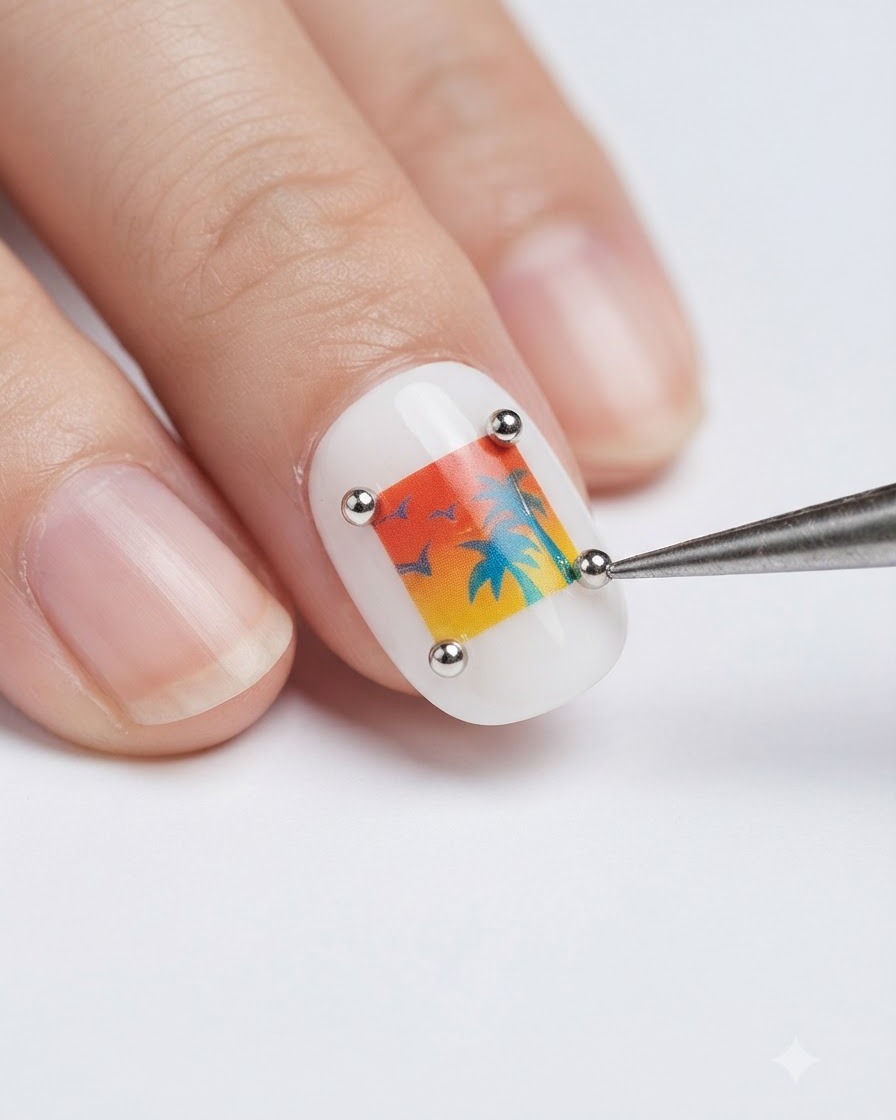
Place four small silver metal rivet studs at the four corners of the square postcard design to give it a realistic stamp or photo frame look. Secure them using a small dot of clear gel or top coat and cure.
Tip: Use a wax picker tool or fine tweezers to pick up and position the tiny metal studs accurately. - 10Apply textured orange and yellow gel strokes
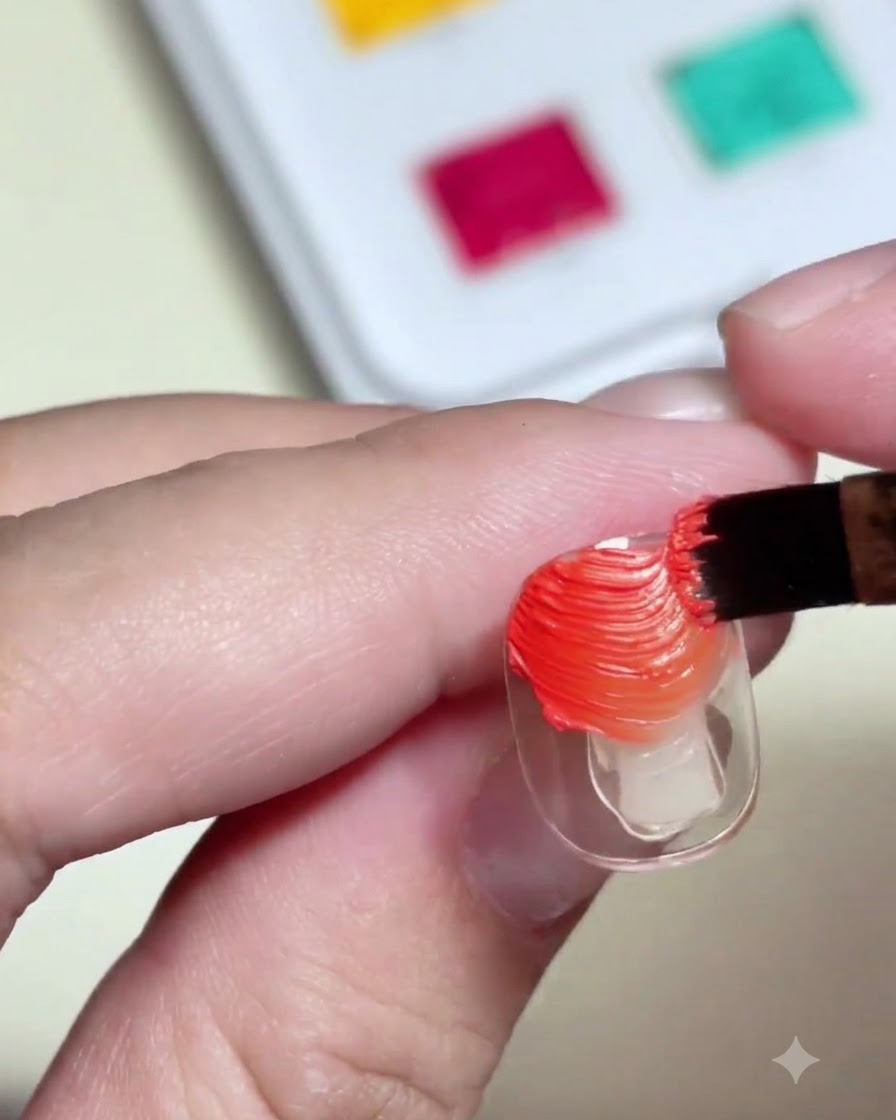
Apply orange and yellow color painting gel onto a second bare nail tip to create textured brush strokes. Make sure to keep some of the raised body texture in the gel as you swipe across the nail.
Tip: Keep your brush strokes consistent and directional to build a neat, textured base for the seashell style. - 11Rub shimmering aurora powder
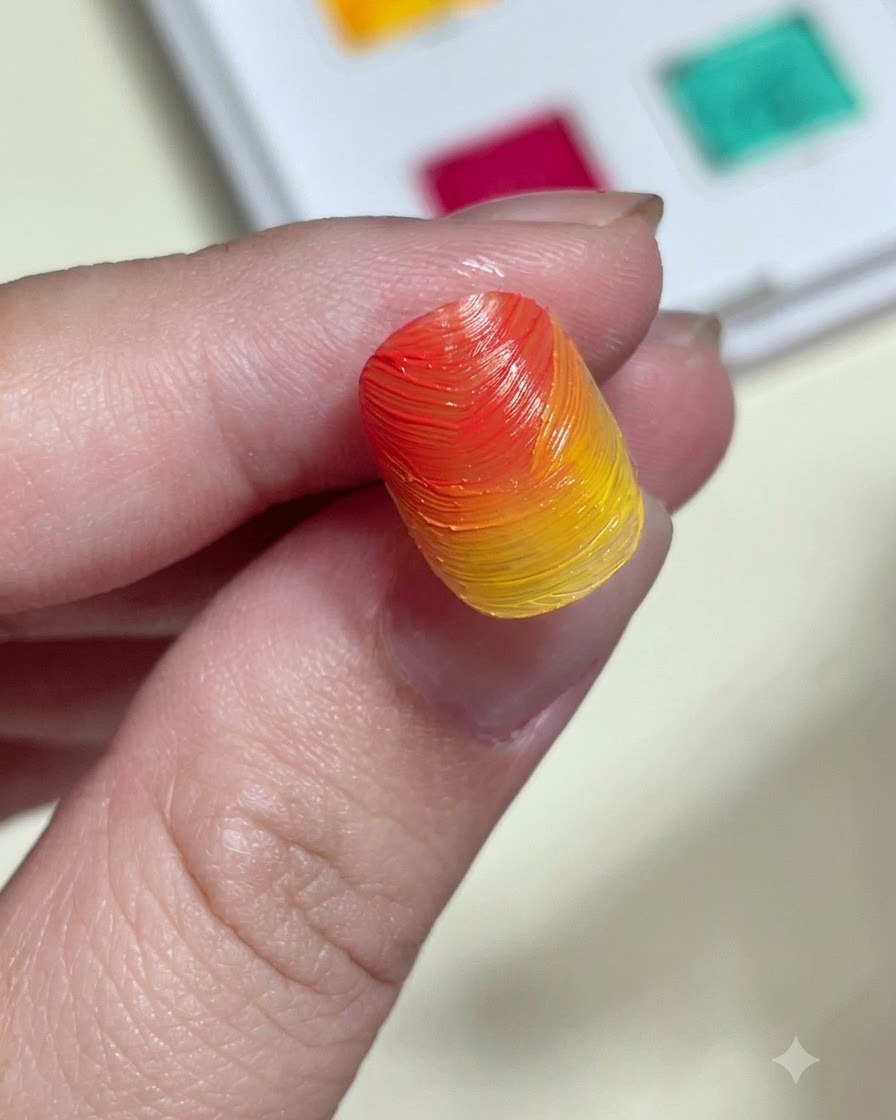
Rub shimmering aurora powder onto the cured gradient nail tip using a small sponge applicator. This will create a watery, shimmering feel reminiscent of a sunset afterglow.
Tip: Buff the aurora powder gently over the cured surface for an even, high-shine holographic effect before dusting off excess. - 12Attach 3D starfish and seashell charms
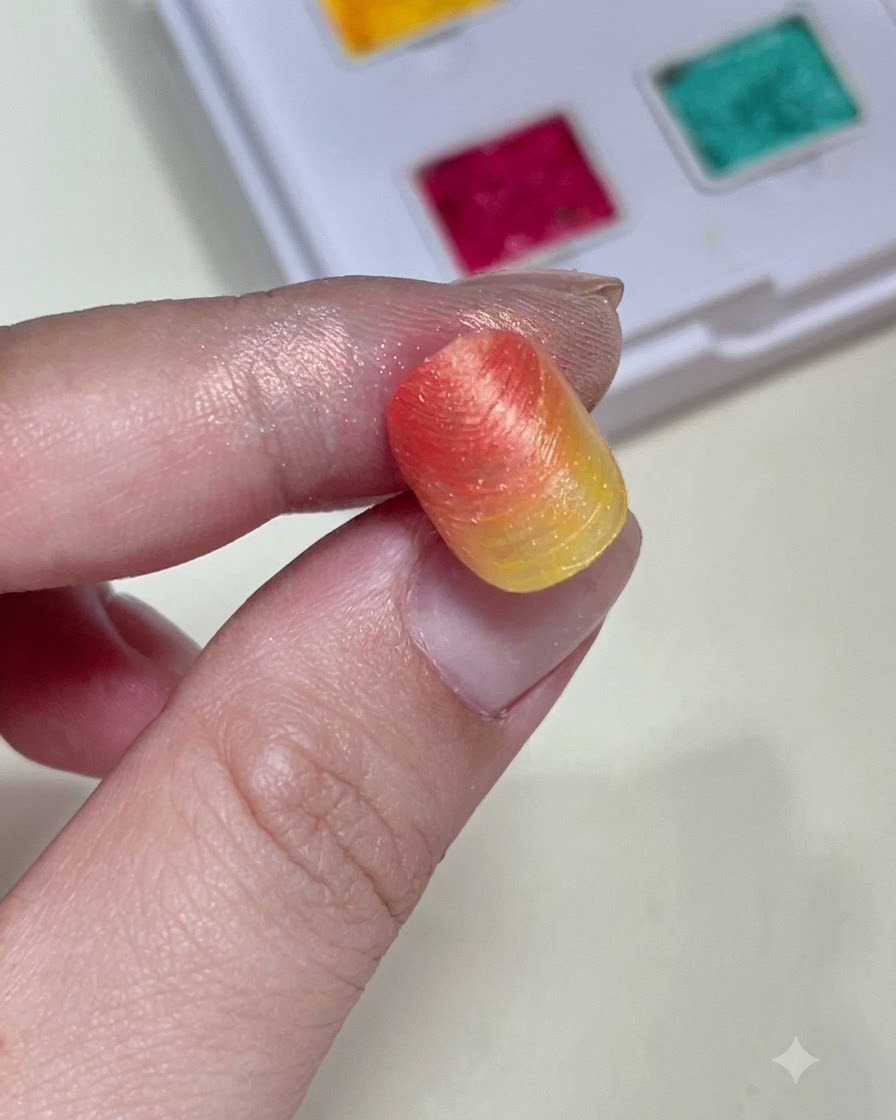
Apply a dab of clear building gel onto the shimmering gradient textured nail. Using tweezers, carefully place a 3D white starfish and a seashell charm onto the gel bed and press down gently to secure them in position before curing.
Tip: Make sure to position charms securely on a thick enough dab of clear gel so they do not catch on clothes or lift off. - 13Add tiny pearl beads and metal studs
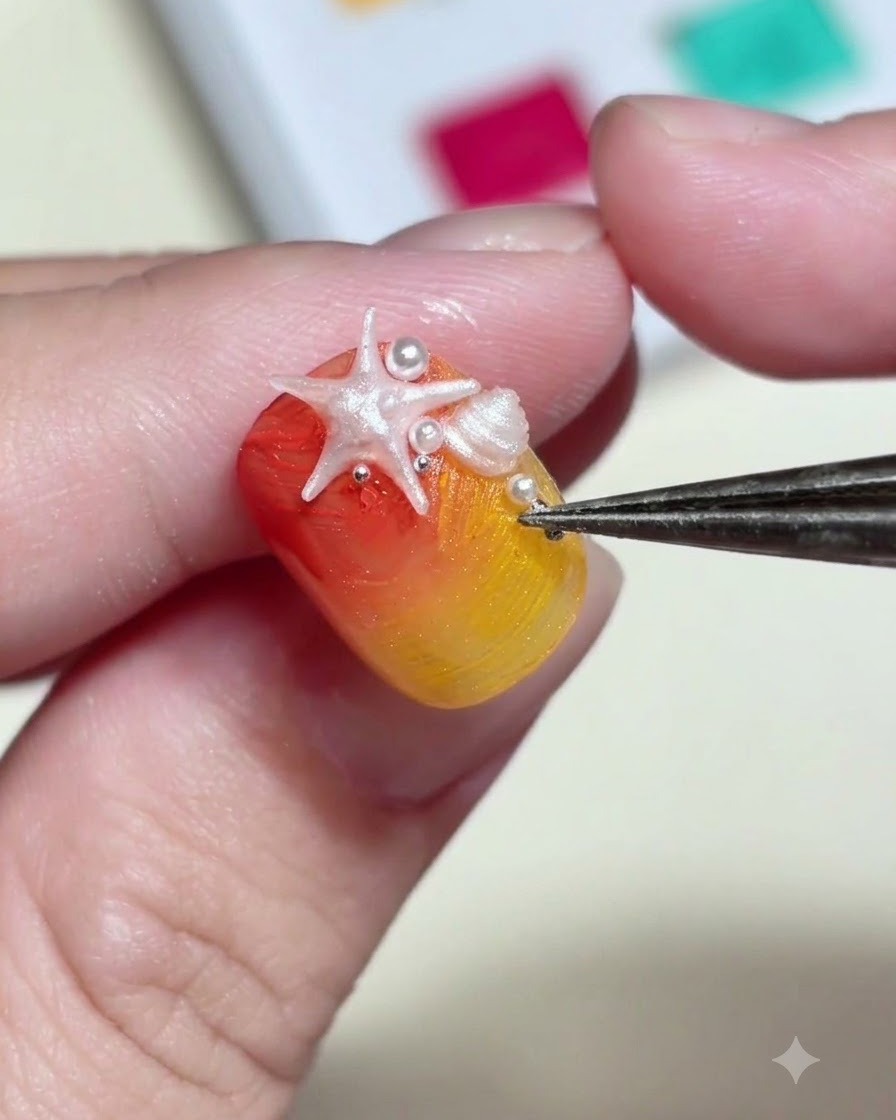
Using a fine tool or wax pencil, pick up tiny white pearl beads and small metallic studs and place them carefully around the base of the starfish and seashell charms. This adds intricate detailing and complements the oceanic vacation theme.
Tip: Work quickly with a tacky layer or wet clear gel to catch the tiny beads in place before curing the nail. - 14Paint fine white accent details
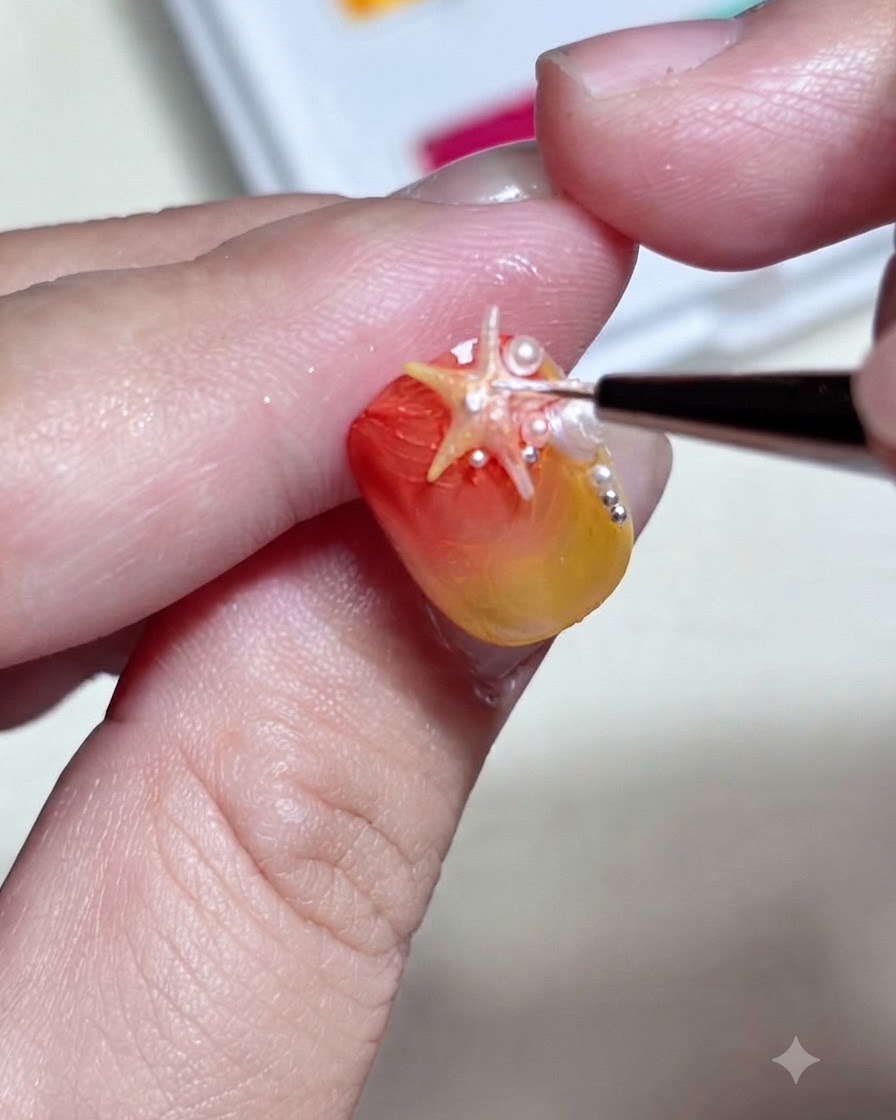
Dip a fine liner brush into white color painting gel and carefully dot or outline small accents onto the surface of the starfish and seashell charms. This creates a realistic textured white sand look and highlights the charm details.
Tip: Keep your hand steady and use a very minimal amount of gel on the tip of the brush for precise dotting. - 15Draw water ripples with hard top coat
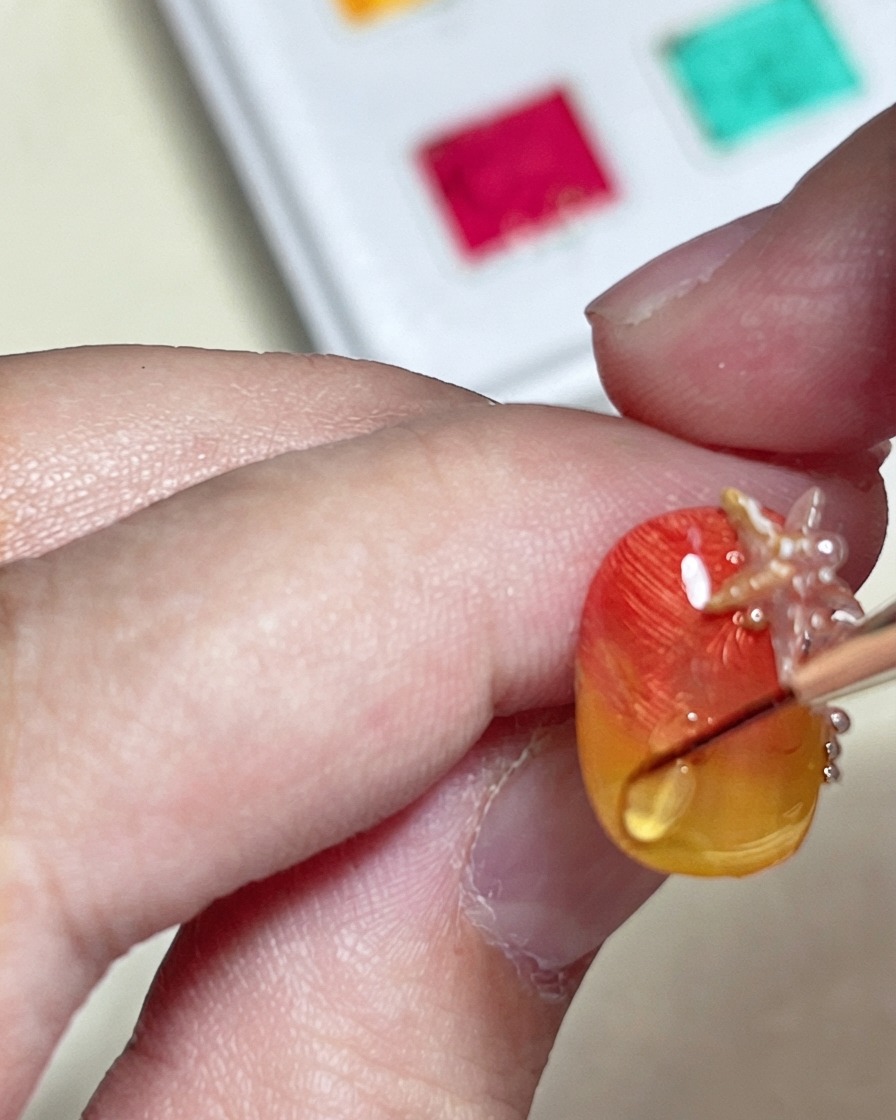
Select a slow-flowing hard top coat and use a fine brush to draw subtle, flowing water ripple lines over the textured gradient base around the charms. Cure immediately under the UV or LED lamp once the ripple effect is perfected.
Tip: A slow-flowing hard top coat helps maintain the raised dimensional look of water ripples without running flat before curing.