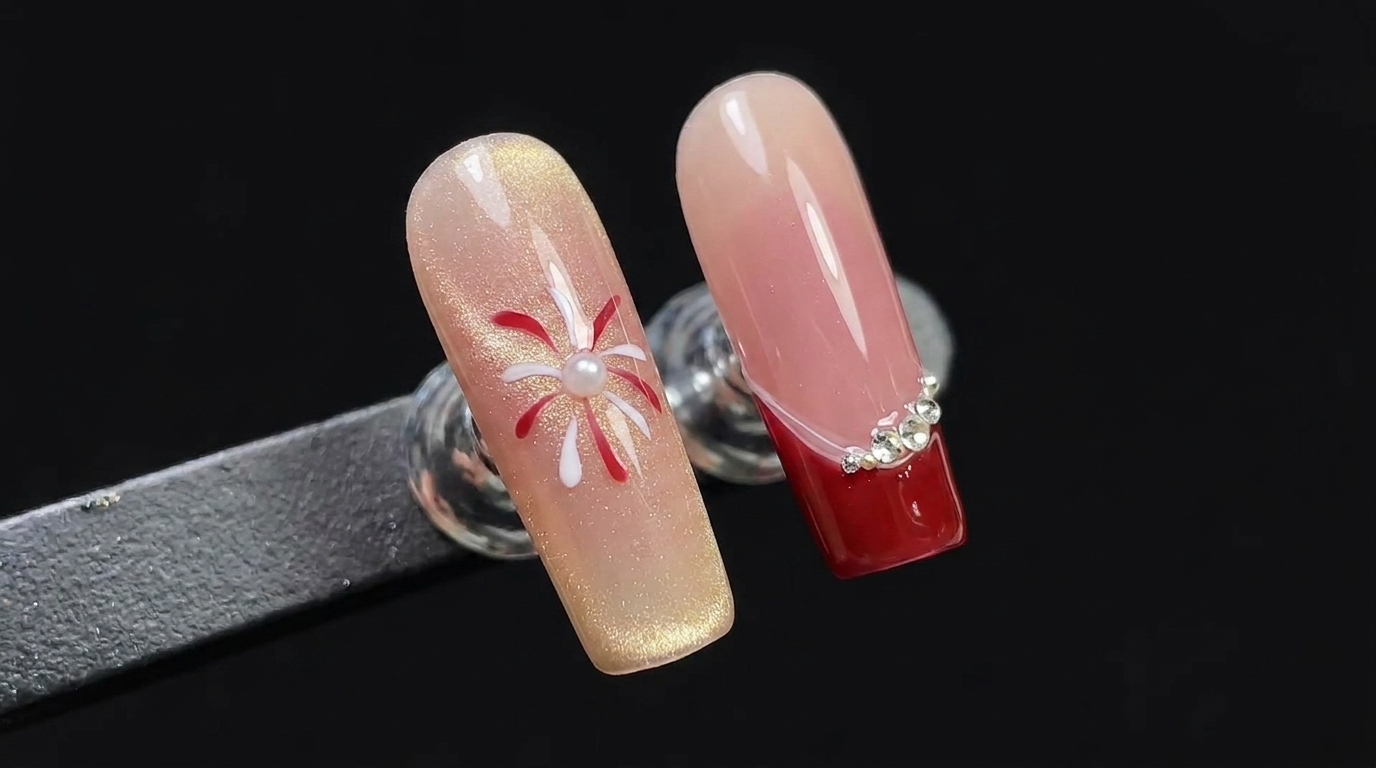
New Year Fireworks
Classic French Tip Nail Tutorial
Celebrate in style with this festive New Year fireworks nail art tutorial, featuring a stunning gold cat-eye gradient and a sophisticated red French tip design.
Ring in the New Year with a manicure that truly sparkles. This dual-style nail tutorial combines the whimsical charm of hand-painted fireworks over a magnetic gold cat-eye base with the timeless elegance of a deep red French manicure. It is the perfect celebratory look to make your festive season extra special.
Steps
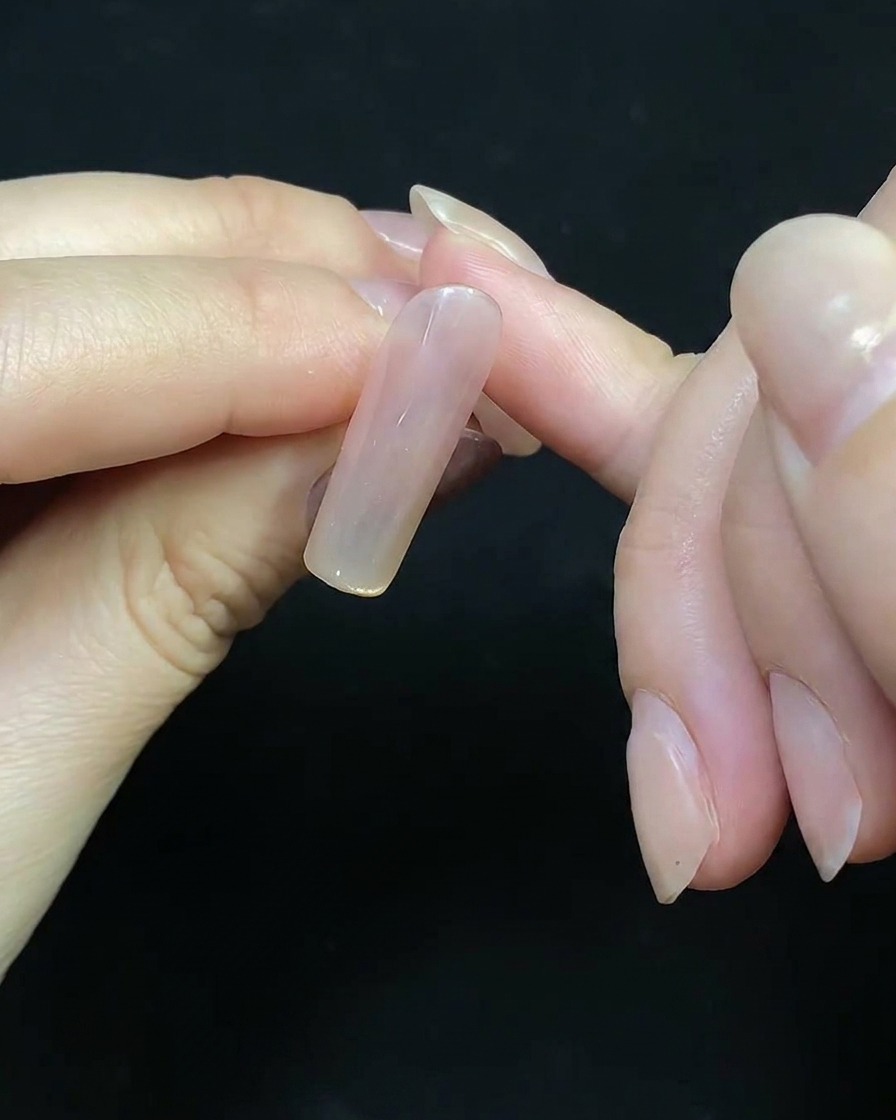
- 1Apply nude base coat
Apply a thin, even layer of nude base gel to the nail tip. This provides a clean, neutral canvas for the nail art design. Ensure the polish is applied smoothly to the free edge and cure under an LED or UV lamp as per the product instructions.
Tip: Apply a thin layer to avoid bulkiness and ensure a smooth surface for the subsequent color application. - 2Apply gold cat-eye gel
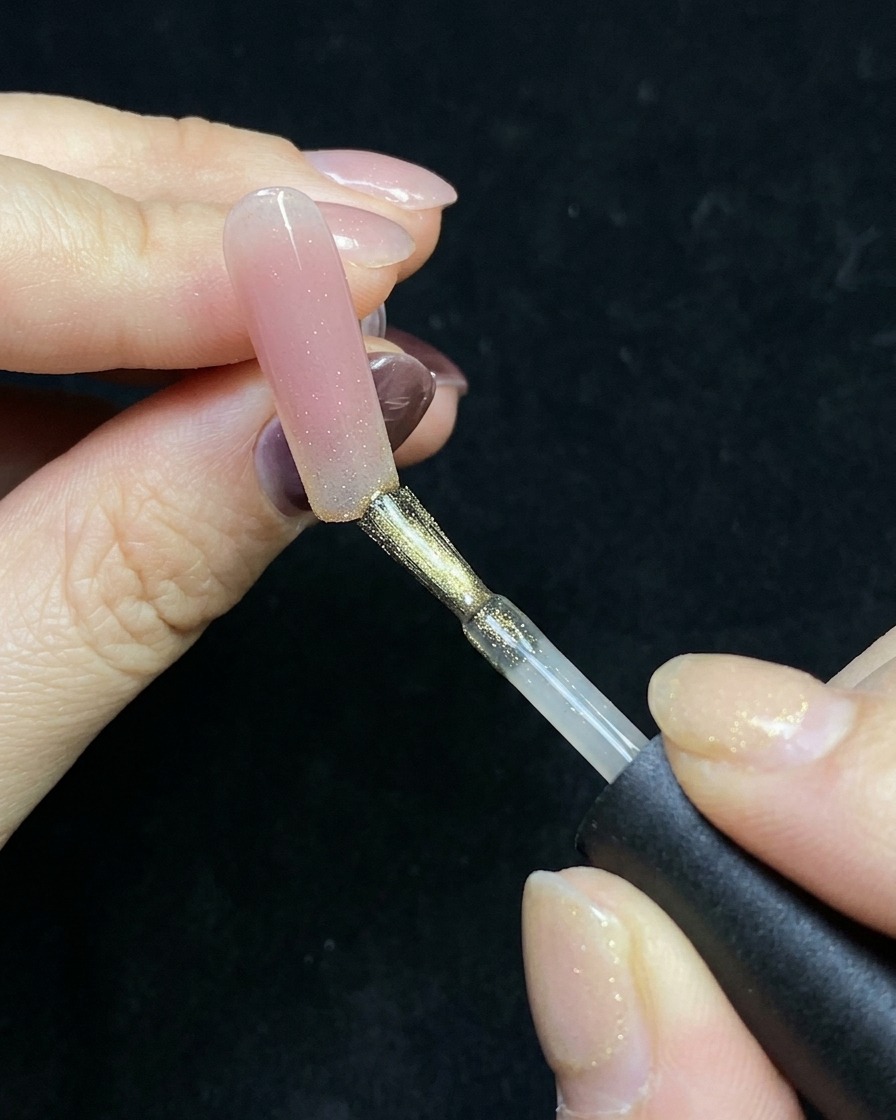
Apply gold cat-eye gel to the front portion of the nail tip. Use your brush to lightly blend the gel towards the center, creating a soft gradient effect from the tip downward.
Tip: Keep the layer thin to allow for better manipulation of the magnetic particles. - 3Shape cat-eye effect
Hold a magnet near the nail to move the particles in the cat-eye gel into your desired shape or light reflection pattern. Once you are satisfied with the look, cure the nail under your lamp to set the design.
Tip: Experiment with the angle of the magnet to create different light reflections before curing. - 4Paint red fireworks
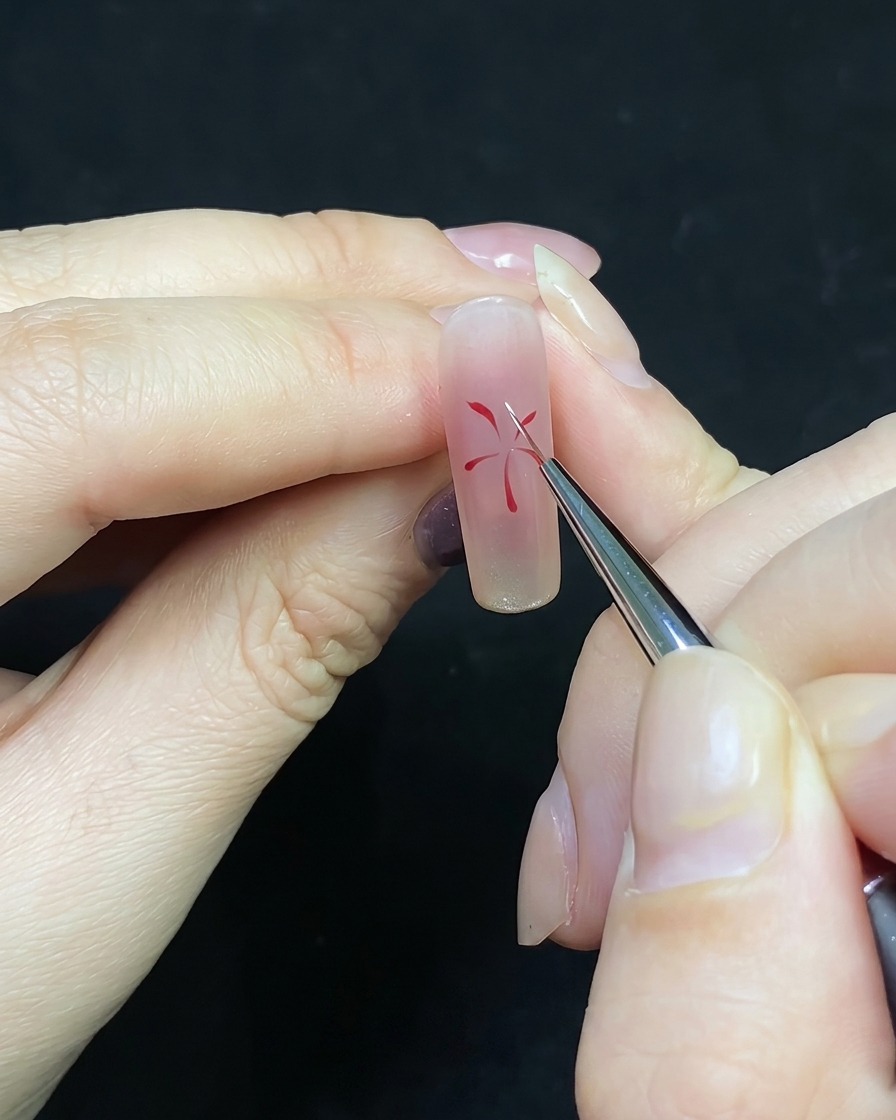
Using a fine liner brush, paint thin red lines originating from a center point on the nail to create the base for the firework design.
Tip: Keep the lines thin to ensure the design remains delicate and allows room for additional colors. - 5Add white firework details
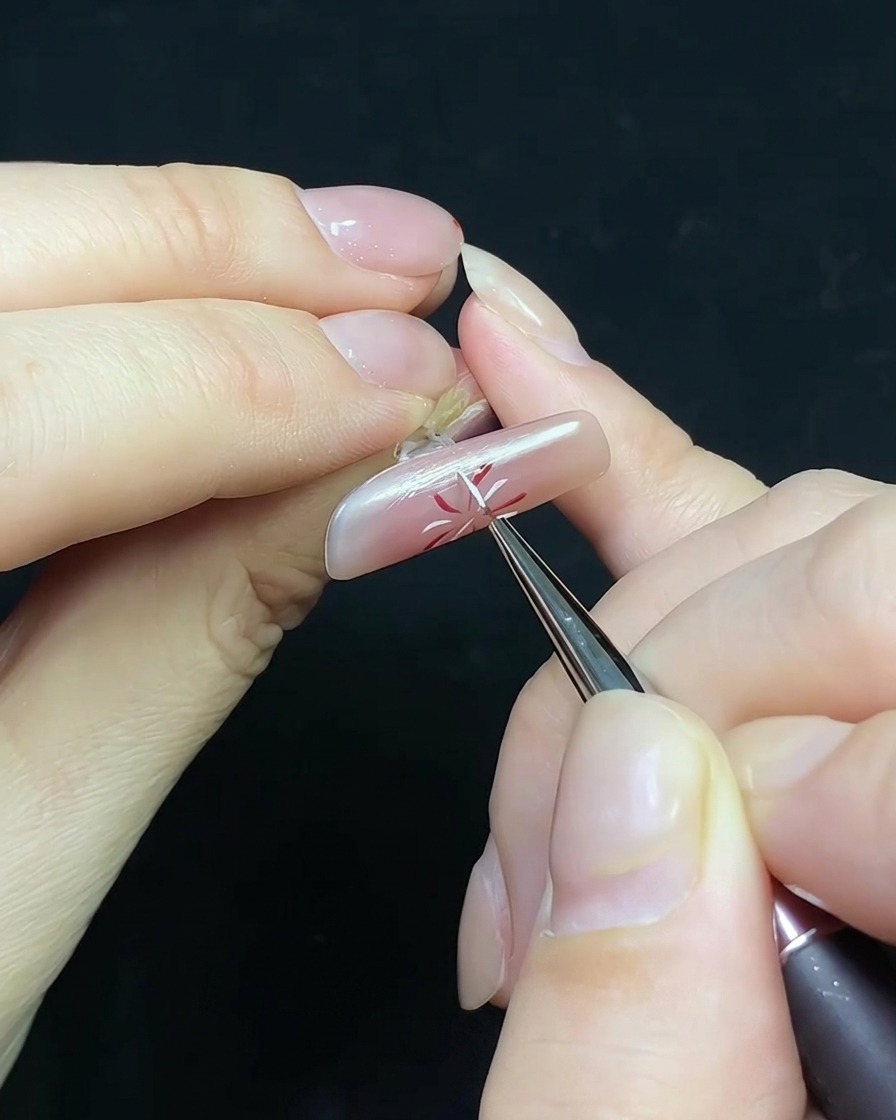
Using white gel polish and a fine detail brush, fill in the gaps between the red lines with thin white strokes to add depth and detail to the firework design.
Tip: Use a light touch to keep the white lines crisp and distinct from the red lines. - 6Seal with top coat and pearl
Apply a final layer of top coat over the entire nail to seal the design. While the top coat is still wet, place a small pearl embellishment in the center of the firework and cure the nail to finish.
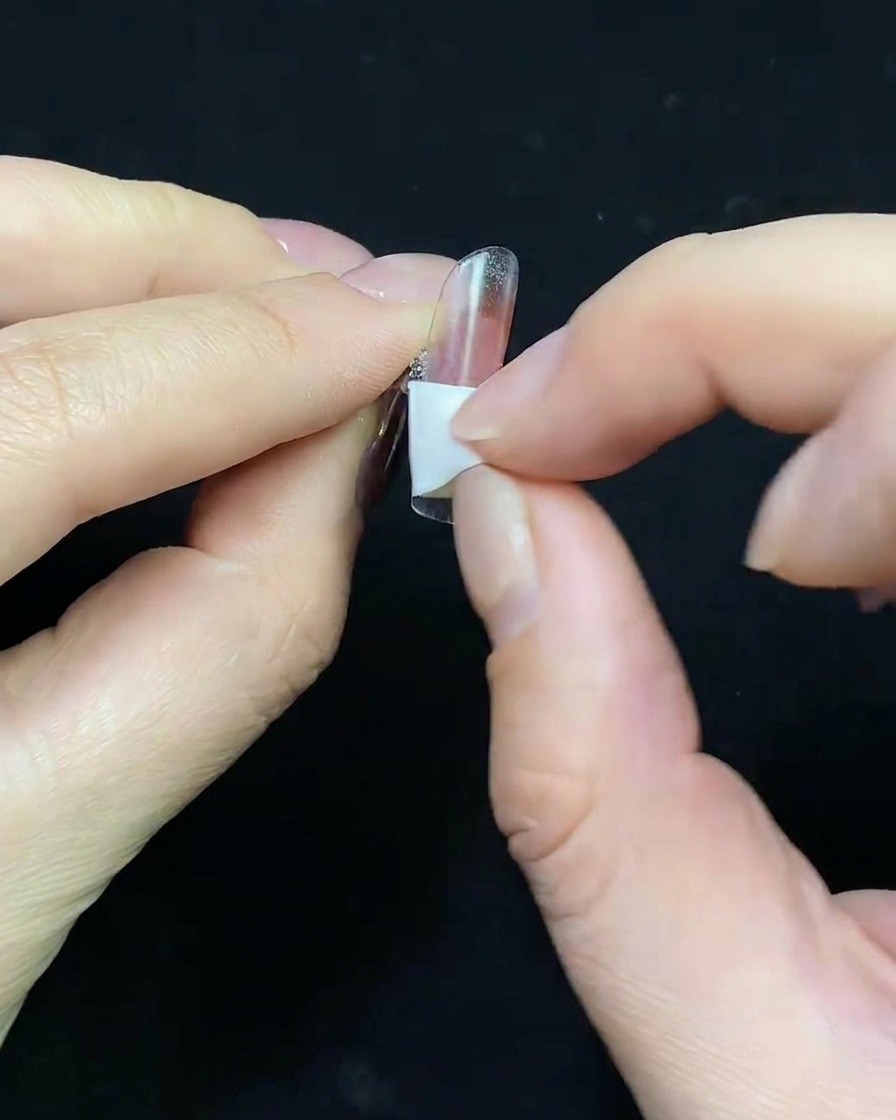
Tip: Ensure the pearl is firmly set in the top coat before curing to prevent it from falling off. - 7Apply base for second nail
Apply a smooth, even layer of nude base coat to the second nail tip. Ensure the product covers the nail fully without flooding the cuticles, then cure under your UV or LED lamp to create a clean, durable foundation for the French manicure.
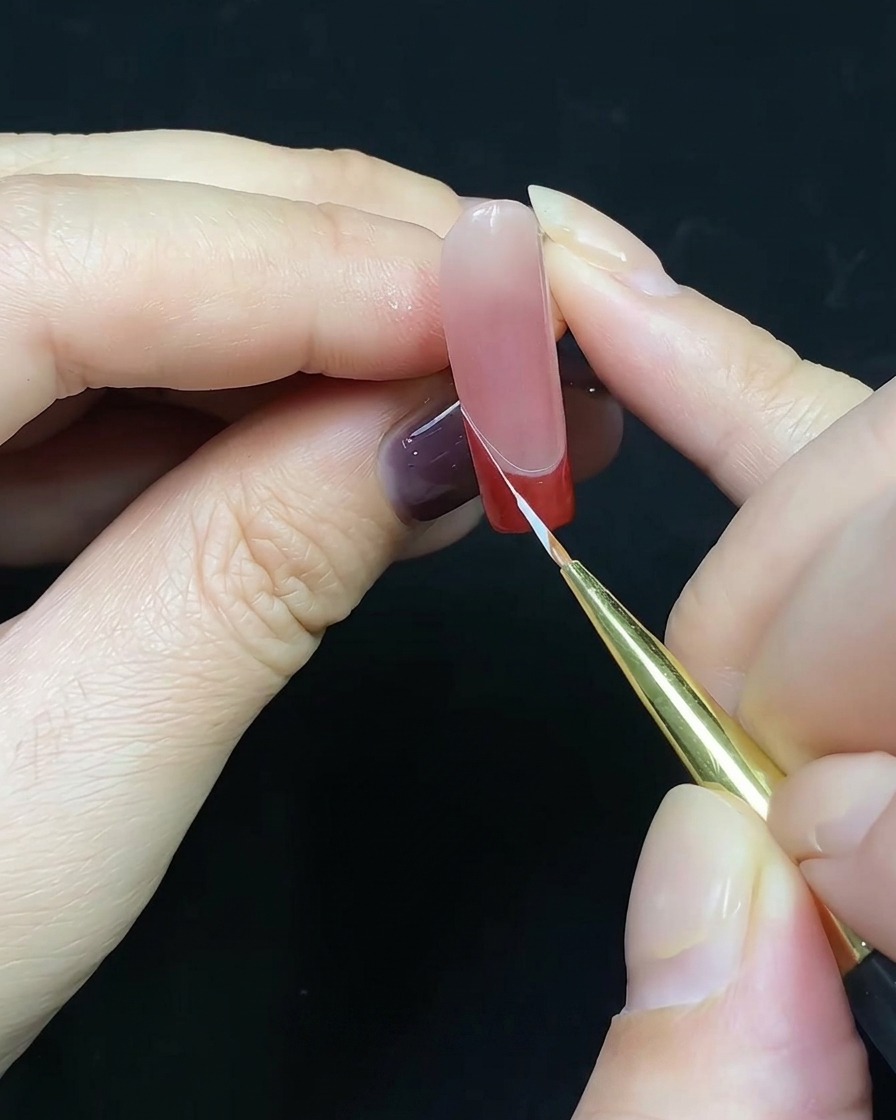
Tip: A thin, uniform application prevents bumps and ensures the nude color looks natural and streak-free. - 8Paint red French tips
Using a thin detail brush or the polish applicator, paint a precise, deep red French tip across the free edge of the nail. Follow the natural curve of the nail bed for a clean, professional finish, then cure briefly to set the color.
Tip: Keep the brush nearly parallel to the nail to create a smooth, clean smile line for the French tip. - 9Add white detail line
Take a small amount of white spider gel on a fine liner brush. Carefully draw a thin, crisp line along the edge of the red French tip to add contrast and definition. Ensure the line is straight and clean before curing.
Tip: Use a light touch to let the spider gel stretch into a thin, consistent thread for the best detailing. - 10Apply top coat

Apply a layer of glossy top coat over the entire nail to seal in the design. Make sure to cap the free edge to enhance durability and prevent chipping, ensuring a smooth, high-shine finish before moving to final embellishments.
Tip: Cap the free edge by running the brush horizontally along the very tip of the nail. - 11Add rhinestone accents
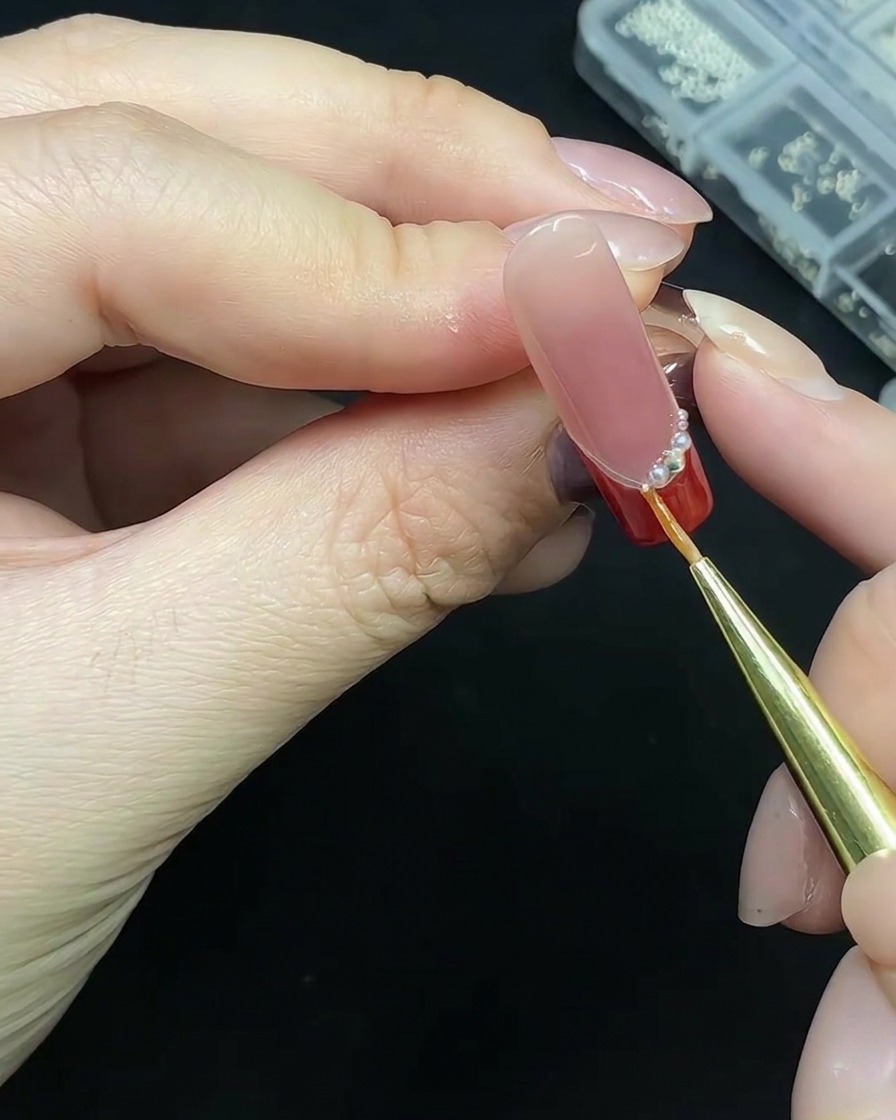
Carefully place small decorative rhinestones along the base of the French tip nail using a dotting tool or wax pen. Press them gently into the uncured top coat to secure them, then cure the entire nail under the UV or LED lamp to lock the design in place.
Tip: Use a tiny drop of base coat or rhinestone glue if the top coat isnt tacky enough to hold the stones securely before curing.