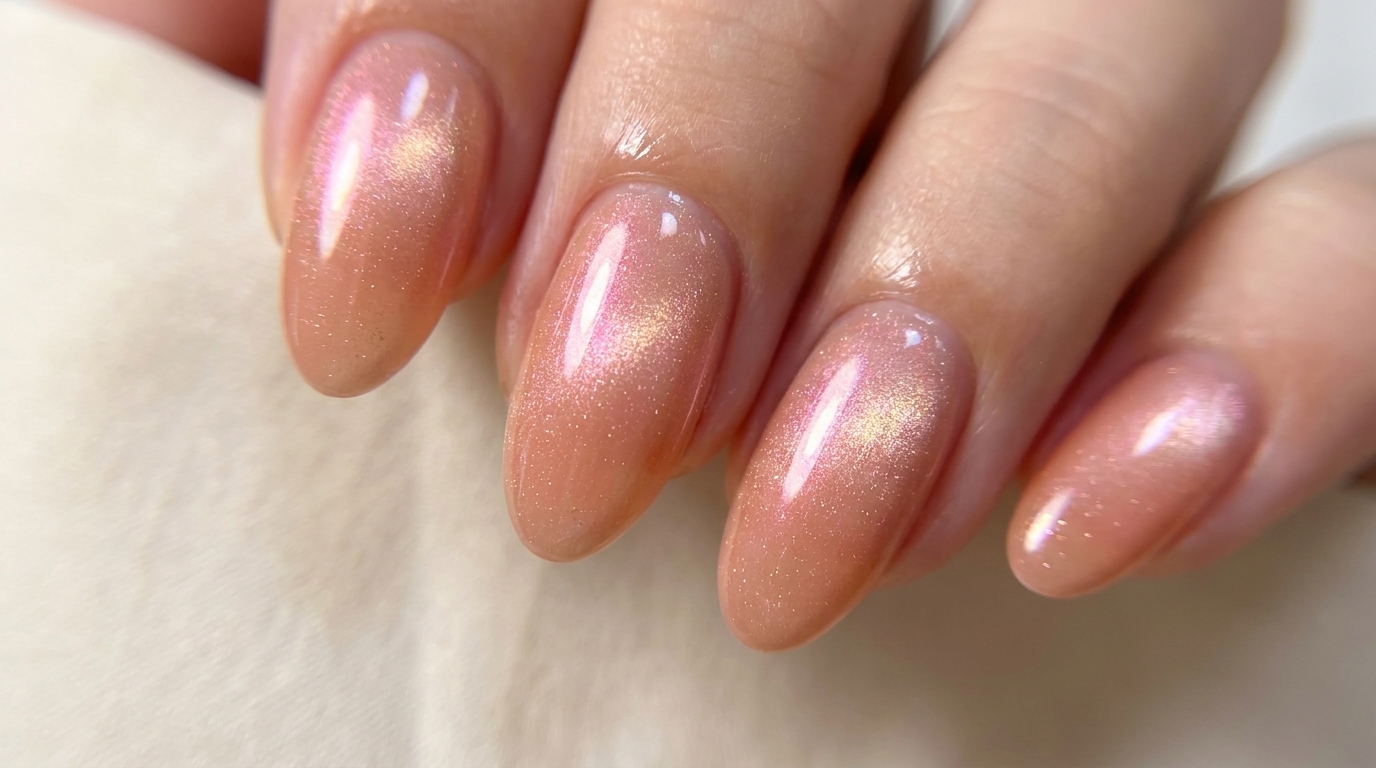
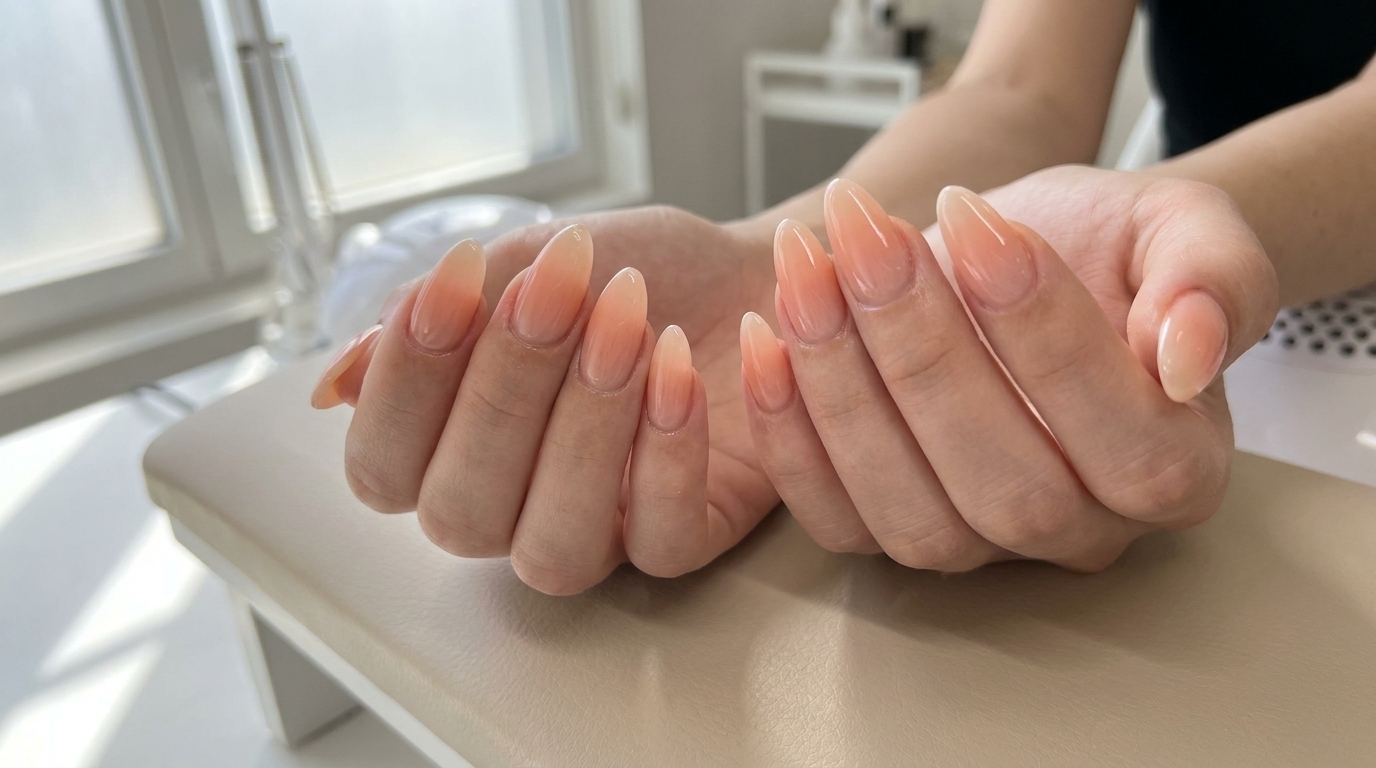
Peach Ombré Blush Gel Nails — Beginner Step-by-Step Tutorial
Achieve a soft, frosted gradient with these dreamy peach ombré blush nails. Learn the simple sponge-blending technique using clay-textured gels.
Ombré nails remain a timeless favorite, but achieving that perfectly smooth, grain-free blend can be intimidating. This tutorial utilizes unique clay-textured gel, which offers a forgiving application process that makes creating a soft, diffused gradient easier than ever. Whether you are a beginner or a seasoned pro, these peach blush nails provide a delicate, feminine look perfect for any season.
Steps
- 1Pick up base color
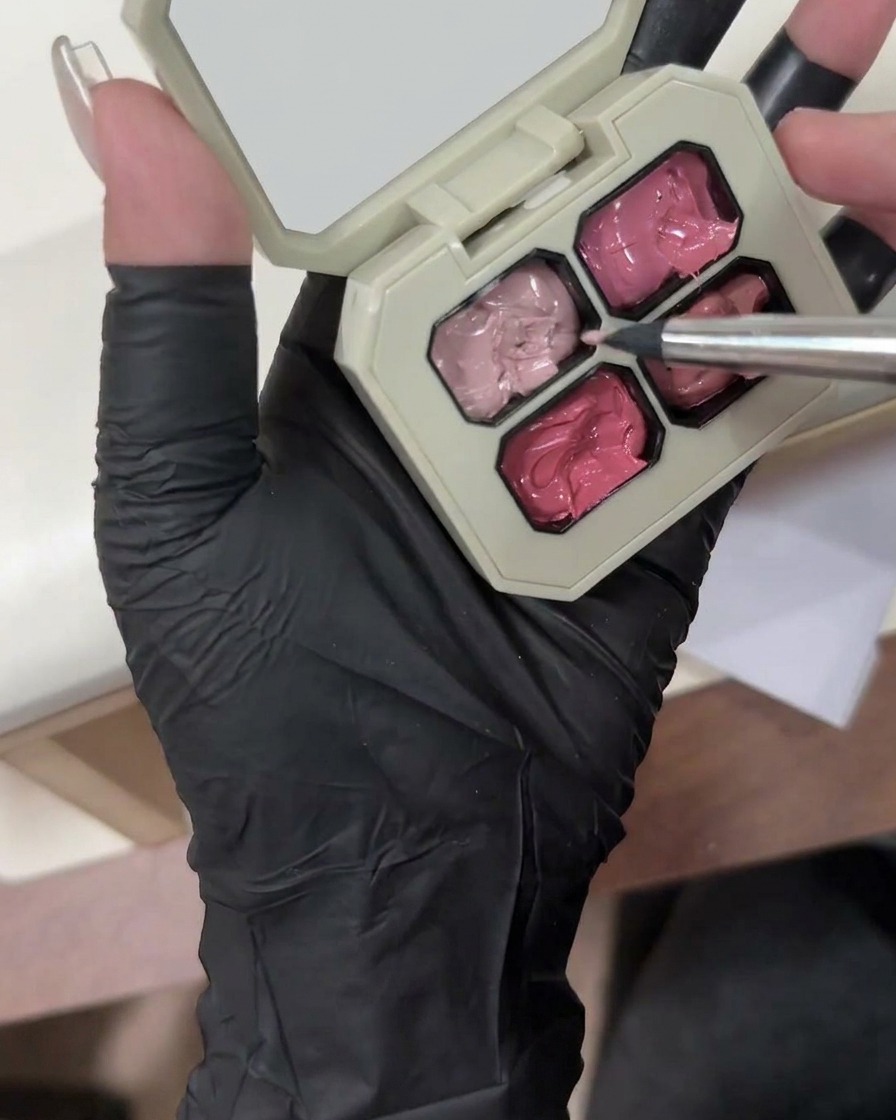
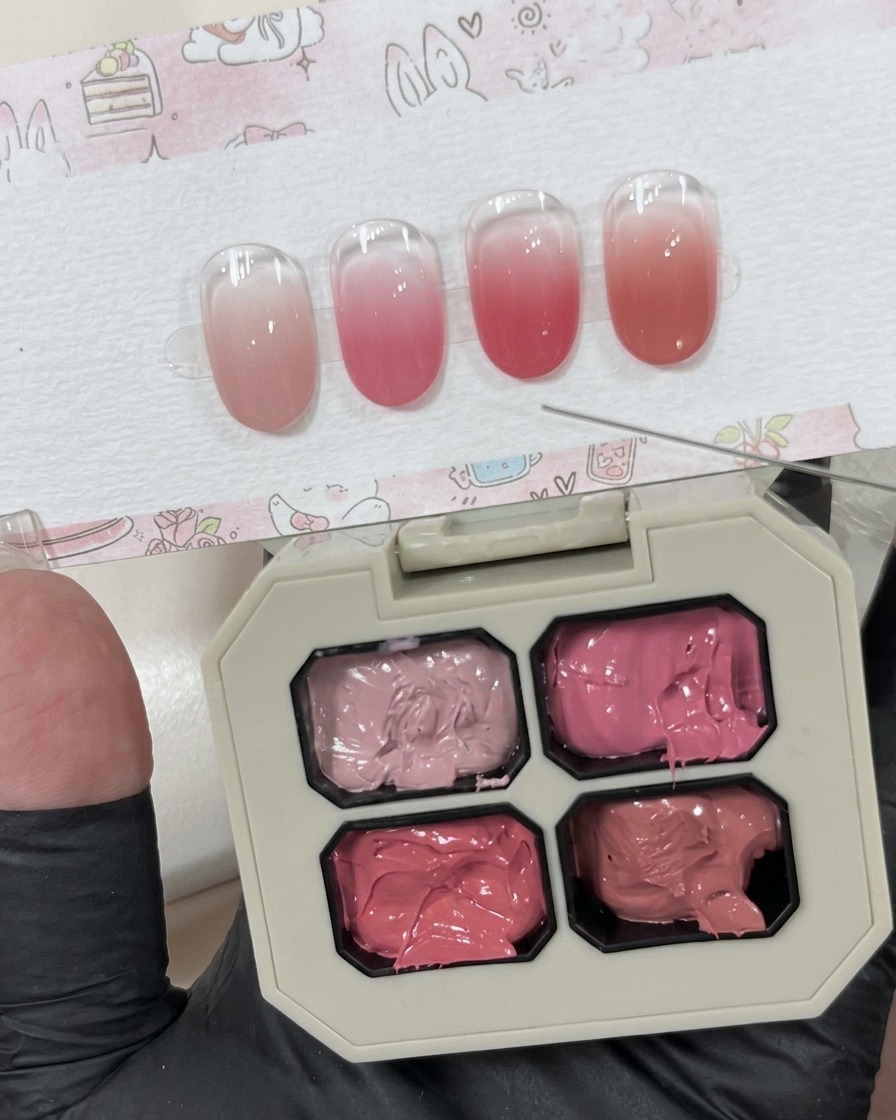
Take a flat brush and pick up the lightest shade from your pink clay gel palette. The clay-like texture of the gel makes it easy to scoop and control without running, making it ideal for creating soft nail looks.
Tip: Use a gentle scooping motion to keep the product smooth and even on the bristles of your brush. - 2Apply base color
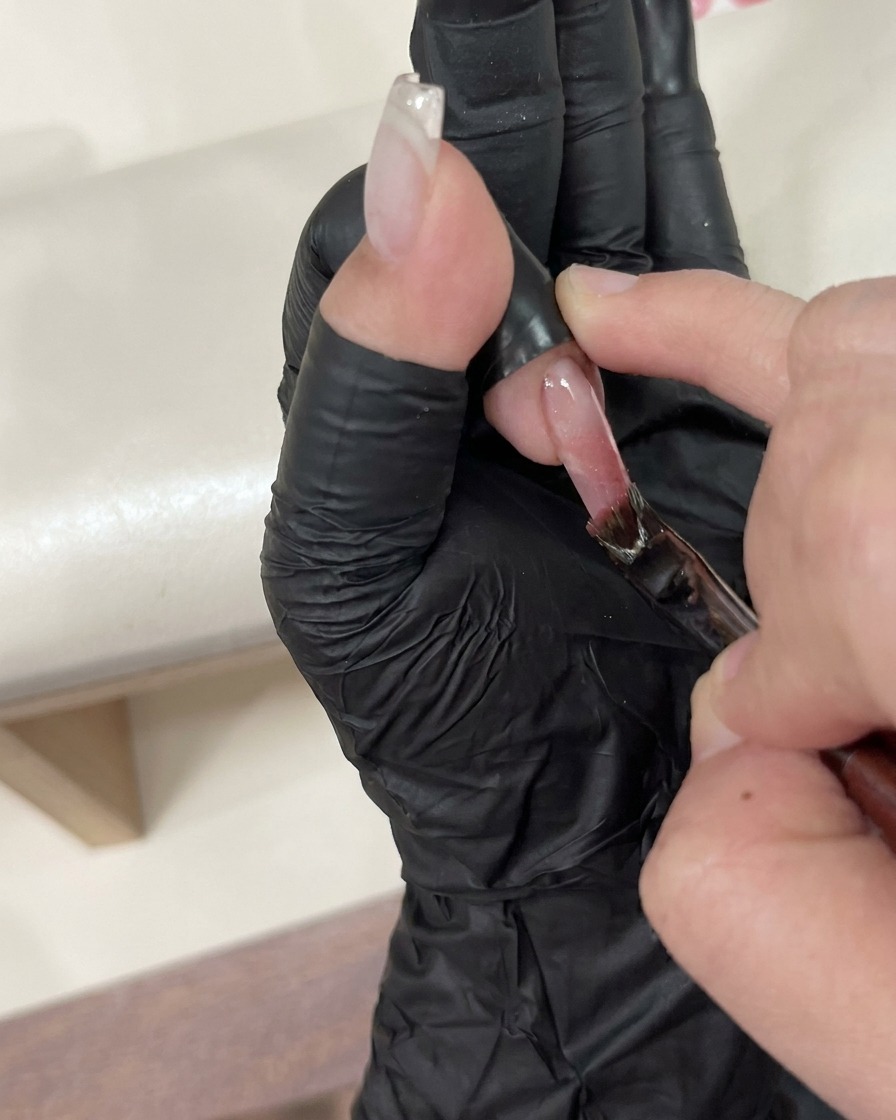
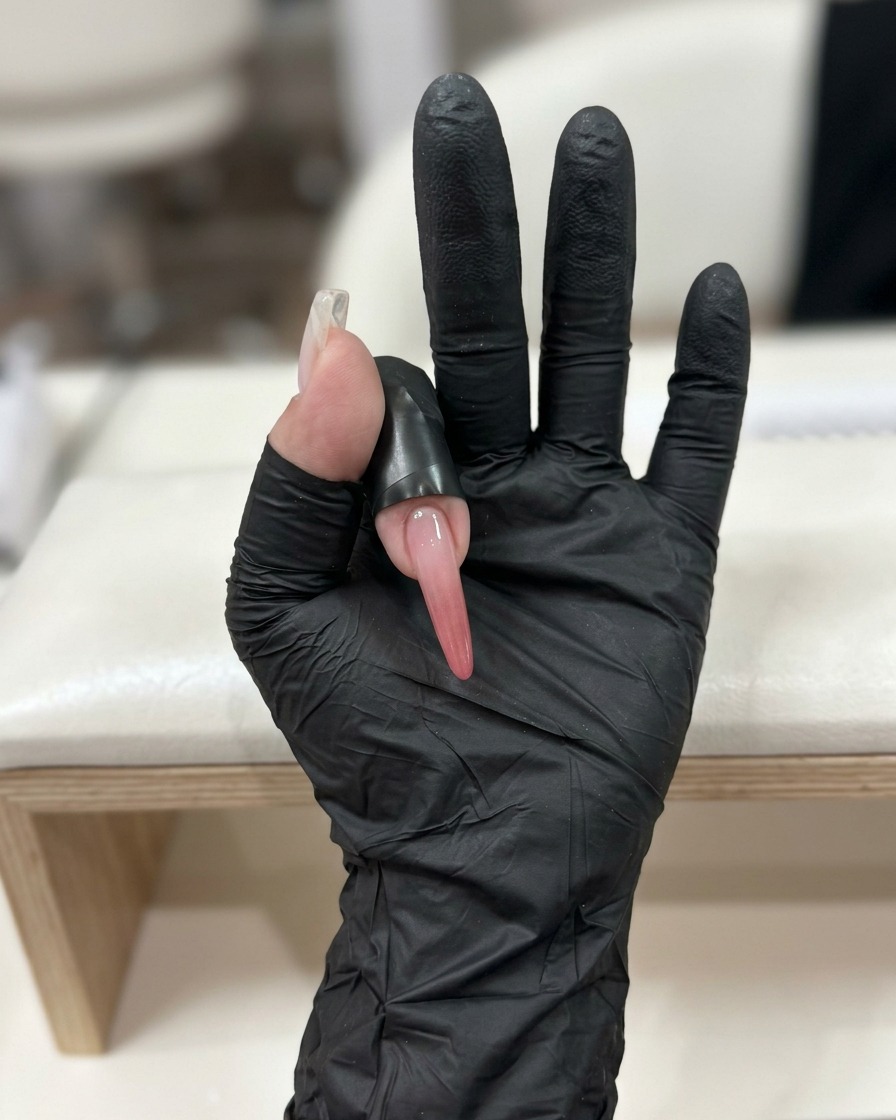
Brush a thin, even layer of the light pink clay gel across the entire nail plate. Because of its unique forgiving texture, the gel spreads effortlessly and blends seamlessly with the natural nail bed to create a perfect canvas.
Tip: Keep this base layer thin and light; a dark base color would alter and overpower the final ombré effect. - 3Prepare the gel for application
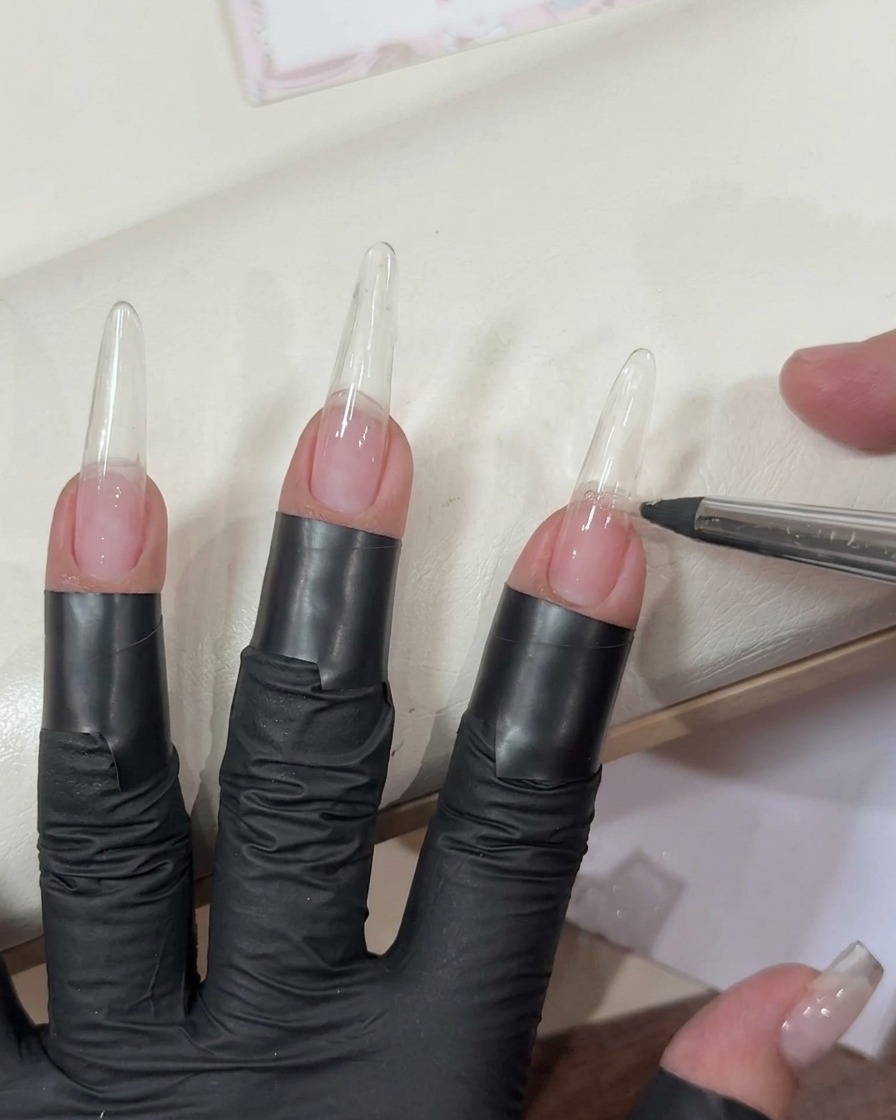
Take a small amount of the desired pink clay-textured gel from your palette using a brush or spatula. Place it onto a clean, flat surface to prepare it for pickup. This ensures you have an controlled amount of product ready for sponge application.
Tip: Working from a palette helps you avoid overloading your sponge, which keeps the gradient transition smooth. - 4Load the sponge
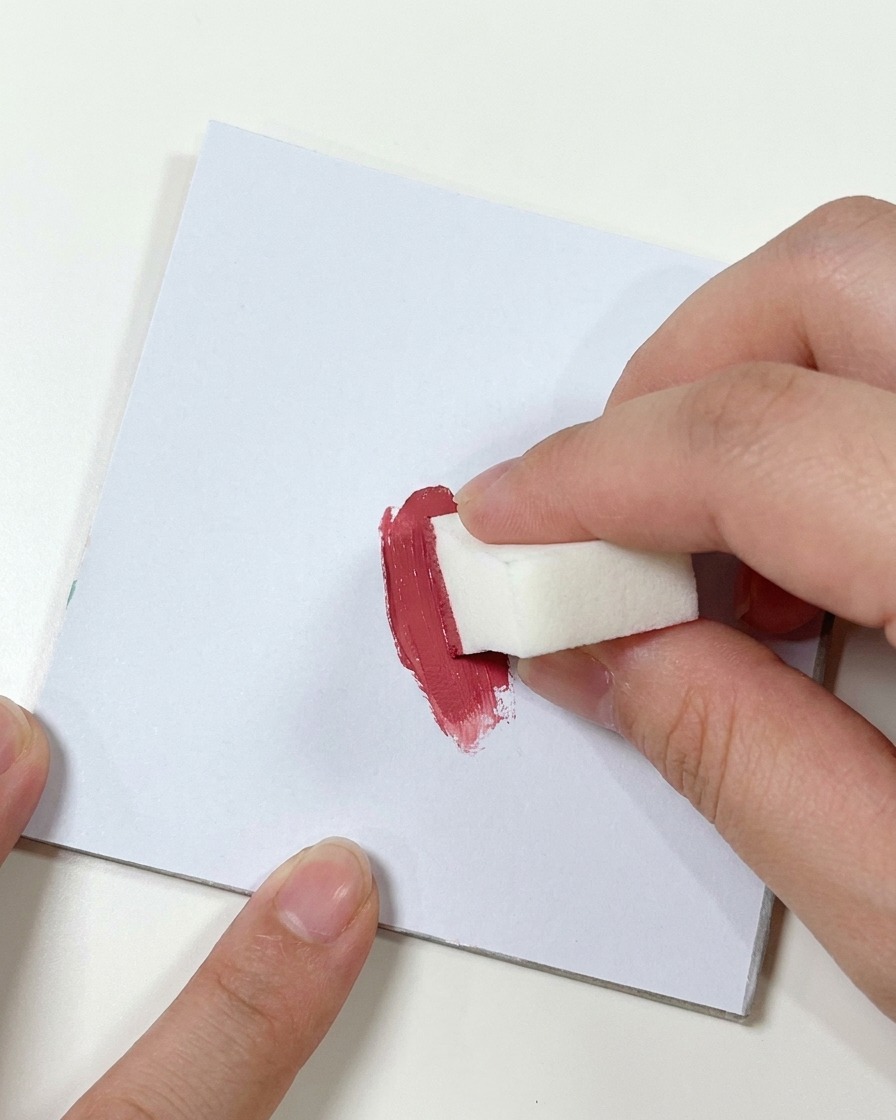
Take a small cosmetic sponge and press it directly into the dab of darker pink gel you placed on your flat mixing surface. Pick up just enough product to begin building your gradient effect.
Tip: A dense makeup sponge offers excellent control and prevents the gel product from soaking in too deeply. - 5Diffuse the gel color
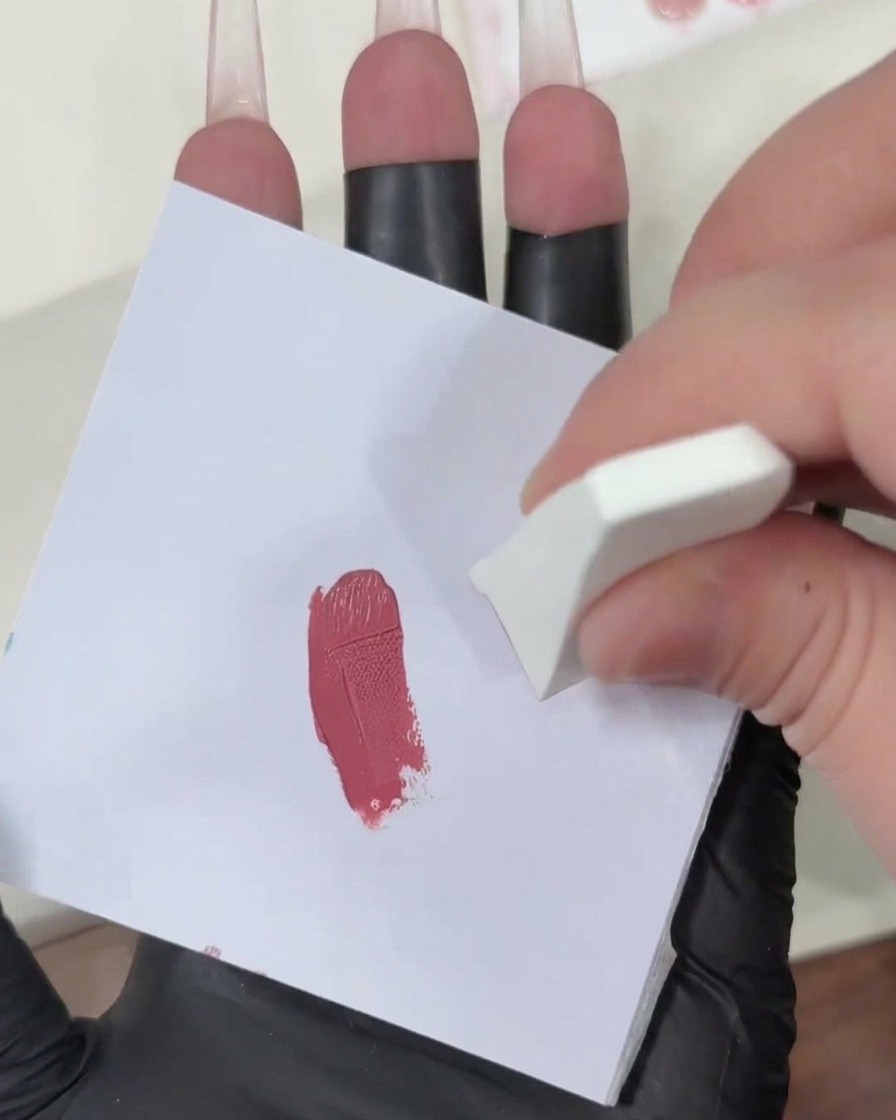
Before applying the sponge to your nail, repeatedly pat it onto a clean section of your palette. This essential step diffuses the pigment evenly across the sponges surface, ensuring a smooth, soft application without any harsh lines.
Tip: Keep tapping until the color looks softly faded on the sponge. This guarantees the frosted, grain-free ombré transition you want. - 6Begin the gradient application
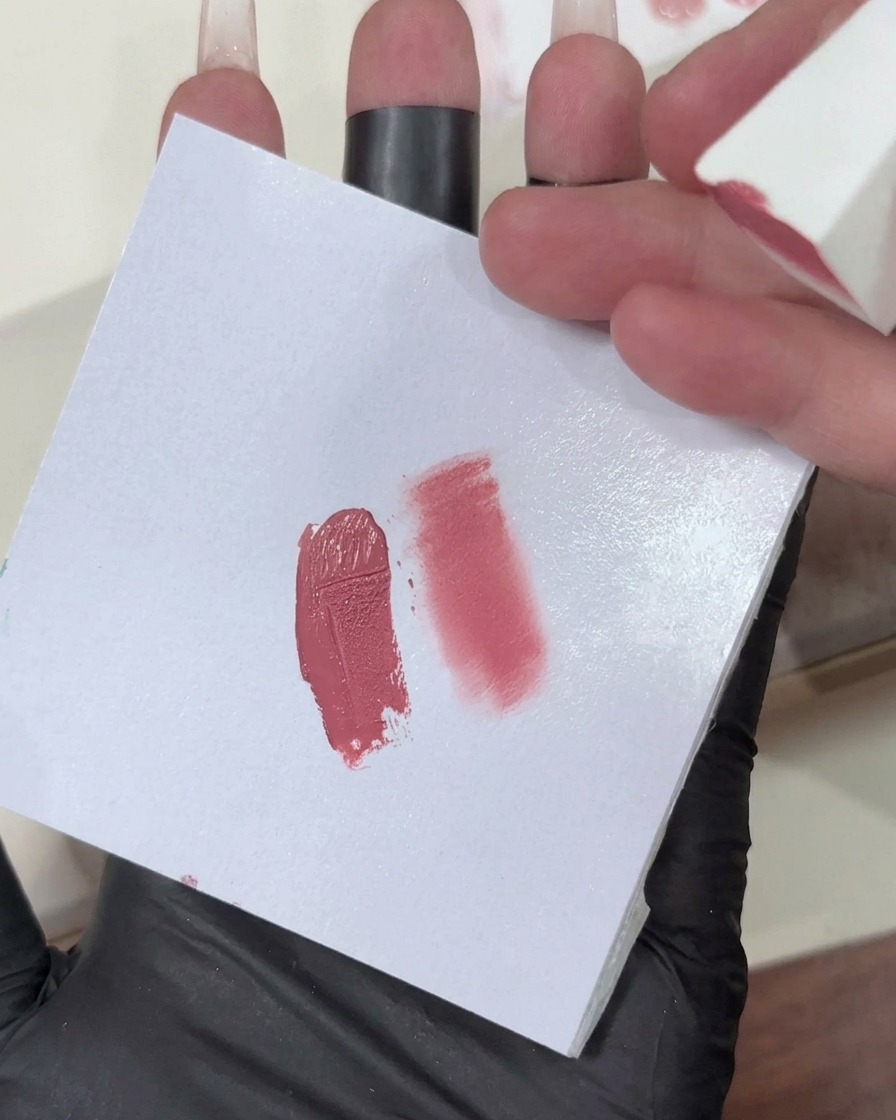
Take some gel onto your palette, then use a sponge to pick up a little bit of color. Pat the sponge on the palette first to get a soft, diffuse effect before patting it onto the nail tip. This method ensures the most pigmented part of the gradient is at the free edge, creating a soft, even blend.
Tip: Always pat off excess product on your palette; this prevents the sponge from leaving harsh, thick blobs of gel on the nail. - 7Blend the ombré gradient
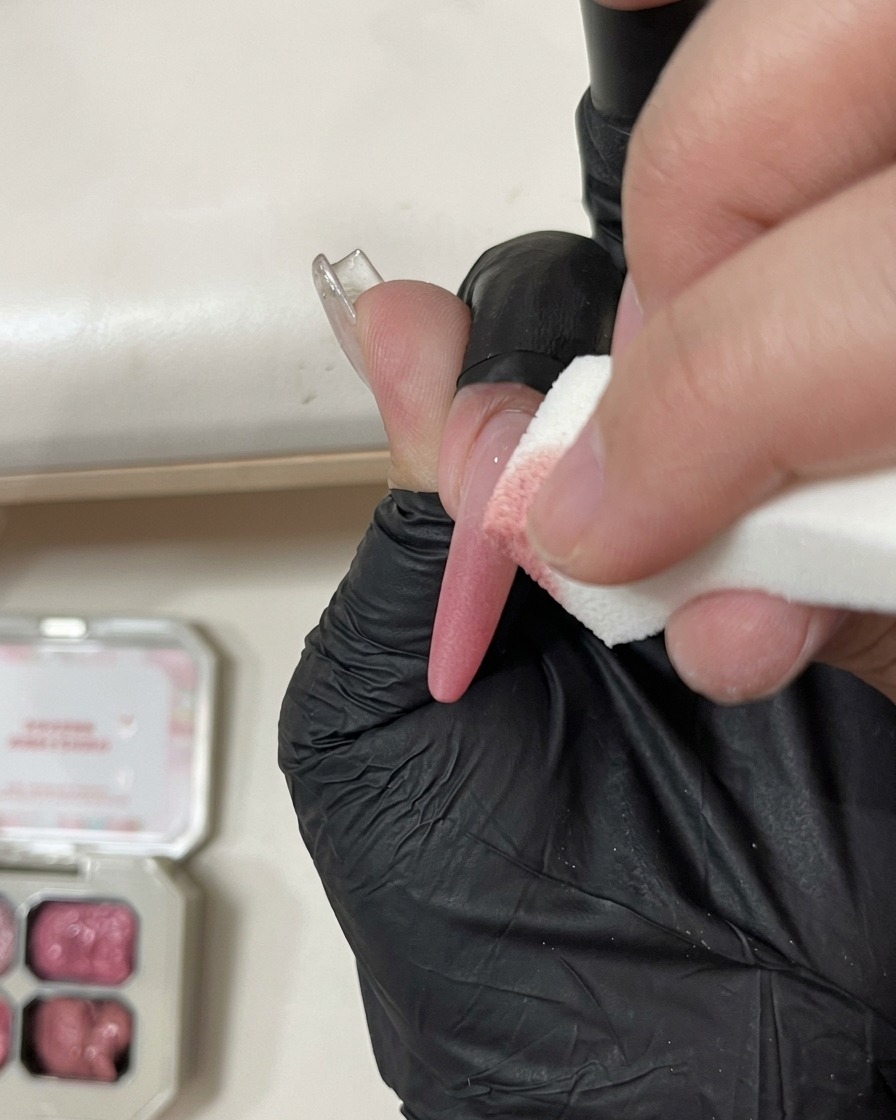
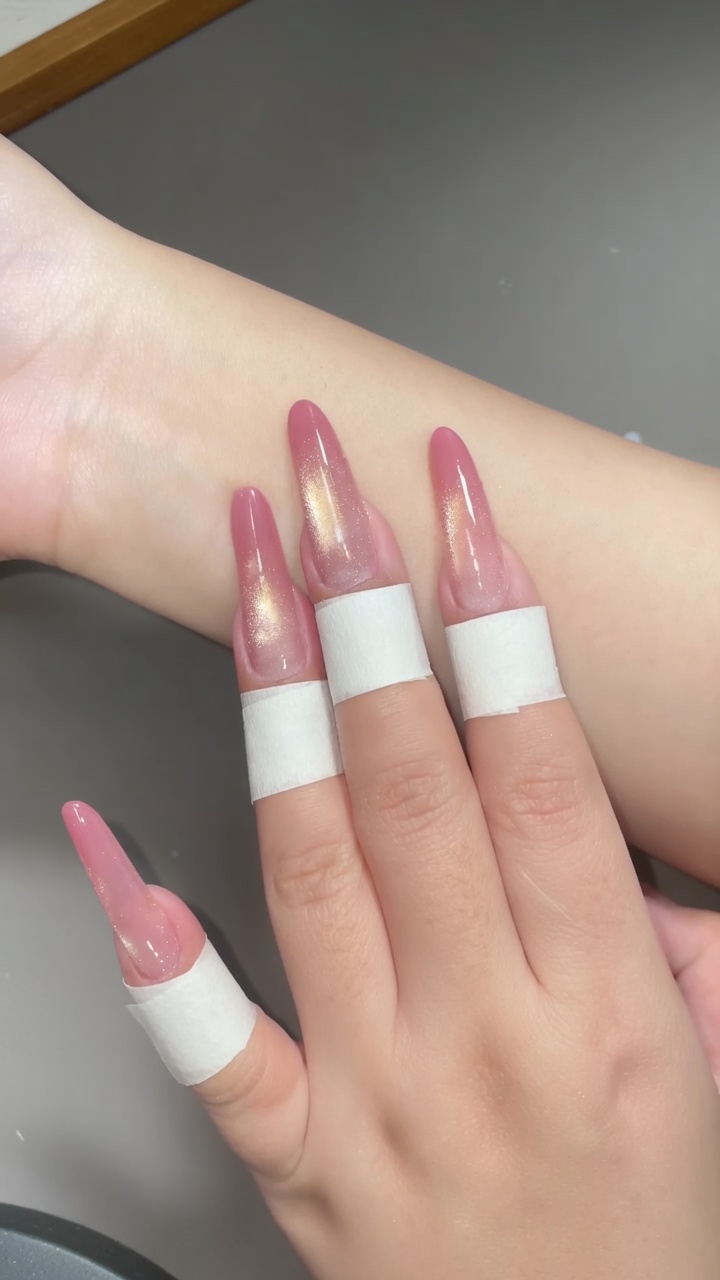
Continue gently patting the sponge from the nail tip towards the center of the nail. The clay texture of the gel is very forgiving and will naturally diffuse to create a seamless, frosted ombré transition. Build up the coverage slowly until you achieve your desired depth of color.
Tip: Maintain a light touch as you move toward the center of the nail to keep the color transition airy and soft. - 8Seal with a top coat
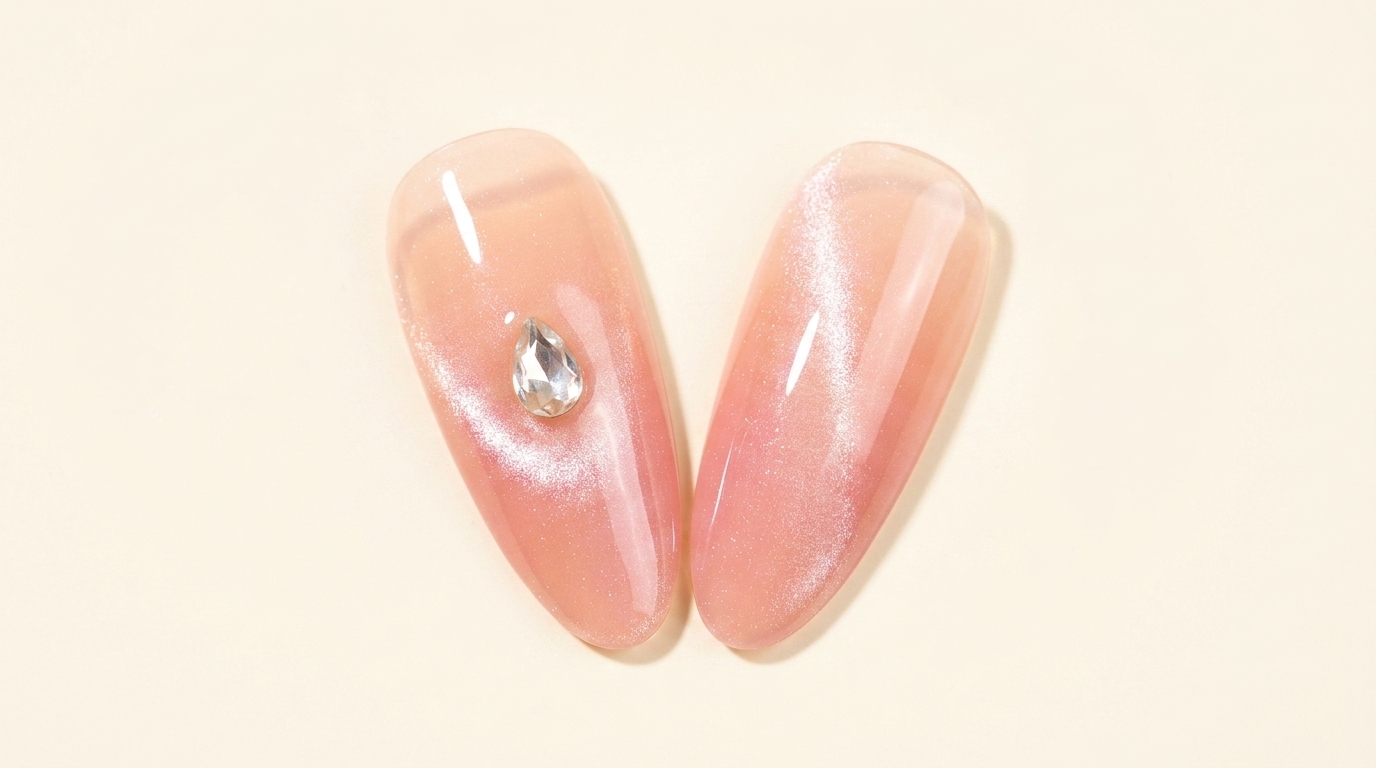
Once your ombré design is cured, apply a thin, even layer of clear top coat over the entire nail using a gel brush. This seals the design, adds a high-gloss finish, and provides a tacky surface to secure any embellishments if desired.
Tip: Ensure you cap the free edge of the nail to prevent the top coat from chipping and to protect the ombré blend underneath. - 9Add nail embellishments
While the top coat layer is still wet, carefully place your chosen decorative charm onto the nail surface. Use a dotting tool or tweezers to position it exactly where you want it. This adds a touch of flair and extra shine to the soft ombré look.
Tip: Place the charm firmly but gently; avoid pressing too hard to prevent pushing the wet top coat into the cuticle area. - 10Final cure
Place your hand under an LED or UV lamp to fully cure the top coat and secure the charm. Follow your gel systems instructions for the appropriate curing time to ensure the nail is completely set and durable.
Tip: Make sure your fingers are positioned directly under the light source for a uniform cure.