Sunset Orange Cat Eye
Glitter Gel Nails — Step-by-Step Tutorial
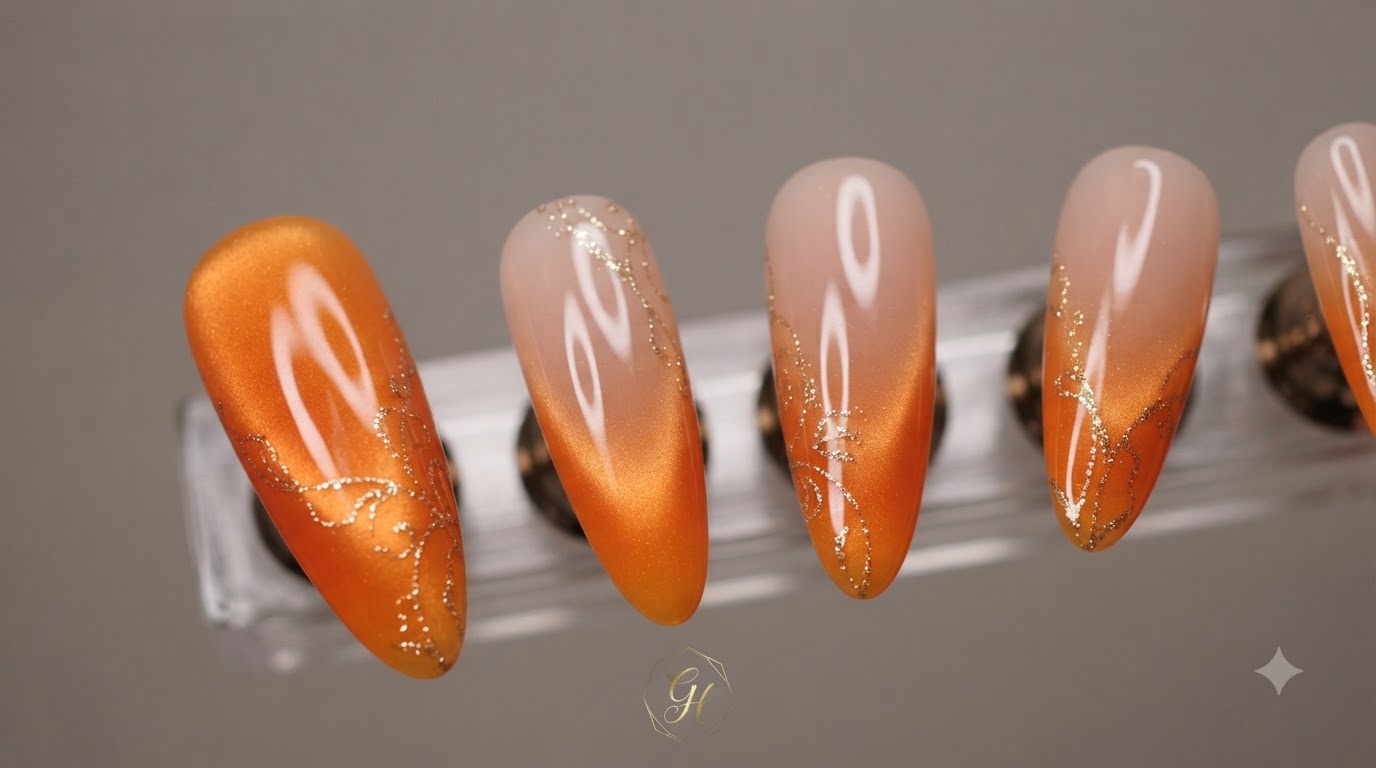
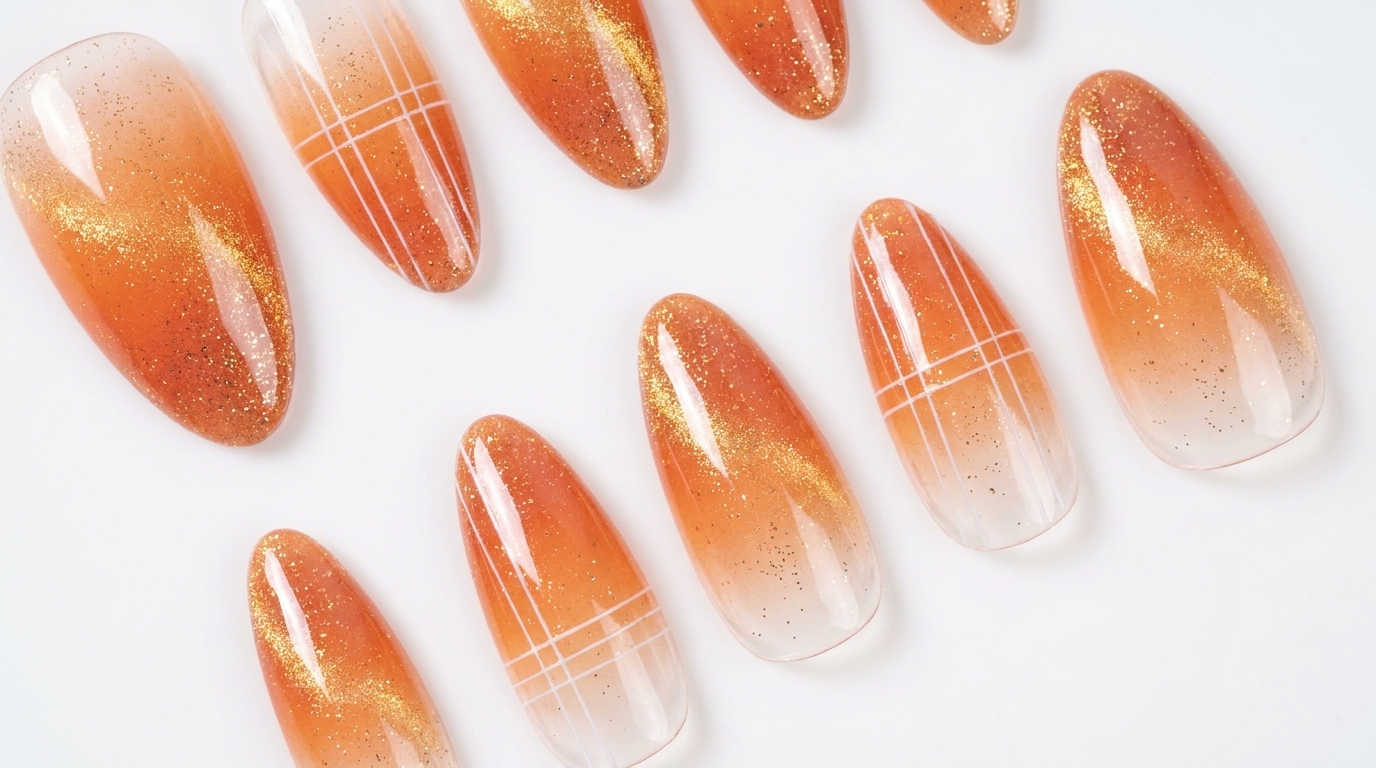
Create stunning sunset orange gel nails featuring sparkling moonlight flakes, a mesmerizing glass ball cat eye effect, and delicate grid line art.
The sunset orange nail trend combines vibrant warm tones with multi-dimensional magnetic textures and crisp geometric patterns. This tutorial guides you through layering glitter flakes, crafting the signature floating cat eye orb, and adding refined gold details for a sophisticated finish.
Steps
- 1Apply sparkling moonlight glitter flakes
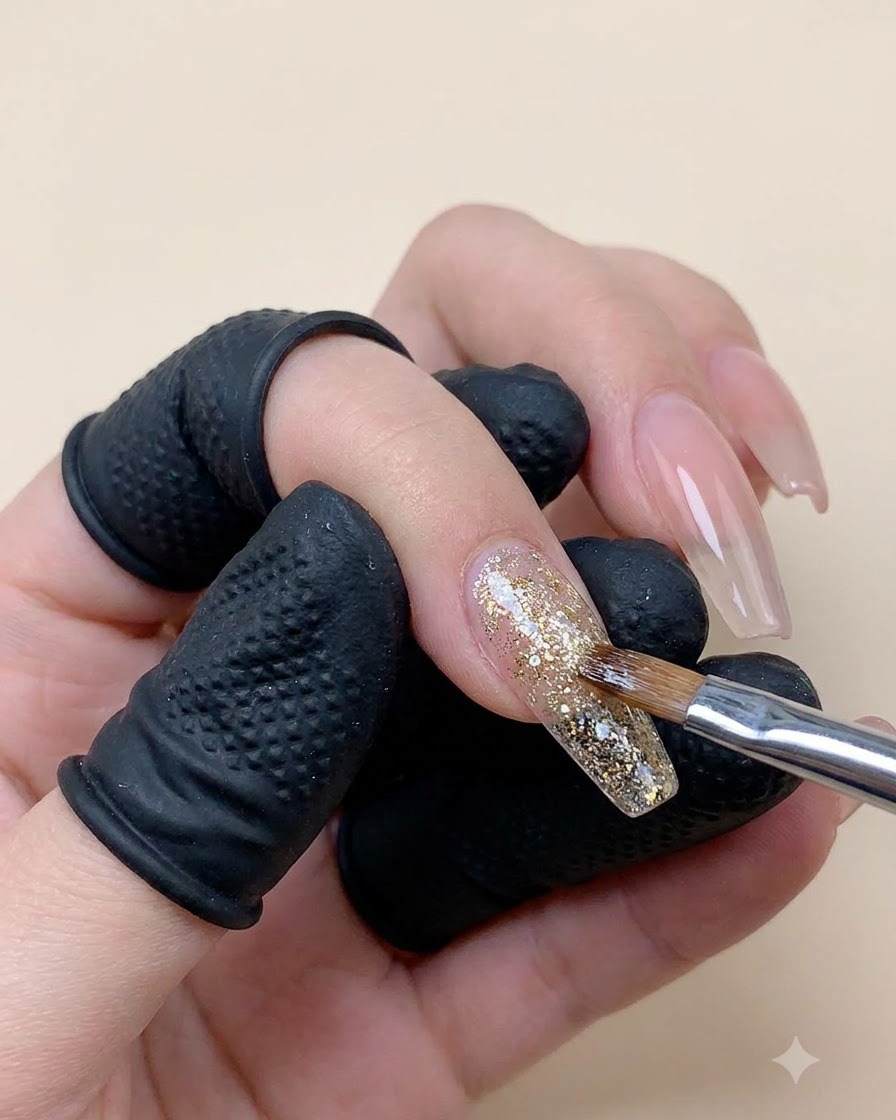
Using a fine nail art brush dipped in TAYE NAIL #E117, carefully pick up and apply the sparkling moonlight glitter flakes onto the ring finger. Distribute the glitter densely near the free edge and let it fade out slightly toward the cuticle area to create a dimensional, shimmering effect.
Tip: Tap the glitter flakes gently into place with the flat side of your brush to ensure they lie flat and dont create bumpy surfaces under your top coat. - 2Apply cat eye gel to remaining fingers
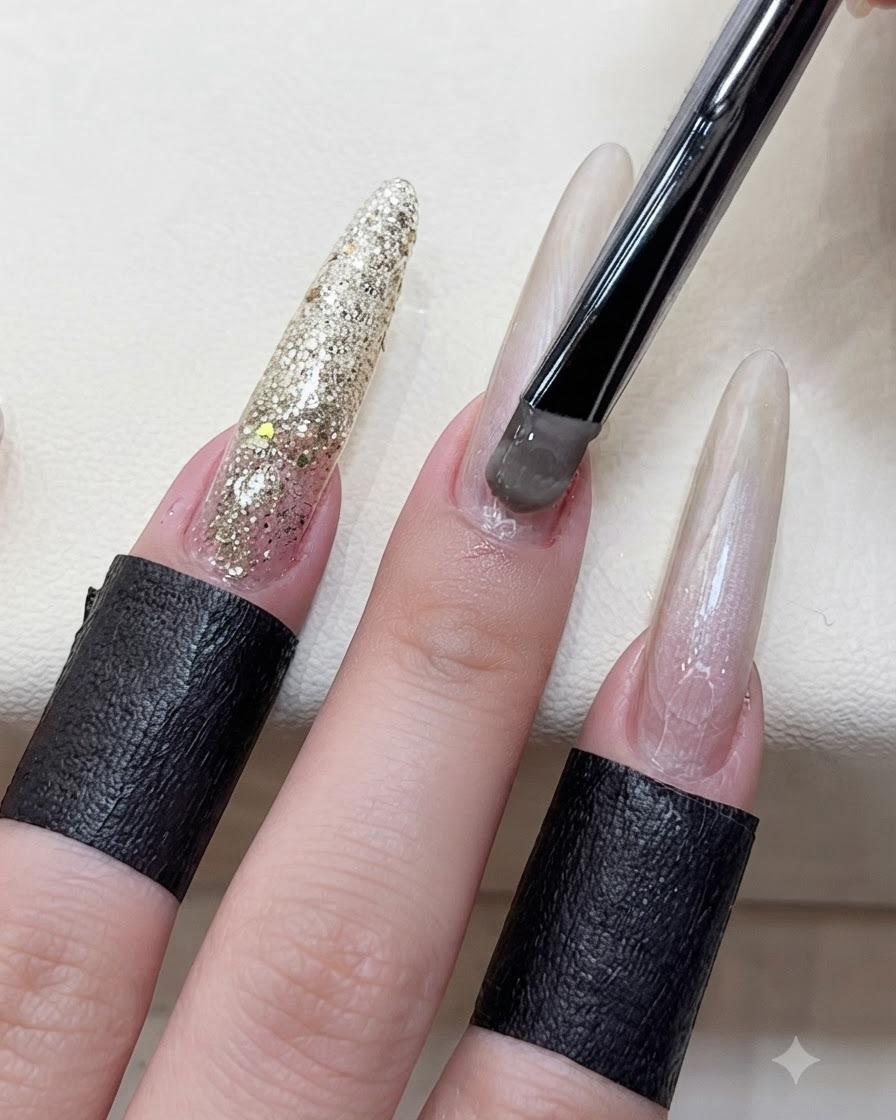
Using a nail brush, apply TAYE NAIL #E302 cat eye gel evenly onto the remaining unstyled fingers, ensuring smooth and uniform coverage over the nail plate without pooling at the cuticles.
Tip: Apply a consistent, thin layer of cat eye gel so that the magnetic particles can move freely and concentrate sharply when the magnet is applied. - 3Create the glass ball cat eye effect with a magnet
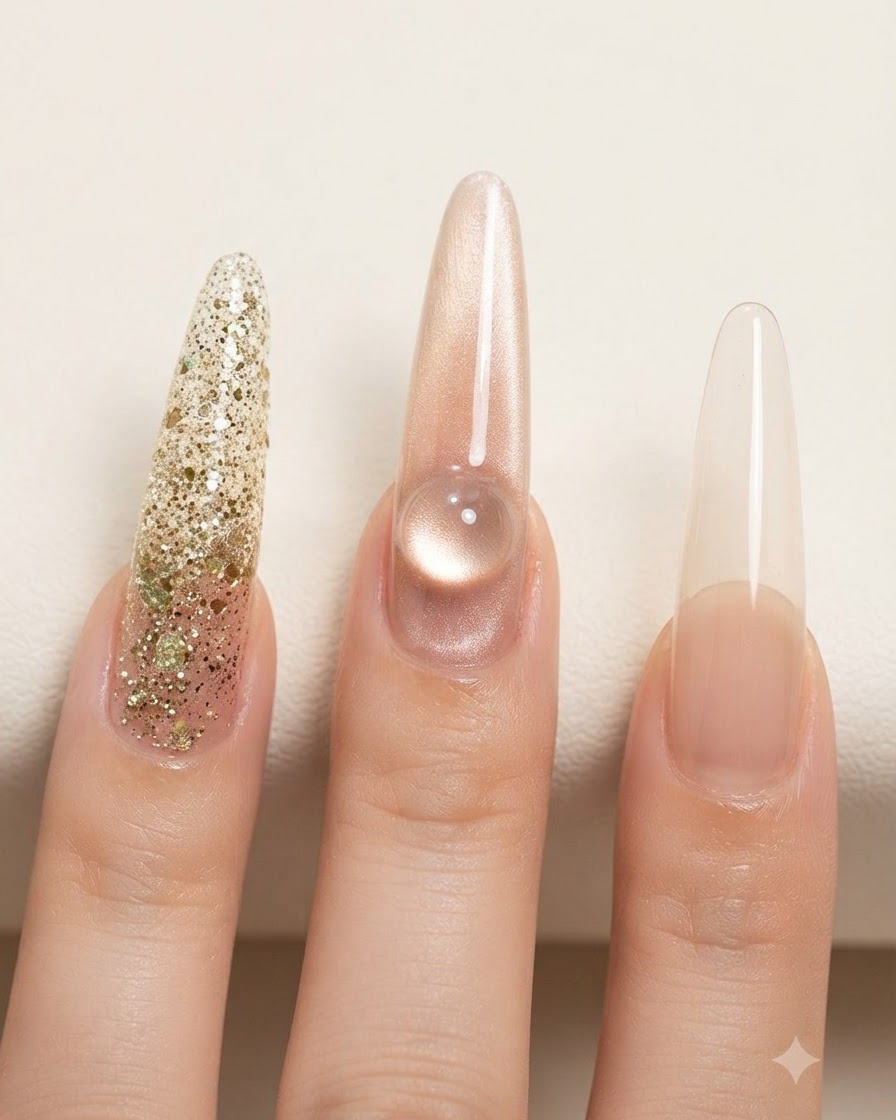
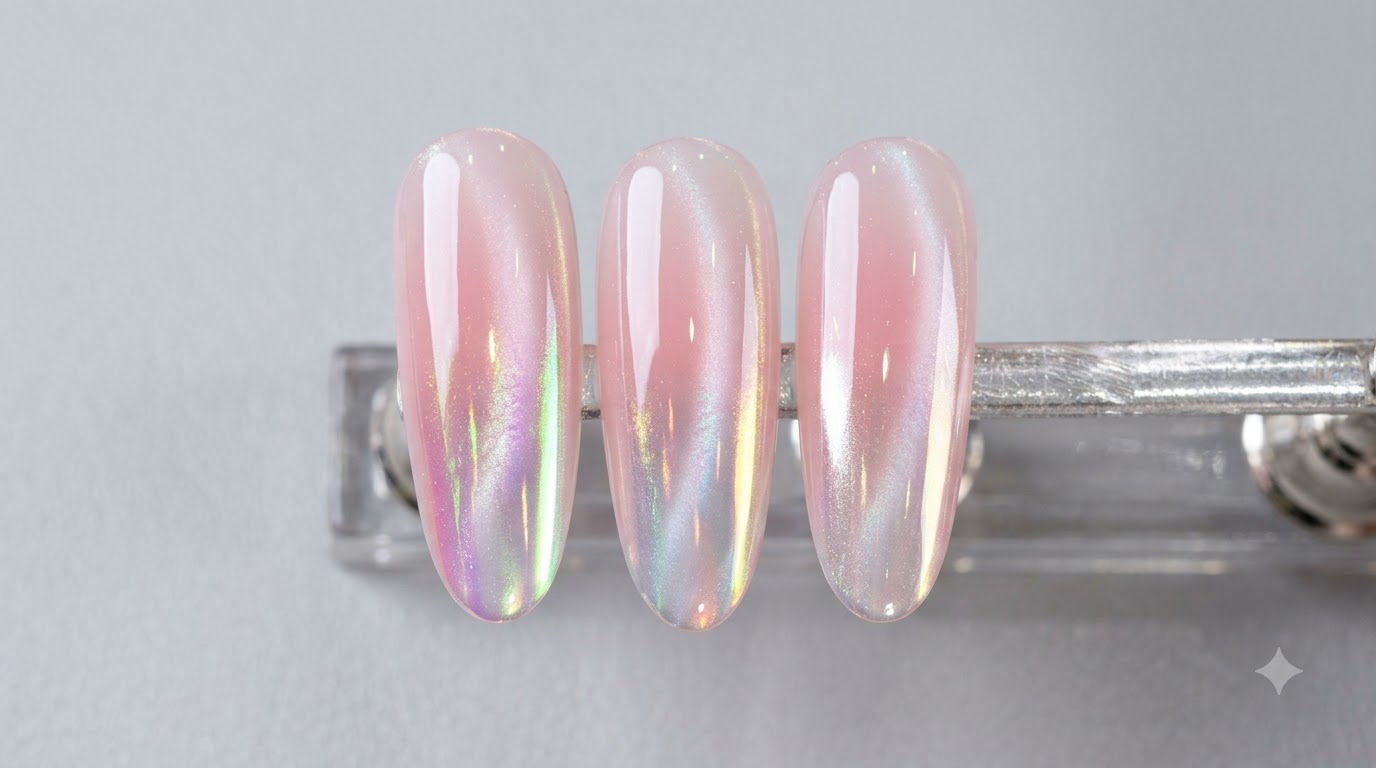
Hold a strong magnet close to the uncured TAYE NAIL #E302 cat eye gel to pull and concentrate the magnetic particles, creating a luminous, glowing glass ball or floating orb effect in the center of the nail.
Tip: Keep the magnet steady and close to the surface without touching the wet gel to achieve a crisp, well-defined cat eye highlight. - 4Paint half of the nail tip with rock salt orange gel
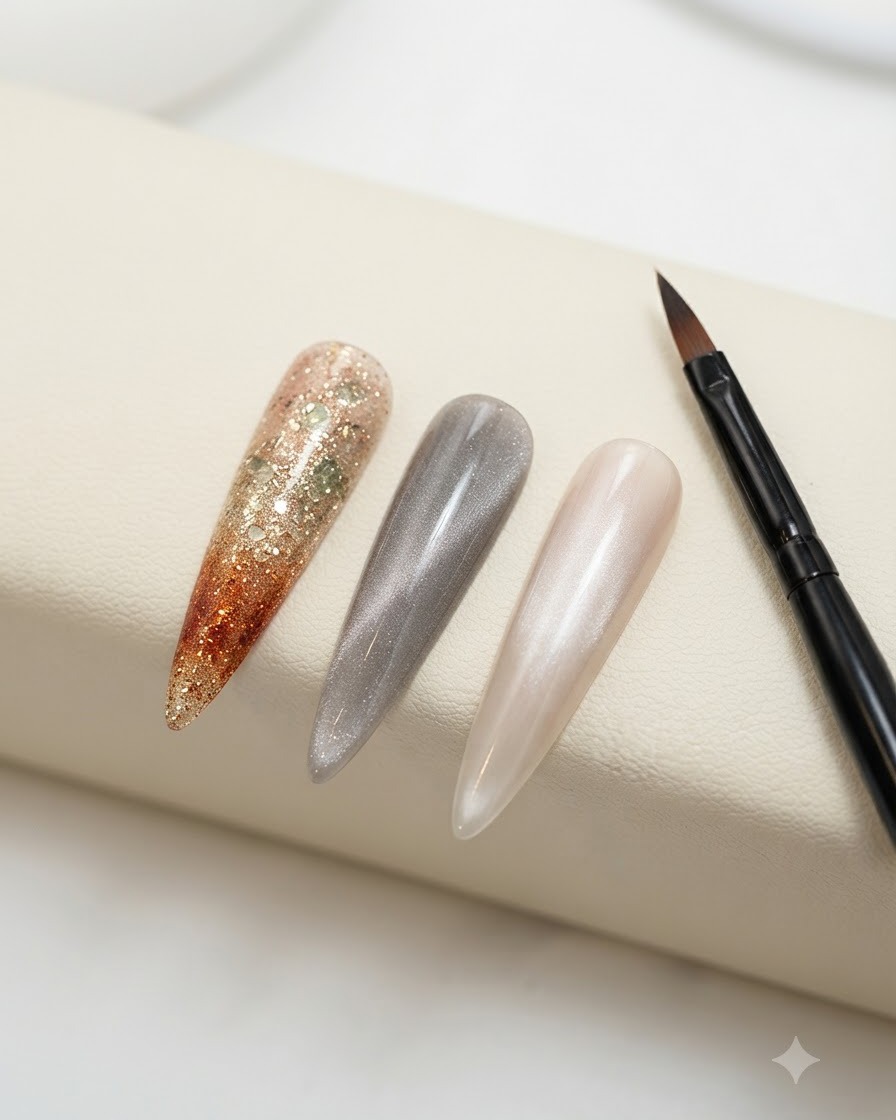
Using a fine brush with TAYE NAIL #E273 rock salt orange gel, paint approximately half of the nail tip to establish a rich, vibrant color block before blending.
Tip: Keep the starting boundary of the color block relatively soft to make the subsequent transition blending much easier. - 5Blend the orange gel color transition
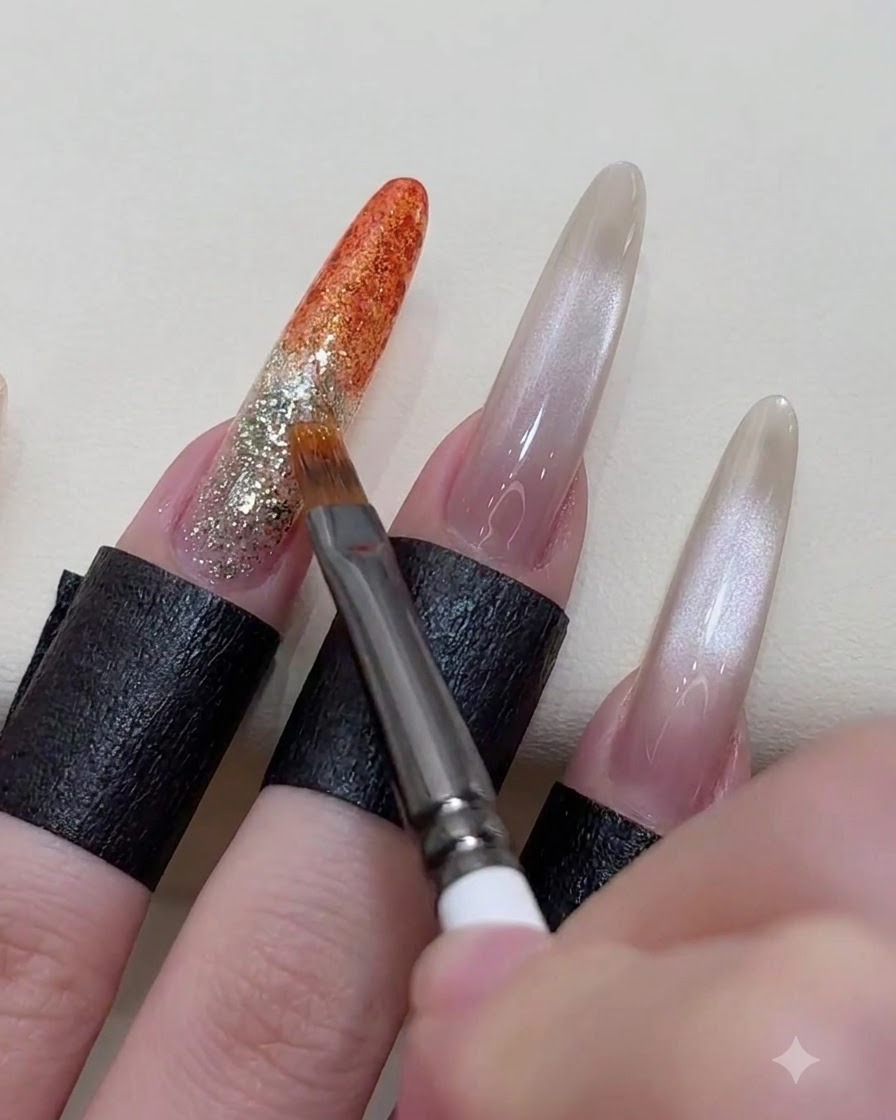
Using a clean brush, sweep back and forth across the junction line of the orange gel to soften the edges and create a smooth, seamless gradient transition into the underlying glitter layer.
Tip: Use a very light touch and a slightly damp alcohol or base brush if needed to feather out harsh lines without wiping away the pigment. - 6Paint grid pattern
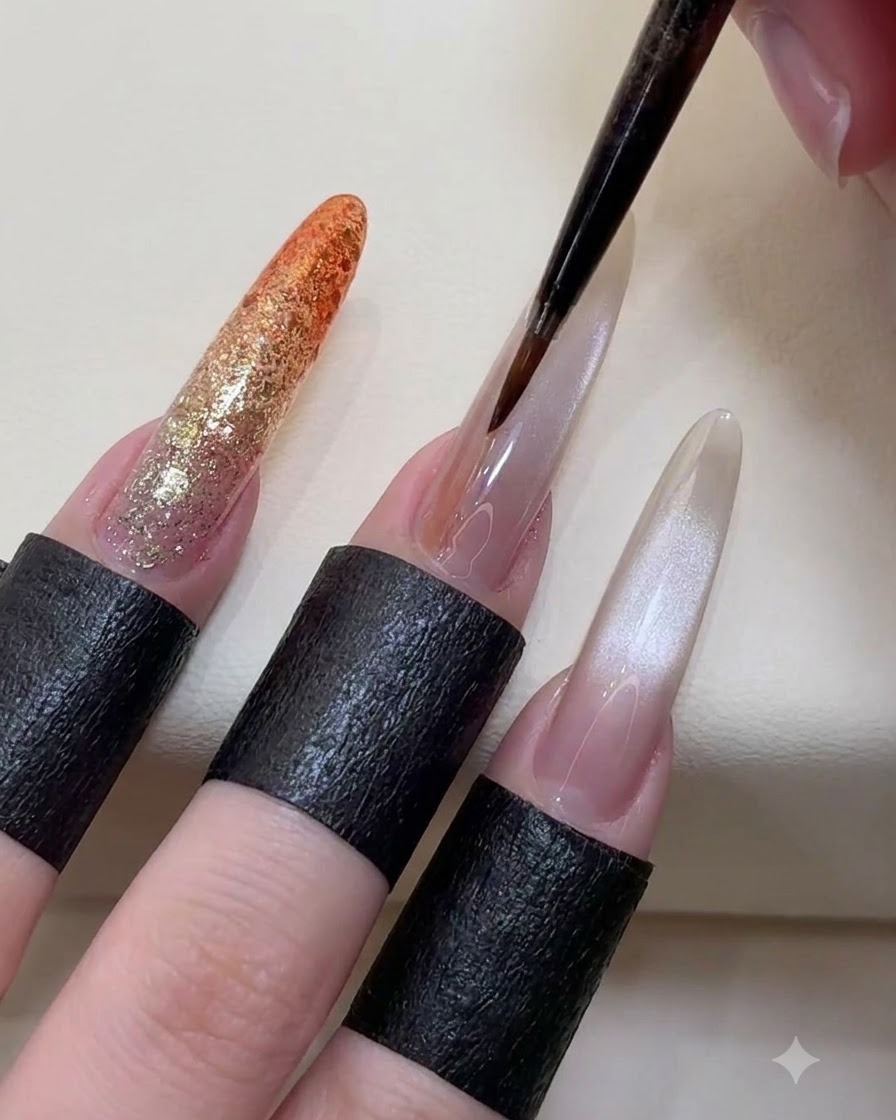
Using a fine liner brush dipped in TAYE NAIL #E273, carefully paint a delicate grid pattern onto the middle finger over the gradient base. Ensure lines are straight and evenly spaced for a clean, geometric finish.
Tip: Keep a light hand when drawing fine lines to prevent the product from pooling or smudging. - 7Paint random color blocks
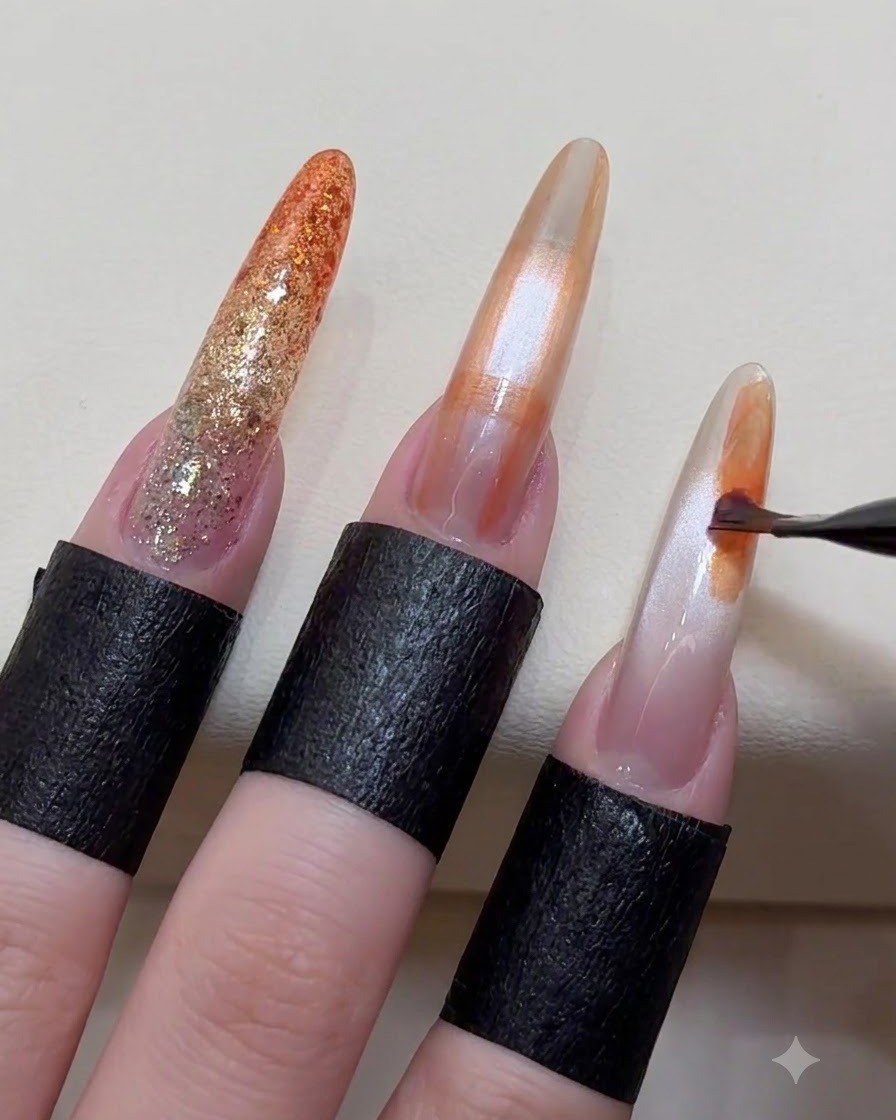
Using a brush with TAYE NAIL #E273, randomly apply color blocks onto the index finger to build an abstract design. Vary the placement and shapes to create a natural, artistic look across the nail surface.
Tip: Apply small amounts of gel at a time so you have full control over the shape and opacity of each color block. - 8Blend and deepen color blocks
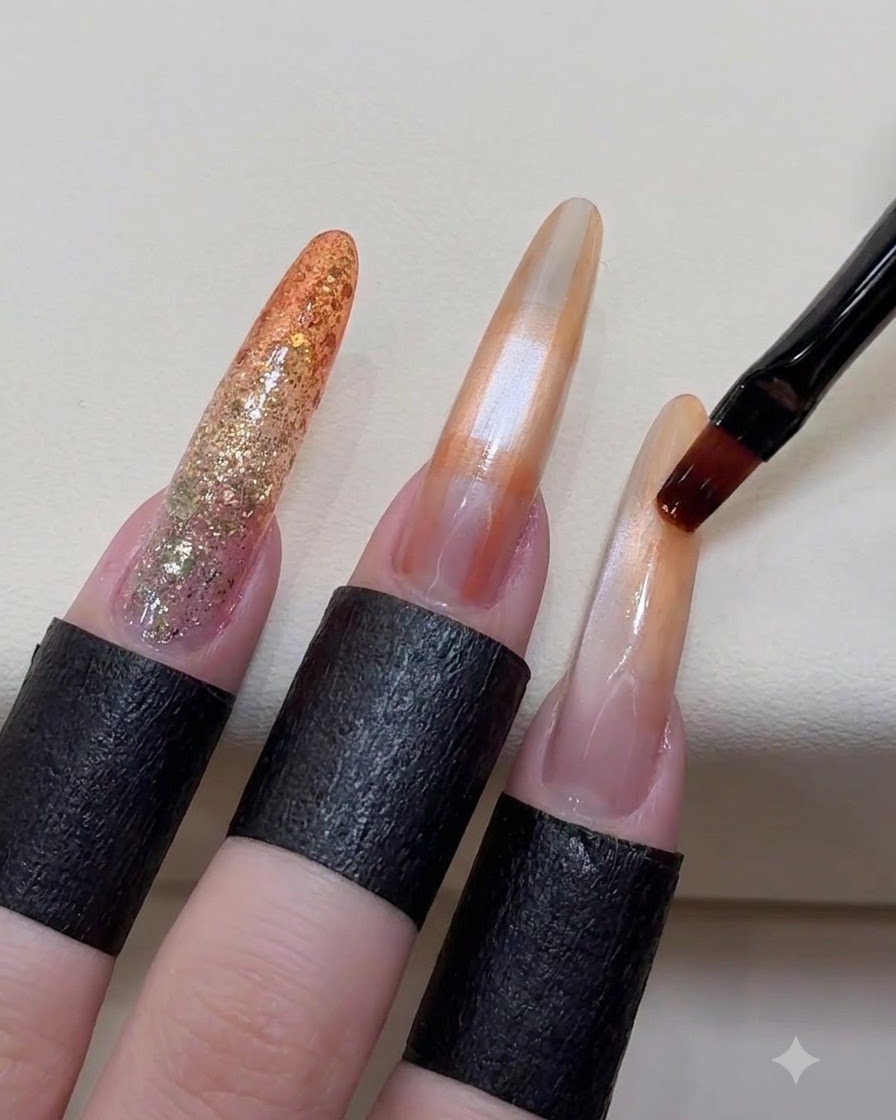
Gently blend the edges of the color blocks on the index finger to create smooth transitions. Apply additional color locally where needed to deepen specific areas and add rich dimension to the design.
Tip: Use a clean, damp brush or a blending tool to soften harsh lines and create a seamless gradient look between blocks. - 9Add champagne gold lines
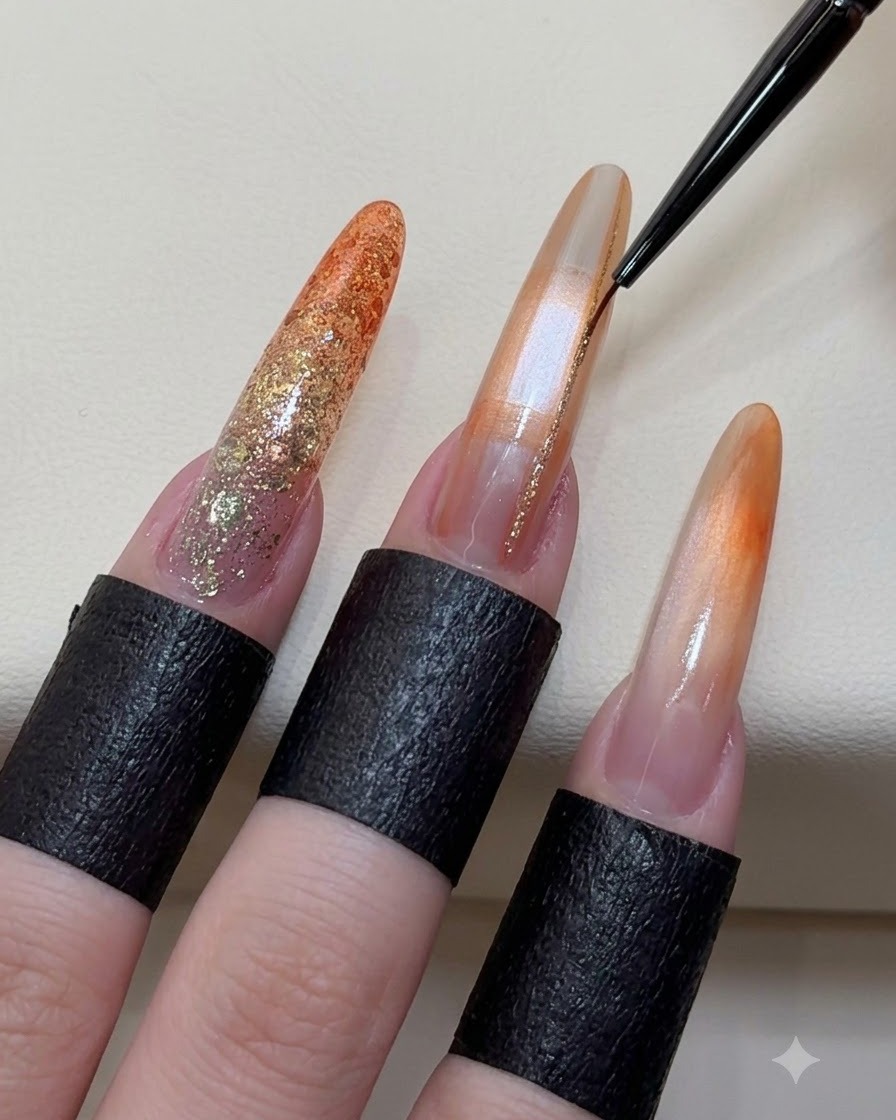
Using a fine liner brush with TAYE NAIL #C041 champagne gold gel, paint precise horizontal and vertical accent lines over the nail design. This adds a sophisticated metallic highlight that ties the whole look together.
Tip: Flash cure for a few seconds after painting straight lines if you want to lock them in place before adding more details. - 10Apply top coat
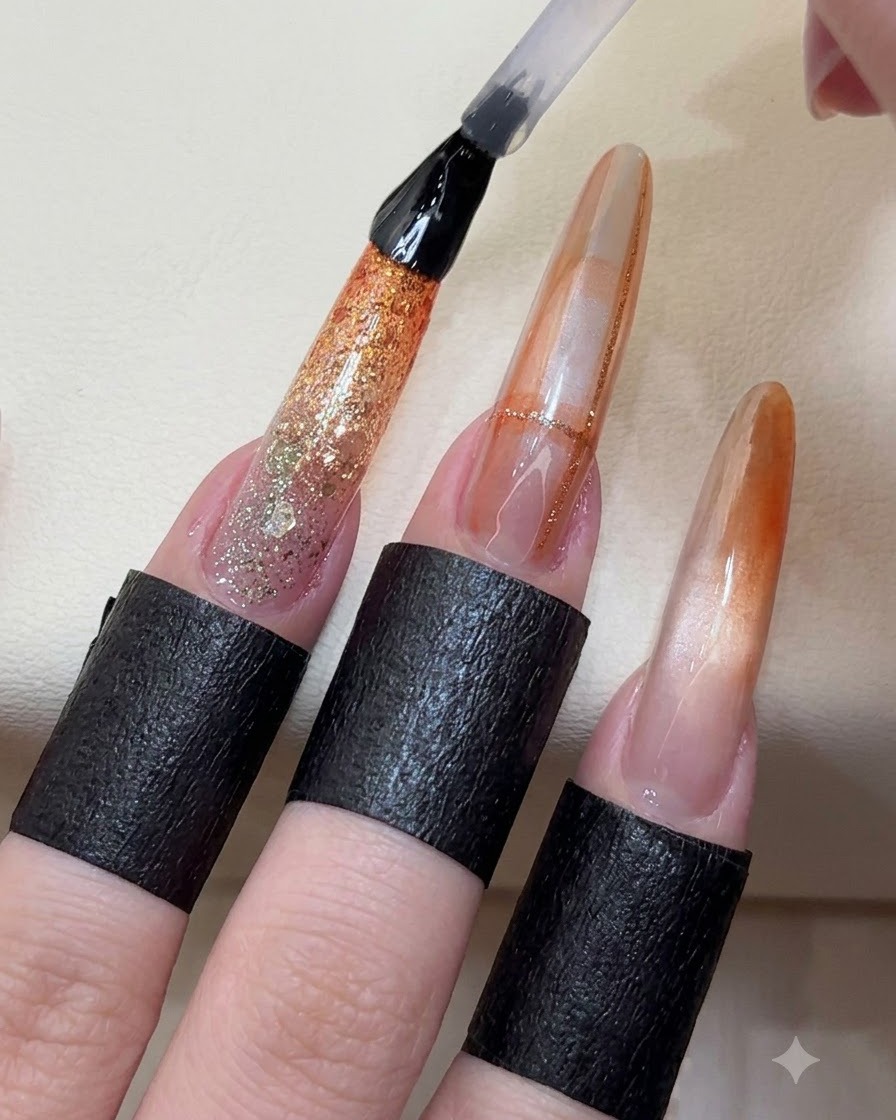
Apply an even layer of TAYE NAIL #M009 top coat over all the decorated nails to completely seal the design and provide a long-lasting high-gloss shine. Cap the free edge securely to prevent chipping.
Tip: Ensure every piece of nail art and glitter is fully covered by the top coat to prevent premature peeling or rough edges.