Aurora Chrome Cat-Eye French Nails — Elegant Winter Tutorial
Create an enchanting winter manicure featuring aurora chrome gradients, cat-eye depth, and delicate snowflake crystal accents in this step-by-step guide.
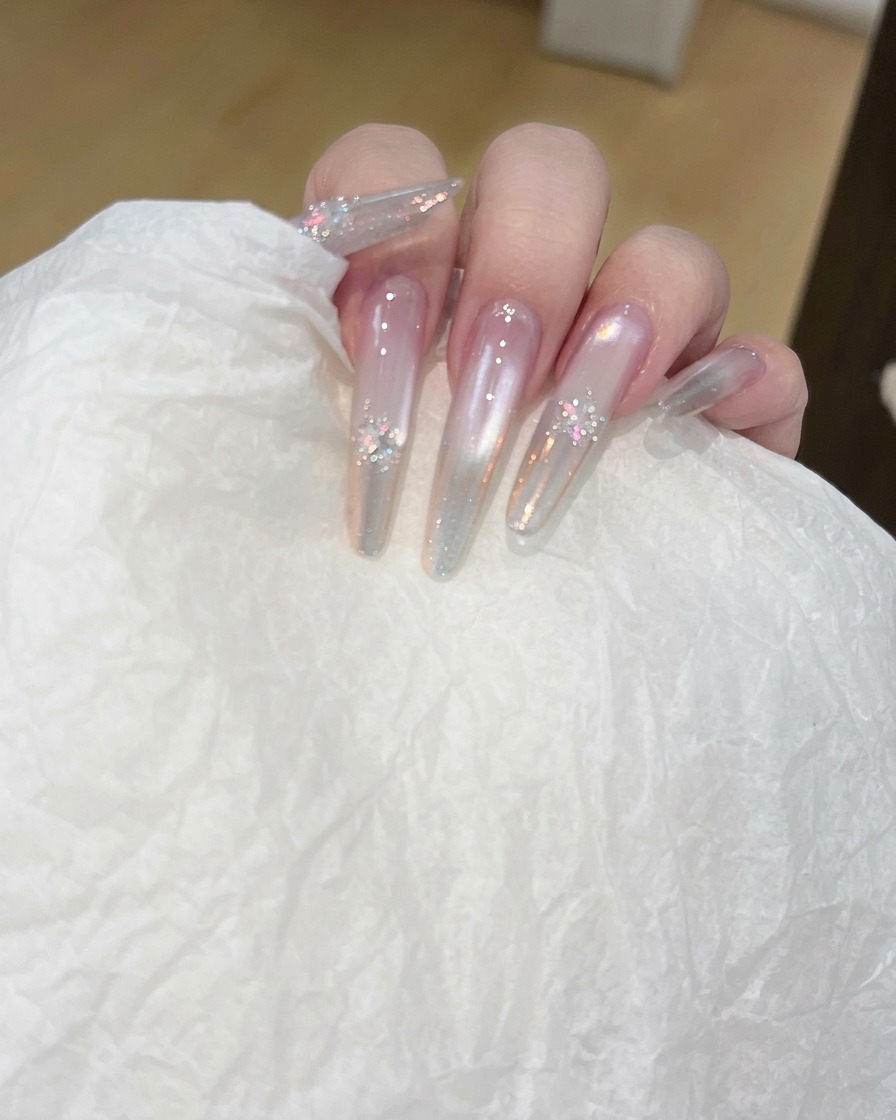
The aurora chrome cat-eye look is the perfect fusion of ethereal shimmer and sophisticated design. By layering a soft nude cat-eye base with iridescent chrome powder and delicate silver detailing, you can achieve a multidimensional finish that catches the light beautifully from every angle. This tutorial breaks down the process of combining these trending techniques into a cohesive, winter-inspired nail art look.
Steps
- 1Clean the nail surface
Use a lint-free pad dampened with nail cleanser or alcohol to thoroughly wipe the nail surface. This removes any sticky inhibition layer or dust, ensuring a clean base for the following application steps.
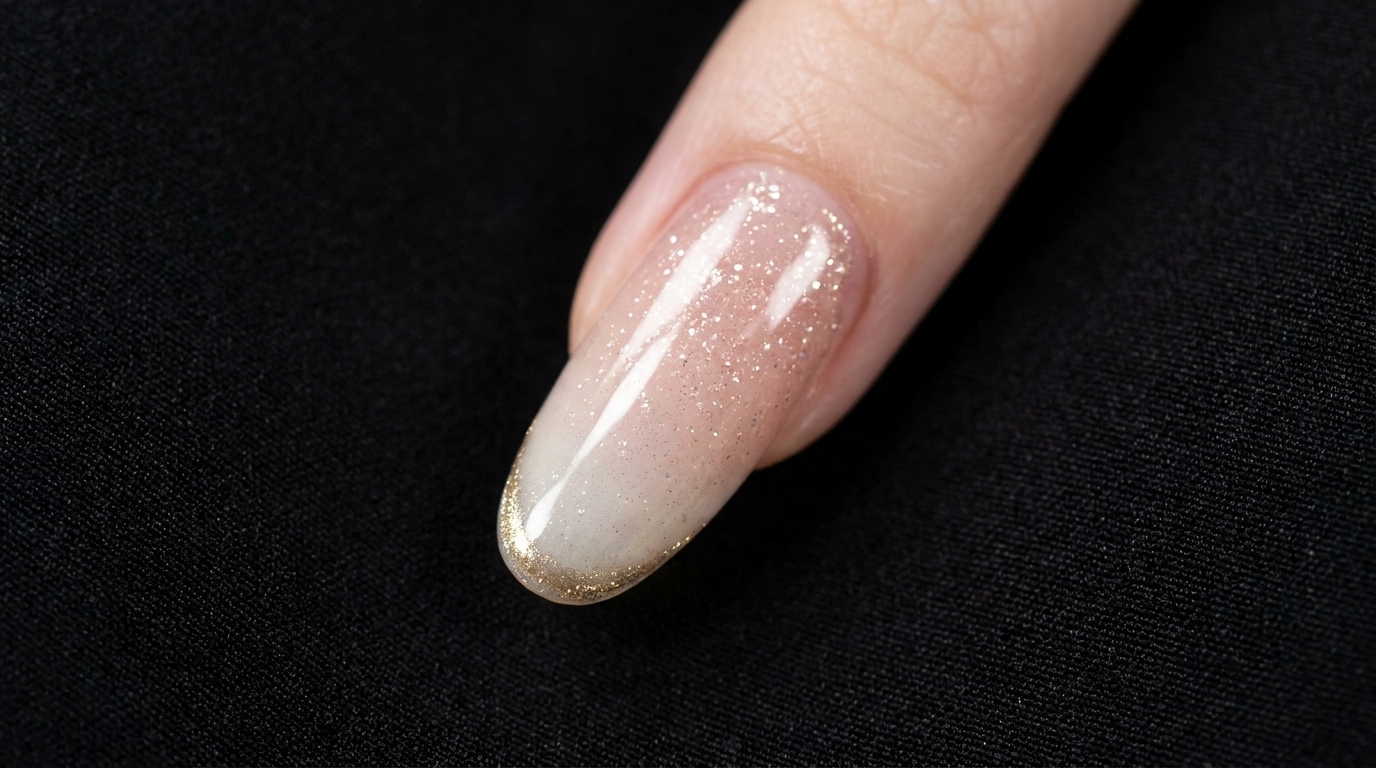
Tip: Make sure the nail is completely dry before moving to the next step to ensure proper adhesion of the base. - 2Apply nude cat-eye gel polish
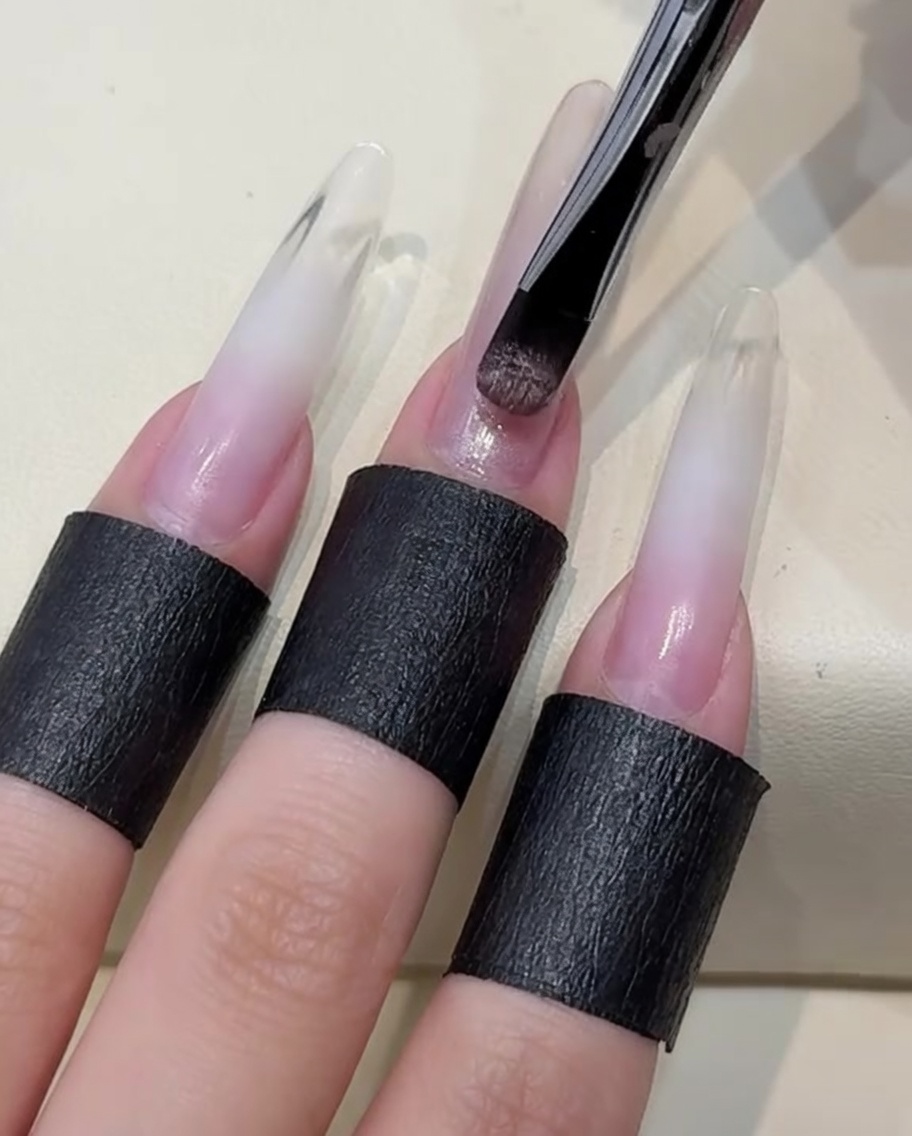
Apply a thin, even coat of nude cat-eye gel polish over the entire nail plate. Take care to avoid the cuticle and skin areas for a professional finish.
Tip: Apply the gel in thin layers to prevent pooling or wrinkling during the curing process. - 3Create the cat-eye effect
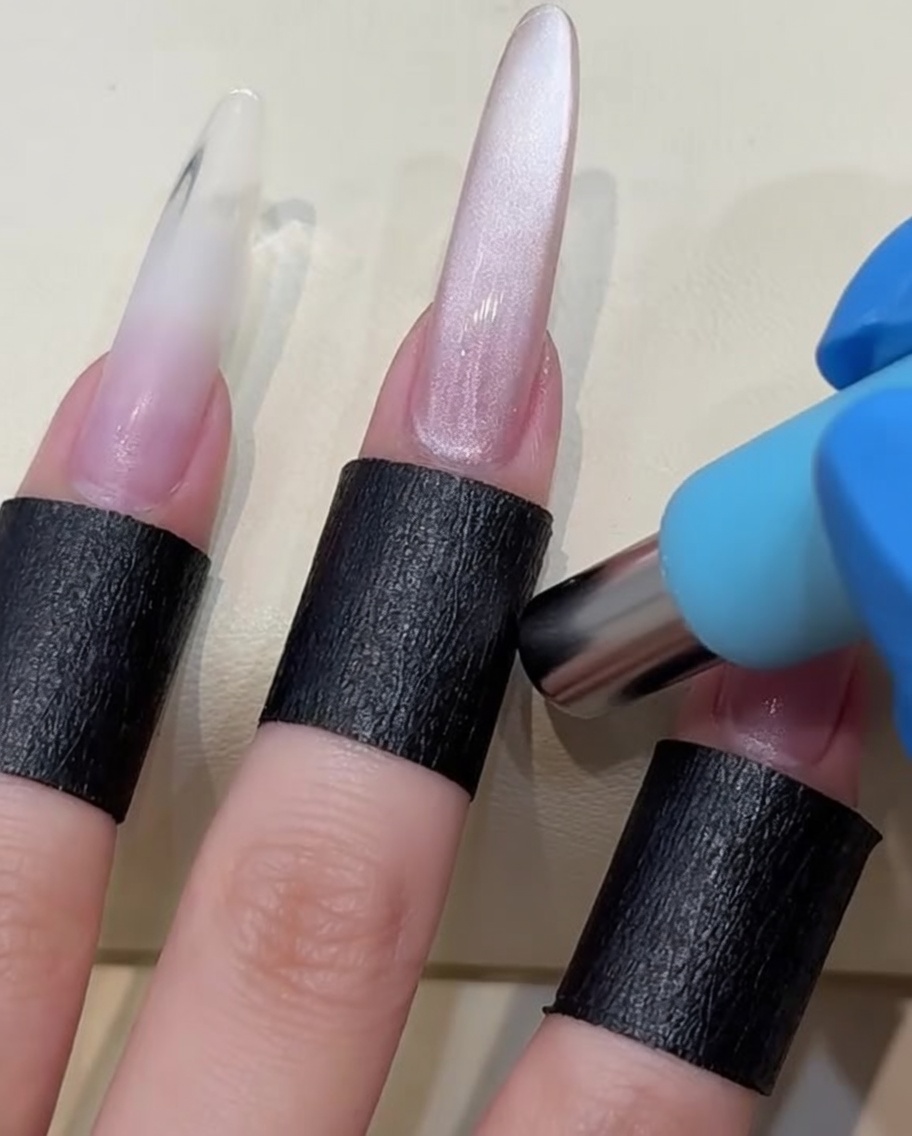
While the gel is still wet, hold a cylindrical magnet near the nail without touching it. Move the magnet to manipulate the magnetic particles within the polish to create your desired cat-eye pattern.
Tip: Experiment with different magnet angles to create unique patterns like diagonal, straight, or curved lines. - 4Apply non-wipe top coat
Apply a layer of non-wipe top coat over the cured cat-eye effect. This provides a smooth surface for the chrome powder to adhere to.
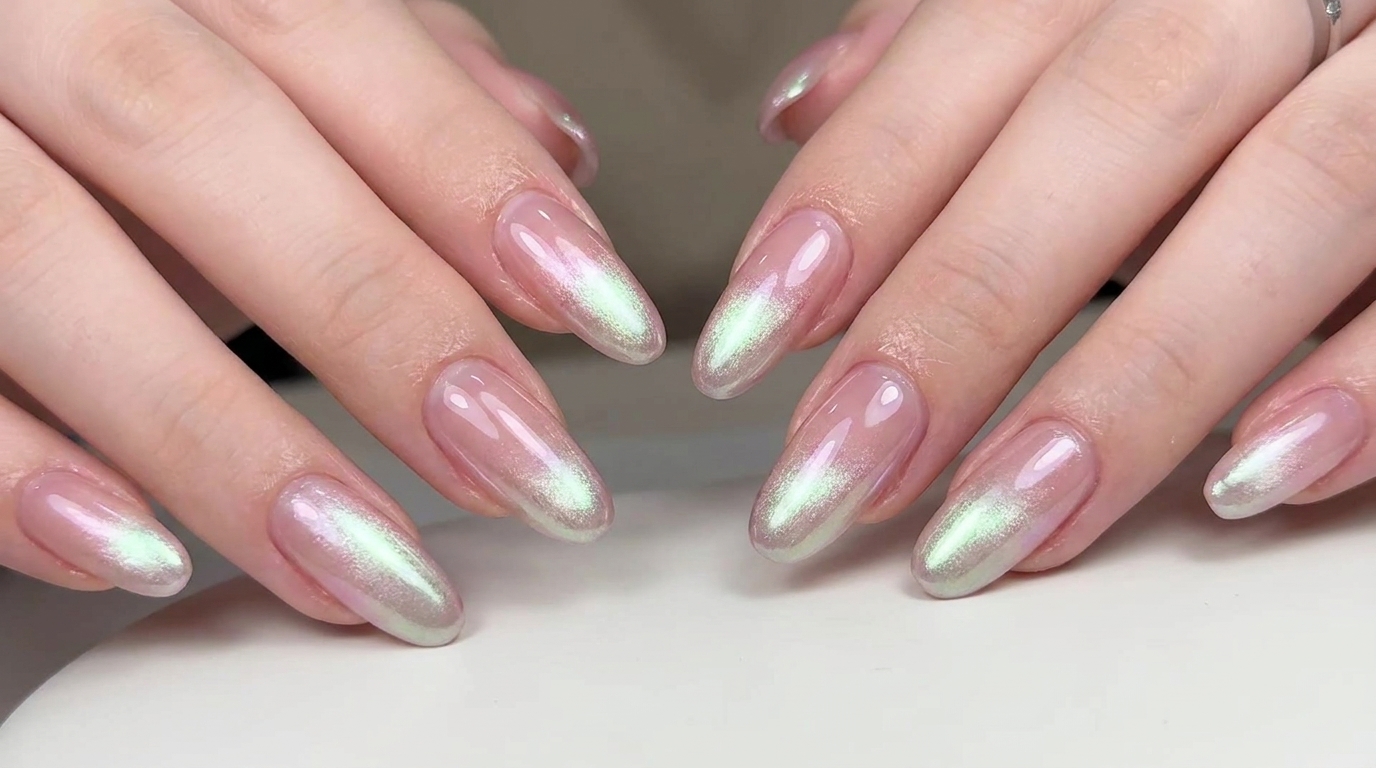
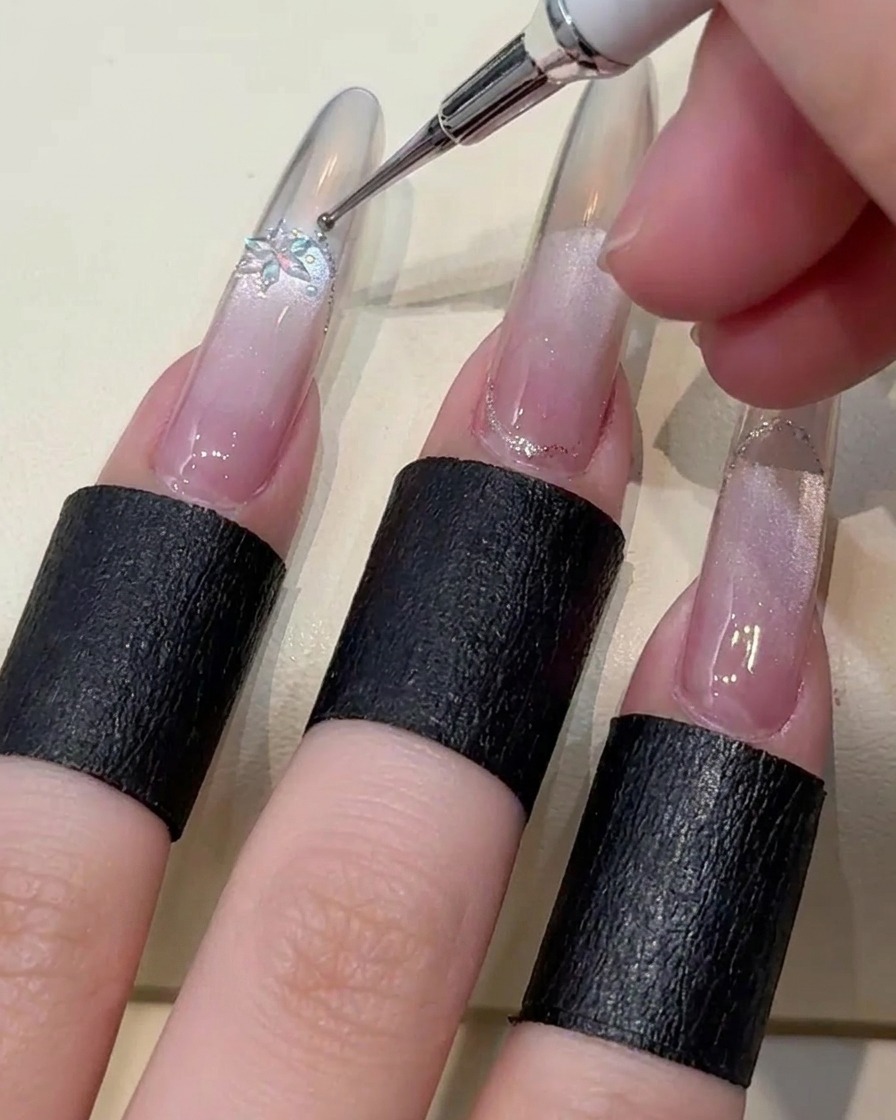
Tip: Ensure the entire surface is covered evenly to prevent patches when applying the chrome powder. - 5Apply aurora chrome powder
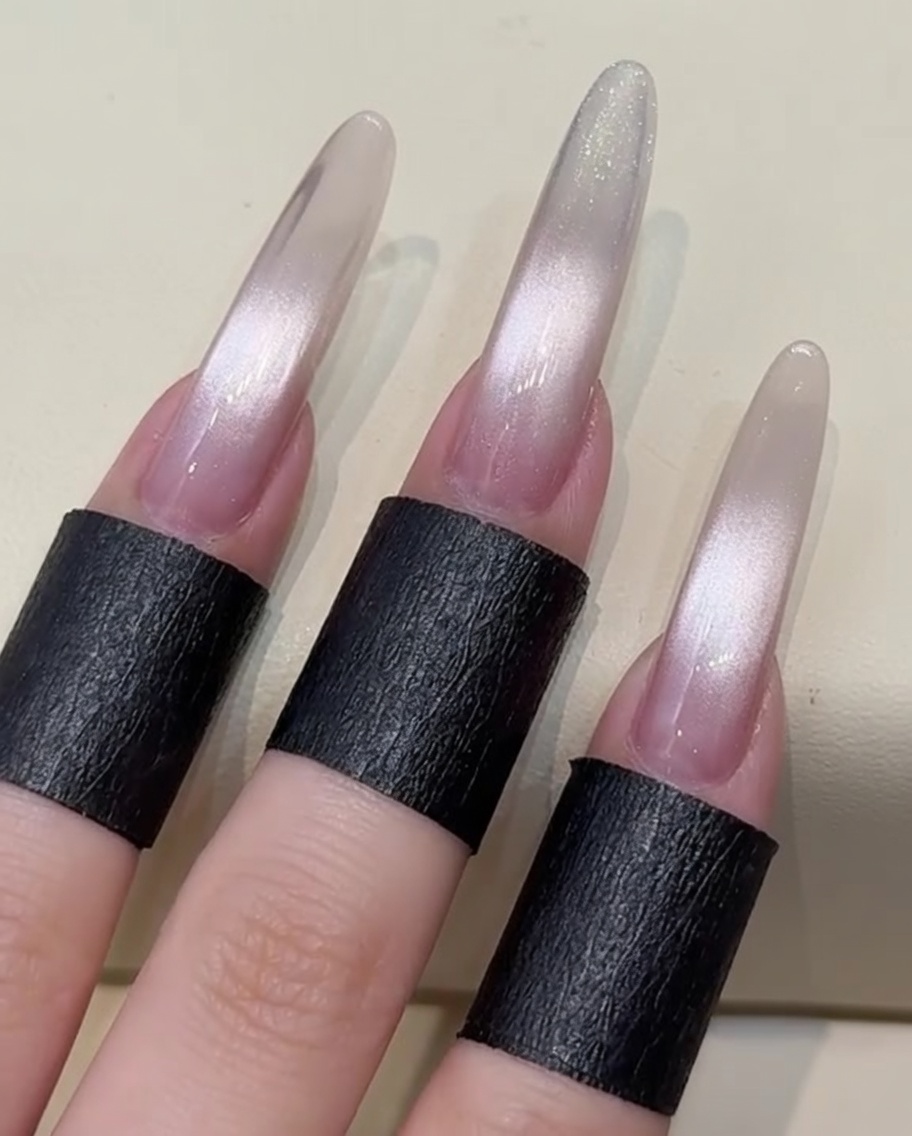
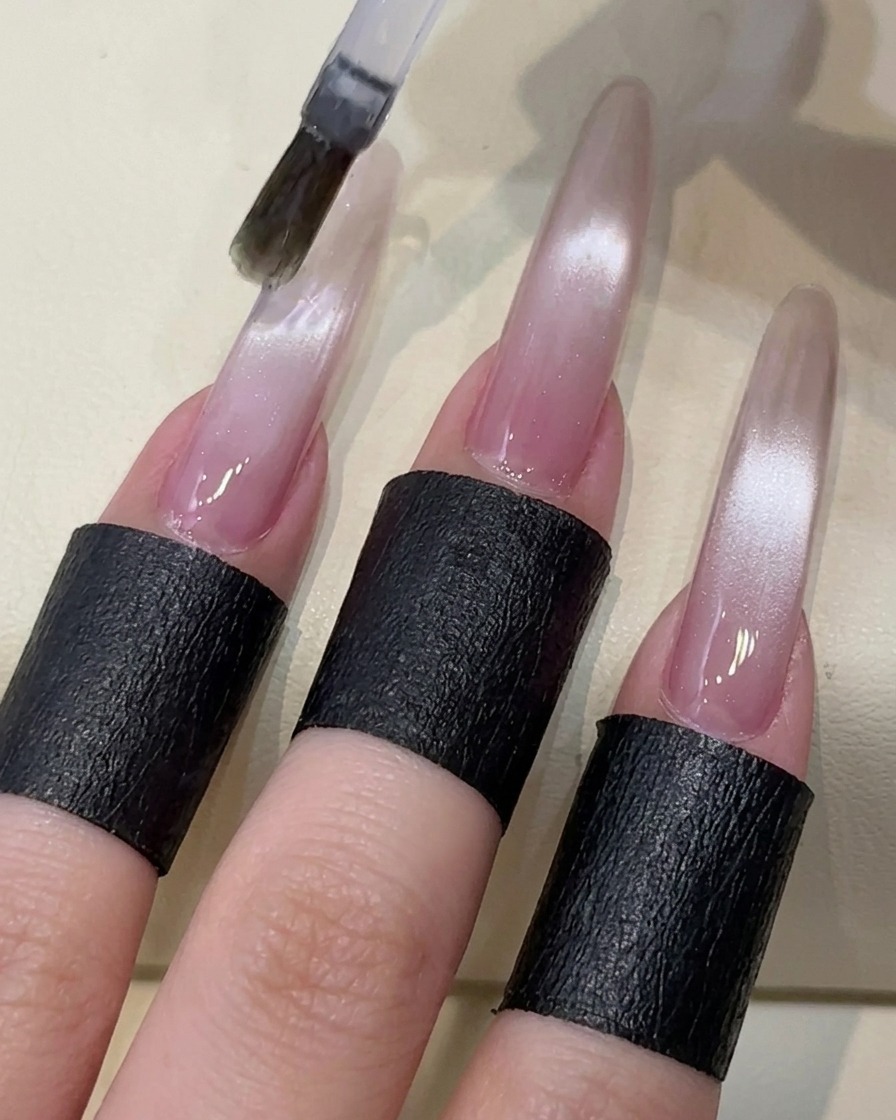
Using an applicator, gently buff the aurora chrome powder onto the tip half of the nail. The powder will adhere to the top coat, creating a reflective, iridescent finish.
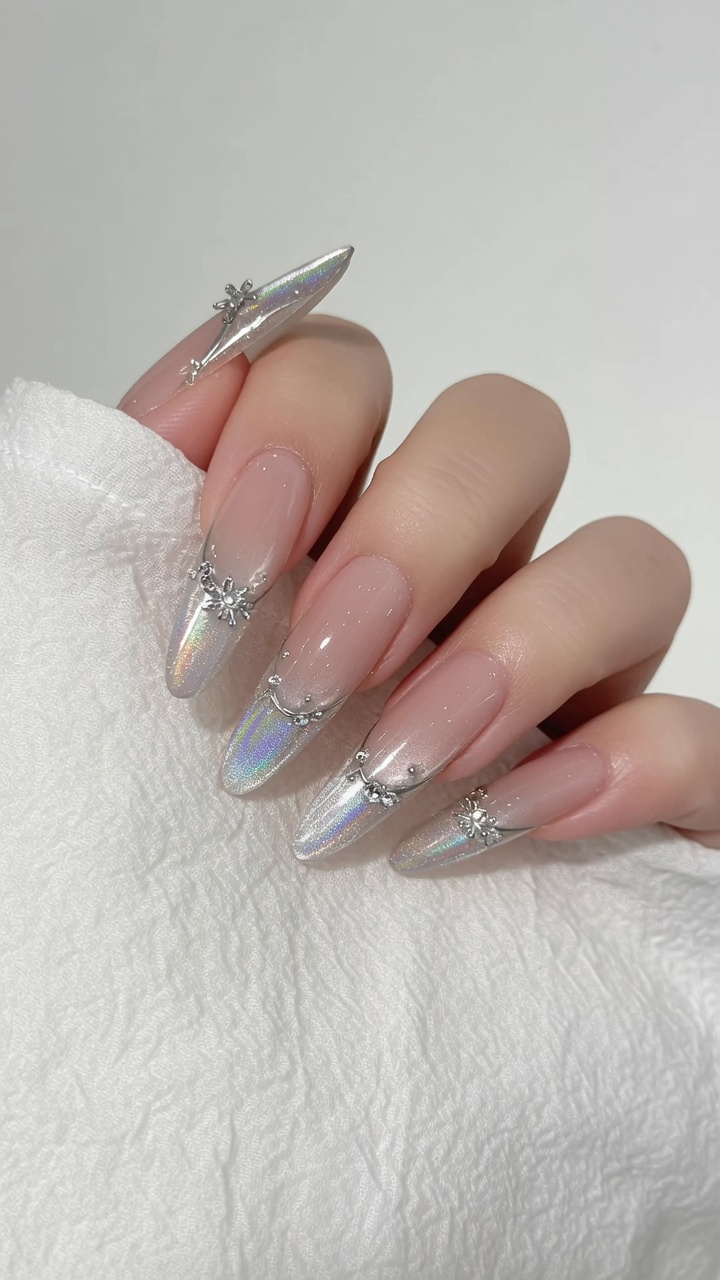
Tip: A little powder goes a long way; start with a small amount and add more if needed to build the desired opacity. - 6Draw a French tip line
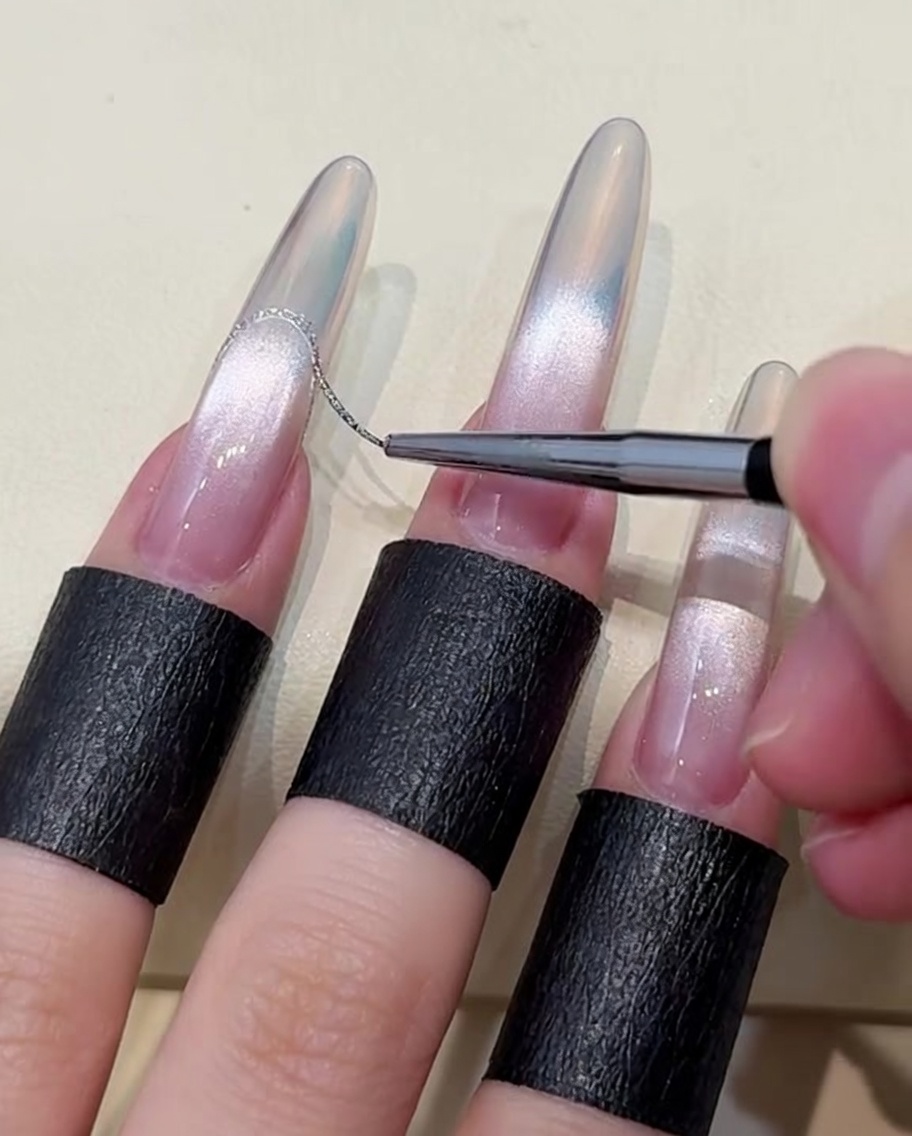
Using a fine liner brush and platinum silver gel, carefully draw a precise French tip line along the smile line of your nails. This adds an elegant, shimmering detail that enhances the cat-eye gradient effect. Ensure the line is smooth and even for a professional finish.
Tip: Keep a light hand to ensure the line remains delicate and does not become too thick or uneven. - 7Apply and cure top coat
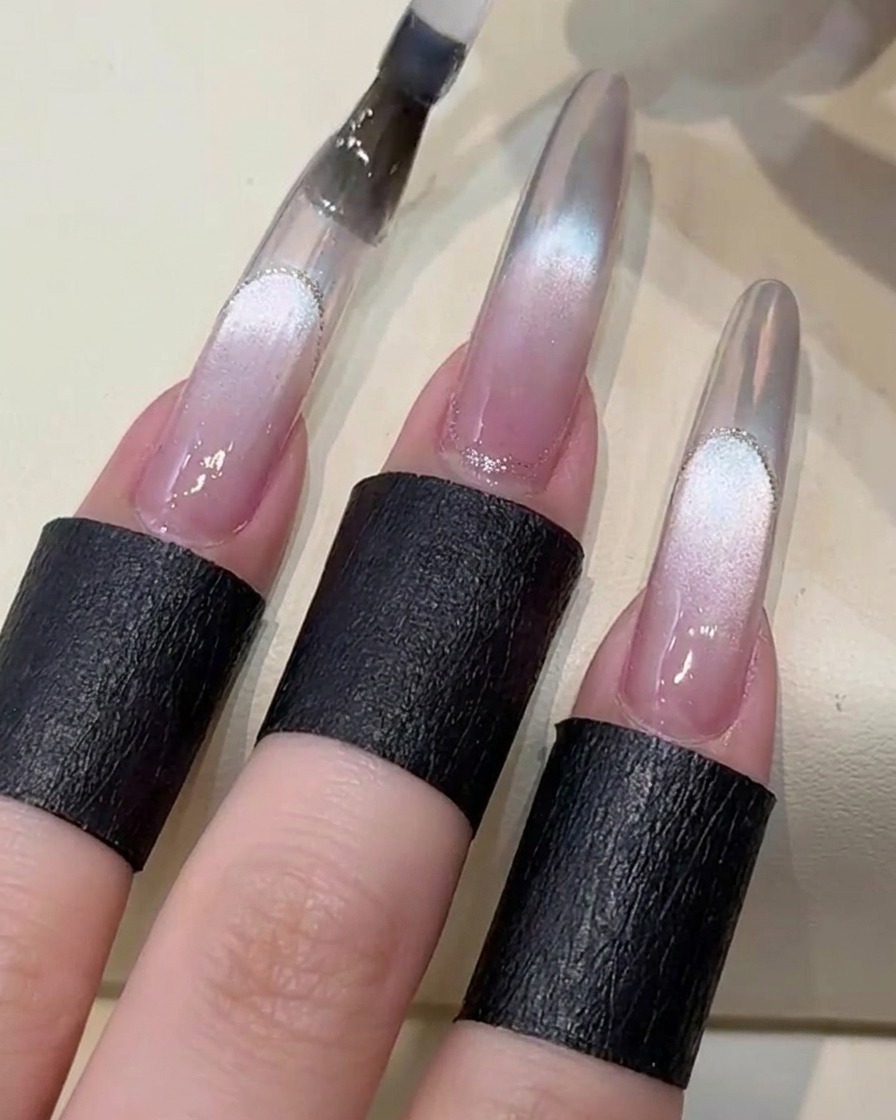
Apply a layer of reinforcing top coat over the entire nail surface to protect your design. Once applied, place your hand under the UV or LED lamp and cure for 20 seconds to set the layer before proceeding to the final decoration steps.
Tip: Ensure you cap the free edge of the nail with the top coat to improve durability and prevent chipping. - 8Prepare for embellishments
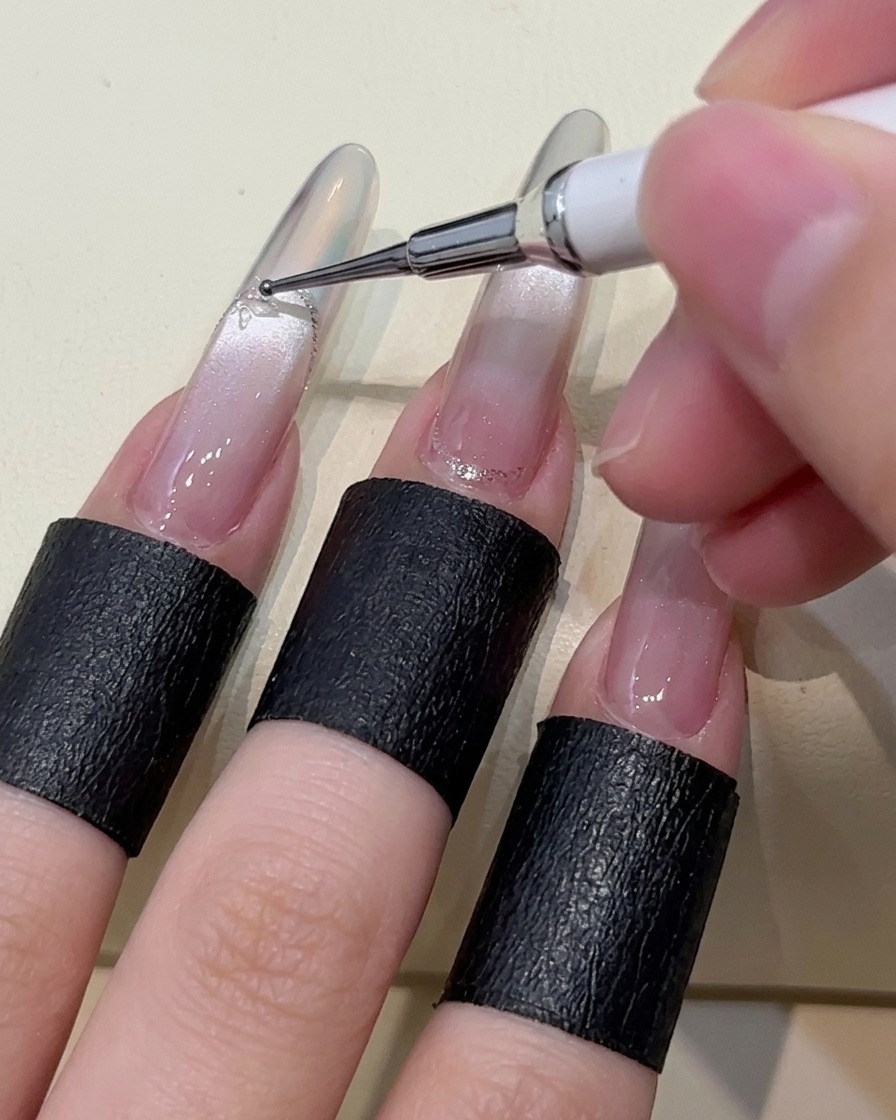
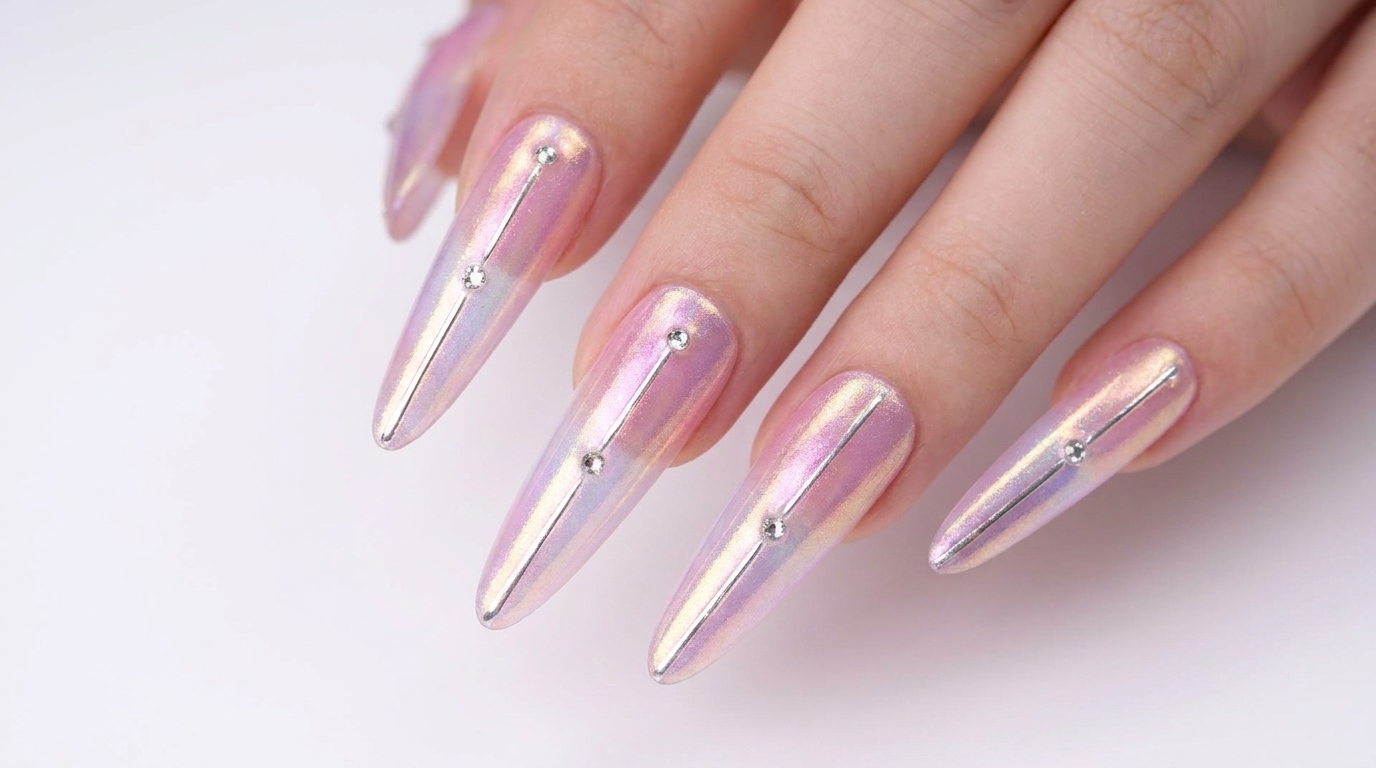
Apply small, precise dots of crystal adhesive gel onto the nail where you plan to place your snowflake crystals and steel beads. This specialized adhesive ensures that your decorations remain securely attached to the nail surface.
Tip: Use a dotting tool to place the adhesive accurately so you dont over-apply the gel, which can cause the stones to slip. - 9Attach crystals and beads
Using a pair of tweezers or a wax pencil, carefully pick up the snowflake-shaped crystal and tiny steel beads, placing them directly into the uncured adhesive gel. Arrange them in your desired pattern to create a sophisticated, winter-themed accent.
Tip: Place the crystals gently without pressing too hard, allowing the adhesive to encapsulate the base for a secure hold. - 10Accent the index finger
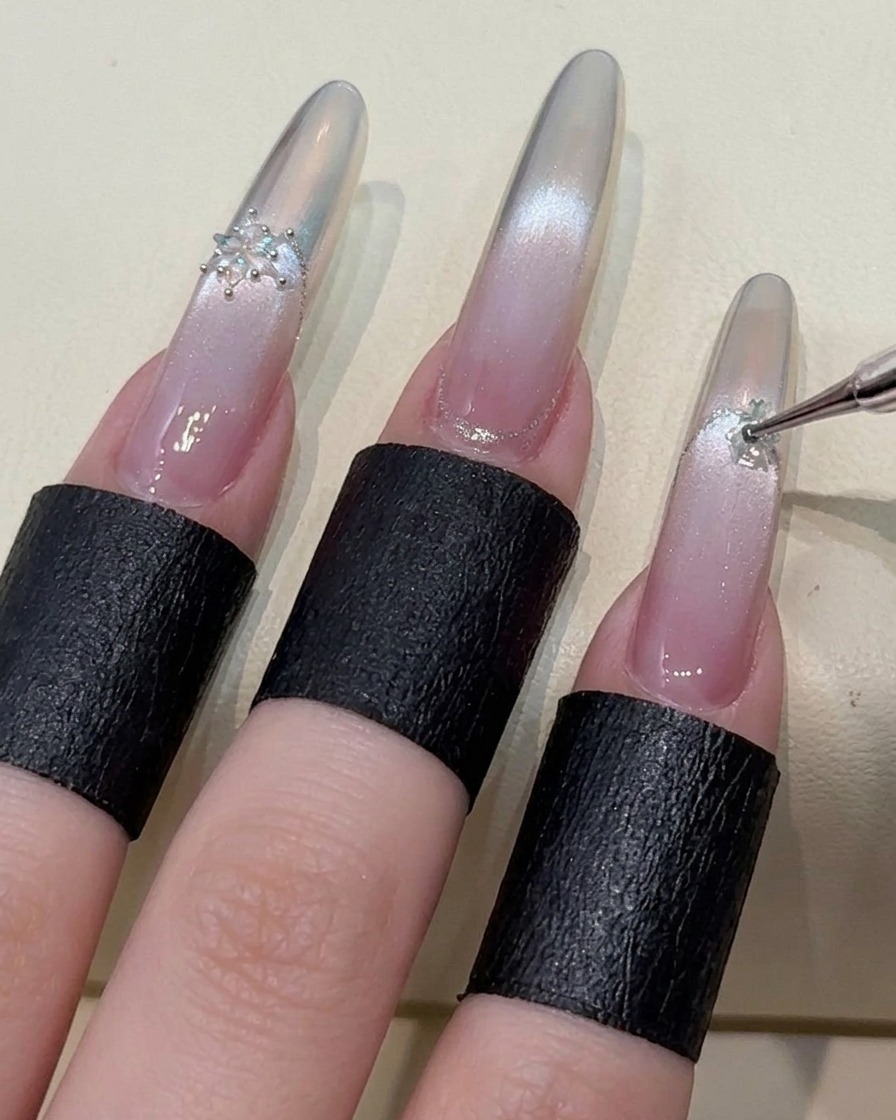
Focus on the index finger by applying an additional snowflake crystal accent to complete the aesthetic. Ensure this piece is aligned correctly with the overall design and matches the placement on the other nails for a balanced look.
Tip: Check the symmetry across your hands to ensure the accent placement looks intentional and uniform. - 11Seal and finish
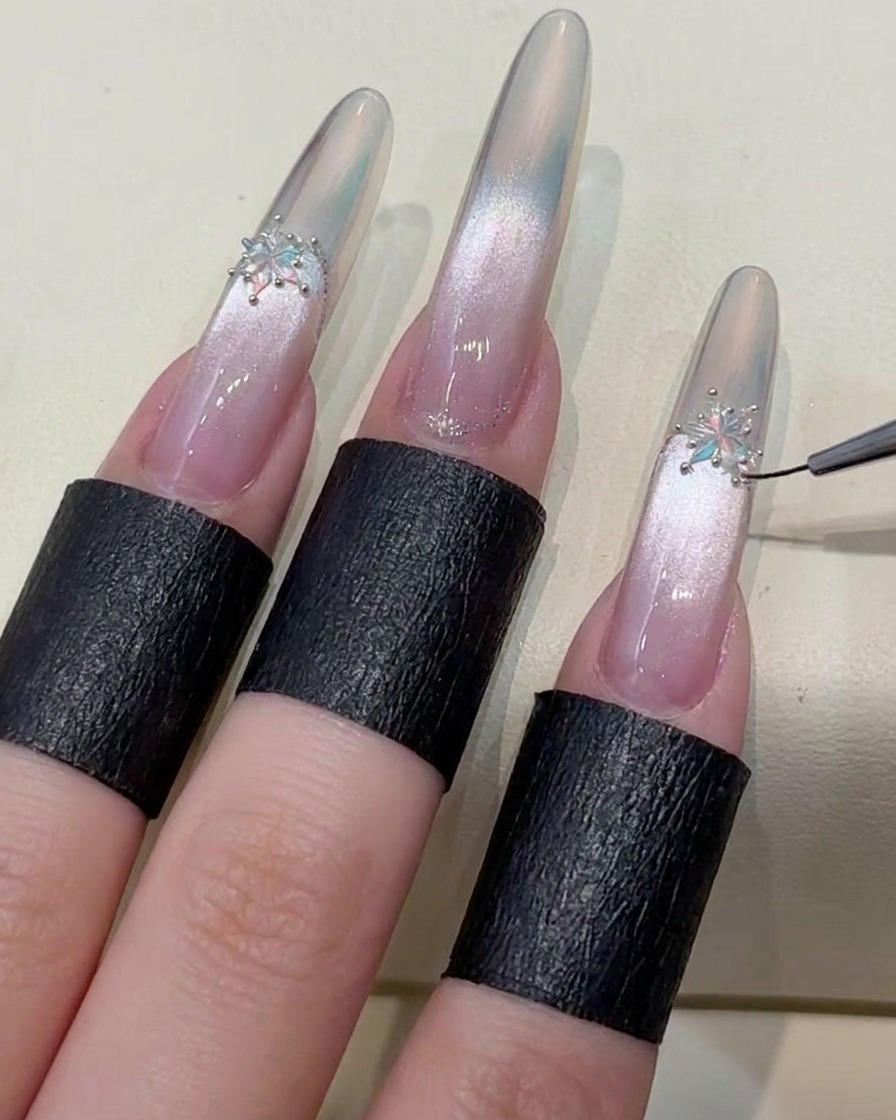
Finally, apply a hard-style top coat along the edges of the nail and around the crystals to lock the design in place and provide a durable, glossy finish. This step is crucial for preventing the embellishments from snagging and ensuring the manicure lasts.
Tip: Be careful to avoid covering the face of the crystals with too much top coat, as this can dull their shine.