Aurora Gradient Cat-Eye Nails — Elegant Shimmer Tutorial
Create a mesmerizing aurora effect with this simple gradient cat-eye technique. Perfect for an ethereal, glass-bead finish that catches the light beautifully.
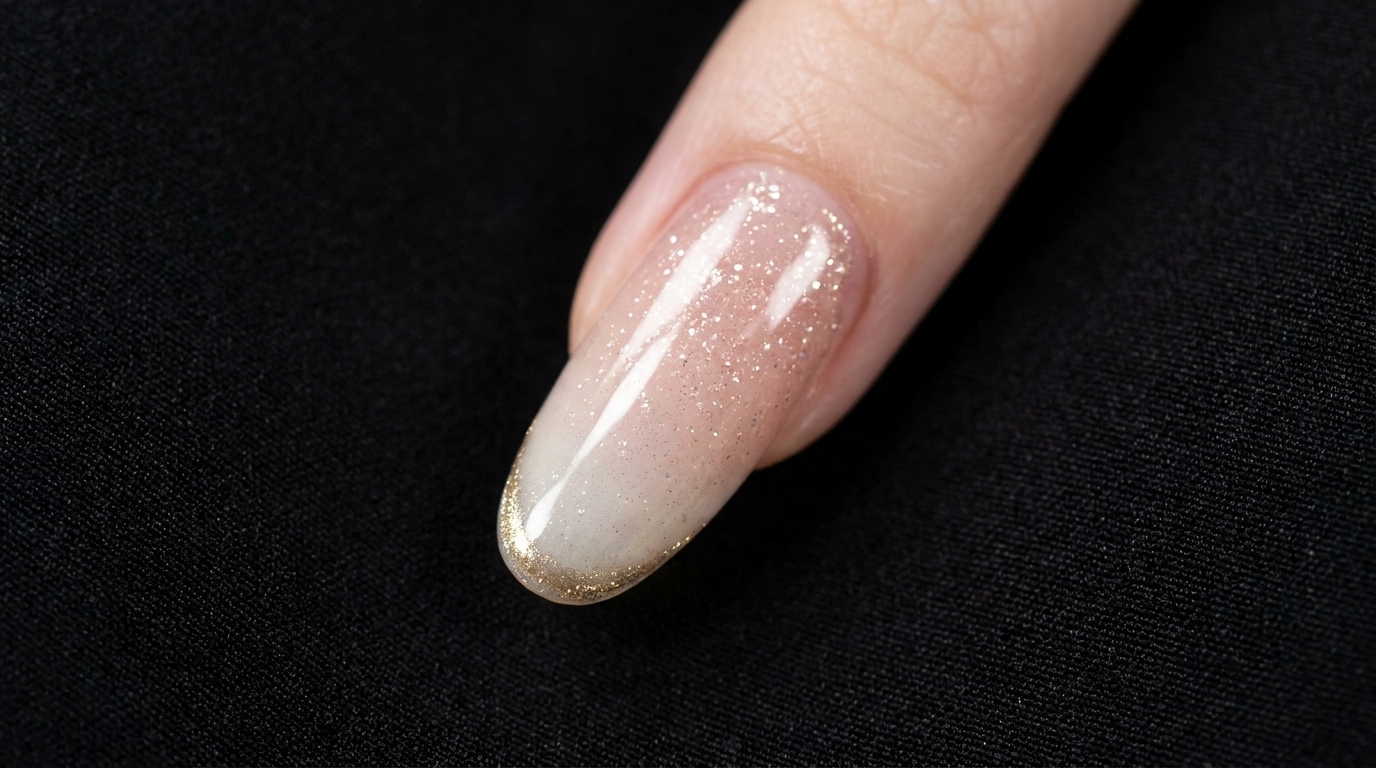
Step into the light with this stunning aurora gradient cat-eye look. By combining the depth of magnetic polish with the ethereal glow of chrome pigments, you can achieve a professional-looking, multidimensional manicure that shifts from pink to soft green right at your fingertips.
Steps
- 1Apply nude pink cat-eye gel
Apply a smooth, even layer of nude pink cat-eye gel polish to the entire nail plate. Ensure you cover the surface thoroughly while maintaining a thin, consistent application for an even magnetic effect.
Tip: Apply in thin layers to ensure the magnetic particles can move freely before curing. - 2Finalize gel application
Check that the nude pink cat-eye gel polish has full coverage across the entire nail surface, including the sides and near the cuticle, before moving on to the magnetic stage.
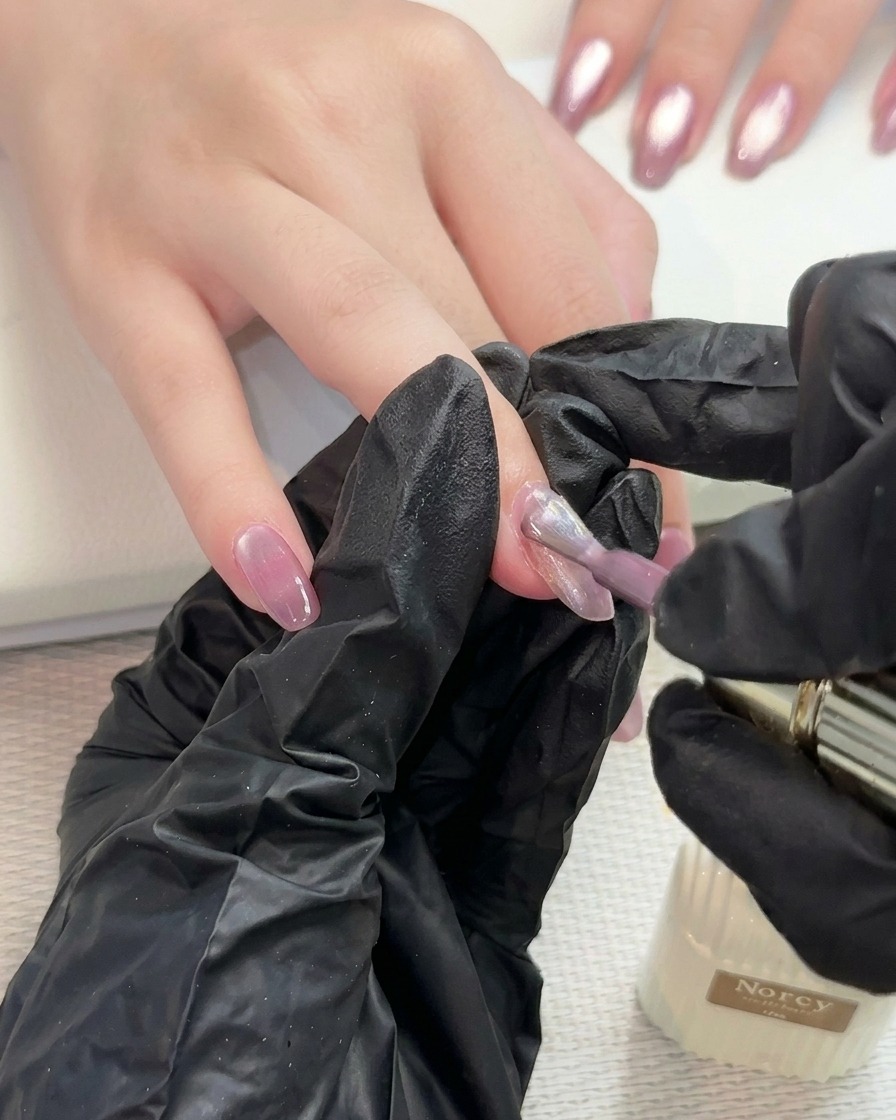
Tip: Check the edges of the nail under good lighting to ensure no patches were missed. - 3Position magnet for cat-eye effect
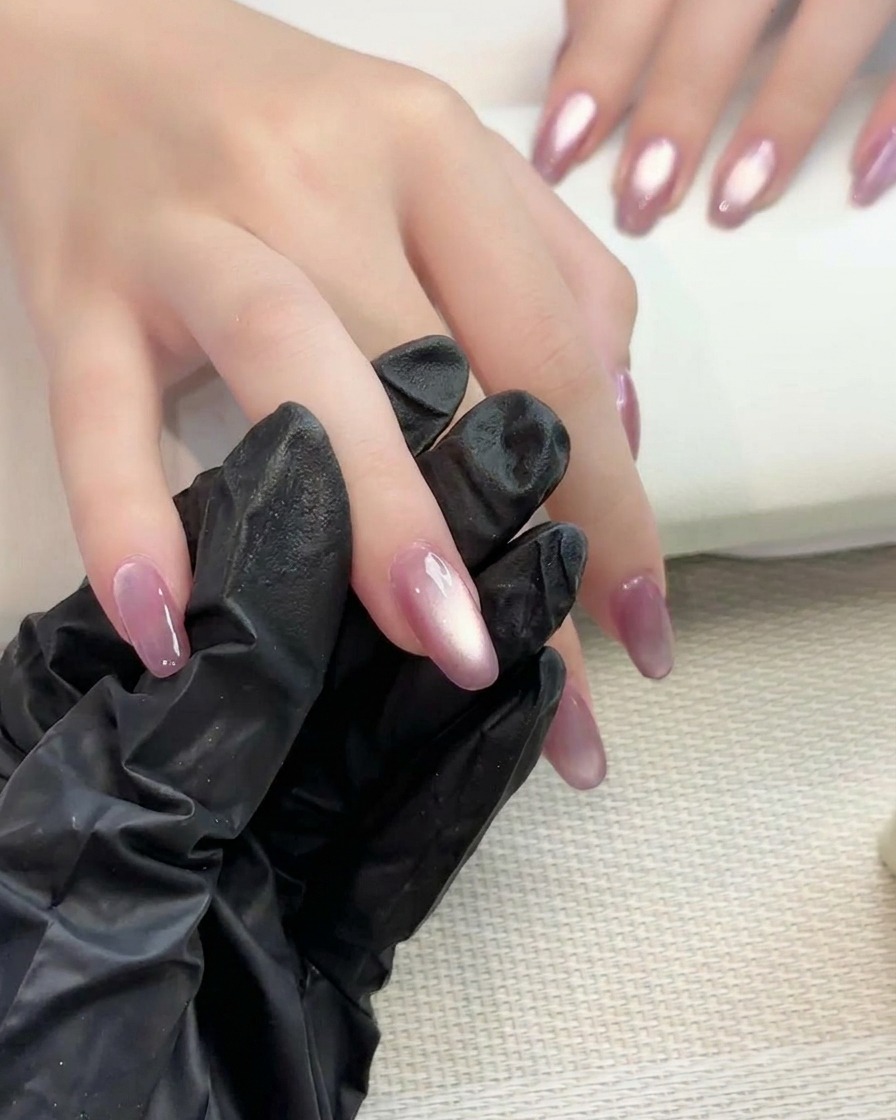
Hold your rectangular magnet close to the side edge of the nail without touching the wet gel. This action pulls the magnetic particles toward the side to create the initial depth and movement for the cat-eye pattern.
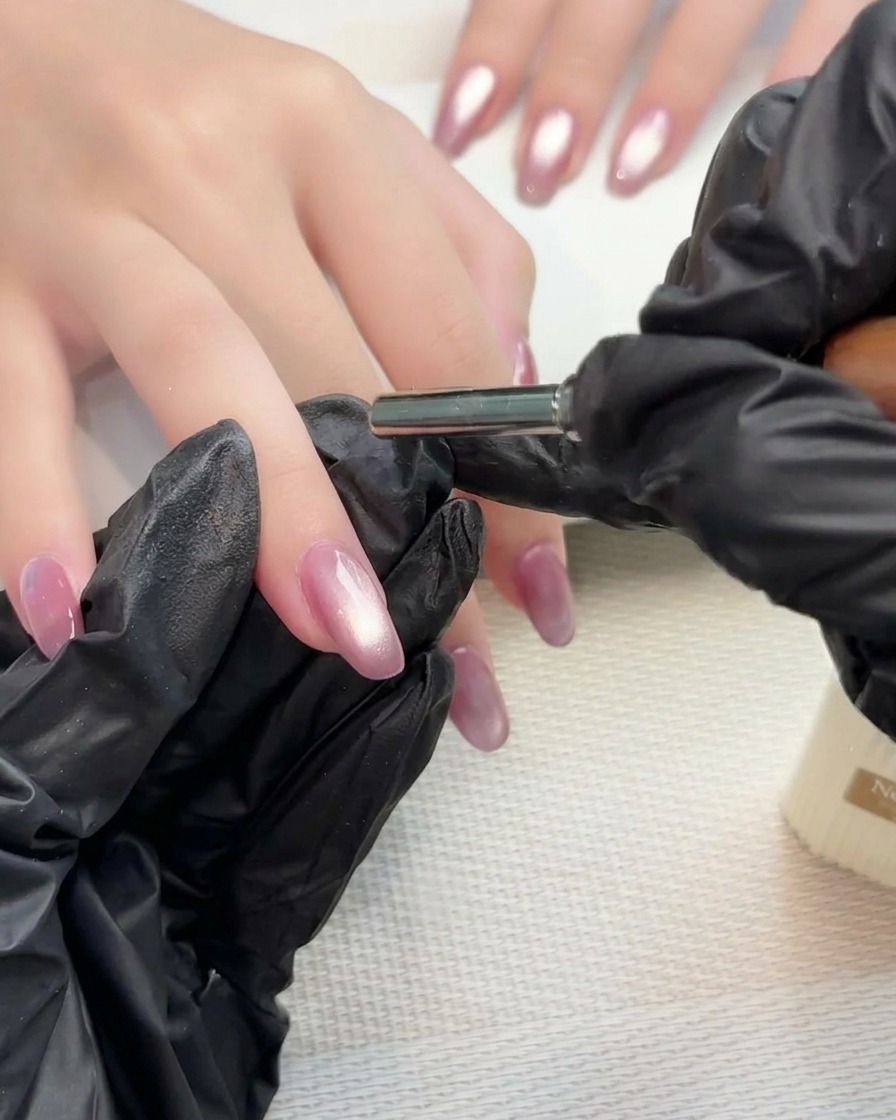
Tip: Keep the magnet steady to get a clean, sharp line, or move it slightly for a softer effect. - 4Create glass bead effect
Using a circular motion, move the magnet around the perimeter of the nail. This technique gathers the metallic particles toward the center, creating a concentrated, glass bead-like shimmer that gives the cat-eye look its depth.
Tip: Watch the shimmer closely as you move the magnet to get the placement just right before curing. - 5Cure the gel

Once you are satisfied with the magnetic pattern, immediately place the nail under the UV/LED lamp to cure. This locks the magnetic particles in place so the design does not shift.
Tip: Ensure the finger is placed flat and stable in the lamp to prevent the gel from pooling to one side. - 6Apply chrome-compatible top coat
After curing the cat-eye gel, apply a layer of non-wipe top coat specifically designed to adhere to chrome or aurora powders. This layer provides a smooth, tacky-free surface that is ideal for rubbing on pigments.
Tip: Cure this layer for the exact time recommended by the manufacturer to ensure the perfect surface for powder application. - 7Cure the top coat
Place your nails under the UV/LED lamp and cure the top coat for 30 seconds. This step is crucial as it prepares the surface for the aurora powder application, providing the necessary tacky layer for the powder to adhere to.
Tip: Ensure your hand is placed flat and stable inside the lamp to get an even cure across all fingers. - 8Begin aurora powder application
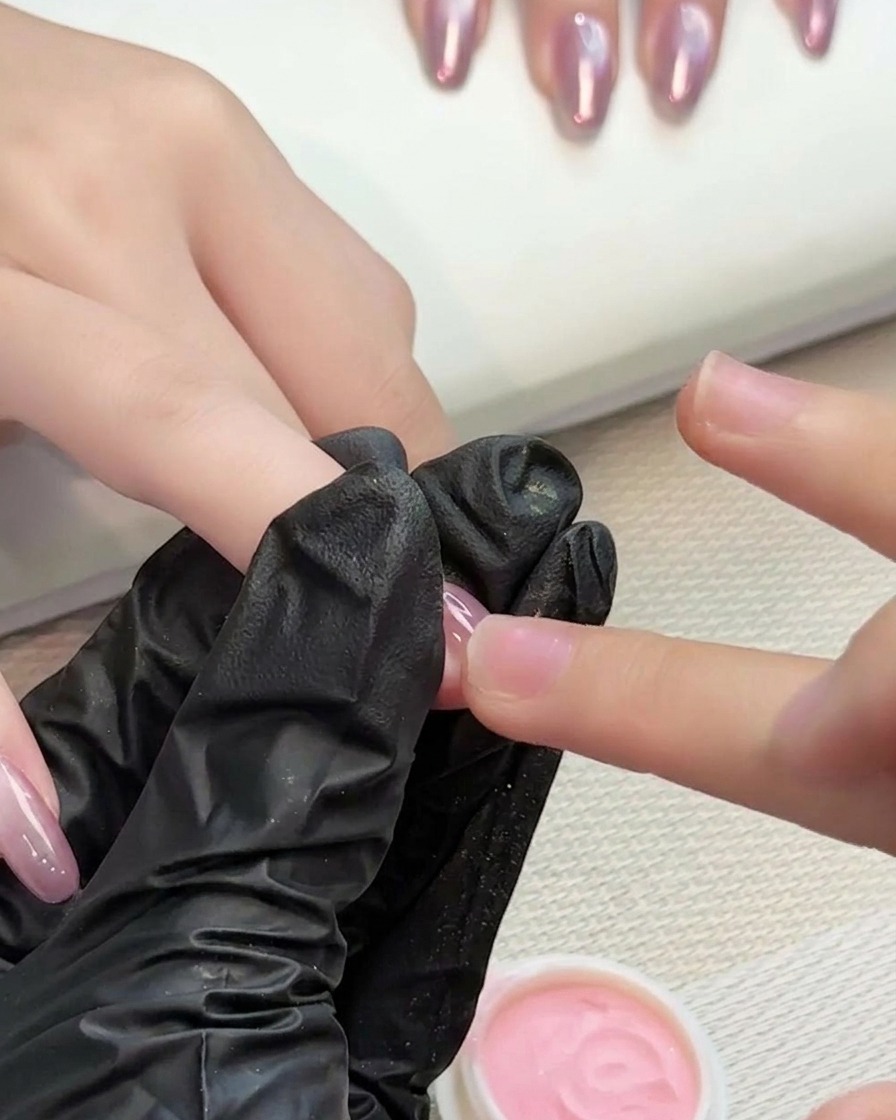
Using a sponge applicator or a gloved finger, pick up a small amount of the iridescent pink aurora chrome powder. Gently begin rubbing the powder onto the tip of the nail, focusing the intensity at the very end.
Tip: A little powder goes a long way. Start with a light amount and build up the intensity as needed. - 9Create the gradient effect

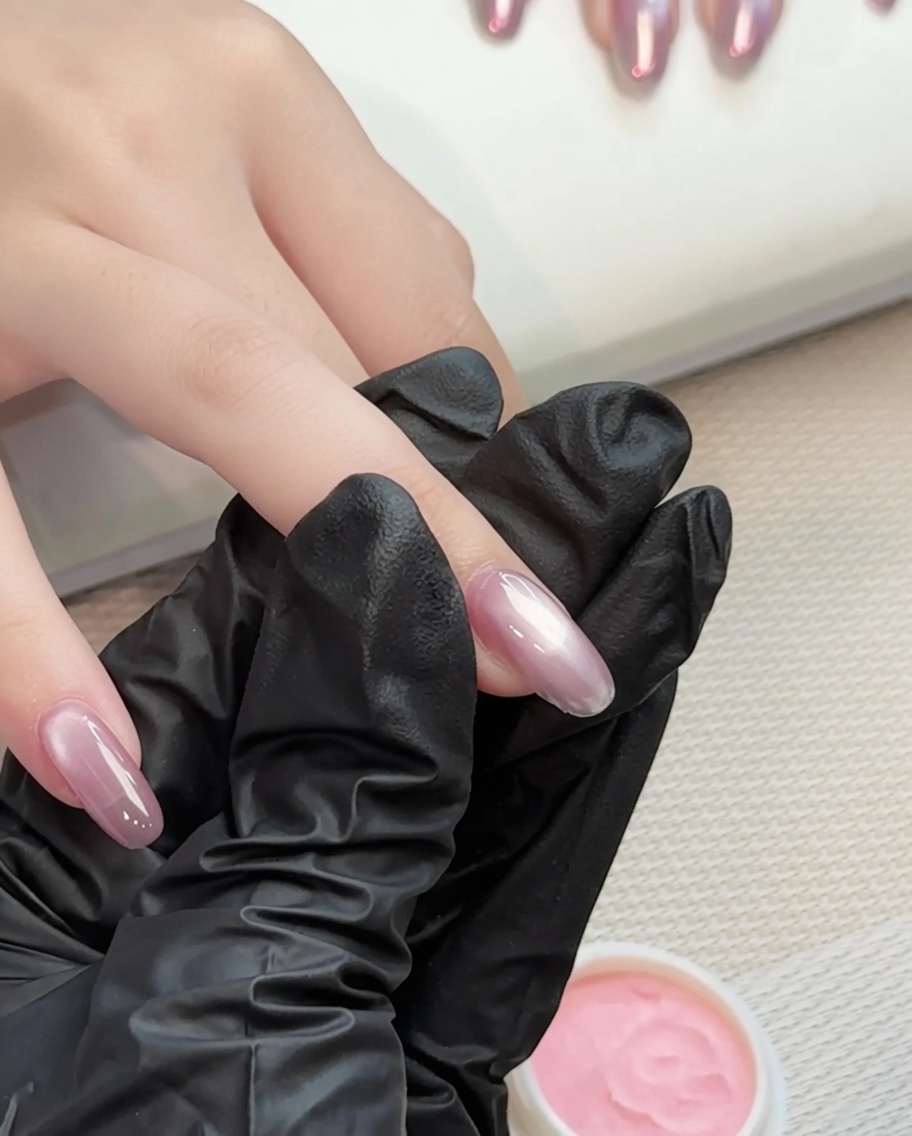
Continue rubbing the powder from the nail tip and gently blend it upwards towards the cuticle area. This creates a soft, shimmering gradient where the aurora effect is strongest at the tip and fades into the pink base coat.
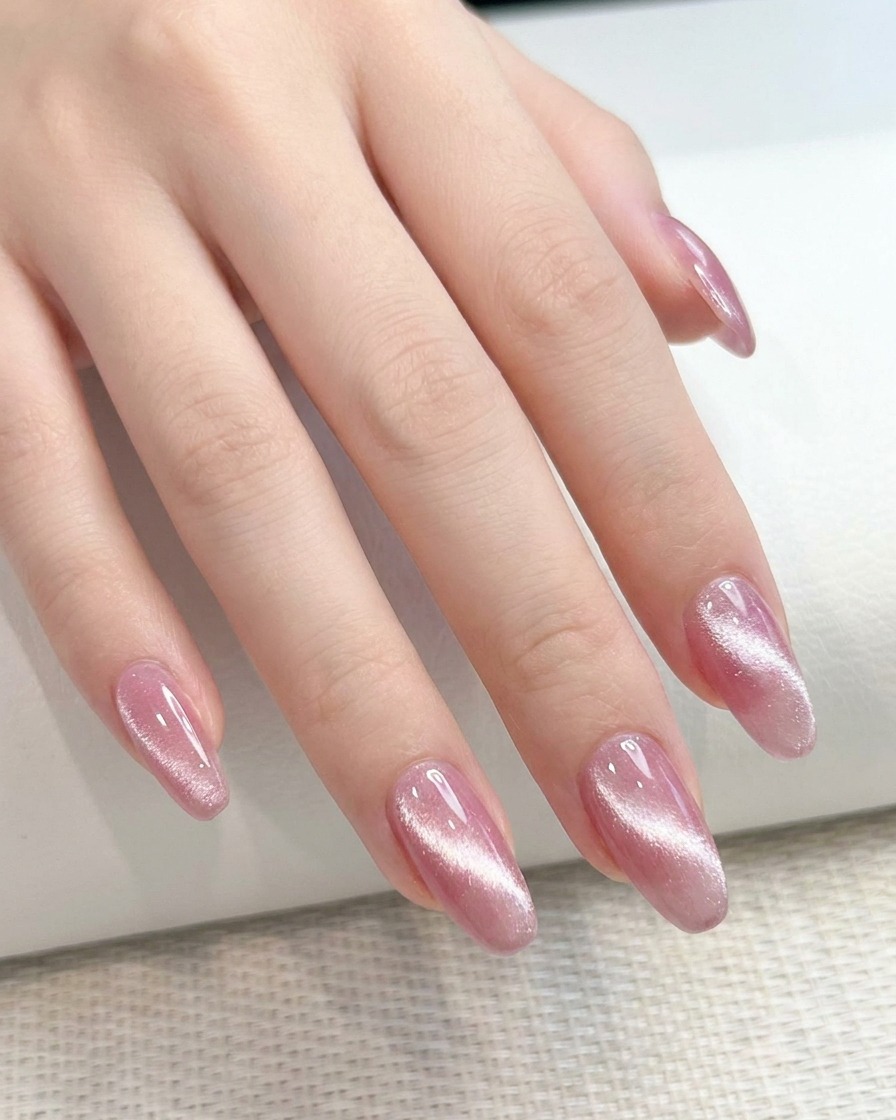
Tip: Use light pressure and circular motions to ensure the powder blends seamlessly without harsh lines. - 10Verify the gradient
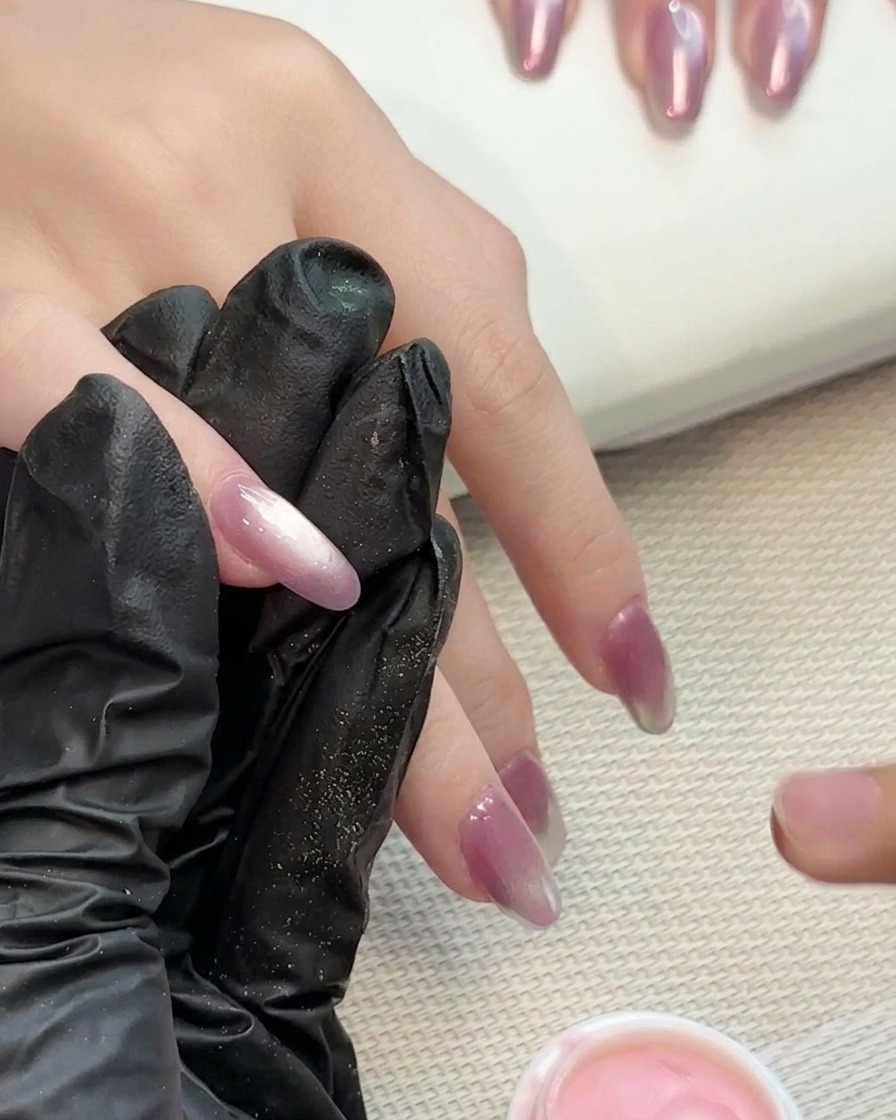
Examine the nail to ensure the aurora chrome gradient is smooth and even. The transition from the dense powder at the tip to the translucent pink base should be seamless and shimmering.
Tip: If there are any patchy areas, lightly dab a tiny bit more powder and buff it in until the finish is uniform. - 11Seal the design

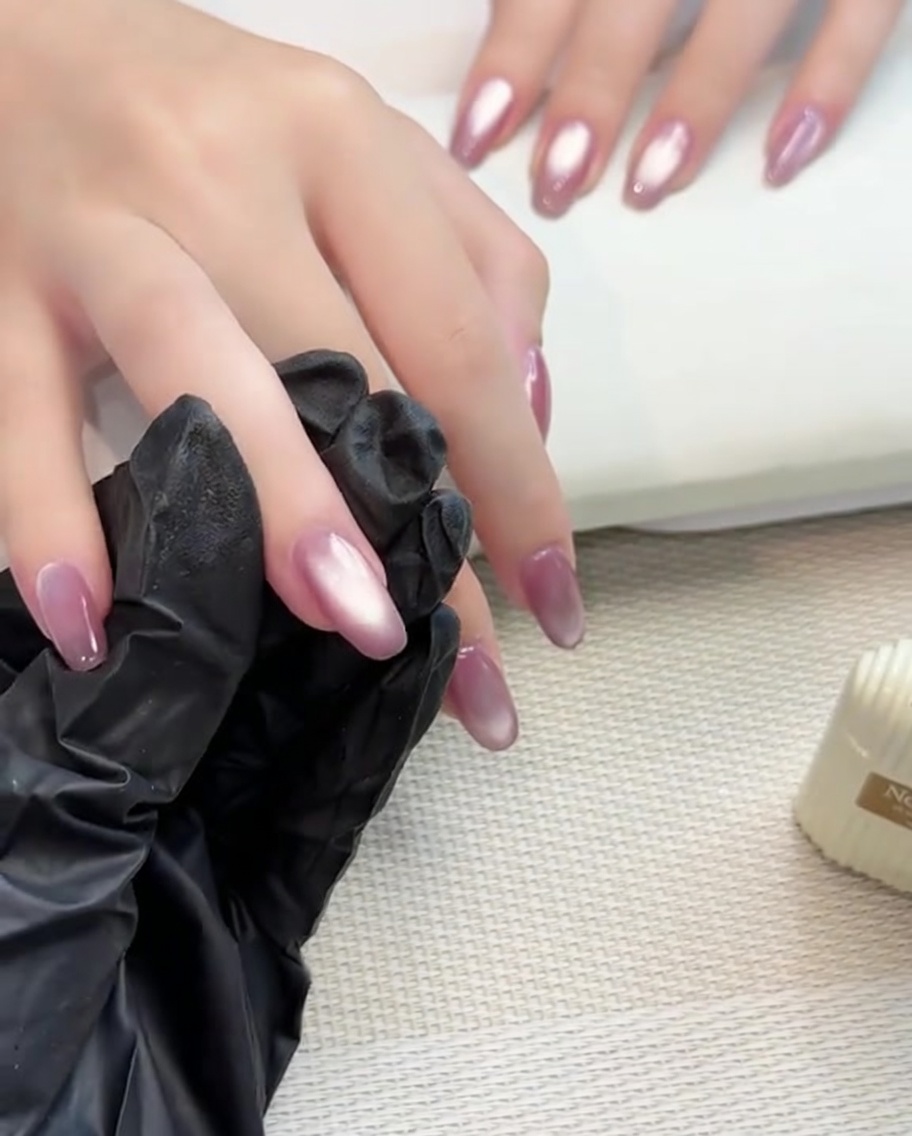
Apply a final layer of a no-wipe sealing top coat over the entire nail. This protects the delicate aurora powder and prevents it from dissolving or rubbing off. Be sure to cap the free edge.
Tip: Use a light touch with the top coat brush so you dont smear or drag the chrome powder before its sealed.